- Telescopes
- Solar
- Mounts & Tripods
- Accessories
-
Astrophotography
- Sale Astrophotography
- New Astrophotography Products
- Astrophotography Kits
- Astrophotography Telescopes
- Astrophotography Cameras
- Astrophotography Solutions
- Autoguiding Solutions
- Astrophotography Accessories
- Camera Adapters & T-Rings
- Astrophotography Filters
- Focal Reducers and Field Flatteners
- Video Astrophotography
- Binoculars
- Sale
- Gift Center
- Shop by Brand
{"closeOnBackgroundClick":true,"bindings":{"bind0":{"fn":"function(){$.fnProxy(arguments,\'#headerOverlay\',OverlayWidget.show,\'OverlayWidget.show\');}","type":"quicklookselected","element":".ql-thumbnail .Quicklook .trigger"}},"effectOnShowSpeed":"1200","dragByBody":false,"dragByHandle":true,"effectOnHide":"fade","effectOnShow":"fade","cssSelector":"ql-thumbnail","effectOnHideSpeed":"1200","allowOffScreenOverlay":false,"effectOnShowOptions":"{}","effectOnHideOptions":"{}","widgetClass":"OverlayWidget","captureClicks":true,"onScreenPadding":10}
{"clickFunction":"function() {$(\'#_widget667965188003\').widgetClass().scrollPrevious(\'#_widget667965188003\');}","widgetClass":"ButtonWidget"}
{"clickFunction":"function() {$(\'#_widget667965188003\').widgetClass().scrollNext(\'#_widget667965188003\');}","widgetClass":"ButtonWidget"}
{"snapClosest":true,"bindings":{"bind0":{"fn":"function(event, pageNum) { PagedDataSetFilmstripLoaderWidget.loadPage(\'#recentlyViewed\', Math.floor(pageNum)); }","type":"scrollend","element":"#_widget667965188003_trigger"}},"unitSize":220,"widgetClass":"SnapToScrollerWidget","scrollSpeed":500,"scrollAmount":660,"afterScroll":"","animateScroll":"true","beforeScroll":"","direction":"vertical"}
{entityCount: 0}
{"emptyItemViewer":"<div class=\"image\"><!-- --></div>\n <div class=\"info\">\n <div class=\"name\"><!-- --></div>\n <div class=\"orionPrice\"><!-- --></div>\n </div>\n ","imageThreshold":3,"pages":2,"dataModel":{"imageWidth":90,"cacheEntitiesInRequest":false,"dataProviderWidget":"com.fry.ocpsdk.widget.catalog.dataproviders.RecentlyViewedDataProviderWidget","imageHeight":90,"itemViewerWidget":"com.fry.starter.widget.viewers.ItemViewerWidget","direction":"vertical"},"pageSize":3,"widgetClass":"PagedDataSetFilmstripLoaderWidget","loadThreshold":1,"direction":"vertical"}
{"ensembleSEOTranslationTypes":"ensemble","widgetClass":"BreadcrumbWidget","productSEOTranslationTypes":"product","categorySEOTranslationTypes":"category|section,category,thumbnail","delimText":"","catalogSEOTranslationTypes":"catalog","showCatalog":false}
{"showSinglePage":false,"totalItems":7,"defaultPageSize":20,"paging_next":"Next","paging_view_all":"View All 7 Items","paging_view_by_page":"View By Page","pageSize":20,"paging_previous":"Prev","currentIndex":0,"inactiveBuffer":2,"viewModeBeforePages":true,"persistentStorage":"true","showXofYLabel":false,"widgetClass":"CollapsingPagingWidget","activeBuffer":2,"triggerPageChanged":false,"defaultTotalItems":7}
Free Registax Image Processing Software - Click Here
Explore the photos of this video in the Orion Image Gallery
Products in order of appearance:
2:10 - Orion ED80T CF Triplet Apochromatic Refractor Telescope
2:11 - Orion Sirius EQ-G Computerized GoTo Telescope Mount
2:12 - Orion StarShoot G3 Deep Space Monochrome Imaging Camera
2:20 - Orion SteadyPix Telescope Photo Adapter for iPhone
2:20 - Orion SteadyPix Deluxe Camera Mount
2:28 - Orion StarShoot Solar System Color Imaging Camera IV
2:28 - Orion StarShoot Video Eyepiece
2:28 - Orion StarShoot USB Eyepiece
2:40 - Orion StarShoot Pro V2.0 Deep Space Color CCD Imaging Camera
2:40 - Orion Parsec 8300C Color Astronomical Imaging Camera
2:56 - Orion StarShoot 3MP Planetary Imager & AutoGuider
3:08 - Orion Apex 90mm Maksutov-Cassegrain Telescope
3:08 - Orion 8" f/3.9 Newtonian Astrograph Reflector Telescope
3:20 - Orion 10" f/3.9 Newtonian Astrograph Reflector Telescope
3:08 - Orion 8" f/3.9 Newtonian Astrograph Reflector Telescope
3:20 - Orion 203mm f/4.9 Reflector Tube with Crayford-Style Focuser
3:51 - Orion SkyQuest XT6 Classic Dobsonian Telescope
3:55 - Orion Paragon-Plus XHD Extra Heavy-Duty Tripod
4:14 - Orion SkyQuest XT10g Computerized GoTo Dobsonian Telescope
4:24 - Orion Sirius 8 EQ-G Reflector Telescope with GoTo Controller
4:28 - Orion Sirius ED80 EQ-G Computerized GoTo Refractor Telescope
4:28 - Orion Sirius EQ-G GoTo 180mm Maksutov-Cassegrain Telescope
4:44 - Orion StarShoot AutoGuider
5:09 - Orion Deluxe Off-Axis Guider for Astrophotography
5:12 - Orion Awesome AutoGuider Refractor Telescope Package
5:17 - 2" Orion LRGB Astrophotography Filter Set
5:18 - Orion Shorty 1.25" 2x Barlow Lens
5:20 - Orion Focal Reducer Corrector for ED Telescopes
5:21 - Orion AccuFocus Electronic Telescope Focuser
5:23 - Orion Dynamo Pro 17Ah Rechargeable 12V DC Power Station
5:24 - Orion Dew Zapper Pro 4-Channel Prevention System
{ sourceURL:'/catalog/includes/quicklook_miniproduct.jsp?entityId=102125&entityTypeId=4', sourceSelector:'' }

Many amateur astronomers are drawn to capture images of the night sky through their telescope and camera. Astrophotography, also referred to as astro-imaging (for you savvy folks), is both an art and a science. What you see in an astrophoto is real. However, it will not look the same as when looking through a telescope visually. Given some practice and patience, you can take beautiful celestial images not unlike the ones displayed in posters and magazines. Astrophotography has progressed greatly over the last few years, especially with the rise of digital camera technology. While astrophotography is both challenging and rewarding, modern low-cost equipment brings this exciting hobby within reach for any enthusiastic amateur astronomer.
The Simple Approach
You can start snapping photos with nothing more than a "point and shoot" digital camera, such as a Canon PowerShot or Nikon CoolPix. With a modest telescope, it's possible to start taking impressive photos of the solar system objects which include the Sun (with a solar filter), Moon, Jupiter and Saturn. We'll briefly cover some simple ways you can start taking astrophotos with any camera setup you might have.
Shoot the Moon
Any telescope and camera setup will allow you to take quality astro-images of the Moon. Because the Moon is so bright, it does not require a long exposure and can be imaged without the use of an equatorial mount equipped with a tracking motor. The exposure is only a small fraction of a second, almost the same as a daytime photo. All you're basically doing is holding the camera in front of the telescope's eyepiece to snap a shot of the Moon. The telescope and tripod are setup as they normally would be for visual use. If you are using a "point and shoot" digital camera, you can easily couple it to the telescope's eyepiece using the Orion SteadyPix Deluxe Camera Mount.
Star Trails
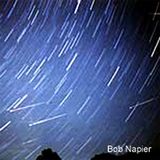
 Star trails are a fun kind of time lapse photography that can be performed under any decent dark sky. Using a SLR (Single Lens Reflex) camera and an ordinary camera tripod, you can point the camera at the sky and open the shutter for several minutes. As long as the camera does not move during the exposure, you will capture the apparent movement of the stars in the sky during the exposure. Pointing the camera near the celestial pole will reveal steep concentric arcs. The further away from the pole you point the camera, the straighter the arcs become.
Piggyback Photography - Make your Telescope and Mount Hold your Camera
Beginners in astro-imaging can start taking quality wide field photos by "piggybacking" a camera to their telescope and mount. You will need a telescope equipped with a equatorial mount (EQ) which has a motor to compensate for the apparent movement of the sky (which of course, is really just Earth's rotation), and an SLR or DSLR (film or digital single lens reflex) camera capable of manual shutter control.
Piggyback astrophotography is a great way to start taking deep sky astrophotos without an elaborate setup. Instead of photographing through the telescope, you're placing the camera on top of the telescope. The camera telephoto lens is being used completely independent of the telescope. The point of placing the camera on top of the telescope is really just to take advantage of the heavy-duty equatorial mount which offers stable tracking. Many telescopes, such as Orion refractors and reflectors have tube rings with a camera attachment bolt on the top, ready for your SLR/DSLR camera. Some EQ mounts offer a 1/4"-20 adapter to fit directly to the top of the mount, allowing you to bypass the telescope and use the EQ mount directly. The camera telephoto lens has significantly less power than the telescope, which makes it far easier to track accurately; any errors or drift in tracking will not show up as much with a small camera lens. This is one of the reasons why piggyback photography can easily achieve good results. Milky Way panoramas, comets, meteor showers, and night landscape silhouettes are just a few of many fun things you can try with piggyback astrophotography.
The exposure time can be anywhere from a few seconds to several minutes. The shorter the f-stop on the camera lens, the shorter the exposure can be. But with any type of photography the required exposure ranges greatly. Bracket your exposures by starting with an educated guess, say 3 minutes, then experiment with shorter and longer exposures to determine what exposure time works best for your purpose. It is helpful to record your settings in a photo log.
Solar System Imaging
While the Moon can be photographed through just about any telescope and camera, the planets need more magnification because their apparent size is so much smaller. The full Moon is half a degree in the sky (about half the size of your pinky at arms length), while the largest planet in our Solar System, Jupiter, is about 2.5% the size of the Moon as seen from Earth. Telescopes with a long focal length and focal ratio work well when imaging the planets. The planets are bright, but because they require so much magnification to see well, the image will appear much darker, just like using a high power eyepiece. It's a common practice to use a 2x or 3x (or higher) Barlow lens to further boost the power on the planets to photograph them. But like visual astronomy, too much power will significantly degrade the quality of your image.

You will need an equatorial (EQ) mount equipped with a motor drive that compensates for the rotation of the Earth. It's also possible to use a simple altitude-azimuth mount with tracking ability, like some computerized "Go-to" systems such as the Orion StarSeeker 130mm GoTo Reflector Telescope. Exposure times will vary greatly, but is usually anywhere from a fraction of a second, to 1-3 seconds.
Stack Your Images
One of the biggest breakthroughs in digital image processing for astrophotography has been the method of stacking and combining the images to yield extraordinary detail of the Moon and planets. The same method is used for deep sky astrophotos as well. One high power digital image of Jupiter may not look impressive. However, by taking 50, 100 or even 500 fast exposure images of Jupiter, computer software (such as MaxIm DL, MaxIm DL Essentials included with Orion StarShoot cameras, or Registax ) will sum all the good detail, and remove the bad detail. The bad detail which stacking eliminates includes camera noise and lapses of time when the image may have been blurry due to atmospheric turbulence. The powerful effectiveness of digitally stacking several images allows ordinary digital cameras and web cameras to achieve amazing results of the Moon and planets. Modified webcams and planetary imagers, such as the Orion StarShoot Solar System Color Imager IV, work very well for capturing Solar System objects.
Deep Space Imaging
 The "deepest" form of astro-imaging is of faint, deep space objects. These objects consist of nebulae, galaxies, and star clusters. Compared to solar system objects, deep space objects are extremely faint and require special CCD or digital SLR cameras. Many of these objects, especially galaxies, are invisible to the unaided eye and require a large telescope to see visually. However, unlike visual astronomy, photographing a faint object is possible with a smaller telescope. Telescopes with a short or "fast" focal ratio (just like a camera f-stop) are favorable for deep space imaging. It is critical to have a high-quality EQ mount with a motor drive that will track very accurately. Instead of opening the shutter for a few seconds or less, deep space objects usually require several minutes of exposure to capture the light needed.
A CCD camera replaces the eyepiece and plugs directly into the telescope's eyepiece holder. An SLR or DSLR can also replace the eyepiece, but they require a T-ring (specific to the make and model of your camera) and a universal T-adapter. This method of attaching the camera directly to the telescope without an eyepiece is known as prime focus astrophotography. This is the most effective way to capture deep space objects because you utilize the telescope's full light-collecting capability. Focal reducers, also called telecompressors, are available for some telescopes. These increase the field of view and decrease the focal ratio to provide a brighter image.
One of the biggest challenges of deep space astro-imaging is tracking. The telescope must move seamlessly with the apparent motion of the sky. Any drift or tracking error will create an oblong star in your image, or worse. All EQ mounts, even very expensive ones, don't track perfectly enough to produce a perfectly pinpoint star (also read about "polar alignment" in our Learning Center). When taking a long time-lapse exposure, the tracking will need to be corrected during the length of that exposure. This is known as guiding. Guiding involves monitoring a star through a separate guide scope and making tracking corrections as needed to prevent the star from drifting. This can be done visually with a crosshair (reticle) eyepiece, or with the use of a CCD autoguider. An autoguider is simply another camera that takes pictures of the star and sends corrections to your EQ mount. The guide scope is typically mounted on top of, or beside, the main imaging telescope. Most guide scopes are small, high-powered refractors because they don't add much weight to the setup and do offer the image detail needed to see the star drift.
CCD Cameras
 The ultimate camera for any type of astrophotography is the CCD camera. While CCDs are most commonly used for deep space imaging, they can also be used for solar system imaging. But you really take full advantage of a CCD when you go deep! The high sensitivity of a CCD camera allows you to take excellent images of distant galaxies and nebulas. High quality CCD cameras are equipped with a thermo-electric cooler which reduces much of the inherent noise from the camera. In general, CCD cameras have a higher cost compared to digital SLRs and also require the use of a laptop computer.
Digital SLR (DSLR) Cameras
 DSLR cameras are favored for their versatility because they work well for deep sky astrophotography and can still be used as an ordinary daytime camera. DSLRs offer a large imaging sensor usually about 60% of the size of a traditional 35mm camera (some newer models are offering a full 35mm format). DSLRs do not require using a laptop computer, but using an external computer is still beneficial to better control the camera. DSLRs have impressive capabilities, but they are also effected by noise and do not have the cooling capability of CCD cameras. As a result, longer exposures deliver more noise in the image.
Give It a Shot!
Becoming proficient in astrophotography is a challenging avenue, but it's also very rewarding. You can share your images with friends, family, and with the online community. As you continue to take better pictures, you may find that you were "bitten by the bug" and acquire more astro-imaging equipment. The sky is truly the limit for astrophotography.
{ sourceURL:'/catalog/includes/quicklook_miniproduct.jsp?entityId=99818&entityTypeId=4', sourceSelector:'' }
{ sourceURL:'/catalog/includes/quicklook_miniproduct.jsp?entityId=101872&entityTypeId=4', sourceSelector:'' }
This educational article, written by our featured customer Chanan G., takes an in-depth look at amateur digital astrophotography. This is a useful guide for affordable astrophotography and contains great explanations of the different processes and equipment needed to start taking great night-sky pics of your own.
This series will include 4 segments:
Part 1: Is Astrophotography for me?
Part 2: Astrophotography 101: Shooting a Moving Target
Part 3: Equipment: Mount, Camera, Focusing and Guiding
Part 4: Imaging & Image Processing
Download the entire PDF here. File Size: 4.2 MB
{ sourceURL:'/catalog/includes/quicklook_miniproduct.jsp?entityId=102622&entityTypeId=4', sourceSelector:'' }
{ sourceURL:'/catalog/includes/quicklook_miniproduct.jsp?entityId=101883&entityTypeId=4', sourceSelector:'' }
Any type of telescope can be used for astrophotography, as long as it has a solid mount and a clock drive. To attach a 35mm SLR camera securely to the telescope, you need the proper adapters.
Piggyback Camera Adapters
Allow the camera to ride on the telescope "piggyback style," taking advantage of the telescope’s equatorial mount and clock drive (but not its optical system). The adapter attaches to the telescope’s optical tube and provides a platform with a 1/4"-20 threaded post on which to mount the camera.
T-Rings
Convert the lens mount on a camera body to a standard "T-thread" that can accept a T-adapter or universal camera adapter for prime-focus or eyepiece-projection photography. T-rings are available for most camera brands.
T-Adapters
Used for prime-focus photography, either terrestrial or short-exposure astronomical, with Schmidt-Cassegrain and Maksutov- Cassegrain telescopes. The adapters screw on to the rear cell of the telescope, replacing the visual back. At the camera end of the adapter is a T-thread, which allows attachment of a camera body fitted with a T-ring. T-adapters mount more securely than slide-fit universal camera adapters, and thus are recommended over universal models if available.
Universal Camera Adapters
Permit coupling of a 35mm camera to reflecting or refracting telescopes. These adapters slide into the telescope’s focuser like an eyepiece, and thread into the T-ring on the camera. Most models consist of two detachable components, for use in either prime-focus or eyepiece-projection applications.
Tele-Extenders
Required for eyepiece-projection photography with Schmidt-Cassegrain telescopes. They allow higher-magnification projections than can be achieved with a regular T-adapter. They’re especially useful for lunar and planetary photography, or long-distance terrestrial close-ups. One end threads over the eyepiece holder, or visual back, of the telescope (with eyepiece in place). The other end couples to the T-ring on your camera.
{ sourceURL:'/catalog/includes/quicklook_miniproduct.jsp?entityId=99826&entityTypeId=4', sourceSelector:'' }
On just about any evening under a dark sky, you’re likely to see a meteor or two streak across the starscape. They catch you by surprise, serving as a reminder that space is not static — things are moving out there, and fast.
What Are Meteors?
Often called "shooting stars," meteors are really particles from outer space — fragments of comets and asteroids — that burn up from friction as they enter the Earth’s atmosphere. While still in space, the particles are called meteoroids. A very bright meteor is about the size of a grape; typical meteors are more the size of tiny pebbles or grains of sand. A very large meteor may break up as it penetrates the atmosphere, throwing off sparks. Occasionally, a meteor may even make noise as it shoots through the air, though this is rare. The largest meteors do not completely incinerate and actually land on Earth as rocks, called meteorites.
A fireball is a very bright meteor loosely defined as being brighter than the planet Venus, whose maximum magnitude is -4.7.
Ordinarily, you can see about one meteor per hour at a dark-sky location if you watch the sky continuously. These are sporadic (random) meteors, not associated with specific meteor showers. You will see more meteors after midnight, since you are then on the "forward" side of the Earth as it moves along in its orbit.
Meteors En Masse — Meteor Showers
A meteor shower happens when the Earth enters a swarm of meteoroids, usually debris from a comet that trails along in the comet’s orbit. At certain times of the year, the Earth’s orbit intersects that of a comet, and we get pelted with the debris.
Then, the meteor rate rises to 10 or 20 per hour, and possibly even 100 or more per hour at the maximum of some showers! The meteors in a shower all appear to come from the same general area in the sky. More precisely, if you trace the path of each meteor backward, you’ll find that they converge near one point in the sky. That point is called the radiant, and it is different for different showers. Each shower is named for the constellation in which its radiant is located. For example, the Perseid shower in August has its radiant in the constellation Perseus. It is often hard to tell whether a meteor belongs to a particular shower or not, since even during a shower, some meteors appear far from the radiant or are moving in slightly different directions.
Because they occur at particular positions in the Earth’s orbit around the Sun, meteor showers recur on the same date every year. Most showers last two or three days; some are longer, and some are very brief.
Some meteoroid swarms have orbital periodicities of their own, so we don’t encounter them every year. For example, the Leonids were spectacular in 1933, 1966 and 2001. In the "off" years, few or no Leonid meteors are seen.
Below is a list of major showers; there are many minor ones producing smaller numbers of meteors. One major shower, the Quadrantids, is named for an obsolete constellation corresponding to part of Bootes.
Table of Annual Meteor Showers
| Date (every year) | Name of Shower | Remarks |
|---|---|---|
| Jan. 1-5 | Quadrantid | Brief maximum, Jan. 3 or 4. Radiant in Bootes. |
| April 21-23 | Lyrid | Brief and variable |
| May 1-8 | Eta Aquarid | Radiant in Aquarius |
| July 15 - Aug. 15 | Delta Aquarid | Maximum July 27/28 |
| July 25 - Aug. 18 | Perseid | "Old reliable" — strong and regular. Maximum Aug. 12. |
| Oct. 16-26 | Orionid | Maximum Oct. 21 |
| Nov. 15-19 | Leonid | Spectacular in 1933, 1966, 2001. Check astronomy magazines for predicted maximum. |
| Dec. 11-17 | Geminid | Usually a fine shower |
Observing Meteors
Meteor watching is like fishing. You cast your sights upward, sit back, wait a while, and see if you get any bites. You’ll increase your chances by going to a dark-sky location, away from suburban light pollution. Most meteors aren’t very bright, so you’ll see more of them if you go to a dark country site. Your chances of logging meteors are also improved when the Moon is below the horizon, or during the new Moon phase, as moonlight can wash out all but the brightest fireballs.
Observing meteors is a naked-eye activity. You don’t need, or even want, a telescope or binoculars to view meteors, as these will only restrict your field of view. You want to be able to visually canvas as much of the sky as possible, because meteors can flash anywhere. For scientific work you’ll need a star chart (for plotting meteor paths) and a ruler (to hold up against the sky to note exactly where a meteor went). More important is a lawn chair and, if appropriate, blankets to keep you comfortable during your vigil.
You will notice that meteors not only differ in brightness, but also in speed and length of travel. Some appear to move relatively slowly, glowing for a second or two while others streak quickly and are gone in a fraction of a second. Some of the brightest meteors leave vapor trails in the sky that can linger for several seconds after the meteor has disappeared.
While looking for meteors you’ll see plenty of airplanes and satellites, too. How do you distinguish them from meteors? For one, meteors move much faster. Another dead giveaway for an airplane is a blinking light. Binoculars will help you identify airplanes, which normally have more than one light. A satellite looks like a slowly moving star. An iridium satellite occasionally reflects sunlight so that it looks like a bright, slow meteor; however, the movement is much slower and it fades out rather than burning up suddenly.
Telescopic Meteors
Occasionally, you’ll see a tiny, distant meteor in binoculars or a low-power telescope. These are called telescopic meteors and are so rare that you probably shouldn’t spend time looking for them — but take note when you happen to see one while viewing other things.
Photograph a Falling Star
Photographing meteors is relatively easy — if you encounter a meteor at the right place and right time! The technique is to use a DSLR or camera with a manual exposure setting using anormal or wide-angle lens (preferably f/2.8 or faster) and take a long exposure of the stars. If a bright meteor comes through the field, the camera will probably catch it.
The camera can stand on a fixed tripod (recording the stars as trails due to the Earth’s motion) or on a clock-driven telescope (to get pinpoint images of the stars). Light pollution and your local sky qulaity conditions will limit how long the exposure can be before the image quality degrades. Experiment with different exposures and ISO settings to determine the best results for your set-up and location.
You’ll likely catch a lot of airplane and satellite trails in your pictures, too. You can distinguish them from meteor trails by their uniform thickness (or the regular-spaced, dots from an airplane’s blinking light). A meteor trail is usually not uniformly thick, but rather almost always exhibits a bright "head" where the meteor burned up.
{ sourceURL:'/catalog/includes/quicklook_miniproduct.jsp?entityId=99823&entityTypeId=4', sourceSelector:'' }
{"showSinglePage":false,"totalItems":7,"defaultPageSize":20,"paging_next":"Next","paging_view_all":"View All 7 Items","paging_view_by_page":"View By Page","pageSize":20,"paging_previous":"Prev","currentIndex":0,"inactiveBuffer":2,"viewModeBeforePages":true,"persistentStorage":"true","showXofYLabel":false,"widgetClass":"CollapsingPagingWidget","activeBuffer":2,"triggerPageChanged":false,"defaultTotalItems":7}


Why Buy From Orion
- 30 Day Money Back Guarantee
- Safe & Secure Shopping
- Next Day Shipping
- Easy Returns
- Sale Price Guarantee
- Free Technical Support

Shop Our Catalogs
Check out our colorful catalog, filled with hundreds of quality products.
See our eCatalogsEmail Sign Up
- 800-447-1001
- Telescope.com
- © 2002- Orion Telescopes & Binoculars All rights reserved
- DMCA/Copyright
- Terms and Conditions
- Privacy & Security


About Orion Telescopes & Binoculars
Since 1975 Orion Telescopes & Binoculars has been offering telescopes for sale direct to customers. Now an employee-owned company, we pride ourselves on an unswerving commitment to best quality products, value and unmatched customer care. Our 100% satisfaction guarantee says it all.
Orion offers telescopes for every level: Beginner, Intermediate, Advanced, and Expert. From our entry level beginner telescopes for amateur astronomers to our Dobsonian telescopes to our most advanced Cassegrain telescopes and accessories, you can find the best telescope for you. Because we sell direct, we can offer you tremendous value at a great price. Not sure how to choose a telescope? Orion's Telescope Buyer's Guide is a great place to start.
Orion binoculars are known for quality optics at a great price. We offer binoculars for every viewing interest, including astronomical binoculars, compact binoculars, waterproof binoculars, birding binoculars, and sport and hunting binoculars.
Orion's telescope and astrophotography accessories will enhance your telescope enjoyment without breaking the bank. Expand your viewing experience with accessories ranging from moon filters to power-boosting Barlow lenses to advanced computerized telescope mounts. Capture breathtaking photos with our affordable astrophotography cameras. And when you're stargazing, Orion's telescope cases and covers, observing gear, red LED flashlights, astronomy books and star charts will make your observing sessions more convenient, comfortable and meaningful.
At Orion, we are committed to sharing our knowledge and passion for astronomy and astrophotography with the amateur astronomy community. Visit the Orion Community Center for in-depth information on telescopes, binoculars, and astrophotography. You can find astrophotography "how to" tips and share your best astronomy pictures here. Submit astronomy articles, events, & reviews, and even become a featured Orion customer!
sales, new products, and astronomy.


