There are three ways to observe a comet: with your unaided eye, with binoculars and with a telescope. For all three types of observations, you will need a few simple tools to help you get the most from what you see. Before you begin, the most important thing you will need is a good locator map or the coordinates of where the comet will be at the time of your observation. There are several online sources which provide general charts, such as Heaven's Above . You can also get the ephemeris (a table which lists a comet's position over a period of time) from official websites, such as the Harvard Minor Planet Center. Once you have this information, you can use them to locate the comet on a star chart, enter the coordinates into a planetarium program to generate a map, or enter them into a computer-assisted telescope. Remember a comet can move a degree or more each night and you have to update your location information accordingly! Ephemeris information often lists the comet's magnitude as well. This will assist you in knowing if it can be seen visually, with binoculars, or if it requires a telescope. Generally, a comet will need to be at least magnitude 4 to be seen without optical aid, while larger (10X50) binoculars will reach to about magnitude 8 and an average (150mm) telescope can easily detect a magnitude 10 to 11 on a dark night with excellent seeing conditions.
The next step is to gather your observing materials and choose a location where you'll be able to see the comet over a period of several days. You'll need a red flashlight to read your chart (How Do You Read a Star Chart?) and to aid you while sketching. Before you panic at the thought of doing a little art work, this is essential to record keeping. It's fun and easy, too! Just use an ordinary sheet of white paper and trace four circles on it. These circles will be your eyepiece, binocular or visual field of view. You will need to label each of your little "mini sketches" with the date, time, location, equipment used, magnification factor and sky conditions. It may seem like homework, but it's really quite simple. It's not that hard to translate what you see onto paper when it is only a few dots and some symbols. Use large dots to denote bright stars and small dots to represent dimmer stars. The comet might be a dot which approximately represents the size and brightness of the nucleus with shading around it for the coma and shading for the tail. Make the comet sketch size as accurate as possible in relation to the star field in the eyepiece, binocular field of view or unaided eye section of the sky. These sketches will let you keep track of the comet's position over a period of time - allowing you to determine the direction in which it is going or how its appearance (such as the size of the coma and tail) may change. You might even catch an exciting event, such as a close pass to a planet or deep space object!
Now, let's get down to business.
Once you have located the comet, record the information for that night onto your observing sheet. This important information includes the date, time, your observing location (latitude and longitude), instrument used, magnification or eyepiece used and sky conditions. (How to Judge Sky Conditions). Now you are ready to begin sketching. You don't have to include every star that you see in the eyepiece, binocular field or sky into your sketch — just the major ones. Remember to use larger dots for brighter stars and smaller dots for dimmer ones. For example, the comet might be located to one side of a triangle of large stars with a Y-shaped asterism of smaller stars to the other side. You will need to label at least one star with a proper Greek letter or catalog number. This information is usually provided on your printed star chart. Look for a star which has a symbol or number printed beside it. If there isn't one, don't worry. Draw the field and use an arrow to the outside and label it with a direction towards a known star on your chart which has a symbol or number. Now, sketch the comet and label the outside of the sketch circle with the cardinal directions. Which way is which? That's easy. Turn off any drive units and watch which way the stars "drift" to the outgoing edge. That's west! Since this is your first sketch, you can't place an arrow which shows the direction the comet is headed just yet. That's why we need to do three to four observations. This same sketching technique holds true for all three types of observations. For the unaided eye, the sketch field might be something as large as a constellation. For binoculars, it's around three or four degrees of sky so choose a bright pattern of stars and label the primary ones.
Once you've done your paperwork, then it's time to have some fun! Try switching around eyepieces in your telescope to see which one gives the best view. Ask yourself some questions! If you'd like to determine the size of the comet, try locating an object which has a known size. For example, your observing catalog tells you globular cluster M80 is approximately 10' in size. How does the comet compare? Is there a tail visible? If so, how far does it extend? By knowing how many arc minutes a comparison object is in size, you can judge these simple measurements for yourself.
If you'd like to determine a comet's magnitude, you can do that, too. Just choose a star for which you have a value. Most star charts have a key to the edge which gives a magnitude. Just put the known star in the eyepiece and defocus. Compare what you see with the comet. For example, if you think the comet is brighter than its listed value of 5, try locating a 4th magnitude star and defocus your eyepiece. Is the star brighter than the comet — or the same? While this isn't a professional grade observation, it's certainly a good way of telling from night to night how a comet changes.
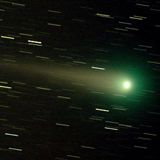
Be sure when you observe a comet to note how it appears. Does it have a stellar nucleus — a central "body" which appears as bright and as sharp as a focused star? How large is the coma — the fuzzy halo around it? How bright is the tail? What color does it appear to be? Does the tail split into two components? If so, you may be observing a comet with an ion tail and a dust tail!
Lather, rinse and repeat. For many observing programs, you'll need to observe a comet at least three or four times before your observations become "official". While it might be tempting just to head out with binoculars and take a quick shot at the sky, remember the lessons learned by Charles Messier — there's a lot of things out there that may look like a comet, but aren't. Even if you don't submit your records, you should still be very proud of yourself for being a real comet hunter!


