


{ width: 160, height: 160, defaultImage: '', layers: 'Artimg-Using_Color_Filters_square' }


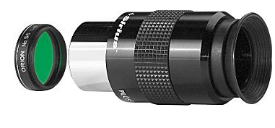
Using Color Filters
Seeing Planets in a Different Light Reveals More Detail
Earth's atmosphere is in constant fluctuation; turbulent air currents blur fine surface detail on solar system objects viewed through a telescope. Faint contrasting areas blend together due to "irradiation" — a distortion of the boundaries between light and dark surfaces.
When you employ a color filter to zero in on a narrow region of the spectrum, the scattering of interfering wavelengths is enormously reduced. Suddenly, the smeared, pale bands of Jupiter resolve into loops and festoons. Delicate markings appear on Saturn's globe, and the Cassini ring division darkens and solidifies. Mars' polar caps stand out like tiny pearls, and vague lunar rilles acquire greater depth and contrast. Bad "seeing" becomes acceptable; good seeing becomes superb!
Because many planets have a characteristic color (e.g., Mars is reddish), you will dramatically increase detail by reducing the predominant hues, uncovering hidden contrast and surface markings. That's why "the Red Planet" is most effectively enhanced with a green filter.
Below is a guide to using color filters to best view the planets in our solar system.
 Mercury
#25 Red will make the planet's disk stand out against a blue sky, permitting daytime or twilight viewing. Mercury is usually best observed just after sunset, when the sky is awash in orange light, so employ #21 Orange with high magnifications to see the planet's phases.
Venus
No matter what telescope aperture you use, Venus's excessive brightness usually causes a very "overexposed," roiling image. With a #47 Violet filter, or stacked #58 Green and #80A Medium Blue filters, you'll reduce the severe twinkling for a better view of the fascinating changing phases.
Mars
#25 Red passes the predominant reflections of surface plains and maria, and #21 Orange is good for reducing the intense glare to enhance detail and mottling. The polar caps stand out with #15 Deep Yellow and #80A Medium Blue; examine the melt lines with #58 Green.
Jupiter
This great planet reveals its cloud bands, loops, festoons, ovals, and Red Spot with #11 Yellow-Green, #80A, #58, and #21. Go from seeing only two bands without a filter to seven or more with a filter! Try stacking filters to reduce heavy glare.
Saturn
Many subtle globular details are improved by #15 Deep Yellow. See the difference in brightness of the extremes of the rings with #25, #11, #58, or #80A. #15 helps sharpen Saturn's image in photographs, improving the resolutions of Cassini's division.
Moon
Reduce the Moon's glare with #80A Medium Blue, and enhance the contrast of lunar rilles and strata with #15 Deep Yellow.
Other Uses
You will improve black-and-white photographs by blocking UV light with #15 Deep Yellow. Refractor chromatic distortion is also reduced by #15, and by #80A. The #82A Pale Blue is great for stacking with other colors, and can adjust film color balance by absorbing excess yellow and red. #58 Green will block street light while passing much of the wavelength of doubly ionized oxygen in emission nebulae. Try #25 Red for long black-and-white exposures of the Omega or Rosette Nebulas.
Do you have questions about selecting the right color filter? Email us at sales@telescope.com, contact us via live chat, or give us a call Toll-Free at 800-447-1001, and we'll help you find what you need!
{ width: 160, height: 160, defaultImage: '', layers: 'Artimg-BBC_UnderstandingFilters' }

![]() Orion is proud to partner with BBC Sky at Night Magazine, the UK's biggest selling astronomy periodical, to bring you this article as part of an ongoing series to provide valuable content to our customers. Check back each month for exciting articles from renowned amateur astronomers, practical observing tutorials, and much more!
Orion is proud to partner with BBC Sky at Night Magazine, the UK's biggest selling astronomy periodical, to bring you this article as part of an ongoing series to provide valuable content to our customers. Check back each month for exciting articles from renowned amateur astronomers, practical observing tutorials, and much more!
These tiny accessories can make a huge difference to what you can see
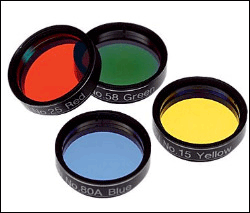
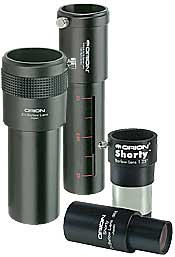
1.25" Orion Basic Set of Four Color Filters
If there is one seriously neglected and underused tool in your astronomical toolbox, then it surely has to be the filter. These often-colorful discs are available in 1.25-inch or 2-inch sizes and screw into the barrel of an eyepiece, the end that attaches to a telescope. The point of filters is that they alter how astronomical targets appear. They work by stopping — filtering out — some wavelengths of light from passing through your telescope's tube, changing what you see through the eyepiece.
This flies in the face of conventional astronomical wisdom that every photon counts, that more light means better views. But this is precisely the point of filters: they remove the light you don't need and only deliver the wavelengths you want for a given situation. It's for this reason that there are so many filters out there. Some are colored, some are clear, but each has a slightly different effect and is designed with a different purpose in mind.
Sometimes the effects can be remarkable: there are, for instance, filters that can enhance the polar caps of Mars and reveal the subtle shadings of clouds on the otherwise bland disc of Venus. It has to be said, though, that filters can't perform feats of magic. There is still no filter in existence that acts as a cure-all for poor seeing or poor sky transparency.
Where to Begin
Most astronomers, whether budding or experienced, are aware of color filters, which are used for planetary work to tease out hidden details like the ones already described. But there are many more types, and they can cut down on lunar glare, help to reduce the insipid orange glow of streetlighting and even block out all light bar one specific wavelength, which can work wonders if you are keen on examining the denizens of the deep sky. We cover all of these in a bit more detail below. Some filters can even be used together for an enhanced effect, but bear in mind that stacking them in this manner will further dim the view.
If, once you have read up on all the different types, you decide filters might be of use to you, where should you begin? Many suggest a neutral density filter — otherwise known as the Moon filter. This one simply dims the view, and as such it is great for observing our close companion when it is in its dazzling fuller phases.
As always, if you can try before you buy, then do so — astronomical society events and the larger star parties around the country are both good opportunities to get some hands-on insight into the kinds of changes filters can deliver.
Once you're committed to making a purchase, be aware that you don't always have to buy filters individually: colored filters in particular are often sold in sets. If you get to the point that you are using a lot of filters, you may wish to consider another accessory, the filter wheel. Some are motorized, some are manually operated, but the basic premise is the same — they allow you to swap filters without having to remove your eyepiece each time.
Do be aware that all of the filters discussed here are intended for night-time use only. Under no circumstances should they be used to view the Sun, as they will do nothing to mitigate the dangerous intensity of its light. But, just as with any other object in the sky, the Sun's appearance changes once viewed through different filters. Never view the Sun without a solar filter in place.
Color Filters
Color filters are designed for planetary work. They are often referred to by their Wratten number, written in the style '#1'. This is based on the original Eastman Kodak filter range, which had 100 shades, although for most astronomical purposes only a few are required. Among the most useful are:
- #8 (Yellow) — For cloud bands on Jupiter and Saturn
- #25 (Red) — For picking out surface detail on Mars and cloud details on Venus
- #47 Violet — Useful for Venus and enhances the Schr�ter effect
- #58 (Green) — For improving red features such as Jupiter's Great Red Spot
- #80A (Blue) — For Martian dust storms and clouds, and the belts of Jupiter
Ultra-High Contrast
Like narrowband filters, ultra-high contrast filters improve contrast, making the background sky darker and helping deep-sky targets to stand out better. They pass both hydrogen-beta and oxygen III light, so will improve your view of a wider range of nebulae than any single narrowband filter.
Light Pollution Reduction
These are designed to suppress the specific wavelengths giving the orange glow from sodium streetlights, with the result that they darken the background sky. This can help you see deep-sky objects better, particularly nebulae and galaxies, as they are more easily washed out than the planets are.
Narrowband
As the name suggests, narrowband filters cut all but a few select wavelengths of light — typically the ones emitted by bright emission and planetary nebulae. By blocking the rest, they help to improve contrast and so bring out subtle detail. Typical narrowband filters include hydrogen-beta and oxygen III.
Neutral Density/Polarizing
Both of these filter types reduce the glare of bright targets — the Moon, Venus, Mars, Saturn and Jupiter. Neutral density filters reduce the intensity of all wavelengths, but are particularly favoured for lunar use. Polarizing filters can often be tuned to control the amount of dimming they deliver.
Anti-Fringing
These filters can help you to combat the chromatic effects often seen through achromatic refractors, which most commonly take the form of noticeable blue or violet halos around bright stars. Hence these filters are also sometimes referred to as 'minus violet' filters. They can be used on any target.
Copyright � Immediate Media. All rights reserved. No part of this article may be reproduced or transmitted in any form or by any means, electronic or mechanical without permission from the publisher.
{ width: 160, height: 160, defaultImage: '', layers: 'Artimg-BBC_ChoosingAnEypiece' }

![]() Orion is proud to partner with BBC Sky at Night Magazine, the UK's biggest selling astronomy periodical, to bring you this article as part of an ongoing series to provide valuable content to our customers. Check back each month for exciting articles from renowned amateur astronomers, practical observing tutorials, and much more!
Orion is proud to partner with BBC Sky at Night Magazine, the UK's biggest selling astronomy periodical, to bring you this article as part of an ongoing series to provide valuable content to our customers. Check back each month for exciting articles from renowned amateur astronomers, practical observing tutorials, and much more!
Make sure you get the best view of the night sky by using the right eyepiece
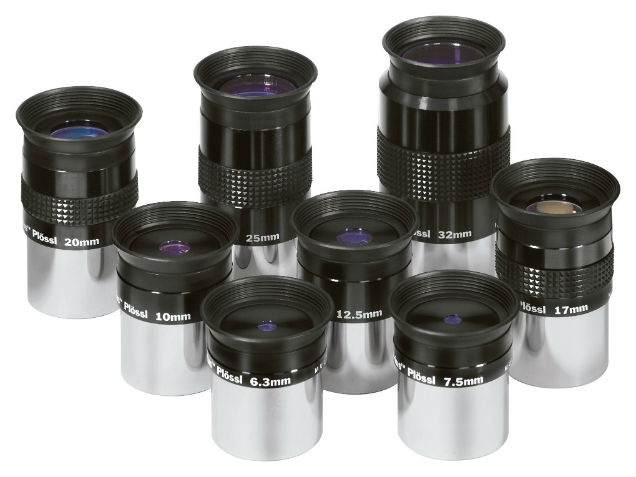
Orion Sirius Plossl 1.25" Telescope Eyepieces
Which is more important: the telescope or the eyepiece? The telescope gets lots of attention because it's the most expensive and impressive-looking part of your setup — but without decent eyepieces, the views you get can be disappointing.
What you ideally want is a good range of eyepieces, because different focal lengths are useful for producing better views of different kinds of objects. This is due to the fact that each eyepiece will have a differing field of view and magnification, depending on the telescope used.
Size Matters
To find out what magnification you're getting with any eyepiece takes a very easy calculation — you simply divide the focal length of the telescope, which is usually printed on a label on the scope near the eyepiece end, by the focal length of the eyepiece. The focal length of any decent eyepiece will be marked in millimeters around its collar. So for example, to work out the magnification of an 800mm focal length telescope with a standard 25mm focal length eyepiece, you divide 800 by 25, which is 32. This setup will magnify objects you see in the eyepiece by a factor of 32.
For wider views of nebulae and star clusters, this is the kind of number you will want. With higher magnifications, maybe with a 10mm eyepiece, you'll get more detailed views of the planets and double stars.
As you progress in astronomy, you will undoubtedly start to experiment with the different views that a range of eyepieces can offer. So make sure you don't underestimate these small, seemingly insignificant bits of astro equipment!
Know Your Eyepieces
There are four main types of eyepiece; a Barlow will increase their magnification.
Pl�ssl
Pl�ssls have a wide field of view (around 52�), so they can be used successfully for planetary as well as deep-sky viewing. The drawback is the short eye relief that becomes an issue with focal lengths of 12mm or less. Eye relief refers to how far your eye must be from the eyepiece in order for you to see the entire field of view.
The internal construction of a Pl�ssl eyepiece consists of two back-to-back lens systems. There's quite a price variation between the highest quality examples and those produced more cheaply.
Radian
The Radian is one of the newer types of eyepiece on the market. With a field of view comparable to a Pl�ssl, you may wonder what the difference is? Well, one is the big eye relief — even with focal lengths down to 3mm. This is a lifesaver if you need to wear glasses while observing, and very user-friendly for everyone else. The design suits medium and higher magnifications in order to get plenty of detail when looking at the planets. Internally, there are six or seven lens elements that have very short focal lengths.
Nagler
The Nagler's most impressive attribute is its huge field of view. While other manufacturers keep their eyepieces within the human eye's 50� field of view, Naglers go the extra mile to develop an ultra-wide 82� field. Imagine the amazing vistas of star fields and nebulae you get with that! The design incorporates six or seven elements, all coated with special chemicals to increase the amount of light that travels through the eyepiece. The downside to some of these eyepieces is their weight, which may require you to rebalance your scope.
Orthoscopic
These were the mainstay for many an amateur astronomer until the Pl�ssls took over, but Orthoscopics are still good little eyepieces. They're made with a four-element optical system that provides very good eye relief. The design also keeps down the amount of light that is refracted within the system very effectively. The field of view, at only 40� to 45�, may not be as great as a Pl�sl, but they are still pretty good all-rounders. They come in particularly useful for making observations of the Moon and planets.
Double up with a Barlow lens
This is a marvellous bit of kit. It isn't actually an eyepiece, but has optical elements that work with an eyepiece to increase the magnification. This is achieved by a very simple process: you basically slot the eyepiece into the Barlow lens and the whole contraption gets popped into where the eyepiece would normally go. Depending on the Barlow, you can double or triple the magnification you would get from the eyepiece alone. This means that with one Barlow lens you have effectively doubled the number of eyepieces — and therefore magnifications — that you have at your disposal.
Copyright � Immediate Media. All rights reserved. No part of this article may be reproduced or transmitted in any form or by any means, electronic or mechanical without permission from the publisher.
{ width: 160, height: 160, defaultImage: '', layers: 'Artimg-Oxygen_III_filter' }

When it comes to observing some deep space objects, there's always a little trick of the trade that makes a huge difference in what you see. In this case, it's knowing what filter to use when observing nebulae.
If you have routinely dark skies, purchasing a nebula filter might seem like an unnecessary expense. After all, you have a good, dark location and you're able to see the nebula of your choice, so what difference could it possibly make? This is something I told myself time and time again, and I was getting perfectly satisfactory views from my smaller telescopes, and really good ones from large aperture, so why bother to filter? The reason is... you can see so much more.

Even if you live and observe in a rural area, chances are that you are getting at least a certain amount of "sky glow," a form of light pollution that eradicates deep sky viewing from urban locations and shows its ugly head as a glow dome when you live in the country.
There are very specific filters which help improve the view, and they enhance nebulae - but an OIII filter is like a secret weapon for special occasions. Orion's O-III eyepiece filter transmits close to 90% of the light corresponding to the two Oxygen-III spectral lines at 496nm and 501nm while completely blocking virtually all other wavelengths. It rocks when it comes to planetary nebulae, some supernovae remnants and diffuse emission nebulae.
If this doesn't make any sense to you, then let's take a look at the various filters. A light pollution filter is a form of nebula filter. It will make the view much better by adding contrast, but remember... it will also decrease the amount of light you see from stars, star clusters, galaxies, etc. Why? Just like streetlights, security lights and house lights, stars emit light at a specific wavelength and this type of filter is blocking that wavelength, with makes the nebula "pop" against a much blacker background.
The next consideration is broadband or narrowband. The broadband filter will help you to see more detail in certain reflection nebulae, but it is the narrowband filter which produces the most dramatic results. The Orion UltraBlock is a narrowband filter and produces spectacular views, but you want more!
This is where the Orion Oxygen III filter comes into play. It isn't a light pollution filter so much as it is a filter which only allows certain wavelengths of light to pass through. When you use this filter, the visual doubly ionized Oxygen III portion of the spectrum is transmitted. It works by rejecting most other light and this will cause specific nebula to appear brighter and more detailed since they are highlighted against a blacker background of space.
If you have ever wanted to see details in objects such as the Veil Nebula, the Helix Nebula, the Dumbbell Nebula, the Ring Nebula, the Eskimo Nebula and those elusive small planetary nebulae, then this is the filter for you. However, remember this is an aggressive filter and since it is blocking a huge amount of light, you're going to want to use it on a scope which gathers a huge amount of light. It's not a filter for everybody, but it's sure a winner if you hanker for a very special view!
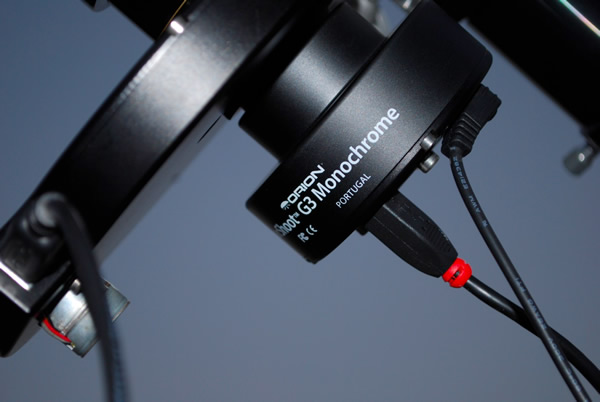
{ width: 160, height: 160, defaultImage: '', layers: 'Artimg-Doug_H_G3_Monochrome' }

If you don't have time to read this entire review and you're looking for an "entry level" Astrophotography camera, stop reading, and buy the Orion G3 now! If you'd like to read more about my experiences with the G3, continue reading...
Unboxing Starshoot G3
The G3 arrived in a cardboard box and was well-packed. It comes with the G3 Camera, Power Cable, USB Cable, Owner's Manual, and Orion Camera Studio Software (OCSS).


Mechanical Quality 
When you pick up the G3 it feels like a solid piece of hardware. The only reason I didn't give the G3 five stars was because of the cooling. I've never been able to set the G3 to one temperature and have the G3 stay at the set point all night. Regulated cooling is normally found on more expensive cameras. The G3's regulated cooling does help keep the camera noise to a minimum. As you know, during the night temperatures drop, and I found the G3 was susceptible to the ambient temperature.

Image Quality
The G3 image quality is very good. First let me show you an image of a dark frame. The dark frame helps illustrate the noise level on the G3. I have two dark frames each @ 600 second exposures, one dark taken in the winter, and one dark taken in the summer.
Below, the winter dark had a cooling set point of minus 10. At the start of the imaging session, the G3 kept on track at minus 10C, but, as the night went on, the CCD temp reached minus 20 Celsius.

The second dark example was taken during the summer at plus +10C and in this example the actual CCD temp was plus +9.6C. This dark was taken early in the evening.

100% cropped side by side comparison (Left Upper Corner) of the dark frames at different temperatures:


The Winter Dark @ -20C has "rounded" noise points vs. the Summer Darks @ +10C have "longer" vertical noise points.
Overall, the temperature set points didn't hold during the night. While the dark frames had some noise, the G3's regulated cooling does reduce camera noise.
G3 Image Samples

IC1396 - Elephant Trunk - Camera G3 Mono
Telescope: Orion ED80T CF Triplet
Exposures: 21 - 10 minute Luminance
Mount: Orion Atlas

NGC1055 - Galaxy 54 Million Light Years from Earth - Camera G3 Mono
Telescope: Orion ED80T CF Triplet
Exposures: 20 - 10 minute Luminance
Mount: Orion Atlas

M13 - Globular Cluster - Camera G3 Mono
Telescope: Orion EON120
Exposures: All 60 Seconds, 15 - Each of Luminance, Red, Green, and Blue Filters.
Mount: Orion Atlas
Filters: Orion LRGB Astrophotography Filter Set

M27 - Planetary Nebula - Camera G3 Mono
Telescope: Orion EON120
Exposures: All 600 Seconds, 10 - Each of Luminance, Red, Green, and Blue Filters.
Mount: Orion Atlas
Filters: Orion LRGB Astrophotography Filter Set

M51 - Whirlpool Galaxy - Camera G3 Mono
Telescope: Orion EON120
Exposures: All 600 Seconds, 15 - Each of Luminance, Red, Green, and Blue Filters.
Mount: Orion Atlas
Filters: Orion LRGB Astrophotography Filter Set

M106 - Galaxy - Camera G3 Mono
Telescope: Orion EON120
Exposures: All 600 Seconds, ONLY TWO - Each of Luminance, Red, Green, and Blue Filters.
Normally I don't like to show images with only TWO FRAMES, you can see the noise because of so little time. Ideally, I like to capture 15 or more frames for each filter.
Mount: Orion Atlas
Filters: Orion LRGB Astrophotography Filter Set

NGC2024 - Flame Nebula - Camera G3 Mono
Telescope: Orion EON120
Exposures: All 600 Seconds, ONLY FIVE - Each of Luminance, Red, Green, and Blue Filters. For this review, you can see more noise when you take fewer exposures. For Best results take 15 - 20 exposures!
Mount: Orion Atlas
Filters: Orion LRGB Astrophotography Filter Set
Software Installation & Use 
Orion Camera Studio Software (OCSS):
It's nice to see Orion develop astrophotography software. During the past year I've seen four significant upgrades to OCSS. The user interface is a little difficult to navigate at first and finding the user controls aren't intuitive to find. This can be frustrating when you don't know what you're looking for and beginners may get confused. Once you find the needed windows ("Camera Control" and "Capture") things come together quickly. If for some reason you "close" these windows, go to VIEW → RESET TOOLS DOCKING (As of OCSS Version 1.5). These little docking windows pull out of the user interface and you can "dock" them any way you'd like, but, the docking feature is a little hard to use. Some people may enjoy the ability to customize their photo capturing desktop.
I have an Orion Nautilus Filter Wheel and there is no feature to integrate an Orion filter wheel. It would be nice to have the Orion Nautilus Filter Wheel automatically change filters for the Mono G3. If you purchase a Color Version of the G3 then changing filters may not be a concern. May be a future release will include filter wheel support?
Overall, OCSS has a great start, and OCSS will help you acquire your photos. I applaud Orion for starting the development of their software. OCSS needs further development and the good thing is Orion seems to be making improvements!

ASCOM Driver
The G3 ASCOM Driver works well with other Astro software like Maxim DL and Nebulosity.
Ease of Use
Nothing is EASY in Astrophotography! Be prepared to take your time and learn baby steps. Soon you'll find the G3 will become easier to use. As you get started remember to take notes of what works for you.
Value 
The Orion G3 is an EXCELLENT VALUE! All of these advanced features are never seen at this low price. For a beginner wanting to get started, this is a great "entry level" astro cam.
Would I Recommend the G3 for Beginners? YES!
The Orion G3 is perfect for anyone wanting to get their feet wet in Astrophotography. The value is ideal for people unsure about Astrophotography as a hobby...but be warned! Astrophotography is highly addictive! After you use the G3 for a while you will become well versed in Astrophotography.
Overall Rating
The Orion G3 is a very good astro camera. There are some needed improvements, but, nothing that will stop you from enjoying the great value of Orion's G3 Camera.
DIY G3 Travel Case
The G3 doesn't come with a protective travel case, but, we found an inexpensive solution that works very well. My wife found this "London SOHO New York" Beauty Case @ Wal-Mart. We also picked up the foam there too. The case was $14, the foam insert was $7, and you can pick up fabric ($2-$5) by the yard in any pattern to cover the foam. A DIY Case will cost you about $25 in materials. Check it out!


With a pair of scissors and about 30 minutes you can make a cool case for your G3. I picked up the "Orion Sticker" as a "hand-out" at SCAE. This case isn't sold by Orion, it's a DIY project!
More Photos!
Orion Starshoot G3 Monochrome and Orion 2" Nautilus Filter Wheel.
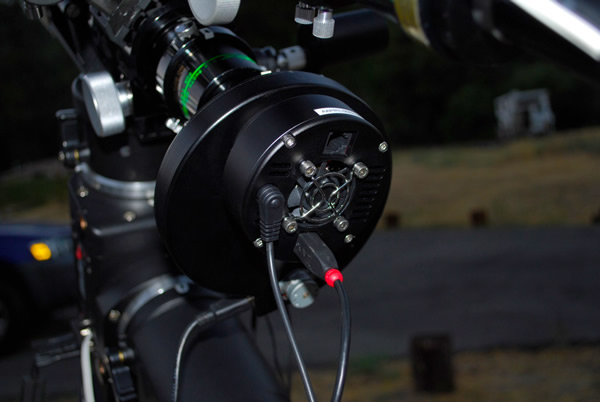
Rear View of Orion G3 Attached to Orion Nautilus Filter Wheel. Notice the "auto guider" port at the top of the G3 camera.
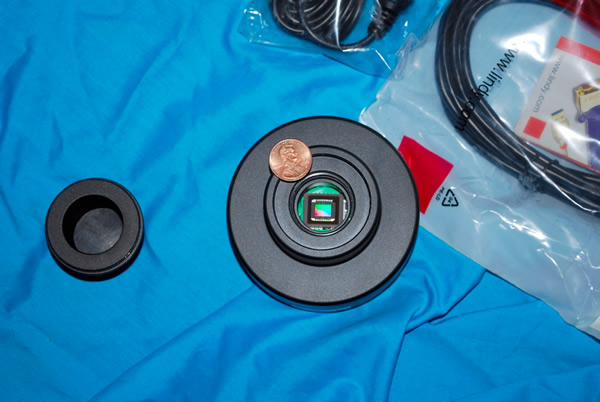
Orion G3 with 1.25" adapter removed. CCD compared to a penny.
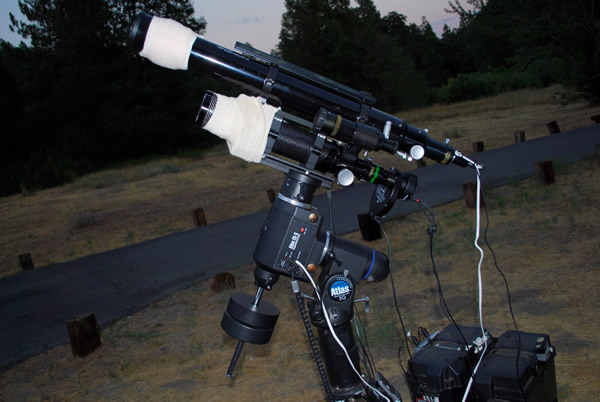
Telescope Setup: Orion 80mm F/11.4 Guide Scope, Orion ED80T CF Triplet Refractor, Orion Illuminated 50mm Finder Scope, Orion Nautilus Filter Wheel, Orion Starshoot G3 Monochrome camera, and Orion Atlas EQ-G Mount.
Statement of Disclosure: The product reviewed was provided to the author at no cost. Orion's policy does not always require authors who are regular Orion Community contributors to return products provided for reviews. Orion's product review policy is to post reviews regardless of the writer's positive or negative feedback of the product.
{ width: 160, height: 160, defaultImage: '', layers: 'Artimg-Telescope_Cases' }

We amateur astronomers are a somewhat nomadic bunch, by necessity. Unless you're lucky enough to live in an area with extremely dark skies and clear seeing conditions year-round, chances are good that you have to hit the road to a remote location with inky black skies when the stargazing bug strikes. Or, at the very least, you move your telescope and mount from its storage spot in the house or garage out to that dark corner in the yard for a night of observing. Whether you're moving a telescope near or far, your valuable astronomy gear deserves a safe and convenient mode of transport. We highly recommend using one of our affordable Orion Padded Cases any time you need to move or store your telescope. Their thick padding will help protect your telescope from dings or scratches during transport, and they'll keep your telescope free of dust and dirt when it's not being used.
Orion Padded Cases come in many different shapes and sizes, but you may not know exactly which case is best for your needs. Let's go over some helpful tips on how to shop for a padded case for your telescope, telescope mount, or both!
Some Orion padded cases can hold both a telescope optical tube and a telescope mount and tripod. These cases feature a padded divider inside the case to keep the optical tube separated from the mount and tripod. These cases, identified by a "C" on our online Padded Case Chart, even feature hook-and-loop straps inside to keep any counterweights secured during transport. Some other Orion padded cases are intended to hold the telescope optical tube only. These cases are identified by a "T" on our online chart. We also have Padded Cases for field tripods, and for equatorial mounts and tripods, which are marked with an "M" on the chart. We even have a few Padded Case Sets specially designed to hold all the optical tube components of our large, but portable SkyQuest XXi and SkyQuest XXg Truss-Tube Dobsonian telescopes.
- Find your telescope in the left-hand "Name" column, or use your telescope's item number to locate it in the "Stock #" column of the "Your Telescope" section of the chart.
- Once you've found your telescope, look in the "Stock #" column within the "Compatible Padded Cases" section of the online chart for the item number of the padded case best suited for your telescope.
If you have an Orion telescope, consult our online Padded Case Chart to find the most appropriate case:
- First, remove your telescope optical tube from the telescope mount & tripod. Be sure your telescope's dust caps are installed.
- Remove any telescope eyepiece, diagonal, finder scope, or reflex sight from the telescope
- If your telescope uses tube rings for coupling to an equatorial or altazimuth mount, you can leave the tube rings attached to the optical tube, along with any dovetail mounting plates that may be attached to the tube rings.
- Use a tape measure to measure the length of your telescope, including the dust caps.
- Next, collapse your tripod's legs to their shortest length, remove any accessory tray or spreader from the tripod, and fold the tripod down to its smallest size.
- Use the tape measure to measure the length of your collapsed tripod.
- Consult our online chart and look at the right-most column, "Dimensions"
- Find the case that best matches the dimensions of your collapsed gear
If you'd like to use an Orion padded case for a telescope of a different brand, or have an older Orion model that no longer appears on the online chart, follow these simple tips to help you select the most appropriate padded case:
If you're having difficulty selecting a padded case, call our Customer Service department at 800-676-1343, Monday through Friday 6:00 AM - 6:00 PM Pacific Time and Saturday 8:00 AM - 1:00 PM Pacific Time. Our friendly and knowledgeable Customer Service staff will help you find the best case for your telescope.
With an Orion Padded Case, your telescope will be ready for stargazing adventure wherever you go, whether you're heading miles down the road, or just a few steps out the back door!
{ width: 160, height: 160, defaultImage: '', layers: 'Artimg-CelestialCoordinates' }

With so many modern stargazers relying on computerized telescopes to locate objects, learning to read a star chart might seem like a lost art form. However, using a star chart is very easy, and it helps you really understand what you're looking at and the way the sky works. Additionally, not all telescopes have on-board computers and not all star gazers want to use them. There's a lot of satisfaction to be gained by learning to use a star chart and manually locating objects. By knowing a few simple instructions, you'll find using a star chart is like a recipe. All you need to know are some common measurements and how to find the key ingredients! Let's start with the basics.
Planispheres and All Sky Chart
The first type of star chart you'll probably encounter is a planisphere or an All Sky Chart. These are normally presented in a round format which depicts the brightest stars and constellations as they are seen during specific times of the year. A planisphere is printed on a wheel with dates and times to help you select a key "window" showing the general night sky for the selected time. Like the planisphere, the seasonal All Sky Chart is designed to be held over your head and aligned with the cardinal directions. Unlike a terrestrial map, all star charts have east to the left and west to the right - the correct orientation to match Earth's movements and the apparent movements of the celestial sphere. To help you understand the concept, hold an All Sky Chart over your head and face south. You'll notice east, the direction of sunrise, is to the left, north is behind you and west, the direction of the setting Sun, is to the right. Now all you have to do match up bright star patterns with what you see and identify the primary constellations. These types of star charts are like gathering together the ingredients.
Formal Star Chart
Once you have familiarized yourself with the constellations and key stars that you see, it is time to get more specific. First, choose an area of the sky in which you'd like to work. You'll notice two sets of numbers along the margin of the formal star chart. Like on a terrestrial map, which uses the alphabet in one direction and numerals in the other, these sets of numbers divide the map into sections. In reading from left to right - which (unlike a terrestrial map) represents east to west - you'll see hours, numbers and seconds. These numbers along the top margin are called Right Ascension and it is abbreviated in celestial coordinates as RA - the equivalent of terrestrial longitude. Each celestial "day" is divided into 24 hours (of rotation of the Earth) and begins on the point of vernal equinox. This "zero hour" is the place in the sky where the Sun crosses the celestial equator during the March equinox (equal times of day and night). The second set of numbers reads from top to bottom - north to south - and they are either positive or negative. This set of directions is the Declination and is abbreviated as Dec. It is the celestial equivalent of latitude. Positive numbers are located above a line on the charts, and an imaginary line in the sky, called the celestial equator. This is the dividing line between the northern half and southern half of the night sky. Negative numbers lay to the south.
Why are these numbers important? All astronomical objects, even stars, are given a set of celestial coordinates which use right ascension and declination. These coordinates remain constant. If you are looking for a specific object, you can use its assigned directional value as a recipe to help you find it! For example, if you wanted to view the Crab Nebula you might ascertain its coordinates from a resource such as an astronomy magazine, an astronomical catalog or an observing book. In this listing you would see the directions: RA 05 34 31 - Dec +22 00 52. This means you can locate it both on your star chart and in the sky at 5 hours, 34 minutes and 31 seconds in right ascension and north of the meridian at +22 degrees, 00 arc minutes, 52 arc seconds. Begin reading your star chart at the zero hour and count the hours across to the west (right) until you reach the fifth hour. Use the declination scale along the side margin and locate positive twenty-two degrees. By looking at the larger scale, you can determine the constellation in which it is located and the general area in which it can be found. Until you have become familiar with the night sky at all seasons, you may need to use a planisphere or All Sky Map to make sure the constellation where your object is located is visible. Once you've determined this, it's time to go on to the next step.
Take a look at the large, printed stars around your object on the map. These primary stars are the ones you'll be looking for when translating map to sky. Note they also have a designation. If you're thinking "That's all Greek to me!" then you'd be correct. Very bright stars are given a Greek letter designation such as Alpha, Beta or Gamma. These designations are not only stellar names, but indications of the star's brightness - starting with Alpha as the most luminous and descending in order. Most good star charts will have a key to these letters as well as a magnitude key where the printed star size is also given a brightness value. Common numerical designations on stars are called either Bayer or Flamsteed numbers. These are stellar catalog numbers assigned to bright stars and were originally created by historical astronomers, Johann Bayer and John Flamsteed. Most ordinary star charts use Bayer numbers - along with Greek letters - but Flamsteed numbers are used where no Bayer designation is given.
From Star Chart To Sky
The next step in using a star chart is to match what you see on the map with what you see in the sky. Begin with the constellation, and then identify the very brightest of the stars you see around your designated target and locate that pattern in the sky. For example, you know from looking at the map that your object is located about ten degrees west of Alpha X. The key is to start big and get smaller, but how do you translate degrees from a book to degrees in the sky?!
Don't panic. A simple way of measuring the sky is to use your hands. Hold your hand outstretched at arm's length. From the tip of your little finger to the tip of your thumb is approximately 20 degrees. If you make a fist, that is about 10 degrees. The width of your thumb is somewhere around 2 to 3 degrees. This easy way of measuring will assist you in finding the general location of what you're looking for. Take an even closer look at your star chart and you'll notice it is also divided into other, smaller sections - usually 10 degrees. While this might seem a little confusing at first, you can learn if you practice!
Now, look at your star chart again. You have found the primary stars around your target and your telescope is aimed in the general direction. Use your optical finderscope to assist you in locating and identifying even fainter stars which match the pattern on the star chart. By knowing how many degrees your finderscope reveals, you can even further refine your hunt.
If you use an equatorial mount, you're also in for a big surprise. Once you have reasonably polar-aligned your telescope and set the axis at least close to your latitude, take a close look at those numerical dials on the mount. Do those numbers look familiar? Darn right, they do! One set is Right Ascension and the other is Declination. It might be like comparing an abacus to a calculator, but these handy tools can also get you very close to the perfect recipe for a starry night!
{ width: 160, height: 160, defaultImage: '', layers: 'Artimg-LCD_DVR' }

As a kid, I was captivated with television. Not to give away my age, but color television (and programs) didn't really become commonplace until I was in grade school. Back then, they were large, cumbersome things. A "portable" set was roughly the size of a suitcase. As technology advanced, the sizes became much smaller and I'd stand for hours at our corner gas station, staring in slack-jawed fascination at what was probably a 3-inch screen implanted in cereal box-sized housing.
Needless to say, as I got older, all things video never lost that sense of appeal. I cherished my ever smaller televisions, reveled in the VCR, embraced the DVD and succumbed to Blue Ray. I've owned several video cameras and video eyepieces, and I still grin like an idiot when it comes to a webcam. How George Jetson can you get?
Then I saw the Orion StarShoot LCD-DVR...

The Orion StarShoot LCD-DVR
I'm in love. Here's a tiny little beastie - no bigger than your average cell phone - that can record the video taken by your telescope's eyepiece camera and play it back. It can be either the normal video style, or the USB computer camera. This Orion Starshoot LCD-DVR can record video in MPEG format, images in jpeg format, and audio in WAV format. And there's more? A lot more! You can use it with any equipment that has an RCA function. That means it doesn't have to be strictly an astronomy tool. You can put a movie right on this diminutive dude and take it with you! It's quite a little player. Not only does it function as a DVR, but it also allows you to transfer what you have in its memory to your computer. You can convert your VHS tapes and plug right into your camcorder. It comes with a 2G SD card that gives you roughly 90 minutes of recording time, but you can add one up to 32G in size for even more space. Power hungry? Skip worrying about spending a fortune in AAA batteries. The Orion Starshoot LCD-DVR comes with a rechargeable 5V lithium battery and the charger. You can go for about 3 hours when loaded. It's even got a remote control.
Can you imagine all the things you can do with the StarShoot LCD-DVR? Let's say you have to wait somewhere. Just record a movie and take it along. Got grandkids? Share your latest videos of them with pocket-sized ease, or put some cartoons on it for the car ride. Do you have old videos that you'd like to have on DVD, but hate the thought of the expense of replacing them? Just use this little gadget as a go-between. Put them on the StarShoot, then on to the computer, then on to DVD!
The astronomy applications alone make the Orion StarShoot LCD-DVR worth its weight in gold. There's a nifty little bracket that you can add to it that attaches right to your telescope. Just hook it up with an eyepiece video camera and you can display what your telescope is seeing. The LCD screen isn't night vision invasive. Now visitors at public outreach functions can see what your telescope is seeing, without needing the eyepiece. That's a real bonus if you sometimes need a step stool for some guests to view! Just think?You could have the Moon on screen and be able to point out its features to several people at the same time!
Need more? Then save that video footage and share it with friends and co-workers. Put it into your computer as a type of "video observing log." Convert it and turn it into a YouTube video! Keep single images and enhance them. There's simply no limit to what you and your imagination can do with an Orion StarShoot LCD-DVR.
I guarantee you'll be fascinated, too!
Tammy Plotner is a professional astronomy author, President Emeritus of Warren Rupp Observatory and retired Astronomical League Executive Secretary. She's received a vast number of astronomy achievement and observing awards, including the Great Lakes Astronomy Achievement Award, RG Wright Service Award and the first woman astronomer to achieve Comet Hunter's Gold Status. Tammy Plotner has been a compensated contributor to the Orion Community since November 2012. Orion's product review policy is to post reviews regardless of the writer's positive or negative feedback of the product.
{ width: 160, height: 160, defaultImage: '', layers: 'Artimg-Dob_Pod' }

By Tammy Plotner
"Ooooooh? I'm getting' too old for this!"
If you're a Dobsonian owner and your scope is less than 12" in aperture, you've probably said that to yourself on more than one occasion.
While a Dob is a fantastic telescope to own, and its affordability and freedom of technical mount parts make it choice for many observers, smaller sizes can sometimes mean big problems: The telescope itself doesn't cause concern, but smaller aperture means becoming a contortionist to use it.
Which one of us hasn't suffered on our hands and knees to aim a 4.5", or regretted having a back when viewing through a 6"? Even 8" and 10" models can be very uncomfortable to use for taller individuals. Sure, we've compensated by setting them up on concrete blocks and created not-so-steady risers out of cable spools, but moving and transporting these contraptions can be a real pain in the asteroid!
Not any more.
Orion has come up with a clever and affordable new product called the "Dob Pod." It's a three-legged telescope stand crafted from sturdy, 1" thick melamine-coated particle board, just like your Dobsonian cabinet and painted in basic black. The wide stance of the Dob Pod makes it very stable and you get a full 12" of additional height. It even has cut-outs which align to the cabinet feet, lighten its overall weight and make it much easier to grab and move. What's more, the Dob Pod is compatible with a very wide range of Orion models, from 4.5" to 10" in size.

Image: Orion's Dob Pod
Just imagine... instead of packing around cinder blocks, you can have a stylish cabinet instead! You can stop crouching on that little stool and you can stop leaving your smaller Dobsonian telescope at home when going to a star party because it's uncomfortable to use. You won't need to worry about your back hurting when doing extended viewing, and you'll be far more comfortable (and accurate) when aiming!
The whole world has gone pod crazy... why not add a Dob Pod to your wish list?
Have you tried the new Dob Pod yet? Tell us what you think in the comments!
Tammy Plotner is a professional astronomy author, President Emeritus of Warren Rupp Observatory and retired Astronomical League Executive Secretary. She's received a vast number of astronomy achievement and observing awards, including the Great Lakes Astronomy Achievement Award, RG Wright Service Award and the first woman astronomer to achieve Comet Hunter's Gold Status. Tammy Plotner has been a compensated contributor to the Orion Community since November 2012. Orion's product review policy is to post reviews regardless of the writer's positive or negative feedback of the product.
{ width: 160, height: 160, defaultImage: '', layers: 'Artimg-ObservMoon' }

By Tammmy Plotner
Do you love your cell phone with its built-in camera feature? How about the view through your telescope? Have you ever wished you could send a friend or relative a photograph of what you're observing and include them in the fun? If this sounds like you, then there are two products that you'll be very excited to know about-the Orion SteadyPix Universal Smartphone Telescope Photo Adapter and the Orion SteadyPix Telescope Photo Adapter for iPhone. These two awesome gadgets are designed to work with your SmartPhone, iPhone, and most average cell phones with a camera.
What do they do? Check this out?
These inexpensive adapters are a rigid connection which holds your phone steady to the eyepiece of your telescope or spotting scope. You don't need anything special. It's basically a gentle clamp which holds around the eyepiece and a bracket, supporting the phone and aiming the camera lens into the eyepiece. What you see is what you get!
What you are doing is called "afocal imaging." In other words, you're using your telescope as a type of telephoto lens and the eyepiece is doing the work. You can use any magnification level you like and you focus the image by looking into your camera's real-time viewfinder.
Want video? You can do that, too. Any type of photography that your phone is capable of can be translated through the telescope. Don't forget your phone's camera also has adjustments. Experiment with the settings!
What can you expect to see? First off, you're not going to be able to get your phone to perform like the Hubble Space Telescope. As exciting as the technology is, your photography will be limited to relatively simple subjects, like the Moon, planets, bright stars and the properly-filtered Sun. However, don't rule out brighter deep space objects. It all has to do with your phone's camera sensitivity to low light- the lux factor. Lux is the amount of light the camera needs to provide an image. The lower the number, the less light the camera needs to reproduce a clear image. If you can see the object on the screen, then chances are it is going to appear in your photograph.

Afocal lunar image courtesy of Tammy Plotner
As you can see, even at low resolution and a very small size, afocal imaging produces some astounding results. With some focusing practice, you'll be able to take (and send) photographs of lunar features, the rings of Saturn, the belts of Jupiter, the phases of Venus, bright star clusters and stellar images. If you want to really heat things up, you can take images of the Sun, too! Just be sure to use a proper solar filter on the telescope at all times.
But, don't stop there. Once you've attached your phone to your telescope, you can also use the display image as a kind of "mini monitor" so others can see what your scope is aimed at. This can be a very handy tool when doing public outreach. Just center the image on something like a particular lunar crater you'd like to explain, and multiple observers can see what you're talking about at the same time! Using your phone to display images works especially great when you're stargazing with children, especially because young children don't always understand not to grab a telescope around the eyepiece when they want to look, and now they can see without touching!
Need more to convince you? Then think about all the things you can do with the images you take. Not only can you share them with your friends, family and co-workers, camera phone images can keep a photographic diary of craters, lunar features, planets and sunspots, record eclipses, transits and occultations. You can even create your own YouTube astronomy video or post to Facebook, or set up an Instagram account. Transfer the images to your computer and add them to your observing reports, or try your hand at enhancing them. The possibilities are only limited by your imagination!
Tammy Plotner is a professional astronomy author, President Emeritus of Warren Rupp Observatory and retired Astronomical League Executive Secretary. She's received a vast number of astronomy achievement and observing awards, including the Great Lakes Astronomy Achievement Award, RG Wright Service Award and the first woman astronomer to achieve Comet Hunter's Gold Status. Tammy Plotner has been a compensated contributor to the Orion Community since November 2012. Orion's product review policy is to post reviews regardless of the writer's positive or negative feedback of the product.
{ width: 160, height: 160, defaultImage: '', layers: 'Artimg-Choose_Eyepiece_square' }

A telescope simply will not work without an eyepiece. The optical elements of an eyepiece allow you to focus light collected by a telescope, so you can observe a sharp view of the object or area where the telescope is pointing. With an eyepiece installed in the telescope focuser, you can bring extremely distant objects into focus for magnified study.
While most new telescopes include one or two eyepieces to get started with, purchasing additional eyepieces can significantly increase the functionality of any telescope, new or old.
Let's take a few moments to learn a bit more about the most common terms and specifications used to describe features of telescope eyepieces. With this knowledge, you'll be well-prepared to select ideal eyepieces for your own telescopes.
Focal Length and Magnification
Perhaps the most important specification of an eyepiece is its focal length. The focal length of an eyepiece, along with the focal length of the telescope the eyepiece is used with, determines the magnification the combination provides.
So the first step in choosing eyepieces is to decide what magnifications, or powers, you want to use and what eyepiece focal lengths will give them. Since both eyepiece and telescope focal lengths are expressed in millimeters, the formula used to determine magnification is:
Magnification = Telescope focal length (mm) � Eyepiece focal length (mm)
Or, put another way,
Eyepiece focal length (mm) = Telescope focal length (mm) � Magnification
For example, a telescope with a 2000mm focal length used with a 20mm eyepiece will give 100 power (2000 � 20 = 100).
The above formula dictates that a telescope eyepiece with a shorter focal length yields a higher magnification than an eyepiece with a longer focal length. For example, a 10mm eyepiece will always provide a higher magnification than a 25mm eyepiece. This relationship is important to remember while choosing eyepieces: the lower the eyepiece focal length, the higher the relative magnification will be. The actual magnification will depend on the focal length of the telescope the eyepiece is used with.
If you've ever used a single telescope at different powers, you know that you have a choice of a small, sharp, bright image at lower magnification; or a big, blurred, dim image at higher power. The reason is twofold. First, the telescope gathers a fixed amount of light, and at higher magnifications, or powers, you're spreading the same amount of light over a larger area, so the image will always be dimmer. Second, because light consists of waves, even an optically perfect telescope picks up only a limited amount of fine detail in the image. Magnifying the image beyond a certain point does not reveal more; it just makes the image look blurry. This is called "empty magnification" and can change depending on the object or area viewed.
Field of View: Apparent and True
A telescope eyepiece's apparent field of view is the angular diameter, expressed in degrees (�), of the circle of light that the eye sees. It is similar to the screen of a television (not the actual picture seen on it). Most eyepieces have an apparent field of about 40� to 50�. Specialized wide-field telescope eyepieces can boast apparent fields ranging from 60� to 100� or more. Such wide-field and Ultra-Wide eyepieces are preferred by amateur astronomers who enjoy the "spaceship porthole" effect of using as wide a field as possible.
The true field (or real field) of view is the area of sky seen through the eyepiece when it's attached to the telescope. The true field can be approximated using the formula:
True Field = Apparent Field � Magnification
For example, suppose you have an 8" Cassegrain telescope with a 2000mm focal length, and a 20mm eyepiece with a 50� apparent field. The magnification would be 2000mm � 20mm = 100x. The true field would be 50 � 100, or 0.5� - about the same apparent diameter as the full Moon.
Eye Relief and Corrective Lenses
The optical design of an eyepiece determines the eye relief, which is the distance from your eye to the eyepiece lens when the image is in focus. If you wear corrective lens eyeglasses while using a telescope, we recommend looking for telescope eyepieces with at least 15mm, and more preferably 20mm, of eye relief to see the entire field of view comfortably. With insufficient eye relief the outer portion of the viewing field will be cut off, resulting in a "keyhole effect" which can be frustrating. In more traditional telescope eyepiece designs, eye relief is proportional to focal length: the shorter the focal length, the shorter the eye relief. However, some of the more modern eyepiece designs provide luxuriously long eye relief regardless of focal length -- a real boon to eyeglass wearers. If you like to keep your eyeglasses on while using a telescope, the eye relief of an eyepiece is a very important specification to consider.
Barrel Size
Most quality telescope eyepieces come in two different barrel diameters, 1.25", and 2". A smaller, 0.965" barrel size is found mostly on low-end "department store" telescopes and should be avoided, if possible. Most amateur telescopes are designed to accommodate the 1.25" eyepiece size. Larger 2" eyepieces are typically used with larger aperture telescopes that feature a 2" focuser. Big 2" eyepieces traditionally feature long eye relief for comfortable views, and they often offer wider fields of view compared to 1.25" eyepiece models.
Optical Correction
The main goal of any telescope eyepiece design is to get all the light rays collected by the telescope to form a sharp image. Depending on the f-ratio of the telescope, this can be a difficult task. Telescopes with low f-ratios require more highly corrected eyepieces because the cone of light entering the eyepiece is converging more sharply. With a relatively low f-ratio telescope, such as an f/4 optical tube, only the best modern eyepieces will yield completely sharp images all the way out to the edge of the field of view. Some older designs may result in blurred views around the edge of the field of view, but the center will remain sharp. In telescopes with a relatively high f-ratio, such as an f/10 telescope, any well-made eyepiece will give a sharp image.
How Exit Pupil Relates to Power
The powers or magnifications at which a telescope will work well depend on the aperture of the instrument. In general, a larger telescope gathers more light and captures a broader wavefront, giving sharper images. One handy way to classify powers is in terms of "power per inch" of aperture. For example, 80x on an 8"-aperture telescope is 10 power per inch. Another way is to go by the size of the exit pupil. The term "exit pupil" describes the size of the bundle of light rays coming out of the eyepiece. Exit pupil size in inches is the reciprocal of power per inch. More commonly, exit pupil size is calculated in millimeters using these formulas:
Exit pupil size (mm) = Telescope aperture in mm � Telescope magnification
Exit pupil size (mm) = Eyepiece focal length in mm � Telescope f-ratio
The exit pupil must be smaller than the pupil of your eye, or else some of the light rays will not make it into the pupil, meaning the light will essentially be wasted. A young person's fully dark-adapted eyes may have 7mm-wide pupils. As you age, maximum pupil diameter decreases. For middle-aged adults, the practical maximum is closer to 5mm.
At the other end of the scale, at magnifications that yield an exit pupil in the range of 0.5mm to 1.0mm, empty magnification begins to set in, depending on the quality of your telescope and your eyes. In other words, this much magnification really starts to degrade the image you see. Here's a table of how various powers stack up:
| Power Range | Exit Pupil Size | Power Per Inch | Power (3" Telescope) | Power (8" Telescope) | What It's Used For |
|---|---|---|---|---|---|
| Very Low | 4.0 - 7.0mm | 3 - 6x | 10 - 18x | 28 - 50x | Lowest usable power. Wide-field views of deep-sky objects under dark skies. |
| Low | 2.0 - 4.0mm | 6 - 12x | 18 - 36x | 48 - 100x | General viewing; finding objects; most deep-sky observing. |
| Medium | 1.0 - 2.0mm | 12 - 25x | 36 - 75x | 100 - 200x | Moon, planets, more compact deep-sky objects, wide double stars. |
| High | 0.7 - 1.0mm | 25 - 35x | 75 - 100x | 200 - 280x | Moon and planets (in steady air), double stars, compact clusters. |
| Very High | 0.5 - 0.7mm | 35 - 50x | 100 - 150x | 280 - 400x | Planets and close double stars in very steady air. |
What Does Parfocal Mean?
Eyepieces that are "parfocal" can be interchanged without the need for refocusing. This is desirable (but not necessary) when switching eyepieces while looking at the same object. Often, eyepieces of the same design, from a given manufacturer, will be parfocal. But the same eyepiece design from different manufacturers will likely not be parfocal. Some parfocal eyepieces may require a nominal amount of focus adjustment.
Illuminated-Reticle Eyepieces
These telescope eyepieces have etched crosshairs or other reticle grid patterns at the focal plane that can be illuminated so they're easily visible in the dark. An external illuminator arm incorporating a small red LED light, a button-cell watch battery or two, and a potentiometer for varying the brightness is screwed into the specially made eyepiece. An illuminated reticle eyepiece is needed for manual guiding exposures in astrophotography, and is useful for aligning a finder scope with the main telescope. It also comes in handy when drift-aligning an equatorial mount, or performing an alignment procedure for a computerized GoTo or IntelliScope system. Due to the presence of crosshairs in the field of view, illuminated reticle eyepieces aren't recommended for normal viewing through a telescope, although they can prove very useful for specific applications.
So, How Many Eyepieces Do I Really Need?
The short answer is a few. The long answer depends on your own goals. You can observe for a long time with one low-power and one high-power telescope eyepiece, although eventually you will want a few more focal lengths for more magnification options. Avoid the temptation to go all the way to the limits (very low and very high) until after you've filled in the middle range. For example, for an f/10 telescope, a 25mm and a 9mm eyepiece make a good starter set; you can add something around 15mm and perhaps 6mm next, and so on.
With a several different telescope eyepieces, you have a better chance of hitting the optimal power for the particular object you are observing, given the sky conditions at the time. Usually, you'll want to start out with low power (i.e., long eyepiece focal length, such as 25mm or 30mm) to get the object in the field of view of the telescope. Then you might try a slightly higher-power (shorter focal length, maybe 18mm or 15mm) eyepiece and see if the view looks any better. If it does, swap in an even higher-power eyepiece, etc., until you hit that "sweet spot" where image brightness, image scale, and the amount of visible detail combine to form the most pleasing view. Remember: higher power doesn't necessarily equal a better view.
To Zoom or not to Zoom?
Some telescope eyepieces provide a range of different focal length settings. Such "zoom" eyepieces can be very convenient if you don't like the idea of storing and carrying a number of separate eyepieces in order to use different magnifications. Many amateur astronomers enjoy using zoom eyepieces since they make it possible to increase or decrease power without swapping out eyepieces from the telescope focuser. In general, zoom eyepieces do not perform quite as admirably as single focal length eyepieces, due to the fact they are typically made with more optical elements, which can reduce overall image brightness and clarity. However, many amateur astronomers consider the increased versatility and convenience of a zoom eyepiece to be preferable to an assortment of single focal length eyepieces. Many high-end premium zoom eyepieces are designed to optimize performance, but they can be a bit pricier than other zoom eyepieces.
Using a Barlow Lens with Eyepieces
You can also use a 2x Barlow lens to boost the power (or reduce the effective focal length) of any eyepiece by a factor of two. Thus, instead of a 3mm eyepiece, you can use a 6mm eyepiece with a 2x Barlow lens and get the same magnification. Using a Barlow is easy: just insert an eyepiece into the Barlow lens, then insert the Barlow/eyepiece combination into the telescope focuser and adjust until the image is sharp. By using a Barlow lens you can get away with having fewer eyepieces in your collection, while still having a variety of magnifications at your disposal. To gain the maximum benefit from the Barlow lens, choose eyepiece focal lengths that are not multiples of each other. In other words, if you have eyepieces of 25mm, 12.5mm, and 6mm - multiples of 2 - then a 2x Barlow won't provide much in the way of additional magnifications. But if your eyepieces are 25mm, 15mm, and 10mm, then use of the 2x Barlow with each, respectively, will provide 12.5mm, 7.5mm, and 5mm effective focal lengths - just like having three additional (and different!) eyepieces. Since Barlow lenses add glass elements into the light path, you may notice a slight dimming of the image when alternating from an eyepiece to a Barlow and eyepiece combination. Barlow lenses are also available in 3x and 5x models for those looking to significantly increase power.
Closing Thoughts
Using different eyepieces can profoundly increase the versatility and functionality of any telescope. While shopping for eyepieces, remember these basic tips:
- Consider the focal length of your telescope, or telescopes, to make sure the eyepiece will provide an appropriate magnification to suit your needs.
- If you wear eyeglasses while using a telescope, pay attention to the eye relief specification of different eyepieces, as ample eye relief can improve comfort and ease-of-use while wearing corrective lenses.
- Depending on your observing goals, consider the apparent field of view of your eyepiece choices.
- If versatility is paramount, consider a zoom eyepiece or Barlow lens to increase the amount of possible magnifications to use.
Keep in mind the specifications described above and you're sure to choose an ocular that will provide you with night after night of enjoyment with your telescope(s). And remember, Orion is here to help with any questions you have along the way. Just send us an email at sales@telescope.com, contact us via live chat, or and we'll help you find the right telescope eyepieces.
Clear skies!
{ width: 160, height: 160, defaultImage: '', layers: 'Artimg-BenefitsBarlows' }

One of the more useful and cost-effective tools in an amateur astronomer's accessory case is a Barlow lens. Invented in the early 1800s by British mathematics professor Peter Barlow, it is a simple concave (negative) lens that, when placed between a telescope's objective lens or mirror and the telescope eyepiece, amplifies the magnifying power of the instrument.
If the standard eyepiece in your telescope yields a magnification of 50x, a 2x Barlow will boost that to 100x (50 x 2). If a high-power eyepieces in your scope yields 150x, insertion of a 2x Barlow lens before the eyepiece will boost that to 300x (150 x 2).
 A Barlow lens works by reducing the convergence of the light cone heading toward the telescope eyepiece. In this way it essentially increases the focal length of the telescope. Since magnification is determined by dividing the telescope's focal length by the eyepiece's focal length, you can see that by doubling the telescope's focal length, a Barlow lens doubles the magnification of the system for a given telescope eyepiece.
A Barlow lens is useful in several ways. First, it allows you to reach a higher maximum power. This is not always very beneficial, however, because the maximum useful power is generally limited not by the telescope or eyepiece but by prevailing atmospheric conditions ("seeing"). If atmospheric turbulence renders the image wavy and fuzzy at 150x, doubling the power to 300x is not going to help; it'll only degrade the image even more.
Barlows are particularly useful with telescopes that have short focal lengths. Such scopes often do not reach high powers even with fairly short focal-length telescope eyepieces. A Barlow lens can increase the magnification and allow the short focal length telescope to achieve its maximum useable power.
Perhaps the biggest benefit of a Barlow is that it doubles the number of magnifications available to you, effectively doubling the number of telescope eyepieces in your repertoire. If you have 26mm, 18mm, and 10mm eyepieces, for instance, adding a 2x Barlow will allow them to function as 13mm, 9mm, and 5mm eyepieces ? it's like getting three more eyepieces for the price of one Barlow lens (which often costs less than one telescope eyepiece)!
A less obvious but very nice perk of Barlow lenses is that they can make high-power viewing through a telescope more comfortable. High-power (short-focal-length) eyepieces often have very little eye relief, which requires that you position your eye very close to the lens to see the image comfortably. But a Barlow lens allows you to achieve the same magnification with a lower-power eyepiece, which typically has more eye relief. This can be a real benefit for eyeglass wearers, enabling them to see the whole field of view at higher powers, when normally they cannot. Also, many high-power telescope eyepieces feature very small eye lenses, which can be difficult to look into. Using a Barlow lens with a longer focal length telescope eyepiece allows you to enjoy the same magnification, but with a larger and more comfortable eye lens to peer into.
 A 2x Barlow lens will actually provide 3x magnification when placed in front of the telescope diagonal on refractor, Schmidt-Cassegrain and Maksutov-Cassegrain telescopes.
Lastly, a precision-made Barlow with antireflection coatings can actually improve eyepiece performance, providing sharper images and reducing edge-of-field optical aberrations at the expense of only a two or three percent reduction in image brightness. In fact, many deluxe high-power eyepieces contain built-in Barlow lens elements to achieve their high magnifications.
Choices in Barlow Lenses
When selecting a Barlow lens, the first thing you need to determine is the barrel size of the telescope eyepieces you intend to use with it. (The barrel size is the diameter of the eyepiece tube that drops into the focuser. The most common eyepiece barrel size is 1.25"; some larger telescopes and some refractors can also use 2" eyepieces, and some inexpensive telescopes still use smaller 0.965" eyepieces.) Whatever the barrel size of your telescope eyepieces, you'll want to select a Barlow of the same diameter.
Barlows also come in different magnifications. The most common Barlow magnification is 2x, which means that it doubles the power of any eyepiece with which it's used. There are also 3x and 5x Barlows available, and even some in-between magnifications such as 1.5x and 2.5x.
 A 2x Barlow lens provides 2x magnification when placed between the telescope diagonal and eyepiece.
Make sure you get a quality Barlow lens that is fully antireflection coated or fully multi-coated. Most cheap Barlows included with low-end department-store telescopes are virtually worthless due to their lack of antireflection coating and resulting poor performance.
Using a Barlow Lens
A Barlow is very simple to use: It is inserted in place of the telescope eyepiece in the focuser, and the eyepiece is then inserted into the Barlow itself. When the Barlow is inserted into the optical path you will need to refocus, and often the change of focus required is quite large. To avoid excessive refocusing, therefore, you may find it easiest to sequence through your eyepieces without the Barlow, then, if the object and conditions warrant higher power, insert the Barlow and run through your eyepieces again starting with the longest focal-length (lowest power) eyepiece. As with all visual observing, don't increase magnification to the point that the image becomes fuzzy. Once the image becomes fuzzy there is no more detail to be seen, and such empty magnification makes it more difficult to discern detail in celestial sights.
Use of a Barlow should be factored into your choice of telescope eyepieces. If you're just starting out, you'll find that most telescopes come with a single low-power eyepiece, often of about 25mm focal length or thereabouts. A good strategy is to purchase a 2x Barlow and a second eyepiece of about 1/3 the focal length of your first telescope eyepieces. (For example: if your first eyepiece is a 25mm eyepiece, your second eyepiece would therefore be in the range of 8mm to 10mm). Those two telescope eyepieces and a single 2x Barlow lens will give you a range of four different magnifications, from low power to relatively high power ? a very good way to get started!
{ width: 160, height: 160, defaultImage: '', layers: 'Artimg-Illuminated_Reticle_square' }

An eyepiece with an illuminated reticle (crosshair or grid) has many uses for the astronomer.
It's a necessity for long-exposure astrophotography, where it is used in conjunction with a guide scope or off-axis guider to hold a guide star in a fixed position, to prevent star trailing on the film.
It is useful for polar-aligning an equatorially mounted telescope, because it shows the exact center of the telescope's field of view. Most polar-alignment procedures require centering Polaris or another star in the field of view.
An illuminated reticle eyepiece can be helpful in collimating of a telescope, where the image of a star must be kept centered to accurately judge the alignment of the primary and secondary mirrors.
A calibrated grid or bull's-eye is handy for measuring the apparent size of an object or the angular separation between double-star components. It also helps in pointing out objects to inexperienced observers, such as at public demonstrations or star parties.
The crosshairs in an illuminated reticle eyepiece are usually etched on a thin, flat optical window located at the eyepiece's focal plane. A built-in diopter mechanism allows the reticle to be focused. An illumination source positioned at the edge of the etched window lights up the reticle.
The best illumination source is a red light-emitting diode, or LED. It consumes much less power than an incandescent bulb, and the red light helps preserve your eyes? dark adaptation. Most illuminated reticle eyepieces available today are wireless, powered by tiny internal batteries, usually type SR-44. Other models, however, can be plugged into an external battery pack or a telescope?s drive corrector or power panel. While the dangling wire is less convenient, you won't have to worry about batteries dying in the middle of a photographic session.
Illuminated reticle eyepieces generally come in Kellner, Orthoscopic, or Plossl designs. Of these, Plossls have the largest-diameter eye lens and the longest eye relief, for more comfortable viewing. Typical focal lengths are 9mm and 12.5mm; higher powers can be achieved by attaching a barlow lens.
{ width: 160, height: 160, defaultImage: '', layers: 'Artimg-LightPollution' }

Astronomy Under Light-Polluted Skies: What's to See
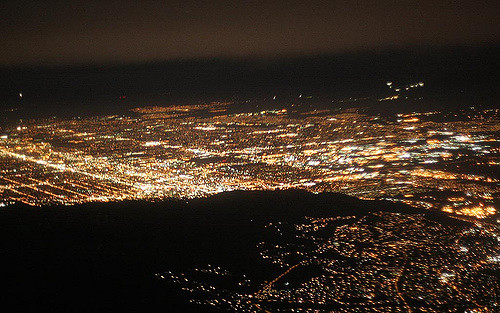
Salt Lake City Light Pollution by makelessnoise, shared on flickr. Used with permission by Creative Commons license.
If you live where the glow of city lights washes out the starry sky, you may think that astronomical observing with a telescope would be about as exciting as snorkeling in a muddy river. What could you possibly see? As it turns out, plenty. Sure, your best views of deep space galaxies and nebulas will be had under a dark sky away from major population centers, streetlamps, and neighborhood house lights. But there are some brighter deep-sky gems that you can see, as well as interesting stars, planets, and our magnificent Moon, which shine brightly and make for pleasurable gazing from even heavily light polluted locales. With a little perseverance, a clear night, and the tips provided here, there's no reason you can't enjoy astronomy under skies that are, shall we say, less than stellar.
What's the Best Telescope for Urban Observing?
The "best" telescope for exploring the heavens from a light-compromised site is the same one you'd choose for a dark sky. That is, a scope that fits your budget, that is easy to set up and move when you're ready to use it, and that you have room to store in between viewing sessions. As far as aperture goes, larger optics collect more starlight, and that applies whether your sky is light polluted or pitch black. You'll be able to see more objects and resolve fainter detail with an 8" telescope than with a 4" one. So get the biggest telescope you can comfortably afford, but one that's not too unwieldy to conveniently set up and use on a frequent basis, or too bulky to stash when it is idle.
For city astronomy you might consider getting a telescope with a computerized, or Go-To, mount. It will make pinpointing objects to view much faster than star hopping the old-fashioned way with a star chart, since fewer stars are visible in a bright sky to guide your way. A Go-To mount works equally well in any sky conditions.
Where Should You Set Up?
Pavement and rooftops absorb heat during the day and radiate it back off during the night. The resulting turbulent air can distort the image through your telescope. So for best results, set up your telescope on dirt or grass, which absorb much less heat, and avoid aiming directly over nearby buildings. Of course, try to find a spot that isn't in the direct line of sight of a streetlight or a neighbor's porch light. Not only can such light be distracting, but it also can diminish the contrast of the images you see in the eyepiece. But if there's no escaping one or more such fixtures, try draping your head and the eyepiece area of the telescope with an opaque black cloth to block out the light.
There are a couple of other points worth mentioning here. First, the best time to view an object is when it is high in the sky. You're looking through less sooty air pollution than when viewing an object near the horizon, so the view will be clearer. Also, there's less skyglow higher up. Second, the amount of light pollution usually decreases late at night, as downtown businesses close and households turn off some of their outdoor lights. Take advantage of the darker skies by stargazing near midnight or during the "wee hours" of the morning when possible.
What Objects Will You Be Able to See?
Now that you've got your telescope set up, preferably in a spot shaded from direct street and house lights, what celestial objects can you expect to see? We'll leave the Sun out of this discussion and concentrate just on nighttime objects. (The Sun makes a fascinating target for daytime viewing. Just make sure the front of your telescope is capped with a proper solar filter to protect your eyes!)
The Moon
Let's start with the biggest and brightest object first ? the Moon. Earth's crater-pocked satellite makes a spectacular telescopic target even from the city. Different surface features are highlighted every night along the terminator, the border between the lit and unlit portions of the Moon's face, as the phase changes. Low-grazing rays from the Sun cast long shadows from mountains and craggy crater walls. You'll see hundreds of impact craters of all sizes, plus valleys, rilles, rounded domes ? all served up in sharp relief. Indeed, the Moon can be so bright that it helps to tone down the glare with a neutral density or variable polarizing Moon filter, which threads into the eyepiece barrel or diagonal.
Planets
Four of Earth's fellow planets shine brightly enough to provide particularly striking views through the telescope for urban astronomers. Getting a crisp view requires a steady atmosphere, i.e., good "seeing," and patience at the eyepiece to wait for moments of maximum clarity, when the surface details pop sharply into focus. Use our monthly star chart to locate the planets, as their positions change relative to the stars throughout the year.
Our closest planetary neighbor, Venus, is the third brightest orb in the sky after the Sun and the Moon. Because it lies between the Earth and the Sun, it is only partially illuminated from our vantage point and displays Moon-like phases, from crescent to gibbous. In its crescent phase Venus is closer to Earth and thus appears much bigger than it does in its gibbous phase, when Venus is farther away. Its surface is perpetually shrouded by atmospheric clouds, so you won't see much detail, but it's a cool sight nonetheless.
Mars is a small and challenging telescopic object, for sure, but one whose subtle surface features are definitely worth checking out. In unsteady air, the "red planet" ? more a light salmon color ? will look like little more than a blurry, "boiling" ball. But on a night of excellent "seeing," when atmospheric turbulence is low, a high-quality telescope at high magnification may reveal one or possibly two polar ice caps and distinctive dark markings, including the famous Syrtis Major feature. Sometimes a Martian dust storm can alter the shapes of the dark regions, or temporarily mask them altogether.
The best times for viewing Mars are when it is at opposition, which occurs about every 26 months. That's when the planet passes closest to the Earth and, thus, appears larger in size.
Our solar system's biggest planet, Jupiter, rewards city dwellers and anyone else who aims a telescope at it with fascinating and dynamically changing detail. Parallel cloud bands of varying hue and the famous "Great Red Spot" ? a swirling anti-cyclone that spans three Earth diameters ? are easily seen on its large disk (though the Spot is more of a light tan color). Large optics will also reveal whorls, small light and dark spots, and grayish festoons within the major bands. A new, smaller red spot, dubbed Red Spot Jr., appeared in 2006 and remains visible today. See if you can make it out!
Jupiter's four Galilean moons, named after Galileo Galilei who discovered them in 1610, are another reason to train your telescope on the gas giant. Io, Europa, Ganymede, and Callisto can be easily seen in small telescopes ? and even binoculars. The satellites orbit Jupiter at different rates, from two days to two weeks, so their positions change from night to night. Sometimes you will see all four ? tiny dots lined up "in a row" on one side or flanking both sides of the planet's disk. On other nights, you may see only two or three of them, because one or two are hidden behind the planet, or one could be passing in front and is washed out by the glare. On occasion you may see a tiny, distinct black dot on the planet's disk. That's the shadow cast by a moon in the foreground!
There is no more dazzling sight in the solar system than that of the ringed planet Saturn. City lights can't diminish the beauty of this tiny but picturesque crowd pleaser! Anecdotes abound about non-astronomers who catch their first glimpse of Saturn through a telescope, only to check the front of the scope in disbelief to see if there isn't a picture of the ringed planet dangling there. For how could an object so far away in space appear so perfectly clear and sharp? Such is the utter coolness of Saturn.
You can easily see the rings with any size telescope and 40x power or more. With a medium-sized or large telescope, you can often detect some subtle variations in hue between the center and the poles of the ball, and maybe even the thin black shadow cast onto the "surface" by the rings. On a night of good seeing you should be able to distinguish two rings ? the outer gray "A" ring and an inner white "B" ring, separated by a thin black gap known as the Cassini Division. Closer inspection might even reveal a third, dark-gray "C" ring inside of the B ring.
As you observe Saturn, you will notice that the tilt of its rings varies from edge-on to our line of sight to a maximum of 26 degrees over about a nearly 15-year period. When they are edge-on the rings actually disappear from view for a time.
Saturn has many moons that are also visible in amateur telescopes in close proximity to the planet. They are sometimes hard to distinguish from stars, but you should have no trouble identifying Titan, the biggest of the bunch.
The planets Mercury, Uranus, and Neptune can also be spotted in backyard telescopes from light-polluted sites, if you know where to look. But their tiny disks look little different from stars. The thrill is in finding them and saying you've seen them, more so than in discerning any detail in them, which you won't. Pluto you can forget about seeing from downtown. Besides, it isn't even a "planet" anymore!
Double and Variable Stars
Double and variable stars cut through urban skyglow and thus make easy and interesting targets for urban stargazers. Most double and multiple stars are gravitationally bound, orbiting systems (visual binaries). Others only appear close together in our line of sight, but really aren't physically associated at all (optical doubles). Doubles are fun to view because, like snowflakes, every one is different. The component stars may or may not differ in brightness and/or color. They might be very tightly paired, such that you need high power to resolve them, or more widely separated.
One of the most beautiful doubles is Albireo in the constellation Cygnus. Its primary star is a golden 3rd magnitude gem that glows in striking contrast to its sapphire blue 5th-magnitude companion. A spectacular sight in even the smallest telescope! Another fine example is the "Double Double" in Lyra. In a low-power eyepiece you see two widely separated white stars of roughly equal magnitude. But swap in an eyepiece that provides 100x magnification and suddenly both stars resolve into separate binaries themselves ? a quadruple star system!
Variable star observing requires more patience. There are different types of variables ? eclipsing binaries, pulsating stars, and eruptive variables ? each of which exhibits a change in brightness over some length of time, from just hours to many months. You can estimate the magnitude of the variable at any given time by comparing its brightness to stars of known, fixed magnitude that lie close to it. Keep monitoring the star and recording your observations, and over time you will see how its brightness has changed.
There are some variable stars whose brightness swings can even be perceived with the naked eye, though they are not dramatic. Algol in Perseus is one. Its magnitude varies from 2.1 to 3.4 every 2.87 days. If you're up for a challenge, see if you can detect the change.
You can find lists and descriptions of interesting double and variable stars in many astronomical observing guidebooks, including Nightwatch by Terence Dickinison.
Deep-sky Objects
So-called deep-sky objects, most of which are dim in modest-sized telescopes even from rural locations, have a tough time peeking through urban skyglow. The faintest types ? galaxies and nebulas ? fare the worst, while open and globular star clusters pierce through the muck better. But don't despair, because some specimens of all classes of deep-sky object can beam their photons through to your eyepiece.
Again, the higher the object is in the sky and the later at night you look, the better. Globular clusters and tightly packed open star clusters concentrate a lot of light into a small radius, which makes them easier to see than objects whose light is spread out more, such as galaxies and nebulas. The Double Cluster in Perseus, the Hercules Cluster (M13), the Wild Duck Cluster in Scutum, the Pleiades in Taurus, M44 in Cancer, M52 in Cassiopeia, M4 and M6 in Scorpius, and M22 in Sagittarius are a few examples of bright star clusters worth taking a gander at.
Planetary nebulas are small but their disk-shaped shells of ejected gas display high surface brightness. Two good planetaries to shoot for with a backyard telescope are the Ring Nebula (M57) in Lyra and the Dumbbell Nebula (M27) in Vulpecula.
For galaxies and nebulas, the selection is rather slim if you're observing in heavy light pollution. You'll enjoy a longer roster of candidates in more modestly tainted suburbs. Start with low power and try occasionally tapping the telescope tube, as the eye is more sensitive to motion and more likely to discern the object when it is vibrating slightly in the field of view. Using averted vision can also help.
Some "faint fuzzies" that you should have success seeing are the Andromeda Galaxy (M31), Whirlpool Galaxy (M51), and M81, a spiral galaxy in Ursa Major. For diffuse nebulas, the Orion Nebula (M42) is the easiest pickings, and the Lagoon Nebula (M8) and Swan Nebula (M17) in Sagittarius are possibilities. You might try using a narrowband light-pollution or "nebula" filter to improve the contrast between the nebulas and the background sky.
Final Thoughts
I hope this article has convinced you that there is plenty to see with an amateur telescope even in a light-polluted night sky. Escape to a dark-sky observing site whenever you can. But for the rest of the time, you needn't keep your telescope locked away in a closet. Get it out, set it up, gather a few friends or family members around, and enjoy a sampling of the many bright celestial showpieces that still manage to out-glow the skyglow.
{ width: 160, height: 160, defaultImage: '', layers: 'Artimg-Filter_Types_square' }

What do you do on a sunny day? Chances are you slip a pair of polarized sunglasses over your eyes. They cut down glare and appear to make colors, such as a cobalt-blue sky, look snappier.
Backyard astronomers do the same thing when they thread eyepiece filters into a telescope eyepiece to, say, cut the Moon's glare or bring out cloud bands on Jupiter. Eyepiece and telescope filters improve the view. And in the case of solar observing, they actually provide a safe way to look at the Sun directly.
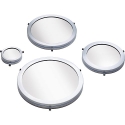 Solar Filters
Solar filters come in two main varieties: metal-coated black-polymer film and glass. In both instances, it's a metal alloy electrostatically applied to a surface that filters out the Sun's blinding intensity and harmful infrared radiation. Glass solar filters typically slip over a telescope's front aperture to block the light before it enters the scope. Film solar filters can be found in rolls or sheets of material that is wrapped around the front of a telescope, and more deluxe versions can have a plastic filter cell specially fitted for the front aperture of the telescope.
By some measures, glass solar filters offer greater durability than foil-like black-polymer film. On the other hand, black polymer can take an occasional drop on the ground without worry of cracking or shattering, like glass. The type of metal coating applied to black polymer film makes the Sun appear blue or neutral-white, while the coating on glass solar filters yields a more realistic yellow image.
Solar filters designed to fit a telescope eyepiece should be avoided. They are extremely dangerous because they sit right where the sunlight is most concentrated (focused). Remember burning dried leaves with a magnifying glass when you were a kid? Well, likewise, the heat that builds up at the eyepiece will eventually cause the filter to crack, which can permanently damage your eyes. If you come across a filter like this, get rid of it. See our handy solar filter reference chart to find the right solar filter for your telescope or pair of binoculars.
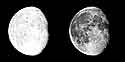 Moon Filters
Believe it or not, you're also dealing with bright, albeit reflected, sunlight when you turn your scope on the Moon. A noncrescent Moon will consistently leave spots even in a hardened lunar observer's eyes, although this will not damage your eyes.
To tone down the glare, a Moon filter can be used. This inexpensive accessory threads into a telescope eyepiece and blocks a large percentage (typically over 80%) of the light, making for more comfortable viewing and bringing out more lunar surface details.
A variable-polarizing Moon filter is a little fancier, allowing you to "dial in" the amount of light reduction you want. In so doing, it acts as something of a dimmer switch for your telescope. Such variable-polarizing filters actually consist of two polarized filters mounted in a rotating housing, which you turn to adjust the brightness. Double star observers often use variable polarizers to distinguish, or enhance, tightly paired targets that sometimes smear together in each other's light.
![]() Planetary (Color) Filters
Planetary (Color) Filters
Backyard observers also utilize an array of color eyepiece filters to glean subtle features on the planets. Earth's atmosphere is in constant fluctuation; turbulent air currents blur fine surface detail on solar system objects, like planets, viewed through a telescope. Faint, contrasting areas blend together due to irradiation - distortion of the boundaries between light and dark areas. Using color eyepiece filters can help reduce such distortion.
A color filter zeros in on a narrow region of the spectrum, reducing the scattering of interfering wavelengths. Because many planets have a characteristic color (e.g., Mars is reddish), a filter can dramatically increase detail by reducing the predominant hues and uncovering hidden contrast and surface markings. That's why the Red Planet is most effectively enhanced with a green filter. Each color eyepiece filter passes its characteristic color of light while blocking complementary colors. For example, green objects will appear bright (pale) through a green filter, and dark through a blue or red filter. Red features will appear bright through a red eyepiece filter and dark through a green or blue eyepiece filter.
Telescope eyepiece filters thread into the barrel of an eyepiece. Usually the aluminum cell holding the filter is threaded such that two or more can be "stacked," to achieve simultaneous filtering of more than one color.
 Color filters go by their "Wratten" numbers. Here is a rundown of the color eyepiece filters that are useful for enhancing detail on each planet and some other objects.
Mercury
#25 Red will make the planet's disk stand out against a blue sky, permitting daytime or twilight viewing. Mercury is usually best observed just after sunset, when the sky is awash in orange light, so employ #21 Orange with high magnifications to see the planet's phases.
Venus
No matter what telescope aperture you use, Venus's excessive brightness usually causes a very "overexposed," roiling image. With a #47 Violet filter, or stacked #58 Green and #80A Medium Blue filters, you'll reduce the severe twinkling for a better view of the fascinating changing phases.
Mars
#25 Red passes the predominant reflections of surface plains and maria, and #21 Orange is good for reducing the intense glare to enhance detail and mottling. The polar caps stand out with #15 Deep Yellow and #80A Medium Blue; examine the melt lines with #58 Green.
Jupiter
This great planet reveals its cloud bands, loops, festoons, ovals, and Red Spot with #80A, #58, and #21. Go from seeing only two bands without a filter to seven or more with a filter! Try stacking filters to reduce the heavy glare.
Saturn
Many subtle details are improved by #15 Deep Yellow. See the difference in brightness of the extremes of the rings with #25, #58, or #80A. The #15 filter also helps sharpen Saturn's image in photographs, improving the resolution of the Cassini division.
Moon
Reduce the Moon's glare with #80A Medium Blue, and enhance the contrast of lunar rilles and strata with #15 Deep Yellow.
Other Uses
You will improve black-and-white photographs by blocking UV light with #15 Deep Yellow filter. Refractor chromatic distortion is also reduced by #15, and by #80A filters. The #82A Pale Blue filter is great for stacking with other colors, and can adjust film color balance by absorbing excess yellow and red. #58 Green will block street light while passing much of the wavelength of doubly ionized oxygen in emission nebulas. Try #25 Red for long black-and-white exposures of the Omega or Rosette Nebulas.
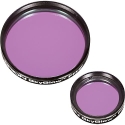 Deep-Sky Filters
One very useful weapon in the fight against light pollution is a light-pollution filter. So-called broadband filters, like the Orion SkyGlow, effectively block the wavelengths of light generated by incandescent, sodium, and mercury-vapor lights, which brighten the evening skies in cities and suburbs, while letting through the desirable wavelengths emitted by galaxies and emission nebulas (hydrogen alpha, hydrogen beta, and oxygen III). This type of eyepiece filter is also popularly called a light-pollution-reduction, or LPR, filter. Bright, light-polluted skies appear much darker, and the contrast between object and sky is improved significantly.
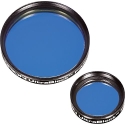 Narrowband eyepiece filters, such as the Orion UltraBlock, allow an even narrower range of wavelengths through. This type of eyepiece filter is often called a "nebular filter" because it is particularly effective in enhancing detail and contrast of emission and planetary nebulas. Galaxies and reflection nebulas don't benefit much.
Narrowband eyepiece filters block all forms of light pollution, including wavelengths from incandescent and fluorescent lighting, which broadband filters cannot stop. So they are effective in areas with severe light pollution. They will transform a poor, milky-sky urban backyard into something useable for deep-sky observing.
Still, their effect is most dramatic under a truly dark sky.
Other deep-sky eyepiece filters are "tuned" with bandpasses intended for the light of specific targets. Oxygen III, or O-III, filters are optimized for planetary nebulae. H-beta eyepiece filters convey the blue-green luminescence of faint emission nebulae like the Horsehead or California Nebulas. And comet filters permit the passage of light given off by, of all things, glowing cyanogen gas that surrounds comets.
So, thanks to a whole battery of eyepiece and telescope filters we can see things that run the gamut from sunspots to the shattered remains of an exploded star. If you enjoy even a moderate amount of observing, you will benefit by having a few filters at your disposal. Chances are, you will reach for an eyepiece filter at night as often as you reach for sunglasses on a sunny day.
They almost always improve the view!
{ width: 160, height: 160, defaultImage: '', layers: 'Artimg-About_Finders_square' }

In general, a finder scope is a very small telescope that rides piggyback on the main telescope. Its purpose is simple: to aid in aiming the main telescope toward objects of interest. By virtue of low magnification and a wide field of view, the finder scope allows you to see more of the sky than you can through the main telescope. This wider field of view allows you to locate objects of interest easily, so you can study them at higher magnifications with the main telescope.
Once you locate an object of interest in the sky with the finder scope, center it on the finder scope crosshairs by adjusting the position of the telescope. Now, when you look in the main telescope - voila! - the object will be waiting right there for you in the telescope eyepiece. This method can be used whether the object of interest is a crater on the relatively close-by Moon, or a faint galaxy tens of millions of light years distant.
Types of Telescope Aiming Devices and Finder Scopes
Orion offers three main types of aiming devices: achromatic finder scopes, reflex sights, and bracketed green laser pointers. Within these three main categories of aiming devices, there are also different models of finder scopes and reflex sights available with specialized features and functionality. You can use just one of these aiming tools to help point your telescope, but many amateur astronomers have found that having more than one aiming device on the same telescope can make aiming easier than using a single device.
Let's take a moment to find out what the major differences are between the different types of aiming devices:
Achromatic Finder Scopes
An achromatic finder scope is itself a miniature refracting telescope that uses glass lenses to gather and focus light. Most offer modest magnification on the order of 5x to 10x, and a field of view of 5� or more. A 6x30 finder scope is a common model. The 6 is the magnifying power, while the 30 represents the diameter, or aperture, of the main lens, in millimeters.
Different models of achromatic finder scopes are equipped with different features which can help to make aiming a telescope more accurate, more comfortable, and more convenient.
Straight Finder Scopes
Standard straight finder scopes are the simplest design of magnified aiming device. They transmit light gathered by the objective lens through the finder scope barrel to the eye lens, which sticks straight out the back of the finder barrel. You just peer into the eye lens to see a wide-field magnified view of where the finder scope is pointing, and therefore where the telescope is pointing.
Beginners are often surprised that the image in a standard finder scope is upside-down (rotated 180�). That's normal (though perhaps not ideal) for any refractor used without a correcting prism. It's not that big of a deal, however, since all you're trying to do is center the object on the crosshairs. Whether it's upside down or not doesn't much matter, though it does make navigation by star-hopping a little trickier.
Right-Angle Correct-Image Finder Scopes
Unlike standard straight finder scopes, specialized right-angle correct-image designs employ a right-angle prism to bend the path of gathered light 90� and correct the inverted (upside-down) view. The benefits of such a finder scope are twofold. Many astronomers prefer the right-angle positioning of the eye lens as a more comfortable alternative to straight finders, especially when trying to locate a celestial object that is near the zenith of the night sky, straight overhead. The correct-image view makes it easy to make accurate position adjustments of the main telescope, since the view in the finder matches the naked-eye view of the sky.
Illuminated Reticles and Standard Cross Hairs
All finder scopes feature some type of cross hair reticle which is visible when you look through the finder scope. Using the cross hair pattern, you can easily center an object of interest in the finder scope's field of view, so it will be visible in the eyepiece of the main telescope the finder is aligned with.
Some achromatic finder scopes have standard black cross hair reticles, while other so-called "illuminated reticle" models feature a small red LED light which illuminates the cross hairs for easier detection at night. On especially dark nights, it can prove difficult to see standard black cross hairs against the dark background of the black sky. Orion Illuminated Reticle Finder Scopes employ double cross hairs which form a small box around the center of the finder field of view. Centering an object is as easy as placing it in the illuminated box! Illuminated reticle finder scopes require button-cell batteries to power the illuminator.
Focusing the Finder Scope
Most achromatic finder scopes have an adjustment ring that allows the image to be focused for your eyesight. Focusing is done by moving the objective (front) lens in or out by adjusting the knurled ring near the front of the finder. Consult the instruction manual that came with your telescope or finder scope to learn more about focusing.
The Bigger the Finder, the More You'll See
With finder scopes, as with any telescope, the bigger the diameter of the light-collecting lens or mirror (i.e., the aperture), the more you'll be able to see with it. Greater light-grasp translates into being able to see fainter objects and finer detail. So larger, more expensive 8x40 or 9x50 finder scopes garner more light to pull in fainter targets and, more importantly, dimmer stars. Such large-aperture finders are popular add-on accessories for telescopes of 6" and greater apertures.
If the object you're targeting is too faint to be seen in the finder scope, then you have to aim where you think it is and "sweep" the area a little with small circular motions of the main telescope until it appears in the eyepiece. This can require a bit of practice, but the satisfaction of finding a celestial object on your own, without computerized assistance will be worth it!
Reflex Sights, or "Red Dot" Finders
A refreshingly simple type of aiming device is called a reflex sight, or "red dot" finder. It is a non-magnifying aiming tool that displays a red, LED-lit bull's-eye pattern or red dot in the center of the finder's field of view. The red dot appears superimposed on the sky, showing exactly where the telescope is pointed (once properly aligned, of course).
While a reflex sight can only be used to locate objects that are visible to the naked eye, its main advantage is that it does not invert or flip the image like a standard finder scope does. It also has a very wide field of view. So it makes star-hopping very easy and intuitive. Using a reflex sight is easy - just look on a star chart, locate a celestial object's position relative to bright nearby stars, or its position within a recognizable constellation or asterism. Move the main telescope to place the reflex sight's red dot on that spot, and, presto, the object is right there in the main telescope's eyepiece.
Like achromatic finder scopes, different types of reflex sights are available. Some especially affordable models offer a single red-dot aiming pattern, while other more deluxe models offer a variety of different reticle patterns and brightness settings which are preferable to many amateur astronomers.
Because standard finder scopes and reflex sights each have their own merits, many amateur astronomers use them both, mounting them side by side on their telescopes.
Green Laser Pointers
Many amateur astronomers enjoy using a green laser pointer to help aim their telescope. To use a laser pointer as an aiming device, a specially designed bracket is required which both holds the pointer and allows it to be aligned with the main telescope. With such a bracket attached to your telescope, a green laser pointer can be used as a high-tech aiming tool.
Bracketed green laser pointers can be used as the main aiming device, but they are also commonly used as a secondary aiming tool in addition to a finder scope and/or reflex sight to help aim the main telescope with precision.
CAUTION: Always use green laser pointers responsibly! Never aim them anywhere near people, animals, moving vehicles, aircraft, or windows.
IMPORTANT NOTE: Remember to power-off the laser pointer once you've completed aiming the telescope at your target celestial object by loosening the ON/OFF collar thumbscrew before you observe through the attached telescope, to both prolong battery life and avoid unintentional pointing of the laser at passing aircraft, animals, etc.
Align then Find
Finder scopes and other aiming devices will only work if they have first been aligned with the main telescope, so the two instruments are aiming at exactly the same spot. That's easy to do.
Aligning Finder Scopes and Reflex Sights
To avoid hassle, align a finder scope or reflex sight while it's still light outside. A good time to perform aiming device alignment is after the telescope has been set up but before the Sun goes down.
First, put a low-power (long focal length) eyepiece in the focuser of the main telescope. Looking into the telescope eyepiece, center a distant stationary object in the field of view - the top of a telephone pole, a treetop, or a chimney on a house. The object should be at least a quarter-mile away to optimize precise alignment of the finder scope. Selecting an even more distant object will improve accuracy. Now, without moving the main telescope, carefully look through the finder scope and see if the object appears in the center of the finder scope's field of view (where the crosshairs intersect). If it does not, use the adjustment screws on the finder scope bracket to adjust the aim of the finder scope until the object is centered on the crosshairs. For reflex sights, use the adjustment knobs to adjust the aim of the red-dot sight until the object is centered in the viewing window. You may want to power on the reflex sight so you can see the red-dot.
Once the object is centered in either the finder scope or reflex sight, look back into the telescope eyepiece and make sure the object is still centered there as well. If it is, you're done. If it is not, repeat the procedure, being careful not to move the main telescope while you're adjusting the position of the finder scope or reflex sight.
When the distant object is centered in both the main telescope and the aiming device, the finder scope or reflex sight is properly aligned and ready to use. Verifying the aiming device's alignment should be one of the steps you go through each time you set up for an observing session. While most of the time an aiming device will retain its alignment, it's a good idea to check before each observing session to avoid frustration if the finder has been inadvertently bumped and misaligned.
Aligning Bracketed Green Laser Pointers
Aligning a bracketed green laser pointer with a telescope is easy to do. It should be done outdoors by aligning on a distant fixed target or a bright star.
First, point your telescope at a target that is 100 feet or further away. Using a low power telescope eyepiece, such as a 25mm focal length eyepiece, look through the telescope, and make sure that the target object is centered in the field of view. Then, turn the green laser pointer on by rotating the knurled metal thumbscrew on the on/off collar clockwise. Finally, use the adjustment thumbscrews of the bracket to adjust the green laser until it is pointing to the same target that the telescope is centered on.
If you have a higher power eyepiece you can repeat the procedure for enhanced precision. The narrower field of view provided by a higher power eyepiece will increase the accuracy of the laser's alignment with the main telescope.
Once the laser points to the same target that the telescope is centered on, the laser is aligned with the telescope. You're ready to use the green laser pointer with the telescope under the night sky.
So, Which Aiming Device is Best?
Deciding which type of finder scope or aiming device best suits your needs depends on a mixture of personal preference and desire for specialized features and functionality. Most telescopes include some type of aiming device right out of the box. Acquiring a different finder scope or aiming device can substantially improve your experience when using a telescope, as they can significantly improve ease-of-use. As you use your telescope, make note of whether or not you feel your current finder scope or aiming device is providing you with a comfortable and effective means of aiming. Chances are good there is a better finder available from Orion that can make pointing your telescope in the right direction a more pleasurable experience.
In closing, let's review the main factors to consider when shopping for an aiming device for your telescope:
o A finder scope or aiming device is used to accurately point the main telescope towards objects of interest
o Different designs of finder scopes and aiming devices provide different features and functionality that can significantly improve your experience
o The different designs available are:
o Straight through magnifying finder scopes with standard cross hairs
o Straight through magnifying finder scopes with illuminated-reticle cross hairs
o Right-angle correct-image magnifying finder scopes with standard cross hairs
o Right-angle correct-image magnifying finder scopes with illuminated-reticle cross hairs
o Non-magnifying reflex sights with a 'red-dot' aiming pattern
o Non-magnifying deluxe reflex sights with multiple aiming patterns and brightness settings
o Bracketed green laser pointers which emit a laser beam to help aim the telescope
o Many amateur astronomers use more than one aiming device on a telescope
o The best aiming device(s) to use depends on you and your personal preferences in the hobby
Remember, Orion is here to help with any questions you have while shopping for a new finder scope or other telescope aiming device. Just send us an email at sales@telescope.com, contact us via live chat, or give us a call Toll-Free at 800-676-1343 and we'll help find the best aiming device for you!

{ width: 160, height: 160, defaultImage: '', layers: 'Artimg-DealingDew' }

Dew forms on any surface that is sufficiently colder than the air temperature. The dew point varies with both temperature and humidity. Odd as it may seem, the temperature of an object exposed to the night sky rapidly becomes colder than the ambient air. This radiant cooling takes place when an object gives off more heat than it absorbs from the surrounding environment. If the temperature drops enough to reach the dew point, dew forms.
Dew is particularly troublesome on Schmidt-Cassegrain telescopes, with their exposed front corrector plate. Once dew forms, wiping it away does no good; it just keeps forming. To prevent dew, you must either slow down the radiant cooling (with a dew cap) or replace lost heat (with a heater), or both.
Dew Caps
A dew cap is a hollow tube that extends out in front of the objective lens (refractors) or corrector lens (Schmidt-Cassegrains). It shields the exposed optics from wide exposure to the cool ambient air, slowing heat loss. Reflector telescopes don’t need dew caps because the main mirror rests at the bottom of the tube, which acts as a dew shield. A dew cap works best if made from an insulating material. It will prolong viewing time and can prevent dew formation entirely.
Dew Heaters
A dew heater warms the telescope’s corrector plate to a temperature higher than the dew point. There are several different types:
Warm air blowers, such as home hair dryers, can rapidly warm up optics and evaporate dew. They work well for casual observing, but must be used repeatedly and can cause temporary image distortion.
Heated dew caps warm the air around the corrector, heating it by convection. This eliminates dew, but can cause "heat wave" optical effects, which distort the image.
Contact heaters are electric heating elements that directly warm the telescope tube or optical mounting cell, which conducts heat directly to the optics. They avoid heating the air or the dew cap, thereby minimizing heat waves and other undesirable thermal effects.
{ width: 160, height: 160, defaultImage: '', layers: 'Artimg-ExpanseEyepieces' }

Until recently, high power eyepieces usually meant cramming your eye against a tiny eye lens and viewing a dim narrow field. Then optical designers got the idea of combining eyepieces and Barlow lenses into a single package which gave high magnification, long eye relief, and bright, easy-to-see images. Such eyepieces have been quite expensive until Orion� recently announced their new Expanse' series of eyepieces, available in four focal lengths: 20mm, 15mm, 9mm, and 6mm. The 20mm and 15mm are normal wide-field designs, while the 9mm and 6mm versions combine a fairly low power eyepiece with a built-in Barlow lens. That's why, if you look at the picture above, the 9mm and 6mm versions are nearly twice as large as their low-power brethren, the opposite of what we see with most eyepieces. So, while the 20mm and 15mm are nice to have, the real interest is in the 9mm and 6mm versions, which offer a totally different viewing experience from typical short-focus Pl�ssl eyepieces.
I tested the 15mm and 6mm Expanse eyepieces which came with the StarBlast EQ as standard equipment. Both offer wide 66� fields of view, as compared with the 52� fields of most Pl�ssls. This gives you a 61% increase in the area you can see at a given magnification, which in itself is impressive. Secondly the lens you put your eye to is much larger than we're used to in eyepieces of this size. The eye lens on the 15mm measures 20mm in diameter, and that of the 6mm measures a whopping 22mm. The effect is like looking through a picture window rather than straining to peep through a tiny pinhole. This contributes to the large eye relief of these eyepieces, 13mm to 17mm, depending on the focal length. Eyeglass wearers will be able to see all or most of the field of view, and for non-eyeglass wearers, it will be just as comfortable to look through the 6mm as through the 20mm.
These eyepieces come with all the deluxe features you expect from a high quality eyepiece:
- Fold-down rubber eyecups
- Undercut barrels to keep them securely in place in your eyepiece holder;
- High quality coatings on all optical surfaces;
- But the most remarkable feature is the price: these eyepieces cost just about what we are used to paying for Pl�ssl eyepieces with narrower fields of view and much shorter eye relief.
In addition to testing these eyepieces in the StarBlast EQ, I also tried them in my Starmaster 11" f/4.3 Newtonian. As I always do with this telescope, I used a Tele Vue Paracorr to correct for the aberrations of its short focal ratio mirror; this results in an effective focal ratio of f/5, a pretty stringent test for any eyepiece. The Expanses delivered really sharp images almost to the very edge of their wide field, challenging eyepieces costing many times more. Once again, the Double Cluster in Perseus was my acid test, and both eyepieces delivered pleasingly sharp images all the way across their 66� field of view.
With eyepieces like these Expanses available now at such a reasonable price, why even consider Pl�ssls with their narrow fields of view and short eye relief?
November 2006
{ width: 160, height: 160, defaultImage: '', layers: 'Artimg-Equip_Features_Reviews' }

I recently received two of Orion's eyepieces for testing purposes: a Stratus 24mm and an Edge-On Planetary 5mm. These are two of my most used focal length eyepieces, so serve as a good test for their respective series.
Stratus 24mm
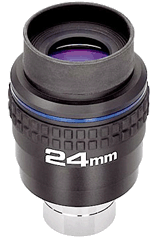 I've always been a bit concerned over an eyepiece series named for a type of cloud. However I've heard good things about this series, and have long wanted to test one.
The Stratus series is unusual in being usable in both 2" and 1.25" focusers. There is a normal 1.25" barrel, but the lower part of the main body of the eyepiece is 2" in diameter, and so fits perfectly in 2" focusers. Since the Stratus series covers a wide range of focal lengths, it means that you can switch eyepieces in any telescope without fiddling around with adapter rings.
Stratus eyepieces are available in 24mm, 21mm, 17mm, 13mm, 8mm, 5mm, and 3.5mm focal lengths. All offer a 68� field of view and 20mm eye relief, with the exception of the 24mm which has only 15mm eye relief. The eyepieces are finished in a matte black, with knurled rubber grips.
The 24mm is a particularly useful focal length because it offers just about the widest actual field of view possible in a 1.25" eyepiece, delivered at a high magnification so that contrast with the background sky is maximized. For many years I have used a Meade Super Wide 24.5mm eyepiece to fulfill this function, so naturally that was the main eyepiece I compared the Stratus with.
The telescope used for these tests was a Starmaster 11" f/4.3 Newtonian equipped with a Tele Vue Paracorr coma corrector. This lengthens the focal length by 15% but corrects all aberrations, delivering an aberration-free f/4.9 image. This is an "acid test" for eyepieces, as most are not designed to function well at focal ratios as short as f/5. If an eyepiece does well at f/5, it will be excellent in just about any telescope.
My main test for eyepieces is to examine a critical image at both the center of the field of view and at the very edge of the field of view. Both images should be identical; I look particular for a variety of aberrations: chromatic, spherical, defects in contrast, etc.
The Stratus 24mm passed all of these tests with flying colors. It was noticeably better than the Meade eyepiece at the edge of the field, where the Meade lost color and contrast. It's worth noting that the Meade eyepiece, now discontinued, cost twice as much as the Stratus does.
In the 11" Starmaster, the 24mm yielded a pleasing 58x: powerful enough to show detail in galaxies but with an actual field of 1� 11', putting the objects in context. As I said, this is one of the most useful combinations of focal length and field of view.
If the rest of the Stratus series is comparable to the 24mm, this makes an excellent choice for a high-quality eyepiece with a wide field of view.
Edge-On Planetary 5mm
 It used to be that using a 5mm eyepiece for planetary observation was literally a pain. Classic designs like the orthoscopic and Pl�ssl had an eye relief so short that the observer needed to cram their eye into the eyepiece to even begin to see its rather narrow field of view. About ten years ago a series of new designs incorporating Barlow elements changed all this, allowing comfortable eye relief so that anyone, even with glasses, could observe in a relaxed manner.
Orion's new 5mm design represents the next generation of these comfortable short-focus eyepieces. Like the latest designs of ED refractors, it has a classy high-tech look with a gleaming black anodized finish. As expected, it delivers a bright, high contrast image, which can be viewed in total comfort thanks to its 20mm eye relief and large eye lens. It has a moderate 55� field of view, larger and far better corrected than any Pl�ssl. This series of eyepieces is available in 14.5mm, 12.5mm, 9mm, 6mm, 5mm, and 3mm focal lengths.
I tested it in my 11" Starmaster the same way I tested the 24mm Stratus. Once again, the image was identical whether in the center or at the edge of the field of view. This eyepiece produced 276x magnification, which proved to be the perfect magnification for Jupiter. It passed one of the best subjective tests of an eyepiece: within seconds I'd forgotten it was even there, and was totally absorbed in the detail visible in Jupiter's atmosphere. Once it was in the focuser, I really didn't want to take it out—ever!
These two series of eyepieces are representative of what is now possible with computer-designed eyepieces manufactured with care. They outperform even the most expensive eyepieces of a decade ago and yet sell for prices a fraction of the so-called premium brands. Truly, we have never had it so good!
{ width: 160, height: 160, defaultImage: '', layers: 'Artimg-Tips_n_Tricks' }

When I worked as a computer consultant, my specialty was importing and exporting data. I once had a job trying to export data from an early Macintosh database. The authors of the program had decided that their software was so good that no one would ever want another program, and so had cleverly designed their software so that data, once entered, could never be exported. Despite my knowledge of all the tricks of the trade, I couldn’t figure a way to export the data. The situation made me really aware of the importance of software being able to talk to other software, clearly and unambiguously, and that has always been one of the reasons I like Starry Night.
Printing Charts
The most obvious way of exporting information from Starry Night is printing star charts for use under the sky or at the telescope.
There are two main ways of printing charts: 1 pane and 3 pane. 1 pane charts are traditional charts, which can be set up to any scale using Starry Night’s zoom capabilities, including a special 180° chart of the whole sky. 3 pane charts allow you to show the sky at three different scales, so that you can depict naked eye, binocular, and telescope views on a single page.
Starry Night gives you a series of 11 standard chart designs, or you can print custom charts using whatever display features you choose to turn on. All of these charts are negatives of what you see on the screen: black stars and labels on a white background, which is what most experienced observer’s prefer.
Exporting Images
Sometimes you want a more naturalistic depiction of the night sky. In this case, use the “Export as Image…” command under the File menu. This allows you to export the screen display in 11 different formats, including the best known graphical exchange formats and formats specific to many different graphics programs. The Options button lets you control the resolution and image size.
QuickTime
You can make QuickTime movies of anything displayed and animated on your Starry Night screen. You can even export the sky in QuickTime VR format, so that anyone with QuickTime can examine details of the sky by panning and zooming.
Logs
Experienced observers who use Starry Night will know about its logging features, which enable you to record your observations as part of Starry Night log files. While individual logs can be exported as text files, you can also use the “Export All Logs…” command to export all your log entries at once—an excellent way to prepare an observing blog, for example.
This article has just touched on a selection of the export facilities built into Starry Night. As with many features, I encourage you to explore and experiment this rich learning environment.
October 2009


Why Buy From Orion
- 30 Day Money Back Guarantee
- Safe & Secure Shopping
- Next Day Shipping
- Easy Returns
- Sale Price Guarantee
- Free Technical Support

- 800-447-1001
- Telescope.com
- © 2002- Orion Telescopes & Binoculars All rights reserved
- DMCA/Copyright
- Terms and Conditions
- Privacy & Security
![]()


About Orion Telescopes & Binoculars
Since 1975 Orion Telescopes & Binoculars has been offering telescopes for sale direct to customers. Now an employee-owned company, we pride ourselves on an unswerving commitment to best quality products, value and unmatched customer care. Our 100% satisfaction guarantee says it all.
Orion offers telescopes for every level: Beginner, Intermediate, Advanced, and Expert. From our entry level beginner telescopes for amateur astronomers to our Dobsonian telescopes to our most advanced Cassegrain telescopes and accessories, you can find the best telescope for you. Because we sell direct, we can offer you tremendous value at a great price. Not sure how to choose a telescope? Orion's Telescope Buyer's Guide is a great place to start.
Orion binoculars are known for quality optics at a great price. We offer binoculars for every viewing interest, including astronomical binoculars, compact binoculars, waterproof binoculars, birding binoculars, and sport and hunting binoculars.
Orion's telescope and astrophotography accessories will enhance your telescope enjoyment without breaking the bank. Expand your viewing experience with accessories ranging from moon filters to power-boosting Barlow lenses to advanced computerized telescope mounts. Capture breathtaking photos with our affordable astrophotography cameras. And when you're stargazing, Orion's telescope cases and covers, observing gear, red LED flashlights, astronomy books and star charts will make your observing sessions more convenient, comfortable and meaningful.
At Orion, we are committed to sharing our knowledge and passion for astronomy and astrophotography with the amateur astronomy community. Visit the Orion Community Center for in-depth information on telescopes, binoculars, and astrophotography. You can find astrophotography "how to" tips and share your best astronomy pictures here. Submit astronomy articles, events, & reviews, and even become a featured Orion customer!
sales, new products, and astronomy.