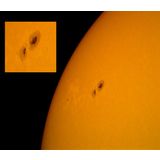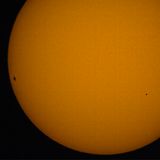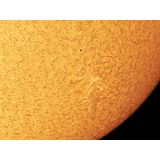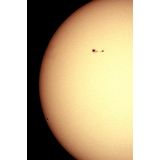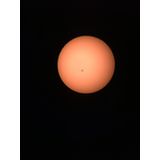
While simply observing the Sun at any wavelength is a wonderful experience, there is something very satisfying about watching sunspot activity with a white light solar filter and recording the changes which occur over a period of days. While you might think it would take sophisticated photography equipment, all it really takes is some patience combined with a pencil and paper and a solar-filter equipped telescope or binocular.
To begin recording sunspots, set up your equipment in a comfortable area. Inspect your solar filter(s) for any pinholes or scratches and then securely attach it to your telescope or binocular. Be sure to cover your finder scope before aiming at the Sun, unless you have a solar-filter equipped finder scope! Once you have the Sun in view, give your equipment a few minutes to reach thermal stability. Since the sunlight will also warm your telescope and cause some image waiver, it will be impossible for it to have a completely steady view. However, a few minutes allowance time for things to "warm up" helps significantly. To help you get the most from your viewing session, try draping a dark colored towel over your head when you are at the eyepiece — similar to an old-fashioned photographer. While you might think it looks silly, it helps to block the stray light and allows your facial muscles to relax and enjoy the view!
Now, let's take a look at the sunspots...
Like our Earth, the Sun is divided into two hemispheres — north and south. Sunspots occur on either side of the equator and they rotate across the solar surface from east to west. Sunspots which appear near the solar poles rotate quickly, making their journey across the visible face in just a matter of a few days, while sunspots appearing along the equator take a longer path and move more slowly. Each sunspot will be constructed of two parts — the very dark umbra and the more opaque penumbra. Regions of sunspots can also contain "fragments" as well.
When you're ready, it's time to begin sketching. Start by drawing a simple circle on your paper. (It's easy to trace around a saucer in advance and do several sheets for several days — or just in case you make a mistake and need another.) Now, sketch what you see! It's easy to make the dark patches which signify the umbra and then shade around them for the penumbra. Try to be as accurate as possible - not because anyone is going to grade your sketches, but because you'll be amazed at the small changes which occur. Be sure to note anything else you might see, such as signs of granulation or areas which appear brighter than others. When you are finished, turn off any drive on your telescope and allow the Sun to "drift" in the eyepiece. The direction in which the limb first goes out of view is west. Label your sketch accordingly. North and south can be completed later.
Once you have a finished sketch, it's time to put away your equipment safely and begin some investigations. All of the sunspots, or groups of sunspots, you have drawn have been assigned numbers. These numbers go by a sophisticated classification system and even more names. They might be referred to a Carrington Rotation Numbers, Wolf Numbers, or Mt. Wilson Numbers... just to name a few. No matter how you refer to them, you will need an accurate source to label your sketch. One of the best resources for sunspot numbers is the Solar Influences Data Analysis Center (SIDC) website at http://sidc.oma.be/index.php3. Once you have viewed the Sun for yourself, it's easy to match what you have on your sketch to their information. Checking with this website will also ensure that you have labeled east and west properly, and can now add the northern and southern hemisphere accurately. Before you put away your sketch, there's more information to be added. You will also want to include the date, time, location, instrument used, type of filter used and magnification.
As the days pass and you continue to observe the same sunspots, you'll notice many wonderful and exciting changes. Some umbra regions may break apart, forming smaller groups all located in the same penumbra. Other umbra regions may join themselves together, forming a large spot with a changed penumbral size. Some smaller spots may disappear entirely and other new ones might form. More sunspots may have rotated into view — while others may have passed around the limb. As a sunspot nears the limb, look for an unusual, dimpled appearance known as the "Wilson Effect". It's just one of many great things you can see using a white light solar filter!
Be sure to store your sunspot records in a safe place. As time passes and you learn even more about solar observing, you'll enjoy accessing your observing reports and seeing how much you have learned. With some practice, you might even find yourself accurately predicting the return of large sunspot regions - or even predicting events such as coronal mass ejections based on what you have seen. It's a wonderful hobby and a great way to enjoy your telescope equipment while observing our nearest star!
CAUTION: Never view the Sun, even for an instant, without a properly installed protective solar filter for your telescope or binoculars, or specialized solar telescope. Doing so could permanently damage your eyes.


