


{ width: 160, height: 160, defaultImage: '', layers: 'Artimg-CelestialEvents2012' }


Do you enjoy sky-watching? During the month of May, there is an exciting event which doesn't require the use of a telescope or binoculars. All you will need is your eyes, an unobstructed western horizon and clear skies

May 2010 Venus-Jupiter-Mercury Conjunction Courtesy of
Shevill Mathers
Beginning on May 10, there's a "line up" happening on the western horizon. If sky conditions permit, you will see a very faint, very slender crescent Moon, only hours old. It will be accompanied by bright Venus to the north and Jupiter high above them to the east-southeast. On May 11 the Moon moves its position and will be located directly between Venus and Jupiter. By May 12, the Moon has climbed even higher - taking station above Jupiter. By the evening of May 21 and May 22, the Moon will accompany Saturn and the bright star, Spica, in the constellation of Virgo. While the Moon will climb higher as it heads east each night, keep your eyes on the two western planets... they are about to dance.
Let's learn about what we'll see!
We watch it occur in the sky. We accept that it's natural. We even know this gathering of planets is called celestial mechanics. But exactly what laws govern these movements and how do we understand them? Let's take a look...
Once upon a time, just two days after Christmas in 1571, a very cool dude named Johannes Kepler was born. Like some of us, he had a pretty rough life. His dad died when he was 5, but he had a great mom. She was not only a waitress, but a herbalist as well. One of the best things she ever did for her son was to take him out to watch the Great Comet of 1577 and a lunar eclipse in 1580. Even though she ended up being later tried for witchcraft, the love of astronomy that she inspired in her son would shape the way we now understand planetary motion.
Kepler wasn't always lucky. Smallpox crippled his vision and hands, but that didn't stop him. He excelled at studying planetary motion in the astrological sense and kept busy as a math teacher. Not only did he like numbers, but he also liked to play around with lenses, too? and write letters to his friend Galileo Galilei. Even though he ran the risk of losing his job and getting in trouble with the church, Kepler defended Copernican theory of a Sun-centered system and went on to devise some formulae of his own. At age 24, he was teaching a class about the conjunction of Saturn and Jupiter when he realized that regular polygons bound one inscribed and one circumscribed circle at definite ratios, which, he reasoned, might be the geometrical basis of the Universe. Thankfully, his school supported him and published his work as the Mysterium Cosmographicum, or Cosmographic Mystery.
Fortunately, that was a good move and it landed Kepler a part time job helping out an astronomer named Tycho Brahe. To make a long story short, that was his introduction into the real world of astronomy and many long years and bad political times kept things from progressing. However, the astronomers of the time respected his work in their own ways and continued to test out Kepler's theories - right down to his predictions when Venus and Mercury would transit the Sun. Yep. It would be long after Kepler died before his ideas were finally recognized, but these three principles withstood the test of time:
1. The orbit of every planet is an ellipse with the Sun at one of the foci.
2. A line joining a planet and the Sun sweeps out equal areas during equal intervals of time. (Suppose a planet takes one day to travel from point A to B. The lines from the Sun to A and B, together with the planet orbit, will define a (roughly triangular) area. This same amount of area will be formed every day regardless of where in its orbit the planet is. This means that the planet moves faster when it is closer to the Sun.) This is because the Sun's gravity accelerates the planet as it falls toward the Sun, and decelerates it on the way back out, but Kepler did not know that reason.
3. The squares of the orbital periods of planets are directly proportional to the cubes of the semi-major axis of the orbits. Thus, not only does the length of the orbit increase with distance, the orbital speed decreases, so that the increase of the orbital period is more than proportional.
Now that we understand the law, let's go out and observe!

May Conjunction
If you paid attention to Kepler's laws, you'll notice that Venus climbs just a bit higher each night, while Jupiter lowers to the west. Around May 20, another player will enter as tiny, dim Mercury emerges from the Sun's glare and joins the show. On May 27, the trio will make a spectacular appearance as they triangulate low on the western horizon. This event is called a conjunction. Even though Momma said it ain't polite to stare, there's a very good reason we humans can't take our eyes off this celestial phenomenon!
"Your eye is like a digital camera," explains Dr. Stuart Hiroyasu, O.D., of Bishop, California. "There's a lens in front to focus the light, and a photo-array behind the lens to capture the image. The photo-array in your eye is called the retina. It's made of rods and cones, the fleshy organic equivalent of electronic pixels."
Near the center of the retina lies the fovea, a patch of tissue 1.5 millimeters wide where cones are extra-densely packed. "Whatever you see with the fovea, you see in high-definition," he says. The fovea is critical to reading, driving, watching television. The fovea has the brain's attention. The field of view of the fovea is only about five degrees wide. "Tonight, Venus, Jupiter and Mercury will all fit together inside that narrow angle, signaling to the brain, "This is worth watching!"
When it comes to our eyes, almost every photoreceptor has one ganglion cell receiving data in the fovea. That means there's almost no data loss and the absence of blood vessels in the area means almost no loss of light either. There is direct passage to our receptors - an amazing 50% of the visual cortex in the brain! Since the fovea doesn't have rods, it isn't sensitive to dim lights. That's another reason why the conjunctions are more attractive than the surrounding star fields. Astronomers know a lot about the fovea for a good reason: it's is why we learn to use averted vision. We avoid the fovea when observing very dim objects in the eyepiece.
Let's pretend we're a photoreceptor. If a light were to strike us, we'd be "on" - recording away. If we were a ganglion cell, the light really wouldn't do much of anything. However, the biological recorder would have responded to a pinpoint of light, a ring of light, or a light with a dark edge to it. Why? Light in general just simply doesn't excite the ganglion, but it does wake up the neighbor cells. A small spot of light makes the ganglion go crazy, but the neighbors don't pay much attention. However, a ring of light makes the neighbors go nuts and the ganglion turns off. It's all a very complicated response to a simple scene, but still fun to understand why we are compelled to look!
Many of us have been watching the spectacle of the planets as they draw closer over the last several days. How many of you have seen the Venus and Jupiter pair appear one over the top of each other - looking almost like a distant tower with bright lights? Once again, we've been observing Kepler's Laws of Planetary Motion in action - and it's a great way to familiarize your self with celestial mechanics. What's happening is called a conjunction. This is a term used in positional astronomy which means two (or more) celestial bodies appear near one another in the sky. Sometimes this is also called an appulse. No matter what you call it, it's an event worth watching!
{ width: 160, height: 160, defaultImage: '', layers: 'Artimg-WhatsInTheSky_05_13_square' }

Get outside with your telescope on clear May evenings to see celestial treats in the sky! With weather warming up and skies clearing up, there's no shortage of celestial delicacies to view. Here are a few of Orion's top suggestions for May observing:
Eta Aquarid Meteor Shower - Get outside well before dawn on May 5th to catch the Eta Aquarids. You don't need a telescope to enjoy this meteor shower, which should deliver about one meteor per minute. Look for meteors appearing to radiate out of the water jug portion of the constellation Aquarius.
Dancing Planets - Between May 10th and May 30th, there will be a wonderful conjunction of three bright planets and the Moon. Jupiter, Venus and Mercury will entertain us as they dance across the western sky, with Jupiter and Venus coming within a single degree of each other on May 28th. Use a telescope to see planetary details, or use unaided eyes to witness this great gathering of planets shortly after dusk.
Stellar Occultation - During the evening of May 24th, watch as the nearly Full Moon will cover up the bright star Beta Scorpii. This "occultation" will only be visible from the Midwest and Southeast, but lucky observers thereabouts can see the bright star "blink out" as the Moon covers it. If you've never had the pleasure of seeing an occultation, be sure to make the most of this opportunity - it's simply incredible to see how fast the star appears to "hide" behind the Moon!
The Ringed Planet - A perennial favorite of amateur astronomers around the world, ringed Saturn will be nicely positioned in May skies for telescopic study. Saturn reached opposition in April and will steadily rise higher in the night sky as May progresses. As it gets higher in the sky, views of Saturn and its stunning rings will get better and better! While you can detect the rings in a small telescope like the 76mm FunScope, bigger telescopes such as an XT6 or XT8 Dobsonian will provide significantly better views of Saturn.
Four Big Planetary Nebulas - Use a 6" or larger telescope and an O-III or UltraBlock filter to catch four relatively large planetary nebulas in May skies. See the "Ghost of Jupiter," NGC 3242 in Hydra; M97, "the Owl Nebula" in the Big Dipper; NGC 4361 in Corvus, and the famous "Ring Nebula", M57 in Lyra just a few degrees from bright star Vega.
Four Glittering Globulars - Four picture-perfect examples of globular star clusters will be visible in May skies. Check out M3 in the constellation Bo�tes. M13, the "Great Cluster in Hercules" will be visible near the zenith. M5 can be found in Serpens, and M92 in the northern section of Hercules. Big telescopes will provide the best views, but even 50mm binoculars will show you these dense balls of stars from a dark sky site.
Four Face-On Spirals - Use large telescopes to see the classic pinwheel shapes of galaxies M51 and M101 in the Big Dipper asterism, and M99 and M100 in the Virgo galaxy cluster. There are also dozens of additional galaxies to explore in the Virgo cluster with a big-aperture telescope.
May's Challenge Object - May skies present perhaps the best opportunities to grab a view of Omega Centauri - the brightest globular star cluster in the sky! While it's big and bright, even visible as a "fuzzy" star in binoculars, the challenge Omega Centauri presents is its low position in southern skies, which can make it unobservable from higher northern latitudes.
All objects described above can easily be seen with the suggested equipment from a dark sky site, a viewing location some distance away from city lights where light pollution and when bright moonlight does not overpower the stars. All objects have been verified by actual observations by Orion Telescopes & Binoculars Staff at Fremont Peak State Park, and/or Deep Sky Ranch, 60 miles and 90 miles respectively from San Jose International Airport, San Jose, CA.
{ width: 160, height: 160, defaultImage: '', layers: 'Artimg-Comet' }

The unofficial "Year Of The Comets" has indeed opened and the excitement hasn't ended yet. According to NASA's Jet Propulsion Laboratory in Pasenda, California, a relatively new comet discovery might very well make a tantalizingly close pass by the planet Mars on October 19, 2014. How close? According the Near-Earth Object Program Office, it should come within 186,000 miles of the Red Planet and there's a strong possibility it might be much closer.
Discovered by Robert McNaught on January 3, 2013 at Siding Spring Observatory, New South Wales, Australia, Comet C/2013 A1 has been observed as far back as October 4, 2012. just a small step in time from millions of years it has taken for it to journey from the Oort Cloud into our solar system. At present, it is theorized this is the comet's first pass through our neighborhood and it is just one of many objects identified by "SpaceGuard" — an amalgamation of ground and space-based telescopes which search the sky for potential asteroids and comets that could pose a threat to Earth.
However, this time it isn't Earth that's in the danger zone. It's Mars.

Comet Trajectory Visualization Courtesy of NASA
By using "pre-recovery" archival observations taken by the Catalina Sky Survey, astronomers have been able to forecast the comet's orbital plot. By combining this data set with current observations, they have been able to provide fairly accurate estimates of where the comet is headed. As of the beginning of March 2013, the NEO program office predicts Comet Siding Spring may come as close as 31,000 miles (50,000 kilometers) to impact. While that sounds dangerous for Mars, it's well over twice the distance of the orbit of Deimos, the most distant Martian moon. As more observations are obtained, the calculations for Comet C/2013 A1's orbital path — and how it coincides with Mars' orbit — will become more exact. This should allow researchers to totally rule out a collision scene, but current probability still has the chances as less than a one in 600. That's pretty close odds!
We know that a comet crashing into a planet within our solar system is entirely possible. After all, it has only been roughly twenty years since Shoemaker-Levy 9 slammed into Jupiter. Even if Comet C/2013 A1 Siding Spring doesn't impact Mars, there's more to a comet than just the nucleus. It also will carry with it the coma and tail — a combination of volatiles which will be boiling away from it as it approaches Mars. Does that pose any danger for the space-placed instrumentation or the rover missions? According to comet expert Leonid Elenin, it is certain that Mars will pass through A1 Siding Spring's detritus. Even if these remains are as small as microparticles, the concentration will be far higher than design specifications ever planned for and the space probes could possibly malfunction as a result of this exposure.
Is Comet Siding Spring observable? If you were on Mars, it might reach a visual magnitude of zero, but here on Earth we'll be lucky if it reaches a binocular-possible magnitude 8. It's not going to happen soon, either. C/2013 A1 won't be a target for the amateur telescope until mid-September/October 2014 and you'll also need to be in the southern hemisphere to spot it.
For now, we don't have enough highly accurate information to make too many predictions of what may happen with Comet A1 Siding Spring. We don't know exactly how large it is, nor can we forecast how it will react as it nears the Sun. We do know the comet is cruising along at 35 miles per second (126,000 miles per hour) and that it appears to be headed towards Mars, but so much can change with very little notice. Our orbiting and ground-based probes might very well be witness to one of the most spectacular events in Mars' history!
And maybe not...
{ width: 160, height: 160, defaultImage: '', layers: 'Artimg-Comet' }
Now having passed the Sun, Comet C/2011 L4 PANSTARRS ended its reign of the Southern Hemisphere skies and is now breaking the western horizon and is visible for Northern Hemisphere observers. So far the bright comet has made an awesome impression on those who have had a chance to both view and photograph it. Let's begin at the ending — and check out a report from Tasmania.

Comet PANSTARRS Courtesy of Shevill Mathers March 5, 2013
"I have observed/photographed Comet PANSTARRS on two successive nights just after sunset and with the comet about 10 degrees about the horizon." reports renowned astrophotographer, Shevill Mathers of Southern Cross Observatory. "I observed it naked eye, easily visible, and with 10x50 binoculars? a superb view. The fan-shaped tail is quite visible and covers perhaps three degrees of sky. The head is very bright and to me appeared to have yellowish hue. However, our skies are filled with varying degrees of bush fire smoke."
As he observed, Mathers was quite taken at how quickly that C/2011 L4 appears to set. Although the comet itself isn't actually moving that quickly, the position so near the horizon seems to be accelerated - an illusion all amateur astronomers well know. Remember to take this low position into consideration during the first few days after PANSTARRS becomes visible to the Northern Hemisphere. It would be very disappointing indeed to find out the comet had "set" before you had a chance to see it!
Now that Comet PANSTARRS has arrived on the northern scene, it's not far away from the setting Sun and it certainly isn't an easy target. Although it is anticipated to be as bright as magnitude 2, the twilight skies will greatly interfere with detailed sightings and the observing window to see the comet is roughly in the 30 minute range. However, don't give up hope! As time quickly passes, Comet PANSTARRS will climb higher each night -moving its way through Pisces, then on through Pegasus and Andromeda. For a very lucky few, the comet made an awesome appearance on the evening of March 12th, when it was just a few scant degrees south of the crescent Moon. Check out this image taken by John Chumack.

Comet PANSTARRS Courtesy of John Chumack March 12, 2013
As luck would have it, Comet L4 PANSTARRS didn't come to John — he had to go to it. His mission was to head west against great odds to catch this comet conjunction. Says Chumak, "Sometimes it's worth traveling to increase your chances of witnessing something astronomical, even if your original plan does not work out, I'm so glad I went to Indy. One should never give up hope... as opportunities can come your way at any time!"
Just how will this icy visitor look in the sky? During the opening of the show, you will most likely need 50mm or larger binoculars to pick it out of the twilight glow, but as it climbs higher it will match the brightness of the major stars of Pegasus and — once located — should be able to be seen without optical aid for a short period of time. As C/2011 L4 PANSTARRS moves northward — and further away from the Sun — it will require a small telescope or larger astronomical binoculars to be spotted. For the most part, the comet will appear as a thin scratch, very much like a tiny contrail and be roughly about half the length of your little fingernail when held at arm's length. It is not going to jump out and wave a sign. (But then, perhaps it will!) Look for this "scratch" on the sky no more than about a handspan above the northwestern horizon. Once you initially spot it, it will be much easier to locate on successive nights as it climbs slightly higher and moves more slightly more northward.
Don't be "underwhelmed" and by no means be discouraged if your views of PANSTARRS are mediocre. Even though this particular comet isn't a huge affair that dominates the night sky, it is still a rare occurrence and should be treated as such. For those of us who have routinely observed comets, they are normally very small, dim, fuzzy contrast changes... and PANSTARRS is a rare treat!
As you follow the Comet PANSTARRS, be sure to watch for changes. How does the nucleus appear from night to night? How bright is the coma? Does the comet have a duo tail? How far does the tail extend? Be sure to take a few moments to sketch the comet for your records and follow the "How To Log Your Comet Observations" instructions for getting the most out of your time. You'll be glad you did!
{ width: 160, height: 160, defaultImage: '', layers: 'Artimg-Comet' }
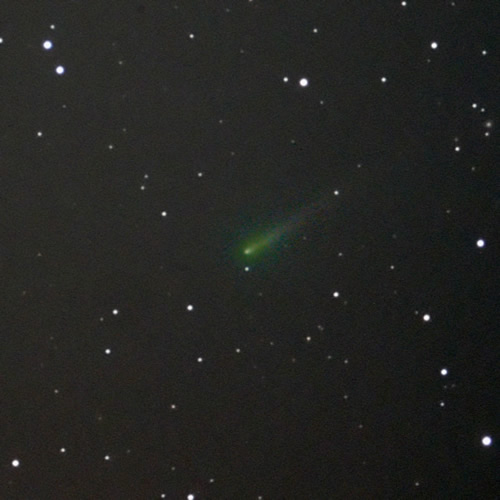
The year 2013 is certainly living up to its expectations as being the "Year of the Comets". With both Comet PANSTARRS and Comet ISON warming up on the sidelines, Comet Lemmon (C/2012) is already making Southern Hemisphere news as the star of the show.
While looking for Near-Earth objects, Alex Gibbs discovered Comet Lemmon (C/2012) on March 23, 2012 while participating in the Catalina Sky Survey (CSS). Back then, the five mile wide blip on the astronomical radar screen was glowing at a feeble magnitude 20, but it didn't take long before the comet began to change. At the moment, this traveling space rock is doing some pretty spectacular things - including being far brighter than anticipated. Currently near unaided eye visibility, the comet is expected to continue to intensify as it nears the Sun, possibly glowing as brightly as magnitude 5 at perihelion.
What makes Comet Lemmon (C/2012) so special? Presently it is being incredibly photogenic, sporting a long dust tail, an ion tail and brilliant color. Thanks to its chemical composition of a colorless, toxic gas called cyanogen and a companion volatile known as diatomic carbon, this icy visitor from the Oort Cloud appears green when exposed to sunlight. This makes Comet Lemmon quite beautiful in appearance and also makes for a wonderful opportunity for study. Astronomers are able to examine these pristine materials spectroscopically as the comet sublimates - a chance to study the impact of the solar winds and take a look at materials which share their origin with both stellar atmospheres and the interstellar medium.
As it approaches the Sun, Comet Lemmon will become even more visible - but where is it now? Easily seen in both binoculars and small telescopes, it is currently only accessible to Southern Hemisphere observers and about to reach the zero hour on the ecliptic plane on February 24th. It will be moving rapidly across the sky each night and soon be readily apparent to the unaided eye as it crosses into the constellation of Phoenix by March 7th. It will continue to head north and move into the constellation of Sculptor by March 17th. Don't delay your observations, because Comet Lemmon makes its closest approach to the Sun - perihelion - on March 24th. At this time it will be roughly the same distance from Sol (the Sun) as the planet Venus, but it will be hidden from our point of view by the Sun's glare.
As April opens, it is time for Northern Hemisphere viewers to begin planning for observations of Comet Lemmon. By mid-month it should become visible at lower latitudes as it enters into the constellation of Pisces. Since it will be placed just a few scant degrees ahead of the dawn glow, make sure to choose an observation point where you have an unobstructed eastern horizon and reasonably dark skies with good seeing. On April 19th, Comet Lemmon will cross the celestial equator and be ready to dazzle the sunrise skies. Comet Lemmon (C/2012) will remain in the direction of the constellation of Pisces as it exits our solar system - staying visible to most amateur telescopes for a short period of time. By the beginning of May, it will have dimmed to the extent that it will be very difficult to pick out of brightening skies, even with the help of a telescope.
As always, there are no guarantees that Comet Lemmon will continue to perform. As amateur astronomers well know, even the most celebrated of comets can be an incredible sight one night, only to break up and fizzle away when we least expect it. Even though it has been some 11,000 years, we do know this isn't Comet Lemmon's first trip through our neighborhood and there's always a chance it may disintegrate as it nears the Sun. However, never give up hope! Right now it is putting on an exciting show and there's no reason to believe it will stop. Just remember, there is only a small window of opportunity to view this comet, so plan accordingly. Choose your observing area in advance and have your equipment ready.
While getting up early in the morning isn't always an appealing prospect, having the chance to view one of the historic comets of 2013 is certainly worth the effort!
{ width: 160, height: 160, defaultImage: '', layers: 'Artimg-Comet' }
At one time, comets were referred to as dirty snow balls. Then they became known as dusty ice balls. Now they are considered icy rock balls. No matter what set of adjectives you use to describe them, what we have learned recently is that comets are as individual as, well, individuals!
Astronomers have hypothesized that comets began their lives as part of the solar nebula and orbit the Sun in two distinct periods — long or short. Comets which have short orbital periods are thought to come from the Kuiper Belt, an area of the Solar System beyond the planets, extending from the orbit of Neptune and similar to the asteroid belt. Comets with longer orbital periods may originate from the Oort Cloud, a suspected region of comet bodies that's located about a light year from the Sun. These comets might have orbital periods which last hundreds, or even thousands, of years, and some may just take a direct route towards the Sun when nudged by the gravity of the larger planets or a wandering star. There are even a handful of comets — hyperbolic — which make only one pass through our Solar System before being flung out into deep space.
Periodic comets which have an established orbital period of less than 200 years have the designation "P/" added to their name. For example, Halley's Comet is officially designated as 1P/Halley. This means it is the first periodic comet discovered and it was named after its discoverer, Edmund Halley. Non-periodic comets — or ones for which an orbital period hasn't yet been confirmed — are designated with "C/". Many non-periodic comets are located and named for the equipment which reveals them, such as ones discovered by the Lincoln Near-Earth Asteroid Research (LINEAR) and Solar and Heliospheric Observatory (SOHO). These may be less famous, but often turn into spectacular telescopic objects.
Hyperbolic comets make only a single approach into the Solar System and only a few hundred of them are known. A famous example of this type of comet is C/1980 E1 discovered by Edward L. G. Bowell. It left the Solar System faster than any natural object known!
These little icy bodies are somewhat similar to asteroids - measuring anywhere from tens of meters to a hundred or more meters across. They are composed of very ordinary materials, such as rock, water ice and dust. Another major component of a comet is frozen gases, such as ammonia, methane, carbon monoxide and carbon dioxide. Comets are even known to hold key organics, such as amino acids. While they might appear round when viewed through a telescope, comets are very irregular in shape due to their lack of mass.
While comets are distant in the Solar System, they remain frozen and most of their volatiles — frozen gases or liquids — are suspected to be hidden beneath a dry, dusty surface. Because of their small size, they are almost impossible to detect. As they near the Sun, they begin to warm and vaporize, causing the volatiles to stream away from the comet's nucleus and carry the dust away with them. This action creates a thin, visible atmosphere around the comet's body and is called the coma. The radiation pressure of the Sun and the solar wind causes the coma to extend away from the nucleus into the highly visible tail. This is what makes a comet so beautiful to view and creates its distinct shape. A comet's tail will always point away from the direction of the Sun.
As a comet passes through the inner Solar System, both the coma and the tail are illuminated by reflecting sunlight and can often be seen from Earth. Most comets are very faint and require a telescope to be seen, but there are a few which reach unaided eye visibility. Some may develop a dual tail, one from dust and the other from ionized gases. There are even a few comets which have unexpected outbursts of gas which can cause them to suddenly brighten and increase in size. While it doesn't happen very often, it's quite exciting when it does!
Comets can be very exciting for other reasons, too. Some have been known to break up into fragments for unknown reasons — while others have been observed smashing into planets or diving into the Sun. Some even "run out of gas" — a condition where the volatile material contained in a comet nucleus evaporates away.
How often do we see a comet? Comets visible to the unaided eye don't occur very often, but telescopic comets happen several times a year. Sometimes there is even more than one visible at any given time. How they appear is mostly due to their composition and how close they get to the Sun. While a comet's movements are fast compared to other astronomical objects, it appears slow when seen through the telescope eyepiece. Don't count out seeing movement, though. By patiently watching over a period of hours, it is very possible to physically detect the distance a comet has moved by the relationship with the surrounding background stars. Observing a comet (How Do I Observe A Comet?) is easy enough, but locating and tracking a comet takes some work. They can often move several degrees from night to night! Always be sure to use a good locator map to help you correctly identify a comet - or enter the proper coordinates into your telescope's computer control.
The year 2013 might just be a very good time for comets. Right now, there is one headed our way which should make a good apparition for the southern hemisphere — Comet C/2011 L4 PanSTARRS. It is projected to come within 45 million kilometers (28 million miles) of the Sun on March 9, 2013. This is close enough that it should have a visible tail. But hold on... An even more exciting new comet is expected to rock the mid-latitude northern skies! It is named Comet C/2012 S1 (ISON), and it was discovered by a Russian team, Vitali Nevski and Artyom Novichonok, at the International Scientific Optical Network (ISON). Currently Comet ISON is located about the distance of Jupiter's orbit, but it is expected to come within less than 2 million kilometers from the Sun at perihelion (its closest pass) by November 28, 2013. Will it be spectacular? No one knows for sure because comets are very unpredictable. It could be as breathtaking as Comet Hale-Bopp, or it might be a dud like Comet Kohoutek. If Comet C/2012 S1 (ISON) continues on its anticipated trajectory toward the Sun and doesn't break apart, it might even be visible during the day!
{ width: 160, height: 160, defaultImage: '', layers: 'Artimg-Comet' }
There are three ways to observe a comet: with your unaided eye, with binoculars and with a telescope. For all three types of observations, you will need a few simple tools to help you get the most from what you see. Before you begin, the most important thing you will need is a good locator map or the coordinates of where the comet will be at the time of your observation. There are several online sources which provide general charts, such as Heaven's Above . You can also get the ephemeris (a table which lists a comet's position over a period of time) from official websites, such as the Harvard Minor Planet Center. Once you have this information, you can use them to locate the comet on a star chart, enter the coordinates into a planetarium program to generate a map, or enter them into a computer-assisted telescope. Remember a comet can move a degree or more each night and you have to update your location information accordingly! Ephemeris information often lists the comet's magnitude as well. This will assist you in knowing if it can be seen visually, with binoculars, or if it requires a telescope. Generally, a comet will need to be at least magnitude 4 to be seen without optical aid, while larger (10X50) binoculars will reach to about magnitude 8 and an average (150mm) telescope can easily detect a magnitude 10 to 11 on a dark night with excellent seeing conditions.
The next step is to gather your observing materials and choose a location where you'll be able to see the comet over a period of several days. You'll need a red flashlight to read your chart (How Do You Read a Star Chart?) and to aid you while sketching. Before you panic at the thought of doing a little art work, this is essential to record keeping. It's fun and easy, too! Just use an ordinary sheet of white paper and trace four circles on it. These circles will be your eyepiece, binocular or visual field of view. You will need to label each of your little "mini sketches" with the date, time, location, equipment used, magnification factor and sky conditions. It may seem like homework, but it's really quite simple. It's not that hard to translate what you see onto paper when it is only a few dots and some symbols. Use large dots to denote bright stars and small dots to represent dimmer stars. The comet might be a dot which approximately represents the size and brightness of the nucleus with shading around it for the coma and shading for the tail. Make the comet sketch size as accurate as possible in relation to the star field in the eyepiece, binocular field of view or unaided eye section of the sky. These sketches will let you keep track of the comet's position over a period of time - allowing you to determine the direction in which it is going or how its appearance (such as the size of the coma and tail) may change. You might even catch an exciting event, such as a close pass to a planet or deep space object!
Now, let's get down to business.
Once you have located the comet, record the information for that night onto your observing sheet. This important information includes the date, time, your observing location (latitude and longitude), instrument used, magnification or eyepiece used and sky conditions. (How to Judge Sky Conditions). Now you are ready to begin sketching. You don't have to include every star that you see in the eyepiece, binocular field or sky into your sketch — just the major ones. Remember to use larger dots for brighter stars and smaller dots for dimmer ones. For example, the comet might be located to one side of a triangle of large stars with a Y-shaped asterism of smaller stars to the other side. You will need to label at least one star with a proper Greek letter or catalog number. This information is usually provided on your printed star chart. Look for a star which has a symbol or number printed beside it. If there isn't one, don't worry. Draw the field and use an arrow to the outside and label it with a direction towards a known star on your chart which has a symbol or number. Now, sketch the comet and label the outside of the sketch circle with the cardinal directions. Which way is which? That's easy. Turn off any drive units and watch which way the stars "drift" to the outgoing edge. That's west! Since this is your first sketch, you can't place an arrow which shows the direction the comet is headed just yet. That's why we need to do three to four observations. This same sketching technique holds true for all three types of observations. For the unaided eye, the sketch field might be something as large as a constellation. For binoculars, it's around three or four degrees of sky so choose a bright pattern of stars and label the primary ones.
Once you've done your paperwork, then it's time to have some fun! Try switching around eyepieces in your telescope to see which one gives the best view. Ask yourself some questions! If you'd like to determine the size of the comet, try locating an object which has a known size. For example, your observing catalog tells you globular cluster M80 is approximately 10' in size. How does the comet compare? Is there a tail visible? If so, how far does it extend? By knowing how many arc minutes a comparison object is in size, you can judge these simple measurements for yourself.
If you'd like to determine a comet's magnitude, you can do that, too. Just choose a star for which you have a value. Most star charts have a key to the edge which gives a magnitude. Just put the known star in the eyepiece and defocus. Compare what you see with the comet. For example, if you think the comet is brighter than its listed value of 5, try locating a 4th magnitude star and defocus your eyepiece. Is the star brighter than the comet — or the same? While this isn't a professional grade observation, it's certainly a good way of telling from night to night how a comet changes.
Be sure when you observe a comet to note how it appears. Does it have a stellar nucleus — a central "body" which appears as bright and as sharp as a focused star? How large is the coma — the fuzzy halo around it? How bright is the tail? What color does it appear to be? Does the tail split into two components? If so, you may be observing a comet with an ion tail and a dust tail!
Lather, rinse and repeat. For many observing programs, you'll need to observe a comet at least three or four times before your observations become "official". While it might be tempting just to head out with binoculars and take a quick shot at the sky, remember the lessons learned by Charles Messier — there's a lot of things out there that may look like a comet, but aren't. Even if you don't submit your records, you should still be very proud of yourself for being a real comet hunter!
{ width: 160, height: 160, defaultImage: '', layers: 'Artimg-Comet' }
The year 2013 looks to be a very promising time to observe comets. Because two of these events - the appearance of Comet C/2011 L4 PANSTARRS and Comet C/2012 S1 ISON - may be very spectacular, viewers may wish to take more careful notes of what they view and when.
Why bother? Although you may not be interested in observing programs such as those offered by the Astronomical League, there may be a time in the future when your observations will become important to you. Comet challenges take several years to complete and the ones you observe now might be the start of a great journey of learning and logging. Why not start out right?
While a comet is very dim and distant, such as C/2012 S1 ISON at the beginning of 2013, it will require the use of CCD equipment to both reveal and verify position. While many amateur observers do not take astrophotos, those who do are encouraged to image even faint comets as often as possible. These "comet snapshots" should be carefully labeled, giving the comet's position and known magnitude. These will act as a photographic record of your early observations. Some comets, such as C/2011 L4 PANSTARRS may be bright enough during their pass through our astronomical neighborhood to be captured with average DSLR cameras or inexpensive solar system imaging cameras.
As a comet nears the Sun, it begins to sublimate and become brighter - making it accessible to average telescopes and visual observations. For those who do not use CCD equipment, comets provide an ideal opportunity to begin logging your observations using simple sketches and labeling methods. Once your comet target has been located and verified, logging your observations becomes a fairly easy process. There may even be a time when you can observe a given comet with just binoculars or your unaided eye, depending on its magnitude. Who knows? In the case of Comet C/2012 ISON, which is expected to become very bright, you may even be able to observe it during daylight hours! All of these observations "count". Begin by logging the basics of your comet observation. Write down specifics such as the date, universal time, latitude and longitude of your physical position, equipment in use, magnification and sky conditions. Now draw a circle which will represent your eyepiece field of view. Once you have located the comet, start your sketch by drawing the brightest stars you can see in the eyepiece. When at all possible, label one or more of these stars with their proper designation. You can find this information on a good star chart or planetarium program. If there are no primary stars visible in the area, draw an arrow on your chart which points in the direction of a major star and label it. If you are using binoculars or just your eyes, the field will be much larger, but the principle is the same.
When your star field sketch is complete, it's time to add the comet. Be sure to make it proportionate in size to the stellar background. For example, if you are drawing a circle to represent the comet's coma, make sure the circle covers as close to the same approximate area as what you see. If the comet has a concentrated nucleus, do your best to represent this in your drawing. Does the comet have a tail? If so, be sure to add this into your comet portrait as well. Once these elements are in place, label the edges of your sketch with the cardinal directions. West will always be the direction the star field "drifts" out of the telescope or binocular's field of view. After your initial sketch, be sure to place an arrow on subsequent drawings showing which direction the comet is headed. Add any additional information you may have to your sketch as well... such as the official Right Ascension / Declination (R.A. and Dec) coordinates and estimated magnitude. This type of information is available through the Harvard Minor Planet Center.
While this might seem like a lot of extra work just to keep track of a comet, there may very well be a day when you'll appreciate the extra time you took to log your comet observations properly. Even if you never choose to use them in a structured observing program, you'll enjoy looking back at the nights you spent at the eyepiece and how you watched a comet change over a period of time. Who knows? You may very well catch the beginning of an exciting event, such as a comet break-up or a sudden flare in brightness! It's all part of good observing and you can do it!
{ width: 160, height: 160, defaultImage: '', layers: 'Artimg-Comet' }
Comet C/2011 L4 (PANSTARRS) is on its way and may give amateur astronomers around the world the opportunity to study a bright and interesting target. The comet itself has some very interesting properties. According to researchers, PANSTARRS appears to have a compact, asymmetric coma and is actively producing dust. This is very exciting news for observers because this dust production could make for breath-taking structure - of both of the comet itself and the tail. As it passes through the Solar System and nears the Sun, it may reach a maximum magnitude of -1 and be capable of being seen at a dark sky location as a +1 magnitude comet with a 10� to 20� long tail!
Right now, the question on everyone's mind is the location of Comet C/2011 L4 and its appearance. As of January 2013 PANSTARRS is a Southern Hemisphere object and should be gaining about a tenth of a magnitude of brightness on an almost daily basis. By January 19th, it will have reached the Scorpius / Corona Australis region (RA 18 15 15.0 Dec -43 06 27) and should be dancing in the skies at magnitude 8! This puts the comet well within reach of average backyard telescopes (4.5" to 6") and able to be picked up by larger binoculars at dark sky locations.
By Februrary 5 Comet PANSTARRS will have tracked to its most southerly declination (RA 19 47 51.9 Dec -45 37 32). After it reaches this area of the sky, it will begin its journey northward. According to predictions, it should be brightening fast - at a rate of between one and two-tenths of a magnitude per night. On Februrary 15, 2013 - if all goes as surmised - Comet PANSTARRS should have reached an unaided eye magnitude of 4.6 and be located in the vicinity of Microscopium (RA 21 11 14.3 Dec -43 40 56). Just remember that it will still be a Southern Hemisphere object at this time, so it would only be visible from locations in the Southern Hemisphere, and sky conditions will play a great role on whether or not it can be seen without optical aid.
As Comet PANSTARRS heads toward the Sun, it will continue to become more and more visible. By March 1, 2013 it should have achieved a bright magnitude of 1.9 and located in Pisces (RA 23 25 18.0 Dec -27 18 25). Comet C/2011 L4 will pass closest to Earth on March 5. No need to worry about a potential impact, though? it will still be about 1.10 AU from our home planet during its closest approach - just a little more distance than the Earth is from the Sun. At this point, it should reach magnitude 1 and still be located in the constellation of Pisces (RA 23 55 55.4 Dec -18 27 08). According to JPL/HORIZON predications the comet could be brightest between the dates of March 8-12, reaching a blazing magnitude near -0.5. However, it is still on the move and PANSTARRS will be closest to the Sun (perihelion) on March 10, 2013 at a distance of 0.30 AU.
March is the time for Northern Hemisphere observers to begin to get excited! If you live at very low latitudes, chances are that Comet PANSTARRS should be visible at your location - just 15� from the Sun - around the magic date of March 15th. If the comet's trends follow predictions, it will have probably dimmed to magnitude 1 by that time and be an incredible vision low on the sunset horizon and located in the constellation of Pisces (RA 00 33 07.8 Dec +07 10 29).
Mid-March is time for Comet C/2011 L4 PANSTARRS to begin its sojourn northward. Less than a week after its close approach to the Sun - around the date of March 20th - it should dim by a full magnitude as it reaches the border of Pisces / Andromeda (RA 00 35 20.4 Dec +17 50 42). However, there's still good news for observers! At an estimated magnitude 2, the comet will still be an easy unaided eye object from a dark sky location and glorious in any set of optics!
As Comet PANSTARRS moves further away from the Sun, it will begin losing a tenth to two-tenths of a magnitude per night. By April 1, 2013, it will have faded to magnitude 4.4 and be located in Andromeda (RA 00 31 16.6 Dec +36 33 27). A month later, on May 1, it will have returned to a much dimmer magnitude 7.5 and be located in the Cassiopeia / Cepheus region (RA 00 11 17.9 Dec +67 12 23). This means it should still be within reach of larger binoculars (with 50mm or larger objective lenses) from a dark sky location and well within the range of medium-sized telescopes (4.5"-6"). By May 28, 2013, it will have reached its most northerly declination (RA 19 28 57.2 Dec +85 13 44 and should be around magnitude 9.3.
Does this news mean you'll no longer be able to follow Comet PANSTARRS? Not necessarily. While Comet C/2011 L4 will continue to loose around one to two tenths of a magnitude in brightness per night, it will become circumpolar and be able to be viewed by most Northern Hemisphere observers at any time during the night. On June 1, 2013, it should be located in the Ursa Minor / Draco region (RA 17 20 23.9 Dec +84 31 17) and be at an estimated magnitude 9.5. If you have a larger telescope (12" and up), you should be able to continue to observe Come PANSTARRS for at least another two months. It will remain in the Ursa Minor / Draco region through July 1 (RA 31 13.3 Dec +66 57 34) at magnitude 11 and then continues on through August 1 towards the constellation Bootes (RA 14 40 55.2 Dec +51 29 45) at a very faded magnitude 12.
As always, each comet is unique, and predictions are just that - predictions. Comet PANSTARRS could perform exactly as the professional astronomers think it might, or it might become a surprise. Remember that all brightness and tail estimations rely upon how much the comet dissipates as it nears the Sun and viewing depends greatly on sky conditions at your location.
{ width: 160, height: 160, defaultImage: '', layers: 'Artimg-Comet' }
October, 2013
In October, comet S1 ISON will be spending some quality time with the planet Mars as it moves its way toward the constellation of Leo. By this time, it will become accessible to amateur telescopes at slightly brighter than magnitude 10. An Orion XT8, for example, will be able to pick up Comet ISON from a dark sky site.
Comet ISON, imaged by Doug Hubbell on the morning of October 6, 2013 from Southern California. Hubbell used an Orion StarShoot Pro camera, Orion Atlas Mount, and Orion EON120 Telescope.
The Hubble Space Telescope imaged comet ISON on October 9, and NASA reported that the nucleus appears to still be fully intact.
"The comet's solid nucleus is unresolved because it is so small. If the nucleus broke apart then Hubble would have likely seen evidence for multiple fragments," says the Hubble Team. "Moreover, the coma or head surrounding the comet's nucleus is symmetric and smooth. This would probably not be the case if clusters of smaller fragments were flying along. A polar jet of dust first seen in Hubble images taken in April is no longer visible and may have turned off."
On October 26 comet ISON will be located within 3 degrees (RA 10 45 33.6 Dec +09 45 40) of the "Leo Trio" (M95, M96 & M105), presenting an excellent opportunity for astrophotographers to image. For even more clues to help you find the comet, on October 30 the Moon passes 6 degrees south of ISON. The comet is located at RA 11 02 43.9 - Dec +07 36 18 and should be very close to magnitude 8 - well within the reach of a small telescope.
November, 2013
As November opens, the race is on! Each night, comet ISON will be gaining in brightness; about two-tenths of a magnitude every 24 hours. It should have a visible coma and a concentrated, sharp nucleus, perhaps even beginning to show a tail!
On November 7 comet ISON passes less than a degree away from Beta Virginis. The comet will be located at RA 11 47 04.8 - Dec +01 46 57 and within reach of small optics at magnitude 7. It is heading towards the Sun and is accompanied in the morning sky by Jupiter and Mars. This comet is a sun-grazer and the closer it gets to our nearest star, the faster the gases and dust will begin to flow away. How much of a tail will it have by now? How big will the coma be? It's anyone's guess at this point in time, but predictions show it brightening between two and three tenths of a magnitude each night, and changing positions faster.
By mid-November, comet ISON will have rapidly moved towards the rising Sun and can be found buzzing through the constellation of Virgo. If predictions hold true, it should have reached at least magnitude 5 by this time and it is about to begin to blaze! Every 24 hours will see comet ISON gaining about 1/5 of a magnitude. Our "traveler" could be on the verge of becoming fantastic!
On November 14, comet ISON is located less than a degree away from 10th magnitude galaxy NGC 4697, making it an excellent target for astrophotographers.
It gets even easier to locate on November 18 as it passes less than half a degree away from bright star, Spica (Alpha Virginis). It will be located at RA 13 24 59.4 - Dec -10 48 47 and be just on the edge of unaided eye visibility at magnitude 5.
Be sure to set your alarm early for the morning of November 23 when you'll find comet ISON is located just slightly less than 5 degrees SSW of planets Mercury and Saturn. It will be located at RA 14 30 41.6 - Dec -17 38 00 and be faint, but visible to the unaided eye at magnitude 3.5.
The closer it gets to the Sun and its November 28 perihelion date, the more the tail will grow and the faster it will brighten. Just how fast will these changes occur? While we can't be entirely sure, it is predicted that ISON will jump several magnitudes in a period of three days - a jump which could possibly make it as bright as the planet Venus!
If comet ISON doesn't come apart, it should reach its maximum magnitude on November 29 and be located at RA 16 23 17.5 - Dec. -19 52 52. From this point forward, comet ISON will rapidly drop in brightness as its dusty "fuel" becomes exhausted. However, by no means is the show over.
December, 2013
The beginning days of December should still find it lighting up the skies at magnitude 1.0 and descending slowly - again just a few tenths of a magnitude every few nights.
By December 25, it should still be an unaided eye object at magnitude 4 and possibly remain as bright as magnitude 4.5 until the end of the year. Will comet C/2012 S1 ISON become one of the infamous "comets of the century"? Let's face it: we have no idea. Each and every comet has unique properties and ISON is no exception. There is just as much possibility that ISON could break apart and fizzle as there is for a spectacular performance. What we do know is that there is potential, and that's an exciting word for astronomers everywhere.
Have you imaged or viewed comet ISON yet? Let us know in the comments!
{ width: 160, height: 160, defaultImage: '', layers: 'Artimg-Comet' }
With the arrival of Comet C/2011 L4 PANSTARRS and Comet C/2012 S1 ISON about to occur during the year 2013, observers around the world are anxious to learn "how bright" this solar system pair may eventually become. While astronomers can only make estimates for any given date at this time, now is a great opportunity to learn how to judge a comet's brightness - also called magnitude - for yourself!
A comet is made up of four distinct sections: the nucleus, the coma, the dust tail and the ion tail. Not all of these parts may be visible at any given observing session, yet all four play an important role in how the comet can be observed. The brighter the comet becomes - it requires less optical equipment to be observed. When it is very distant, only the coma of a comet is visible? the nucleus is far too small to be seen and the whole structure isn't close enough to the Sun yet to have developed a tail. During this time comets are barely visible and usually only seen in CCD images. However, if you continue to follow a comet, changes will occur!
As a comet nears Earth the nucleus will reveal itself and the coma around it will become larger. It can be seen with telescopic aid and will appear much like an unresolved, fuzzy globular cluster or a small elliptical galaxy. The nucleus may be sharp and bright - or just a concentration. As a comet approaches the Sun and begins to sublimate, the tail will also appear - rocky debris creates the dust tail and frozen gases comprise the ion tail. When you can see a comet with ease, you can start to determine its relative brightness. For formal measurements, try using the Harvard Minor Planet Center information or a planetarium program. However, comets are notoriously fickle creatures and an estimated magnitude on a program could be subject to a real life major change in just a matter of hours! Here's where a little learning and fun come into play...
Once you have located and identified your comet target, try heading off to a nearby star for which you have a known magnitude. You can find this information on a printed star chart as a graduated circular scale which appears along with the given magnitudes - or the information may be located on a planetarium program. Once you have selected a sample star, go to the eyepiece, identify it and defocus it. While an "out of focus" star won't be as soft in appearance as the comet's coma, it will still give you a great suggestion of brightness! Use this same method to judge the magnitude of the comet's tail section(s) as well. However, when it comes to the comet's nucleus, it is best to leave your test star in focus to compare.
While these estimations won't replace genuine scientific measurements, it is great fun to experiment and a great way to teach yourself better observing techniques!
{ width: 160, height: 160, defaultImage: '', layers: 'Artimg-Comet' }
With the exciting appearances of both Comet C/2011 L4 PANSTARRS and Comet C/2012 S1 ISON expected to happen during the year 2013, observers around the world will be anxious to relate what they see to other amateur astronomers in a meaningful way... and one of these ways will be reasonably judging the size of a comet's coma and tail.
First let's begin by explaining comet "parts" and how they appear. The body of a comet is divided into two distinct regions - the coma and the nucleus - and not always will both be seen at the same time. While a comet is distant, its coma is basically the only thing visible. It will appear as a soft, fuzzy contrast change, somewhat similar to an unresolved globular cluster or small elliptical galaxy. Because a comet can masquerade as a deep space object, it is always very important to be sure of its position. (Small wonder Charles Messier's famous list of objects that weren't comets became so popular!) Because the nucleus of a comet is inherently small, it doesn't become visible until the comet nears Earth. When the nucleus makes its appearance, it could show as sharp and bright - or may just appear as a more concentrated region. The coma around it will continue to be hazy in appearance, but need not always be regular in shape. Be sure to watch for changes not only in size, but in appearance as well, over a period of time.
The next major part of a comet is its tail. Thanks to the solar wind, the tail will always point away from the Sun. For example, if a comet is making a morning appearance, the tail will appear to be roughly headed west? or if the comet is viewed just after sunset, it will be approximately aimed east. The tail may also appear in two sections. The most common tail appearance is the dust tail - created from the sandy, rocky volatile ingredients of the comet's nucleus. These particles stream away from the comet's body and are illuminated by sunlight and may have a slightly curved appearance. The other section of a comet's tail - the ion tail - can have a slightly blue tint and is formed from the gases flowing away from the comet's nucleus. The ion tail will always point directly away from the direction of the Sun.
Now that we understand the parts of a comet, it's time to be able to make a rough estimate of their size. When viewing through a telescope, try this simple trick: observe an easy deep space object and compare them in size. For example, you might wish to choose a globular cluster such as Messier 3. It spans around 18 arc minutes in size. Compare it to the comet. While you can't place them side by side, it will give you a rough idea. Another suggestion is to determine how many arc minutes your eyepiece reveals. For example, if the full Moon just fills the field of view, your eyepiece covers about 1/2 a degree of sky - or 30 arc minutes. If the comet is covering about a third of that area, its approximate size would be 10 arc minutes. The same holds true of judging the length of comet's tail using the eyepiece. If it extends for two eyepiece fields of view, then the tail would have an approximate length of 60 arc minutes - or one degree.
When using binoculars, judging size isn't difficult if you use your binoculars specifications. Most common binoculars cover between 5 to 6 degrees (5� to 6�) of sky - and your binocular manufacturer should be able to provide you with a specific number for your model. Simply make sure your binoculars are steady and estimate! For unaided eye observing, the principle is roughly the same. If you hold your hand at arm's length and make a fist, your fist covers about 10 degrees of sky. Your average thumb length is about 3 degrees and the width of a single finger is about 1 to 1.5 degrees.
While these aren't scientific measurements, being able to judge the approximate size of a comet's nucleus and tail is a great way to communicate what you see to your fellow amateur astronomers. Would you rather say; "I saw Comet ISON last night." Or "Comet ISON was great last night! It had a bright, sharp nucleus and a coma that was about 15 arc seconds across. The dust and ion tail stretched almost two degrees of sky!" It's great fun to learn and you can do it!
{ width: 160, height: 160, defaultImage: '', layers: 'Artimg-CelestialCoordinates' }

When it comes to astronomy, you will find the term "arc second" used in three ways: (1) to express a given distance in declination on a star chart, (2) as a given unit of an astronomical object's size, and (3) as an expression of telescope's resolving power. Let's take a look at each use of the term in more detail.
First, we'll examine how an arc second is expressed when applied to a star chart and to the visible night sky. Picture the entire dome of the night sky as the face of a clock. The clock is divided into hours, minutes, and tiny seconds. Much like this imaginary clock, the celestial dome is divided into degrees and each degree is comprised of arc minutes and arc seconds. There are 60 arc minutes in each degree, and each arc minute is made up of 60 arc seconds. But, just how big would that be? Let's use the full Moon as an example. It covers approximately 1/2 a degree of night sky - which equals 30 arc minutes or 1800 arc seconds. These measurements are abbreviated into a type of astronomical shorthand. Terms for the Moon's apparent size would read 30' for arc minutes or 1800" for arc seconds.
When you look at a star chart (How Do I Read a Star Chart?), you'll see degrees of declination - measurements from north to south — marked along the edge. Each degree of sky contains 60 arc minutes, or 3600 arc seconds. When using an astronomical catalog or observing instructions, you'll be provided with an "address" of coordinates to celestial objects which utilizes arc seconds. This address may read something like RA 12h 22m 13s — Dec +22� 44' 11". Look at the second set of numbers. This means your object is located twenty-two degrees, forty-four arc minutes, eleven arc seconds north of the celestial equator. Although a single arc second would be too small to visually determine when looking at the sky, it is very important to celestial surveys and catalogs. It is like assigning a celestial "house number" to a specific target and allows astronomers to locate targets with precision.
When expressing the size of an astronomical object, it is often given in terms of angular diameter as seen from Earth — not its true size. Most of the time, these angular diameters are very small since most objects are very far away from Earth, so they are expressed as arc minutes, or more frequently as arc seconds. An astronomical catalog or observing guide will provide an object's size to help observers better understand what to expect from a target before they try to locate it with a telescope. This is helpful if you have never seen a particular object. Let's use two samples to illustrate this concept - a globular cluster and a double star. For example, globular cluster M80 is listed as 10' (ten arc minutes) in size. A good star chart will show this object printed to scale in relationship to the stars around it. This makes identifying it from the surrounding stellar patterns seen in the eyepiece much easier. You knew in advance the cluster would cover a certain amount of distance between identifiable stars. However, the angular distance measurement between double stars is much smaller and is always expressed as arc seconds. A good example is Polaris. The main bright star, Polaris A, is separated from small faint star, Polaris B, by 18" (eighteen arc seconds). By knowing a double star's separation in advance, you can test your telescope's ability to resolve small distances and aid you in determining sky conditions (How Do I Judge Sky Conditions?). Most general star charts don't print separations that small, so you'll need to rely upon your astronomy catalog as a resource for those numbers.
Another place in which you will encounter arc seconds is in a telescope's specifications — the resolving power. This is your telescope's ability (under ideal observing conditions) to "see" or separate a given size or distance. While there are lengthy mathematical expressions used to determine arc seconds of resolution for telescopes, a simple way to understand is to use the known separation of a double star as an example. Let's return to Polaris. If a telescope has a stated resolving power of 1.0" that means it is capable of clearly resolving an object — or distance — of one arc second. That's just 1/18th the distance between Polaris and its companion! With this information, you know our example telescope with a resolving power of 1.0" (one arc second) will be able to "split" the double star Polaris under ideal observing conditions.
While these measurements might seem a little confusing at first, you'll soon understand and appreciate them. Knowing an arc second's distance on a star chart will help you better locate objects by further refining their positions. Being able to add arc minute and arc second directional numbers to a telescope's computer aiming system will make it far more accurate. Understanding an arc second in size will assist you in relating what you see to others. For example, you might observe a comet and want to record its size in your notes. If you know a given object's size in arc minutes or arc seconds, you can compare the two and make a more accurate assessment. By knowing your telescope's resolving ability in arc seconds, you'll also know if you're able to "split" a given double star in advance - or know if your telescope is capable of "seeing" very small separations, such as revealing individual members in a star cluster. Arc seconds might be tiny, but they're very important!
{ width: 160, height: 160, defaultImage: '', layers: 'Artimg-SeeingDark' }

When it comes to astronomical observations, it is important to note what your sky conditions are. The reason is simple enough - sky conditions affect how you see things. You may find, like most amateur astronomers, that you'll enjoy keeping a record of your observations. Understanding how to assess and log factors such as transparency, limiting magnitude and stability are important contributions as to how, and when, you can see certain astronomical subjects. By reading the tips below, you'll be better equipped to more accurately record sky conditions in your observing journals.
Transparency or Clarity
If you have ever taken notice of a blue sky, then you know there is more than one shade of blue. One day it might be pale, the next day a break-your-heart shade that seems like it almost has purple in it. This is caused by transparency - the volume of moisture in the atmosphere - and the amount of thin cloud cover (or even pollutants) at any given time. This same transparency factor carries over into the night. While it might be dark, just how dark is it? Darkness or transparency is judged on a scale of one to ten, with one representing totally cloudy and ten representing maximum clarity. For example, a slightly hazy sky would have a transparency of around five or six. A partly cloudy sky might be considered a three. A perfectly clear night high in the mountains with no Moon, where stars seem to have a life of their own could be a nine! You can even have a moonlit night where very little light is scattered by thin clouds... a seven! The most important thing is to be consistent on the numerical value you assign to any given evening's transparency factor because it affects limiting magnitude.
Limiting Magnitude
The next factor to help you judge sky conditions is limiting magnitude , which indicates the faintest star you can see without optical aid. To assist, you will need to know the magnitude of several stars visible at the time of your observation. You can find this information on almost all star charts. For example, if you were viewing during the summer in the northern hemisphere, you might use such stars as Alpha Cygni (Deneb) with a magnitude of 1.2. Now take a look at Beta Cygni (Albireo). It has a magnitude of 3.1. Next, try 61 Cygni, which has an apparent magnitude of 5.2. If you can see this star, then the limiting magnitude of your sky is at least 5. These stars are only examples, and you can use any star for which you have a given magnitude. Take your samples from various positions around the night sky and list the faintest you can see! Always be sure to wait until you are fully dark adapted.
Stability
The next factor in judging sky conditions is stability. This is how "steady" the sky - and the image in your eyepiece - appears to be. Stability can be attributed to atmospheric conditions, or it may be nothing more than rising heat. Using your telescope, take a look at several stars in different locations in the sky. You will be judging stability, like transparency, on a scale of one to ten. Stars seen near the horizon will almost always appear to twinkle, wink in and out and move around. This is an unstable viewing condition and would rate around a two. If you are looking high above the horizon and the view looks like it is under running water, you might have great clarity, but poor stability. To help you further refine your reading, take a look at something which relies on stability to be seen, like the reasonably close double star Polaris. Does the image split into two stars easily? Do you have to focus and refocus again? If so, you might have a slightly unstable sky. However, don't make a hasty judgment. Ask yourself two very important questions: (1) Are your telescope optics at ambient temperature? And (2) Is your telescope set up in a place that might cause temperature "waves" like a concrete or blacktop surface? These two factors also play a very important role in how you see things. An unstable sky won't stop you from viewing, but never being able to come to perfect focus because of image waiver could cause you to miss small details which would otherwise be visible.
Putting It All Together
Now that you've judged your sky conditions and marked your field notes, don't stop there. While you might have great transparency, great limiting magnitude and poor stability when the evening begins, these conditions can change in a short period of time. Sometimes you'll find the most unusual combination of conditions, too. For example, a night with poor transparency might be the most stable. After you have logged sky conditions for awhile, you'll also be able to judge what types of nights work best for certain observations. For example, very stable nights are great times to shoot for tight double stars and planetary details, while nights with exceptionally good limiting magnitude could be the time to find that extremely faint galaxy you've been craving!
{ width: 160, height: 160, defaultImage: '', layers: 'Artimg-CelestialCoordinates' }
With so many modern stargazers relying on computerized telescopes to locate objects, learning to read a star chart might seem like a lost art form. However, using a star chart is very easy, and it helps you really understand what you're looking at and the way the sky works. Additionally, not all telescopes have on-board computers and not all star gazers want to use them. There's a lot of satisfaction to be gained by learning to use a star chart and manually locating objects. By knowing a few simple instructions, you'll find using a star chart is like a recipe. All you need to know are some common measurements and how to find the key ingredients! Let's start with the basics.
Planispheres and All Sky Chart
The first type of star chart you'll probably encounter is a planisphere or an All Sky Chart. These are normally presented in a round format which depicts the brightest stars and constellations as they are seen during specific times of the year. A planisphere is printed on a wheel with dates and times to help you select a key "window" showing the general night sky for the selected time. Like the planisphere, the seasonal All Sky Chart is designed to be held over your head and aligned with the cardinal directions. Unlike a terrestrial map, all star charts have east to the left and west to the right - the correct orientation to match Earth's movements and the apparent movements of the celestial sphere. To help you understand the concept, hold an All Sky Chart over your head and face south. You'll notice east, the direction of sunrise, is to the left, north is behind you and west, the direction of the setting Sun, is to the right. Now all you have to do match up bright star patterns with what you see and identify the primary constellations. These types of star charts are like gathering together the ingredients.
Formal Star Chart
Once you have familiarized yourself with the constellations and key stars that you see, it is time to get more specific. First, choose an area of the sky in which you'd like to work. You'll notice two sets of numbers along the margin of the formal star chart. Like on a terrestrial map, which uses the alphabet in one direction and numerals in the other, these sets of numbers divide the map into sections. In reading from left to right - which (unlike a terrestrial map) represents east to west - you'll see hours, numbers and seconds. These numbers along the top margin are called Right Ascension and it is abbreviated in celestial coordinates as RA - the equivalent of terrestrial longitude. Each celestial "day" is divided into 24 hours (of rotation of the Earth) and begins on the point of vernal equinox. This "zero hour" is the place in the sky where the Sun crosses the celestial equator during the March equinox (equal times of day and night). The second set of numbers reads from top to bottom - north to south - and they are either positive or negative. This set of directions is the Declination and is abbreviated as Dec. It is the celestial equivalent of latitude. Positive numbers are located above a line on the charts, and an imaginary line in the sky, called the celestial equator. This is the dividing line between the northern half and southern half of the night sky. Negative numbers lay to the south.
Why are these numbers important? All astronomical objects, even stars, are given a set of celestial coordinates which use right ascension and declination. These coordinates remain constant. If you are looking for a specific object, you can use its assigned directional value as a recipe to help you find it! For example, if you wanted to view the Crab Nebula you might ascertain its coordinates from a resource such as an astronomy magazine, an astronomical catalog or an observing book. In this listing you would see the directions: RA 05 34 31 - Dec +22 00 52. This means you can locate it both on your star chart and in the sky at 5 hours, 34 minutes and 31 seconds in right ascension and north of the meridian at +22 degrees, 00 arc minutes, 52 arc seconds. Begin reading your star chart at the zero hour and count the hours across to the west (right) until you reach the fifth hour. Use the declination scale along the side margin and locate positive twenty-two degrees. By looking at the larger scale, you can determine the constellation in which it is located and the general area in which it can be found. Until you have become familiar with the night sky at all seasons, you may need to use a planisphere or All Sky Map to make sure the constellation where your object is located is visible. Once you've determined this, it's time to go on to the next step.
Take a look at the large, printed stars around your object on the map. These primary stars are the ones you'll be looking for when translating map to sky. Note they also have a designation. If you're thinking "That's all Greek to me!" then you'd be correct. Very bright stars are given a Greek letter designation such as Alpha, Beta or Gamma. These designations are not only stellar names, but indications of the star's brightness - starting with Alpha as the most luminous and descending in order. Most good star charts will have a key to these letters as well as a magnitude key where the printed star size is also given a brightness value. Common numerical designations on stars are called either Bayer or Flamsteed numbers. These are stellar catalog numbers assigned to bright stars and were originally created by historical astronomers, Johann Bayer and John Flamsteed. Most ordinary star charts use Bayer numbers - along with Greek letters - but Flamsteed numbers are used where no Bayer designation is given.
From Star Chart To Sky
The next step in using a star chart is to match what you see on the map with what you see in the sky. Begin with the constellation, and then identify the very brightest of the stars you see around your designated target and locate that pattern in the sky. For example, you know from looking at the map that your object is located about ten degrees west of Alpha X. The key is to start big and get smaller, but how do you translate degrees from a book to degrees in the sky?!
Don't panic. A simple way of measuring the sky is to use your hands. Hold your hand outstretched at arm's length. From the tip of your little finger to the tip of your thumb is approximately 20 degrees. If you make a fist, that is about 10 degrees. The width of your thumb is somewhere around 2 to 3 degrees. This easy way of measuring will assist you in finding the general location of what you're looking for. Take an even closer look at your star chart and you'll notice it is also divided into other, smaller sections - usually 10 degrees. While this might seem a little confusing at first, you can learn if you practice!
Now, look at your star chart again. You have found the primary stars around your target and your telescope is aimed in the general direction. Use your optical finderscope to assist you in locating and identifying even fainter stars which match the pattern on the star chart. By knowing how many degrees your finderscope reveals, you can even further refine your hunt.
If you use an equatorial mount, you're also in for a big surprise. Once you have reasonably polar-aligned your telescope and set the axis at least close to your latitude, take a close look at those numerical dials on the mount. Do those numbers look familiar? Darn right, they do! One set is Right Ascension and the other is Declination. It might be like comparing an abacus to a calculator, but these handy tools can also get you very close to the perfect recipe for a starry night!
{ width: 160, height: 160, defaultImage: '', layers: 'Artimg-Orion_Nebula' }

In honor of our 37th anniversary, we have compiled a list of 37 astronomy wonders:
- The Sun - Use a solar filter and look for sunspots.
- The Moon - A great site for beginning stargazing. Easy to find!
- The Perseid Meteor Shower - Happens every August, and you don’t need a telescope to enjoy this Celestial treat.
- Jupiter - The largest planet in our Solar System. You can see its four brightest moons with binoculars.
- Saturn - The disk and rings make for fantastic viewing.
- Mars - The red planet and still visible low in the southwest (Summer 2012).
- Venus - This cloud covered body goes through phases like the Moon and is our closest planetary neighbor.
- Mercury - You will need a clear view of the east or west horizon to find Mercury. Catch it in the early morning sky in August, 2012.
- Uranus - Uranus can be a challenge to find (you need a good star chart), but looks different enough from a star to make it distinguishable.
- Aurora - 2012 is a year of Solar Maximum, if you visit the northern US this summer you might catch these incredible displays caused by solar explosions - the sky looks like its on fire!
- The Milky Way - Easily the most spectacular sight visible to the unaided eye outside the solar System. Its easy to see with the naked eye when the moon is gone and you are away from city lights. Scan it with your binoculars or telescope to see details.
- The Pleiades - The seven sisters. Found above the constellation Taurus; as summer starts, the Pleiades are rising above the eastern horizon about dawn.
- The Orion Nebula - A winter favorite, spot the four stars that give this nebula its glow below Orion’s belt.
- The Double Cluster - NGC884 & NGC869 are two clusters in the Peruses constellation.
- Andromeda Galaxy - This galaxy is the furthest visible object in our night sky.
- Ring Nebula - M57 is a planetary nebula in the Lyra constellation.
- Albireo - One of the brightest double stars.
- Messier 13 - The Great Cluster in Hercules is a Globular Cluster with ten’s of thousands of stars
- Messier 67 - A vivid cluster of stars in the Cancer constellation.
- Dumbbell Nebula - M27 is another planetary nebula that so bright and large it’s easy to find in 10 power binoculars.
- M7 - A huge open star cluster; point your binoculars or wide field telescope a little north east of the "stinger" of Scorpio and you’ll nab it!
- Lagoon Nebula - M8 is in the constellation of Sagittarius and is one of the prettiest emission nebula in the night sky.
- Crab Nebula - M1 is a supernova remnant in Taurus that has a pulsar inside.
- Beehive Cluster - M44 is an open star cluster similar to the Double Cluster. It is in the constellation of Cancerand can be see with binoculars or wide field telescopes.
- Big Dipper - More specifically, the galaxies around the stars of the Big Dipper, including M81 and M82. There are dozens of fairly bright galaxies in this area; get a star chart!
- Eagle Nebula - M16 is best seen through telescopes when the moon is down. It is in the constellation Serpens.
- Swan Nebula - M17 is a glowing cloud of gas also known as the Omega nebula. It is in the Sagittarius constellation.
- Omega Centauri - NGC5139 is the largest known globular star cluster found low in the south in the constellation Centaurus.
- Trifid Nebula - M20 is in the Sagittarius constellation and is made up of smaller nebulas and clusters.
- Globular Star Cluster - M22, again in Sagittarius is one of the brightest clusters in the sky.
- Sirius - The brightest star in the night sky is in the constellation of Canis Major. It also is a binary star system.
- Whirlpool Galaxy - M51is a spiral galaxy in the constellation of Canes Venatici.
- M51b - This is a dwarf galaxy visible right next to the Whirlpool Galaxy.
- The Helix Nebula - NGC 7293, this exploded star is big enough to see with binoculars, but look for it from a dark sky site when the moon is absent.
- M83 - The Southern Pinwheel, is in Hydra and bright enough to see in astronomical binoculars.
- Lunar Eclipses - Check astronomy sites to find the next lunar eclipse visible in your area.
- Just Explore - A clear night sky is filled with an infinite number of astronomy wonders. Set up your telescope and explore from horizon to horizon.
{ width: 160, height: 160, defaultImage: '', layers: 'Artimg-ObservMeteors' }

On just about any evening under a dark sky, you’re likely to see a meteor or two streak across the starscape. They catch you by surprise, serving as a reminder that space is not static — things are moving out there, and fast.
What Are Meteors?
Often called "shooting stars," meteors are really particles from outer space — fragments of comets and asteroids — that burn up from friction as they enter the Earth’s atmosphere. While still in space, the particles are called meteoroids. A very bright meteor is about the size of a grape; typical meteors are more the size of tiny pebbles or grains of sand. A very large meteor may break up as it penetrates the atmosphere, throwing off sparks. Occasionally, a meteor may even make noise as it shoots through the air, though this is rare. The largest meteors do not completely incinerate and actually land on Earth as rocks, called meteorites.
A fireball is a very bright meteor loosely defined as being brighter than the planet Venus, whose maximum magnitude is -4.7.
Ordinarily, you can see about one meteor per hour at a dark-sky location if you watch the sky continuously. These are sporadic (random) meteors, not associated with specific meteor showers. You will see more meteors after midnight, since you are then on the "forward" side of the Earth as it moves along in its orbit.
Meteors En Masse — Meteor Showers
A meteor shower happens when the Earth enters a swarm of meteoroids, usually debris from a comet that trails along in the comet’s orbit. At certain times of the year, the Earth’s orbit intersects that of a comet, and we get pelted with the debris.
Then, the meteor rate rises to 10 or 20 per hour, and possibly even 100 or more per hour at the maximum of some showers! The meteors in a shower all appear to come from the same general area in the sky. More precisely, if you trace the path of each meteor backward, you’ll find that they converge near one point in the sky. That point is called the radiant, and it is different for different showers. Each shower is named for the constellation in which its radiant is located. For example, the Perseid shower in August has its radiant in the constellation Perseus. It is often hard to tell whether a meteor belongs to a particular shower or not, since even during a shower, some meteors appear far from the radiant or are moving in slightly different directions.
Because they occur at particular positions in the Earth’s orbit around the Sun, meteor showers recur on the same date every year. Most showers last two or three days; some are longer, and some are very brief.
Some meteoroid swarms have orbital periodicities of their own, so we don’t encounter them every year. For example, the Leonids were spectacular in 1933, 1966 and 2001. In the "off" years, few or no Leonid meteors are seen.
Below is a list of major showers; there are many minor ones producing smaller numbers of meteors. One major shower, the Quadrantids, is named for an obsolete constellation corresponding to part of Bootes.
Table of Annual Meteor Showers
| Date (every year) | Name of Shower | Remarks |
|---|---|---|
| Jan. 1-5 | Quadrantid | Brief maximum, Jan. 3 or 4. Radiant in Bootes. |
| April 21-23 | Lyrid | Brief and variable |
| May 1-8 | Eta Aquarid | Radiant in Aquarius |
| July 15 - Aug. 15 | Delta Aquarid | Maximum July 27/28 |
| July 25 - Aug. 18 | Perseid | "Old reliable" — strong and regular. Maximum Aug. 12. |
| Oct. 16-26 | Orionid | Maximum Oct. 21 |
| Nov. 15-19 | Leonid | Spectacular in 1933, 1966, 2001. Check astronomy magazines for predicted maximum. |
| Dec. 11-17 | Geminid | Usually a fine shower |
Observing Meteors
Meteor watching is like fishing. You cast your sights upward, sit back, wait a while, and see if you get any bites. You’ll increase your chances by going to a dark-sky location, away from suburban light pollution. Most meteors aren’t very bright, so you’ll see more of them if you go to a dark country site. Your chances of logging meteors are also improved when the Moon is below the horizon, or during the new Moon phase, as moonlight can wash out all but the brightest fireballs.
Observing meteors is a naked-eye activity. You don’t need, or even want, a telescope or binoculars to view meteors, as these will only restrict your field of view. You want to be able to visually canvas as much of the sky as possible, because meteors can flash anywhere. For scientific work you’ll need a star chart (for plotting meteor paths) and a ruler (to hold up against the sky to note exactly where a meteor went). More important is a lawn chair and, if appropriate, blankets to keep you comfortable during your vigil.
You will notice that meteors not only differ in brightness, but also in speed and length of travel. Some appear to move relatively slowly, glowing for a second or two while others streak quickly and are gone in a fraction of a second. Some of the brightest meteors leave vapor trails in the sky that can linger for several seconds after the meteor has disappeared.
While looking for meteors you’ll see plenty of airplanes and satellites, too. How do you distinguish them from meteors? For one, meteors move much faster. Another dead giveaway for an airplane is a blinking light. Binoculars will help you identify airplanes, which normally have more than one light. A satellite looks like a slowly moving star. An iridium satellite occasionally reflects sunlight so that it looks like a bright, slow meteor; however, the movement is much slower and it fades out rather than burning up suddenly.
Telescopic Meteors
Occasionally, you’ll see a tiny, distant meteor in binoculars or a low-power telescope. These are called telescopic meteors and are so rare that you probably shouldn’t spend time looking for them — but take note when you happen to see one while viewing other things.
Photograph a Falling Star
Photographing meteors is relatively easy — if you encounter a meteor at the right place and right time! The technique is to use a DSLR or camera with a manual exposure setting using anormal or wide-angle lens (preferably f/2.8 or faster) and take a long exposure of the stars. If a bright meteor comes through the field, the camera will probably catch it.
The camera can stand on a fixed tripod (recording the stars as trails due to the Earth’s motion) or on a clock-driven telescope (to get pinpoint images of the stars). Light pollution and your local sky qulaity conditions will limit how long the exposure can be before the image quality degrades. Experiment with different exposures and ISO settings to determine the best results for your set-up and location.
You’ll likely catch a lot of airplane and satellite trails in your pictures, too. You can distinguish them from meteor trails by their uniform thickness (or the regular-spaced, dots from an airplane’s blinking light). A meteor trail is usually not uniformly thick, but rather almost always exhibits a bright "head" where the meteor burned up.
{ width: 160, height: 160, defaultImage: '', layers: 'Artimg-ObservMoon' }

Of all the celestial sights that pass across the sky, none is more inspiring or universally appealing than our planet's lone natural satellite, the Moon. Remember the rush of excitement that you felt when you first peered at the rugged lunar surface through a telescope or binoculars? (If you haven't, you'll be amazed.) The first view of its broad plains, coarse mountain ranges, deep valleys, and countless craters is a memory cherished by stargazers everywhere.
A New View Every Night
Since the Moon orbits our planet in the same time that it takes to rotate once on its own axis, one side of the Moon perpetually faces Earth. Though the face may be the same, its appearance changes dramatically during its 27.3-day orbital period, as sunlight strikes it from different angles as seen from our standpoint. Due to the sunlight's changing angle, the Moon presents a slightly different perspective every night as it passes from phase to phase. No other object in the sky holds that distinction. (Note that it is actually 29.5 days from New Moon to New Moon; the added time is due to Earth's motion around the Sun.)
The Moon is the ideal target for all amateur astronomers. It is bright and large enough to show amazing surface detail, regardless of the type or size of telescopic equipment, and can be viewed just as successfully from the center of a city as from the rural countryside. But bear in mind that some phases are more conducive to Moon-watching than others.
The Best Times to View It
Perhaps the most widespread belief is that the Full Moon phase is the best for viewing, but nothing could be further from the truth. Since the Sun is shining directly on the Earth-facing side of the Moon at this phase, there are no shadows to give the lunar surface texture and relief. In addition, the Full Moon is so bright that it can overwhelm the observer's eye. Although no permanent eye damage will result, the Full Moon is uncomfortable to look at even with the naked eye. Instead, the best time to view the waxing Moon is a few nights after New Moon (when the Moon is a thin crescent), up until two or three nights after First Quarter (First Quarter is when half of the visible disk is illuminated). The waning Moon puts on its best show from just before Last Quarter to the New Moon phase. These phases show finer detail because of the Sun's lower elevation in the lunar sky.
 Using a Moon Filter Improves the View
No matter what the phase of the Moon is, the view is almost always better through a lunar filter. It screws into the barrel of a telescope eyepiece and cuts the bright glare, making for more comfortable observing and bringing out more surface detail. Some lunar filters, called variable polarizing filters, act something like a dimmer switch, permitting adjustment of the brightness to your liking.
Notable Surface Features
The Moon is dominated by large, flat plains known as maria; the singular is mare (meaning "sea"), which is pronounced (MAH-ray). Maria were first thought to be large bodies of water. In reality, the maria are ancient basins flooded by long-solidified lava created some three billion years ago when the Moon was still volcanically active. All are relatively free of craters except for a few scars from impacts that have occurred since. Their romantic-sounding names, such as the Sea of Crises, Sea of Fertility, Sea of Serenity, Ocean of Storms, and the Sea of Tranquility, are believed to date back to the mid-17th century.
 Surrounding the maria are the lunar highlands, dominated by nearly uncountable craters that measure up to several hundred miles across. Most are believed to have been created when debris from the formation of the solar system collided with the young Moon, leaving a permanent record of the barrage on its surface. Some of the more spectacular lunar craters include Tycho, Copernicus, Kepler, Clavius, Plato, and Archimedes, all named for figures of historical stature. Tycho, Copernicus, and Kepler are especially noteworthy, as each displays a broad pattern of bright rays radiating outward. These are particularly impressive during the Moon's gibbous phases (between Quarter and Full), when the Sun appears high in the lunar sky. The Moon also has several noteworthy mountain ranges, such as the Alps and Apennines, as well as straight cliffs, towering ridges, broad valleys, and small, sinuous rilles.
Focus on the Terminator Region
The greatest amount of detail is visible along the Moon's terminator, the line separating the lighted area of the lunar disk from the darkened portion. It is here that the Sun's light strikes the Moon as the narrowest angle. This casts the longest shadows, increasing contrast of lunar features and showing the greatest three-dimensional relief. Sometimes you will notice a bright "island" surrounded by darkness on the dark side of the terminator. That's a high peak, tall enough to still catch the light of the setting Sun, while the lower terrain around it does not.
A Great Target for Telescopes or Binoculars!
So, the next time the Moon is riding high in the sky, take time to visit our nearest neighbor in space. A binocular provides a terrific view; use a tripod or brace it against something to hold it steady. If you have a telescope, begin with a low-power eyepiece. Slowly scan across the lunar disk and try to imagine the emotion that the astronauts must have felt as they orbited that alien world, a world so close to our own, yet so astonishingly hostile and different — "magnificent desolation," as Edwin Aldrin put it during his and Neil Armstrong's historic visit on Apollo 11 in 1969. Then, switch to higher powers for close-up studies of specific areas and features. Get a lunar map or lunar atlas to identify specific craters and features.
 An amazing world, our Moon, so rich in detail and so easy to see.
Checklist of Observable Features
1) Maria — Once thought to be oceans of water, these "seas" are actually vast plains of hardened lava. In some of them you will see giant ripples.
2) Craters — Like snowflakes, no two appear exactly alike. In the center of some larger craters, look for peaks formed from the upsurging of molten rock at the impact point. Look for small craterlets inside craters, too.
3) Crater Rays — Long, bright "splash marks" radiating from a few craters, such as Copernicus and Tycho. Best observed at Full or Gibbous phases.
4) Mountains — Several major mountain ranges scar the lunar surface. Check out the largest one, the Apennines, in the southern half of the Moon's disk along the vertical centerline. You can't miss it!
5) Domes — These small, low mounds often have a tiny craterlet in the middle and tend to cluster in groups.
6) Rilles — Filamentous faults and channels, some of which were once meandering rivers of flowing lava.
{ width: 160, height: 160, defaultImage: '', layers: 'Artimg-ObservPlanets' }

First thought to be gods and goddesses, later believed to be inhabited by alien life forms, today the planets are well known as strange and marvelous worlds. Each has its own set of characteristics and personality; each is a wonder to behold through a telescope.
Most telescopes of any aperture will give pleasing views of the planets, at least of Saturn and Jupiter, because they're so big, bright, and distinctive. The telescope must have clean, high-quality optics, a sturdy mount, and good eyepieces. High-quality refractors have the edge for studying the planets because of their "clear apertures." Any time something blocks a portion of a telescope's aperture (such as a secondary mirror), some image sharpness and contrast are lost. While reflector and catadioptric telescopes need small, secondary mirrors to redirect light to their eyepieces, refractors have a clear light path straight to their eyepieces, keeping contrast at its greatest. Reflectors and catadioptric telescopes work very well on the planets, it's just that a larger aperture is needed to give the same view.
Regardless of the type of telescope, always use your best eyepieces to get the sharpest views. This is especially critical with the planets. Most telescopes come with one or two eyepieces that are fine to start off with, but usually cannot reveal a telescope's full potential. The same instrument will show much more planetary detail just by switching eyepieces. It's almost as good as getting a whole new telescope!
Use Reasonable Power, Not More
A common mistake made by beginners is to think that high power eyepieces are best for viewing the planets. Often, the exact opposite is true. A telescope's ability to gather light from a distant target is based on its aperture (the diameter of its main mirror or lens). Low magnification concentrates that light into a small, bright image, while high magnification spreads that light over a larger area, producing a dimmer image. Too much magnification will cause the image to become so faint that it becomes impossible to focus, or even see.
So, what magnification is best for viewing the planets? That's hard to say, but a rule often mentioned is the "sixty power per inch" rule. Never use an eyepiece that will magnify more than 60 times for every inch of aperture. In other words, 240x is the highest you should use in a 4-inch telescope, while 480x is the highest in an 8-inch telescope. But this also assumes that the telescope and eyepiece are optically perfect and that "seeing" ? the measure of how steady the Earth's atmosphere appears ? is calm. Many nights may only let you use 30x per inch, or even 20x. The best advice is to increase magnification until the image brightness and sharpness begin to deteriorate.
Good "Seeing" is a Must
"Seeing" is just as important as optical quality. Even the best telescope will show only fuzzy planetary blurs if the Earth's atmosphere is turbulent. A good way to judge seeing conditions is to check the stars. If the stars appear to be twinkling, which is caused by a turbulent atmosphere, then conditions are poor for planet gazing. Frequently, the steadiest nights appear slightly hazy, when our atmosphere is more tranquil and seeing is enhanced.
Even with steady seeing, however, a telescope still won't do the planets justice unless its optics are cooled to the outdoor temperature. Depending on telescope aperture and the change in temperature, acclimatization may take anywhere from ten minutes to more than an hour. To keep this time as short as possible, store your telescope in an unheated, but protected, place.
Many observers also recommend using color filters to enhance subtle features on some of the planets. While filters do help, their benefit is best appreciated by experienced observers. Filters are not a substitute for quality optics and steady skies.
Finally, the greatest tool for viewing the planets cannot be purchased anywhere: a trained eye. Most first-time observers only see small, round blurs when viewing the planets. That's normal, so don't be discouraged! Stick with it and observe the planets as often as possible. Don't merely take a quick look. Switch eyepieces (magnifications) until you find that perfect view and study it intently. As time goes on, your eye and brain will become accustomed to seeing fainter, more tenuous detail. Skill as an observer will only be gained by going out night after night and observing.
What Can You Expect to See?
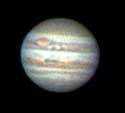 Jupiter: Cloud Bands and Dancing Moons
Of all our planets, none is more impressive through amateur telescopes than Jupiter. This largest planet of our solar system shows off its impenetrable atmosphere of parallel light and dark bands through even the smallest astronomical instruments. The bright equatorial zone dominates the center of the planet, framed on either side by the dark north and south equatorial belts. To either side of these lie the north and south temperate zones, and finally, the darker north and south polar regions. Four-inch and larger telescopes also reveal subtle markings and details within these broad regions. Most notable is the Great Red Spot, a cyclonic storm located on the outer edge of the south equatorial belt. The name is a bit misleading, as the spot usually appears more of a pale pink or orange.
The smallest telescopes will show four of Jupiter's satellites. They make a pretty sight: four small dots flanking the planet's large disk. All were discovered by Galileo, and are collectively known as the Galilean satellites. Which ones are in view depends on timing. Sometimes, two are visible on both sides of the planet, while at other times, three might be seen on one side and one on the other. If one or more is missing, it may be either behind Jupiter, hidden in its shadow, or passing in front of the planet's bright disk. Trying to identify each Galilean satellite by name through a telescope is a fun activity for observers. Astronomical periodicals such as Astronomy and Sky & Telescope publish charts that show satellite orientation during the given month.
Saturn: The Ringed Wonder
Jupiter may be the most impressive planet, but the stunning ring system surrounding Saturn casts it as the solar system's most breathtaking sight. Most people are amazed by the view. Best of all, Saturn's rings are visible with telescopes as small as 2-inches aperture and at magnifications as low as 25-power. Naturally, larger telescopes will show greater detail, including Cassini's Division, a tenuous band of opaque material that divides the outer A ring from the middle, broader B ring. The faint C ring lies along the inner edge of the B ring, but is usually very difficult to make out. Look for its subtle silhouette against the planet's brighter disk.
While Saturn's atmosphere is chemically similar to Jupiter's, it lacks the same prominent banding. Instead, most amateurs can only make out a whitish-beige equatorial region, slightly darker temperate zone, and a still darker polar region.
Saturn is encircled by 18 satellites, with the largest, Titan, visible through small telescopes. Six-inch instruments will show an additional four to five satellites, although all are considerably fainter than 8th-magnitude Titan.
Venus: Goes Through Phases
Venus is the brightest planet in the sky and is often the closest to Earth, yet it shows very little detail through telescopes. Its surface is forever hidden beneath a thick layer of carbon-dioxide clouds. Although this frustrates both amateur and professional astronomers, we can watch Venus go through phases like our Moon, from a thin crescent to a broad gibbous.
Nearly any telescope will show these phases easily. When nearest to Earth, just to one side or the other of the Sun in our sky, Venus shows a slender crescent phase that can actually be seen through 7-power binoculars. As it continues in its orbit, Venus pulls away from Earth, shrinking in apparent size, but broadening to a half phase. Finally, Venus widens to a gibbous phase before moving behind the Sun from our vantage point. As Venus pops out from the other side and moves farther away from the Sun in our sky, the order of phases reverses.
 Mars: The Red Planet
Mars has always attracted wide attention among stargazers. Its appearance through a telescope changes dramatically depending on where it is in its orbit compared to Earth. When far away, its small apparent size makes it nearly impossible to see any surface details, except for perhaps a hint of its white polar caps. But when Mars is closest to Earth (at opposition), the Red Planet displays some interesting dark surface features. These dark markings were thought by some in the late 19th century to be man-made "canals," but that was merely an optical illusion.
Even when Mars is closest, 200x or more will be needed to see fine details, demanding a high-quality telescope and eyepieces. During an opposition, 4-inch and larger telescopes can certainly show Mars' two white polar caps as well as some amorphous surface features, but near-perfect seeing conditions are a must for the best view. The easiest dark marking to spot on Mars is called Syrtis Major, which looks like a triangular wedge extending North and South. A second, smaller feature is called Meridiani Sinus, which looks a little like a claw. Finally, take a look for the "Eye of Mars," Solis Lacus, a bright, circular area surrounding a dark middle.
Mercury: Low Rider
Mercury is the most difficult of the five naked-eye planets to see, since it is only visible very low in the west right after sunset, or low in the east just before sunrise. The best time to hunt for Mercury is when it is near greatest elongation from the Sun, when the distance between the two in our sky is farthest. Since Mercury takes only 88 days to orbit the Sun, greatest elongations occur often. Due to the tilt of the Earth compared to the plane of our orbit, the spring and early summer prove to be the best times of year for observers in the Northern Hemisphere to spot Mercury during evening elongations, while the fall and early winter are best for seeing Mercury in the early morning. The exact opposite is true from the Southern Hemisphere. Even then, seeing Mercury with the naked eye is difficult because of the bright, twilight sky. Binoculars and finder scopes can help isolate the planet.
In a telescope, Mercury appears as a tiny gray disk. Like Venus, it goes through different phases; the apparent size of its disk varies with phase. Because Mercury hugs so close to the horizon, the disk usually shimmers from atmospheric turbulence. A better image can be obtained when the planet is higher in the sky, during evening or morning twilight, even though the contrast between the planet and the sky won't be as good.
Uranus, Neptune, & Pluto: Challenging Quarry
Uranus and Neptune are challenges that can only be met using optical aid. The former is seen as a greenish, 6th-magnitude "star," while Neptune looks like an 8th-magnitude, turquoise point. Neither will show any detail through most amateur telescopes apart from their distinctive colors. Finally, Pluto shines faintly at about 13th magnitude. While Uranus and Neptune can be glimpsed through 7-power binoculars, Pluto demands at least a 6-inch telescope to be seen. All require a detailed star map to identify them from their surroundings.
Relish Those Fleeting Moments of Great Seeing!
The view of a planet is not continuously crisp and clear in the eyepiece. Usually the seeing conditions effectively "blur" the image to varying degrees, smearing out some of the finer detail. But there are brief moments when the planet's disk will appear very sharp, and these are the moments to relish. Under the right conditions you get enough of these moments of clarity to make the viewing highly worthwhile. Be patient, keep tweaking the focus to make sure it's right on, and adjust the magnification down enough so that your optics aren't blurring the image.
Each planet shows off a set of unique characteristics through telescopes both large and small. If one of the planets is visible in tonight's sky, take a moment to gaze its way and say hello to one of your celestial neighbors.
{ width: 160, height: 160, defaultImage: '', layers: 'Artimg-EnjoyAstro' }

For anyone who has dared to look up and wonder at the splendor of a starry sky, the appeal of astronomy may be beckoning. Submit to it in the slightest and you may get hooked! Once you do, the universe, and your place in it, will never look the same. And the more you learn, the more the picture changes. Astronomy is a hobby that allows you to pace yourself, so take heart, you can go as slowly or as quickly as you like. The universe is a patient place — one that doesn’t mind waiting while you take the first steps toward understanding.
The Milky Way, in all its glory, reveals itself wondrously to the naked eye. To experience the full impact of a meteor shower, the best optics in town are still two eyeballs. If you stare into the night long enough, gaseous nebulas, glittering star clusters, and curious fuzzy patches begin to emerge, and a blazing fireball may suddenly interrupt the calm. The stellar patterns of constellations take shape. Stars appear not just as uniform white specks, but as variously hued light sources, from barely perceptible to boldly bright.
Through a pair of binoculars, hundreds of stars appear suddenly where there was only darkness a moment ago. Colors jump out at you as you scan for red giant stars such as Betelgeuse or hot blue stars like Sirius. Dense star clouds and tight knots intermingle with inky, starless voids. It’s a view you’ll be drawn to again and again.
Even more compelling is a good long look through a telescope. Sure we’ve all seen the pictures, but nothing quite compares to seeing the ice crystal rings of Saturn for the first time, or Jupiter with its four perfectly aligned moons. Our closest satellite, the Moon, will stun even the most skeptical beginner with magnificent views of its rugged, crater-laden terrain.
And it gets better. The bigger the telescope, the more light it gathers, allowing you to see even deeper into space. Suddenly, the Great Red Spot of Jupiter appears in color, and the cloud belts in its upper atmosphere take on definition. Star clusters resolve into distinct stellar groupings, like snowflakes, no two of which look the same. Ghostly puffs of gas and dust called nebulas mark both the birthplaces and deathbeds of far-away suns. And a myriad of faint, mysterious "island universes," or galaxies, challenge our powers of perception as they reveal a multitude of different shapes and subtle structural intricacies.
Astronomy is truly a fascinating hobby. From your backyard, and with nothing more than your own two eyes and, if you wish, an ordinary pair of household binoculars or an inexpensive telescope, you can travel, visually, farther out into space than you ever dreamed, discovering wonders that boggle the mind. It’s a hobby you can enjoy by yourself in quiet contemplation, or together with family and friends.
So go ahead and take a look. You have nothing to lose, and literally a universe to gain.


Why Buy From Orion
- 30 Day Money Back Guarantee
- Safe & Secure Shopping
- Next Day Shipping
- Easy Returns
- Sale Price Guarantee
- Free Technical Support

- 800-447-1001
- Telescope.com
- © 2002- Orion Telescopes & Binoculars All rights reserved
- DMCA/Copyright
- Terms and Conditions
- Privacy & Security
![]()


About Orion Telescopes & Binoculars
Since 1975 Orion Telescopes & Binoculars has been offering telescopes for sale direct to customers. Now an employee-owned company, we pride ourselves on an unswerving commitment to best quality products, value and unmatched customer care. Our 100% satisfaction guarantee says it all.
Orion offers telescopes for every level: Beginner, Intermediate, Advanced, and Expert. From our entry level beginner telescopes for amateur astronomers to our Dobsonian telescopes to our most advanced Cassegrain telescopes and accessories, you can find the best telescope for you. Because we sell direct, we can offer you tremendous value at a great price. Not sure how to choose a telescope? Orion's Telescope Buyer's Guide is a great place to start.
Orion binoculars are known for quality optics at a great price. We offer binoculars for every viewing interest, including astronomical binoculars, compact binoculars, waterproof binoculars, birding binoculars, and sport and hunting binoculars.
Orion's telescope and astrophotography accessories will enhance your telescope enjoyment without breaking the bank. Expand your viewing experience with accessories ranging from moon filters to power-boosting Barlow lenses to advanced computerized telescope mounts. Capture breathtaking photos with our affordable astrophotography cameras. And when you're stargazing, Orion's telescope cases and covers, observing gear, red LED flashlights, astronomy books and star charts will make your observing sessions more convenient, comfortable and meaningful.
At Orion, we are committed to sharing our knowledge and passion for astronomy and astrophotography with the amateur astronomy community. Visit the Orion Community Center for in-depth information on telescopes, binoculars, and astrophotography. You can find astrophotography "how to" tips and share your best astronomy pictures here. Submit astronomy articles, events, & reviews, and even become a featured Orion customer!
sales, new products, and astronomy.