


{ width: 160, height: 160, defaultImage: '', layers: 'Artimg-BBC_ValueOfBinos' }


![]() Orion is proud to partner with BBC Sky at Night Magazine, the UK's biggest selling astronomy periodical, to bring you this article as part of an ongoing series to provide valuable content to our customers. Check back each month for exciting articles from renowned amateur astronomers, practical observing tutorials, and much more!
Orion is proud to partner with BBC Sky at Night Magazine, the UK's biggest selling astronomy periodical, to bring you this article as part of an ongoing series to provide valuable content to our customers. Check back each month for exciting articles from renowned amateur astronomers, practical observing tutorials, and much more!
Telescopes aren't the only option for observing astronomical objects

Orion 10x50 Binocular Stargazing Kit
Starting out in astronomy and wondering what to buy for your first telescope? There's a simple answer to that question: don't buy one, buy two. Two small ones that are joined with a hinge so that the distance between them can be adjusted to exactly match your eyes. We are of course talking about binoculars — a valuable tool in the armouries of most active observers.
There are hundreds of astronomical bodies that a pair of binoculars will bring into view for you. Not only will they let you see many more objects than you can with the naked eye, but the detail and colour in those objects become a lot richer.
With binoculars, the Coathanger asterism in Vulpecula actually looks like a coathanger and the Orion Nebula becomes a fantastically detailed painting of light. The Milky Way is no longer a tenuous glowing band, but a knotted tangle of stars, interspersed with mysterious dark patches. Albireo goes from being an ordinary-looking star that marks the head of Cygnus to an exquisite binary juxtaposition of gold and sapphire. And you can easily see galaxies by the light that left them millions of years ago, when our ancestors were thinking about leaving the trees.
Binoculars are still suitable even if you want to do 'serious' astronomy. There are variable star observing programmes specifically for binoculars, and their portability makes them ideal for taking to the narrow track where a lunar graze or asteroid occultation is visible.
Alternatively, you could wrap up warm, lie back on your garden recliner and just enjoy the objects that the binoculars let you find as you cast your gaze among the stars. Before you even realise it, you have begun to learn the sky and you'll soon be able to navigate around it better than the entry-level Go-To telescope you nearly bought instead.
Best of all, you can have this complete observing system for two eyes for less than the price of one reasonably good telescope eyepiece.
What to Look For
Binoculars are classified by two numbers that refer to their magnification and aperture. A 10x50 pair of binoculars has a magnification of 10x, and each of the objective lenses has an aperture of 50mm. These numbers also enable you to calculate the size of the circle of light — or 'exit pupil' — that emerges from the eyepieces: all you have to do is divide the aperture by the magnification. This means a 10x50 pair of binoculars has an exit pupil of 5mm. The exit pupil should be no larger than the dark-dilated pupils of your eyes: a pupil of anywhere between 4-6mm is fine for your first pair of binoculars.
Larger apertures potentially show you more, but may need mounting if you want steady views over prolonged periods. Common sizes are:
- 8x40, which almost anyone over the age of 10 can hold steadily
- 10x50, which most adults can hold steadily (this size is a popular compromise between size and weight)
- 15x70, which really needs to be mounted, although they can be briefly handheld
You should also check that the distance between the eyepieces, or 'interpupillary distance' will adjust to your eyes. If you wear glasses, ensure that the binoculars have enough distance ('eye relief') from the eyepiece to your ideal eye position; 18mm or more should be fine.
There are two basic types of binoculars: Porro-prism and roof-prism. In any price range, roof-prisms are lighter, but Porro-prisms tend to have better optical quality. Once you've decided on size and type, get the best quality you can for your budget and start exploring the night sky.
Can I Use Any Old Binoculars?
In principle, yes: even plastic-lensed 4x20 toy binoculars can show you astronomical objects that you otherwise couldn't see, such as the moons of Jupiter. If you already have a pair of small binoculars, for example a 6x30 or 8x32 pair, try them out under the stars: you'll be amazed at how much more you can see. The optical quality will also make a difference and you may find that there are things you can see with good-quality small binoculars like 8x42s that are beyond the capability of an entry-level 15x70. But avoid zoom binoculars: good ones don't exist.
Better Than a Telescope?
If your passion is planetary detail, close double stars, globular clusters or planetary nebulae, then consider buying a telescope. But for the rest of the visible Universe, binoculars are the better option. Setting up handheld binoculars takes a few seconds, and even mounted ones can be set up in a few minutes, so you'll be observing long before your Go-To telescope-using buddies are ready to start.
Many objects are ideally framed in the wider field of handheld binoculars: asterisms like Kemble's Cascade or the Leaping Minnow overflow most telescope fields, as do large open clusters such as the Pleiades and the Beehive Cluster. Even large faint objects like the Triangulum Galaxy and the North America Nebula can be easier to see in budget 10x50 binoculars than in amateur telescopes of several times the price.
Copyright � Immediate Media. All rights reserved. No part of this article may be reproduced or transmitted in any form or by any means, electronic or mechanical without permission from the publisher.
{ width: 160, height: 160, defaultImage: '', layers: 'Artimg-Rose_Ringed_Parakeet' }

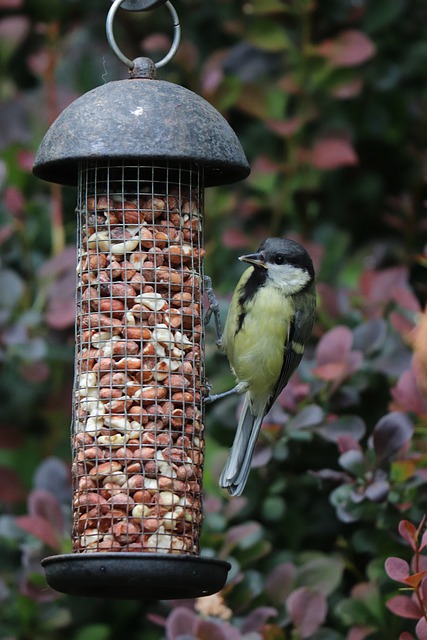
Birdwatching, or "birding" is one of the most popular hobbies to enjoy outdoors. Millions of people all over the world participate in some form of birding. One of the main reasons for birding's popularity is that it's inexpensive - all you need is a field guide or birding app for your smartphone and a good pair of binoculars. Whether you're a dedicated birdwatcher or you just like seeing what shows up at the backyard feeder, the most vital tool for appreciating the natural beauty of birds is a binocular optimized for daytime use.
So what makes a binocular good for birding?
Quality optics, for starters. Image sharpness and brightness are vital for a pleasing birdwatching experience. Anti-reflection coatings on binocular optical elements help to maximize the amount of light that passes through a binocular. Binoculars with quality, fully coated, or better yet "fully multicoated optics" are ideal for bright, sharp views, since they allow a maximum amount of light to be transmitted through the binocular to reach your eyes.
Another important factor to consider when comparing binoculars for birding is power, or magnification. While it's tempting to assume that more power is always better, it's just not true. Binoculars with magnifying power of 7x or 8x are arguably the best for all-around birding. Such moderate magnifications make it easy to hold binoculars steady for stable, shake-free observations and usually provide a wider field of view to explore. While more powerful 10x or higher binoculars may come in handy for viewing over longer distances, they are more difficult to hold steady and usually also have a narrower field of view.
You should also pay special attention to the size of a binocular's front lenses (also called "objective lenses") when shopping for a good birdwatching binocular. Objective lenses (the front lenses of a binocular) measuring 35mm to 42mm in diameter are preferred for birding binoculars, and many quality compact models with 26mm lenses also perform admirably during the day. You don't really need larger lenses unless most of your observations will occur at dawn or dusk. Binoculars with 42mm lenses gather ample light for bright, clear daytime views of birds and wildlife. Binoculars with 42mm and smaller objective lenses are usually more portable and compact than binos with larger lenses, and you'll appreciate their relatively smaller sizes when you take a birding binocular along with you on a hike, camping trip, or birdwatching expedition.
Another specification to be aware of is a binocular's close focus or near focus distance. This defines how close you can be to an object while obtaining a focusable view in the binocular. A short close-focus distance of 10 to 20 feet or less is a plus for studying birds at close range.
{ width: 160, height: 160, defaultImage: '', layers: 'Artimg-Bino_Buying_Guide_square' }

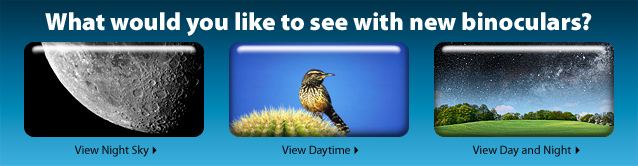
The process of choosing the best pair of binoculars for your needs can be overwhelming. We put together the following resources to help you make an informed decision. ![]() We suggest starting by watching our helpful video, How to Choose a Binocular
We suggest starting by watching our helpful video, How to Choose a Binocular
The process of choosing the best pair of binoculars for your needs can be overwhelming. We put together the following resources to help you make an informed decision. We suggest starting by watching our helpful video, How to Choose a Beginning Telescope, and then reading the article below.
 See our eCatalog on how to choose the right Binocular for you.
Selecting the right pair of binoculars is a matter of picking the best combination of features for your particular needs, including magnification, bulk and weight, brightness, field of view, optical quality, and cost.
Understanding the Basics of Binoculars
Binocular sizes are expressed with two numbers: 7x35, 10x50, etc. The first number is the magnification (or power), the second is the aperture, or diameter of the objective (front) lenses in millimeters. For example, 7x35 binoculars provide 7x power magnification and have 35mm objective lenses. For a given magnification, larger objective lenses yield a brighter image in dim light, but also result in a bulkier, heavier pair of binoculars.
The higher the power, the "shakier" the image will be, because small hand movements get magnified. Therefore, we recommend binoculars of moderate 7x or 8x magnification unless you have a specific need for more power. Lower-power binoculars also usually offer a wider field of view, allowing you to take in more of a scene at one time.
To select the best binoculars for your own particular needs, let's consider a few simple but vital questions and features:
1) What Will You Do With the Binoculars?
Hiking
If you hike or travel a lot, you'll want binoculars that are compact and lightweight, perhaps even weatherproof. An 8x24 or 10x25 would be a good choice, thanks to their small size, great portability, and good daytime performance.
Birding
The most popular models for birdwatching are 8x40 and 8x42. They're small and nimble, offer steady hand-held views, and have sufficient light grasp to provide bright, well-resolved images. If you plan to study birds at close range, look for binoculars with a near-focus distance of a few feet.
Astronomy
For stargazing, light grasp is the most important factor. Choose binoculars with at least a 50mm aperture. A 7x50 model is easily hand-holdable and provides nice, wide-field views of starry swaths. The higher-power 10x50 is also popular, and in fact is preferable to the 7x50 where skyglow light-pollution is a problem. A tripod is recommended for a steady view through astronomy binoculars?your arms will thank you!
"Giant" astronomy binoculars of 70mm, 80mm, or 100mm aperture will reveal fainter deep-sky objects and more subtle detail. If you can afford the higher price (and a good tripod) and don't mind the extra bulk, you'll be rewarded nightly with incredible views.
Of course, other factors should play into your buying decision too, such as eye relief, optical coatings, and mechanical construction. If you need advice, give us a call!
2) Binocular Prisms: Porro vs. Roof
The prisms inside binoculars turn what would otherwise be an upside-down image right-side up. There are two main types of prism systems used in modern binoculars: porro prisms and roof prisms.
Porro-Prism Binoculars
Each barrel of a porro-prism binocular contains two right-angle prisms. They are offset from each other, which requires that the objective lenses be spaced farther apart than the eyepieces. Thus, porro-prism binoculars are bulkier than their roof-prism counterparts. Optically, however, porro-prism binoculars usually perform better, because the prism design requires less strict tolerances. That makes them easier to manufacture, so they cost less. Also, porro prism binoculars yield a more stereoscopic, or three-dimensional, image.
Roof-Prism Binoculars
The prisms in a roof-prism binocular overlap closely, allowing the objective lenses to line up directly with the eyepieces. This results in a more streamlined, compact, and often more lightweight binocular than equivalent porro-prism models. But roof-prism binoculars are also more difficult to manufacture, so they cost more. Roof prisms lose slightly more light to reflection than porro prisms ? a disadvantage for astronomical use but not a concern for daytime terrestrial viewing. Well-made roof-prism binoculars can provide optical performance nearly equal to, but not better than, porro-prism binoculars.
Prism Glass
Most optical prisms are made from either BK-7 (borosilicate) glass or BAK-4 (barium crown) glass. BAK-4 is the higher-quality glass and yields brighter images and better edge sharpness. It is also more expensive.
3) Field of View
The field of view is the size of the "window" you see through a binocular. The field has no effect on the size of the subject being viewed (that's a function of the magnification). Surprisingly, the field of view is not determined by the binocular's main (objective) lenses, but rather by the eyepiece and prism designs.
The width of the field is expressed either as an angular measure in degrees, or as a linear width measurement, in feet, of the viewing area at a distance of 1000 yards. You can convert from angular field to linear field by multiplying the angle in degrees by 52.5.
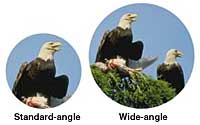
"Wide-angle" is an inexact term that simply indicates that a binocular field is wider than average. Generally, a binocular is considered wide-angle if its apparent field of view (angular field in degrees times magnification) is 60 or greater.
A wide-angle binocular is ideal for finding subjects quickly, and it can deliver spectacular panoramic views. A wide field is especially desirable for watching action sports or scanning to pick up motion at close range, such as in a wooded area. A narrower field of view is sufficient for longer-distance observation.
The Bottom Line
Deciding which pair of binoculars are best for you depends on your particular goals for using the binoculars. We recommend you take advantage of information and resources such as our website and catalog to help you make the most appropriate selection for you and your family.
In closing, let's re-visit some of the most important factors to consider:
- What Will You Do With The Binoculars? ? By far the most important factor to consider when choosing a binocular. For daytime outdoor use while hiking, a lightweight, compact and portable binocular is preferable. Birding enthusiasts will appreciate a slightly larger model with 36-42mm objective lenses as they provide brighter views with more detail visible than smaller binoculars. For nighttime use viewing starry skies, a larger astronomy binocular with at least 50mm diameter lenses is required for the best views.
- Binocular Prisms: Porro vs. Roof ? Once you've determined what you'll be using binoculars for, you can consider what prism type to select for the best results. In general, porro prisms provide brighter views, but are often bulkier than roof prism binoculars. Roof prism binoculars are significantly more compact and portable than porro prism models, but they do not provide the same level of brightness, and are often more costly.
- Field of View ? A pair of binoculars with a wide field of view lets you scan vast areas with magnified vision. If you wish to view large areas such as sporting events, or scenic landscapes, a binocular with relatively low magnification and a wider field of view is recommended. However, if you wish to really zoom in on wildlife or starry skies, a higher-magnification binocular with a more narrow field of view may be preferable.
If you get stuck along the way, Orion is here to help you with any questions. Just send us an email at sales@telescope.com, contact us via live chat, or give us a call Toll-Free at 800-447-1001 and we'll help you find the right binoculars!
Don't forget the most important factor of all?to enjoy your new binoculars and have FUN!
{ width: 160, height: 160, defaultImage: '', layers: 'Artimg-Birdwatching' }

 Would you like to take part in the fastest growing recreational activity in the United States? Just pick up a pair of binoculars and point them at the nearest ball of feathers.
Yes, bird watching (birding) flies highest among the flock of fastest growing recreational activities in the US.
"Why bird watching?", you may ask.
Here are a few of its allures:
- a great activity in your backyard during a "staycation";
- beautiful scenery;
- tranquility;
- a chance to get away by yourself or a reason to get together with a few friends;
- a little exercise;
- a chance to visit new places;
- a motivating focus for your outings;
- a chance to learn a lot or a little;
- a large established and (usually) friendly community of birders; and finally,
- the great aesthetic pleasures given by the birds themselves.
Whether you become a birding fanatic or just dabble around the edges of the avian community, once you take that first bird hike, you will be smitten.
 One of the best things about becoming a birder is how easy it is. Many people start in their own backyards. Bird-friendly landscaping and a bird feeder or two often result in attracting several different kinds or species of birds. Every outdoor environment hosts at least a few birds. The local, state, or national parks host dozens or hundreds of different species.
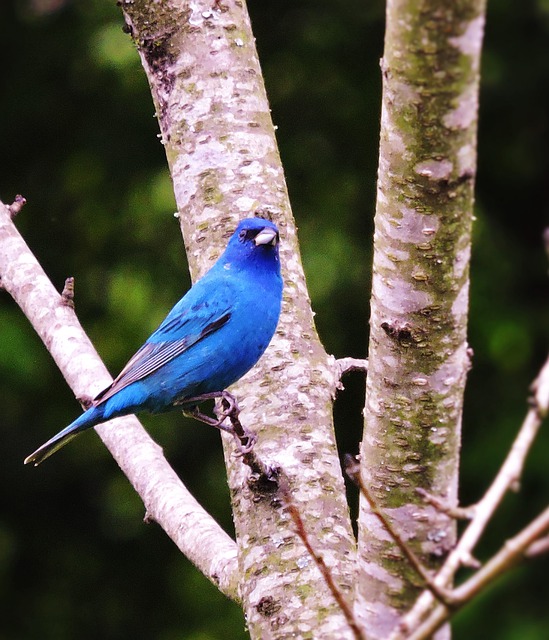
You will need a pair of binoculars. Binoculars enable a person to see the brilliant red cheek stripe of the red-shafted flicker, or the crest of feathers at the top of the head of the oak titmouse. Binoculars bring forth the exquisite streaked and scalloped patterning of the California quail, which can otherwise appear as a comical brown tufted orb skittering between the bushes.
Choosing Binoculars
Purchasing binoculars might seem a bit daunting — there are so many to choose from.
Don't despair!
First, take an honest look at your budget. The price range of binoculars is from twenty-five dollars to several thousand dollars. Most of that price difference comes from the quality of the optics (glass) &nmdash; its light-gathering ability and precision at transmitting the light. It is a good idea to have the optics multi-coated. The coatings reduce glare on the subject and eliminate the "halo effect" that can occur without the coatings. A serviceable pair of binoculars can be had for between $40 and $300.
If you need help choosing, try our Binocular Product Wizard!

Or speak with one of our product specialists via phone at 800-447-1001, send us an email at sales@telescope.com, or contact us via chat.
Binoculars are labeled with two numbers. For example, they may read 8x40 or 10x50. The first number refers to the magnifying power (the object viewed looks 8 or 10 times closer than it actually is). The second number refers to the front objective lens size in millimeters. A ratio of 1 to 5 between the two numbers (the magnification and the lens diameter) allows in the optimal amount of light for a given magnification. The 8x40 binocular is probably the most popular variety, but 7x35 or 10x50 also work for birders.
 When choosing binoculars, make sure that they are comfortable for you. You will spend much time with your arms up, holding the binocular to your face. The weight of your binocular is an important consideration. If the binocular is too heavy, not only will your shoulders get sore, but also your trembling will destabilize the image you see. Also, check the minimum focusing distance of the binocular. Some models won't focus on an object 10 to 15 feet away, which may be desirable as some birds allow close approach.
Identifying Birds
A field guide to the birds of your area is indispensable in sorting out the different bird species. There are many field guides to choose from. Some guides just list the more common species of the area or specialize in certain bird groups, e.g., waterbirds or raptors. Guides with fewer species of birds have the advantage of not overwhelming the novice with large numbers of birds, but there is nothing more frustrating than getting a good look at a beautiful bird and not being able to find it in the guide book.
A comprehensive field guide such as National Geographic Society's Field Guide to the Birds of North America (4th ed.) or The Sibley Guide to Birds (North America) may seem a bit complex at first but all the birds are there. This, of course, doesn't mean that you will be able to identify every bird that you see.
There is a steep learning curve when identifying birds. Don't let this frustrate you. Even the expert birders can't identify every bird they see.
It is a good idea to start by becoming familiar with the most common birds in your area and slowly expanding your range of bird familiarity. You will slowly learn to identify more and more birds. Begin with noting the overall size and shape of the bird, its beak shape, plumage coloration (it is important to learn the parts of the bird and locate these colors). You will also start to notice where you find them (habitat), the seasons or months that they are present, their behaviors, their sounds, and much more. These observations in turn may spark a curiosity about where they come from or are going to (migratory patterns) or if they nest in your area. Now your field guide becomes a resource for more than just identification.
 The reason that most of us watch birds is because we get great pleasure from them. Nothing can drain the pleasure from a bird hike more than being lost, cold, hungry or injured. Know where you are going and plan your hike. Trail maps are very helpful. Always bring enough water and a few snacks to tide you over in case the birding is so good that you decide to stay on the trail a little longer than you expected. Always expect the unexpected when it comes to weather. Dress in layers and wear comfortable, supportive shoes. It is definitely true that a few minutes of planning and forethought can go a long way in assuring a safe and enjoyable birding experience.
A benefit of bird watching is that it tends to slow people down. Although many birds are in plain sight, there are many more that are tucked away in bushes and trees. The pace that you might set for a "normal" early morning or late afternoon (the best times to see many birds) hike would result in a dismally low bird count. A birder is quiet, slows his/her pace and focuses his/her senses. The first hint of a bird's presence may be a sound or a slight movement at the edge of vision.
And birds aren't the whole of a birder's experience. Heightened senses often result in our becoming aware of the natural beauty we often overlook. It would not be unusual for a birder to spend an entire morning covering a mile-long stretch of a rich habitat.
With experience you will automatically lift your binoculars into exactly the right place to spot that chickadee in the pine tree across the trail. And there will be fewer and fewer times that you will need to pull out that guidebook to make an identification of a bird. But more importantly, you will be eagerly planning your next bird adventure even before returning home from your present one. You are hooked.
Happy birding!
{ width: 160, height: 160, defaultImage: '', layers: 'Artimg-AstroBinocs' }

Budding astronomers today have a greater variety of telescopes to choose from than ever before. Some are complex, computerized marvels, while others offer a more basic approach to stargazing. But even with all of these to entice us, none is more versatile than a pair of binoculars. Indeed, when it comes to touring the universe, two eyes are better than one!
Advantages of Two-Eyed Touring
Observing the night sky with binoculars has many advantages. One of the greatest is how friendly and comfortable binoculars feel. Perhaps this is because they can be used either while standing up or sitting down. What could be more enjoyable than casually scanning the heavens with a binocular while lying back in your favorite chaise lounge?
Another great advantage is their portability. Astronomy on the go! While a telescope can be bulky and takes time to set up, binoculars are compact, lightweight, and ready instantly, either for a casual glance at the night sky or for an in-depth study of the universe.
Binoculars show the "real" sky. Astronomical telescopes flip the sky around one way or another, either upside-down, left-to-right, or both. Thanks to both their upright image and wide fields of view, binoculars keep everything as it was meant to be, making it easier to find your way around when comparing the view you see to a star chart.
The wide fields of binoculars also let us enjoy some sky objects that are simply too large to fit into a telescope’s limited field of view. You are probably familiar with some already, such as the Pleiades and the Coma Berenices Star Cluster, but that’s just the start! Dozens of sky sights are better appreciated through binoculars than through telescopes.
Research: Binocular Vision is Better
Beyond aesthetics, research shows that an observer’s visual acuity is greatly improved by using two eyes instead of only one. Binocular vision enhances our sensitivity to subtle differences in contrast, resolution, and color. Some people experience up to a 25 to 40 percent increase in their ability to detect faint objects through a binocular than through a conventional telescope!
That’s a dramatic improvement, but why? Light entering the eye is focused by the lens onto the retina, which converts the image into electrical pulses and sends them onto the brain. The brain then interprets the pulses into the image that we sense. By relying on only one set of pulses (i.e., using one eye), any inconsistencies in the signals will interfere with the final image. With two sets of signals to interpret, however, the brain will merge the pair of electrical messages. The result is the ability to see fainter, lower-contrast objects.
Yes, there are many benefits to touring the universe through binoculars, but perhaps the greatest is that the binocular universe seems much more personal than that viewed through a telescope. By extending our natural, two-eyed view, the cosmos seems drawn to us, and us to it. It is a feeling, a sense of oneness and belonging, that cannot be duplicated any other way.
Choosing Binoculars for Astronomy
The nighttime performance of binoculars depends on the aperture (diameter) of the front (objective) lenses and the magnification provided by the eyepieces. The wider the objective lenses, the more light the binocular will collect and transmit to your eyes. For astronomy, objective lenses of 50mm diameter or larger are recommended. Indeed, 7x50 binoculars (7x power and 50mm objective lenses) are ideal stargazing glasses because they offer plenty of light gathering, good power, bright images, and a wide field of view (which makes it easier to find things). A 10x50 binocular, also a popular size, has the same light-gathering capability but provides higher magnification (10x). The higher magnification may result in a slightly shakier image if you’re holding the binoculars by hand. But for astronomy, it’s advisable to mount the binocular on a tripod anyway, to prevent arm and neck fatigue from prolonged overhead viewing.
Even better for stargazing are "giant" binoculars with 70mm, 80mm, or 100mm objective lenses. Because they admit more light, they can reveal fainter objects. But beware: such binocs are heavy and will require a tripod for support. Big binoculars often come in higher powers such as 14x, 16x, 20x, or even more. With smaller binoculars, high powers like that would yield very dim images, but larger apertures take in enough light to maintain good image brightness as magnification is increased.
Ten Favorite Binocular Targets
1) The Moon — Wow! You’ll see an unbelievable number of craters and rocky mountainous features, all in stunning clarity. Because its surface is so bright, the Moon is best observed during its crescent phases.
2) Jupiter and its Moons — Binoculars will reveal the bright disk of this giant planet, flanked by its four largest Moons, whose positions change nightly.
3) The Milky Way — Scanning along this dense band of stars on a summer night is immensely pleasurable. You’ll see countless clusters, knots, vacant dark patches, and nebulous puffs.
4) Sagittarius Star Clouds — The part of the Milky Way near the constellation Sagittarius ("the Teapot") reveals the richest detail in the night sky. It teems with interesting objects, including the Lagoon, Swan, and Eagle Nebulas, the M24 Star Cloud, and a wealth of open clusters. Use a star chart to help identify them.
5) The Pleiades — This sprawling cluster in Taurus appears as six or seven bright stars to the naked eye, but blooms to several dozen in binoculars.
6) The Andromeda Galaxy — Easy to spot with the unaided eye under a dark summer sky, this majestic "island universe" fills a good portion of the binocular field. You’ll see its bright core and faint disk, perhaps even the dark dust lane around the edge.
7) The Orion Nebula — One of the most beautiful gems in the sky, this expansive winter nebula glows brightly, displaying intricate wisps and tendrils. At its heart is an easily-split double star and a luminous quadruple star, called the Trapezium, which can be resolved with binoculars of 11x or more.
8) The Double Cluster — Residing halfway between the "W" of Cassiopeia and the constellation Perseus, these side-by-side stellar splashes are a true delight to behold in binoculars.
9) Albireo — A bright double star in the head of Cygnus the Swan, notable for its gorgeous color contrast: one star glows yellow, the other blue. Ten-power binoculars will split the pair cleanly.
10) Scutum Star Cloud — This impressive star field contains the compact open cluster called the Wild Duck and some dark, starless patches.
{ width: 160, height: 160, defaultImage: '', layers: 'Artimg-SeeingDark' }

You've probably noticed that when you first go outside from indoors on a starry night, you can see relatively few stars. But then, as your eyes adjust to the darkness, many more stars come into view. This phenomenon is called dark adaptation, and it is crucial for visual astronomy, especially for observation of faint objects, such as galaxies and nebulas.
There are many ways you can improve and maximize your night vision. But first we must understand how night vision works.
Dark Adaptation: A Complex Process
Dark adaptation begins as soon as you enter a dark environment, and it happens in several steps:
- The iris of your eye opens the pupil, the "black hole" in the center, to its maximum width, usually 5 to 7 millimeters. Though this is the most visible aspect of dark adaptation, it is only the first step.
- Next, a pair of chemicals in the eye, rhodopsin and iodopsin, begin to take effect. These two chemicals are always present in the eye, but they break down in the presence of light, so when the eye is exposed to bright light these chemicals have no effect. But when in the dark the concentration of these chemicals begins to grow and the rod cells and cone cells in the retina become more and more light sensitive.
- At first, most of the increase in night vision comes from the cones, which are densely concentrated in the center of the retina. They are highly sensitive to color and are important for distinguishing fine detail. After 7 minutes or so the cones have reached their maximum sensitivity, while the rods, which are insensitive to color but are more sensitive than cones to low levels of light, keep gaining in sensitivity for another 20-30 minutes.
At the end of a half-hour or so the eye has achieved almost all of its dark sensitivity, with a small increase continuing until about 1 hour or so.
The Rods Have It
When your eye is fully dark adapted, most of your night vision comes from the rod cells in the retina. But the rods are not color sensitive, which is why in the dark you can see only shades of gray. The bright colors you see in pictures of nebulas and galaxies are typically only visible in photographs (film being much more sensitive to colors than a dark-adapted eye).
Most people are aware that night vision is not in color, but few realize that you see less fine detail at night as well. This is because the rods are not as tightly packed as the cones, so they cannot distinguish detail nearly as well. To prove this to yourself you need only look at a tree about 50 feet away: In the daytime you can clearly make out the leaves in the tree; at night you can make out the outline of the tree, but not the individual leaves.
Ten Tips For Improving Your Night Vision
So now that you know how night vision works, here's how to maximize your ability to see in the dark.
1) Observe from a dark site. Any amount of light will reduce your dark adaptation, so get away from street lamps, porch lights, car headlights, and urban skyglow.
2) Avoid bright sunlight as much as possible during the day prior to an evening's observing session, especially later in the afternoon. Exposure to intense light can hamper your dark-adaptation for a long time! Wear sunglasses when you have to go outside.
3) 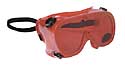 If you are in a light-polluted location consider wearing dark glasses or special red night-vision goggles at all times except when looking through the eyepiece. It may seem odd to wear dark glasses at night (and certainly don't do that when you're driving), but it can be a real help.
4)  When you need some light to see what you're doing, use a dim red flashlight, the dimmer the better. A red light with adjustable brightness is very handy because it allows you to dial down the brightness to the bare minimum required. (Red light works best because it is less efficient than white light at breaking down the iodopsin and rhodopsin that allow your eye to see in the dark.)
5) Your eyes adapt to darkness independent of one another, so if you have to look at something bright do so with one eye, saving the dark adaptation of your other eye.
6) 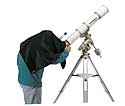 In light-polluted areas, do whatever you can to block ambient light from your eyes. For instance, consider using a dark shroud over your head to block out distracting light when at the eyepiece. Cupping your hand around your eye and the eyepiece helps, too.
7) When you take a break during a night of observing, say to go inside to warm up or grab a bite to eat, put on a pair of red goggles. If you don't need to see what you're doing, cover your eyes with a dark cloth and relax. Even though your eyes may seem fully dark adapted, after a half hour with your eyes completely sealed from light you may find that you gain a bit more acuity.
8) Use averted vision. The rod receptors, which are most sensitive to dim light, are more highly concentrated around the periphery of the retina than in the center. This means that you can see faint objects better by looking slightly off to the side of them rather than straight at them. Try it.
9) Breathe deeply. Avoid the tendency to slow your breathing rate or hold your breath when concentrating intently on a dim object. Reduced oxygen diminishes your night vision. Many experienced astronomers use the trick of "oxygen loading" before observing a particularly faint object, to enhance their visual acuity. Breathe deeply for 15 to 30 seconds just before looking into the eyepiece, and continue doing so as you observe. Don't go overboard, though. If you start feeling dizzy, breathe normally!
10) Avoid drinking alcoholic beverages before or during an observing session. Alcohol is a depressant and will decrease your visual acuity. Wait until after you're finished to crack open that cold one!
In astronomy the name of the game is seeing as much as you can possibly see. For that reason it pays to take a few extra steps to achieve and maintain your maximum dark-adapted night vision, particularly because it is so easy to do.
{ width: 160, height: 160, defaultImage: '', layers: 'Artimg-TwoEyes' }

Very soon after the first telescope was invented, someone got the idea of mounting two telescopes side by side. We are, after all, creatures with two eyes, and tend to see more, and be more comfortable, when using both our eyes. Originally called "field glasses," because of their military applications, they soon became adopted by nature lovers and amateur astronomers. In the late 19th century opticians started adding prisms to the design, resulting in more compact instruments with wider fields of view, and these instruments became known as "binoculars."
Although binoculars do impart a mild three-dimensional view to nearby objects, when used for astronomy any such effect is an optical illusion, though sometimes a powerful one. The main advantage for an amateur astronomer in using binoculars, rather than a small handheld telescope, is that they are relatively easy to hold steady, and the images often seem brighter and more detailed because of the image processing which goes on in our brains when presented with two channels of information. Binoculars are extremely easy to use, and make scanning the night sky a pleasant intuitive activity, without the need to fiddle with finders, mounts, and eyepieces.
In some ways, binoculars "don't get no respect." They're often looked down on as the astronomical telescope's poor relation. Yet they are a fine instrument in their own right, capable of observing objects which are simply too big to see properly in a telescope. One of the few astronomers to take binoculars seriously is Phil Harrington, whose book, Touring the Universe through Binoculars (Wiley), is the bible of binocular astronomy. They are also, to serious deep sky observers, an essential accessory in discovering starhopping paths through the stars. Many households already have a pair knocking around, or a reasonably good pair can be found at most sporting goods stores, so they are an inexpensive way to get started in exploring the sky.
Numbers and more numbers
Binoculars have a numbers game all their own. Different types are described by a pair of numbers with an "x" in between: 7x35, 10x50, 20x80, etc. The first number is the magnification: 7 times, 10 times, 20 times. The second number is the aperture of each half of the binocular in millimeters: 35 mm, 50 mm, 80 mm. They usually will be labeled with a field of view, either in degrees or how many feet they will show at 1000 yards (one of the strangest units I know of!) Another important number is their "eye relief," which measures how far behind the eyepieces you must put your eyes to catch all the light. If you need to wear glasses while using binoculars, choose a pair with at least 15 mm eye relief. Finally, there is their "exit pupil," the diameter of the cylinder of light coming out the back of the binoculars. This is calculated by dividing the aperture by the magnification; it's a very important number, and I'll say more about it later.
Other factors
I mentioned that all modern binoculars have prisms in their optical design. These are of two different kinds, but both serve the same purpose, to turn right side up the telescope's typical inverted image. Porro prisms give many binoculars their characteristic "Z" shape; they are relatively simple to make and pass light well. Roof prisms result in "straight through" optical tubes: more compact, but also more expensive to make and, until recently, less efficient at passing light. The glass from which the prisms are made also has an effect, better binoculars using BAK-4 glass. A quick way to check a binocular in a store is to hold it about 15 to 20 inches away from your eyes and look at the exit pupils (the circles of light leaving the eyepieces). If these are clean circles, the binoculars have good prisms; if they're cut off into a diamond shape, the prisms are too small or made from the wrong glass.
Most optical instruments nowadays have their glass to air surfaces coated to reduce reflection and increase light throughput. But binoculars differ in how many surfaces are coated and with what kind of coating. "Coated" by itself means little; "fully multicoated" means that all glass to air surfaces are coated with multiple layers of coating.
Because binoculars have two telescopes, there must be a way of focusing them independently, because most peoples' eyes differ a bit from left to right. The best binoculars allow both halves to focus together, while one eye has an independent adjustment. Avoid at all costs binoculars labeled "fixed focus" or "universal focus" as these will be poor performers in general, and totally useless for astronomy.
Binoculars on your computer
It's easy to select objects for binocular viewing. Users of Starry Night� Pro 6 and above can easily add field-of-view indicators to their Starry Night� display.
- Open the FOV tab.
- Expand the Binoculars layer.
- Initially, this list will be blank. To add equipment and their corresponding field-of-view indicators, choose Edit.
- Press the "From List..." button in the lower right corner of the dialog box. Starry Night� version 6 now has a database of over 300 Orion, Meade, Celestron and Vixen scopes, binoculars, SBIG, Apogee, FLI and Starlight Express CCD chips and more from which to choose.
- Simply select your binoculars from the list to add to your equipment list.
- If your equipment is not listed, press the "New" button in the lower left corner. A dialog box will open, which allows you to name your piece of equipment, and enter its relevant information.
To turn the outline of the indicator on/off, simply check/uncheck the box to the left of the indicator box where it appears on your equipment list.
Starry Night� will simulate what you might be seeing through various binoculars and will help you determine which binoculars might be best for the objects you're hunting.
Binoculars for astronomy
 As with other aspects of astronomical equipment, with binoculars aperture is a primary consideration. While any binocular will be a tremendous advance over the unaided eye, a 50mm aperture is probably the minimum you should consider in a binocular specifically for astronomy for an adult. For a child, a 7x35 is more manageable, and the Starry Night� Binocular Stargazing Kit which includes such a binocular along with some really good learning tools would be great for any kid.
If you look through Orion's web site, you'll see 50mm binoculars at a variety of prices and two main magnifications: 7x50 and 10x50. Which magnification? It depends on your age. As we grow older, our eyes lose their ability to open wide. Someone under 30 years old usually has eyes which can accept an exit pupil 7 mm in diameter, such as a 7x50 binocular provides. Someone over 50 years old has eyes which won't open much above 5 mm, so a 5 mm exit pupil, such as a 10x50 produces, will be more suitable. Another factor comes in as well: with a bit more magnification, the sky background will be darkened more and the magnification boost will make small objects easier to see. For that reason, I generally recommend 10x50 as the best size for general astronomy use.
So, what about the different prices? With binoculars, you pretty much get what you pay for. The more expensive models are generally better made from more expensive materials, and will generally last a lot longer. A good compromise on an entry level binocular is the Orion Scenix.
A few years ago, I decided to treat myself to a somewhat better binocular, and bought a Celestron Pro 10x50, which has become my constant observing companion. Celestron discontinued that model, but its twin lives on as the Orion UltraView.
Here there be giants!
While 10x50 binoculars are probably the most useful everyday tools for most amateur astronomers, some of us get hooked on the two-eyed view, and long for something bigger and better. Yes, aperture fever lurks in the world of binoculars too! When you move to giant binoculars, you lose a bit of the easy hand-held use of small binoculars, though the performance of any binocular can be improved by mounting it on a tripod. But what views you gain!
My first giant binocular was an Orion Little Giant II 15x70. Despite its size, this binocular is remarkably light in weight and very well balanced, so that I found I could use it while sitting down and braced without a tripod, almost as convenient to use as my 10x50s. I particularly like taking this binocular with me when traveling to southern destinations.
Recently I had the opportunity to try out the giant of giants: an Orion GiantView 25x100 Explorer. Although it says "Tripod optional" in the photo, don't believe it! These are two 4-inch refractors linked together on a solid longitudinal axis, the whole unit weighing in at over ten pounds. They come packed in a solid carrying case, and are absolutely gorgeous to look at. But it's the views through them which are really astounding.
The unit I tested had been kicking around the Starry Night� office for a while, and Pedro hesitatingly said they might be out of collimation. Collimation? I've collimated my Newtonian reflectors many times, but had always believed that binocular collimation was something which required special tools. However, a little research on the internet indicated that giant binoculars like this are very sensitive to misalignment, but quite easily put right once you know the secret. The secret is to find out where the adjustment screws are located.
My first look through the binocular confirmed that things were out of whack: the two images were out of alignment beyond anything my eyes could accommodate. My internet guide told me that the adjustment screws were hidden beneath the rubber grip on the prism housings, just in front of the name plates. Prying the rubber up with a screwdriver revealed the screw heads, and some scratches that showed that I wasn't the first person to venture into this region. It seems that, in the land of the giants, collimation is pretty routine. Collimation is done in daylight with the binoculars focused on a distant object, moving your eyes back from the eyepieces and then forward again, tweaking the screws gently, until the two images merge cleanly and comfortably. Not all that hard really.
Once collimated, the views were outstanding. I concentrated on really large objects under my dark country skies, and was especially impressed with the Andromeda Galaxy and its two companions, the Pleiades, and, especially, the Double Cluster in Perseus. The latter gave the illusion of three-dimensionality which makes these binoculars so addictive. The heavy axis joining the two halves has a sliding tripod adapter on it, making balancing these giants on a tripod very easy. The only difficulty is that at 25 power, it's sometimes hard to point them accurately. I've heard of people mounting unit-power finders on them to get them pointing in the right direction!
February 2007


Why Buy From Orion
- 30 Day Money Back Guarantee
- Safe & Secure Shopping
- Next Day Shipping
- Easy Returns
- Sale Price Guarantee
- Free Technical Support

- 800-447-1001
- Telescope.com
- © 2002- Orion Telescopes & Binoculars All rights reserved
- DMCA/Copyright
- Terms and Conditions
- Privacy & Security
![]()


About Orion Telescopes & Binoculars
Since 1975 Orion Telescopes & Binoculars has been offering telescopes for sale direct to customers. Now an employee-owned company, we pride ourselves on an unswerving commitment to best quality products, value and unmatched customer care. Our 100% satisfaction guarantee says it all.
Orion offers telescopes for every level: Beginner, Intermediate, Advanced, and Expert. From our entry level beginner telescopes for amateur astronomers to our Dobsonian telescopes to our most advanced Cassegrain telescopes and accessories, you can find the best telescope for you. Because we sell direct, we can offer you tremendous value at a great price. Not sure how to choose a telescope? Orion's Telescope Buyer's Guide is a great place to start.
Orion binoculars are known for quality optics at a great price. We offer binoculars for every viewing interest, including astronomical binoculars, compact binoculars, waterproof binoculars, birding binoculars, and sport and hunting binoculars.
Orion's telescope and astrophotography accessories will enhance your telescope enjoyment without breaking the bank. Expand your viewing experience with accessories ranging from moon filters to power-boosting Barlow lenses to advanced computerized telescope mounts. Capture breathtaking photos with our affordable astrophotography cameras. And when you're stargazing, Orion's telescope cases and covers, observing gear, red LED flashlights, astronomy books and star charts will make your observing sessions more convenient, comfortable and meaningful.
At Orion, we are committed to sharing our knowledge and passion for astronomy and astrophotography with the amateur astronomy community. Visit the Orion Community Center for in-depth information on telescopes, binoculars, and astrophotography. You can find astrophotography "how to" tips and share your best astronomy pictures here. Submit astronomy articles, events, & reviews, and even become a featured Orion customer!
sales, new products, and astronomy.