


{ width: 160, height: 160, defaultImage: '', layers: 'Artimg-BBC_Magnetic_Universe' }


![]() Orion is proud to partner with BBC Sky at Night Magazine, the UK's biggest selling astronomy periodical, to bring you this article as part of an ongoing series to provide valuable content to our customers. Check back each month for exciting articles from renowned amateur astronomers, practical observing tutorials, and much more!
Orion is proud to partner with BBC Sky at Night Magazine, the UK's biggest selling astronomy periodical, to bring you this article as part of an ongoing series to provide valuable content to our customers. Check back each month for exciting articles from renowned amateur astronomers, practical observing tutorials, and much more!
The Magnetic Universe
Lucie Green takes a closer look at how magnetic fields have shaped the cosmos.
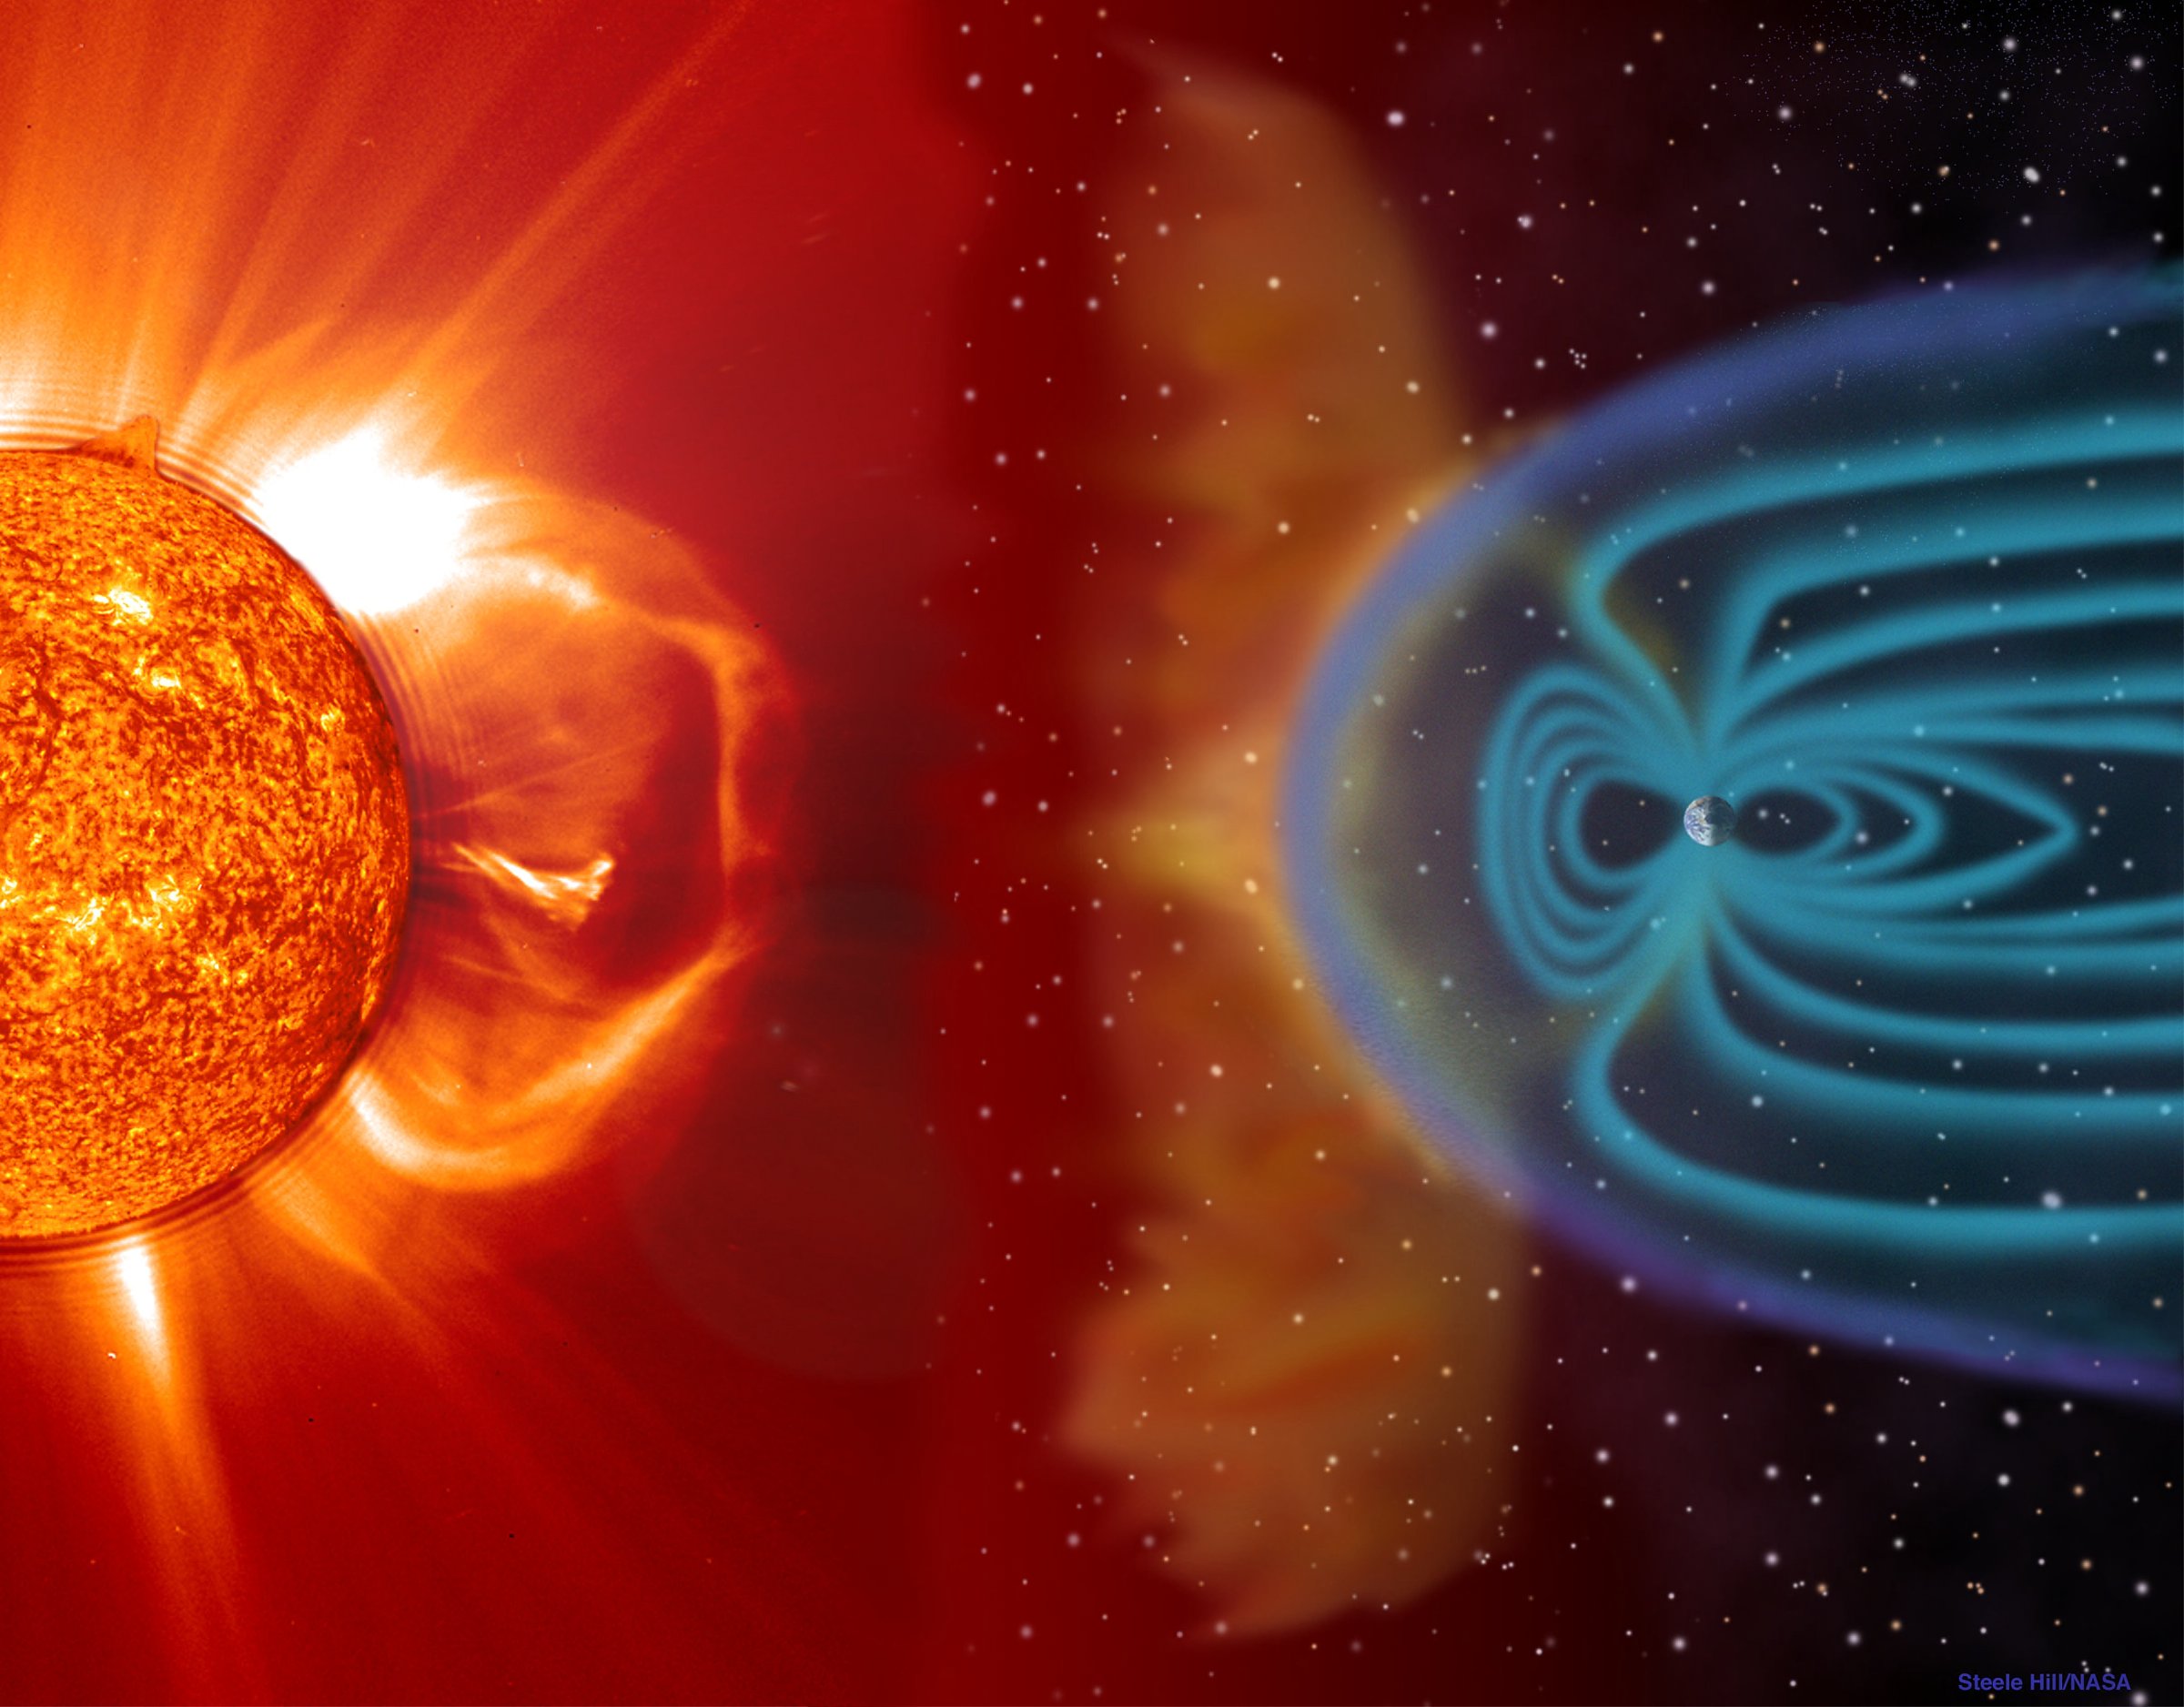
The Sun's magnetic field and the release of plasma directly affect Earth and the rest of the solar system. Solar wind shapes the Earth's magnetosphere and magnetic storms are illustrated here as approaching Earth. The white lines represent the solar wind; the purple line is the bow shock line; and the blue lines surrounding the Earth represent its protective magnetosphere. (Image and caption courtesy of NASA Image Gallery)
You can't see it, but it's there. All the time, and all around you. Protecting you from harmful space radiation and preventing our atmosphere from being stripped away by solar winds — it's the Earth's magnetic field.
For most of us, it hardly ever catches our attention. In observational astronomy, the Earth's magnetic poles are far less important than the geographic poles that we rely on to align our equatorially mounted telescopes. Consider this, though: the Earth's magnetic field probably made life on this planet possible, while more distant, cosmic magnetic fields are the reason that pulsars act like radio lighthouses and vast clouds of electrically conducting gas get sculpted into strange and unusual shapes.
As magnetic fields go, Earth's is the one we're most familiar with and its origin lies in the electric currents that flow in the molten iron that makes up our planet's outer core.
Planetary magnetism
Let's take a step back and look at Earth from the surface of the Moon. From here, we can see the land, oceans and atmosphere. What we can't see, however, is how the Earth's magnetic field envelops it all and extends out into space. For most of the time the Moon is inside the Earth's magnetic field. It only pops out for a few days around the time of new Moon. When it does, the Moon moves into the solar wind — the Sun's outer atmosphere that expands into space at a speed of a million miles an hour.
This wind can't penetrate Earth's magnetic field and instead slams straight into it. Although this interaction is invisible to the human eye, it does produce something spectacular: the aurora. As the solar wind pushes against Earth's magnetic field, it adds energy to it that accelerates charged particles down into our atmosphere. When the particles interact with atmospheric gas, they pass their energy on and cause the gas to glow.
The solar wind is blocked from reaching our atmosphere because it too contains a magnetic field. We've learned that any magnetic field that threads through an electrically charged gas (a plasma) is tied to that gas; they can't be easily separated, or decoupled, as the process is known. So when the gusty flow of magnetized plasma reaches the Earth's magnetic field, it flows around it, causing it to move and ripple like a windsock in a breeze. This property prevents the solar wind from reaching our atmosphere and stripping it away, as happened on Mars. It also provides us with protection from electrically charged cosmic rays.
This life-preserving property that planetary magnetic fields have means that it's important to consider them when it comes to studying exoplanets. So far, we're unable to directly observe an exoplanet's magnetic field. But should a technique for detecting them be developed in the future, the presence of a magnetic field around an exoplanet is likely to influence which ones become targets for further study.
The discovery of the Sun's magnetic field came in 1908 and was made by American astronomer George Ellery Hale. It's impossible to look for and study cosmic magnetic fields without the ability to detect them from a distance using electromagnetic radiation. In 1896, Dutch physicist Pieter Zeeman was carrying out experiments when he found that a strong magnetic field could affect the light given off by a "luminous vapor". The spectral lines emitted by the vapor were broadened or, in extreme cases, split into several components. In a paper published in 1897, Zeeman suggested that his discovery might be used to detect cosmic magnetic fields.
Indeed, it was this technique that was used by Hale to detect the magnetic field of sunspots. The Zeeman effect also polarizes the light in particular ways that can be used to understand the strength and direction of the distant magnetic field, allowing astronomers to probe distant magnetism by studying electromagnetic radiation.
In fact, the Sun allows us to investigate cosmic magnetism up close. Observations of the Sun provide a fantastic level of detail that really shows us how dynamic stellar magnetic fields can be. The Sun has an overall magnetic field that connects the north and south magnetic poles, which are close to the heliographic north and south poles, as they are on Earth.
Small-scale magnetism
But closer inspection of the solar atmosphere reveals arches of magnetic field connecting pairs of sunspots and twisted magnetic field structures known as flux ropes. These ropes are revealed because glowing, electrically charged gas traces them out, similar to the way iron filings sprinkled around a bar magnet align themselves to the field lines. If you watch the Sun over time you'll see that these magnetic structures are always changing and often erupt into the Solar System. The Sun's spatially resolved dynamic activity, powered by magnetism, gives us a glimpse of what other stars are also up to. And it's not just main sequence stars that have important magnetic fields.
Pulsars are a sub-set of neutron stars. Formed from the collapsed cores of high-mass stars that have undergone a supernova explosion, they spin extremely rapidly. As they spin, they flash out pulses of radio waves, as if they were cosmic lighthouses. Some of them flash many times a second. When Jocelyn Bell-Burnell discovered pulsars in 1967 they were viewed as curious objects and jokingly labelled LGM for Little Green Men. But the radio flashes can be understood if you combine a very rapidly spinning star with a strong magnetic field.
As a dying star collapses, its magnetic field is also drawn in with the material of the star itself, intensifying the field strength to a trillion times that of the Earth's. The presence of the field causes charged particles to gyrate around the magnetic field lines and when this happens, radio waves can be created. The radio signal will be concentrated at the north and south magnetic poles of the neutron star. The final ingredient in the making of a pulsar is to have an offset between the star's axis of rotation and the axis connecting the magnetic poles. This means that as the neutron star spins, the radio beam will sweep across space and our radio telescopes can detect it. In fact, neutron stars are record holders when it comes to magnetism: another sub-set of these stars harbor the strongest magnetic fields in the Universe, a thousand times stronger than that of the pulsars. These objects are rather unsurprisingly known as magnetars.
Galactic magnetism
The magnetic field of Earth and the magnetic field of the Sun, thanks to the solar wind, are not the only fields we find ourselves immersed in. Our Galaxy, the Milky Way, has a magnetic field too, albeit with a strength tens of thousands of times less than that of the Earth's. What the galactic field does have in common with the Earth, though, is that rotation is at the heart of its existence.
Magnetic fields in astrophysical objects are created by dynamos, a mechanism in which the rotation of an electrically conductive liquid (such as the molten iron in the core of a planet) is converted into magnetic energy. In this way, how fast an astronomical object spins is an important aspect of magnetic fields and dynamos.
In this context we can understand why Earth has a relatively strong field whereas Mars, once thought to be more Earth-like than it is today, doesn't. Inside Earth, the rotating molten shell means its dynamo is still acting. Mars, on the other hand, had a dynamo, but it ceased acting when the interior of this smaller planet cooled and solidified, leaving only a remnant of its magnetic field locked up in its rocks.
When it comes to timescales, stars and planets can take anything from hours to weeks to complete a single rotation. But these bodies have been around for so long that plenty of time has passed during their lifetimes to sustain and even evolve their magnetic fields. For example, the Sun rotates once every 27 days and has been around for 4.5 billion years. Assuming that the rotation rate has been constant during all of this time, the Sun could have spun over 60 billion times. This isn't the case when it comes to galaxies though. Take the Milky Way: our Galaxy rotates once every few hundred million years, which means there has only been time for it to make a few hundred rotations. So, while a dynamo is important for our Galaxy, there are other additional processes that are making an impact and which still need to be understood.
In 2017, a team led by scientists from the Max Planck Institute for Radio Astronomy in Germany published work showing that galaxy observations can be used to investigate magnetic fields when the Universe was much younger too. Their study of a galaxy that is nearly five billion lightyears away allows us to look back into the early Universe to study the history and evolution of magnetic fields, providing insight into a question that astronomers have long wanted to answer: how long have magnetic fields existed for?
Magnetic fields are magnificent and common across the cosmos. From planets and stars, to galaxies and beyond. Along with gravity, magnetism is responsible for shaping and controlling what we observe. So, next time you look up — no matter what you're looking at — remember the invisible force that is helping shape our Universe.
What are magnetic fields?
Magnetism is a force that is intimately related to electricity. Whenever an electric current flows there will be an associated magnetic field in the surrounding space, or more generally, the movement of any charged particle will produce a magnetic field. Try turning your kettle on and off and see if your smartphone's compass app can detect the magnetic field generated as the current runs through the cable.
These fields have a direction, which is why Earth has a north and a south pole. When two magnetic fields come close to each other, they will try to align, potentially causing the physical objects causing them to move — a compass needle has a magnetic field, and so will always try to line up with Earth's field and point north.
Similarly, the motion of a charged particle will change as it passes through a magnetized area, due to the interaction of the electric and magnetic fields. How the direction changes depends on the charge and mass of the particle, the strength and direction of magnetic field and how fast the particle is travelling.
ABOUT THE WRITER
Lucie is a Professor of Physics and a Royal Society University Research Fellow based at the Mullard Space Science Lab.
Copyright © Immediate Media. All rights reserved. No part of this article may be reproduced or transmitted in any form or by any means, electronic or mechanical without permission from the publisher.
{ width: 160, height: 160, defaultImage: '', layers: 'Artimg-BBC_Heart_of_Pluto' }

![]() Orion is proud to partner with BBC Sky at Night Magazine, the UK's biggest selling astronomy periodical, to bring you this article as part of an ongoing series to provide valuable content to our customers. Check back each month for exciting articles from renowned amateur astronomers, practical observing tutorials, and much more!
Orion is proud to partner with BBC Sky at Night Magazine, the UK's biggest selling astronomy periodical, to bring you this article as part of an ongoing series to provide valuable content to our customers. Check back each month for exciting articles from renowned amateur astronomers, practical observing tutorials, and much more!
Getting to the Heart of Pluto
Two years since the New Horizons flyby, Paul Abel reveals how its data is driving new discoveries about the dwarf planet.
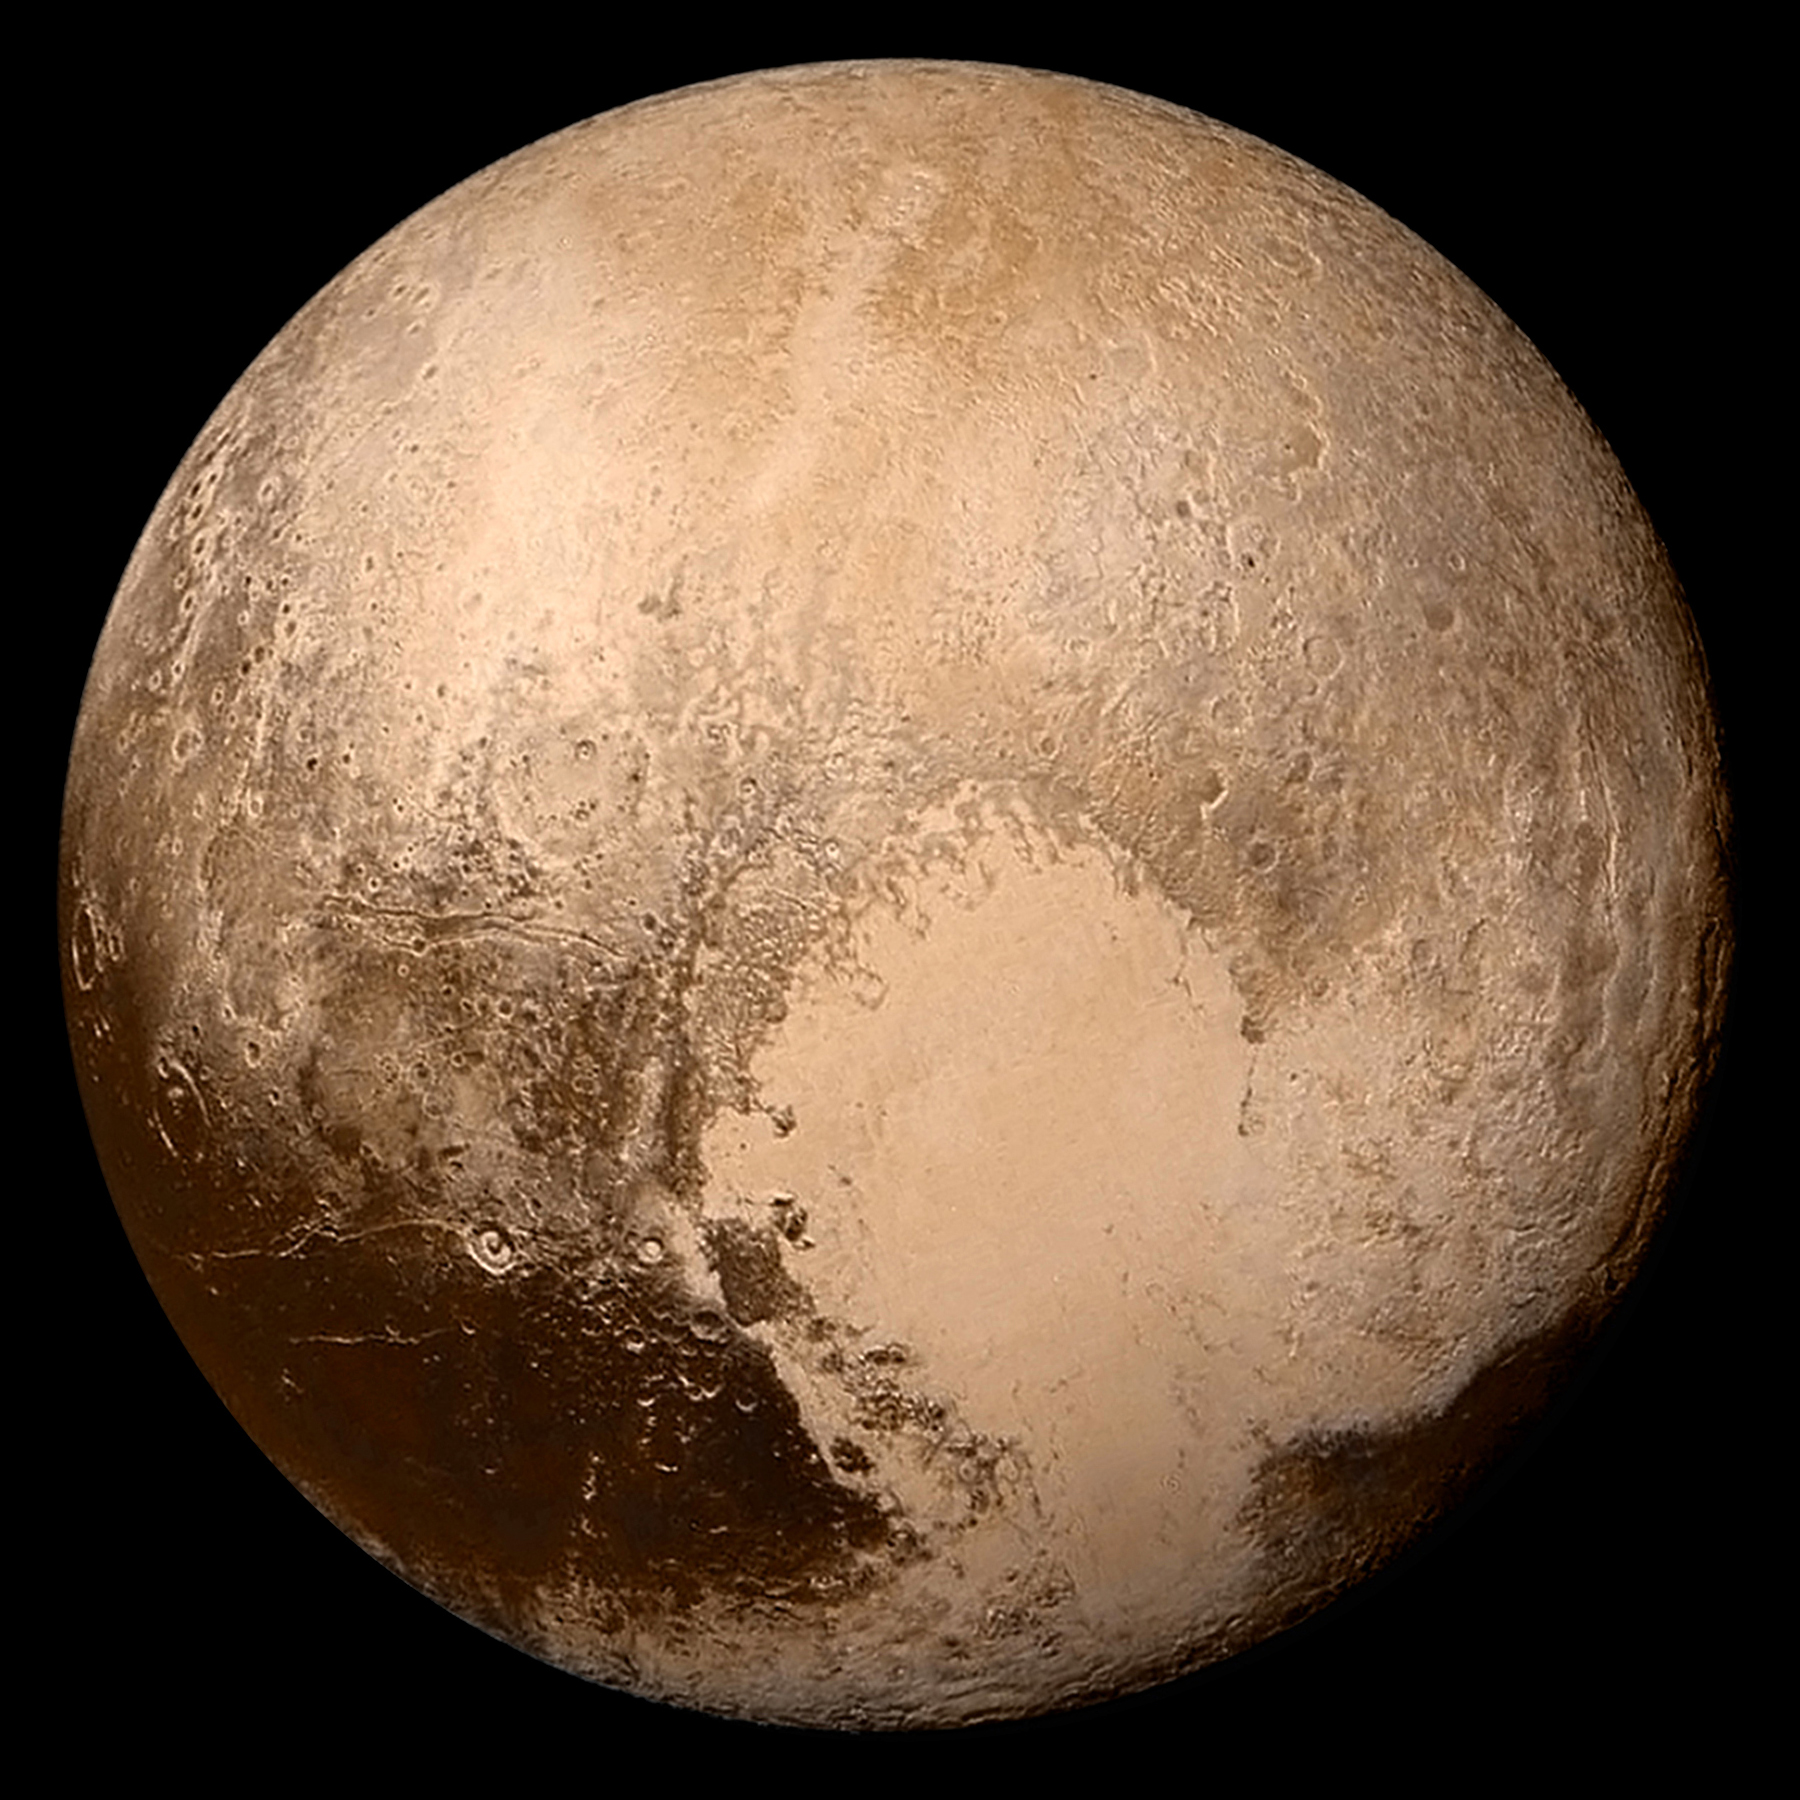
Four images from New Horizons' Long Range Reconnaissance Imager (LORRI) were combined with color data from the Ralph instrument to create this global view of Pluto. (The lower right edge of Pluto in this view currently lacks high-resolution color coverage.) The images, taken when the spacecraft was 280,000 miles (450,000 kilometers) away, show features as small as 1.4 miles (2.2 kilometers), twice the resolution of the single-image view taken on July 13 [2015]. By NASA / Johns Hopkins University Applied Physics Laboratory / Southwest Research Institute — Public Domain
On 14 July, it will be two years since New Horizons made its historic closest approach of dwarf planet Pluto. Nine years after its launch in 2006, the spacecraft became the first robotic emissary from Earth to survey this frozen enigma, which has spent much of humanity's existence lost in the frozen darkness of the outer Solar System.
Back in the summer of 2015 we looked at the history of Pluto and made some predictions about what New Horizons might reveal. Now we return to those predictions and look at the exciting discoveries that have been made about this fascinating sentry of the distant Kuiper Belt.
A patchwork surface
In the decades following its discovery Pluto remained little more than a speck of light, even when glimpsed by the world's largest telescopes. In 2002-03, the Hubble Space Telescope produced the first map of its surface, which provided tantalizing hints of a patchwork body. While there was speculation about the existence of cryovolcanism and stunning surface features in the 2015 feature, and some might have thought the author was — as Patrick might have said — letting his imagination run riot, after the flyby it seemed that more imagination was needed.
Dominating the surface of Pluto is the bright, heart-shaped feature known as the Tombaugh Regio, where New Horizons has discovered evidence of some spectacular geological activity. The western lobe is formed by the Sputnik Planitia, a vast, smooth deposit of bright carbon-monoxide ice. It is some 1,050x800km in size, making it the largest glacier in the Solar System. To the south we have the mountains Hillary and Norgay Montes. Norgay Montes is about 3.4km high and largely made of water-ice. There is evidence of ice flows here, and hints of structures that resemble frozen lakes. The views from the top of these mountains are likely to be quite spectacular.
High-resolution images of the Sputnik Planitia show it to be formed of polygon convection cells. It is thought that nitrogen and carbon-monoxide ice is warmed by heat welling up from inside the cells, and that this ice then flows down to lower levels. The small pits located in the ice could be the result of the sublimation of nitrogen-ice. There are no surface craters here, and this has led scientists to conclude that this part of Pluto's surface must be younger than 10 million years old. Clearly, Pluto is still geologically active.
Other areas of interest include ancient dark terrain like the whale-shaped Cthulhu Regio: its dark red coloration is due to the presence of complex hydrocarbons called tholins. The cratering of this part of the surface would suggest it to be a few billion years old, certainly much older than the Sputnik Planitia.
The New Horizons data provides two possible candidates for cryovolcanism: Wright Mons and Piccard Mons. These two features are the tallest objects on the surface of Pluto, reaching a height of 4km. A series of dark irregular patches on the equator form the Brass Knuckles region. The dark patches are separated by bright ice-covered mountains, which themselves contain deep canyons and valleys. It seems that there is no dull place on the surface of Pluto!
A lively atmosphere
It had long been thought that Pluto's atmosphere would be interesting. Due to its rather elliptical orbit, the general consensus was that the atmosphere would freeze to the surface as Pluto moved farther from the Sun. However, scientists now believe that Pluto may have an atmosphere for most, if not all, of its long year. Pluto has a substantial axial tilt of about 120°, so as it orbits the Sun one pole is kept in shadow while the other remains in direct sunlight. New Horizons has revealed that methane and nitrogen are distributed all over the surface. This means that there is probably enough ice to sublimate and keep the atmosphere from completely condensing on the surface.
This does not mean that the atmosphere is static: indeed it is far more dynamic than we thought. Over Pluto's long history, changes in the axial tilt mean there may have been times when the atmosphere was much more dense than it is now. It has been suggested that the atmosphere may even become dense enough to allow the existence of lakes of liquid nitrogen on Pluto.
After New Horizons made its closest approach, its Long Range Reconnaissance Imager began to observe the dwarf planet and it made a surprising discovery: surrounding Pluto was a notable atmospheric haze. Unexpectedly, this haze seemed to be composed of several different layers. It is thought to be due to the interaction of Pluto's atmosphere with sunlight. Although the Sun is weak from this far away, it is still sufficient to break up methane in the upper atmosphere, allowing more complex hydrocarbons to form. These slowly fall to colder, lower altitudes, forming the haze. The Sun's ultraviolet rays convert them into compounds called tholins, the compound responsible for the dark coloration on Pluto's surface. This is a general picture however; the exact details have yet to be determined. No doubt there is a complex interplay between the atmosphere and the surface, creating the dramatic topography we have seen. If anything, New Horizons has revealed the atmosphere of Pluto to be just as fascinating and complex as the planet it enshrouds.
Fellow travelers
Pluto does not wander alone in space: it is accompanied by five satellites, Charon, Nix, Kerberos, Hydra and Styx. Charon is around one-eighth the mass of Pluto, and as a result the pair are tidally locked, which means they always present the same face to each other as they move around the Sun. Unlike our own Moon, Charon does not rise and set over the surface of Pluto, it remains fixed in the black sky.
New Horizons surveyed Charon and the results once more challenged the expectations of planetary scientists. Instead of a dead, cratered world, the spacecraft found a surface every bit as exciting as Pluto's. Charon has a dark red northern polar cap, and this is probably material that has escaped from Pluto's atmosphere. Running along its equator is a vast canyon system nearly 1,600km in length. What could have caused this enormous fracture?
Names from science fiction are given to features here and the aptly named Vulcan Planum is, as Mr. Spock would say, fascinating. There is surprisingly little cratering on this plain, which indicates that some sort of resurfacing has taken place; the fingerprints of cryovolcanism in action. New Horizons was also able to image the other satellites, although Nix was the only other moon close enough to show interesting surface details. The spacecraft showed a red patch on the surface similar to the dark coloration found on Pluto and Charon.
The continuing mission
Although the Pluto flyby has long since passed, New Horizons is far from finished. The mission has already been a spectacular success and it has transformed an object that was once just a pinprick of light on a photographic plate into a complex and diverse world.
The discovery of mountains and apparent ice floes shows that even out here, in the frozen extremities of the Solar System, geological activity is quite common. Like the satellites of Jupiter and Saturn, Pluto and Charon remind us that we were wrong to write them off as dead, airless worlds.
No doubt in years to come the next generation of planetary scientists will use data from New Horizons to formulate new models of these distant wanderers. In the larger picture they will help to provide a better understanding of the early Solar System. I would imagine there will be many more surprises in store as the story of Pluto embarks on a new chapter.
LIFE ON PLUTO
The dwarf planet's subsurface oceans are a well of possibility.
It is currently believed that under the thick icy surface of Pluto there is a vast layer of water-ice. Beneath this lies the core of Pluto, containing radioactive elements that would release heat as they decay, thawing the water-ice above. Indeed, there may have been enough heating to have produced yet-undiscovered subsurface oceans on the dwarf planet.
Data from New Horizons indicates that Sputnik Planitia is probably an impact basin formed when a large object collided with the surface. As a result of the collision, water from this subsurface ocean could have welled up to produce the vast glacier we see today. One can't help wondering whether conditions in the subterranean oceans of Pluto were ever right for life to have got started.
ABOUT THE WRITER
Paul Abel is an astronomer at the University of Leicester. He co-hosts BBC Sky at Night's Virtual Planetarium every month.
Copyright © Immediate Media. All rights reserved. No part of this article may be reproduced or transmitted in any form or by any means, electronic or mechanical without permission from the publisher.
{ width: 160, height: 160, defaultImage: '', layers: 'Artimg-BBC_MilkyWayMonsters' }

![]() Orion is proud to partner with BBC Sky at Night Magazine, the UK's biggest selling astronomy periodical, to bring you this article as part of an ongoing series to provide valuable content to our customers. Check back each month for exciting articles from renowned amateur astronomers, practical observing tutorials, and much more!
Orion is proud to partner with BBC Sky at Night Magazine, the UK's biggest selling astronomy periodical, to bring you this article as part of an ongoing series to provide valuable content to our customers. Check back each month for exciting articles from renowned amateur astronomers, practical observing tutorials, and much more!
Catching the Milky Way's Monsters
A revolution that began with colliding neutron stars is taking place in astronomy. Will Gater looks at how electromagnetic and gravitational wave observations are expanding our view of the cosmos.
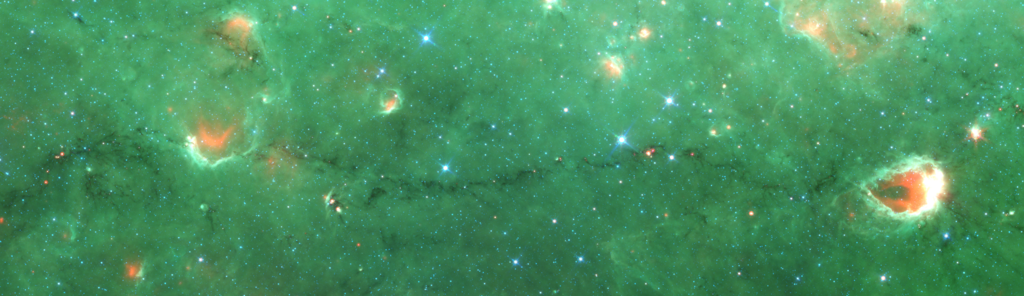
The "Nessie" infrared-dark cloud observed by the Spitzer Space Telescope. By NASA/JPL/SSC Public domain, via Wikimedia Commons
A brave trio of astronomers based at Harvard's Center for Astrophysics have been monster hunting in the Milky Way. Their first discovery was 'Nessie'; not a creature from the depths of a Scottish loch, but rather a long, dark filament slashed through our Galaxy's disc. The structure, made up of a long thread of relatively dense gas whose sinuous turns reflect those of the monster 'seen' in the classic photo, is hundreds of lightyears long.
When I first heard about it, I thought the existence of such a structure was just a curiosity, but this 'Nessie' is a complicated beast. Understanding how such a filament could have formed, and how it has resisted being ripped apart by the turbulent structure of the Galaxy's gas clouds, is not easy. A proper survey is needed and others have set out on this quest before. Six separate papers have tried to compile catalogues of giant filaments, using data from infrared and radio surveys within which dense clumps of gas stand out. Some inspected their data by eye while others used algorithms and machine learning to look for long filaments, so the first task for Catherine Zucker — the PhD student leading this monster hunt — was to bring these different datasets together in a useful way, using data from ESA's Herschel observatory to measure their properties.
The results of her and her team's hard work are fascinating. There are, it turns out, several types of monsters lurking in the Milky Way. While all share a habitat — closer to the center of the Galaxy than we are, and close to the middle of the disc — there are distinct differences. The most obvious bear similarities to how we imagine the Loch Ness Monster to look: they're long, thin filaments that, thanks to a significant fraction of dense gas, appear capable of forming massive stars (in some, three quarters of their gas is dense enough to be able to form stars). Such large and thin features are almost certainly the result of gravity working on a grand scale. What's more, these giant filaments may be very important, acting like bones to underpin the whole spiral structure of the Milky Way.
The second type, which have less dense gas and a more rounded appearance, may be squeezed versions of normal molecular clouds, which form the bulk of the Milky Way's star-formation regions. A comparison with recent simulations suggests that this idea is at least plausible, though more work — probably with more powerful computers — is needed. The third and final type sits between the previous two; these are as thin as the 'Nessie' filament but contain relatively little dense gas. They seem to be networks of molecular clouds, sorted into a regular pattern by gas collapsing in a particular way, specifically due to something called a 'sausage instability' (a wonderful technical term).
The three types of filaments seem to tell different stories about how gas collapses locally and how the large-scale structure of the Milky Way is put together. In corralling all of these beasts in the same place, Zucker and her team have done a great service to those who'll follow and continue our exploration of the Milky Way's wild places.
ABOUT THE WRITER
Chris Lintott is an astrophysicist and co-presenter of The Sky at Night on BBC TV. He is also the director of the Zooniverse project.
Copyright © Immediate Media. All rights reserved. No part of this article may be reproduced or transmitted in any form or by any means, electronic or mechanical without permission from the publisher.
{ width: 160, height: 160, defaultImage: '', layers: 'Artimg-BBC_RipplesRadiationRevelation' }

![]() Orion is proud to partner with BBC Sky at Night Magazine, the UK's biggest selling astronomy periodical, to bring you this article as part of an ongoing series to provide valuable content to our customers. Check back each month for exciting articles from renowned amateur astronomers, practical observing tutorials, and much more!
Orion is proud to partner with BBC Sky at Night Magazine, the UK's biggest selling astronomy periodical, to bring you this article as part of an ongoing series to provide valuable content to our customers. Check back each month for exciting articles from renowned amateur astronomers, practical observing tutorials, and much more!
Ripples, Radiation and Revelation
A revolution that began with colliding neutron stars is taking place in astronomy. Will Gater looks at how electromagnetic and gravitational wave observations are expanding our view of the cosmos.
By ESO (https://www.eso.org/public/images/eso0917a/) [CC BY 4.0], via Wikimedia Commons
Every so often, a true moment of scientific insight comes along, a moment that has a profound impact on how we explore the Universe. One such moment came in 2015 with the first detection of gravitational waves — ripples in the fabric of space-time that propagate from moving celestial bodies and violent events such as the merging of two black holes or neutron stars.
But despite the astronomical possibilities gravitational waves grant us, it was another, more recent, observation that opened up a new field of space science. That new field is multi-messenger astronomy, in which the secrets of the Universe are revealed through detecting and observing not only electromagnetic radiation, but gravitational waves and other celestial phenomena too. And its story begins around lunchtime, in August last year.
At 12:41 UT on 17 August 2017, the Laser Interferometer Gravitational-wave Observatory (LIGO) detectors in Washington and Louisiana, USA, sensed a gravitational wave washing over their respective sites. What happened next would thrill researchers and set off a dramatic chain of events.
Mere seconds later, in space, NASA's Fermi Gamma-ray Space Telescope and ESA's International Gamma-Ray Astrophysics Lab (INTEGRAL) satellite both caught a burst of gamma rays emanating from somewhere in the southern celestial hemisphere. Could the two things be related?
"Less than a minute after the gamma-ray [burst] was picked up by the Fermi team, they notified everyone else that they'd seen something interesting and gave a rough sky map of the location," recalls Dr. Michalis Agathos, a LIGO-Virgo Collaboration researcher based at the University of Cambridge.
The scramble to correlate
As news of the gamma-ray burst started to reach astronomers around the world, the LIGO researchers were already analyzing the wave their detectors had sensed, which they'd now catalogued as GW170817. Like the Fermi and INTEGRAL teams, the LIGO researchers notified collaborators at astronomical organizations around the world with access to telescopes observing across practically the entire electromagnetic spectrum.
Astronomers and gravitational wave researchers have started to work together like this in recent years in the hope of observing electromagnetic radiation (be it visible light, radio waves, X-rays or gammarays) from the events that trigger gravitational waves and send them rippling across the cosmos. Such an observation of electromagnetic radiation had never been made alongside a gravitational wave before but now, with GW170817, the LIGO-Virgo team worked with great urgency to notify their colleagues who had spotted the Gamma-ray burst.
"We already knew that the Fermi team had circulated [news of the Gamma-rays] so everyone at LIGO worked hard to get [details of GW170817] out fast with as much accurate information as possible," says Agathos.
Using data from a third detector, Virgo in Italy, the researchers were able to narrow down the area of the sky that GW170817 had come from. "When we cross-checked our sky map with that of Fermi, which was relatively wide but still narrowed down the location to a few hundred square degrees, we noticed a significant overlap. That encouraged people to believe that this was something that may be picked up by other telescopes," says Agathos.
On the ground, the professional observatories in Chile slewed towards the area specified by the LIGOVirgo team, picking out a new pinprick of light in NGC 4993, a galaxy around 130 million lightyears away. Meanwhile in orbit, both the Hubble Space Telescope and NASA's Swift satellite spotted it too, while the Chandra X-ray Observatory would later detect X-rays streaming from the same location. One estimate from the European Southern Observatory suggests that around 70 observatories saw the glowing dot that had appeared in the distant galaxy. More significant than the large number of eyes on the new spot of light, however, is what the diversity of observations constituted.
For the very first time, researchers had caught both electromagnetic radiation and gravitational waves emanating from an astronomical phenomenon. And with the data they'd amassed, the science of multimessenger astronomy — of studying distant celestial objects by examining more than just the light they emit — took a vast leap forward.
As had long been hoped, decades of technological improvements had brought gravitational wave detection to the point where it could work in concert with all kinds of observatories to provide astronomers with a new way to scrutinize astrophysical processes. And nowhere was this better demonstrated than in the revelations that came from the analysis of the GW170817 event.
Looking beyond the wave
"The data that we see in [a] gravitational wave detection is in a waveform," says Agathos. "You can see it as a wave that evolves in a certain way and the structure of it gives you information about the source that generated it."
Analysis of the GW170817 gravitational wave suggested that the event which had produced it was a violent collision between two neutron stars that had been spiraling in towards each other. When the two stars finally collided, the force of the impact shuddered the fabric of space-time, sending the gravitational wave rippling across the cosmos. It also illuminated their host galaxy with a powerful blast of radiation — the light the world's telescopes picked up in August.
The identification of a neutron star binary system as the origin of GW170817 was important in itself. The initial flash that the Fermi telescope saw was a phenomenon known as a short gamma-ray burst. Short gamma-ray bursts had been observed many times prior to the GW170817 event and one of the theories that astronomers had put forward for what causes them was the merging of neutron stars.
With Fermi's observation of the short gamma-ray burst and a simultaneous detection of a gravitational wave produced by a collision of neutron stars, astronomers now had a key piece of evidence to support that theory.
The kilonova question
This revelation from the study of the GW170817 gravitational wave was the first triumph of multimessenger astronomy, but it wasn't the only one. The telescopes observing the electromagnetic radiation from the explosion caused by the two neutron stars colliding were able to capture spectra of the event. In doing so they were able to shed light on one of the great enigmas in astrophysics: where some of the heaviest elements in the Universe come from.
"Once you have the spectrum you can infer things about the [chemical] composition of the matter that you're observing," says Agathos. "The fact that we saw spectral lines of certain elements in this detection indicated that a big portion of elements, such as gold, platinum, uranium or other heavy elements, [are] actually produced in this type of process. This had been an open question for decades."
Those heavy elements were flung out by the explosion observed by the follow-up telescopes &mash; a powerful blast known as a 'kilonova', which astronomers had for many years suspected would occur when two neutron stars smash together. Kilonovae are fainter and release less material than supernovae, but as they dim rapidly they're much more tricky to catch.
"Sometimes you can see objects that have characteristics which would have looked like the theoretical models put forward for a kilonova," says Dr Kate Maguire, an expert in supernovae from Queen's University, Belfast. "But because they fade away very quickly from their brightness we never had good datasets."
Indeed, the multi-messenger nature of the GW170817 observations was crucial to positively identifying it as the kilonova predicted by models. "This is the first object that's conclusively a kilonova, because we have the gravitational wave detection of the two neutron stars merging," adds Maguire.
More messages
Astronomers hope to make more multi-messenger observations of kilonovae in order to get a better understanding of these events. But future multimessenger astronomy studies may also offer new insight into their more energetic cousins, supernovae, as well. And that's because there's another type of 'messenger' to pick up, a messenger that wasn't detected in the GW170817 event but one that could reveal the inner workings of these violent stellar detonations: neutrinos.
Neutrino particles can be produced in the powerful core-collapse supernovae that occur when a massive star dies, but they're extraordinarily hard to detect and require specialist detectors, such as the IceCube Neutrino observatory located at the South Pole. "We've only seen neutrinos from one supernova, 1987A, and that was 20 neutrinos out nos [a theorized total of] 1058," says Maguire.
Nevertheless if a supernova went off in the Milky Way and enough neutrinos could be detected from the blast, along with gravitational waves and electromagnetic radiation, it would be a pivotal observation. "The neutrinos would tell us about the explosion mechanism of the core-collapse supernova," explains Maguire. "The gravitational wave detection would be very nice for tying down the properties of the system, such as the mass. And we'd have the electromagnetic radiation as well — because it would be a supernova in our galaxy we'd be able to get very detailed observations. It would be incredibly exciting if we were able to do that."
With LIGO coming back online later this year, professional astronomers will be preparing to jump into action when another gravitational wave signal is detected. But there's another development on the horizon that should excite amateur astronomers too. In the future, the private notifications that the LIGO team send out to collaborators alerting them to a potential new gravitational wave event will be made more widely available.
"One cannot exclude the possibility that certain sources may be observable by amateur astronomers with decent telescopes," says Agathos. "For instance the host galaxy of the first neutron star binary [merger] detection was something in the region of [mag.] +12.4 and the source itself was not much dimmer. With a decent telescope, if you're lucky enough and you're in a place where the sky is dark and clear, you may actually be able to discover things before the large telescopes do."
The future of multi-messenger astronomy will certainly involve advanced, professional observatories and rapid-reaction, wide-field telescopes working alongside gravitational wave and neutrino detectors. But in among the authors of forthcoming studies they produce, we may well also see the names of dedicated amateurs working from their own back gardens.
ABOUT THE WRITER
Will Gater is an astronomy journalist, author and presenter. Follow him on Twitter at @willgater or visit willgater.com.
Copyright © Immediate Media. All rights reserved. No part of this article may be reproduced or transmitted in any form or by any means, electronic or mechanical without permission from the publisher.
{ width: 160, height: 160, defaultImage: '', layers: 'Artimg-BBC_Spying_on_Neighbors' }

![]() Orion is proud to partner with BBC Sky at Night Magazine, the UK's biggest selling astronomy periodical, to bring you this article as part of an ongoing series to provide valuable content to our customers. Check back each month for exciting articles from renowned amateur astronomers, practical observing tutorials, and much more!
Orion is proud to partner with BBC Sky at Night Magazine, the UK's biggest selling astronomy periodical, to bring you this article as part of an ongoing series to provide valuable content to our customers. Check back each month for exciting articles from renowned amateur astronomers, practical observing tutorials, and much more!
Spying on the Neighbors
Hubble's successor, the James Webb Space Telescope, will look farther back in time and space than ever before. But this giant telescope could also be turned to targets right in our own cosmic backyard, as Benjamin Skuse reveals.
Creative Commons Zero (CC0) license
Bigger and more powerful than any space observatory ever launched, the James Webb Space Telescope's (JSWT's) infrared gaze will stretch to the very first stars and galaxies being born, offering new insight into the Universe's origins. Its eyes will also scan exoplanets in the search for the building blocks of life beyond our cosmic doorstep, looking for answers to the perennial question: 'Are we alone?'
What many do not realize though is that JWST will not solely be peering at the farthest reaches of the Universe. In fact, with some clever reconfiguring, Webb will be able to cast its spying eye on our closest cosmic neighbors, hoping to uncover some of the secrets hidden within our Solar System.
Adapting JWST for the local nature of Solar System science, however, is fraught with difficulties. The biggest is that the telescope is designed for detecting the faintest, most distant objects. Its extremely sensitive sensors therefore need to be protected at all times from the overpowering light and heat from the Sun, which is why it is equipped with a tennis court-sized sunshield. This would not be a problem but for the fact that Webb will be located at the second Lagrangian point (L2), some 1.5 million km beyond Earth's orbit. As it is, the sunshield permanently shrouds Mercury, Venus, Earth and the Moon from Webb's gaze.
The closest of our neighbors Webb will be able to track are near-Earth objects (NEOs) like Eros and Halley's Comet. "The Earth's atmosphere makes it very difficult to observe NEOs in certain wavelength regions, some of which are very informative and diagnostic of things like water and organics," says NASA research scientist Cristina Thomas. "If we want to focus on origins of life questions, then going outside the atmosphere helps us."
The brightness dilemma
The second nearest target, Mars and its moons, will only be within JWST's spyglass every two years. Webb will add an infrared view to the Mars toolbox of rovers and satellites tasked with studying the planet and its potential for hosting life.
NASA planetary scientist Geronimo Villanueva believes this capability will be invaluable: "JWST will open a new window into the planet's current and past habitability," he says. Villanueva should know. Among other achievements, he was the co-discoverer of methane on the planet (a possible biosignature) and mapped deuterium to hydrogen ratios in Mars's atmospheric water — leading to the realization that the Red Planet had an ancient ocean. "New observations are urgently needed to confirm these findings," he says.
The Red Planet brings us to the second main challenge in using Webb to look over the garden fence: overexposure. Essentially, Mars is far too bright for the Webb's sensitive detectors to cope with. "Even Pluto is bright enough that if we took full-frame data with our widest filters it would saturate," says John Stansberry, a Space Telescope Science Institute (STScI) scientist. "So bright has a different definition for JWST!"
To get round this, NASA will command the instrument to just process a tiny square right in the middle of the full detector array. "Instead of having a 4-megapixel image, we'll take a much smaller postage stamp in the middle," says NASA space scientist Conor Nixon. "That way we can read that out really quickly before it becomes overexposed."
Beyond Mars is where JWST will really have to start getting busy. With an observing window of around 50 days approximately every six months, the giant planets Jupiter, Saturn, Uranus and Neptune will all be viewable, as well as their associated rings and 170 known moons.
While the planets themselves will be monitored by JWST, some of the most interesting science will concern their satellites. From helping to solve the tidal heating conundrum on Jupiter's moon Io to taking over the task of watching the Saturnian moon Titan after the Cassini mission comes to an end or even establishing whether Neptune's retrograde-orbit moon Triton has a subsurface ocean, JWST offers the chance to view and try to understand the most dynamic processes of the Solar System's satellites.
Focus on the small things
However, the bread and butter for JWST's Solar System science will be even less studied, smaller and distant bodies: comets, the main belt asteroids situated between Mars and Jupiter, the Trojan asteroids that share Jupiter's orbit, and the Kuiper Belt objects — including dwarf planet Pluto and the yet-to-be-seen Planet Nine. All could yield clues to how the Solar System came to be the home we know.
"Because they retain material from the very start of Solar System history, they reveal the chemical makeup of the planets and how planets form," says Andy Rivkin, planetary astronomer from Johns Hopkins University.
For these smaller distant bodies and ring systems, NASA has another trick up its sleeve: stellar occultations, where a star is temporarily blocked by a passing Solar System body.
"If you can take data very quickly as an object passes in front of a star, you can measure various things about the object itself," explains Stansberry. By looking at the changes to the star's light as it disappears behind a planet, Webb will be able to look at ring microstructures, and may discover rings around minor planets or even find atmospheres around various Kuiper Belt objects.
All of these proposed targets for Webb suggest the Solar System's most well-hidden mysteries may soon be solved, but one paper really sticks out as having the potential to captivate the public's imagination. In it, the authors propose using JWST and Hubble together to create stereo 3D movies of the planets and moons amateur astronomers have been fascinated by for centuries.
"I worked with a vision scientist colleague to understand the limits of human depth perception," says Joel Green, a project scientist at STScI, who led the study. "It turned out that if you had eyes one million miles apart, and the resolution of Hubble and Webb (roughly 1,000 times better than 20/20 vision), you could actually see objects like Mars, or Jupiter's moon system or Saturn's rings in stereo 3D!"
Not only might this be a boon to astronomers, offering stereo data on weather changes, collisional studies, ring system shocks, and many more, but would also be a first for science education, making ancient astronomical bodies come to life in the classroom. As Green notes: "These are the sorts of images that could inspire a generation."
ABOUT THE WRITER
Dr. Benjamin Skuse is a mathematician turned science writer based in Bristol, UK.
Copyright © Immediate Media. All rights reserved. No part of this article may be reproduced or transmitted in any form or by any means, electronic or mechanical without permission from the publisher.
{ width: 160, height: 160, defaultImage: '', layers: 'Artimg-BBC_Grand_Designs' }

![]() Orion is proud to partner with BBC Sky at Night Magazine, the UK's biggest selling astronomy periodical, to bring you this article as part of an ongoing series to provide valuable content to our customers. Check back each month for exciting articles from renowned amateur astronomers, practical observing tutorials, and much more!
Orion is proud to partner with BBC Sky at Night Magazine, the UK's biggest selling astronomy periodical, to bring you this article as part of an ongoing series to provide valuable content to our customers. Check back each month for exciting articles from renowned amateur astronomers, practical observing tutorials, and much more!
Grand Designs
Grand Canyon National Park is set to get a whole lot darker as it embraces its International Dark Sky status, writes Jamie Carter.

Creative Commons Zero (CC0) license
For anyone after an uplifting experience from nature, the Grand Canyon almost has it all. By day you can stand anywhere along its South Rim and peer down nearly 2,000m into its layer-cake bands of red rock, taking you back two billion years into Earth's deepest history. When the Sun goes down, the combination of a high elevation and dry desert air means clear, cloudless night skies are common. So why doesn't the Grand Canyon National Park have a particularly high reputation among amateur astronomers and astrophotographers?
Five million visitors per year, that's why. Most of them visit Grand Canyon Village on the South Rim, which is easily accessible from Flagstaff in Arizona and only a few hours from Las Vegas in neighboring Nevada. Over the years the undeniably picturesque properties on the South Rim added lighting. And then more lighting. Even the pathways along the rim were floodlit.
This wilderness gateway is now a major light polluter, but that's all set to change in the wake of the June 2016 announcement that the reserve has been provisionally designated as an International Dark Sky Park. This certification is awarded by the International Dark-Sky Association (IDA), a US-based organization that encourages others to maintain the darkness of the night sky for future generations.
The 'provisional' status reflects the complex job ahead. There are thousands of light fixtures on both rims and within the canyon itself, and the National Park Service has set a deadline of June 2019 — the park's centenary year — to retrofit two-thirds of them to comply with the IDA's lighting guidelines.
Harking back to darker times
"Technology is coming along nicely, with excellent night sky and eye-friendly choices now on the market, with prices that are becoming competitive with more common fixtures and bulbs," says Jane Rodgers, deputy chief science and resource management at Grand Canyon National Park, who applied for the Dark Sky Park status. "Backpackers and campers within the canyon will look up at the South Rim and see fewer, more subdued lights, most of which are illuminated only for a few hours after sunset and an hour or so before sunrise. The general aesthetics will hark back to the time when the village was first developed, where the natural world dominated and visitors experienced the feel of an amazing night sky."
Not that the national park doesn't already promote itself as a dark-sky destination. Its rangers are well informed about the night sky, and a star party has been held here each June for over a quarter of a century. Last year's even included talks in the visitor center, constellation tours and free telescope viewing outside the building and at nearby Mather Point, a 10-minute walk away on the rim.
The north-south divide
At other times of year (May to September pretty much guarantees a dry climate and crystal clear night skies), there are night-time walks and talks by rangers, who often set up a telescope for public use. Amateurs and professional astronomers from nearby Lowell Observatory in Flagstaff (where Clyde Tombaugh discovered Pluto) make visits, while on the darker North Rim, the Saguaro Astronomy Club of Phoenix set up telescopes on the porch of the Grand Canyon Lodge.
Mather Point is the best place for stargazing on the South Rim, though Rodgers is looking into establishing a designated night-sky viewing area. Nearby Hermit's Rest and the many pullouts on the flat Rim Trail are perfect, as are the remoter Desert View and Lipan Point on the South Rim, about 30km drive from Grand Canyon Village.
Alternatively, pitch a tent in one of the reserve's campgrounds. Here you may well find a ranger who can point out the local Navajo tribe's giant constellations: the First Revolving Male, First Revolving Female and the Central Fire. You'll recognize them; they're based on the Plough, Cassiopeia and Polaris, respectively. The constantly turning circumpolar stars represent the Navajo ideal home of a husband, a wife and an abode. By protecting natural darkness as well as the natural landscapes, Grand Canyon is itself committing to a beautiful billion-year marriage all of its own.
ABOUT THE WRITER
Eclipse-chaser and dark skies expert Jamie Carter is the author of A Stargazing Program for Beginners: A Pocket Field Guide
Copyright © Immediate Media. All rights reserved. No part of this article may be reproduced or transmitted in any form or by any means, electronic or mechanical without permission from the publisher.
{ width: 160, height: 160, defaultImage: '', layers: 'Artimg-BBC_Capturing_the_Hunter' }

![]() Orion is proud to partner with BBC Sky at Night Magazine, the UK's biggest selling astronomy periodical, to bring you this article as part of an ongoing series to provide valuable content to our customers. Check back each month for exciting articles from renowned amateur astronomers, practical observing tutorials, and much more!
Orion is proud to partner with BBC Sky at Night Magazine, the UK's biggest selling astronomy periodical, to bring you this article as part of an ongoing series to provide valuable content to our customers. Check back each month for exciting articles from renowned amateur astronomers, practical observing tutorials, and much more!
Capturing the Hunter
The familiar winter constellation of Orion holds many surprises for imagers who want to delve a little deeper, says Will Gater.
Photo taken by astrophotographer Steve Peters at Fremont Peak, California.
There are few constellations that grab the attention quite like that icon of the winter heavens, Orion. The glittering bright stars, the instantly recognizable 'belt' and the many glowing nebulae scattered within the Hunter's boundaries all make Orion a wonder to behold on a frosty, dark night. But the constellation is also a rich hunting ground for astrophotographers seeking captivating targets of many kinds. In this article we're going to explore some of the different ways Orion's splendors can be captured on camera, from a simple nightscape that conveys the naked-eye view to advanced CCD imaging techniques that can reveal the constellation's extraordinary deep-sky features. And hopefully, by the end of this piece, you'll agree with us that no matter how many times you catch sight of the Hunter, you'll always find something new to inspire you and test your astrophotography skills.
The Hunter in his element
Experience Level: Beginner to Intermediate
What You'll Need: A DSLR or bridge camera and a sturdy photographic tripod. A wide kit lens (of the kind that comes with most DSLRs) will be perfectly sufficient. More experienced astrophotographers may also want to use a portable tracking mount to capture longer exposures.
There's something tremendously evocative about glimpsing the bright stars of Orion over a wintery landscape — or towards the end of the autumn months just as the nights start to get longer and colder — so in this project we're going to look at how to shoot a 'nightscape' that attempts to capture some of that magic.
STEP 1: Make a conceptual plan
Thinking about the emotions you want to convey or elicit with your shot can help you to plan a powerful picture, and it'll inform every stage of the photographic process. For example, if you wanted to evoke the harsh iciness of winter observing you might shoot Orion over an isolated, leafless tree in a barren landscape, and process in such a way as to create a hard contrast between land and sky.
STEP 2: Select your focal length or a prime lens
Once you've thought about what atmosphere you want to capture with your image, you can select the focal length you'll be shooting at. A typical kit lens set to around 24mm, or an equivalent prime lens, provides a wide field of view for Orion on a camera's sensor, allowing you to fit in the brighter central stars and the Hunter's fainter outlying 'arms'.
STEP 3: Focus the view
Next focus the view. Some cameras have a live preview function that can be zoomed onto a suitable star, giving you instant feedback as you make slight focusing adjustments. With Orion there's no shortage of bright stars that can be used for this. Repeat the process a few times — checking that the star is a small as possible — so you're certain the image is as sharp as it can be.
STEP 4: Compose with the landscape and sky conditions
To compose your nightscape you can take short, very high ISO test exposures to show you the balance and positioning of foreground and sky, and any structures or landscape features in frame. Try to use the foreground — trees, buildings, etc. — to lead the viewer's eye toward Orion. Sometimes clouds can be used as a framing device too, and thin cloud can even 'bloat' and enhance the colors of bright stars.
STEP 5: Set the exposure length, aperture and ISO
When shooting, keep the lens aperture wide open (lowest f-stop), though some lenses will perform better when reduced a few stops. Experiment with the ISO and exposure length until you're happy with the look. You may need to use an exposure that very slightly trails the stars in order to define the foreground.
STEP 6: Process your image
When processing nightscapes, reducing the noise in the image and bringing out foreground detail are the main challenges; as long as you shoot in RAW format, modern image-processing software is well-equipped to handle these tasks. In Photoshop or GIMP you can correct the color balance, and use the 'Curves' tool to bring out star fields and improve overall contrast and definition.
Far and Wide
Reveal the hidden delights lurking within Orion with the help of long-exposure, wide-field imaging.
Experience Level: Intermediate
What You'll Need: A DSLR, a tracking mount and either a relatively long focal length camera lens (between 100 and 300mm focal length on a full-format DSLR) or a short focal length refractor. You could use a CCD camera, but the field of view produced by your setup will need to be at least 5° across or you'll need to mosaic.
One of the things that makes Orion so attractive for astrophotography is the diversity of deep-sky objects within its borders, from pinkish-red star forming regions to blue-tinted reflection nebulae.
The proximity of these targets to one another means that long-exposure wide-field imaging of Orion can produce some spectacular compositions. Not only do such wide-field images show the positions of objects such as the Orion and Horsehead Nebulae in relation to one another, but they can also reveal the rarely seen fainter surroundings of objects that are usually given the 'close-up' treatment, such as the aforementioned nebulae.
A DSLR with a long focal length lens and mounted on some form of equatorial tracking mount is probably the simplest setup with which to get started in wide-field imaging. Unlike most deep-sky imaging, wide-field deep-sky astrophotography generally doesn't require auto guiding, as it's possible to capture good data with unguided sub-exposures of just a minute or two.
With fast prime lenses and those relatively short exposure lengths, you may be surprised at how easily you can pick up some of Orion's most recognizable deep sky objects. For the best results capture multiple sub-exposures (as well as dark frames and flat fields) and then calibrate and stack them, using software such as the free DeepSkyStacker, before final enhancements in your preferred image processing software.
Colorful captures
With the right setup you can show Orion is more than just white stars against a black background.
Experience Level: Beginner
What You'll Need: A basic DSLR or bridge camera fitted with a lens that allows manual focusing (some compact digital cameras will also work depending on the lens/focusing mechanism they use). You'll also need a photographic tripod and your camera will need to be able to take exposures of a few seconds.
The color variation of Orion's bright stars is one of the most captivating things about the constellation, yet it can be tricky to capture these wonderful hues as the chromatic aberration in some camera lenses overwhelms the true star color. One method for showing the tints of stars such as Betelgeuse, Rigel and W Orionis is to manually defocus the image. It's a technique that was made famous by the renowned astrophotographer David Malin many years ago. You can use this method with a wide lens (or a fast long lens) on a static tripod, as long as you use short exposures — a second or so in the case of a longer lens. All you do is frame the star (or constellation), defocus the lens a little by hand and capture an exposure, usually at a mid-to-high level ISO setting. In the two composite images below we focused on Betelgeuse and Rigel. We captured a number of exposures and in between each one we defocused the lens a bit more. Then we combined them into one frame using processing software. It's a very artificial composition, but it does give a flavor of one of the things that makes observing and imaging Orion special.
Portrait of a stellar nursery
Capture the Orion Nebula's ethereal pink swirls of gas and dust that are giving birth to new stars.
Experience Level: Intermediate to advanced
What You'll Need: A small refractor or Newtonian telescope carried on a motorized tracking mount, plus a monochrome CCD camera (and a computer to control it) with a set of LRGB imaging filters and a filter wheel. For exposures of more than a few minutes it's also a good idea to use an autoguiding system alongside the above, though this is not absolutely necessary.
There are few greater tests of a deep-sky astrophotographer's skills than the magnificent Orion Nebula, M42. Among the many challenges it provides are the faint outer regions of the nebula that can be lost in processing, or simply not picked up at all during the imaging process, and its dazzlingly bright core that requires careful planning to capture. In the step-by-step guide below we've described the basic process of how to go about shooting M42 with the kind of setup you might typically have if you're starting out in CCD imaging — that is a monochrome CCD camera and a set of LRGB filters (luminance, red, green and blue) with which to make a full-color image.
STEP 1: Set up and polar align accurately
Once you've got your equipment set up, spend some time finessing the polar alignment of your mount. This is so you'll be able to get the longest unguided exposures your mount is capable of before the stars drift out of position — this is especially important if you're not using autoguiding equipment.
STEP 2: Capture different length luminance exposures
Use short, 'binned', test exposures to compose the image. Then take three groups of exposures through a clear luminance filter: short ones for M42's bright core, longer ones for the main body and, for the faint outer regions, as long as your unguided mount can manage without the stars 'wandering' (usually several minutes).
STEP 3: Get the RGB color
When you've got around 10-15 sub-exposures for each of the three groups of luminance data, you can move on to capturing the color data through red, green and blue filters. Capture at least 10-15 images per color channel — aim for an exposure length similar to your shots of the main body of M42 with the luminance filter.
STEP 4: Take dark frames and flat fields
After capturing each 'LRGB' channel, carefully stretch a clean white pillowcase or t-shirt over the scope aperture (without touching the lens) and illuminate it with a torch before taking an image. This is a flat field, which records image artefacts such as vignetting and dust on the optics. Also take a set of dark frames if the data from your CCD needs them.
STEP 5: Stack and calibrate the data
You should now have six sets of sub-exposures: three luminance groups of varying exposure length and one for each of the RGB channels. Load them into your preferred astronomical image processing software (for example, DeepSkyStacker) and use the flat fields and dark frames to calibrate them before stacking those calibrated sets into six images.
STEP 6: Combine the three luminance images
Bring the three luminance images into layers-based image processing software, such as Photoshop or GIMP. With each image in a separate layer, erase the overexposed portion of the long-exposure image so that the 'main-body' exposure shows through — do the same for the main body layer so the core shows clearly. Merge the layers.
STEP 7: Add the color and make final processing adjustments
Next, place your red, green and blue filtered images in their respective color 'channel' in a new image file. Copy the resulting full-color image, as a separate layer, into the luminance file created in Step 6 and turn its blending mode to 'Color'. Lastly make any final image tweaks to your taste.
ABOUT THE WRITER
Will Gater is an astronomy journalist, author and presenter. Follow him on Twitter at @willgater or visit willgater.com.
Copyright © Immediate Media. All rights reserved. No part of this article may be reproduced or transmitted in any form or by any means, electronic or mechanical without permission from the publisher.
{ width: 160, height: 160, defaultImage: '', layers: 'Artimg-BBC_Mission_to_Mercury' }

![]() Orion is proud to partner with BBC Sky at Night Magazine, the UK's biggest selling astronomy periodical, to bring you this article as part of an ongoing series to provide valuable content to our customers. Check back each month for exciting articles from renowned amateur astronomers, practical observing tutorials, and much more!
Orion is proud to partner with BBC Sky at Night Magazine, the UK's biggest selling astronomy periodical, to bring you this article as part of an ongoing series to provide valuable content to our customers. Check back each month for exciting articles from renowned amateur astronomers, practical observing tutorials, and much more!
Mission to Mercury
October will see the launch of a European mission to the innermost world in our Solar System.
By NASA/Johns Hopkins University Applied Physics Laboratory/Carnegie Institution of Washington [Public domain], via Wikimedia Commons
"A peculiar planet of mysteries and surprises" — this is how European planetary scientist Johannes Benkhoff describes Mercury. In October this year, ESA will launch the BepiColombo spacecraft to the Solar System's smallest and innermost planet. Some eight years from now, it will begin studying Mercury in meticulous detail across the electromagnetic spectrum. According to Benkhoff, the mission's project scientist, planetary researchers expect BepiColombo to solve many Mercurial mysteries. It's a planet, he says, that is also a key element in understanding the formation of the Solar System.
The mission's Ariane 5 rocket launch from French Guiana will send two orbiters to the planet: the relatively small Japanese Mercury Magnetospheric Orbiter (MMO) and ESA's 4,100kg Mercury Planetary Orbiter (MPO). Both are mounted on a six-meter tall transfer module that will deliver the two craft into orbit around the 4,879km-diameter planet.
"It's a very harsh environment," says Benkhoff, referring to Mercury's distance from the Sun, which varies between just 46 and 69 million km. "But if we're lucky, the nominal mission duration of one year may be extended up to four years."
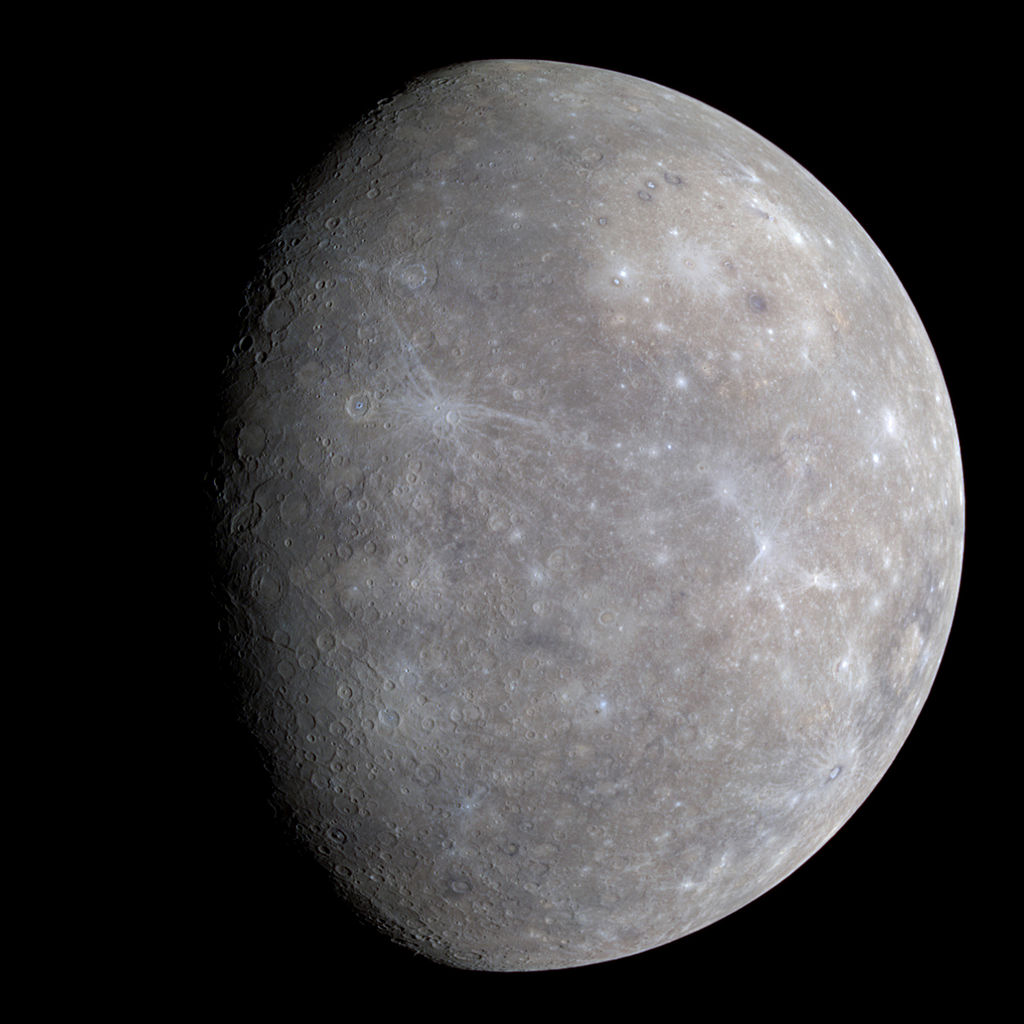
Although Mercury is much closer to Earth than, say, Saturn, it's tough to get there, basically because the planet's orbital speed is much higher than Earth's. The first Mercury probe, NASA's Mariner 10, didn't even make it into orbit. Launched in 1973, it performed three close flybys in 1974 and 1975, before ending up orbiting the Sun. Mariner 10 mapped just shy of half of the planet's surface, revealing a crater pocked landscape. It also discovered a weak magnetic field: quite a surprise, since no one expects Mercury to have retained a molten core.
It would be 30 years before another probe set course for Mercury. NASA's MESSENGER spacecraft launched in August 2004, and orbited the barren world between March 2011 and its intentional crash in April 2015. From its polar orbit, MESSENGER collected nearly 290,000 images and mapped the planet's topography. Among other things, it discovered deposits of ice at the floors of permanently shadowed polar craters, mysterious 'hollows' beneath the surface, signs of relatively recent volcanic activity, and a mysterious displacement of the magnetic field by 400km northwards with respect to the planet's center.
So what's left for BepiColombo to discover? A lot, says former project manager Jan van Casteren at the European Space Research and Technology Center (ESTEC) in Noordwijk, the Netherlands. Originally, he says, BepiColombo was scheduled to arrive first, but the project was delayed by technological problems, cost overruns and redesigns. "Still, in 2009, ESA's Science Programme Committee decided to give the go-ahead for the mission because of its great scientific potential. BepiColombo is a much more versatile mission than MESSENGER, which was relatively simple."
No easy journey
During its seven-year cruise phase, BepiColombo's solar orbit will gradually be tweaked by one Earth flyby, two Venus flybys and no less than six Mercury flybys. This 'gravity assist' technique, pioneered by Mariner 10, was invented by Italian astronomer Giuseppi 'Bepi' Colombo, after whom the mission is named. The craft's versatile ion engine will perform additional orbital corrections. Eventually, in early December 2025, BepiColombo will arrive in its elliptical polar orbit. A few months later, the lowest point of the orbit is brought down to just 250km, and science operations will begin.
At Mercury, a spacecraft receives about 10 times more solar energy than it would in Earth orbit: some 14,500 watts per square meter. Moreover, Mercury's surface is so hot (430°C) that BepiColombo's main orbiter needs to be protected from the planet's infrared radiation, which delivers more energy: 5,500 watts per square meter. To cope with these extremes, the craft is completely wrapped in thick, multilayer thermal blankets. A huge contraption of silver-coated titanium fins always points away from the planet to radiate excess heat away into space.
You might expect that the use of solar panels is straightforward when you're so close to the Sun, but you'd be wrong, as Markus Schelkle of Airbus Defence and Space in Germany (the spacecraft's prime contractor) explains. "The solar array had to be newly developed using novel materials," he says. "It's very difficult to make them resistant to both high temperatures and strong ultraviolet radiation." The same is true for the large solar arrays on BepiColombo's transfer module, which provide the energy for the ion engine. "Developing the solar arrays took as long as developing the whole spacecraft," says Schelkle.
As the MPO studies the planet up close, the smaller MMO will monitor the solar wind, the planet's magnetic field and the extremely tenuous sodium-rich 'exosphere'. Because of strong solar wind buffeting, Mercury's magnetosphere can sometimes be pushed back all the way to the surface. As a result, the solar wind directly interacts with the surface, possibly releasing sodium atoms in the process. "It's one of the questions we want to answer," says Hajime Hayakawa of the Japanese space agency JAXA. Another big issue he hopes MMO will solve is the mysterious 'shift' of Mercury's magnetic dipole. Meanwhile, as project scientist Benkhoff recounts, the MPO will map the elemental and chemical composition of the planet's surface, look for morphological changes in the mysterious subsurface 'hollows' (which may be due to the loss of volatiles), hopefully elucidate the origin of the polar ice deposits and study the planet's relatively large iron-nickel core. "Also," says Benkhoff, "Mercury's potassium/thorium ratio is much higher than current planetary formation models predict. The mission may shed new light on the origin of the Solar System." Van Casteren is confident that the ambitious €1.65 billion mission will be worth every penny. "The highest resolution images will reveal details as small as 5m," he says, "and BepiColombo has an impressive suite of 11 science experiments. It would have been nice to be the first, but in the long run, it's the science that counts."
TARGET MERCURY
Why is studying Mercury so tricky, and what might we learn from doing so?
Mercury is the smallest and innermost planet in the Solar System. Studying it from Earth (or with an Earth-orbiting instrument like the Hubble Space Telescope) is difficult, because it always appears close to the Sun in the sky.
Because Mercury is orbiting the Sun so fast (48kms on average), a spacecraft launched from Earth has to undergo a large change in velocity to end up orbiting the planet. That's one reason why there have been so few Mercury probes so far.
Visible light, X-rays and ultraviolet radiation from the Sun are about 10 times more powerful at Mercury than they are on Earth. The solar wind (charged particles from the Sun) is also more energetic. This is another reason why Mercury has remained relatively unexplored.
Compared to the other terrestrial planets, Mercury has a very large iron-nickel core. No one knows why. Maybe a huge primordial impact blew away most of its rocky mantle. Or maybe scientists need to adapt their pet theories on the formation of the Solar System.
Learning more about Mercury and its extreme environment will also help in understanding habitable-zone exoplanets that orbit at comparable distances to their parent dwarf stars.
Copyright © Immediate Media. All rights reserved. No part of this article may be reproduced or transmitted in any form or by any means, electronic or mechanical without permission from the publisher.
{ width: 160, height: 160, defaultImage: '', layers: 'Artimg-BBC_Types_of_Twilight' }

![]() Orion is proud to partner with BBC Sky at Night Magazine, the UK's biggest selling astronomy periodical, to bring you this article as part of an ongoing series to provide valuable content to our customers. Check back each month for exciting articles from renowned amateur astronomers, practical observing tutorials, and much more!
Orion is proud to partner with BBC Sky at Night Magazine, the UK's biggest selling astronomy periodical, to bring you this article as part of an ongoing series to provide valuable content to our customers. Check back each month for exciting articles from renowned amateur astronomers, practical observing tutorials, and much more!
The Three Types of Twilight
The period between 'day' and 'night' is complex, and so is the sky at this time.
By Pmurph5 (Own work) [CC BY-SA 4.0], via Wikimedia Commons
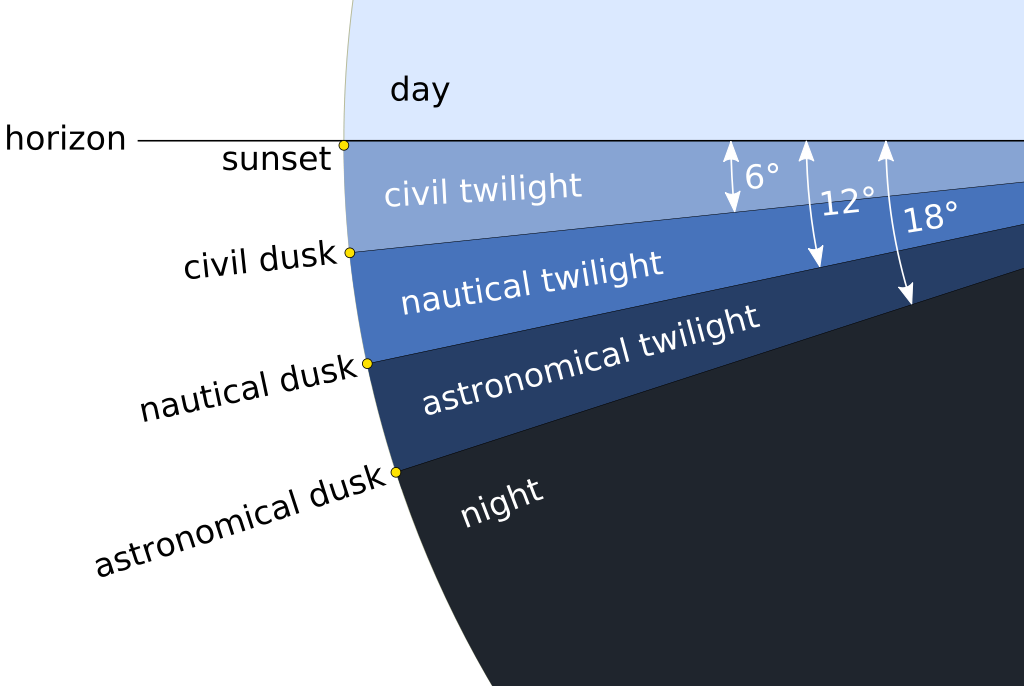
The changes that occur during dusk can be as striking as anything we observe in nature. Everything we can see changes, as the brightness of the sky drops to less than 3/10,000ths of a per cent of its intensity at sunset. Yet this daily spectacle is often lost to us, perhaps obscured by cloud, but also obliterated by artificial lighting and sometimes simply ignored because of its regularity.
Twilight is not a single, fixed state, but a gradual change that has three distinct phases. The first is civil twilight, which begins as the upper limb of the Sun disappears below the horizon and ends at civil dusk, when the geometric center of the Sun is 6° below the horizon. During this period, you can carry on doing things much the same as if the Sun were above the horizon, lit only by the still-blue overhead sky. The first half an hour being dubbed by photographers as the 'blue hour'.
We tend to look to the west at sunset, drawn by the coral pink hues above the horizon, and miss the more dramatic changes that are happening behind us. Here, we see a band of more muted amaranth pink, dubbed the Belt of Venus, illuminated by red sunlight that is not scattered in its passage through the atmosphere. Below is a rising purple swathe, that part of the visible sky that is in Earth's shadow. During civil twilight, only the very brightest stars and planets become visible.
Civil dusk signals the beginning of nautical twilight, which persists until the geometric center of the Sun is 12° below the horizon — nautical dusk. At nautical dusk, it's sufficiently dark that a sailor at sea would not be able to see the horizon, hence its name. Our monochrome scotopic (low light) vision begins to dominate and colors fade as everything on land takes on shades of grey. The purple in the east merges with darkening sky above. First-magnitude stars begin to appear. Initially they seem lonely points of light, but they gradually multiply as the sky darkens and fainter stars join them. Eventually, the entire Plough asterism in Ursa Major appears, pointing to Polaris, so at last we can polar align our equatorial mounts. Night is approaching, but the sunlit sky is still visible on the sunset horizon. The third phase, astronomical twilight, is beginning.
Light's last gasp
As the Sun descends past nautical dusk and into astronomical twilight, when our star is between 12° and 18° below the horizon, its illumination is replaced by other sources. For too many of us, this is the skyglow from artificial light, but even in unlit places on a Moonless night the sky is never completely dark. The combination of an imperceptibly faint auroral glow, the zodiacal light (sunlight reflected off interplanetary dust particles), and the light of diffuse matter in our Galaxy all contribute, though their contribution is less than that of a single mag. +6.5 star if it was distributed over an area the size of the Moon.
Astronomical dusk takes place when the Sun's geometric center drops to 18° below the horizon. Above our heads we will see, with dark-adapted eyes, objects as faint as we are likely to. Away from light pollution, the Milky Way shows structure sculpted by the dust of dark nebulae. The Andromeda Galaxy and the Double Cluster in Perseus may show themselves even without binoculars. The varied colors of stars become more apparent, and our awareness of the existence of artificial satellites and sporadic meteors grows. The glittering sky-dome above our heads appears to have come closer. This is night.
Then, all too soon, it is over. The sky brightens, the stars fade, the twilight phases play out in reverse. Dawn, and a brand-new day, is upon us.
Copyright © Immediate Media. All rights reserved. No part of this article may be reproduced or transmitted in any form or by any means, electronic or mechanical without permission from the publisher.
{ width: 160, height: 160, defaultImage: '', layers: 'Artimg-BBC_Our_Fortunate_Earth' }

![]() Orion is proud to partner with BBC Sky at Night Magazine, the UK's biggest selling astronomy periodical, to bring you this article as part of an ongoing series to provide valuable content to our customers. Check back each month for exciting articles from renowned amateur astronomers, practical observing tutorials, and much more!
Orion is proud to partner with BBC Sky at Night Magazine, the UK's biggest selling astronomy periodical, to bring you this article as part of an ongoing series to provide valuable content to our customers. Check back each month for exciting articles from renowned amateur astronomers, practical observing tutorials, and much more!
Our Fortunate Earth
Our world would be a much more chaotic place if Jupiter's orbit was only slightly different.
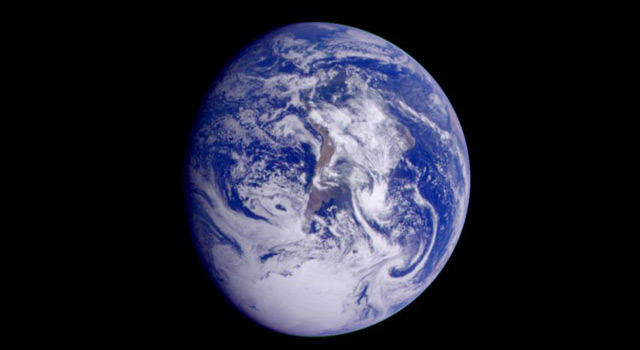
This color image of the Earth was obtained by Galileo on Dec. 11, 1990. Image credit: NASA/JPL
One of the central questions in planetary science, and the possibility of life elsewhere in the cosmos, is how ordinary our own planet is. Is Earth in some way in a special situation, offering unusually clement conditions for the emergence of life, or are there potentially multitudes of planets in our Galaxy that could be alive? This question is becoming more and more important in light of the fact that we continue to discover extoplanets. What features would these far-flung worlds need to offer the best hope for harboring extraterrestral life, and therefore which candidates should we shortlist for our follow-up telescopic observations of their atmospheres to look for signs of biology?
In particular, it's been argued that Earth may have offered an especially stable climate over the billions of years of its existence. Earth's climate has varied over planetary history — from the hot and humid times of the early Triassic period 250 million years ago, to the 'Snowball Earth' episodes when much of the world is thought to have frozen over. But overall, the terrestrial climate has remained remarkably stable. Some of the main drivers for a fluctuating climate, seen over the past few million years of the world swinging between ice ages and warmer interglacial respites, are the Milankovitch cycles. These are cosmic cycles in the eccentricity of Earth's orbit (how circular or egg-shaped it is), the planet's obliquity (how much its axis tilts), and the timing of the seasons — all affected by the gravitational influences of the other planets in the Solar System. The orbital eccentricity of Mercury, for example, varies far more than that of Earth. So the key question is, if the architecture of the Solar System was slightly different, how would this affect our world's orbit?
Jonathan Horner, at the University of Southern Queensland, and his colleagues have explored just this. They used a computer model of the Solar System to track how Earth's orbital oscillations changed as they tweaked the orbits of Jupiter, Venus or Mars in the Solar System, trying almost 40,000 different situations for each planet.
The most obvious result of their simulations, although not entirely unexpected, is that if Jupiter was slightly closer to the Sun it would completely disrupt Earth's stable orbit. Similarly, moving Venus further out than about 0.92 AU spells disaster. Interestingly, though, they did find that Venus and Earth could be stable even with both orbiting at 1 AU if they were located in a 1:1 orbital resonance — just like the Trojan asteroids in a locked orbit with Jupiter. This is one possibility for habitable worlds in exoplanetary systems with warm Jupiters.
The most important results, however, are the ones looking at more subtle shifts to Earth's Milankovitch cycles and how these might affect the planet's climate. The team intend to apply their modelling approach to Earth-like exoplanets, as and when they are discovered. Any worlds likely to experience more pronounced climate variability could have a lower chance of maintaining life, and Horner says that these can be ruled out and our attentions instead focused on the more promising worlds.
ABOUT THE WRITER
Lewis Dartnell is an astrobiology researcher at the University of Westminster and the author of The Knowledge: How to Rebuild our World from Scratch (www.theknowledge.org)
Copyright © Immediate Media. All rights reserved. No part of this article may be reproduced or transmitted in any form or by any means, electronic or mechanical without permission from the publisher.
{ width: 160, height: 160, defaultImage: '', layers: 'Artimg-BBC_Imaging_For_Science' }

![]() Orion is proud to partner with BBC Sky at Night Magazine, the UK's biggest selling astronomy periodical, to bring you this article as part of an ongoing series to provide valuable content to our customers. Check back each month for exciting articles from renowned amateur astronomers, practical observing tutorials, and much more!
Orion is proud to partner with BBC Sky at Night Magazine, the UK's biggest selling astronomy periodical, to bring you this article as part of an ongoing series to provide valuable content to our customers. Check back each month for exciting articles from renowned amateur astronomers, practical observing tutorials, and much more!
Imaging for Science, Asteroids
Pete Lawrence looks at how your images can help monitor the position of potentially hazardous objects crossing Earth's orbit.
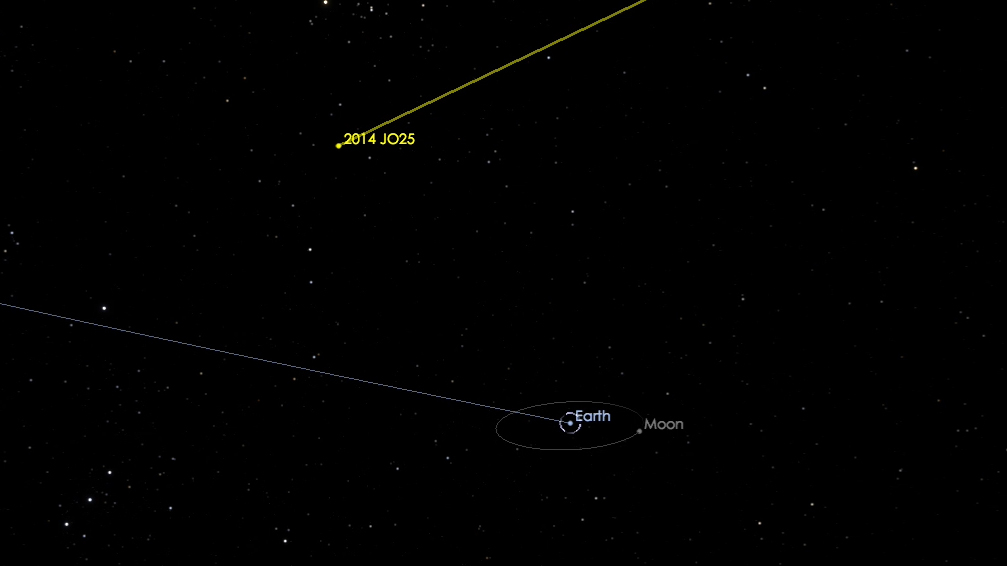
This computer-generated image depicts the flyby of asteroid 2014 JO25. The asteroid safely flew past the Earth on April 19, 2017 at a distance of about 1.1 million miles (1.8 million kilometers), or about 4.6 times the distance between Earth and the moon. Image credit: NASA/JPL-Caltech
Asteroids or minor planets are small Solar System bodies that are visible because they reflect sunlight. The larger members of this group have dimensions measured in hundreds of kilometers, but asteroids can be as small as 1m along their largest axis. Most asteroids are located in what's known as the main belt, a huge repository for such objects located between the orbits of Mars and Jupiter. In all but very rare circumstances, asteroids appear star-like through amateur scopes. Visually, they can be measured in terms of their brightness, position and occasional apparent interactions with other objects.
The sheer number of asteroids in orbit around the Sun means that occasionally we get to see one occult a distant star. Asteroid occultations provide an important way to determine the shape profile of these rocky bodies.
Accurate date and time recording is vital when observing asteroids, as it is this information which ultimately is used to refine the objects orbit and position.
Asteroids look just like stars when viewed through a telescope. It's only when their positions have been noted or photographed over an extended period — normally days — that their motion and true nature is revealed. Most asteroids appear to move slowly against the background stars but those that venture close to Earth may have enough apparent speed to appear to move in real time when viewed through a telescope or binoculars.
Bodies that have orbits bringing them close to Earth are known as near-Earth objects (NEOs) of which near-Earth asteroids (NEAs) are a subset. NEOs larger than 140m that cross Earth's orbit are classed as potentially hazardous objects (PHOs) and again, asteroids form a subset known as potentially hazardous asteroids (PHAs). To date, all known PHOs are PHAs.
Scientific asteroid images for astrometry and photometry need to record the body as a sharp dot without trailing. For slow-moving asteroids this may not be an issue, but fast movers require short exposures or setups that track the asteroid itself. This is especially useful for the high-cadence photometry necessary to determine the light curve, and hence spin-rate, of an asteroid.
For more general appeal, in outreach material for example, a fast-moving asteroid provides a convenient way to produce a trail that would otherwise take many extended exposures to capture. In this instance, a correctly polar aligned telescope tracking at the sidereal rate or, better still, autoguided on the stars, will produce a sharp star field with the asteroid as a light trail. A similar effect can be created by aligning shorter exposures on the stars, and stacking them with the brighter elements set to show through.
Many asteroids are within range of a basic telescope and DSLR setup. For scientifically calibrated work, CCD cameras, (preferably with specialist filters) are recommended. By using planetary imaging techniques, larger telescopes may even be able to capture larger asteroids as extended discs during favorable oppositions, rather than the usual star-like dot.
Project 2: Asteroid astrometry
Use software to help you plot the exact position of small space rocks
Measuring the position of an asteroid is an important step in determining and refining its orbit. This is especially true for asteroids on eccentric orbits, which have the capacity to pass close to Earth. Smaller bodies returning to the inner Solar System may have been gravitationally perturbed, leading to changes in the previously established orbit, and these need to be monitored.
The astrometry of asteroids is similar to comet astrometry, with the exception that asteroids are somewhat easier to measure, appearing as singular dots of light without the complexity that accompanies the expansive head of a comet.
It is recommended that serious astrometric measurements follow the guidelines set out by the International Astronomical Union's Minor Planet Center (MPC), available online at www.minorplanetcenter.net/iau/info/Astrometry.html.
The basic workflow for the astrometric measurement of an asteroid is quite straightforward. First you need to obtain a set of images that include the object you intend to measure. Then you'll need some software assistance to measure the position accurately; the shareware Astrometrica is highly recommended.
Astrometrica allows you to 'blink' your images, which should reveal the asteroid moving against the static star field. The software will need to identify the star field in the images in order to determine the asteroid's position. You can help here by manually identifying the star field and supplying Astrometrica with the correct RA and dec. coordinates for the center of the imaging frame. Once entered, the program attempts to match the star field.
If it doesn't quite get things right, you can adjust the alignment manually. Astrometrica's star template can be adjusted for scale with a focal length used setting, for rotation with a position angle setting and positionally with an onscreen arrow key pad. Once the alignment has been set, clicking on the object will generate an MPC compatible log file of positional data which can then be submitted according to the submission guidelines.
Project 3: Asteroid photometry
Accurately plotting of the brightness and shape of distant asteroids is a team effort
Occasionally an asteroid will pass in front of a star, dimming the star's light as it goes. There are numerous programs available to predict such events as well as websites, such as Euraster, which presents results without you having to having to calculate them yourself.
A typical asteroid occultation path will be a narrow track and may require you to travel to a specific location in order to view and record the event. This adds additional complexity in that it requires the use of a portable observing and recording setup and a means to accurately calculate your location and altitude. The modern way to do this is with some form of GPS recorder.
One of the hardest parts of observing asteroid occultations is to locate the star that is going to be occulted. This can be done using a Go-To system, but you often need to use very accurate star charts to augment the process, especially when the star to be occulted is very faint.
A common way to record asteroid occultations is with a low light video camera. The resulting video, normally recorded in the AVI format, can then be analyzed by specialist programs such as LiMovie or Tangra, which are both available for free.
A successful occultation should produce a light graph for the star that shows it dim as the asteroid passes in front of it and brighten as the asteroid moves out of the way. Accurate timing of the star's dimming will produce a line profile across the asteroid. Interesting though this is, such profiles really become useful when multiple observers record and communicate these events. With multiple profiles recorded, it's then possible to produce a more complete profile of the asteroid.
Obviously for this to be of any worth, a highly accurate time signal needs to be used. A device such as the International Occultation Timing Association's video time inserter (IOTA-VTI; https://occultations.org) is an ideal way to do this as it has the capability to insert coordinated Universal Time (UTC) on every frame of a recorded video signal.
ABOUT THE WRITER
Pete Lawrence is an expert astronomer and astrophotographer who holds a particular interest in digital imaging.
Copyright © Immediate Media. All rights reserved. No part of this article may be reproduced or transmitted in any form or by any means, electronic or mechanical without permission from the publisher.
{ width: 160, height: 160, defaultImage: '', layers: 'Artimg-BBC_Wonders_Satellites' }

![]() Orion is proud to partner with BBC Sky at Night Magazine, the UK's biggest selling astronomy periodical, to bring you this article as part of an ongoing series to provide valuable content to our customers. Check back each month for exciting articles from renowned amateur astronomers, practical observing tutorials, and much more!
Orion is proud to partner with BBC Sky at Night Magazine, the UK's biggest selling astronomy periodical, to bring you this article as part of an ongoing series to provide valuable content to our customers. Check back each month for exciting articles from renowned amateur astronomers, practical observing tutorials, and much more!
The Wonder of Satellites
Astro imager Will Gater explores the photo opportunities presented by the myriad spacecraft that can be seen speeding overhead through the night.
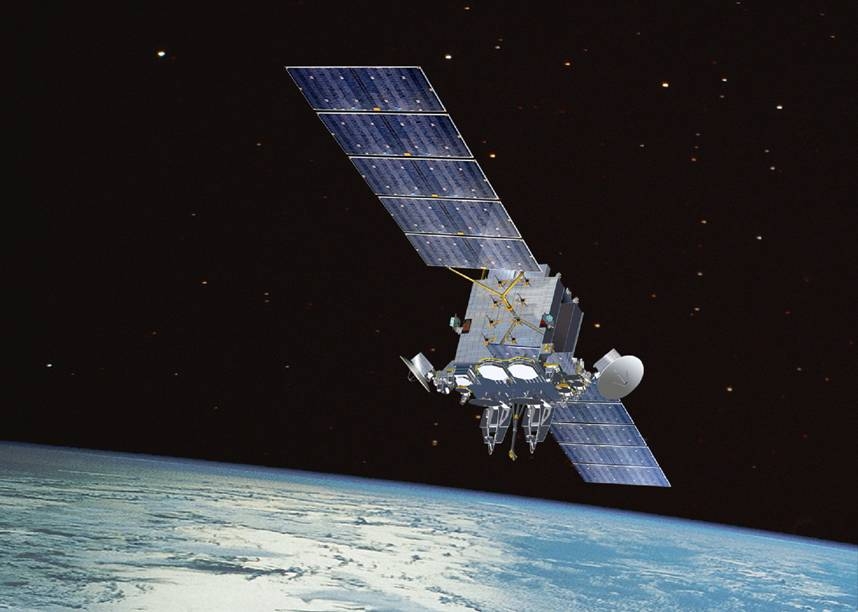
AEHF (Advanced Extremely High Frequency) Satellite. Image By USAF (Los Angeles AFB) [Public domain], via Wikimedia Commons
Nightscapes with a bit of Sparkle
Nightscape images that contain glinting Iridium flares or space stations have been a staple of astro-imaging for decades. For beginners, they're great targets to practice your skills on, and it's possible to get really striking images with a basic setup consisting of nothing more than a DSLR and tripod. If you have a bit more experience, don't dismiss shooting a satellite or space station; even advanced photographers can find fresh challenges in experimenting with the framing and foreground of such photos, and in finessing the quality of the final shot. Done well, these pictures can really spark the imagination in ways that other types of astro-images might not.
The timing, brightness and location on the sky of any potential Iridium flares is dependant on your location, so — just as with ISS and other bright-satellite passes — in order to find out when and where one will be visible from your site you'll need to consult a website like Heavens Above (www.heavens-above.com). Once you have this information you can set about planning your shot.
The free planetarium software Stellarium (www.stellarium.org) is particularly useful for this as you can use its plugins to overlay a rectangle showing the size of your camera's field of view on the sky. By cross-referencing the Stellarium view with the information and star chart from Heavens Above, you can identify the path and position of whichever satellite you're aiming to catch and try out different compositions. Stellarium can show the track of the ISS on the sky, and the paid app SkySafari Plus can also perform the same task.
Shooting a series of consecutive 10- to 20- second exposures at a mid-range ISO with a DSLR, kit lens and static tripod will pick up most bright satellite passes. With Iridium flares, aim to start capturing images about 90 seconds prior to the predicted flare time and end the series about the same amount of time after the flare reaches its brightest; this way you'll capture a pleasing trail that slowly builds in brightness, peaks, then fades away. You can then bring the series of images you've captured into processing or stacking software and combine them, so that the short trail in each photo joins the others to form a longer one.
Since most satellites zip across the sky, capturing a series of photos from a static tripod will result in gaps in the final 'combined' satellite trail due to the short delay between exposures. To get around this you can mount your camera on a tracking mount and take one, much longer, single exposure. This requires balancing the exposure length — which will need to be several minutes — with the lens aperture, ISO setting and sky brightness, but can produce attractive unbroken satellite trails against rich, starry skies. Remember, if you do this any foreground will be slightly blurred.
A Split-Second Spectacular
One of the most exciting areas of satellite astrophotography to develop in recent years is imaging the International Space Station passing in front of the Sun or Moon. Imaging these 'transits' requires extensive planning, but the resulting pictures are extraordinary. A typical transit might last seconds, — sometimes much less — and will only be visible from within a narrow strip of Earth's surface. To find out when an ISS transit is visible near your location you can use the excellent ISS Transit Finder (transit-finder.com). If you intend to image a solar transit, where the space station is silhouetted against the disc of the Sun, you'll need to use a certified solar filter for your telescope and be sureto remove any finderscopes. Here are the key steps required to capture this thrilling phenomenon with a scope and DSLR camera.
Step 1: Plan
Find out when a transit will be visible nearby using the ISS Transit Finder website. You may have to travel to be in a position to capture the event. Use planetarium software to check where in the sky the Sun or Moon will be.
Step 2: Setup
Next set up your scope and have it track at the solar or lunar rate (depending on your target). If you're imaging the ISS transiting the Sun, fit a specialist, certified solar filter and remove any finder scopes.
Step 3: Focus and exposure
Focus the view — use the terminator if viewing the Moon, or sunspot or the solar limb if viewing the Sun. Whether you capture stills or video, make sure that the exposure length is very short so that the ISS does not blur.
Step 4: Capture video or a rapid burst of stills
Start capturing video or a burst of stills as the moment of the transit approaches; that way if there is a slight error in your timing you'll still get the shot. For a DSLR video use the highest frame rate that the camera allows.
Step 5: Review, extract and process
Review and process the frames from our video or still images that show the ISS. Software such as PIPP (https://sites.google.com/site/astropipp) can extract still frames from videos. Then process and enhance the images.
Catch a Dragon
If, like us, you remember fondly the days of NASA's Space Shuttle, you may well recall that on occasions the spacecraft and its — just-detached — external fuel tank would be visible passing over the UK shortly after launch. There was nothing quite like watching the rocket roar off the pad live on NASA TV then seeing the very same shuttle and orange fuel tank — both appearing as points of light; the orbiter appearing white, the fuel tank a subtle ochre tint — silently glide overhead. Though the Space Shuttle is no longer flying, there's still occasionally a chance to catch a similar spectacle thanks to one of the new generation of ISS-servicing spacecraft: SpaceX's Dragon capsule.
Whether you'll be able to see the capsule on its way to the ISS just after lift off depends on the conditions of its launch. For the capsule to be visible, it needs to be dark or deep twilight in the UK, but the Dragon itself has to be in sunlight as it flies over. Helpfully, the CalSky website (www.calsky.com) publishes visibility predictions for some of the Dragon spacecraft around the time of scheduled launches to the ISS; you simply input your location details and it will tell you if the Dragon will make any visible passes. The pass you want to look out for — if it's listed — is the one that's about 20 minutes after the expected launch time, as that'll be the Dragon making its first flyover after departing the Florida coast. It's worth keeping an eye on either the NASA TV or SpaceX online video stream that usually accompanies the launch too, as it'll let you know if the lift off gets scrubbed.
One of the things that's so exciting about catching the ISS-bound Dragon just after lift off is that, from here in the UK, it's not just the capsule you get to see. Dragon is propelled into orbit by a SpaceX Falcon 9 rocket, and the separated upper stage of that rocket is visible next to the capsule as it passes over.
Not only that, but Dragon itself jettisons two solar-panel covers after lift-off and these appear either side of the spacecraft as two points of light which repeatedly brighten and fade during the pass as they tumble away. It's a truly electrifying sight and one that can be captured easily using a DSLR, static tripod and 50-100mm lens, and the same basic technique described in 'Nightscapes with a sparkle'. We've even been able to film Dragon firing one of its thrusters during a pass, using a DSLR and a telephoto lens.
The ISS up Close
Ordinarily, high frame rate cameras are used to create detailed images of targets like the lunar surface and planets. But it's also possible to use them to capture high-resolution shots of the ISS showing its modules and solar arrays.
The primary challenge with this type of imaging is tracking the rapidly-moving ISS, since most high frame rate camera and telescope combinations will provide a small field of view that is tricky to keep centred on the station.
Tracking is typically done manually with the help of an accurately aligned finderscope and the mount's handset set at the highest possible slew rate or, in some cases, carefully manoeuvring the telescope by hand. Essentially you start your computer recording a video from the camera and hope that at some point during the pass your guidance causes the ISS to race through the frame.
Focusing can be done in advance on a bright star — or even better, the Moon — while the correct exposure length will depend on the setup you're using; crucially it'll need to be short enough to stop the ISS from blurring and this may mean that you have to greatly increase the camera's gain to compensate.
Fade to Orange
The reason it's possible to see the ISS against the starry sky is that, at the altitude of its orbit, it's still illuminated by the Sun. Sometimes, however, the ISS will disappear into the darkness of Earth's shadow. Just before it does that you can see and image one of the most beautiful satellite phenomena of all: the ISS experiencing 'orbital sunset'.
As the station slips into the shadow, the Sun sinks below the Earth's limb as seen from the ISS in orbit. In the last moments leading up to that 'sunset' the whole structure is bathed in a deep-orange light. And because that light is the same sunlight that illuminates the station as it passes over us, from the ground the ISS turns from a brilliant white to a deep orange-red, before disappearing.
This effect can be seen clearly in binoculars from suburban sites, but is a particularly rewarding target for imagers and naked-eye observers under darker skies. The passes in which the ISS moves into Earth's shadow are clear in the night-sky charts that accompany each ISS pass prediction on Heavens Above (www.heavens-above.com); they're the ones where the pass seems to abruptly 'stop' amongst the stars. Point your camera in the direction of that end point and — with a long exposure of a minute or so using a DSLR on a tracking mount — you should pick up the gradual fade to orange in the ISS's trail.
What is an Iridium flare?
Iridium 'flares' appear as a brief and slow-moving point of light that brightens rapidly and fades just as fast. They are produced when the antennas of any of the numerous of Iridium communications satellites catch the Sun's light and reflect it back to Earth. In January, the first in a new fleet of Iridium satellites was launched. The antennas of these new satellites aren't as reflective, so the days of Iridium flares could be numbered.
ABOUT THE WRITER
Will Gater is an astronomy journalist, author and presenter. Follow him on Twitter at @willgater or visit willgater.com
Copyright � Immediate Media. All rights reserved. No part of this article may be reproduced or transmitted in any form or by any means, electronic or mechanical without permission from the publisher.
{ width: 160, height: 160, defaultImage: '', layers: 'Artimg-BBC_Sky_motion' }

![]() Orion is proud to partner with BBC Sky at Night Magazine, the UK's biggest selling astronomy periodical, to bring you this article as part of an ongoing series to provide valuable content to our customers. Check back each month for exciting articles from renowned amateur astronomers, practical observing tutorials, and much more!
Orion is proud to partner with BBC Sky at Night Magazine, the UK's biggest selling astronomy periodical, to bring you this article as part of an ongoing series to provide valuable content to our customers. Check back each month for exciting articles from renowned amateur astronomers, practical observing tutorials, and much more!
The Sky in Motion
Astronomer Will Gater reveals the best way to observe and image transient and evolving celestial phenomena, and how you can help scientists in the process.
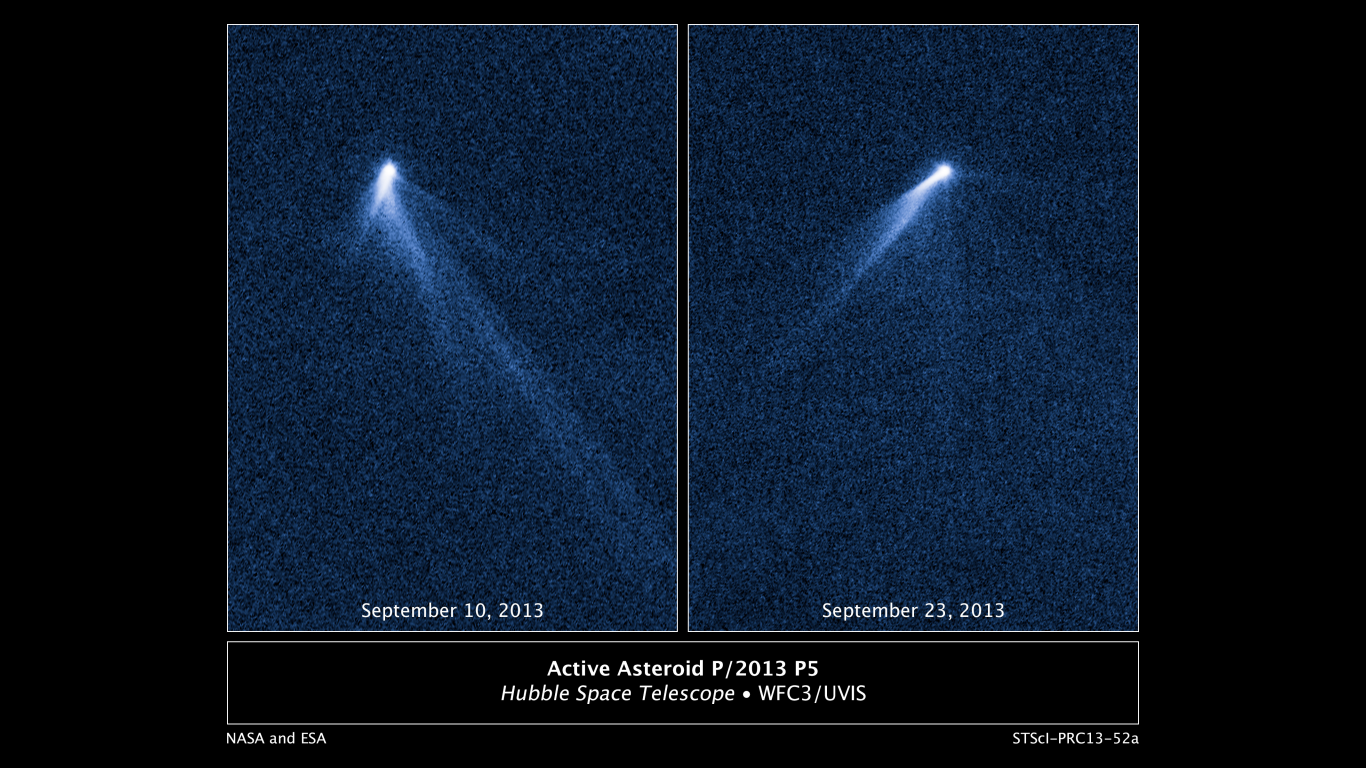
This NASA Hubble Space Telescope set of images from Sept. 10, 2013 reveals a never-before-seen set of six comet-like tails radiating from a body in the asteroid belt designated P/2013 P5. Image Credit: NASA, ESA, D.Jewitt/UCLA
For most of us our interest in astronomy is, and hopefully will continue to be, a lifelong passion. In 10, 20, even 30 years from now we'll look up to the night sky and in the stars, galaxies and nebulae that fill our view we'll see old friends, unchanged over all that time. The truth is, of course, that the stars and galaxies we see are moving through space, and nebulae are evolving — they're just changes that are unfolding on an extraordinarily long cosmic timescale.
But that's not to say that we humans can't perceive any alteration or movement in the night sky. Quite the opposite. One could argue that the heart of amateur astronomy — and indeed one of the key elements of astronomy as a field of scientific study — is a rich and deep tradition of observing the changing night sky, from the appearance of comets to the monitoring of variable stars and the searches for supernovae in distant galaxies.
In the following pages we're going to explore some other transient and evolving celestial phenomena that you can observe and photograph with relatively simple equipment — the kind of kit that many amateurs have access to — so that you can see for yourself that the sky, and indeed the cosmos all around us, really is in motion.
Watch an Asteroid Whizz By
While the planets might be the quintessential 'wandering stars', drifting against the night sky's sparkling backdrop over weeks and months, there are other objects within the Solar System whose movement across the heavens is far more dramatic — so much so that their motion against the stars can be discerned over hours and minutes, rather than many days. Near-Earth asteroids are small, typically irregularly shaped bodies, whose orbits bring them relatively close to our planet at times. If a near-Earth asteroid is big and bright enough it can be a thrilling object to catch sight of in a telescope eyepiece, or capture on camera, as it makes a close approach. ESA maintains a database at http://neo.ssa.esa.int/web/guest/close-approaches that you can examine to see when any large, relatively, bright objects are next passing by — and of course the BBC Sky at Night magazine Sky Guide will usually contain news of upcoming notable near-Earth asteroid passes.
Capturing a Near-Earth Asteroid Pass on Camera
Watching a near-Earth asteroid slowly wander across a star field at the eyepiece can be tremendously exciting, but it's the sort of target that really requires a medium- to large-aperture instrument to be seen well. On the other hand, even a modest astrophotography setup can capture brighter near-Earth asteroids — here we explore how.
Step 1 — Equipment Small refractors or Newtonians combined with a CCD camera or DSLR are well-suited to imaging bright near-Earth asteroids; we've even had success using just a DSLR and a 135mm telephoto lens. You'll also need a mount that can track the sky accurately for a few minutes at least.
Step 2 — Track and focus Set up your imaging kit. If you're using an equatorial mount get the polar alignment (and thus the mount's tracking) as accurate as you can, as this will help both image quality and processing later on. Next, focus on a bright star — ideally with the help of a Bahtinov mask.
Step 3 — Locate and image capture Use Stellarium (stellarium.org) and its Solar System Editor plug-in to find a near-Earth asteroid's location. Slew to the coordinates, take brief test exposures, then cross-reference the star field with Stellarium. When you've confirmed the near-Earth asteroid is in frame, check it's not moving out of shot. Capture a series of exposures.
Step 4 — Stack or animate You should now have a set of images (typically taken over several tens of minutes) that shows the near-Earth asteroid moving between frames. You can now process and stack these together with your chosen image processing software to show the asteroid's path, or collect and save the frames as an animated GIF.
Marvel at a Lunar Sunrise
As astronomers we're familiar with the Moon's phases, caused by its movement around the Earth and the changes in illumination that come from the varying geometry of the Earth, Moon and Sun relative to one another. Prior to full Moon, the boundary demarcating night and day on the lunar globe, and the line that gives the phase its 'shape' — called the terminator — is the swathe of terrain where the Sun is rising over the lunar landscape. At this point in the lunar cycle the phase is waxing (growing), as the terminator travels across the disc. After full Moon the terminator moves westwards from the eastern limb once again, but is now where the Sun is setting, with the phase waning (shrinking).
This night-by-night movement of the terminator, and consequently the daily change in the lunar phase, is large and easily visible to the naked eye. But you can also observe and image subtle variations in the Moon's phase over the course of just one night. Watching the Sun rise or set over a chain of mountains or a large crater rim is a captivating observing experience; it is quite something to see the lighting change, and shadows lengthen or shorten. It's evidence of the Moon's orbital motion, happening right in front of your eyes.
The UK winter months, when the Moon is high for hours in a dark sky, are an ideal time to attempt the observation. Our favourite targets to see this phenomenon on are the large craters Copernicus and Plato — the latter especially, for the shadows from its rim that creep across its smooth floor — the lunar Alps and the Sinus Iridum.
A high frame rate camera and a modest amateur telescope can capture the changes easily. If you are able record an AVI video every 20-30 minutes or so for several hours, you can create dramatic animations of the changing illumination. This requires each processed image produced from the raw AVI videos to be brought into software — such as Photoshop or GIMP — as a separate layer. Multiple layers within a single picture can then be saved as an animated GIF file.
How You Can Help The Professionals
Taking pictures or making observations of some of the phenomena we've covered in this article can be an exciting experience in itself, but it's also possible that your records could help professional astronomers with their research. For example, if asteroid imaging is your thing, the scientists working on the OSIRIS-REx mission — which will return samples from the surface of the asteroid 101955 Bennu in 2023 — run a project called Target Asteroids! (https://www.asteroidmission.org/get-involved/target-asteroids) It uses data captured by amateurs to help learn more about certain asteroids. Alternatively, if you've been lucky enough to capture a picture or timelapse of the Northern Lights on holiday, the Aurorasaurus citizen-science project (http://aurorasaurus.org) is collecting images of a poorly-understood auroral phenomenon dubbed, rather unusually, 'Steve' — if your snaps show the unusual filamentary feature they could be useful to researchers.
And of course many national astronomical societies and organisations gather reports and observations of transient and changing astronomical phenomenon sometimes for publication and analysis in their journals.
So whether it's through a citizen-science project or a more traditional endeavour, like meteor counting, planetary imaging or variable star observing, there are many ways that we amateurs can make a meaningful contribution.
The Spectacular Seething Sun
We needn't look lightyears out into space to find evidence of the dynamic and ever-changing nature of the cosmos we live in. In fact you'll find it on our celestial doorstep in the form of our star, the Sun. This seething ball of plasma is constantly changing. Its churning 'surface' — the photosphere — is occasionally pockmarked by dark, transitory, blemishes known as sunspots, while above huge tendrils of plasma, called prominences, rise and waver as they are corralled by the star's magnetic fields.
To observe these features safely however you'll need specialist equipment. To study the photosphere, for example, a telescope needs to be fitted with a certified solar filter and any finder scopes should be removed too. With careful and correct use and installation — conforming to the manufacturer's instructions — certified solar filters can provide superb views of evolving sunspots and large sunspot groups.
There are also specialist dedicated solar telescopes available which, as well as filtering the Sun's light so it is safe to view, show only certain specific wavelengths of the Sun's radiation. One type of dedicated solar telescopes shows what's known as the 'hydrogen-alpha' band in the Sun's spectrum. These solar scopes reveal a layer in the Sun's atmosphere known as the chromosphere and in doing so open a window onto one of the most dynamic regions of our star.
While an ordinary certified solar filter will show the solar photosphere as a smooth whitish or yellowish disc, perhaps marked by sunspots or speckled bright patches known as faculae, a hydrogen-alpha solar telescope will show the Sun's chromosphere as a bright, scarlet-red globe shrouded in a mass of plasma 'fibres'.
A hydrogen-alpha solar telescope will also often reveal the prominences leaping off the limb of the Sun, and these can change in literally a matter of minutes, meaning they are a wonderful target for high-resolution imaging where spectacular animations can be made of their evolution. Sketching can be a great way to record the changes in these features too.
The powerful magnetic fields associated with sunspots also have an effect in the chromosphere. There they manifest themselves as bright 'active regions' where loops of plasma twist and turn around the dark sunspots. Like prominences these too can change and evolve over short periods. Sometimes they may even exhibit very bright, fleeting, beads or filaments of light. These are thrilling events for solar observers and imagers, and are known as solar flares.
Create a Timelapse of the Turning Sky
One of the most obvious signs that we live on a rock spinning in space is the motion of the stars across the sky during the course of a night. This movement is a result of Earth rotating on its axis, and you don't need a hugely advanced setup to capture it on camera; a DSLR, wide kit lens and static tripod are ideal for tackling a classic star trail shot. Leave the shutter open for 30-60 seconds and the rotation of the Earth will blur the stars into short arcs. If you want to take things a step further, try creating a timelapse of the sky — and perhaps the Milky Way too — moving. You can use the same kit as for a star trail shot, but you'll need to approach the way you capture the images in a slightly different way. For timelapses you don't actually want the stars to trail. What you need are for them to be points of light so that when you come to animate the shots it looks almost as if the sky is a static picture that's drifting over a landscape. This may mean that you have to keep the exposure length short, increase the ISO and open your lens's aperture right up to compensate. When you've found the right settings, set the camera taking exposures continuously, say for 30 minutes for a short timelapse. You'll typically capture hundreds of photos doing this, so make sure your camera's memory card and your computer are up to the task! The images can then be processed as a group in image processing software and then imported into a video editor to be animated into a smooth video. There are numerous ways of achieving the latter — for example in iMovie you'd do it by setting the 'duration' of each still image to 0.1 seconds. This technique can also be used to make timelapses of other dynamic astronomical phenomena, such as aurorae and noctilucent clouds.
The Skies In Motion This Month
A particularly fine chance to watch the motion of the heavens is on offer in the UK this month when, in the early hours of the morning on 6 November, the gibbous Moon will occult (slip in front of) the bright star Aldebaran in Taurus. As the Moon journeys across the background stars of Taurus, Aldebaran will disappear behind the brightly lit western limb of the Moon, emerging 40-60 minutes later from behind the unlit eastern limb. Occultations are great events for video astronomy, so if you have a digital camera that can shoot video try capturing Aldebaran suddenly popping into view as it reappears from behind the Moon. The exact moment of Aldebaran's reappearance (and disappearance) will depend on where in the UK you're observing from, so consult a planetarium programme, such as Stellarium (http://www.stellarium.org), for location-specific times.
ABOUT THE WRITER
Will Gater is an astronomy journalist, author and presenter. Follow him on Twitter at @willgater or visit willgater.com
Copyright © Immediate Media. All rights reserved. No part of this article may be reproduced or transmitted in any form or by any means, electronic or mechanical without permission from the publisher.
{ width: 160, height: 160, defaultImage: '', layers: 'Artimg-BBC_Chasing_Moon_Shadow' }

![]() Orion is proud to partner with BBC Sky at Night Magazine, the UK's biggest selling astronomy periodical, to bring you this article as part of an ongoing series to provide valuable content to our customers. Check back each month for exciting articles from renowned amateur astronomers, practical observing tutorials, and much more!
Orion is proud to partner with BBC Sky at Night Magazine, the UK's biggest selling astronomy periodical, to bring you this article as part of an ongoing series to provide valuable content to our customers. Check back each month for exciting articles from renowned amateur astronomers, practical observing tutorials, and much more!
Chasing the Moon's Shadows
This summer, Elizabeth Pearson travelled across the US to hunt down the total eclipse of the Sun on 21 August 2017.
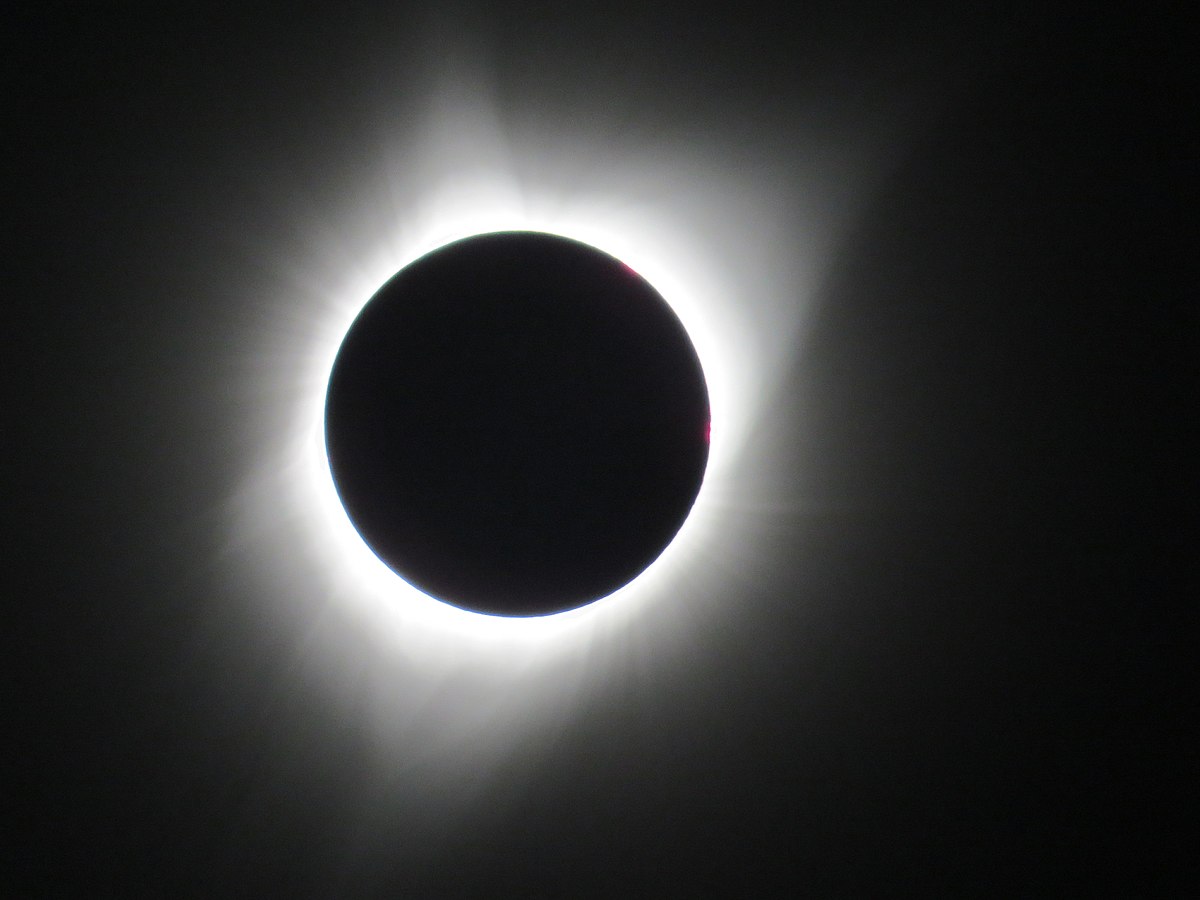
By Zombiepedia - Own work, CC BY-SA 4.0, Link
In 1999, a total eclipse of the Sun passed over Cornwall. And I missed it. Ever since, I have wanted to see totality, and so when I heard that the Moon's shadow would be passing coast to coast over the US mainland on August 21st 2017, I knew I had to be there. I decided to take a road trip that would end up taking me almost 3,000km across the country as I attempted to chase down the lunar shadow.
My journey started in Salt Lake City, Utah, where I picked up the hire car that would prove to be my faithful steed for the week. My first stop was Salt Lake City's Clark Planetarium, where I found queues out the door. The crowds had been brought in by an email from a major online retailer recalling eclipse glasses, sparking a panic.
"A lot of people who thought they had glasses just got emails saying their glasses cannot be trusted, and have come to the Clark Planetarium because we have the real ones. We never thought we'd be the only supplier in town. We have a supply for today, we may even have a supply for tomorrow, but then who knows," says Seth Jarvis, the director of the Clark Planetarium.
Like most of the nation, Salt Lake City would only see a partial eclipse, making appropriate eyewear crucial. But for me, the 91 per cent it would see wasn't enough. I wanted totality. It was time to start chasing that shadow.
As I drove from Utah into Wyoming, I began to see signs that I was heading into totality country. On the highways there were notices banning heavy vehicles on August 20-22 to keep traffic moving, while in towns handwritten signs offered eclipse parking. Every business, it seemed, had special 'Totality Deals'.
The Building Buzz
Eventually I made it to Casper, Wyoming, the largest town on the eclipse's central line and host to the Astronomical League's annual AstroCon convention — which happened to coincide with my visit. The event had drawn people from all over the world, keen to see the eclipse.
"Once you've seen totality, you've just got to see it again," says Sue Baldwin, an eclipse chaser from Auckland, New Zealand. "The first time I saw it I bawled my eyes out for 30 seconds, and actually had to hit myself so I could look at the totality. It's just that emotional, there is no comparison."
With so many eclipse enthusiasts together under one roof I couldn't help picking up on their excitement. And it only grew when I drove on to my next pit stop of Alliance, Nebraska. "They're saying that there are going to be 20,000 people in town altogether," says Jessica Hare, the acting manager for local monument 'Carhenge', a replica of Stonehenge made from scrap cars and the reason this remote location is so busy when I arrive.
"For the most part people in town are excited. There's a reason we live here, though: we're not into big crowds," Hare continues. "But it's a change of pace for a few days and then we've got something to talk about for 60 years."
With only two days to go, people were already arriving and setting up camp. But amongst the bustle, an air of disquiet was beginning to form. People were checking the weather and all was not well. On August 21st, clouds were forecast across the eastern side of the US. Combined with the eclipse glasses scare, it looked like huge numbers of people might not get to witness the great event.
By the time I reached Sutherland in central Nebraska, where I had planned on watching the eclipse, the forecast had grown even worse. The nearest place with completely clear skies forecast was almost 400km back the way I had just come, along roads already gridlocked with traffic. Did I stay and risk being clouded out, or go and risk getting stuck on the highway?
I had come too far to end up staring at clouds. Time to chase those clear skies. Wanting to avoid the most horrific traffic, I picked a town just off the centerline and at 4am on 21 August, I was back in the car.
As I set off, the fog was so thick that at times I could barely see 30m ahead of me. But I was determined to beat the clouds and fought on until four hours later I reached my final destination — an old airfield in Mitchell, Nebraska. A few hundred people had already arrived, most of whom had also undertaken long treks, and were ready to see their first eclipse when it started at 10:25am.
The Moment of Darkness
When the hour came, we donned our (certified) eclipse glasses to watch as the Sun was slowly eroded away by the Moon. As the spectacle unfolded, the dwindling sunlight made its effect felt. The air, which should have been uncomfortably hot by now, felt more like a breezy afternoon.
With around 20 minutes to go, I reached to take my sunglasses off before realising I wasn't wearing them. The light was fading and taking the colour out of the world with it, like an old photograph that's been left in the Sun.
At 11:46am, with one minute left, the Sun was down to the merest sliver. I turned to the west to watch as a wall of darkness seemed to advance across the sky.
Turning back, I watched as a sudden explosion of diamond light came from the Sun as the last of its rays were covered, accompanied by a huge cheer from the crowd.
Where once the Sun had been, there was now a hole of utter blackness. A crown of light danced around it and I could almost see the fine tendrils swaying with the breeze. It seemed huge, stretching over a much larger area of sky than I'd expected. Around me, the sky was in twilight with pink trimming every horizon, as if the Sun had just set in all directions together.
The crowd was quiet now. After all the excitement and panic, I felt a sense of quiet calm. I was under the shadow of the Moon, watching plasma arcing a million kilometres out of the Sun. It was humbling, a reminder of our small place in the grand Universe.
The Chance of a Lifetime
All too soon, I could tell totality was reaching its end. The perfect circle of blackness was beginning to look lopsided. One minute, 53 seconds after the first, there was a second burst of light as the shadow passed, sweeping across the nation and taking the spectacle to the millions who waited farther east. As others rushed home, I stayed to watch as the Sun returned, taking a moment to appreciate what I had just witnessed.
Later that evening, back in Sutherland (where the weather had been perfect, of course), I headed out to look at the Milky Way, knowing our Galaxy is only one of billions that all move together in the ballet of the Universe. I've devoted my life to studying that dance, but I have never grasped its majesty like I did in that one minute and 53 seconds.
Once you've seen totality, you really do have to see it again. On April 8th, 2024, another eclipse will sweep across the US and I plan on being under the Moon's shadow once more. Maybe I'll see you there.
Stargazing Central
Sandhills, NE
The rural state of Nebraska is home to some of the darkest accessible skies in the world, making it a dream destination for deep-sky imagers.
https://visitnebraska.com/stories/visit-the-sandhills
Strategic Air and Space Museum, Omaha, NE
The museum is home to several space artefacts and a tribute to Nebraskan astronaut Clay C Anderson, as well as dozens of aircraft.
http://sacmuseum.org
Clark Planetarium, Salt Lake City, UT
As well as shows in the dome, the Clark Planetarium houses a space museum with interactive exhibits to enthuse little astronomers.
https://slco.org/clark-planetarium
Yellowstone National Park, WY
Spend the days exploring the world-class park and the nights taking in the dark skies. An astronomy program runs in summer.
www.nps.gov/yell/index.htm
Carhenge, Alliance, NE
This huge replica of Stonehenge made from cars was built in 1987 as a tribute to the artist's father, and has proved to be a popular road trip stop ever since.
http://carhenge.com
Craters of the Moon, ID
Follow in the footsteps of the Apollo 14 crew, who underwent geology training in this volcanic landscape prior to their trip to the Moon.
www.nps.gov/crmo/index.htm
ABOUT THE WRITER
Dr Elizabeth Pearson is BBC Sky at Night Magazine's news editor. She gained her PhD in extragalactic astronomy at Cardiff University.
Copyright © Immediate Media. All rights reserved. No part of this article may be reproduced or transmitted in any form or by any means, electronic or mechanical without permission from the publisher.
{ width: 160, height: 160, defaultImage: '', layers: 'Artimg-BBC_Buzz_Aldrin_Mars' }

![]() Orion is proud to partner with BBC Sky at Night Magazine, the UK's biggest selling astronomy periodical, to bring you this article as part of an ongoing series to provide valuable content to our customers. Check back each month for exciting articles from renowned amateur astronomers, practical observing tutorials, and much more!
Orion is proud to partner with BBC Sky at Night Magazine, the UK's biggest selling astronomy periodical, to bring you this article as part of an ongoing series to provide valuable content to our customers. Check back each month for exciting articles from renowned amateur astronomers, practical observing tutorials, and much more!
Why We've Got to Get to Mars
He may be one of the most famous moonwalkers, but Buzz Aldrin has spent the past 30 years developing a plan to get people to Mars. He tells Jamie Carter why.
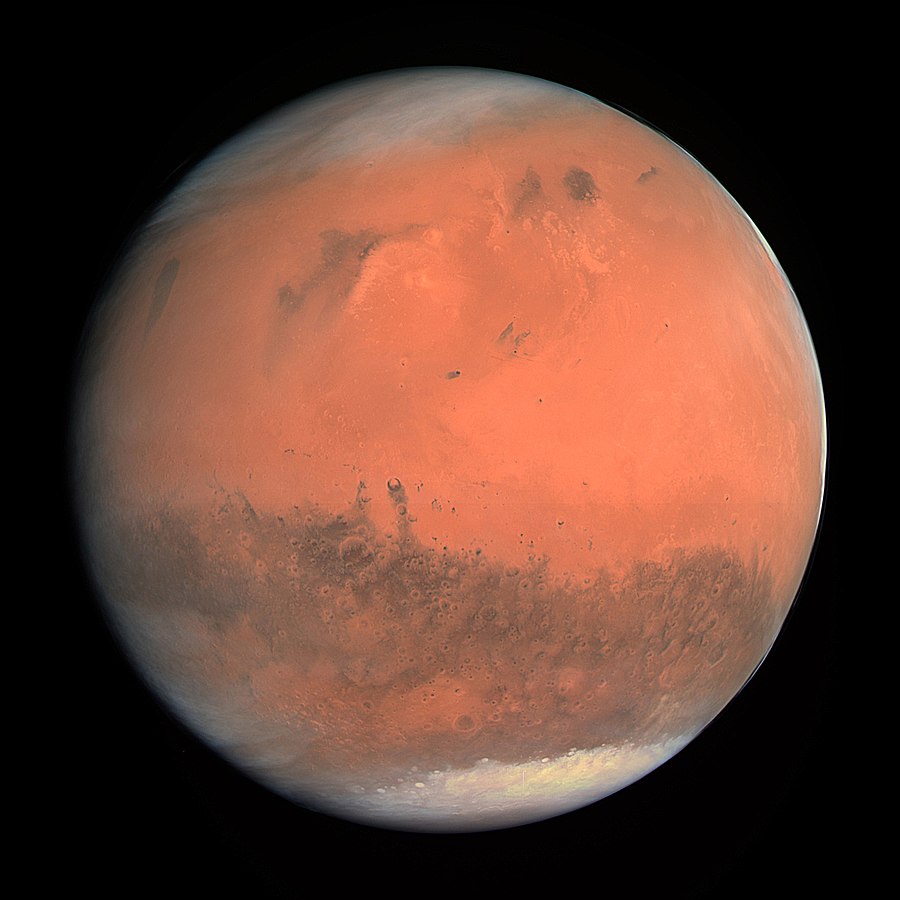
By ESA - European Space Agency & Max-Planck Institute for Solar System Research for OSIRIS Team ESA/MPS/UPD/LAM/IAA/RSSD/INTA/UPM/DASP/IDA - http://www.esa.int/spaceinimages/Images/2007/02/True-colour_image_of_Mars_seen_by_OSIRIS, CC BY-SA 3.0-igo, Link
Colonising the Solar System is becoming the 'in' thing among billionaires. SpaceX supremo Elon Musk recently talked putting a million people on the Red Planet within 100 years, while Blue Origin's Jeff Bezos thinks he can help spread a trillion people throughout the Solar System. That's big talk, but there's one man who's spent the last three decades telling anyone who'll listen about his plans to go to Mars, and why it's so important we do so.
"I'm 87 years old and I'm getting impatient," says Dr Buzz Aldrin, who walked on the Moon in 1969 as part of Apollo 11. "We've been stuck in low-Earth orbit for too long and I believe that we need to break this malaise," he says. "I do believe we can establish permanent habitation on Mars by 2039, and I have a plan to achieve it."
If that date seems rather specific, there's a good reason for it: it would be the 70th anniversary of Apollo 11's Moon landing. Not that Aldrin wants to be constantly reminded of that. It may be regarded as a seminal moment for humanity, but only until someone sets foot on Mars. "I want to be remembered as the man who led the world to Mars, for a permanent settlement," he points out.
Occupation vs. Exploration
Aldrin, who is constantly refining the ideas he first set out in his 2013 book Mission to Mars: My Vision for Space Exploration, now wants to play a pivotal role in the push to the Red Planet. But there remains a fundamental question: why do we need to occupy Mars? Why not just pay it a quick visit?
"What concerns me most about expeditionary missions is that we may go there once or twice and never go back — it would be flags and footprints again," says Aldrin, citing the Apollo Moon landings, the last of which was 45 years ago. "But the more important reason is that it's vastly more expensive to send people up there with all their infrastructure in one spacecraft and the quality of the science would be dramatically lower."
According to Aldrin, once you have the right kind of surface and transportation infrastructure, the cost of sending individual astronauts would be affordable. His is a pragmatic plan built upon orbital calculations that could make inhabiting Mars far more affordable than anyone imagines.
Aldrin's idea revolves around the concept of 'Cycling Pathways': one or possibly two Earth-Mars spacecraft (a 'Cycler') that travel constantly between Earth and Mars. "The astronauts will be transported to the Earth-Mars Cycler with a single launch, with refuelling in Earth orbit," explains Aldrin. "Using spacecraft that cycle between Earth and Mars would be an order of magnitude cheaper than using an entirely new series of rockets to send each crew to Mars."
Following on From Von Braun
Although his ideas pre-date those currently being proposed by various billionaires, Aldrin is certainly not the first to consider how to carry out a manned mission to Mars. Dr. Wernher von Braun, developer of the Saturn V rocket, briefed NASA's Space Task Group just after the Moon landings on a plan to land two expedition spacecraft on Mars in 1982. "Werner von Braun's vision of Mars exploration was a tremendous inspiration to many of us," says Aldrin. "But von Braun was really interested in using very large rockets. I think we can get to Mars without the same reliance on state-developed and operated rockets." Aldrin's plan also differs from Von Braun's in its level of reusability.
Ambitious space exploration plans always come with a huge caveat: politics. Aldrin was recently at the White House, standing alongside President Donald Trump as he signed an executive order re-establishing the National Space Council after its 24-year hiatus, but he's not getting too carried away with that decision. "I don't expect the Space Council to fundamentally change the US space programme by itself. But it will really become critical if the administration decides to fundamentally rethink major aspects of our civil and national space programmes," says Aldrin. That's what he's hoping for.
Aldrin will be keeping a close watch on what President Trump says on 24 July 2019 when the world marks 50 years since Aldrin and Neil Armstrong set foot on the Moon. "I'm personally very committed to the idea that the President should, and indeed must, announce a major US commitment to Mars permanence by the 50th anniversary", he says. "It's essential to force us to make the hard choices we must make in order to get to Mars in the next 20 years."
ABOUT THE WRITER
Jamie Carter is the author of A Stargazing Program for Beginners: A Pocket Field Guide and edits WhenIsTheNextEclipse.com
Copyright © Immediate Media. All rights reserved. No part of this article may be reproduced or transmitted in any form or by any means, electronic or mechanical without permission from the publisher.
{ width: 160, height: 160, defaultImage: '', layers: 'Artimg-BBC_Secrets_Jupiter' }

![]() Orion is proud to partner with BBC Sky at Night Magazine, the UK's biggest selling astronomy periodical, to bring you this article as part of an ongoing series to provide valuable content to our customers. Check back each month for exciting articles from renowned amateur astronomers, practical observing tutorials, and much more!
Orion is proud to partner with BBC Sky at Night Magazine, the UK's biggest selling astronomy periodical, to bring you this article as part of an ongoing series to provide valuable content to our customers. Check back each month for exciting articles from renowned amateur astronomers, practical observing tutorials, and much more!
Secrets Erupt from Jupiter
In January 1979, after a journey of 15 months, Voyager 1 began to photograph the first planet on its Grand Tour, the gas giant Jupiter. Voyager 2 followed a few months later, and together they rewrote almost everything we thought we knew about the Jovian system — not least the fact that volcanism exists beyond Earth.
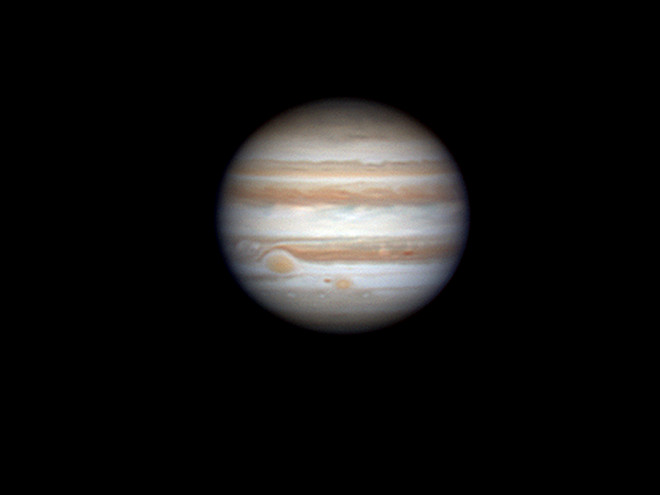
Photograph by Cherdphong Visarathanonth in Prawet district, Bangkok, Thailand
At first glance, it resembled nothing more than a blemish on Voyager 1's lens. But as 26-year-old engineer Linda Morabito peered closer at the image of Jupiter's moon, Io, she realised she was looking at something extraordinary. The blemish was actually a faint, bluish crescent that was protruding from beyond the moon's limb.
This all occurred on 9 March 1979, four days after the probe had made its closest pass — 349,000km — of the broiling Jovian cloud tops. Morabito was part of the optical navigation team, plotting Voyager 1's trajectory to Saturn, three-quarters of a billion kilometres and 20 months away. She had just made the most significant discovery of the entire mission.
The long-exposure shot, taken a day earlier, viewed Io from a parting distance of 4.5 million km. Analysis revealed the crescent to be a plume — rising over 280km into space — from a volcano. Later named 'Pele' after the Hawaiian goddess of volcanoes, it was the first of hundreds of such features to be found on Io. As the days wore on, infrared data pinpointed regions rich in sulphur dioxide, where temperatures soared up to 200°C higher than the surrounding terrain. Four months later, on 9 July, Voyager 2 revealed that Pele had fallen dormant, although several other volcanoes remained active.
Big Surprises
It was a big surprise on a natural satellite with a size and density roughly equal to that of our geologically inactive Moon. Io's proximity to its giant host (it orbits just 421,800km from Jupiter's centre) forces it to bear the brunt of a punishing magnetic field. This is hundreds of times stronger than Earth's and 'co-rotates' with Jupiter's interior every 10 hours, transporting vast quantities of energetic plasma back and forth along magnetic field lines. The field is inflated at the magnetic equator, pushing the plasma outwards in a huge, tilted 'sheet' that rises and falls, flopping north then south, during each rotation period.
The relationship between Jupiter and Io is a complex one. As Jupiter's magnetic field sweeps past Io it strips 1,000kg of mass from the moon every second. This forms a doughnut-shaped 'torus' of charged particles, the existence and extent of which was first inferred by Pioneer 10. Ground-based observations also identified a neutral sodium cloud around Io, formed by atmospheric sputtering, as well as the spectroscopic fingerprints of sulphur dioxide.
Not until the discovery of Io's volcanism did the process of how this torus was maintained begin to make sense. Under Voyager 1's gaze, twice-ionised oxygen and sodium atoms glowed brightly at ultraviolet wavelengths. To achieve such intensities, electron temperatures have to surpass 100,000°C and radiate a trillion Watts — double the power-generating potential of the entire US — along a 'flux-tube' into Jupiter's magnetosphere. Voyager 1 tried to fly through this flux-tube, but missed its centre by around 5,000km.
Lava Lakes and Lights
Morabito's chance discovery identified Io as the most volcanically active place in the Solar System. It yields twice as much energy as all of Earth's volcanoes combined, despite having a fifth as many hotspots and being only a third of the size of our planet.
Voyager 1 found virtually no impact craters on its young and dynamic surface, just a few per cent of which was pockmarked with dark-centred volcanoes. From these snaked red and orange lava flows, some fanning out in wide arcs, others forming a series of twisting tentacles. Pele was surrounded by a hoofprint-shaped lake of sulphur dioxide, while 200km-wide Loki — more powerful than all of Earth's volcanoes, put together — had increased in magnitude and evolved into a two-plume eruption by the time Voyager 2 was able to observe it.
Jupiter's torus offered a contributing reservoir of energetic particles, which spiralled along magnetic-field lines to fuel the planet's spectacular aurorae. One display extended 30,000km across its north polar region and generated extraordinary 'whistling' radio emissions. The Voyager 1 image that confirmed the existence of the 'Jovian Lights' also picked out massive electrical discharges from 19 lightning 'superbolts', while Voyager 2 went on to locate eight additional flashes.
Jupiter's magnetosphere is a truly colossal powerhouse. The Pioneer probes revealed its sunward extent and raised speculation of a bullet-like 'magnetotail' in its wake. Voyager data confirmed the tail's existence and showed that it extended 740 million km beyond the planet, as far as Saturn's orbit. Increased solar activity since 1974 had compressed the sunward boundary and a continuous push-pull dynamic saw both spacecraft repeatedly enter, exit, then re-enter the magnetosphere — Voyager 2 recorded 11 boundary crossings. This showed the variability of the magnetosphere's size, as the boundary rhythmically flashed in and out in response to solar wind pressure.
Moving Pictures
The two Voyagers spent months examining Jupiter, both before and after their closest passes. From January until April 1979, Voyager 1 transmitted data across the 778-million-km gulf to Earth, while Voyager 2 did likewise between April and August. Pictures received during those periods showing how the differential rotation of Jupiter's atmosphere produces a colorful latitudinal display of bright 'belts' and dark 'bands', prompted comparisons to the work of Vincent van Gogh.
Movies made with overlapping photos of Jupiter's rotation showed clouds swirling around the edge of the planet's famous Great Red Spot and clipping along at 100m/s. Twice the size of Earth and observed telescopically since the 17th century, the spot inhabits the southern hemisphere and rotates anticyclonically, bearing many hallmarks of a high-pressure region. With no solid surface or continents to anchor pressure waves, Jupiter's storms can (and do) endure for centuries. The Pioneer probes saw uniform color within the spot and its attendant clouds, but by 1979 south temperate latitudes had altered considerably, producing complex turbulence. In July, Voyager 2 hurtled past at a distance of 576,000km and revealed a notable 'thinning' of bands at the spot's southern rim, a spreading-out of clouds to the east and a greater evenness of color. Three oval-shaped white spots, first seen four decades earlier and each the size of our Moon, had also worked their way steadily eastwards.
A Ring Is Revealed
At 1,300 times the size of Earth, Jupiter is the biggest and most massive planet in the Solar System. Infrared data from Voyager pegged its composition at 87 per cent hydrogen and 11 per cent helium, with trace amounts of methane, water, ammonia and rock. A seething mass of clouds, storms and eddies within its bands and belts moved crisply across its disc, indicating that the motion of material, rather than energy, was at work deep in the interior. Westward-blowing zonal winds extended at least 60° north and south, far closer to the poles than expected. But the surprises didn't end there.
Before 1979, only Saturn and Uranus were known to have rings; theoretical models of long-term stability had not predicted any to exist at Jupiter. That prediction was proven wrong just 17 hours after Voyager 1 made its closest approach, when a photo taken to search for new moons picked out a tenuous ring only 30km wide.
It was intrinsically dark and composed of tiny, rocky grains, with a reddish hue similar to the surfaces of the newly found moons Thebe, Metis and Adrastea. Long-range imagery also revealed a red surface on the elongated and cratered moon Amalthea. This prompted speculation that the ring might have evolved from an ancient moon torn apart by tidal forces and it was argued that Adrastea could provide a suitable reservoir of material for it.
Voyager 2 revealed the ring to be quite narrow — one scientist called it "ribbon-like" — and its proximity to Jupiter implied that it was quite young. Its main body was joined by an interior 'halo' of dust and an outer 'gossamer' ring, which petered out into the background darkness, 180,000km above the planet's cloud tops.
New View, New Details
The Voyager probes unveiled the Jovian system in its entirety for the first time and showed us the vast differences between the four Galilean moons. Even the finest telescopes of the era were only capable of showing Io, Ganymede, Europa and Callisto as tiny, dancing points of light. The two Voyager spacecraft revealed them to be four distinct worlds that varied in size from smaller than our Moon to almost as big as Mars.
Giant Ganymede is the largest planetary satellite in the Solar System, with an equatorial diameter of 5,270km, slightly pipping Saturn's moon Titan. Voyager 1 uncovered the presence of a thin atmosphere on Ganymede with a pressure equivalent to just one billionth of the sea-level pressure on Earth. Images taken by the probe showed a terrain split between dark, heavily cratered ancient areas and brighter, more youthful patches intersected by ridges and furrows.
The dominant feature on Ganymede's surface is the Galileo Regio, a 4,000km-wide dark patch big enough to cover the 48 adjoining US states. This vast oval-shaped remnant of Ganymede's primordial crust is punctuated by craters nicknamed 'palimpsests', after pieces of reused medieval parchment that allow the original, partly erased work to show through the new writing. The region and its craters offer a tantalising glimpse of Ganymede's past tectonic upheavals. Elsewhere, younger craters exhibit dark rays, extending for hundreds of kilometres across the surface.
An Old Moon
Callisto, although eight per cent smaller in equatorial diameter than Ganymede, was expected to be similar, as both moons are approximately half-water and half-rock and, unlike Io, are far enough from Jupiter to escape serious magnetospheric bombardment. Voyager 1 saw Callisto on the outward leg of its journey and found a surface without high mountains or deep ravines but dominated by the 600km-wide bullseye of the Valhalla impact crater and its surrounding array of concentric rings.
Vast tracts of heavily pitted terrain revealed a world whose origin may stretch as far back as the accretional stages of the giant planets themselves, some 4.5 billion years ago. 'Large' craters, exceeding 150km in diameter, were conspicuously absent, however, leading to theories that Callisto's ice-rock composition had somehow altered the ability of its thin crust to support them. Even at the time of the Voyager encounters, it was argued that ice floes over millions of years probably filled and obliterated craters of this size.
As for Europa, the two spacecraft saw the smallest Galilean moon as a highly reflective globe, reminiscent of a "string-wrapped baseball". It was a description inspired by the moon's striking linear features, from its scalloped ridges to meandering dark stripes that crisscrossed the surface for thousands of kilometres, while mysterious 'triple bands' made up of two parallel ridges, separated by a depressed central gorge. One of the few craters on Europa is 26km-wide Pwyll, which is surrounded by bright rays of ejecta that run for hundreds of kilometres out from its central basin.
Interestingly, the Pwyll impact seemed to have occurred on a particularly thin portion of the crust, for iceberg-shaped chunks of subsurface material protruded from its floor. Dark areas, nicknamed 'maculae', were identified as potential upwellings from deep within Europa's interior, while the side of the moon, which faces away from Jupiter was characterised by huge, wedge-shaped bands, many kilometres long.
More to Discover
The Voyagers' discoveries at Jupiter underlined the unpredictability of planetary exploration, for the largest planet in the Solar System had begrudgingly surrendered only a handful of the mysteries it held. For the Voyager scientists, it had been a once-in-a-lifetime experience. NASA's associate administrator for space science Thomas Mutch likened it to "being in the crow's nest of a ship during landfall and passage through an archipelago of strange islands". Volcanism on Io, colossal polar aurorae, along with unknown and unseen rings and moons could never have been confidently predicted before we turned our knowledge-gathering capabilities over to the Voyager robots, millions of kilometres from home; robots whose findings rewrote the textbooks on Jupiter for the next quarter of a century.
The Radiation Problem
Before 1970, it was theorised that large quantities of abrasive dust might endanger a spacecraft as it attempted to pass through the asteroid belt between Mars and Jupiter. Several years later, when the Pioneer probes crossed the belt, they showed the dust was no danger. But upon their arrival at Jupiter, a new problem emerged: the Pioneers' circuits had been fried and their optics darkened by the savage Jovian radiation belts. They'd endured 1,000 times the human-lethal dose of high-energy protons and electrons.
As well as building a plasma-wave instrument to analyse this environment, engineers worked to toughen the Voyager probes' electronics ahead of their visits to Jupiter and Saturn. Radiation-resistant materials, including tantalum, were tested to maximise their reliability, before being added into each of the spacecraft. Particularly sensitive areas received additional spot-shielding.
The Voyagers made it through the radiation belt but not wholly unscathed. Voyager 1 experienced a 'timing offset', which caused its on-board clock to slow down. Moreover, its two computers drifted out of synchronisation with each other and the flight data systems. These glitches led to some photographs being taken 40 seconds too early, which induced blurring and the loss of high-resolution images of Io and Ganymede.
Fortunately, Voyager 2 passed Jupiter at a much wider distance than its twin so its problems were correspondingly lessened. Its computer had also been reprogrammed to synchronize automatically, every hour. In this fashion, the complications of image-smear by the high radiation levels were largely avoided.
A Fresh Glimpse Of An Old Great
Measuring 26,000km in its east-west diameter and half as much north-south, the enigmatic Great Red Spot lies 22° south of Jupiter's equator and has been observed telescopically for more than three centuries. Its discovery is usually attributed either to the English scientist Robert Hooke or the Franco-Italian astronomer Giovanni Cassini, both of whom are believed to have seen and recorded it between 1664 and 1665. Writing in the Philosophical Transactions of the Royal Society, Hooke identified the feature's presence "in the largest of the three observed belts of Jupiter" and noted that "its diameter is one-tenth of Jupiter".
The spot was seen intermittently up until 1713, before seemingly vanishing. Heinrich Schwabe saw it again in 1831. Since then, it has changed both in size and color: ranging from an extraordinary brick-red hue to a more mellow ruddy brown and swelling at one stage to 40,000km in diameter. Voyager observations revealed it to be a high-pressure region, significantly colder at the cloud-tops, although the reason for its color remains a mystery.
Due to the lack of solid surfaces on the giant planets, long-lived storms of this type have been identified on Saturn and Neptune, although not in the same league as the Great Red Spot. It's possible that such features draw energy from the sides or below, or perhaps that they accrue their size simply by gobbling other smaller spots and eddies. It seems that thanks to the immense depth of the atmosphere and the absence of continents to dissipate the storm's energy, the Great Red Spot has settled into a semi-stable state.
Copyright © Immediate Media. All rights reserved. No part of this article may be reproduced or transmitted in any form or by any means, electronic or mechanical without permission from the publisher.
{ width: 160, height: 160, defaultImage: '', layers: 'Artimg-BBC_Discoveries-Saturn' }

![]() Orion is proud to partner with BBC Sky at Night Magazine, the UK's biggest selling astronomy periodical, to bring you this article as part of an ongoing series to provide valuable content to our customers. Check back each month for exciting articles from renowned amateur astronomers, practical observing tutorials, and much more!
Orion is proud to partner with BBC Sky at Night Magazine, the UK's biggest selling astronomy periodical, to bring you this article as part of an ongoing series to provide valuable content to our customers. Check back each month for exciting articles from renowned amateur astronomers, practical observing tutorials, and much more!
Titanic Discoveries at Saturn
Long regarded as the 'wow' planet of the Solar System, Saturn proved more magnificent than anyone had imagined. While it was in the neighbourhood, Voyager 1 skimmed past Titan, still the only moon we know of with a thick atmosphere.
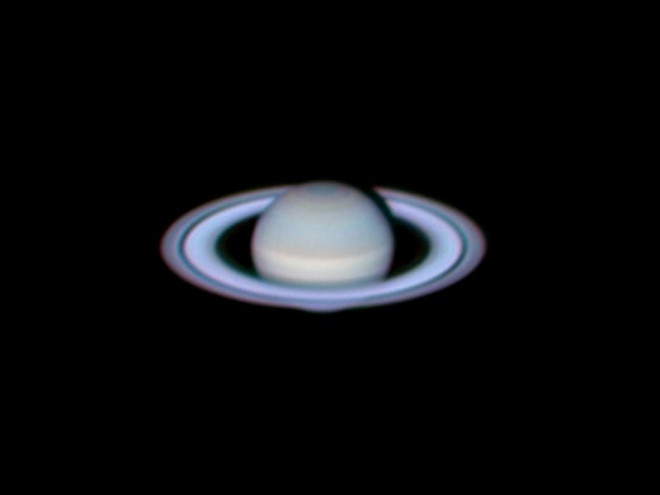
Photograph by Cherdphong Visarathanonth in Prawet district, Bangkok, Thailand
On the evening of 6 November 1980, less than a week before reaching Saturn, Voyager 1 fell abruptly, though not unexpectedly, silent. Bruce Murray, then serving as director of the Jet Propulsion Laboratory (JPL) in Pasadena, California, was not alone in having expressed consternation over the hazardous manoeuvre that was about to take place. After all, the tiny spacecraft was three years into an epic mission of exploration that had already rewritten the textbooks on Jupiter. Now, more than 1.4 billion km from Earth, it was having its critical communications link with Earth intentionally severed so the craft could be turned towards Titan.
"Isn't it risky," Murray asked at one of the last pre-Saturn meetings, "to break communications, so close to encounter?" It was indeed a dauntingly bold move, but there was a clear rationale for it. Voyager 1 was following a route known as 'Jupiter-Saturn-Titan' so it could observe, at close quarters, the only natural satellite in the Solar System definitively known to possess a dense atmosphere.
If it was to fly within 3,900km of Titan's soup-like canopy of gases and particulate haze, a trajectory-correcting firing of the spacecraft's thrusters was needed. And to accomplish that, Voyager 1 had to reposition itself a quarter-turn away from its lock on Earth.
The Deep Space Network's tracking station in Goldstone, California, duly transmitted the requisite commands up to the spacecraft. It took 84 minutes, travelling at the speed of light, for those commands to cross the immense gulf between Earth and the Saturnian system.
Voyager 1 responded crisply, rotating its high-gain antenna away from Earth. Its hydrazine-fuelled thrusters hissed for almost 12 minutes, affording it a slight sideways nudge for the Titan flyby. The probe then realigned itself with our world. To everyone's immense relief, communications were restored 84 minutes later.
Investigations Begin
The first dividend was paid soon after. Early on 11 November, the spacecraft's radio signal passed through Titan's thick orange clouds, gradually faded and then vanished, reappearing after 13 minutes. The signal's 'occultation' allowed investigators to show that Titan's atmosphere — first detected spectroscopically in the 1940s — was far more substantial than anticipated. Later analysis of the signal data revealed the existence of a solid surface with a temperature of –180°C.
The radio signal also showed the moon to have an equatorial diameter of around 5,150km. This was a significant find as, until 1980, the unknown size of Titan's opaque veil had spawned the erroneous assumption that it was the biggest natural satellite in the Solar System, larger even than Jupiter's moon Ganymede. An occultation of our Moon, seen from Earth a few years earlier, suggested an optical size of 5,800km, but this figure was biased by a lack of precise detail regarding the thickness of Titan's clouds. With Voyager 1's data, it was possible to ascertain that Ganymede is marginally the larger of the two, and that both moons are bigger than the Solar System's innermost planet, Mercury.
Titan's equatorial tilt causes distinct seasons and Voyager 1 was able to show that gases and particulates migrate from one hemisphere to the other. Along with the sheer density of the atmosphere, this highlighted broad differences in albedo. Neither Voyager 1 nor Voyager 2, which swept 907,000km past Titan in August 1981, saw any trace of a solid surface through the murk, but they did identify a dark brown 'hood' of detached haze over the north pole. This contrasted starkly with the far brighter south and provided a glimpse of the seasonal variation — at the time it was spring in the north and autumn in the south.
The moon's atmosphere was known to contain methane long before the Voyager probes arrived, although it turns out that methane only accounts for a few per cent. In fact, protons from Saturn's fierce magnetosphere and ultraviolet photons from the solar wind separate molecules of nitrogen and methane. Their atoms recombine into a raft of trace constituents, including hydrogen cyanide and acetylene, many of which were detectable to the Voyagers' infrared instruments. Hydrogen cyanide plays an important role in the synthesis of amino acids and its discovery at Titan triggered early theories that the moon might harbour the building blocks for complex organic chemistry. Indeed, it may even mirror conditions on the infant Earth, as it was billions of years before life evolved here.
A Complicated Picture
During their rapid transits, the Voyagers observed cooler temperatures nearer the moon's and warmer ones in the high troposphere, a phenomenon known as 'temperature inversion'. It's driven primarily by ultraviolet sunlight and contributes to Titan's already complicated photochemical picture, which is dominated by a dense layer of hydrocarbon 'smog', 200km thick, whose particulates vary in size from 0.2�m to 1�m. Even in 1980, it was argued that these particulates could 'snow' onto Titan's surface, and so the existence of hydrocarbon lakes and seas was plausibly considered for the first time.
Eighteen hours after leaving Titan, Voyager 1 hurtled 64,200km past the sickly yellow cloud-tops of Saturn, the Solar System's most visually spectacular planet. Its intricate rings, which so puzzled Galileo in 1610, before they were correctly described and identified by Christiaan Huygens in 1655, have a radial breadth of 282,000km, equivalent to three-quarters of the distance but are believed to be no more than 1.4km thick.
Three rings, dubbed A, B and C, together with the 4,800km-wide Cassini Division, were known to astronomers long before the dawn of the Space Age. In September 1979, Pioneer 11 found the F ring, which resembled a contorted tangle of narrow strands. Moreover, its data hinted strongly at the possible existence of tiny 'moonlets', which somehow anchored, or 'shepherded', the ring material along its million-kilometre-long tracks. A year later, Voyager 1 discovered the moonlets Prometheus and Pandora, both of which straddled and possibly influenced the structure of the F ring. Unfortunately, a defective photopolarimeter meant that the probe was unable to examine them in great detail.
Still, Voyager 1 managed to locate the dusty D ring and the exceptionally slender G ring. Nine months later, Voyager 2 encountered Saturn with a fully functioning photopolarimeter and managed to resolve groups of hitherto-unseen 'ringlets', showing that very few gaps existed anywhere in the rings.
Even the notionally 'empty' Cassini Division, the broad, dark band of which separates the bright A and B rings, turned out to be populated by a vast mass of dust and rocky fragments. Radio-science measurements confirmed that the most closely spaced particles ranged in size from under 1cm to 10m or more.
The Rings' Origins
The principal constituent of the rings is water-ice. It makes up 99.9 per cent of the rings and is what makes them so dazzlingly reflective, although both Voyagers saw discoloration in places, perhaps due to the presence of impurities such as tholins or silicates. Until 1980, scientific consensus favoured gravitational forces as the driving force behind the rings' formation. Yet the Voyager probes uncovered radial features, including spokes and kinks that are inconsistent with gravitational orbital mechanics.
Voyager 1 took a sequence of images during one of Saturn's rotations that revealed the spokes' formation and dissipation lifecycles. The images showed them to be charged particles that levitated above the rings.
It had been argued that divisions within the rings were formed by the process of orbital 'resonance', whereby particles were confined to specific regions by the gravitational attraction of neighbouring shepherd moons. The discovery of Prometheus and Pandora lent credence to this idea, and particles bordering the Cassini Division are thought to be influenced by the presence of the moon Mimas.
Elsewhere, particles near the edge of the A ring are 'sharpened' by the moonlet Atlas — its astonishing equatorial ridge might represent a deposit of swept-up ring material — and by the co-orbiting moonlets Epimetheus and Janus.
Another moonlet, the walnut-shaped Pan, was found in 1990, following an analysis of old Voyager 2 images. It's thought to be responsible for 'scalloping' the edges of the 325km-wide Encke Gap in the A ring and keeping it free of particles. Still other openings in the rings — including the Cassini Division and the narrower Huygens Gap — are thought to be controlled in part by the influence of Mimas. Another gap, measuring 42km in diameter and named in honour of astronomer James Keeler, was detected by the Voyagers deep within the A ring.
Giant Storms
Unexpectedly, the composition of Saturn's atmosphere was quite distinct from Jupiter, with smaller helium abundances and a larger relative share of hydrogen — about 96 per cent, compared to the Jovian 87 per cent. Like its larger cousin, Saturn was shown to radiate more heat into space than it absorbed from incident sunlight and it rotates rapidly upon its axis, generating the polar flattening and outwardly bulging equator that's a curious characteristic of all four giants.
In a further contrast to Jupiter, Saturn is 30 per cent less massive, leading to the famous idiom that if a sufficiently large bathtub could be found, it might float on the water. Its latitudinal banding is also much less obvious. But the world whose name pays homage to the fabled father of Jupiter and Bringer of Old Age is by no means an inactive place. Half a century before the Voyagers visits, comedian and amateur astronomer Will Hay observed an elliptical white spot near Saturn's equator, one of several periodic sightings of large-scale storms at work.
When Voyager 2 flew past the planet on 25 August 1981, it revealed eastward-gusting jet-streams, which peaked at 1,800km/h — five times faster than those on Earth. Marginally greater winds were also clocked at higher latitudes. Data from both spacecraft uncovered powerful polar aurorae at latitudes above 65°N, together with ultraviolet emissions of hydrogen at mid-latitudes.
A Parting Gift
It was Pioneer 11 that first detected the unusual alignment of Saturn's magnetic field, which is tilted by less than 1° with respect to its rotational poles, while the Voyagers observed a strange 'torus' of positively charged hydrogen and oxygen ions about 400,000km above the cloud tops. The strong emissions associated with this torus were measured by the fields-and-particles instruments, revealed a million-kilometre-wide 'sheet' of plasma, perhaps supplied by atmospheric material from Saturn and Titan. The planet's magnetosphere is much smaller than the enormous cavity that encapsulates Jupiter, but was still shown to span over two million km by Voyager 1. Nine months later, when Voyager 2 arrived, solar wind pressures had heightened and markedly compressed the sunward boundary. Then, as the spacecraft departed Saturn on the outward leg of its journey, its instruments detected a sudden drop in solar wind pressure and the magnetosphere rapidly ballooned outwards in less than six hours.
It was a final parting gift. Then Voyager 2's instruments were deactivated and the spacecraft entered hibernation for its lonely, five-year trek to Uranus; the timing had almost been poetic. It seemed as if Saturn was bidding its visitors farewell, by offering up one more mystery to perplex and astound us.
Why Does Saturn Have Such Grand Rings?
For over three centuries, from the earliest observations by Galileo Galilei and Christiaan Huygens, Saturn was believed to be the only planet to have rings. More recently, its three giant cousins have revealed their own assemblages of dust and rocky grains. Despite being far less grandiose than those of Saturn, the creation and endurance of ring systems was a mystery it was hoped the Voyagers could help solve.
Two main theories took centre-stage before 1980. The first, by Edouard Roche, postulated that small moons residing at specific distances from a given planet would be torn apart by tidal forces and the debris might settle into rings. The second, by Pierre Laplace and Immanuel Kant, argued that the rings formed at the same time as Saturn, in a process similar to how the Solar System formed from a large disc.
As viewed by the Voyager probes, discrete particles in the rings were so bright and pristine — formed almost wholly water-ice, with some trace contaminants — that they seemed no older than a few hundred million years. Some particles are so small (from car-sized boulders to sand-like grains) that they would have been pulled into the atmosphere if they were much older than this. Furthermore, the Voyagers revealed exceptionally low levels of ambient radiation at Saturn, implying that the rings have thrived in a relatively benign environment.
This contributed to early theories that Jupiter, Uranus and Neptune lost their primordial gaseous discs quite early in their evolution, leaving mainly volatiles from which to assemble their far darker and less expansive ring systems. Saturn, on the other hand, cooled sufficiently early for water vapour to condense and eventually produce far more brilliant rings. During their encounters, the Voyagers also uncovered much more intricate detail, from spokes and kinks to ringlets and shepherd moons, than had been expected.
A Growing Moon Menagerie
Around a dozen moons were known to orbit Saturn before the Voyagers visited, the largest among them being the planet-sized Titan. Next largest was rocky Rhea, one-third the size at 1,530km in diameter.
It was Rhea — stripped of a 'sensible' atmosphere, globally crater-scarred and seen only from a great distance by both Voyager craft — that had endured two savage epochs of meteoroid bombardment in its youth. Those epochs are thought to have generated many craters on Saturn's other moons. Most intriguing are Tethys and Mimas, both predominantly water-ice, which showcase the biggest craters in proportion to their size ever seen. In fact, Mimas's Herschel crater (almost 10km deep and 130km across) covers a third of its diameter, so enormous that its causative impact must have almost broken the moon apart. Tethys boasts a shallower, more ancient feature, called Odysseus, which also spans a wide fraction of its terrain.
Then there's enigmatic Iapetus, which a bewildered Giovanni Cassini identified as 'two-toned' — bright on one face, dark on the other. The Voyagers revealed a meandering, 300km-wide transitional zone between the two halves, suggesting that preferential bombardment of Iapetus's leading hemisphere by darkened material could be responsible. Elsewhere, icy Enceladus reflects virtually all incident sunlight, rendering it the brightest-known natural satellite and raising early suspicions of 'cryovolcanism'. Rugged Dione was shown to possess a co-orbital companion moon, while potato-shaped Hyperion might be the remnant of an ancient collision and blob-like Phoebe could represent a seized asteroid.
With the Voyagers' close-range observations of Janus and Epimetheus, the floodgates opened. Three more moons (Atlas, Prometheus and Pandora) were found by the Voyagers and later Earth-based work on their imagery led to the detection of others, including Pan. Today, it's known that more than five dozen moons with confirmed orbits exist at Saturn, but the presence of innumerable particles within the rings — from grains to moonlets — could carry this figure into the thousands or beyond.
Copyright © Immediate Media. All rights reserved. No part of this article may be reproduced or transmitted in any form or by any means, electronic or mechanical without permission from the publisher.
{ width: 160, height: 160, defaultImage: '', layers: 'Artimg-BBC_Voyager_40_Year_Space_Journey' }

![]() Orion is proud to partner with BBC Sky at Night Magazine, the UK's biggest selling astronomy periodical, to bring you this article as part of an ongoing series to provide valuable content to our customers. Check back each month for exciting articles from renowned amateur astronomers, practical observing tutorials, and much more!
Orion is proud to partner with BBC Sky at Night Magazine, the UK's biggest selling astronomy periodical, to bring you this article as part of an ongoing series to provide valuable content to our customers. Check back each month for exciting articles from renowned amateur astronomers, practical observing tutorials, and much more!
Voyager: The 40-Year Space Journey
In 1977, two spacecraft left Earth to explore the gas and ice giants. On the anniversary of their departure, Jenny Winder charts their journey towards the edge of the Solar System
Artist's concept of Voyager in flight. By NASA/JPL [Public domain], via Wikimedia Commons
Forty years ago, in August and September 1977, NASA launched two spacecraft on an audacious mission that would eventually study all four giant outer planets and 48 of their moons, and go on to explore the outer reaches of our Solar System. Today, Voyager 1 is our most distant spacecraft, and in 2012 became the first to enter interstellar space. Voyager 2 isn't far behind; it's hoped that it too will 'go interstellar' in the next five years.
The origins of the mission hark back to 1965, when it was realised that a planetary alignment in the latter half of the 1970s would enable a spacecraft to make a complete survey of Jupiter, Saturn, Uranus, Neptune and Pluto. Such an alignment only occurs every 175 years — it was an opportunity not to be missed.
To make the most of it, NASA settled on two identical spacecraft to travel on two separate trajectories. Both would study Jupiter and Saturn. Voyager 1 would then go on to fly by Saturn's largest moon Titan. Voyager 2, meanwhile, would have the option to go to Uranus and Neptune, becoming the first spacecraft to visit either. Each planetary flyby would alter the spacecraft's flight path to deliver it onto the next planet and increase its velocity, reducing the flight time to Neptune from 30 years to just 12. Pluto was off the table; the choice was between it and Titan, and Titan was seen as a more interesting target.
Budget constraints meant the spacecraft were officially only built to last five years, with the hope that they would be able to complete the extended mission to Uranus and Neptune. They launched with 11 scientific instruments: four on Voyager 1 continue to send back data about its surroundings, while five remain operational on Voyager 2.
One of the instruments still active on both is the low-energy charged particle detector (LECP) instrument, which scans the sky through 360° every few tens of seconds measuring cosmic rays. That it continues to function is extraordinary, says its principal investigator, Dr Stamatios M Krimigis.
"The most remarkable design feature of LECP was the stepper motor," he says. "A mechanical device like this in space was frowned upon because everyone thought it could get stuck in short order. We tested the motor for about 500,000 steps, twice the expected usage and it survived. Now it's performed over seven million steps and counting."
Science data from the instruments is returned to Earth in real time via each probe's high-gain antenna. The signals are picked up by the Deep Space Network (DSN), a global spacecraft tracking system, which was also used to reprogram the spacecraft remotely on more than one occasion. Travelling too far from the Sun for solar panels to be employed, the probes rely on three radioisotope thermoelectric generators for power. These convert heat produced from the radioactive decay of plutonium into electricity.
Messages for ET
Each spacecraft also carries a message from humanity in the form of a 12-inch gold-plated copper record. The cover for the Golden Records bear diagrams explaining how to play them, showing the location of our Sun and the two lowest states of the hydrogen atom as a fundamental clock reference.
The selection of content for the record, by a committee chaired by Carl Sagan, was completed in six weeks, chosen to portray the diversity of life and culture on Earth. There are spoken greetings in 55 languages; 116 images; recordings of natural sounds; music from Bach, a Navajo Indian song, Azerbaijani folk music and Chuck Berry; and even a recording of the brainwaves of Ann Druyan, the creative director of the project.
Voyager 1 was launched two weeks after Voyager 2, but on a shorter and faster trajectory that would see it overtake its twin and reach Jupiter first. Between January and August 1979, the Voyagers studied the Jovian system. They revealed Jupiter's famous Great Red Spot to be a complex anticyclonic storm, found smaller storms throughout the planet's clouds and saw flashes of lightning in the atmosphere on the night side. Jupiter's faint, dusty rings were also discovered, along with the satellites Adrastea, Metis and Thebe. But the highlight of the Jupiter mission was the discovery of active volcanism on the moon Io. Together, the Voyagers observed the eruption of no fewer than nine volcanoes on Io. "At that time, the only known active volcanoes in the Solar System were here on Earth, and here was a moon, just a moon of Jupiter, that had 10 times more volcanic activity than here on Earth," explains Voyager project scientist Ed Stone, who has been with the mission from the start. The Voyagers also found Io was shedding a thick torus of ionised sulphur and oxygen, and revealed evidence for an ocean beneath the icy crust of Jupiter's moon Europa.
At Saturn, they studied the planet's complex rings and its atmosphere, and found aurorae at polar latitudes and aurora-like emissions of ultraviolet hydrogen at mid latitudes. They measured Titan's mass, studied its thick nitrogen atmosphere and imaged 17 of Saturn's moons, including three new discoveries: Atlas, Prometheus and Pandora.
From there the two probes parted company as Voyager 1 began its long journey out of the Solar System. Voyager 2 headed to Uranus, where it discovered 11 new moons and visited 16. It discovered the planet's magnetic field and studied the ring system. At Neptune Voyager 2 discovered storms, including the Great Dark Spot, and 1,600km/h winds — the strongest on any planet. It imaged eight of Neptune's moons, discovering five of them and saw active geysers on the largest moon, Triton.
One last glimpse
On Valentine's Day 1990, Voyager 1 took the final pictures of the mission. Turning its camera back towards the Sun, from about 6 billion km away, it took images of Neptune, Uranus, Saturn, Jupiter, Venus and — suspended in a beam of sunlight — the now famous 'Pale Blue Dot' image of Earth. Carolyn Porco planned and executed this Family Portrait alongside Carl Sagan. "As soon as I joined the Voyager imaging team in fall 1983, the idea arose in my mind to take an image of the planets, but especially Earth, as they would be seen from far away, to force that 'reckoning' that comes from seeing our cosmic place as it really is ... alone and isolated," she says.
This marked the end of the Voyagers' planetary explorations — the Grand Tour, as it's known — and the beginning of the Interstellar Mission. In 1998, Voyager 1 overtook Pioneer 10 to become the most distant spacecraft from the Sun. Voyager 2 is expected to pass Pioneer 10 by April 2019.
In December 2004, Voyager 1 crossed the termination shock, marked by a massive drop in particles detected from the Sun and a rise in cosmic ray particles. Voyager 2 followed in August 2007. Finally, on 25 August 2012, at 121 AU from the Sun, Voyager 1 officially crossed into interstellar space.
The Voyager team is still listening. "We listen every day, for four to eight hours per day, per spacecraft, and we'll continue to do that as long as they are sending us something new to learn," explains Ed Stone. From 2020, however, the remaining instruments will be switched off one by one to conserve power. It's hoped they will fly for at least 10 more years. "My goal is to have a 50th anniversary party for Voyager," says Suzanne Dodd, project manager of the Voyager Interstellar Mission.
Stone considers the Voyagers to be "our silent ambassadors". In 40,000 years, they will each pass 1.5 lightyears from stars in Andromeda and Camelopardalis. Having increased our knowledge of our solar neighborhood, the Voyagers will take the story of Earth on to other star systems.
Voyager Mission Timeline
On their long travels, the Voyagers visited four planets and imaged 48 moons. Now they are at the very edge of the Solar System.
20 August 1977
Voyager 2 launches from Cape Canaveral at 14:29 UT atop a Titan IIIE-Centaur launch vehicle
5 September 1977
Voyager 1 launches at 12:56 UT from Cape Canaveral also atop a Titan IIIE-Centaur
10 December 1977
Voyager 2 enters the asteroid belt, swiftly followed by Voyager 1
19 December 1977
Voyager 1 overtakes its twin, placing it on course to reach Jupiter first
8 September 1978
Voyager 1 exits the asteroid belt and continues on to Jupiter
21 October 1978
On a slower trajectory, Voyager 2 finally exits the asteroid belt
5 March 1979
Voyager 1 makes its closest approach to Jupiter
9 July 1979
Voyager 2 makes its closest approach to Jupiter
12 November 1980
Voyager 1 flies by Titan and Saturn, then begins its journey out of the Solar System
25 August 1981
Voyager 2 flies by Saturn but remains within the plane of the planets, bound for Uranus
24 January 1986
Voyager 2 has the first-ever encounter with Uranus, revealing a bland visible surface
25 August 1989
Voyager 2 is the first probe to observe Neptune, a stormier planet than its neighbor
14 February 1990
Voyager 1 takes the Pale Blue Dot image of Earth from 6 billion km away
17 February 1998
Voyager 1 becomes the most distant human-made object in space
17 December 2004
Voyager 1 passes the termination shock and enters the heliosheath
30 August 2007
Voyager 2 passes the termination shock and enters the heliosheath
25 August 2012
Voyager 1 crosses the heliopause and enters interstellar space
Copyright © Immediate Media. All rights reserved. No part of this article may be reproduced or transmitted in any form or by any means, electronic or mechanical without permission from the publisher.
{ width: 160, height: 160, defaultImage: '', layers: 'Artimg-BBC_Unknown_Realm_Ice_Giants' }

![]() Orion is proud to partner with BBC Sky at Night Magazine, the UK's biggest selling astronomy periodical, to bring you this article as part of an ongoing series to provide valuable content to our customers. Check back each month for exciting articles from renowned amateur astronomers, practical observing tutorials, and much more!
Orion is proud to partner with BBC Sky at Night Magazine, the UK's biggest selling astronomy periodical, to bring you this article as part of an ongoing series to provide valuable content to our customers. Check back each month for exciting articles from renowned amateur astronomers, practical observing tutorials, and much more!
The Unknown Realm of the Ice Giants: Uncharted Territory — Uranus & Neptune
In January 1986 and August 1989, Voyager 2 flew past the outer giants Uranus and Neptune — becoming the first spacecraft to visit either. In its brief visits, these cold worlds almost beyond the reach of the Sun's warmth were revealed to be every bit as mysterious as their closer cousins.

Uranus as seen by NASA's Voyager 2. By NASA (http://photojournal.jpl.nasa.gov/catalog/PIA18182) [Public domain], via Wikimedia Commons
Perhaps the toughest kind of exploration is studying a pair of planets about which virtually nothing is known with certainty. In February 1984, several dozen scientists gathered in Pasadena, California, to consider the scant level of knowledge about Uranus and Neptune. These two giants, which reside on the fringe of our planetary system, had only been discovered in the preceding two centuries. And as Voyager 2 journeyed towards them for humanity's first-ever visits, neither had revealed itself as much more than a fuzzy blob in an ocean of emptiness.
Worth a visit
The desire to travel to Uranus and Neptune originated with NASA's Grand Tour programme, but a subsequent rescoping of the mission led to a revised focus on Jupiter and Saturn. Nevertheless, in 1976 NASA approved an extension to Uranus on the condition that all primary objectives were met. A modified infrared detector was built to achieve the necessary resolution at Uranian distance — 2.6 billion km from Earth — but when the Uranus flyby formally began it did so with a greatly reduced budget and a leaner workforce.
By that time Uranus was known to possess five moons, named after characters from the works of William Shakespeare and Alexander Pope. The first pair, Titania and Oberon, were found in 1787 by Uranus's own discoverer, William Herschel, with Ariel and Umbriel observed by William Lassell in 1851 and tiny Miranda identified by Gerard Kuiper in 1948. Some 1.6 billion km beyond Uranus, Neptune was attended by Triton and Nereid, fittingly named after classical deities of the sea. All were barely detectable with Earth-based instruments before the Voyager 2 probe arrived.
Following Uranus's discovery in 1781 and the finding of Neptune thanks to the mathematical predictions and telescopic observations of Johann Galle, Urbain Le Verrier and John Couch Adams in 1846, there existed only the most general and sweeping awareness of either planet. They were known to be near-twins in size, with equatorial diameters around 50,000km, four times bigger than Earth and over 15 times more massive. The probe confirmed hydrogen and helium as their predominant constituents. Uranus's plain aquamarine colour and the richer, sky-blue fa�ade of Neptune also betrayed the presence of ammonia, methane and hydrogen sulphide.
Data gathering
Travelling at 64,000km/h, Voyager 2 had only six hours on 24 January 1986 to make its close-range observations of Uranus. But to maximise the scientific yield of its flyby, the probe took measurements of the planet continually for 16 weeks from November 1985 until February 1986. A similar campaign was adopted at Neptune from June to October 1989. "We had a prediction of where the spacecraft would be at each point in time," recalled Voyager imaging team member Andrew Ingersoll. "We told the engineers what latitude and longitude we wanted to look at and they told the camera to take a picture. These commands had to be worked out and radioed to the probe weeks in advance."
Due to Uranus's 98° axial tilt, Voyager 2 approached the planet's sunward-facing south pole and generated time-lapse movies to track cloud movements and wind speeds. Unlike on Jupiter and Saturn, there was little evidence of storms or latitudinal banding, which led the imaging team to wryly dub themselves 'the imagining team'. However, infrared data revealed clouds beneath a high-altitude layer of hydrocarbons and the probe's radio-science and ultraviolet instruments revealed uniform temperatures throughout the atmosphere of around -216°C.
Theories abounded that this atmosphere might extend more than 3,000km beneath the cloud tops, perhaps terminating in a slushy ocean of water, ammonia and methane, girdling an Earth-sized rocky core. A similar situation is also thought to exist at Neptune. Voyager 2 was unable to prove the existence of such oceans, but did detect radio signals induced by interactions between the solar wind and electrons in the planets' magnetic fields. This enabled its magnetometer to measure Uranus's day at 17.25 hours and Neptune's day at 16.1 hours, which in turn helped provide wind-speed estimates.
The dark of the moons
To great surprise, Uranus's magnetic field extended only 600,000km sunward, but wound backwards, like a giant corkscrew, 10 million km beyond the planet. Ultraviolet observations of polar aurorae showed that the field was tilted at 59� to Uranus's rotational axis — a curiosity that, on Earth, would be equivalent to having our north magnetic pole in the Florida Keys — and bore a powerful sting in the guise of trapped, high-energy radiation. This clearly manifested itself on the surfaces of Uranus's moons.
All five moons appeared intrinsically dark, suggesting that radiation had broken down any methane on their surfaces within a few tens of millions of years, darkening them and leaving a thick, charcoal-like dusting. Umbriel is by far the darkest, although it does exhibit a few splotches of bright material, including an enigmatic 'Cheerio' in the crater Wunda at its equator. As for its siblings, Titania — the largest, at 1,580km across — is marred by huge faults and winding canyons, pointing to a violent tectonic past. Oberon revealed bright and dark regions, not unlike our Moon, indicating meteoroid bombardment and perhaps the volcanic extrusion of subsurface material.
But it was Miranda and Ariel to which Voyager 2 devoted the most attention. The latter is the brightest Uranian moon, with an ancient and heavily cratered terrain that features rolling plains, parallel ridges and troughs lying tens of kilometres apart. Miranda, less than 500km in diameter, was the most closely inspected, principally due to the flyby geometry needed by Voyager 2 to reach Neptune.
It revealed unmistakable evidence of billions of years of impacts, which tore Miranda apart, then hammered it back together, gouging out 20km-deep canyons, at least three enormous, oval-shaped 'coronae' and broad terraces of old and young, bright and dark, lightly and heavily cratered terrain. One area, the 200km-wide Inverness Corona, showed a bright chevron-like feature between dark layers, possibly a result of reaggregated bits of Miranda's original crust, poking out from the present surface.
New moons
Voyager 2 also found 10 new moons, ranging from 160km-wide Puck to diminutive Cordelia, about an eighth as large. A small subset that share similar orbits, surface colouration and generally elongated shapes was classified as the 'Portia Group' (named for its biggest member). Another object was photographed by the probe, but went unrecognised as a moon until 1999. It was fittingly named 'Perdita', the Latin word for lost.
Something that had already been seen at Saturn was the pivotal role tiny 'shepherd' moons play in anchoring ring material. Several narrow rings had been detected around Uranus by ground-based observers in the 1970s, but Voyager 2 uncovered another pair. The probe revealed the new pair to be relatively insubstantial, although the brighter 'Epsilon ring' achieved a maximum extent of 96km.
Up to 18 shepherd moons were predicted to exist at Uranus, but only two — Cordelia and Ophelia — were detected, lying astride and 'binding' the inner and outer edges of the Epsilon ring. The general darkness of the rings underscores their extreme youth, for they are probably no more than 600 million years old. Data from Voyager 2's photopolarimeter and other instruments revealed them to be so sharp that the Epsilon component can't be greater than 150m thick.
Rings were also eagerly anticipated at Neptune, with ground-based studies between 1968 and the early 1980s suggesting that incomplete 'arcs' might run part-way around the planet. Numerous theories postulated that the arcs were held in place by tiny shepherd moons or maybe new rings were in the process of forming. With just two weeks to go until Voyager 2's arrival, their true nature was revealed. A pair of incomplete arcs did appear to exist, with three shepherd moons (Galatea, Larissa and Despina) interacting with them.
Building rings
As the probe drew nearer, it became apparent that more rings extended around the planet. Their uneven 'clumpiness' and irregularly distributed particles offered an early explanation for why arcs had been suspected for so long. Indeed, Neptune's outermost 'Adams' ring revealed several clods of material, up to 50km wide. It was argued that debris from ancient moons could have contributed to this unequal distribution of mass and a pair of tiny moons, Thalassa and Naiad, could themselves someday be torn apart and incorporated into the system.
Voyager 2 confirmed the existence of six new moons at Neptune, including potato-shaped and heavily cratered Proteus, which is thought to be almost big enough for gravity to pull it into a spherical shape. Eccentric-orbiting Nereid, discovered by Gerard Kuiper in 1949, was also seen by the probe, but at a distance of 4.7 million km it was still too far away to resolve any surface detail, much less measure its rotational characteristics.
Before it found any rings, it was hoped that Voyager 2 would fly within 10,000km of the planet's largest moon, Triton, which ground-based observations had shown to possess nitrogen ices on its surface. To avoid the risk of colliding with ring particles, the probe's trajectory was altered to carry it 4,950km over Neptune's north pole — the closest planetary encounter achieved by either Voyager craft — on 25 August 1989. It then plunged south, passing within 39,800km of Triton, five hours later.
Circling Neptune in a highly inclined 'retrograde' orbit, the moon proved smaller than predicted, at just 2,700km across, and a stellar occultation allowed Voyager 2 to measure its 800km-deep atmosphere, all the way down to its surface, the coldest known in the Solar System at a frigid -236°C. In fact, Triton's tenuous mix of gases and particulates is virtually a vacuum, barely capable of supporting thin nitrogen-ice clouds and haze at an altitude of 13km.
Voyager 2 strongly hinted that these constituents originated from the evaporation of surface ices, with winds transporting dust particles up to 50km across its terrain. Triton is the most spectroscopically diverse object in the Solar System, reflecting over 85 per cent of incident sunlight — eight times more than our Moon — and this extreme brightness was a key reason why such a tiny, distant body was found telescopically by William Lassell in October 1846, just weeks after Neptune itself.
Freeze-thaw effect
The probe imaged a third of Triton's surface, uncovering a greenish landscape, nicknamed 'cantaloupe', due to its similarity to the scaly skinned melon. It was crisscrossed with circular depressions, each around 25km wide, and long, interconnecting ridges were thought to be the result of epochs of melting and refreezing. This reinforced the notion of Triton as a captured Kuiper Belt object and that the tidal heating from Neptune's gravity had left its interior fluid for a billion years, underpinning these complex internal processes.
Voyager 2 also revealed a pinkish southern polar cap, abutted by a blue-tinged crustal region, indicative of the presence of methane, nitrogen and water ices. And it was from within the polar caps that a moderate greenhouse effect could have been nurtured, forcing exotic ices to 'de-gas' and build pressure, before prompting one of the most surprising discoveries at Triton: erupting geysers.
In August 1989, only Earth and Jupiter's moon, Io, were known to harbour active volcanism, but dark streaks across Triton's southern polar cap indicated that such phenomena were commonplace, even in this far-flung corner of the Solar System. One geyser was observed to hurl carbonaceous material to an altitude of several thousand metres, while other measurements allowed local wind speeds to be clocked at 54km/h, as strong as a moderate gale on Earth.
Providing a backdrop to these discoveries was magnificent Neptune itself, whose outward similarity to Uranus belied a far more active world. Despite its greater distance from the Sun, infrared data showed it to radiate 2.6 times as much heat from incident sunlight as Uranus. And although the near-twins are thought to have similar compositions, Neptune is marginally more massive, which influences its magnetic field and internal heat. "Wow," exulted one planetary scientist, breathlessly, as Voyager 2 became the only spacecraft in history to visit four planets. "What a way to leave the Solar System!"
Beefing up the Voyagers from the ground
Orbiting billions of kilometers beyond Saturn, the outer giants Uranus and Neptune inhabit a gloomy region of the Solar System, requiring Voyager 2 to examine worlds where high noon is dimmer than dusk on Earth. One scientist likened the problem to photographing a pile of charcoal briquettes lying at the foot of a Christmas tree, lit by a single-Watt bulb.
Stability was crucial, but even turning its tape recorder on and off was enough to induce a disruptive 'nodding' effect in Voyager 2. Its gyroscopes could keep the instruments reasonably steady, but engineers had to halve the duration of thruster firings to allow the probe to settle after manoeuvres. At Neptune, longer exposures of 96 seconds and thruster firings under four milliseconds became necessary. Image motion compensation allowed Voyager 2 to resolve finer detail, but at the expense of picking out irritating optical flaws, including dust on its lenses.
Back on Earth, the three tracking stations that make up NASA's Deep Space Network (located in Canberra, Australia, the remote foothills west of Madrid in Spain and in California's Mojave Desert) received a $100 million facelift to boost Voyager 2's ever-weakening signal, which by January 1986 was a billion times fainter than a watch battery. All three stations had their 64m antennas augmented for Uranus, electronically synchronising them to strengthen the signal. Further upgrades to 70m were implemented for Neptune and two additional tracking stations in Japan and New Mexico were called into duty.
Due to the position of Uranus in Earth's skies in the winter of 1985-1986, Canberra was the main tracking station, following Voyager 2 for 12 hours per day and allowing a 21.6kbps downlink rate. In support, a 400km microwave connection was established with the Parkes radio telescope in New South Wales, bolstering it by 25 per cent and allowing up to 50 extra photographs to be returned every day.
The Bullseye Planet
Uranus is unique among the planets in our Solar System thanks to its extraordinary rotational tilt of 98° — Uranus presents itself to observers as a world tipped on its side. Its poles lie where its equator should be and receive a correspondingly higher level of incident sunlight. Situated 2.8 billion km from the Sun, Uranus circles its parent star every 84 years, with each pole rhythmically illuminated, before being plunged into frigid darkness, every four decades.
When Voyager 2 viewed the planet only the southern pole was in direct sunlight. Its five main moons orbit their giant host within its equatorial plane, placing their southern halves at the height of Uranian summer in January 1986 and casting their northern extremities into a 21-year-long winter season.
How Uranus's axial tilt came about remains a mystery, although a collision with an Earth-sized impactor has been proposed. The fact that the moons circle within its equatorial plane implies that they formed much later from debris placed into orbit by this impact. Moreover, Uranus radiates hardly any heat into space — its temperatures dip as low as -224°C, giving it the coldest planetary atmosphere in the Solar System — and it's possible that whatever hit the planet caused it to expel much of its primordial heat.
A World Of Wild Weather
Four-and-a-half billion kilometres from its parent star, recipient of half as much sunlight as gloomy Uranus and with temperatures as low as -218°C, Neptune should be an inactive world. Yet Voyager 2 revealed it to be surprisingly energetic, with the oval-shaped Great Dark Spot observed at a latitude of 22°S. This counter-clockwise-rotating vortex bore many uncanny parallels with Jupiter's Great Red Spot, in terms of relative size, motion and position within the atmosphere.
As the probe drew closer, a second, smaller dark spot was found, together with a chevron-shaped, westward-moving cloud feature, whose rapid 16-hour transit around Neptune's atmosphere generated the nickname of 'Scooter'. The Great Dark Spot, in keeping with its name, was 10 per cent darker than its surroundings and hustled northwards through the atmosphere at 1,100km/h. At its edge was a hovering, shape-shifting 'bright companion' cloud. The spot lay 50km below Neptune's main cloud deck, with the companion at a slightly higher altitude, creating analogies with lenticular cloud formations on Earth.
Elsewhere in the sky-blue atmosphere were cirrus streaks of methane-ice, which cast shadows, tens of kilometres long, on Neptune's cloud deck at low northern latitudes. How such wild weather can manifest itself on such a cold planet must be related to its dense interior and the fact that it emits 2.6 times as much heat as it receives from incident sunlight. It has been suggested that temperature differences between Neptune's internal heat and its cold atmosphere could trigger instabilities and induce large-scale meteorological phenomena.
Copyright © Immediate Media. All rights reserved. No part of this article may be reproduced or transmitted in any form or by any means, electronic or mechanical without permission from the publisher.
{ width: 160, height: 160, defaultImage: '', layers: 'Artimg-BBC_MissionsOfTheFuture' }

![]() Orion is proud to partner with BBC Sky at Night Magazine, the UK's biggest selling astronomy periodical, to bring you this article as part of an ongoing series to provide valuable content to our customers. Check back each month for exciting articles from renowned amateur astronomers, practical observing tutorials, and much more!
Orion is proud to partner with BBC Sky at Night Magazine, the UK's biggest selling astronomy periodical, to bring you this article as part of an ongoing series to provide valuable content to our customers. Check back each month for exciting articles from renowned amateur astronomers, practical observing tutorials, and much more!
Missions of the Future
With a fleet of probes being readied for flight over the next few years, Elizabeth Pearson looks at the destinations these missions will be heading to throughout our Solar System, as well as what they hope to uncover

Image from Pixabay courtesy of Andrew-Art, Space probe and Jupiter
Mercury
Only two spacecraft have ever been sent to the innermost planet of our Solar System, but that number is set to double. Two probes will fly to Mercury together as part of the BepiColombo mission, due for launch in 2018: ESA's Mercury Planet Orbiter and JAXA's Mercury Magnetospheric Orbiter. These two spacecraft will work together to provide a complete study of the planet's geology, composition, structure and interior when it arrives at the planet in 2024. The aim is to understand Mercury's place in our Solar System's creation and history. One of the greatest mysteries the two the probes will address is that of planet's magnetic field, first detected by Mariner 10 in 1974.
Mercury should be too small to host a molten core, thought to drive the magnetic fields of other planets; uncovering the interior of this world will help clarify which planets are capable of hosting a magnetosphere, both in this planetary system and beyond.
The Moon
Since the early days of the Space Race, reaching the Moon has been a symbol of a country's prowess as a spacefaring nation. But with NASA's eyes on Mars and Russia's lunar exploration programme suspended until 2025, it's time for new players in the space game to join the ranks of lunar explorers.
Both China and India have already conducted lunar missions and both are planning on building on their successes. Chang'e 5 will continue the China National Space Administration's (CNSA's) robotic exploration of the Moon in 2017, and return up to 2kg of material to the Earth — the first fresh lunar samples since 1976.
Set to launch in 2019, another Chinese mission, Chang'e 4, was initially intended as a back up to Chang'e 3. Following that mission's success it was reconfigured to land on the far side of the Moon, an area that has never been visited. The Indian Space Research Organisation (ISRO) is also hoping to cement its spacefaring credentials with the Chandrayaan-2 mission in 2018. The mission will land a rover on the lunar surface — the nation's first attempt touch down on another world.
But the days of space agencies holding sole claim to the Moon could be about to change, as a fleet of private companies are in the final leg of their own race to the lunar surface. The Google Lunar X Prize challenged private groups to land a rover on the Moon by the end of 2017. Three companies have arranged launch contracts so far. After many years of silence, the lunar surface is about to get a lot busier.
Mars
The Red Planet has had its fair share of visitors in recent years, a trend that will continue for the next decade as several new missions head for Mars.
NASA will continue its long legacy of Martian exploration with the InSight (Interior Exploration using the Seismic Investigations, Geodesy and Heat Transport)mission due for launch in 2018. It is a stationary lander that will measure the planet's seismological and thermal activity to work out what's going on under Mars's crust.
In 2020, not one but two new rovers will launch for the Red Planet — NASA's Mars 2020 rover and the second phase of ESA's ExoMars mission, which began in 2016 with the Trace Gas Orbiter. Both of these missions will look for signs of life, past and present, and try to determine if Mars was ever habitable.
But the time of robotic dominion over Mars could soon be at an end, as several key players are beginning to make real moves towards landing humans on the Martian surface. Both Chinese and US officials have stated a desire to start crewed missions to Mars over the next few decades. However, it might not be a government agency to put the first person on Mars, but a commercial one. SpaceX has always been vocal about its intention not only to launch a manned Mars mission, but also to set up a permanent base there. As a first step the company plan to fly and land a modified version of the Dragon module, currently used to send supplies to the International Space Station. This robotic mission, slated for 2018, could be a first step towards the century long journey of making humankind a multi-planet species.
Asteroids
The rubble of our Solar System's formation survives all around in the form of asteroids. Though mostly found in the asteroid belt, there are hundreds of these space rocks that regularly cross Earth's orbit, making them a tempting target for study.
Two missions to visit these cosmic wanderers are already underway, and both hope to return samples to Earth. JAXA's Hayabusa-2 spacecraft launched in 2014, bound for asteroid 162173 Ryugu. Once the probe arrives in 2018 it will obtain three samples, one of which will be excavated using an explosive charge, returning them in 2020. Its launch was followed by NASA's OSIRIS-REX, which set off for asteroid 101955 Bennu in 2016. Once there it will use gas jets to blast dust and rock off the surface before returning them home in 2023.
But robotic missions can only do so much, and NASA is currently planning an audacious mission to send humans to one of our rocky neighbours. The Asteroid Redirect Mission (ARM) will send a robotic probe to a near-Earth asteroid in the 2020s, retrieving a boulder weighing several tons from its surface and transferring it to Earth orbit.
From there, NASA will stage a series of manned missions to the boulder using the Orion crew module, which itself is still in development and hopes to fly in 2021.
This would be the first time such studies have been performed on the primordial bodies in space, rather than being returned to Earth. The mission would also provide a test bed for technologies that could one day take humanity deeper into the Solar System. Asteroids may prove a vital part of such endeavors, as mining them could provide raw materials for building spacecraft in orbit, as well as water. This could can be split into hydrogen and oxygen, and used in rocket fuel.
The Outer Solar System
The Solar System beyond the asteroid belt has remained relatively unexplored since the Voyager probes passed through three decades ago. But the giants of the outer Solar System will soon be giving up their secrets, as several missions to visit this mysterious region are planned. Juno is in the process of mapping out the largest of the gas giants, Jupiter, but it is this planet's companions that will be the next targets.
ESA's first mission to Jupiter, the Jupiter Icy Moons Explorer (JUICE) is currently being designed to make detailed observations of not only the planet, but three of the Galilean moons — Ganymede, Callisto and Europa. All of these worlds could potentially host liquid water oceans beneath an icy crust, making them the likeliest places to discover life beyond Earth. Aiming for a 2022 launch date, JUICE will find out not only if such oceans exist, but how they came to be and how likely it is that such moons are habitable.
Meanwhile NASA is planning a mission for the late 2020s that will perform multiple flybys of Europa, to help us understand its geology. Still in the concept phase, there is the potential for a lander, but it would not be capable of tunnelling through the several kilometers of ice to reach the subsurface ocean. Luckily, the Hubble Space Telescope has spotted jets of water shooting hundreds of kilometers above the moon's crust. If the main probe could fly through one of these, it could take a sample that originated deep within the moon.
NASA plans to venture even further into the outer reaches with its following mission — to Uranus. Currently under consultation, the spacecraft would orbit around the planet, which hasn't been visited in over three decades. Back then, Voyager 2 gave us only a handful of images of a seemingly placid world. Though it's unlikely we will see such a mission before the 2030s, it's worth the wait to see what Uranus hides beneath this calm exterior.
Beyond the Solar System
Though much of the focus of future space missions is on the planets around us, there is a much wider Universe waiting to be explored.
Exoplanets are one of the hottest research topics at the moment and there are several new observatories on the way. NASA's Transiting Exoplanet Survey Satellite (TESS) has already been built, ready for launch later in 2017. It will search the whole sky for exoplanets, but its main aim is to track down Earth-sized planets around nearby bright stars. Once found, those similar to our own world would be prime targets for follow up study by the Characterising Exoplanet Satellite (CHEOPS), which ESA is building for a 2018 launch. Looking at already known exoplanets, CHEOPS will be able to determine their precise orbital properties and radii.
The next goal will be to understand the atmosphere that surrounds these worlds. The UK-built Twinkle satellite, which has just finished its design phase and is planned to launch in 2019. Its aim is to capture the 0.01 per cent of starlight that shines through an exoplanet's atmosphere, which can then be untangled to reveal what chemicals compose it. Perhaps the most anticipated tool in the exploration of exoplanets, however, is the James Webb Space Telescope. From 2018 onwards, this amazing infrared telescope could be used to look at these distant planetary atmospheres, and will be able to do much more besides. Touted as the Hubble Space Telescope's successor, the JWST will be able to study everything from the origin of the Solar System to the first light that ever shone in the Universe.
ESA plans to extend its own cosmic vision with the construction of two deep space observatories — Euclid in 2020 and Athena in 2028. These will help to identify the structure and geometry that govern our Universe, and to unlock the answers of how the cosmos we know came to be.
Future missions at a glance
There are dozens of missions set to take flight in the next decade, but where will they be headed?
2017:
Chang'e 5
Type: Lunar lander
Goal: Sample return
TESS
Type: Satellite
Goal: Exoplanet search
Google Lunar X Prize candidates
Type: Lunar lander and rover
Goal: Dependant on winner
2018:
BepiColombo
Type: Mercury orbiter
Goal: Geological and magnetospheric survey
Hayabusa-2
Type: Orbiter
Goal: Asteroid sample-return mission
OSIRIS-REX
Type: Orbiter
Goal: Asteroid sample-return mission
CHEOPS
Type: Satellite
Goal: Exoplanet measurement
InSight
Type: Mars lander
Goal: Seismic and geological survey
James Webb Space Telescope (JWST)
Type: Space observatory
Goal: Infrared imaging
Red Dragon
Type: Spacecraft
Goal: Test flight to Mars
Chandrayaan-2
Type: Lunar orbiter, lander and rover
Goal: Mineralogical and geological survey
2019:
Chang'e 4
Type: Lunar lander and rover
Goal: Mineralogical and geological survey
2020:
Mars 2020
Type: Mars rover
Goal: Habitability search
ExoMars 2020
Type: Mars rover
Goal: Habitability search
Euclid
Type: Space observatory
Goal: Observing the early Universe
2021:
Juice
Type: Orbiter
Goal: Observe Gallilean satellites at Jupiter
Plato
Type: Satellite
Goal: Exoplanet characterisation
Europa Clipper
Type: Orbiter
Goal: Habitability study of Europa
Athena
Type: Space observatory
Goal: X-ray imaging
Neptune Orbiter Mission
Type: Orbiter
Goal: Planetary observation
Arm
Type: Crewed
Goal: Redirect and survey asteroid
ABOUT THE WRITER
Dr. Elizabeth Pearson is BBC Sky at Night Magazine's news editor. She has a PhD in extragalactic astronomy.
Copyright © Immediate Media. All rights reserved. No part of this article may be reproduced or transmitted in any form or by any means, electronic or mechanical without permission from the publisher.
{ width: 160, height: 160, defaultImage: '', layers: 'Artimg-BBC_Returning_to_Venus' }

![]() Orion is proud to partner with BBC Sky at Night Magazine, the UK's biggest selling astronomy periodical, to bring you this article as part of an ongoing series to provide valuable content to our customers. Check back each month for exciting articles from renowned amateur astronomers, practical observing tutorials, and much more!
Orion is proud to partner with BBC Sky at Night Magazine, the UK's biggest selling astronomy periodical, to bring you this article as part of an ongoing series to provide valuable content to our customers. Check back each month for exciting articles from renowned amateur astronomers, practical observing tutorials, and much more!
Returning to Venus
Space Probes have helped us build a good picture of Mars, yet Earth's inner neighbor Venus is still very much a mystery. But, writes Paul Sutherland, a host of new missions are being planned to help us learn more about it.

Image by Anna M., Venus Transit
Nothing was known about the surface of Venus before the Space Age because it is completely obscured by clouds. Scientists once speculated that it might be a raging ocean, or a Sahara-like desert. The first probe to provide answers was NASA's Mariner 2, which flew past Venus in December 1962, discovering that surface temperatures must be extremely high and that, like Uranus, it rotates in the opposite direction to the rest of the planets in the Solar System. Since then, orbiting probes with cloud-piercing radar have produced maps of Venus's surface and Soviet landers have confirmed that conditions are completely inhospitable on the ground. There is neither sea nor desert, but rather a landscape resembling a vision of hell.
Fire and Brimstone
The surface temperature is twice the maximum found in a kitchen oven and the pressure of the poisonous atmosphere is 90 times that at sea level on Earth, which crushed probes making early landing attempts. The first Soviet probe to reach the surface and send back signals was Venera 7 in 1970, which survived for 23 minutes. It was followed by the more successful Venera 8 in 1972, which returned data on the surface temperature and pressure, wind speed and illumination, before being destroyed after 63 minutes. The probes had to be built like submersibles to withstand the air pressure, but their electronics quickly failed in the extreme heat. Subsequent Soviet landers in the 1970s and 1980s sent back crude photos of a rocky landscape.
Helium balloons were released into Venus's higher, cooler atmosphere in June 1985 by two Soviet Vega probes that were on their way to Halley's Comet. They gathered data for 47 hours each as they floated 50km high in the cooler clouds.
NASA's Mariner 10 flew past Venus in 1974 en route to Mercury and managed to image wind patterns in the clouds. This was followed by a dedicated US mission, Pioneer Venus, made up of two spacecraft that arrived in December 1978. An orbiter studied the atmosphere and made radar maps of the surface. The other component was a multiprobe made up of a transporter and four separate probes that were fired into the atmosphere, returning data for an hour.
NASA's next mission, Magellan, carried out extensive radar imaging of Venus from a polar orbit in the early 1990s. Its imaging of almost the entire surface revealed it was covered with volcanoes. Scientists suspect many are still active, but still no one can say for certain.
ESA's first envoy, Venus Express, was launched in November 2005. During the eight-year mission, the spacecraft's swooping orbit brought it low over the cloud tops and revealed big variations in the sulfur dioxide content, suggesting that the volcanoes were still active. Its fuel exhausted, Venus Express was purposefully destroyed in the atmosphere in early 2015.
A Japanese space probe called Akatsuki, launched towards Venus in 2010, looked lost after a fault caused it to fly past the planet. But five years later, mission controllers managed to rescue it and put it into a new, more elongated orbit where it began to survey the atmosphere.
Two NASA missions to the outer planets also gathered data on Venus as they flew past to get a gravitational boost on their long journeys. Galileo shot past on its way to Jupiter in February 1990, taking pictures, measuring dust, charged particles and magnetism, and making infrared studies of the lower atmosphere. Saturn probe Cassini made two flybys in April 1998 and April 1999 when it looked for, but failed to spot, lightning in the clouds.
The Trouble with Landers
Current proposals for future Venus missions are focusing on orbiters and a new generation of balloons and aerial vehicles. Experts see too many difficulties in sending a lander to explore the surface like the Martian rovers. As planetary scientist and Venus expert Dr. Colin Wilson of the University of Oxford explains: "The issue is the heat, because silicon electronics simply don't work at these temperatures. There are studies into building a new kind of electronics using silicon carbide — this is of interest also for use inside car engines and jet engines — but even if you sort that out, you still have the problem of how you are going to power a probe on the surface. Although Venus is closer to the Sun, only one or two per cent of the sunlight at the cloud tops reaches the surface and so solar panels are completely impractical. Radioactive power sources have been suggested, but this would make the mission both expensive and difficult."
Two proposals to explore Venus are on a shortlist of five Solar System projects currently being considered for the next round of NASA's Discovery Program, missions that could launch in the early 2020s. One, called DAVINCI (Deep Atmosphere Venus Investigation of Noble Gases, Chemistry and Imaging) is being studied by NASA's Goddard Space Flight Center. It is an entry probe designed to study conditions between the dense cloud tops and the surface. "It will have much more modern and accurate instrumentation than previous probes," says Wilson. "All their temperature sensors failed in the lower atmosphere so we have hardly any data about atmospheric processes near the surface. DAVINCI is really going to give us a much better understanding of the deep atmosphere of Venus, in particular of its chemistry." The other proposal, from NASA's Jet Propulsion Laboratory, is for a new orbiter called VERITAS (Venus Emissivity, Radio Science, InSAR, Topography and Spectroscopy) that aims to produce radar maps of the planet in much higher resolution than before. It has strong European support, including for a French-German infrared camera that will look for hot volcanic material on the surface.
Looking Further Ahead
But a further attempt to get a new spacecraft to Venus will come with a UK-led proposal to ESA for a mission called EnVision. The probe will be another orbiter with advanced radar to detect tiny changes in surface features, at centimeter scale, that could confirm lava flows or similar surface deformation. Looking farther ahead, Venus scientists are keen to see a new generation of balloons or airships to taste the planet's atmosphere. It has been suggested that simple microbial life might exist in the cloud tops, though this is pure speculation. One advanced concept being prepared in the US is for a delta winged aircraft called VAMP (the Venus Atmospheric Maneuverable Platform) to be dropped by an orbiter into the clouds. Once in the atmosphere it would switch to flight phase, spending up to a year maneuvering between the upper and mid cloud layers, gathering data to send back to Earth. During the Venusian day, it would fly in the higher atmosphere, charging its batteries from the sunlight, before dipping to lower regions again at night.
ABOUT THE WRITER
Paul Sutherland is a space journalist, and the author of Where Did Pluto Go? Each month he reports on the latest space research in BBC Sky at Night magazine.
Copyright © Immediate Media. All rights reserved. No part of this article may be reproduced or transmitted in any form or by any means, electronic or mechanical without permission from the publisher.
{ width: 160, height: 160, defaultImage: '', layers: 'Artimg-BBC_Realm_of_Ghosts' }

![]() Orion is proud to partner with BBC Sky at Night Magazine, the UK's biggest selling astronomy periodical, to bring you this article as part of an ongoing series to provide valuable content to our customers. Check back each month for exciting articles from renowned amateur astronomers, practical observing tutorials, and much more!
Orion is proud to partner with BBC Sky at Night Magazine, the UK's biggest selling astronomy periodical, to bring you this article as part of an ongoing series to provide valuable content to our customers. Check back each month for exciting articles from renowned amateur astronomers, practical observing tutorials, and much more!
The Realm of Ghosts
Will Gater dives into the region of Virgo, one of the most extraordinary swaths of the night sky, to reveal the science behind the faint galaxies that reside there.
Image by Douglas S, M104 — Sombrero Galaxy
Cast your eye across the band of sky between the star Spica and the handle of The Big Dipper on a clear spring night and what do you see? Save for few stars there doesn't appear to be much to write home about — at least not to the naked eye.
Yet this great swathe of the celestial sphere is arguably one of the most extraordinary patches of our night sky as it's peppered with hundreds of galaxies. Virgo is swarming with faintly glowing celestial forms; there are delicate spiral wisps, fuzzy ellipticals and even great clusters of galaxies gathering in their multitudes. And though they may be hidden to the naked eye, these spectral, stellar gatherings are of enormous interest to astrophysicists. So come with us as we explore the science of some of the more famous inhabitants of Virgo's ghostly galactic realm.
The Sombrero Galaxy
Virgo is a constellation famed for its huge population of distant celestial smudges, one of which is our first object, Messier 104. M104 actually sits close to the border between Virgo and the more southerly constellation Corvus, approximately 11° from the bright star Spica (Alpha Virginis). M104 is more commonly known as the Sombrero Galaxy and it's not difficult to see how it acquired this name when you look at it through a large telescope or see images of it taken by astrophotographers. Its scientific story is every bit as striking as its visual appearance too.
Perhaps its most obvious feature is the dark swathe across the bright mass of stars that make up its glowing oval shape. The swathe is a silhouetted portion of the galaxy's disc of dust and gas, which is viewed edge on from our line of sight. Hubble Space Telescope images have shown this disc in remarkable detail, revealing intricate structures in the dust lanes there. Infrared observations made with the Spitzer Space Telescope meanwhile have revealed that, unusually, M104's disc sits within another, larger elliptical galaxy, only part of which we see in visible light and which only becomes more fully apparent at longer infrared wavelengths.
Abell 1689
Astronomy is full of mind-bending physics — and there's no shortage of weird and wonderful behavior in and around galaxies. Nowhere is this better demonstrated than when distant galaxies swarm together in vast clusters. Abell 1689 is one such galaxy cluster that astronomers have scrutinized intensely in recent decades. It lies at the heart of Virgo, around 7.5° east of the bright star Porrima (Gamma Virginis). At a distance of over two billion lightyears from us, and extremely faint, this cluster is not one you'll be tracking down through the eyepiece of a modest back-garden telescope. But thanks to the powerful orbiting eye of the Hubble Space Telescope, this faraway galactic gathering has been imaged in spectacular detail revealing a lot more than just the individual glowing members of the cluster itself.
Scan your eyes over Hubble's image of Abell 1689 (right) and you might see what makes the cluster so interesting. Scattered throughout it are thin, hair-like arcs of light. These aren't exotic celestial structures, but highly warped visions of other galaxies that sit far beyond the cluster. These arcs appear because the huge combined mass of the cluster galaxies distorts the space surrounding it, causing it to behave like a lens. Though the quality of the image provided by this gravitational lens might raise eyebrows in amateur telescope-making circles, the lens shares one key trait with the telescope lenses we use: it can reveal distant objects that we might otherwise be unable to see. Indeed in 2008 researchers announced that they'd used Hubble, in conjunction with the Abell 1689's gravitational lens, to observe a distant galaxy in the early Universe, some 700 million years after the Big Bang.
M87
Look at any image of the rich fields of galaxies in and around the constellation of Virgo, and among the stars and galactic swirls that fill your view you'll see numerous bright ovals of light. These are elliptical galaxies and although they may not have the beauty or spectacular star-forming regions of their spiral cousins these often vast stellar swarms are some of the most enigmatic intergalactic inhabitants we know of. Foremost among the ellipticals in this part of the sky is the gargantuan M87. It's truly a giant — a recent study by astronomers at the European Southern Observatory was able to determine the size of the halo of stars around the galaxy: the ring of stars spans about 980,000 lightyears, dwarfing the Milky Way's stellar halo, which measures roughly 640,000 lightyears across.
However, M87's most famous feature is not its size but what lies at its heart: a supermassive black hole. Unlike the Milky Way's central black hole M87's is active. Images of the galaxy show an enormous jet emanating from the black hole; the jet is glowing due to light released by high-energy particles that are racing at tremendous speeds along magnetic field lines within it.
Aside from the jet and some globular clusters, though, the rest of M87 might seem rather bland in visible-light. At other wavelengths, however, a hidden maelstrom of activity in and around the enormous galaxy is revealed. Radio telescopes, for example, have observed huge glowing streams of material associated with the black-hole jet, while X-ray images from the orbiting Chandra observatory show immense swirling clouds of superheated gas within the galaxy. Something to consider the next time you set eyes on that seemingly placid, fuzzy patch in your telescope's eyepiece.
The Virgo Galaxy Cluster
Ask a seasoned stargazer to name one of their favorite spring galaxies to observe and chances are it'll be located in Virgo. The constellation boasts an extraordinary array of galactic treasures, including some of the most famous in the sky. It's perhaps no surprise then that many of the galaxies crowding into this part of the heavens are associated, that is they're all part of an enormous — and in cosmic terms relatively nearby — grouping known as the Virgo Galaxy Cluster. Recent surveys suggest that there are some 1,900 galaxies in this cluster, which sits roughly 56 million lightyears from the Milky Way.
The cluster counts within its number many relatively bright galaxies that are familiar to amateur astronomers — for example M87 as well as M86, M84 and the others that make up the sweeping curve of galaxies known as Markarian's Chain. The heart of the cluster itself lies in the region around 6° west of the star Vindemiatrix (Epsilon Virginis). However, modern studies have shown that there are members of the cluster spread all over this patch of sky, with some in neighboring constellations of Coma Berenices and Leo too.
NGC 4488
Looking out into the cosmos, the distances to even the nearest galaxies can seem immense, and yet spiral galaxies collide frequently. As two galaxies approach, their gravitational interactions cause them to distort each other.
You can get a sense of what happens when spiral galaxies engage this way if you look into the constellation of Virgo — specifically within Markarian's Chain. In the chain are two galaxies — known as The Eyes — that lie roughly 50 million lightyears from us. The pair are catalogued as NGC 4438 and NGC 4435, and deep images of NGC 4438 show a contorted jumble of scattered dust lanes and ribbon-like streams of stars around a brighter, central region. Astronomers think that what we're seeing in NGC 4438 is actually a spiral galaxy that's been disrupted by a violent encounter with the elliptical galaxy M86, which now sits less than 0.5° away on the sky.
The Whirlpool Galaxy
This journey across Virgo's ethereal realm of galaxies has taken us across some 60° of the sky and we end our exploration of this extraordinary region with one of the most beautiful galaxies anywhere on the celestial sphere. M51, otherwise known as the Whirlpool Galaxy, has captivated astronomers for centuries and continues to intrigue both amateurs and professionals today. M51 was being scrutinized by astronomers long before its true nature — as a galaxy in its own right and not just another glowing nebula within the Milky Way — was really known.
William Parsons, the third Earl of Rosse, famously sketched M51 in 1845 using the enormous Leviathan of Parsonstown, a 72-inch reflecting telescope housed at Birr Castle in Ireland. His exquisite drawing clearly depicts the sweeping form of the Whirlpool — and its neighbor, the galaxy NGC 519 that's instantly recognizable in the astro images taken with today's photographic equipment.
Our perspective of M51, looking down on the galaxy's disc, affords us a superb view of the physics unfolding there. Within the disc, density waves have formed spiral arms, which are home to vast numbers of hot, relatively young, blue stars. Photographs of the galaxy reveal another striking feature of these arms: numerous crimson patches of light scattered throughout M51's disc. This feature is one that, just like the hot young stars, is testament to the star formation occurring there. These crimson patches are regions where the radiation of infant and newborn stars is exciting their surrounding maternal nebulae, causing the gas clouds to shine with the characteristic ruby hue of glowing hydrogen.
These dramatic flourishes of star formation aren't the only dynamism on display with the Whirlpool Galaxy either. NGC 5195 is interacting with M51 and long-exposure images of the pair show extensive swathes of stars — known as tidal streams — near the galaxies that have been drawn out during this gravitational dance.
See the Galaxies
Although none of the galaxies we've covered here are visible to the naked eye, several, such as M104 (the Sombrero Galaxy) and M51 (the Whirlpool Galaxy), are fine sights through amateur telescopes. If you've never observed a distant galaxy through a telescope before, you'll soon realize why many astronomers affectionately refer to deep-sky objects as faint fuzzies. It's a description that sums up rather well the view of many galaxies through the eyepiece of a modest amateur telescope: a faint, fuzzy blob. That's not to say there aren't brighter examples that show more structure or interesting features, such as M104's dark bar, though. As with many celestial objects the key to seeing more detail is to get away from light pollution and use a larger aperture telescope. If you don't have one then pay a visit to your local astronomical society observing evening or star party during the galaxy seasons of spring and autumn. These events often provide access to large-aperture instruments.
ABOUT THE WRITER
Will Gater is an astronomy journalist, author and presenter. Follow him on Twitter at @willgater or visit willgater.com
Copyright © Immediate Media. All rights reserved. No part of this article may be reproduced or transmitted in any form or by any means, electronic or mechanical without permission from the publisher.
{ width: 160, height: 160, defaultImage: '', layers: 'Artimg-BBC_Treasures_of_Orion' }

![]() Orion is proud to partner with BBC Sky at Night Magazine, the UK's biggest selling astronomy periodical, to bring you this article as part of an ongoing series to provide valuable content to our customers. Check back each month for exciting articles from renowned amateur astronomers, practical observing tutorials, and much more!
Orion is proud to partner with BBC Sky at Night Magazine, the UK's biggest selling astronomy periodical, to bring you this article as part of an ongoing series to provide valuable content to our customers. Check back each month for exciting articles from renowned amateur astronomers, practical observing tutorials, and much more!
Treasures of Orion
Paul Money takes us on a tour of the best sights the Hunter has to offer.

Image by Ron Adams, M42 the Great Orion Nebula
Orion holds something for everyone, whether you enjoy the naked-eye splendor of its stars, want to tour it with a pair of binoculars, peer deeper with a modest telescope or delve into its deepest and faintest targets with 10- to 14-inch systems. It is easy to enjoy the view of the Orion Nebula alone, but a host of astronomical treasures awaits those willing to look a little closer. In this article we reveal some of Orion's most striking features and the equipment needed to see them.
Naked Eye
Allow 30-40 minutes for your eyes to adapt to the dark before you start observing.
Betelgeuse (Alpha Orionis)
RA: 05h 55m 10s
Dec.: +07� 24' 25"
We begin with the most famous star in Orion, mag. +0.5 Betelgeuse (Alpha Orionis). An unmistakable bright orange star of spectral class M0, Betelgeuse is often cited as the most likely red supergiant to go supernova any time in the next million years.
Rigel (Beta Orionis)
RA: 05h 14m 32s
Dec.: –08� 12' 06"
On the opposite side of the Belt stars to Betelgeuse is mag. +0.2 Rigel (Beta Orionis). In contrast to Betelgeuse, Rigel is a brilliant blue-white star of spectral class B8. It is technically a little brighter than Betelgeuse despite being designated Beta.
Binoculars
Delights await you whether you have a pair of 7x42s, 10x50s or 15x70s.
Orion's Belt
RA: 05h 36m 12s (Alnilam)
Dec.: –01� 12' 07" (Alnilam)
With 10x50 binoculars you will see a little deeper. The 6� field of view allows a stunning view of the three
stars that form Orion's Belt: mag. +1.9 Alnitak (Zeta Orionis), mag. +1.7 Alnilam (Epsilon Orionis) and mag. +2.4 Mintaka (Delta Orionis). All three are B0 spectral class.
Sword of Orion
RA: 05h 35m 16s (Theta Orionis)
Dec.: –05� 23' 23" (Theta Orionis)
For now let's sidestep the Orion Nebula, as the sword also contains the wonderful open cluster NGC 1981 at the top. A group of stars including mag. +4.6 42 Orionis and mag. +5.2 45 Orionis sits north of the Orion Nebula (M42) and the adjacent De Mairan's Nebula (M43), which itself is above mag. +2.8 Hatsya (Iota Orionis).
Meissa (Lambda Orionis)
RA: 05h 35m 8s
Dec.: +09� 56' 03"
Mag. +3.5 Meissa (Lambda Orionis) is found in a neglected group of stars known as Collinder 69 or the Lambda Orionis Association. Meissa makes a triangle with mag. +4.4 Pi1 Orionis and mag +4.1 Pi2 Orionis. Meissa and the cluster it resides in are thought to be 1,100 lightyears away and certainly worth looking at with larger binoculars.
Orion's Shield
RA 04h 49m 50s (Tabit)
Dec.: +06� 57' 40" (Tabit)
Another neglected pattern is that of Orion's Shield, formed by the six stars designated Pi Orionis (mag. +4.6 Pi1, mag. +4.4 Pi2, mag. +3.2 Pi3, mag. +3.7 Pi4, mag. +3.7 Pi5, and mag. +4.5 Pi6). They form a curved line best seen with low-power binoculars, such as a pair of 7x42s, as the distance between the two ends of the shield is 8.5�. Pi3 Orionis, also known as Tabit, is a relatively close 26 lightyears away.
Small Telescope
Use a reflector up to 6 inches or refractor up to 4 inches and you'll see more detail.
The Orion Nebula
RA: 05h 35m 16s (Theta Orionis)
Dec.: –05� 23' 23" (Theta Orionis)
The Orion Nebula is the showpiece of the constellation and really comes alive with a small refractor. It has two patches with Messier designations: M42 is the main nebula, its wisps and tendrils stretching out from the central Trapezium Cluster. Just above it is the much smaller M43, also known as De Mairan's Nebula.
M78
RA: 05h 46m 45s
Dec.: +00� 04' 45"
M78 would be the showcase nebula of the constellation were it not for the Orion Nebula. It possesses two stars immersed in nebulosity, shines at mag. +8.0 and from Earth looks like a typical white-sheeted ghost. Look out for nearby NGC 2071: it is smaller than its neighbor but shines at mag. +8.0.
NGC 2112 and Barnard's Loop
RA: 05h 53m 45s (NGC 2112)
Dec.: +00� 24' 39" (NGC 2112)
The emission nebulosity described as Barnard's Loop is well known among astrophotographers, yet part of its section above and slightly east of M78 can be traced with a 6-inch Dobsonian. This faint, 'milky' patch curves and ends close to mag. +9.0 open cluster NGC 2112. Low magnification is best for the loop.
Sigma Orionis
RA: 05h 38m 44s
Dec.: –02� 36' 00"
Close to mag. +1.9 Alnitak (Zeta Orionis) is mag. +4.0 Sigma Orionis, which appears as a stunning multiple star system through small to medium telescopes. There are four splittable stars, the brightest of which is another double ? though this one is too tight to resolve in amateur instruments.
The Flame Nebula (NGC 2024)
RA: 05h 41m 55s
Dec.: –01� 51' 00"
The Flame Nebula needs dark skies and low magnification to see well. Use a 6-inch reflector, making sure you keep nearby Alnitak out of the field of view to improve contrast, and you should be able to see its mottled fan shape. As a bonus, reflection nebula NGC 2023 lies nearby.
NGC 1662
RA: 04h 48m 27s
Dec.: –02� 56' 38"
Now for something different. NGC 1662 is a lovely mag. +6.4 open cluster forming a right-angle triangle with mag. +4.6 Pi1 Orionis and mag. +4.4 Pi2 Orionis, the two stars at the top of Orion's Shield. Pi1 Orionis sits in the right angle. This is another overlooked target, said to resemble a Klingon Bird of Prey from Star Trek.
NGC 2022
RA: 05h 42m 6s
Dec.: +09� 05' 10"
This little planetary nebula can be found just southeast of mag. +3.5 Meissa (Lambda Orionis). The nebula shines
at mag. +11.6. In a 6-inch Dobsonian it is small and round, appearing a pale greenish-blue. It can sustain high magnification if conditions permit.
The 37 Cluster
RA: 06h 08m 24s
Dec.: +13� 57' 53"
Also designated NGC 2169, this cluster gets its name because its stars appear to form the numerals three and seven. A lovely little cluster shining at mag. +5.9 and well worth seeking out even under moderately light-polluted skies. This cluster bears higher magnifications well.
Large Telescope
Delve deep into the constellation with a reflector over 6 inches or a refractor over 4 inches.
The Trapezium Cluster
RA 05h 35m 16s (Theta Orionis)
Dec.: –05� 23' 23" (Theta Orionis)
At the heart of the Orion Nebula is the Trapezium Cluster. The main stars can be easily seen through small scopes, but use a large instrument and two more pop easily into view. Two more challenging stars are mag. +16.0.
Jonckheere 320
RA 05h 05m 40s
Dec.: +10� 42' 21"
This is a stunning but neglected planetary nebula shining at mag. +11.8. In smaller telescopes it looks like a green star at low magnification, so larger telescopes really do it justice and bring out its true nature. Through a 14-inch Newtonian it appears as a small green disc.
NGC 1999
RA: 05h 36m 25s
Dec.: –06� 42' 58"
This is another nebula that could have more attention if it were not for the Orion Nebula. NGC 1999 shines at mag. +9.5 and in small telescopes looks like a small misty star, but a 14-inch scope reveals the mag. +10.3 star V380 Orionis surrounded by faint nebulosity.
NGC 1788
RA: 05h 06m 54s
Dec.: –03� 20' 05"
Off the beaten track and roughly north of mag. +2.8 Cursa (Beta Eridani), NGC 1788 is a reflection nebula that deserves to be better known. It glows by reflecting the light of the mag. +10.0 star embedded within it, and using a large scope reveals more stars around it.
NGC 1924
RA: 05h 28m 02s
Dec.: –05� 18' 39"
Orion is home to dozens of galaxies. One of the easier ones to find is NGC 1924, which lies to the west of M42, shines at mag. +13.3 and may be as far as 100 million lightyears away. When viewed through a 14-inch Newtonian at 200x magnification it appears as a pale, oval smudge of light.
IC 421
RA: 05h 32m 08s
Dec.: –07� 55' 06"
This barred face-on spiral galaxy has a stated magnitude range of mag. +14.2 to mag. +16.4 and is a challenging object. See if you can detect it with a 14-inch Newtonian at 200x magnification as a faint roundish smudge of light. It lies 140 million lightyears away.
UGC 3188
RA: 04h 51m 49s
Dec.: –08� 50' 38"
Use mag. +4.4 Pi2 Orionis to home in on this faint galaxy, which rests just 18 arcminutes east of the star and shines at mag. +15.0. This galaxy has a couple of mag. +10.0 stars nearby that help you locate it. Just south of Pi2 Orionis is UGC 3180, another mag. +15.0 galaxy, this time all alone in the night sky.
The Horsehead Nebula (Barnard 33)
RA 05h 41m 01s
Dec.: –02� 27' 14"
To see the famous Horsehead Nebula, you have to be able to pick up faint emission nebula IC 434, which hangs south from mag +1.9 Alnitak (Zeta Orionis). The horse's head appears as a dark notch through a 14-inch Newtonian and requires averted vision — a great, subtle challenge.
ABOUT THE WRITER
Paul Money is the BBC Sky at Night magazine reviews editor and an experienced astronomer who regularly organizes outreach events.
Copyright © Immediate Media. All rights reserved. No part of this article may be reproduced or transmitted in any form or by any means, electronic or mechanical without permission from the publisher.
{ width: 160, height: 160, defaultImage: '', layers: 'Artimg-BBC_DeepSky' }

![]() Orion is proud to partner with BBC Sky at Night Magazine, the UK's biggest selling astronomy periodical, to bring you this article as part of an ongoing series to provide valuable content to our customers. Check back each month for exciting articles from renowned amateur astronomers, practical observing tutorials, and much more!
Orion is proud to partner with BBC Sky at Night Magazine, the UK's biggest selling astronomy periodical, to bring you this article as part of an ongoing series to provide valuable content to our customers. Check back each month for exciting articles from renowned amateur astronomers, practical observing tutorials, and much more!
The Deep Sky
M42, the Great Orion Nebula, taken by Ron Adams from his backyard in Oakdale, Louisiana.
Galaxies
These concentrations of millions or billions of stars are gravitationally bound together along with gas clouds and pockets of dust. There are probably over 100 billion of them in the Universe. Some of the largest nearby galaxies appear in the night sky as faint smudges of light, but it was only in the early 20th century that astronomer Edwin Hubble proved that they actually exist well beyond our Galaxy — the Milky Way. Before then, they were thought to be spiral-shaped nebulae on its outskirts.
Hubble also established that galaxies vary in shape and size. Two-thirds have distinctive spiral patterns, while the rest range from neat ellipticals to irregular blobs. They can be dwarves containing millions of stars or giants harboring trillions.
Astronomers are still piecing together why this is the case, but collisions and mergers seem to be important in determining how a galaxy evolves. Central black holes also seem to govern how gas is consumed and when stars are formed within these cosmic conurbations.
Galaxies are much more massive than they look. Around 90 percent of their mass is not in luminous stars and gas, but in unseen 'dark matter'. It's arranged in a spherical halo, which governs the motions of the stars within. This invisible cocoon explains why the outskirts of spiral galaxies spin faster than if they were influenced by the quantity of stars and gas alone. Dark matter also governs how galaxies clump together under gravity to form filaments and clusters. Yet dark matter remains an enigma and astronomers are still trying to work out exactly what it is.
Nebulae
These clouds of gas and dust are scattered throughout the Milky Way, mainly in the galactic disc. Nebulae are where stars are created. One idea of how it all starts is that a shockwave from a nearby supernova explosion compresses the cloud. Once the density of the gas passes a critical point, gravity takes over.
Gravity causes clumps of the nebula to pull together. The pressure at the centers of the clumps builds and the temperature rises dramatically. If there is enough gas to fuel the process, the region can become a protostar, an early stage in the making of a star.
If the temperature in the clump reaches 10 million degrees Celsius, the nuclear furnace that powers stars ignites. Over tens of millions of years it settles into normal life and joins what's called the main sequence, like our Sun.
Star Clusters
When you gaze up at the night sky, it looks like a lot of stars are on their own. But a solitary-looking star may be a member of a vast group that's travelling through space as a unit. If we wind the clock back millions of years, we might find these stars forming in the same vast cloud of dust and gas.
Known as open clusters, these families of anywhere from a few dozen to a few thousand stars are created in the dusty spiral arms of the Milky Way. They travel together through space, but gentle tidal forces eventually cause the stars to move apart until they begin to merge into the general starry background.
There is another variety of star cluster out there: the globular cluster. These are much bigger than the open sort, consisting of hundreds of thousands or millions of generally reddish, older stars. Whereas open clusters are found and made within the plane of the Milky Way, globular clusters form a halo around it and their creation is less well understood.
Copyright © Immediate Media. All rights reserved. No part of this article may be reproduced or transmitted in any form or by any means, electronic or mechanical without permission from the publisher.
{ width: 160, height: 160, defaultImage: '', layers: 'Artimg-BBC_IcyWanderers' }

![]() Orion is proud to partner with BBC Sky at Night Magazine, the UK's biggest selling astronomy periodical, to bring you this article as part of an ongoing series to provide valuable content to our customers. Check back each month for exciting articles from renowned amateur astronomers, practical observing tutorials, and much more!
Orion is proud to partner with BBC Sky at Night Magazine, the UK's biggest selling astronomy periodical, to bring you this article as part of an ongoing series to provide valuable content to our customers. Check back each month for exciting articles from renowned amateur astronomers, practical observing tutorials, and much more!
Icy Wanderers
Spectacular comets may be visible only once in a lifetime.

Image courtesy of NASA.
Wandering through the Solar System, comets can be among the most incredible of astronomical sights and, after years of careful observation, astronomers have coaxed out the secrets hidden within their glow.
The heart of a comet is its nucleus, a core of ice laced with rock and dust, a few kilometers wide. Though sometimes called a 'dirty snowball', the ice found on comets is far more exotic than that on Earth.
When the Rosetta spacecraft reached the comet 67P/Churyumov-Gerasimenko in 2014 it performed the first in-situ analysis of the comet's nucleus, finding not only water ice, but also carbon dioxide and monoxide, as well as traces of ammonia, methane and methanol. These highly volatile compounds are usually found as a gas or liquid on Earth, but the frigid depths of space have frozen them to ice as hard as rock.
These snowballs travel in huge elliptical orbits, briefly visiting the inner Solar System at one end before travelling billions of kilometers to the outer regions. 'Long-period comets' travel into deep space, taking thousands of years to complete an orbit, while 'short-period comets' have orbits that take only a few years or decades. Halley's Comet is visible to the naked eye from Earth every 75.3 years.
Comas & Tails
It's thought short-period comets come from the Kuiper Belt, after being knocked out of orbit. Beyond the Kuiper Belt, the Oort Cloud stretches to 3.2 lightyears from the Sun. If a passing star kicks one of its bodies off course, it creates a long-period comet.
For most of these orbits, the nucleus remains an inert lump of ice, but this changes as the comet nears 'perihelion' — its closest approach to the Sun. When close enough, the solar radiation heats the surface, causing the volatile components to boil. As the gas escapes into deep space it lifts off dust, creating a shroud that can stretch out over 50,000km around it — the coma.
As the comet gets closer to the Sun, this envelope begins to feel the solar influence even more acutely, as its wind and magnetic field sweep the dust and gas out into a huge tail, which can extend for millions of kilometers. Some of the tail's debris is left behind in its orbit, forming a meteoroid stream. Several of these cross the Earth's orbit, and when we pass through them every year, we see the debris burning up in the atmosphere as a meteor shower.
Sunlight reflecting off the coma and tail causes these celestial visitors to glow in the night, making them an ever-popular target for astronomers. But, only a handful of comets can be seen every year with the aid of a small telescope. Websites such as www.icq.eps.harvard.edu/cometobs.html or www.ast.cam.ac.uk/~jds will tell you which comets are active and where to find them.
Chasing the Tail
The most alluring part of a comet is surely its huge tail, but it's not always obvious that there are two. The most apparent is the dust tail, swept out in an arc by the solar wind. However, the magnetic field captures the gas, forming a fainter second tail. Sometimes the comet's position relative to Earth means the tails appear to go in two different directions.
Famous Comets
Dominating the sky or the landing site for a probe, these are the best-known comets
Hale-Bopp
Closest approach: 136 million km
Orbit: 2,520-2,533 years
Famed for: Visible to the naked eye for a record 18 months in 1996/97, Hale-Bopp will return around the year 4385.
67P/Churyumov-Gerasimenko
Closest approach: 186 million km
Orbit: 6.4 years
Famed for: Target of the Rosetta mission, which sent the Philae lander to its surface, finding water and organic compounds.
Great Daylight Comet
Closest approach: 19 million km
Orbit: 57,300 years
Famed for: Spotted in January 1910, this comet quickly brightened until it outshone even Venus. Its tail was noticeably curved.
Halley's Comet
Closest approach: 88 million km
Orbit: 75.3 years
Famed for: The only known short-period comet routinely visible to the naked eye, this regular visitor was observed as early as 240 BC.
Ikeya-Seki
Closest approach: 450,000 km
Orbit: 876.7 years
Famed for: Its 1965 close pass of the sun made Ikeya-Seki one of the brightest comets in 1,000 years. It's thought to be a fragment of the Great Comet of 1106.
Copyright © Immediate Media. All rights reserved. No part of this article may be reproduced or transmitted in any form or by any means, electronic or mechanical without permission from the publisher.
{ width: 160, height: 160, defaultImage: '', layers: 'Artimg-BBC_StartingWithBinoculars' }

![]() Orion is proud to partner with BBC Sky at Night Magazine, the UK's biggest selling astronomy periodical, to bring you this article as part of an ongoing series to provide valuable content to our customers. Check back each month for exciting articles from renowned amateur astronomers, practical observing tutorials, and much more!
Orion is proud to partner with BBC Sky at Night Magazine, the UK's biggest selling astronomy periodical, to bring you this article as part of an ongoing series to provide valuable content to our customers. Check back each month for exciting articles from renowned amateur astronomers, practical observing tutorials, and much more!
Starting with Binoculars
Telescopes aren't the only option for observing the night sky, a pair of binoculars is ideal for budding astronomers.

Observing the heavens © Ashley Dace, cc-by-sa.
New to astronomy and trying to work out what to buy for your first telescope? There's a simple answer to that question: don't buy one, buy two. Two small scopes joined with a hinge so that the distance between them can be adjusted to exactly match your eyes — binoculars. Binoculars allow you to observe hundreds of astronomical objects. Not only can you see many more objects through binoculars than with the naked eye, but the detail and color you can see will become richer too.
Binoculars are still suitable even if you want to do 'serious' astronomy. There are variable star observing programs designed specifically for binoculars and being lightweight and easy to carry makes them ideal for getting out and about to view a lunar graze or asteroid occultation.
Closer to home, why not simply wrap up warm, lie back on your garden recliner and just enjoy the objects your binoculars let you find as you cast your gaze among the stars. You'll soon be able to find your way around the night sky and navigate better than with the entry-level GoTo telescope you nearly bought instead.
What Size Should You Buy?
You'll notice that binoculars are classified by two numbers, their magnification and aperture. A 10x50 pair of binoculars has a magnification of 10x and each of the front lenses has an aperture of 50mm. These numbers also allow you to work out the size of the circle of light, or 'exit pupil', that emerges from the eyepieces: to do this you divide the aperture by the magnification. This means a 10x50 pair of binoculars has an exit pupil of 5mm. The exit pupil should be no larger than the dark-dilated pupils of your eyes: so a pupil of anywhere between 4-6mm is fine for your first pair of binoculars. Larger apertures can show you more but being heavier you will probably need to use a mount to keep a steady view over a longer period. The most common sizes are:
- 8x40: almost anyone over the age of 10 can hold these steadily.
- 10x50: most adults can hold these steadily, so this size is a popular compromise between size and weight.
- 15x70: this size really needs to be mounted, although they can be held for short periods.
It's also important to check that the distance between the two eyepieces will adjust to your eyes. If you wear glasses, check that the binoculars have enough distance from the eyepiece to your ideal eye position; 18mm or more should be adequate. Finally, there are two basic types of binoculars: Porro-prism and roof-prism. In any price range, roof-prisms are lighter but Porro-prisms tend to have better optical quality. Once you've decided on the size and type that best suits you, go for the best quality you can buy for your budget.
Copyright © Immediate Media. All rights reserved. No part of this article may be reproduced or transmitted in any form or by any means, electronic or mechanical without permission from the publisher.
{ width: 160, height: 160, defaultImage: '', layers: 'Artimg-BBC_GreatAmericanEclipse' }

![]() Orion is proud to partner with BBC Sky at Night Magazine, the UK's biggest selling astronomy periodical, to bring you this article as part of an ongoing series to provide valuable content to our customers. Check back each month for exciting articles from renowned amateur astronomers, practical observing tutorials, and much more!
Orion is proud to partner with BBC Sky at Night Magazine, the UK's biggest selling astronomy periodical, to bring you this article as part of an ongoing series to provide valuable content to our customers. Check back each month for exciting articles from renowned amateur astronomers, practical observing tutorials, and much more!
The Great American Eclipse
Dan Falk looks forward to the moment when day turns into night across North America.

Image by Luc Viatour, www.Lucnix.be
The date is etched in the brains of eclipse enthusiasts: August 21, 2017. On that Monday, for the first time in nearly 40 years, the path of a total solar eclipse cuts right across the US. For about two and a half minutes, the Moon will completely cover the face of the Sun, turning day into night.
For thousands of years, solar eclipses were seen as shocking, fearful events; our ancestors would witness them and wonder if the world was coming to an end. Today, eclipses no longer take us by surprise: astronomers can calculate when an eclipse will occur hundreds of years in advance. Knowing the physics behind an eclipse, however, doesn't diminish the spectacle. A total solar eclipse is, quite simply, a spellbinding event, one of the most captivating phenomena the natural world has to offer.
People that have never seen a total eclipse might question what all the fuss is about, says astronomer, author and photographer Alan Dyer. "They think it just gets dark, the same way it does every night. No! A total eclipse is unlike anything you've experienced," says Dyer, who's seen 15 total eclipses over the past 40 years. (I've been lucky enough to see four of them, including one that I observed from Easter Island in 2010.) "You see, hear and feel a total solar eclipse," Dyer says. "Experience one and you'll be hooked."
There's another bonus: an eclipse can be enjoyed without any expensive astronomical equipment; you don't need a telescope or even binoculars. A word of caution is in order, though.
During the partial phases of the eclipse, when some portion of the Sun's disc remains visible, it's not safe to look at directly without eclipse glasses or equipment fitted with a certified solar filter. But when the Moon is completely covering the Sun — during the total phase of the eclipse — you can gawk at it safely. You can even use binoculars or take photos with a telephoto lens (again, that's only during totality).
It's been a long wait for the Moon to cast its shadow on US soil again. The last time was in 1991, when it landed in Hawaii but didn't reach the mainland. Prior to that it was 1979, when observers in the contiguous 48 states last saw a total eclipse, and even then it was only visible from the northwestern corner of the country.
Chasing shadows
The situation for eclipse observers will be very different in August. The path of totality — the narrow zone within which the total eclipse will be visible — will be just 110km wide, but will stretch from coast to coast, running from Oregon to South Carolina.
During a solar eclipse, the Moon's shadow (think of it as a very long, narrow cone that points away from the Sun) makes contact with Earth's surface. Since Earth rotates east to west, the Moon's shadow travels along in the opposite direction, running from west to east. After making landfall on Oregon's Pacific coast, the shadow continues east through the Rockies and on into the nation's heartland. It continues its eastward rush, crossing the Appalachian Mountains and finally zipping across the Carolinas and out over the Atlantic, near the historic city of Charleston.
Note that simply being within the path of totality isn't enough: you'll want to be near the middle of the path, known as the centre line. Most locations near the centre line will experience about two and a half minutes of totality. People living just south of Carbondale, Illinois, can brag that they'll get the longest duration of totality, with a little over two minutes and 40 seconds. That duration drops sharply as you move away from the centre line. Meanwhile, anyone viewing from north or south of the path of totality will experience a partial eclipse — far less dramatic than totality.
As the moment of totality approaches, the entire landscape can appear altered. In the half-hour or so before the Sun disappears, the quality of the light changes, shadows get sharper and the temperature drops. Dogs bark and roosters crow in confusion. This is the moment to make sure the batteries in your cameras are fully charged.
Because the eclipse path cuts right through the US, a record number of people are expected to witness the spectacle. More than 10 million Americans live within the path of totality; nearly 30 million live within 100km of the path. Some are already calling on the federal government to declare Monday August 21, 2017 a national holiday.
Location, location, location
With the eclipse's path running some 4,500km across America, where should you go to watch it? The weather, of course, is a big issue. Roughly speaking, the weather prospects improve from east to west; once you're west of the Mississippi, you've got a better than 50/50 chance of having a clear sky on 21 August, based on many years of climate data. Of course, what the local forecast says the day before the eclipse is more important than historical weather data! Some of the driest spots, with the highest chances of clear skies, include the valleys of central Oregon and central Idaho; some locations have a roughly three-in-four chance of cloudless weather. And of course, there's the scenery. No doubt, many visitors will be drawn to places like Grand Teton National Park, in northwest Wyoming, right inside the path of totality. Nearby Yellowstone is just outside the path, but many people will likely drop by for a visit before or afterward.
Another big unknown, apart from the weather, is the size of the crowds. "My guess is that they'll come by the thousands, from all over the US and other parts of the world," says Randy Holst, President of the Boise Astronomical Society in Idaho. Congestion is a real concern: most of the highways in the Northwest, especially those in the mountains, are two-lane, winding roads. And as Holst and others point out, this part of the country is famous for its natural beauty and is often jam-packed with tourists in August, even when there's no eclipse. Not surprisingly, many hotels and campsites are already booked up — but remember, this is an eclipse that you can, at least in theory, drive to; if your hotel is 80km outside the path of totality, you may still be okay — as long as you don't end up stuck in traffic!
Farther east, the population density is greater; millions of Americans will be able to see the eclipse from their backyards. "Every day the momentum is building," says Don Ficken, who heads the Eclipse Task Force for the greater St Louis area, in Missouri. "This is a historic event." In Columbia, Missouri, 50,000 people are expected to gather at a public event at the city's football stadium; the airport in St Joseph, in the northwest of the state, will host up to 60,000 at an eclipse-viewing event. Details for other events, large and small, are likely to be announced in the months ahead.
But what if you miss this particular eclipse? The next total solar eclipse you could go and witness will happen on 2 July 2019 — the path of totality passes through Chile and Argentina. The next one visible from the US comes on 8 April 2024.
Why wait until then, though? As solar eclipses go, this one is relatively accessible and the weather prospects in many locations are reasonably good. As Jay Anderson, a meteorologist and avid eclipse chaser puts it, "You only go around once. So do it while you can."
Top places to view the eclipse
Five of the best locations to see totality from
Grand Teton National Park, Wyoming
The park features some of the most spectacular mountain scenery in the US, and equally majestic Yellowstone, known for its wildlife as well as the Old Faithful geyser, is right next door.
Carbondale, Illinois
If you want the longest possible eclipse, a spot just south of this small university city boasts the maximum duration of totality. Totality is expected to be just over two minutes and 40 seconds here.
Central Nebraska
What's in central Nebraska? A useful 400km stretch of Interstate 80, which happens to run along the path of totality. If may also make an emergency relocation possible if bad weather is forecast on the 21st.
Charleston, South Carolina
Tourists and history buffs flock to this picturesque city on the Atlantic coast even when there's no eclipse. The first shots of the American Civil War rang out over Charleston's harbour on 12 April 1861.
Madras, Oregon
This part of Oregon boasts some of the driest conditions anywhere along the path of totality; statistically, there's about a 65 per cent chance of having a clear sky on Monday 21 August.
Viewing and Imaging the Eclipse
Here's how to get the most out of nature's greatest spectacle
- Weather forecasts, along with your rental car, may be your best friend. Check the forecast the night before the eclipse and again in the morning. You've come this far, another bit of driving — if it gets you to clearer skies — may be well worth it.
- Before and after totality, the Sun is far too bright to look at directly — so don't, unless you have a certified solar filter. Your local astronomy club can help you get your hands on one.
- The partial phases of the eclipse last much longer than the brief moments of totality — so enjoy this slow period. Notice the changing quality of light and shadow as the Sun is reduced to a thin sliver of light.
- The two and a half minutes of totality will go by very fast. Have a plan for how you want to spend that time. If you want to take photos, be sure that your batteries are fully charged.
- If you have binoculars, use them during totality. They'll bring out the details in the Sun's pearly-white corona (its tenuous outer atmosphere). They'll also help you see the bright-red solar prominences that flare up from the Sun's surface.
- During totality, take a few moments to look at the overall scene in the sky. Can you see the bright planet Venus, above and to the right of the hidden Sun?
- "Pictures or it didn't happen." So the younger generation say. But do you really want to spend those two and a half minutes of totality fiddling with your camera? There's a lot to be said for just looking.
- If photography is a must, consider taking wide-angle views that include the scenery. Close-up views of the eclipse all look pretty much the same; a wide-angle shot from your location will be more unusual.
ABOUT THE WRITER:
Dan Falk is a science journalist based in Toronto. His books include The Science of Shakespeare and In Search of Time. Find him at @danfalk
Copyright © Immediate Media. All rights reserved. No part of this article may be reproduced or transmitted in any form or by any means, electronic or mechanical without permission from the publisher.
{ width: 160, height: 160, defaultImage: '', layers: 'Artimg-BBC_PathOfSun' }

Orion is proud to partner with BBC Sky at Night Magazine, the UK's biggest selling astronomy periodical, to bring you this article as part of an ongoing series to provide valuable content to our customers. Check back each month for exciting articles from renowned amateur astronomers, practical observing tutorials, and much more!
The Path of the Sun
The invisible course traced by the Sun as it moves across the sky is one of the most important lines in the celestial sphere

Two equinoxes are shown as the intersection of the ecliptic and celestial Ecuador, and the solstice's times of the year in which the Sun reaches its maximum southern or northern position. By Divad (Own work) [Public domain], via Wikimedia Commons
The Sun never deviates from the path that it traces across the sky. We can't see this line of course but we call it the 'ecliptic' and it's one of the most important markers in the sky. Why? Because the ecliptic also represents the orbital plane of our planet.
All of the planets in the Solar System occupy orbital planes similar to our own. This is because when the Solar System formed, billions of years ago, gravity pulled the dust and gas surrounding our nascent star into a kind of flat disc. The planets we know today all formed within this disc, so they all occupy planes similar to the ecliptic — described as 'coplanar'. Simply put, when the planets are visible, they will always be near the ecliptic.
It's this coplanar nature of the Sun and planets that allows many of the events that captivate astronomers to happen so often. When our Moon and the Sun line up, we see an 'eclipse'. When a planet appears to be in the same part of the sky as another, or our own Moon, we call it a 'conjunction'. Even 'rare' events like a transit of Venus — when Venus passes between the Sun and a superior planet and appears as a small black disk moving across the face of the Sun — are quite frequent in cosmological terms.
The Equinoxes
The two points at which the ecliptic crosses the celestial equator mark the moments when the hours of day and night are roughly the same. These are called 'equinoxes', from the Latin for 'equal night'.
In the northern hemisphere, the equinox in mid-March signals spring, while the one in mid-September marks the beginning of autumn. At these two points in its orbit, Earth has no tilt relative to the Sun. From the March equinox, the days lengthen until mid-June, when Earth reaches the point in its orbit where it is at its greatest tilt relative to the Sun — a solstice. This is the first day of summer and the longest day of the year. At this point, the ecliptic and the celestial equator are at their furthest apart.
The second solstice six months later, in mid-December, when the tilt of the poles is reversed in relation to the Sun, marks the start of winter and the shortest day of the year in the northern hemisphere.
The Planets in Opposition
When the Sun, Earth and another planet form a line with Earth in the middle they are said be in 'opposition'. From our perspective on Earth, this means that the planet is in the opposite position in the sky to the Sun. This is another result of the Solar System being coplanar. This also means that only the superior planets — those with orbits further out from the Sun than Earth's — can be in opposition.
A planet at opposition is usually at its closest to Earth and therefore appears larger than at any other time. Due to its position relative to the Sun, a planet at opposition can also appear brighter than usual, making this the best time to observe the planet on a clear night.
Tracking the Ecliptic
The Sun always sits on the ecliptic, so it's easy to work out where the line is on any clear day. Looking at the whole year, we know that the Sun — and hence the ecliptic — is higher in the sky through the day in the summer months and lower during the winter. But what about at night? If you can work out the path of the ecliptic across the night sky, you can work out where you might be able to spot a planet.
Spring
In the morning, the ecliptic sits low down, but in the evening it stretches high across the sky from east to west. This makes the dusk skies the best time to see Mercury and Venus, as they never stray far from the Sun.
Summer
By dusk, the ecliptic sits at a low angle to the horizon, so any planets are hidden in atmospheric murk. The ecliptic's orientation swings from northwest-southeast in the evening to northeast-southwest in the morning.
Autumn
In a reflection of the northern hemisphere spring, the ecliptic's evening path is now low down, but in the morning it stretches high across the sky from east to west making dawn the best time to spot Mercury and Venus.
Winter
In winter, the ecliptic path is quite high when it's dark and moves higher until it reaches maximum elevation at midnight. This is a great time to observe planets, as you're able to look at them through less atmosphere.
Copyright � Immediate Media. All rights reserved. No part of this article may be reproduced or transmitted in any form or by any means, electronic or mechanical without permission from the publisher.
{ width: 160, height: 160, defaultImage: '', layers: 'Artimg-BBC_OuterPlanets' }

![]() Orion is proud to partner with BBC Sky at Night Magazine, the UK's biggest selling astronomy periodical, to bring you this article as part of an ongoing series to provide valuable content to our customers. Check back each month for exciting articles from renowned amateur astronomers, practical observing tutorials, and much more!
Orion is proud to partner with BBC Sky at Night Magazine, the UK's biggest selling astronomy periodical, to bring you this article as part of an ongoing series to provide valuable content to our customers. Check back each month for exciting articles from renowned amateur astronomers, practical observing tutorials, and much more!
The Outer Gas Giants
These distant worlds include the Solar System's largest

By NASA (JPL image) [Public domain], via Wikimedia Commons
Jupiter
Diameter: 143,000km
Moons: 67
Distance from Sun: 778 million km
The largest planet in the Solar System, Jupiter has more mass than all of the other planets put together and is second only to the Sun in terms of gravitational power. In 1994 it enticed comet Shoemaker-Levy 9 to fragment and crash into its swirling clouds — other likely comet crashes were recorded in 2009, 2010 and 2016. Jupiter is mostly gas, its composition of hydrogen and helium similar to that of the Sun.
With a good pair of binoculars the first things you'll notice are its four most famous moons: Io, Europa, Ganymede and Callisto, spied by Galileo Galilei in 1610. With a telescope you'll see a slightly squashed sphere. This is due to its fast spinning 'day' of just under 10 hours, which causes the equator to bulge outwards and the poles to flatten. Jupiter's cloudy atmosphere is revealed as dark bands separated by white zones. The longer you look, the more features appear, so keep an eye out for spots, wisps and kinks. The most famous feature is the Great Red Spot; twice the width of Earth, this is a gigantic storm with winds reaching up to 644km/h.
Saturn
Diameter: 120,500km
Moons: 62
Distance from Sun: 1.43 billion km
Saturn is known for its spectacular rings, made from millions of chunks of water-ice spread out into a thin disc only a few tens of meters thick but stretching 100,000km from the planet's surface. The rings form bands, some broad, some narrow. Scores of moons orbit within the rings, some carving out wide gaps. As with Jupiter, a handful of them are visible to observers.
Saturn's brightness varies due to the way the rings are tilted and how much sunlight they reflect. The planet is not so bright when the rings are edge-on to us, but its brightness increases over 7.5 years as the rings open up to observers on Earth. Then it fades again over the same period. If you're wondering why this takes 7.5 years, it's a quarter of the time that Saturn takes to go around the Sun.
The best way of understanding Saturn's tilting effect is to go out and look at the planet — it really is one of the telescopic marvels of the Solar System. It doesn't matter if you have a small scope — the sight of this tiny, ringed world hanging in a large, inky black field of view is magical. The view of larger scopes will start to show detail in the rings and on the planet itself.
Uranus
Diameter: 51,000km
Moons: 27
Distance from Sun: 2.87 billion km
The first planet to be discovered with a telescope, found by William Herschel in 1781. Its blue-green hue comes from the abundance of methane ices in its hydrogen and helium atmosphere, which also contains water and ammonia ices. Like Venus, Uranus spins from east to west, but its axis of rotation is tilted almost 90° from the plane of its orbit, suggesting that it might have been knocked over by a collision. Five rings were discovered in 1977 — in 1986 the Voyager spacecraft identified a further six, and two more were found by the Hubble Space Telescope in 2005, bringing the total to 13.
Visually, Uranus doesn't have much going for it, whether you use your eyes, a pair of binoculars or a telescope. By simply turning your head upwards, you can just about see this gaseous world as a very faint star at the limits of visibility (around mag. +5.6). You won't see much from anywhere with light pollution, however — the sky has to be very black. The view improves a little through a telescope, showing a greenish speck.
Neptune
Diameter: 49,500km
Moons: 13
Distance from Sun: 4.5 billion km
Neptune's composition is similar to that of Uranus, being mainly hydrogen and helium with methane ices, water ices and ammonia ices mixed in. But unlike featureless Uranus, Neptune is wracked by stormy weather, with giant tempests boiling among the clouds. Its winds are the fastest in the Solar System, reaching an incredible 600m/s (that's 2,200 km/h). Neptune has six known rings. They appear to have bright clumps within them, which may be short-lived collections of debris.
At around mag. +8.0 you need at least binoculars to see Neptune. When looked at through a telescope it looks like a 'star' with a hint of blue, but it is not as spectacular as its larger, closer compatriots. If you have a very large scope you can also catch a glimpse of Neptune's largest moon, Triton, which is mag. +13.5.
Copyright © Immediate Media. All rights reserved. No part of this article may be reproduced or transmitted in any form or by any means, electronic or mechanical without permission from the publisher.
{ width: 160, height: 160, defaultImage: '', layers: 'Artimg-BBC_InnerPlanets' }

![]() Orion is proud to partner with BBC Sky at Night Magazine, the UK's biggest selling astronomy periodical, to bring you this article as part of an ongoing series to provide valuable content to our customers. Check back each month for exciting articles from renowned amateur astronomers, practical observing tutorials, and much more!
Orion is proud to partner with BBC Sky at Night Magazine, the UK's biggest selling astronomy periodical, to bring you this article as part of an ongoing series to provide valuable content to our customers. Check back each month for exciting articles from renowned amateur astronomers, practical observing tutorials, and much more!
The Inner Planets
These worlds are mostly made up of metals or silicate rocks.

Released under Creative Commons CC0 on Pixabay.com.
Mercury
Diameter: 4,880km
Moons: 0
Distance from Sun: 58 million km
The closest planet to the Sun, Mercury is a place of extremes. It is the smallest and densest planet in the Solar System, barely larger than our Moon. It takes 59 Earth days to rotate once and 88 to orbit the Sun, meaning its parched surface experiences temperatures hot enough to melt lead on the sunward side, but is sub-Antarctic on the side in shadow.
This small world is a real challenge to observe for a variety of reasons. It's a fast mover, travelling around the Sun four times more quickly than Earth, so don't expect it to hang about in any part of the sky for very long. Mercury's orbit is a fairly eccentric oval shape, and it's on a bit of a tilt too, which means some times are better for viewing it than others: spring evenings and autumn mornings. If that's not tricky enough, you only have a relatively short observation window on any day you choose to look, as Mercury never strays very far from the Sun.
In spring, start looking 30 minutes after sunset, after which you'll have about another 45 minutes to see it. Autumn gives you a longer view, from about an hour and 45 minutes before sunrise, but that does mean getting up exceedingly early.
Venus
Diameter: 12,100km
Moons: 0
Distance from Sun: 108 million km
Venus is sometimes called 'Earth's evil twin'. It is similar in size and composition to our planet, but a dense carbon dioxide atmosphere and sulfuric acid clouds make its surface a hellish 470°C. The planet spins slowly, in the opposite direction to most planets, and takes about the same time to rotate on its axis (243 Earth days) as it does to travel around the Sun (225 days).
As Venus's orbit is slower than Mercury's, it can be visible for months on end, and sometimes for up to three hours after sunset or before sunrise. When Venus is at its brightest, it becomes the third brightest object in the sky, only beaten by the Moon and the Sun. This is caused by sunlight reflecting off its bright white carbon-dioxide clouds, and has led to Venus being called the 'Evening Star' or 'Morning Star' depending on when it appears. Venus can come very close to Earth, plus it's rather big, meaning that it's a good target for binoculars, through which you can easily see its larger phases.
Mars
Diameter: 6,800km
Moons: 2
Distance from Sun: 228 million km
The Red Planet is the most visited extraterrestrial destination in the Solar System. Dozens of missions have ventured there, and they have explored the Martian landscape in incredible detail. Smaller than Earth but with the same land area, Mars is like a cold, rocky desert, littered with canyons and volcanoes. The planet has polar caps and a thin atmosphere of mostly carbon dioxide. Although dry today, Mars's mineral salts and rock formations suggest that it was wet in the past, and could possibly have harbored life.
Mars differs from Mercury and Venus in that its position in the Solar System — on the other side of Earth — means it can be 'up' from sunset until sunrise. A small telescope can reveal lighter, pale-reddish areas, darker patches and the bright white of the ice caps.
The Dwarf Planets
Diameter range: 975km to 2,330km
A dwarf planet is, according to the International Astronomical Union, a body that orbits the Sun and is not a satellite, spherical in shape due to its own gravity and too small to have cleared its orbit of debris and so claim the title of a fully fledged planet. This classification was agreed after the 2005 discovery of Eris, an icy body in the outer Solar System very similar to Pluto, which was then considered a planet. In the fierce debate that followed Pluto was demoted into the newly created class, which also contains outer Solar System bodies Haumea and Makemake, and Ceres in the Asteroid Belt.
Ceres is the largest, but still comparatively small, so you will need binoculars to find it. Pluto is best seen by taking images of the region of sky it is in over consecutive nights and looking for the faint moving dot.
Copyright © Immediate Media. All rights reserved. No part of this article may be reproduced or transmitted in any form or by any means, electronic or mechanical without permission from the publisher.
{ width: 160, height: 160, defaultImage: '', layers: 'Artimg-BBC_HeartOfDarkness' }

![]() Orion is proud to partner with BBC Sky at Night Magazine, the UK's biggest selling astronomy periodical, to bring you this article as part of an ongoing series to provide valuable content to our customers. Check back each month for exciting articles from renowned amateur astronomers, practical observing tutorials, and much more!
Orion is proud to partner with BBC Sky at Night Magazine, the UK's biggest selling astronomy periodical, to bring you this article as part of an ongoing series to provide valuable content to our customers. Check back each month for exciting articles from renowned amateur astronomers, practical observing tutorials, and much more!
The Heart of Darkness
At the core of the Milky Way lies an unseen monster. Elizabeth Pearson investigates how astronomers are trying to glimpse the supermassive black hole at the center of our Galaxy.
By Nick Risinger [Public domain], via Wikimedia Commons
At the centre of the Milky Way lies a dark behemoth. One like it is thought to reside in the core of nearly every major galaxy, a hidden heart no one has ever seen — a supermassive black hole.
This body has the mass of over four million Suns but is crammed into a space that's only 20 times our star's diameter. Its gravitational pull is so strong that even light can't escape, meaning that while its influence is felt throughout the Galaxy, we'll never be able to look directly into the black hole.
We aren't completely blind to its mysteries, however. Though the black hole remains shrouded, it's surrounded by a swirling cloud of material known as an accretion disc. As this disc rotates, friction causes the gas and dust in it to heat and glow brightly. The visible part of this glow is shielded by dust, but enough emissions escape at radio wavelengths to create a bright spot 26,000 lightyears away in the constellation of Sagittarius. This radio source is called Sagittarius A* (Sgr A*).
Although enough radio emissions get through the dust for the black hole to be detected, what we can see still seems rather lacklustre compared to what might be expected from looking at the cores of other galaxies.
"The Milky Way's black hole is known to be very inactive. It's radiating several orders of magnitude less than the Eddington luminosity, the maximum luminosity the black hole could have," says Abhijeet Borkar, from the Czech Academy of Sciences in Prague, who was part of a team that spent four years monitoring SgrA* with the Australia Compact Telescope Array.
"Either most of the energy in the accretion disc isn't emitted as radiation, giving it a low luminosity, or there's no stable accretion disc around the black hole. Instead there's a clumpy, discontinuous disc so there is not enough material falling into the inner parts of the accretion disc to maintain its brightness," says Borkar.
Disquiet in the calm
This does not mean the region is a calm and placid place, however. Despite its quiet background emissions, the material around the black hole regularly flares into brightness.
"We see about four instances of flaring each day, when we observe a six-fold increase in the luminosity of the black hole in infrared and X-rays. At radio and submillimetre wavelengths the luminosity increases by 30 per cent," says Borkar.
The flares typically last one or two hours, depending on the wavelength of light observed. They are also likely to originate from material that orbits around the black hole at speeds so fast that the effects of relativity become apparent.
"It's thought that either the light has been Doppler shifted as it goes around the black hole (creating an increase in luminosity when it's coming towards us) or a blob of material gets caught in the base of a jet and is pushed out. And as it's pushed out it expands," says Borkar.
Similar flares have been seen occurring around many other supermassive black holes, but what causes them remains largely unknown. Our proximity to SgrA* gives astronomers a fantastic view of these strange events: by studying the black hole in our Galaxy, astronomers can learn much about these beasts that lie at the centre of every galaxy.
"Black holes are highly significant astronomically," says Frank Eisenhauer from the Max Planck Institute for Extraterrestrial Physics. "They influence the full motion of a galaxy much more than stars do. There is a very strong correlation between the size of black holes and the inner parts of galaxies. They can blow the outer dust about and prevent further gas streaming in, so there's a very strong interplay between the formation and evolution of black holes and the centres of galaxies."
Eisenhauer is the principal investigator for the new Gravity instrument on the VLT, which has been specially made to take advantage of our excellent view of SgrA*. Gravity will image the region around the black hole, not only with an increased resolution compared to previous instruments, but also with a higher precision too. This will allow it to look at the stars that lie around the black hole, which are known as S stars.
"These are stars in the centre of our Galaxy that are a few million years old, with masses around 20 times that of our Sun. They trace the gravitational field and are very good test particles because they are frictionless through the vacuum of space," says Eisenhauer.
The motions of the stars are governed by the black hole they surround. It is by monitoring the motions of these stars that scientists have been able to determine the mass and size of SgrA*. The closer the star, the more accurate the estimation, and the VLT's Gravity instrument will help to refine those measurements.
"Gravity will see fainter stars further in, which are on shorter orbits. We hope to find stars that orbit on the order of a few months or years," says Eisenhauer. Currently the closest known star is S2, which takes 15.5 years to complete one lap around SgrA*. In 2018, it will pass through the point of closest approach — a 'mere' 120 AU from the black hole. During this time, it will be accelerated to 30 million km/h, or 2.5 per cent the speed of light. Travelling this fast means S2 will experience the effects of relativity on its motion, giving the Gravity team a fantastic opportunity to put Einstein's equations through one of their most extreme tests yet.
Little kicks
"Most of the time the star follows Newton's laws, but when it comes very close in 2018 it gets a little kick, and the orientation of its orbital ellipse rotates a bit due to the effects of general relativity," says Eisenhauer. "We know so little about black holes, but they are such a fundamental cornerstone for the understanding of relativity and gravity."
These observations will test Einstein's theories in the one place where they might falter — at the edge of a black hole. "Relativity has passed every test so far, but it hasn't been tested in a scenario where gravity becomes dominant," says Sheperd Doeleman, an astrophysicist from the Smithsonian Astrophysical Observatory. "Gravity is really the weakest force, so it's only near a black hole that it can play with the big boys."
Doeleman is the director of one of the most ambitious astronomical collaborations ever undertaken, the Event Horizon Telescope, which aims to take the first ever image of the shadow cast by the Milky Way's black hole.
"We can't see the black hole directly because it is surrounded by this event horizon that does not permit information to leave the black hole. Because the gravity around the black hole warps light around it, we expect to see the silhouette of the black hole against the backdrop of superheated gas," says Doeleman. "We expect to see a very characteristic strong lensing feature, a ring of light that indicates the last orbit that photons can move through around the black hole before they themselves are sucked in. You end up with an annulus with a relatively dim interior — the silhouette of a black hole."
The size and shape of this silhouette was predicted by Einstein's theories of relativity, which were laid down over 100 years ago. Comparing the shadow that has been forecast with reality could help to solidify our understanding of them. On the other hand, if the observations do not show what is expected, they could throw Einstein's theories into doubt. Within the next year, humankind should have its best look at the dark heart of a galaxy, and with it may even find the key to unlocking the rules that govern our Universe.
Tuning in to a black hole
The center of the Milky Way only became apparent in the age of radio astronomy
In the 1950s, radio astronomy was beginning to come into its own as huge telescopes were built across the world. As radio astronomers surveyed the sky at these newly available wavelengths, a bright new source was discovered in the night sky.
Located at a declination of –29°, the object was best viewed from the southern hemisphere. At the time, one of the largest radio telescopes in the world was the 21.9m 'Hole-in-the-Ground' scope at Dover Heights in Australia, perfectly located to observe this intriguing object. In 1951, the observations of the source, now called Sagittarius A, revealed that it was located at the middle of our Galaxy. In 1958 the International Astronomical Union decided to adopt its position as the centre of the Milky Way.
As radio telescopes increased in size and precision, it became apparent that Sagittarius A was not one single object but something made up of several regions. The eastern section appears to be the remnant of a supernova, while the western part seems to be a three-armed cloud of gas and dust.
In 1974 observations with the National Radio Astronomy Observatory in New Mexico revealed that there was a single bright source embedded within the region, Sagittarius A*. The stars in orbit around it showed the object must have a colossal mass in a tiny area, for which there was only one explanation. The astronomers had found the supermassive black hole at the centre of the Milky Way.
The Event Horizon Telescope
Capturing the heart of our Galaxy requires a telescope the size of the planet
The Event Horizon Telescope (EHT) is one of the biggest projects in the history of astronomy. It aims to combine up to a dozen of the world's premier radio telescopes — from the US, South America, Europe and the south pole — to observe SgrA* in greater detail than ever before.
The telescope works using a technique called very-long baseline interferometry, in which a signal is collected at a number of telescopes. The size of the telescope is not based on the diameter of the dishes, but the distance between them. Each of the scopes has been updated with an atomic clock, the most precise timekeepers on Earth. As well as allowing researchers to make precise timing measurements of the black hole's changing brightness (effectively taking its pulse), the timepieces will make it possible to combine the signals. Using the slight differences in arrival time for the light at each of the scopes, it's possible to reach a much higher precision than can be attained by simply stacking the images together, creating a 'virtual telescope' with the diameter of the Earth.
This huge size is needed as SgrA* is expected to cover a tiny area of sky: around 10 microarcseconds across ? the equivalent of looking for a coin on the surface of the Moon. As the smallest angle resolvable is determined by dividing the wavelength of light by the size of the dish, to further boost the angular resolution of the scope researchers will be observing at 1.3mm. This is the shortest wavelength ever used for the technique and will create an even higher resolution scope.
The EHT's first set of observations will be made on 5-14 April 2017. Once they are completed, the data will be transported to the Massachusetts Institute of Technology, where it will take a supercomputer several months to mix the separate signals into one image. By the beginning of 2018, we should have our first real glimpse of our Galaxy's core.
The Event Horizon Scopes
APEX: Atacama Pathfinder Experiment
ASTE: Atacama Submillimeter Telescope Experiment
ALMA: Atacama Large Millimeter/Submillimeter Array
CARMA: Combined Array for Research in Millimeter-wave Astronomy
CSO: Caltech Submillimeter Observatory
IRAM: Institut de Radioastronomie Millimétrique
JCMT: James Clerk Maxwell Telescope
LMT: Large Millimeter Telescope
MIT: Massachusetts Institute of Technology
NOEMA: Northern Extended Millimeter Array
SMA: Submillimeter Array
SMT: Submillimeter Telescope
SPT: South Pole Telescope
Copyright © Immediate Media. All rights reserved. No part of this article may be reproduced or transmitted in any form or by any means, electronic or mechanical without permission from the publisher.
{ width: 160, height: 160, defaultImage: '', layers: 'Artimg-BBC_BuyingYourFirstTelescope' }

![]() Orion is proud to partner with BBC Sky at Night Magazine, the UK's biggest selling astronomy periodical, to bring you this article as part of an ongoing series to provide valuable content to our customers. Check back each month for exciting articles from renowned amateur astronomers, practical observing tutorials, and much more!
Orion is proud to partner with BBC Sky at Night Magazine, the UK's biggest selling astronomy periodical, to bring you this article as part of an ongoing series to provide valuable content to our customers. Check back each month for exciting articles from renowned amateur astronomers, practical observing tutorials, and much more!
Buying Your First Telescope
Astronomer Will Gater offers tips and advice on the exciting moment you decide to take the plunge and invest in a telescope.

Image Credit: El Camino College Astronomy Department
One of the things all of us at BBC Sky at Night Magazine love the most about astronomy is that you don't need any fancy or expensive equipment to get started. A warm coat, clear skies and a sense of intrigue about what's up there are all you need to begin your adventure in this wonderful hobby.
But there comes a time, naturally, when your thoughts turn to delving deeper into the heavens and when that happens most people start to think about getting a telescope. If you're at that point now, this article will help to guide you through the process of selecting your first telescope, from the things to look for in an instrument, its mount and the essential, and non-essential, accessories.
What about Binoculars?
The best way to begin is not by diving into the world of apertures and eyepieces, but by taking a step back and asking a question. For the purposes of this guide we're going to assume that you're familiar with the naked-eye night sky and can identify many of the bright stars and constellations, but have never used a telescope before. That's important, because the question, which has become something of a clich� in astronomy circles, is: have you considered getting a decent pair of binoculars first?
There are very good reasons why this question is repeated so often that is become a clich�. First, binoculars can open up a great many more objects to observation than the naked eye, from rich Milky Way star fields to star clusters and the brighter galaxies and nebulae. What's more, a good pair of binoculars will often outperform a cheap, poor-quality starter telescope. But the other reason — and one of the key arguments for considering binoculars before a telescope — is that they offer an easy way to learn crucial observing skills that will be useful later in your astronomy career. For example, with binoculars the experience of moving from a naked-eye view to one seen through an eyepiece is easier, as is learning the essential skill of 'hopping' from one star to another, in a magnified view, to track down a celestial target.
You may have already been using binoculars for a while, though, or perhaps you simply want to jump straight to a telescope. In which case there are some other questions to answer before you begin choosing an instrument. Questions such as what type of telescope do you want; what you intend to do with it; and, of course, how much you're willing to spend. Don't worry if you can't answer these straightaway as there are ways to gather the information you need to make an informed decision for each of them. For example, you could visit your local astronomical society, star party or astronomy trade show before you set foot in a shop. At a society meeting you may be able to see some small telescopes in use and speak to people who have used specific models. At a star party, however, you might even get to look through the telescopes, perhaps even the model you're considering.
What will become immediately obvious when you go to any of these events is the huge array of telescope designs, sizes and mountings that are available. So it's well worth getting to know the different types of telescopes and how to decipher the specifications you may encounter.
Types of Telescopes
Generally speaking, telescopes fall into one of three categories. Firstly, there are reflectors, whose defining feature is an arrangement of mirrors that collect and focus light; then there's refractors, which use glass lenses to do the same things; and finally there are catadioptrics, the telescopes that use a combination of lenses and mirrors to do the job. Within these categories there are numerous permutations and, of course, designs that vary from one manufacturer to another.
Refractors tend to be what most people imagine when they think of a telescope: a lens, or group of lenses, mounted in a long metal tube with the eyepiece (the bit you look through) at the bottom end. Refractors often come with a 'diagonal', an accessory that reflects the view 90� up off the telescope's axis to make your observing easier.
The two most common catadioptric designs are the Maksutov-Cassegrain and the Schmidt-Cassegrain. A Maksutov-Cassegrain telescope uses a curved lens and mirrors mounted in a relatively short, stubby tube while a Schmidt-Cassegrain has a large, glass corrector plate holding a small secondary mirror at one end with the primary mirror mounted at the other end.
When it comes to reflector telescopes, many beginners gravitate towards Newtonian models. In telescopes of this design light is collected by a main mirror housed at the bottom of a long tube. Once it hits this primary mirror the light is reflected back to a smaller secondary mirror that bounces it out at a right angle through the eyepiece. For this reason you look through a Newtonian by standing by the top end of the telescope, rather than the bottom end, and peering through an eyepiece that's mounted on the side of the tube.
The Newtonian design uses the same optical configuration as the other popular type of reflector, the Dobsonian. The difference with a Dobsonian is that the telescope's tube is mounted on a simple rotating base and not the more complex type of mount that Newtonians are typically found on? Which brings us onto the matter of mounts.
Mount up
If a telescope's lens is its eyes, then the mount is its neck. When you look at something, you use your neck to tilt your head up or down and turn it left or right to point your eyes in the right direction. Telescope mounts do exactly the same — they allow the telescope to be moved up and down and turned to the left or right. Astronomers call that upward or downward tilt altitude, and left or right rotation azimuth. So, for instance, Dobsonians sit on a basic altitude-azimuth (more commonly known as altaz) mount, while many Maksutov-Cassegrain and Schmidt-Cassegrain telescopes are attached to one or two computer-controlled arms that are essentially just advanced versions of an altaz mount.
With an altaz mount you need to adjust both the altitude and azimuth settings in order to track an object across the sky and keep it in view. This is because Earth's rotation makes it appear as if the sky is moving, so frequent manual adjustments are required to keep your target centred. That is unless you have an advanced (often expensive) motorised and computer-controlled altaz mount that will take care of the adjustments for you.
But there's another type of mount that gets around this issue in a simple way. The equatorial, or EQ, mount also moves on two axes, but instead of having altitude and azimuth axes, equatorial mounts have a right ascension (RA or polar) axis and a declination axis. These two axes refer to an astronomical coordinate system for navigating the sky that's similar to the latitude and longitude system that's used for navigating on Earth. An equatorial mount is built in such a way that when the RA axis is aligned with Earth's rotational axis, changes need only be made to that one axis to match the sky's movement.
To align an equatorial mount to Earth's rotational axis, the mount's RA axis needs to be pointing precisely towards the north celestial pole — the same point in the sky that Earth's rotational axis points towards. In the northern hemisphere this point is very close to the star Polaris. It's for this reason that many mid-range equatorial mounts come with a small 'polar scope' within the RA axis that has a reticle (targeting crosshair) for precise polar alignment.
Manual or automatic?
Whatever type of mount you end up with it has to be rock-solid. If there's any instability in the tripod's legs or play in the mount's fixings and controls then you'll find observing can become a frustrating affair — another reason to try any telescope before you buy.
While you can track the moving sky manually, it's far more efficient to use an electronically driven mount. These come in several forms from simple, motor-driven equatorial mounts, all the way up to Go-To mounts that, with the aid of a small computer handset (and sometimes GPS), take care of all tracking. Go-To mounts allow you to point your telescope towards a target simply by typing in the object's name or New General Catalogue (NGC) number.
Modern Go-To systems are a superb tool for observing but can often add a lot of money to the price tag of a beginner telescope; money that might be better spent on larger optics sitting on a simpler mount. After all, it's the telescope's aperture — the size of its main mirror or lens — that is perhaps the most important specification. The larger the aperture, the more light can be gathered. Hence most beginners are usually better off going for a good reflector, such as a Newtonian, since refractor telescopes tend to be more expensive than reflectors of the same aperture.
Eyepieces and Finderscopes
After the telescope's main body and the mount, the other key component of any stargazing setup is the eyepiece. The eyepiece is the glass lens that you look through to see whichever celestial body you're observing.
On the side of the eyepiece you'll find a measurement given in millimetres. This is the focal length of the eyepiece and it's by using eyepieces with different focal lengths that you change the magnification of the view through the telescope. The longer the focal length of the eyepiece, the less magnified the view through it will be. It's a good idea to have one or two good-quality eyepieces — one with a short focal length, perhaps around 10mm, and another maybe in the region of 25-30mm — rather than a whole range of cheap ones. And you can completely ignore any marketing hype boasting that a scope can provide hundreds of times magnification — this isn't the measure of a good instrument or a guarantee of superior views. A poor-quality telescope can still magnify many hundreds of times.
Finally, on top of the telescope you'll often find a miniature, low-magnification refractor telescope. This is a finderscope and it's used for centering a celestial object in the main scope's eyepiece. Finder scopes — or their cousins the illuminated red dot/reticule finders — are extremely useful when it comes to tracking down celestial targets.
Needless to say, there's certainly a lot to consider when you buy a telescope. But, then again, a good first telescope will last you many years and be a joy to observe with throughout that time. Choose wisely and your scope will take you on a thrilling journey of discovery that no other pastime can offer.
Which Telescope is best for you?
Answering these questions should help you choose the right first telescope for your needs
What do you want to look at?
Sounds obvious right? The night sky! If you're keen to focus primarily on observing faint galaxies, clusters and nebulae, then it makes sense to go for something like a Dobsonian with as big a mirror as you can afford. A smaller aperture Newtonian on a fancier mount will be more suited to closer, brighter objects.
Which telescope has the right size, weight, portability for you?
A good large-aperture Dobsonian will provide superb views but it may hardly ever be used if you've got to lug it downstairs to observe with. Trade shows are useful for examining many different telescopes in detail to gauge their true size, portability and, to some extent, their build quality.
Is the telescope right for your future aims?
It's worth considering early on where you think your interests may develop in the future. If you think you might eventually want to do more imaging, for example, you may want to choose a telescope with a mount that you can easily upgrade to a more advanced model at a later stage.
Do you need 'feature X' when you could get a better 'feature Y'?
The allure of electronic gadgetry or a computerized mount can be strong when buying your first telescope, but do you really need all that extra tech? You may find that your budget would go much further on a simpler setup with larger optics that'll probably give you better views.
ABOUT THE WRITER
Will Gater is an astronomy journalist and presenter. Follow him on Twitter at @willgater.
Copyright � Immediate Media. All rights reserved. No part of this article may be reproduced or transmitted in any form or by any means, electronic or mechanical without permission from the publisher.
{ width: 160, height: 160, defaultImage: '', layers: 'Artimg-BBC_Planisphere' }

![]() Orion is proud to partner with BBC Sky at Night Magazine, the UK's biggest selling astronomy periodical, to bring you this article as part of an ongoing series to provide valuable content to our customers. Check back each month for exciting articles from renowned amateur astronomers, practical observing tutorials, and much more!
Orion is proud to partner with BBC Sky at Night Magazine, the UK's biggest selling astronomy periodical, to bring you this article as part of an ongoing series to provide valuable content to our customers. Check back each month for exciting articles from renowned amateur astronomers, practical observing tutorials, and much more!
How to Use a Planisphere
When you need to find your bearings in the night sky a planisphere is indispensable, even in our digital age.

This hand colored celestial map of the Stars and Constellations is a steel plate engraving, dating to 1878 by the well regarded French cartographer Migeon. By http://www.geographicus.com/mm5/cartographers/migeon.txt [Public domain], via Wikimedia Commons
They don't look like much — usually a planisphere is simply two discs of cardboard or plastic fastened together with a central pin — but as a new stargazer, you'll soon discover that this tool is one of the greatest aids to helping you navigate the night sky. In fact, this deceptively simple design will allow you to work out which bright stars are in the night sky on any date and at any time throughout the year.
Although the two discs are pinned together, they can still be rotated independently of each other. Printed over most of the lower disc are the stars, constellations and brighter deep-sky objects that you can see from a given latitude. Marked around the outside of this lower disc are the days and months.
Latitude Matters
The upper disc will be slightly smaller than the lower one or will have a clear rim, so you can still see the day and month markings underneath. It also has an oval window in it, revealing part of the star chart on the lower disc. The edge of this window represents the horizon with appropriate north, south, east and west markings and everything within it is the visible sky. Just like the lower disc, the upper disc has markings around its edge. In this case, they indicate the time of day. By lining up the date and time, the stars visible in the window will match the ones in the night sky at that time.
The crucial point to keep in mind when using a planisphere is that they are designed to work at specific latitudes. If you try using one too far north or south of the location it has been intended for, you'll find that the stars don't appear in the right positions.
Getting Started
Follow these simple steps and you'll soon be navigating the night sky like a pro
- Find Your Bearings
Before you can start using your planisphere you need to know the cardinal points from where you live. If you don't have a compass, use the Sun. It rises roughly in the east and sets roughly in the west. You can also download a free compass app for most smartphones. - Set the Time and Date
Let's imagine that you are heading out to observe at 9pm on October 15th. Spin the upper disc to align the 9pm marker on this disc with the October 15th marker on the lower disc. The stars in the oval window should now match the stars in the night sky above you. - Look to the North
Look north to begin with, holding the planisphere up so that the word 'north' is at the bottom. If you change the direction you're facing, you need to move the planisphere round so that the compass point sitting at the bottom corresponds with the direction you're facing. - Start at the Big Dipper
Helpfully, the central pin in your planisphere represents Polaris and the north celestial pole. Just to its lower right will be the seven bright stars of the Big Dipper asterism. Use the Big Dipper and the five stars forming the distinct 'W' shape of Cassiopeia to get to know the constellations.
Copyright � Immediate Media. All rights reserved. No part of this article may be reproduced or transmitted in any form or by any means, electronic or mechanical without permission from the publisher.
{ width: 160, height: 160, defaultImage: '', layers: 'Artimg-BBC_TumultOfTime' }

![]() Orion is proud to partner with BBC Sky at Night Magazine, the UK's biggest selling astronomy periodical, to bring you this article as part of an ongoing series to provide valuable content to our customers. Check back each month for exciting articles from renowned amateur astronomers, practical observing tutorials, and much more!
Orion is proud to partner with BBC Sky at Night Magazine, the UK's biggest selling astronomy periodical, to bring you this article as part of an ongoing series to provide valuable content to our customers. Check back each month for exciting articles from renowned amateur astronomers, practical observing tutorials, and much more!
A Time of Tumult
Elizabeth Pearson investigates how the Solar System was transformed 3.9 billion years ago.
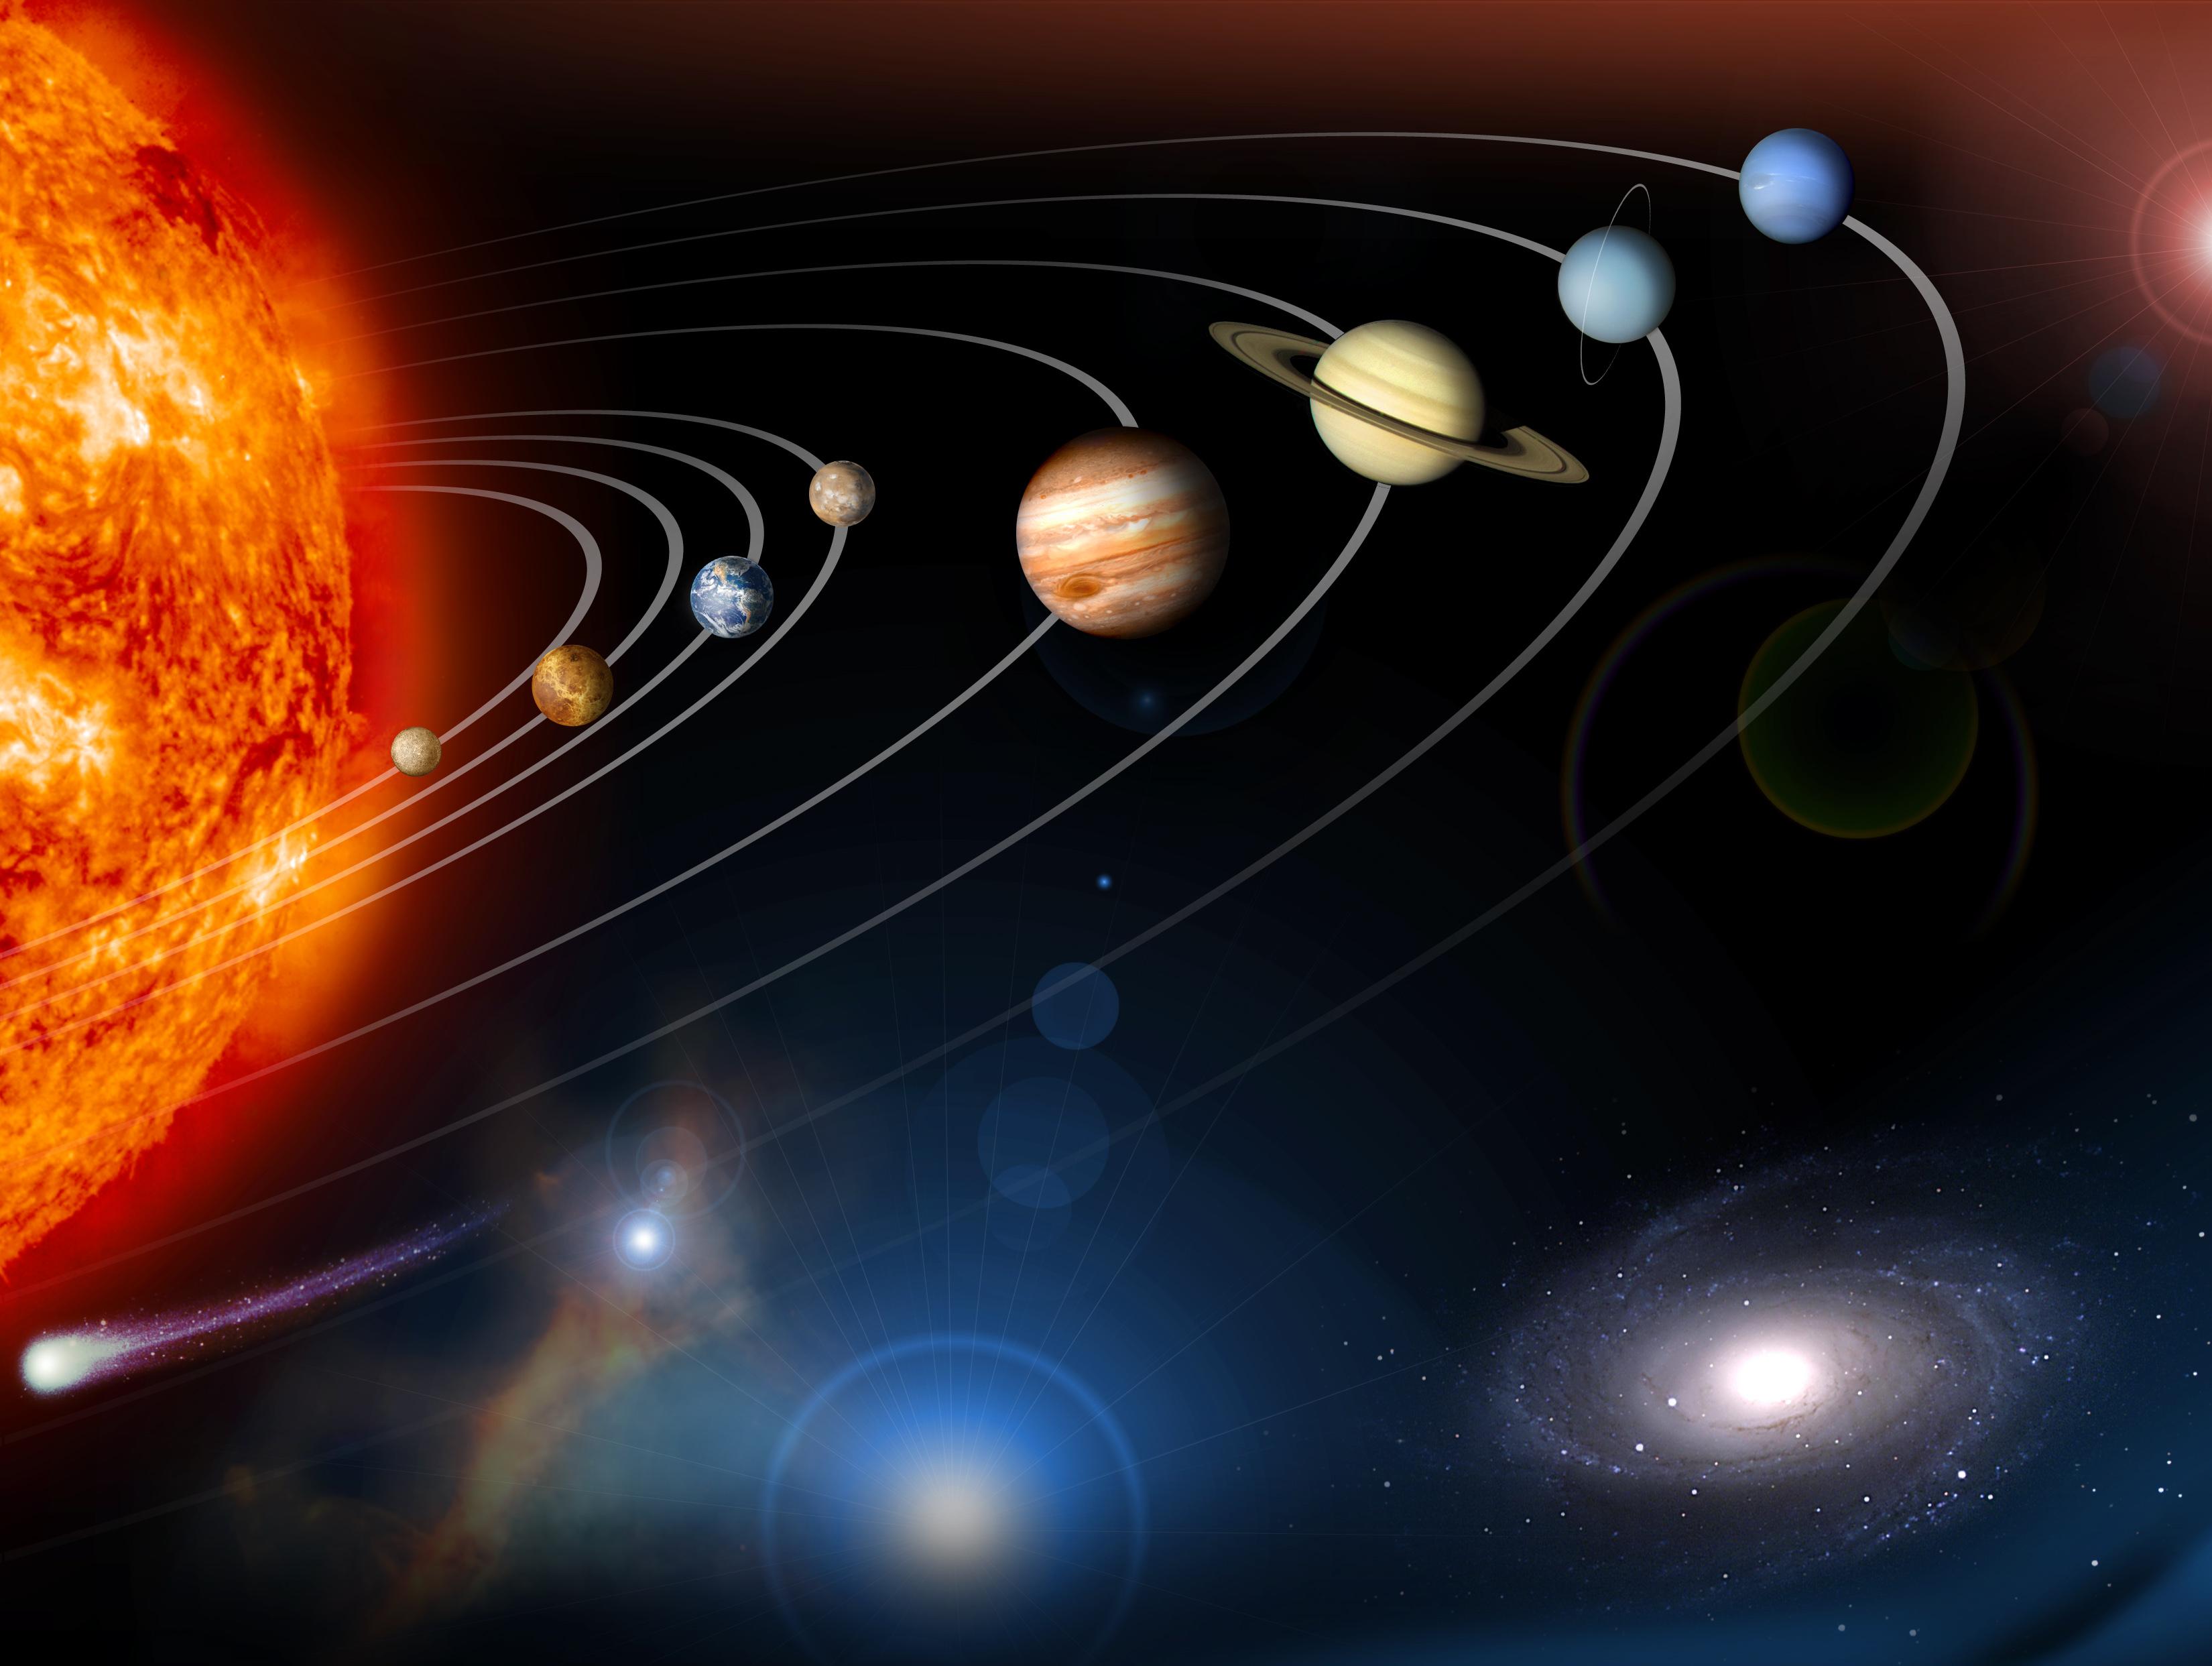
This digital collage contains a highly stylized rendition of our solar system and points beyond. Image Credit: NASA/JPL
When the Solar System first formed 4.5 billion years ago it was a violent place. But quickly, by 4.4 billion years or so ago, the planets had calmed into a familiar configuration — several rocky inner worlds surrounded by gas giants ringed by icy objects. Then, four billion years ago, something catastrophic happened. The planets were thrown once more into chaos, and the face of the Solar System changed forever. This period of upheaval reveals startling truths about the evolution of our home planetary system, and perhaps the origins of life itself.
In the Solar System's first hundred million years or so, the beginnings of planets clumped together from the dust of a boiling protoplanetary disc around our young star. Frequently the young planets would collide and grow larger, though sometimes they would be destroyed entirely. To start, this early Solar System was much like it is today, but there were several key differences.
"Today, we have giant planets from Jupiter at about 5 AU from the Sun to Neptune at about 30 AU," says William Bottke from the Southwest Research Institute in Boulder, Colorado; 1 AU is the distance between the Earth and the Sun. "Modelling work shows the ice giants Neptune and Uranus would never have reached their current sizes if they had to form in the current configuration of the planets. Studies suggested instead that all these bodies formed between about 5 and 20 AU. Beyond that lies the Kuiper Belt. What's interesting about the Kuiper Belt now is that a lot of objects have very special orbits, called resonances. It's very hard to get them into these resonances."
Synced Surprise
A resonant orbit occurs when the ratio between the orbits of two bodies is two whole numbers. Pluto and Neptune share a resonance: for every two orbits Pluto makes, Neptune completes three. To explain what might have caused these resonances, as well as the change in the ice giants' positions, a group of researchers in Nice, France, came up with what is now known as the Nice model in 2005.
"They suggested that you had a gigantic Kuiper Belt with maybe 10 Earth masses in it," says Bottke. "This lets you form Neptune and Uranus on reasonable timescales and you can make lots of Pluto-like objects in the primordial disc."
Using this setup, the team created a computer model of the early Solar System. It's thought that a few hundred years after the formation of Jupiter, leftover gas dragged on the planet and caused it to drift deeper into the Solar System. In time this caused the giant planets to fall into a resonance and their combined gravity acted on the surrounding Kuiper Belt objects, pulling them inwards. In turn, these bodies pulled on the orbits of the gas giants. Though only a small effect compared to that of the planets, little by little the icy rocks began to upset the precarious gravitational balance.
"They found that when the system becomes unstable, Uranus and Neptune move into the primordial disc and actually migrate across it. The giant planets end up with almost identical orbits to what we see today," says Bottke.
This would have thrown the Solar System into disarray. According to the model, Jupiter moved inward while the other gas giants moved out. In turn, the inner planets were jostled and shuffled, pulling some of them into highly eccentric orbits which might have flung some of our siblings out into the Galaxy.
"There's pretty compelling evidence that we didn't start with four giant planets, but five. We had an extra Neptune and then lost it in this process. Jupiter is so massive that anything that encounters it has a good chance of being thrown out of the Solar System," says Bottke.
The addition of a fifth planet to the Nice model also helps to explain observations of the small bodies around Jupiter, as well as certain aspects of the asteroid belt. Could it be that our long-lost sibling is currently floating between the distant stars?
Mass Migration
But planets are not the only things that the Nice model predicts being relocated during this time. The Kuiper Belt currently contains around the same mass as Mars, meaning that during this planetary reshuffle, 99 percent of its mass would have been redistributed. Many Kuiper Belt bodies have been sent hurtling towards the inner Solar System. And it's the scars left behind by these impacts that could help explain a lunar mystery that has been around since the first moonrock samples were brought back by the Apollo missions.
"Many of the Apollo samples, more than you would expect, had been melted in impacts that took place around 3.9 billion years ago," says Barbara Cohen, a planetary scientist at NASA's Marshall Space Flight Center. "You would think that there would be a lot of impact craters from when the Moon formed 4.5 billion years ago, which would fall off as the impactors got used up, but we didn't see any. Instead we saw a lot at 3.9 billion years ago, which was a strange and unusual result."
Apollo scientists hypothesized that 3.9 billion years ago the inner Solar System was pelted with comet-like objects at an impact rate 100 times larger than what's seen today — an era now known as the late heavy bombardment (LHB). However, all the Apollo samples came from a limited area of the Moon, close to the large Imbrium Basin. This 1,150km-wide crater is the result of a huge impact 3.85-3.9 billion years ago, which then flooded with lava. While this is one of the largest examples of the effect the LHB had on the lunar landscape, there is also the chance that all the Apollo samples were simply the ejecta of this one event. To create a bigger picture Cohen had to look towards our only other samples from the Moon — lunar meteorites.
"The meteorites I've been looking at are from places that the astronauts didn't go, they have different geochemical signatures so we think they are from faraway places," she says. "I didn't find any of them to be very old. We see a big pile up at 3.9 billion years, with a long tail off. This tells us there was a prolonged impact rate on the Moon, and then over time the impacts got smaller and smaller."
The Same Old Story
Other meteorites from the asteroid Vesta tell much the same story, indicating a lack of impacts between four and 4.5 billion years ago. But relying on meteorites means that researchers investigating the bombardment history of the Solar System are constrained, as they can only study what happens to arrive on Earth. It's currently impossible to identify meteorites from Mercury and Venus, and all known Martian rocks are volcanic in origin. This leaves large holes in the impact timeline, ones that are unlikely to be filled until we can test the craters directly. Luckily that day could come relatively soon.
"I'm developing an instrument that we could take to Mars to find impact craters and get geochronology on them," says Cohen. "It would have a precision of around 100 million years, a few per cent the age of the crater. That's good enough to distinguish major geologic events in the planet's history."
The recent renaissance in lunar missions means we could soon understand the Moon's history a little better. China's Chang'e program aims to return the first sample from the Moon in over 40 years in late 2017, and then to land the first ever probe on the far side of the Moon in 2019.
A full impact history will prove useful in solving one of the main debates around the LHB. "The question is whether the LHB was a unique event," says Herbert Frey, chief of NASA Goddard Space Flight Center's planetary geology, geophysics and geochemistry lab. "Astronomers have always been keen to know if this is an impact rate spike or whether it is the tail end of a bombardment that had been going on for a long time and we're just seeing the ones that managed to survive because they came in last."
Understanding the precise timing of the bombardment is key to those considering the Nice model. The length of the delay between the Solar System's formation and the bombardment is central to working out what our Universe looked like before the migration.
Though there are still many mysteries surrounding this era this one is certain — our Solar System became a very different place four billion years ago.
The Lasting Effect
The effects of the bombardment can be seen in more than just the craters left behind
Titan
Saturn's largest moon, Titan, is now covered in a thick nitrogen atmosphere but it's unclear when this was created — during the moon's formation or at a later date. If it formed with the moon, then it must have been much thicker as the bombardment would have blasted much of the gas away. Alternately, it could be that the bombardment provided the energy needed to liberate the gas from ammonia ice on the moon's surface.
Mercury
The Caloris Basin, the largest impact basin on Mercury, was formed during the late heavy bombardment. The collision that created the 1,550km-wide site is thought to have been strong enough that it sent shockwaves through the entire planet, creating an undulating terrain on Mercury's other side. It's also been supposed that the impact could have kickstarted volcanic activity on the planet, which created its smooth plains.
Ganymede
Despite being similar in size and composition, Jovian moon Ganymede is very different from its sister, Callisto. While the former has a tectonically evolved surface and a differentiated core, the latter does not. One explanation is that a giant impact struck Ganymede, but not Callisto. The energy from this collision enhanced geologic processes, causing a fully separated iron core and subsurface ocean to form.
Mars
Bombardment would have melted Mars's subsurface ice and produced enough heat to create a temporary climate that might have had the right conditions for life to start. Unfortunately, such conditions would have only lasted a few million years, before the constant shelling began to erode away more atmosphere than it created. By the end of the era, Mars was the cold and dry planet that we recognize today.
The Bombardment of Earth
Despite the extreme conditions of the bombardment, could life have survived the LHB?
On Earth the end of the late heavy bombardment (LHB) coincides with another important epoch for our planet — the emergence of life.
When the LHB was first postulated it was thought that comet-like impactors may have brought the ingredients necessary for life, most notably water. However, findings from missions such as Rosetta show that it's unlikely comets brought any appreciable about of water to the Earth, though they may have brought other prebiotic compounds such as hydrocarbons.
Another theory is that life emerged long before the bombardment, but that all evidence was eradicated by the barrage. If this was so, then only the hardiest of life would have survived. An impact large enough to affect the global environment would have struck every century or so. And around every 10 million years there would have been an impact large enough to melt up to 10 per cent of the surface.
But even such colossal collisions would not have destroyed all havens for life across the planet. While the top few kilometers of ocean might boil away, there could still be enough water left behind for life to survive.
"It's quite possible that life started before, and found ways to protect itself," says Herbert Frey of NASA's Goddard Space Flight Center. "I think life is pretty hardy once it gets started, and it may have found a way to survive through that."
ABOUT THE WRITER
Dr Elizabeth Pearson is BBC Sky at Night Magazine's news editor. She gained her PhD in extragalactic astronomy at Cardiff University.
Copyright � Immediate Media. All rights reserved. No part of this article may be reproduced or transmitted in any form or by any means, electronic or mechanical without permission from the publisher.
{ width: 160, height: 160, defaultImage: '', layers: 'Artimg-BBC_CassiniTheRingGrazer' }

![]() Orion is proud to partner with BBC Sky at Night Magazine, the UK's biggest selling astronomy periodical, to bring you this article as part of an ongoing series to provide valuable content to our customers. Check back each month for exciting articles from renowned amateur astronomers, practical observing tutorials, and much more!
Orion is proud to partner with BBC Sky at Night Magazine, the UK's biggest selling astronomy periodical, to bring you this article as part of an ongoing series to provide valuable content to our customers. Check back each month for exciting articles from renowned amateur astronomers, practical observing tutorials, and much more!
Cassini the Ring Grazer
As the Cassini spacecraft prepares to fly between Saturn and its rings, Will Gater looks at the latest results from the mission.

Image Credit: NASA
As most of us were getting up to go to work on 16 January this year, NASA's Cassini spacecraft was making a spectacular dive towards the rings of Saturn, some 1.6 billion km away. From high above the planet's pastel-yellow globe, Cassini's trajectory brought it racing down past the outer edge of the planet's main rings, in what the mission team are calling a 'ring-grazing' orbit. These thrilling close swoops, which draw to a close in April, in some ways mark the penultimate phase of Cassini's time at Saturn — a paradigm-shifting exploration that began over a decade ago and which will end in September this year when the spacecraft will be crashed into the gas giant's atmosphere. But the ring-grazing orbits are also evidence of how the Cassini team intends to squeeze every last drop of science from the veteran spacecraft, all the while capturing imagery of breathtaking detail.
One such image, of the tiny moon Daphnis, was captured by Cassini's cameras during the probe's close pass of the rings on 16 January. Daphnis is just 8km wide and looks, like many small moons throughout the Solar System do, like a pockmarked potato. Unlike Saturn's larger moons — Titan, Rhea and Dione, for example — it actually orbits within the planet's main rings, close to the outer periphery of the so-called A ring. And its presence there profoundly influences its surroundings.
Daphnis's most obvious impact on the rings is a thin parting that it has created in the icy material. The 'Keeler Gap', as it's known, spans a mere 42km and extends all the way around the A ring. But to see Daphnis's most striking creations one needs to look a little closer to the moon itself.
Either side of Daphnis, on the diagonally opposing edges of the Keeler Gap, the ring material has been swept into exquisite wave-like structures. Cassini's scientists have been scrutinising these extraordinary features from afar for years, but the spacecraft's ring-grazing orbit on 16 January afforded them their finest — and closest — sighting of the mission so far.
Many rings, one disc
To understand what's going on in the new image we first need to briefly explore the physics of the rings themselves — a system that is composed of countless individual objects. "The particles in Saturn's rings range from marble-sized to house size," says Matthew Tiscareno, a Cassini scientist based at the SETI Institute in California, US.
And while the major sections of Saturn's famous ring system certainly have their own designations — the 'A ring', the 'B ring' and so on — it's best not to think of them as a collection of rings.
"This is one of my pet peeves. It's a very common misconception," explains Tiscareno. "There are very few gaps that would separate one ring from another. Instead you should think of it more as a broad disc. But each part of the disc is orbiting Saturn at a different rate."
This motion plays an important role in the creation of the Daphnis wave structures seen in Cassini's recent image. In fact, researchers use modified equations relating to fluids to examine the physics of Saturn's rings, says Jeff Cuzzi, a Cassini scientist and ring expert at NASA's Ames Research Center in California. "[At] the top of the image the ring particles are moving towards the right the fastest. Daphnis is going a little slower. And then the material at the bottom is going the slowest," he says. "You can think of this material at the bottom as flowing past Daphnis from right to left".
It's when the ring particles drift by Daphnis that the gravity of the small moon leaves its mark. "As it goes by, it experiences a gravitational pull towards Daphnis," explains Cuzzi. "That distorts the orbits [of the ring particles] pulling them up towards Daphnis."
The end result is a series of beautiful wave-like peaks trailing the moon, two of which are seen in remarkable detail in the Cassini image shown left. Multiple waves are created — and there are even more out of shot — because, as Daphnis goes around Saturn, the slower orbiting material it has disrupted at the outer edge of the Keeler Gap lags behind the moon in its orbit; Daphnis thus has a constant stream of unperturbed edge material parading past it that it can repeat the 'rippling' process on. "So in that second wave to the left of Daphnis [are] the particles that had encountered Daphnis, just like in that first wave one orbit ago," says Cuzzi.
Daphnis's gravity also creates waves on the inner edge of the Keeler Gap. But, because the material there is orbiting faster than the moon, the waves extend in the opposite direction to those on the outer edge. In the same image you can see that, to the right of Daphnis, the ring particles on the inner edge have been subtly deflected. This is the onset of one of the inner-edge waves.
Cuzzi says there's an Earthly analogy for this remarkable interaction between Daphnis and the edge of the Keeler Gap. "Think about a river going by and there's a rock in the river. As the river goes by the rock, the water flows up and down and you get this ripple downstream of the rock. This is exactly what we're seeing here," he explains. "In the river the ripple is always fixed to the rock, that is there's always a ripple sitting right behind that rock, but the actual water molecules are moving right through that ripple."
Although it's tricky to get a sense of it in Cassini's latest picture, the wavy ripples that Daphnis creates are in fact three-dimensional features. "Daphnis actually has an orbit that's slightly inclined so it kind of slowly moves up and down relative to the rings," explains Cuzzi. "As it does this these perturbations that it causes on the edges are actually flipped up vertically." Indeed previous long-range images of Daphnis taken by Cassini — when the ring system was lit nearly side-on by the Sun — have shown the waves throwing shadows across the icy material below.
Tiny Moon, Huge Influence
What's abundantly clear from Cassini's new image is that even a diminutive moon like Daphnis can have a dramatic effect on the rings. Yet there are even smaller inhabitants of the rings that Cassini's recent orbits have been revealing in exceptional detail. And though these objects may be tiny, and their interactions with the ring system less obvious, they still could have an important story to tell us.
As Cassini was making another one of its ring-grazing orbits on 18 December last year, it turned its wide-angle camera towards a section of the A ring. The image it captured revealed a blizzard of artefacts from radiation and cosmic rays striking the camera's sensor. But it was the subtle features that the picture also revealed embedded within the immense, striated, swathe of icy material that were of interest to Cassini's scientists. Across much of the frame were numerous small, bright streaks within the rings — features known as 'propellers'. Cassini has been scrutinising propeller features in the rings ever since it first spotted them during the early phases of its time at Saturn, says Tiscareno. They come in two types, essentially large ones and small ones. "These are the smaller ones," he says. "We call this part of the ring the 'propeller belts'. They're just swarming here."
The bright streak of the propeller itself is caused by the gravity of a tiny, icy, moonlet disturbing the material around it. "You should probably think of the moonlet as a snowball about the size of a football pitch [roughly 100m]," says Tiscareno. There's even something of a connection between the propellers and their fellow ring-inhabitant Daphnis. "The propellers here and the gap that Daphnis is orbiting in are fundamentally the same thing," explains Tiscareno. "The only thing is that with these propellers [the moonlet] tries to start excavating a gap in the ring, but the ring is so massive that it fills the gap back in before it is able to extend all the way around."
Tell-tale Blades
The December 18th image represents Cassini's finest view yet of the smaller propellers. But Tiscareno and his colleagues have also been using the close ring-grazing orbits to capture spectacular pictures of some of the larger propellers — those that are thought to be created by slightly more substantial icy moonlets. On February 21st the spacecraft imaged one such example informally dubbed 'Santos-Dumont' by the mission team. The image is shown above; although it does not reveal the moonlet itself, it shows fine detail in the 'blades' of the propeller structure that the moonlet has made within the rings.
"This propeller is one of about a half-dozen whose orbits we know well enough that we had the ability to target them with flyby imaging, and it is one that turned out to be passing relatively close by during this particular flyby of the Cassini spacecraft," says Tiscareno. "The central moonlet is the size of a city block [around 500-1,000m], and the disturbance it creates in the rings can stretch for a few thousand kilometers, though it's only a few kilometers wide."
What is it, then, that studying the detailed nature of these features can tell researchers? Why might the Cassini team be using this time in the mission's final months to capture images like those of Santos-Dumont and the propeller belts? Part of the answer is that the propellers could illuminate our understanding of an enigmatic process that we have much to learn about. "It opens a window onto how planetary systems form because, when you have a baby planet forming itself out of the disc around [a] nascent star, it's a very similar situation to this moonlet that's embedded in the disc of Saturn's rings," explains Tiscareno.
It's not just with the propellers that Cassini's ring-grazing orbits are offering broader insights either. One recent high-resolution image reveals what Cassini scientists call 'straw' — conglomerations of icy material that have gathered to form huge clumpy structures within the rings. Examining this 'straw' in detail could shed light on how icy rubble 'sticks' together, which in turn could tell us something about planet formation says Cuzzi. "There are lots of things, big-picture problems, that we are understanding better by looking at the rings." he adds.
Edging towards the end
On April 22nd, once Cassini has completed its ring-grazing orbits, it will switch to a final set of trajectories that the mission team have dubbed the 'Grand Finale' orbits. These will take the spacecraft between the inner edge of the ring system and Saturn itself, with the last orbit hurtling the spacecraft into the planet's atmosphere. As the probe loops around the planet, Cassini will still be gathering data of immense interest to researchers back on Earth. "We're going to be directly measuring the mass of the rings," says Tiscareno. "That will help us distinguish between different models that we have for the origin and operation of the rings and might give us more clarity on how old the whole ring system is."
Cassini will also acquire unprecedented radar observations of the ring material. And its dust instrument will analyse the particles' chemical composition says Cuzzi. "So, finally, we'll be able to answer the big question that we've always had: why are the rings red," he says. "They're actually not white, like pure ice should be, they're actually a little red and we really don't know why that is."
Cassini's grand finale promises to be a period of intense excitement tinged with inevitable sadness then. But perhaps it's Cuzzi who best sums up the spirit for the weeks and months ahead: "We're definitely not done yet," he says.
Cassini's Orbital Timeline
October 1997 — Cassini launches from Cape Canaveral in Florida, US.
July 2004 — The spacecraft enters into orbit around Saturn.
June 2008 — The probe finishes its primary mission. It moves into a new set of orbits for Saturn's equinox in summer 2009.
September 2010 — The Equinox Mission complete, Cassini starts its Solstice Mission orbits, many of which take it far from Saturn.
November 2016 — Cassini starts its series of close 'ring-grazing' orbits. 22 April 2017 - The 'Grand Finale' trajectories will begin; Cassini will dive between the inner edge of the rings and Saturn itself.
15 September 2017 — The mission will come to an end as Cassini enters Saturn's atmosphere.
ABOUT THE WRITER
Will Gater is an astronomy journalist and presenter. Follow him on Twitter at @willgater.
Copyright � Immediate Media. All rights reserved. No part of this article may be reproduced or transmitted in any form or by any means, electronic or mechanical without permission from the publisher.
{ width: 160, height: 160, defaultImage: '', layers: 'Artimg-BBC_BinaryStars' }

![]() Orion is proud to partner with BBC Sky at Night Magazine, the UK's biggest selling astronomy periodical, to bring you this article as part of an ongoing series to provide valuable content to our customers. Check back each month for exciting articles from renowned amateur astronomers, practical observing tutorials, and much more!
Orion is proud to partner with BBC Sky at Night Magazine, the UK's biggest selling astronomy periodical, to bring you this article as part of an ongoing series to provide valuable content to our customers. Check back each month for exciting articles from renowned amateur astronomers, practical observing tutorials, and much more!
Our Sun is an oddball: most stars don't exist alone. But sociability has consequences, writes Mark A. Garlick.

By ESO/L. Cal�ada (http://www.eso.org/public/images/eso1540a/) [CC BY 4.0], via Wikimedia Commons
Like living organisms, stars are a social bunch. Of the 20 star systems closest to the Sun, only 12 are solitary. Stellar multiplicity is very common, and our seemingly lonesome Sun drew a short straw.
If the Sun were reduced to the size of a pea, the closest stars would still be hundreds of kilometres away. So when we consider the truly enormous scale of our Galaxy, it is obvious that stellar multiplicity cannot be the result of neighbours just passing by and becoming entangled by gravity. Though this does happen, it's phenomenally rare. The inescapable conclusion is that most stars have companions because that is how they are formed.
Stars in binaries are commonly quite far apart from each other. They might be separated by less than an astronomical unit (approximately 150 billion km, the Earth-Sun distance) or they could be hundreds of times further apart, taking centuries to complete their orbits around each other. We call this latter group detached binaries. This is where both stars occupy their own Roche lobes — the region where matter is gravitationally bound to the particular star — without spilling over and influencing its companion.
Yet often the situation is very different. If two stars are sufficiently close together when one evolves into a red giant, the atmosphere of this evolving star can stretch beyond its Roche lobe and actually reach the companion. This creates drag, which brings the stars spiralling together and makes for a much more dynamic system — what is called an interacting or semi-detached binary — with two or more stars engaged in a frenetic gravitational tug-of-war. This situation can lead to some extreme behavior.
A distorted demon
Algol (Beta Persei) is the first example of an entire class of semi-detached star systems, hence collectively known as Algol binaries. The two stars are huddled close together, with a separation comparable to their radii and orbital periods ranging from hours to (more typically) days. This proximity means that one of the stars, usually one that has entered the late stages of its life causing it to greatly expand, is distorted by the gravity of its companion, which is usually more massive, hotter, brighter and still in the prime of life. The larger star is so expanded it is said to fill its Roche lobe. Gas from the secondary component flows towards the primary and strikes its surface on the equator. The impacting gas is then flung off, somewhat like water bouncing off a spinning ball, and spreads out around the primary to form a tenuous, messy outflow around it.
Algol binaries are variable stars, and we know of thousands of them. The variation comes from the fact they are eclipsing binaries as seen from Earth: when the secondary star passes in front of its smaller but brighter companion, the brightness dips significantly making the star flicker.
However, in cataclysmic variables we find a much more extreme semi-detached binary. Cataclysmic variables are a very broad class that includes novae and dwarf novae. The two components are almost always the same: a red dwarf and a white dwarf. These two stars are so compact that typically the entire system would fit within the bounds of our Sun. They swing around each other in a matter of hours. As in Algol binaries, one of the stars, the red dwarf, fills its Roche lobe. Gas from this star flows towards the voracious white dwarf — 10 billion tonnes of it every second — forming what is called an 'accretion disc' around it.
It is the accretion disc that gives these systems their dynamic properties and puts the cataclysm into their name. As material in the disc spirals towards the white dwarf, friction heats it to extreme temperatures, making these systems very bright in the ultraviolet and sometimes X-ray regions of the electromagnetic spectrum. Sometimes the accretion disc become unstable, suddenly dumping more gas than usual onto the white dwarf. Alternatively, there might be a momentary, rapid increase in the amount of gas being fed into the disc from the secondary. Both situations can cause a huge influx of extra material accreted by the white dwarf, which then flares up to produce a dwarf nova outburst. The amount of time between such events can vary from days to years. In even more extreme cases, the gas accumulated by the white dwarf becomes so hot and dense that the outer layers undergo thermonuclear burning, as in the centre of a star. This is a classical nova. The event is sudden and explosive, and typically destroys the accretion disc but neither star. In time, the disc will grow again and the 'cataclysm' will repeat.
Not all cataclysmic variables have accretion discs, however. Sometimes the white dwarf is highly magnetic — around 10,000 times more so than a typical bar magnet. This is strong enough to disrupt the formation of the accretion disc, resulting in a ring instead. These systems are known as 'intermediate polars'. In 'polars', where the white dwarf's magnetic field is stronger still, even a ring cannot form. In this instance, gas escaping from the secondary latches onto the white dwarf's magnetic field lines and flows towards it in great auroral arcs.
From powerful to phenomenal
X-ray binaries are more powerful still. As the name suggests, these systems are bright X-ray sources. It's a slight misnomer in that cataclysmic variables are also often X-ray powerhouses, but X-ray binaries tend to be much more luminous at these wavelengths, for reasons that will become clear.
In appearance cataclysmic variables and X-ray binaries are quite similar: a large star sometimes filling its Roche lobe, losing gas to a compact companion, often &mdsah; but not always — through a disc. The distinction is that in X-ray binaries the compact primary is a neutron star or a black hole, rather than the white dwarf found in cataclysmic variables. This extra degree of compactness is what gives them their awesome power.
In cataclysmic variables, the gas in the accretion disc reaches very high temperatures as it spirals around in the disc towards the white dwarf. But neutron stars are hundreds of times smaller than white dwarfs, and black holes are tinier still. This means that the gas orbiting in X-ray binaries travels a lot closer in towards the compact star, picks up much more speed and so more kinetic energy, and experiences much greater frictional heating. The energy released when this gas accretes onto the neutron star or black hole is phenomenal. Some X-ray binaries emit as many X-rays as thousands of Sun-like stars combined.
X-ray binaries exist in two flavours. If the secondary star is lightweight, such as a red dwarf, astronomers call the system a low-mass X-ray binary. But in some cases the mass-donating star is a massive giant, in which case they are called high-mass X-ray binaries; black hole system Cygnus X-1 is an example. The class as a whole resembles cataclysmic variables in that one of the stars fills its Roche lobe. But what happens when both stars fill their respective lobes?
The two members touch at the inner Lagrangian point, causing the system to resemble a gargantuan dumbbell. Because each star is in contact with the other, astronomers refer to these as contact binaries. A famous example is W Ursae Majoris. Binary systems such as this one exchange atmospheric gases and share a sheath of gas, or envelope, and eventually they settle into a configuration where each star has the same temperature. Usually the stars are yellow to orange in color (spectral types F to K) with orbital periods ranging from five to 20 hours. Often one or both of the stars are highly magnetic, and large star spots may be present as a result. These systems are true cannibals. In time, the larger star will completely consume the envelope of its smaller, luckless cohort, laying bare its core. Eventually even this is swallowed in a final merger, until only a single star exists where previously there were two.
Roche Lobes
The delicate balance of gravity is key to understanding binary stars
The Roche lobe is the teardrop-shaped region around a star in a binary system, within which gas is gravitationally bound to the star. But at the point between the two stars where the lobes meet — the inner Lagrangian point (L1) — gravity and centrifugal forces cancel out and the gas feels no net force. That is unless one of the stars has expanded to the point that it fills its Roche lobe. This happens in cataclysmic variable and many X-ray binaries. In these cases, the atmosphere of the lobe-filling star is pushed beyond the L1 point and flows towards and around the other star. As the escaping gas stream encircles the star it eventually loops around and collides with itself. This causes it to lose energy, spread out and form an accretion disc around the companion star.
Accretion Discs
Many powerful phenomena come not from stars, but from the dusty discs around them
There are many kinds of astronomical objects that grow or evolve by gravitationally attracting and harvesting nearby material, a process termed 'accretion'. The accretion disc is simply what we call the gathered material. It is the machine that surrounds an object and allows it to grow larger and more massive. For example, stars are born at the centre of protoplanetary discs, illustrated above. As dust and gas orbit in the disc, it loses momentum and spirals into the central regions, where it accumulates.
In binary stars, accretion discs are created when a secondary star fills its Roche lobe and spills material into the lobe surrounding an adjacent primary star. The gas leaves the inner Lagrangian point and runs in a narrow stream towards and around the primary star, creating a ring-like flow. Friction in this ring causes the gas to heat up, converting potential energy into kinetic energy. The gas also loses angular momentum, so it drops down to lower orbits and spreads slowly inwards, forming a fully fledged disc. The inner regions of an accretion disc around a stellar mass black hole can have temperatures measuring millions of Kelvin — hot enough that they emit most of their energy as X-rays. Astronomers find these emissions useful because they can detect the disc easily and thus infer the presence of a black hole, even if the latter emits no radiation. Supermassive black holes also exhibit accretion discs, although they are orders of magnitude larger and cooler.
ABOUT THE WRITER
Mark A Garlick is a writer and illustrator and animator specializing in astronomy. His latest book is Cosmic Menagerie: A Visual Journey Through the Universe.
Copyright � Immediate Media. All rights reserved. No part of this article may be reproduced or transmitted in any form or by any means, electronic or mechanical without permission from the publisher.
{ width: 160, height: 160, defaultImage: '', layers: 'Artimg-BBC_TopTipsForStargazing' }

![]() Orion is proud to partner with BBC Sky at Night Magazine, the UK's biggest selling astronomy periodical, to bring you this article as part of an ongoing series to provide valuable content to our customers. Check back each month for exciting articles from renowned amateur astronomers, practical observing tutorials, and much more!
Orion is proud to partner with BBC Sky at Night Magazine, the UK's biggest selling astronomy periodical, to bring you this article as part of an ongoing series to provide valuable content to our customers. Check back each month for exciting articles from renowned amateur astronomers, practical observing tutorials, and much more!
Top Tips For Stargazing
Follow this practical advice and enjoy a good first night under the stars.
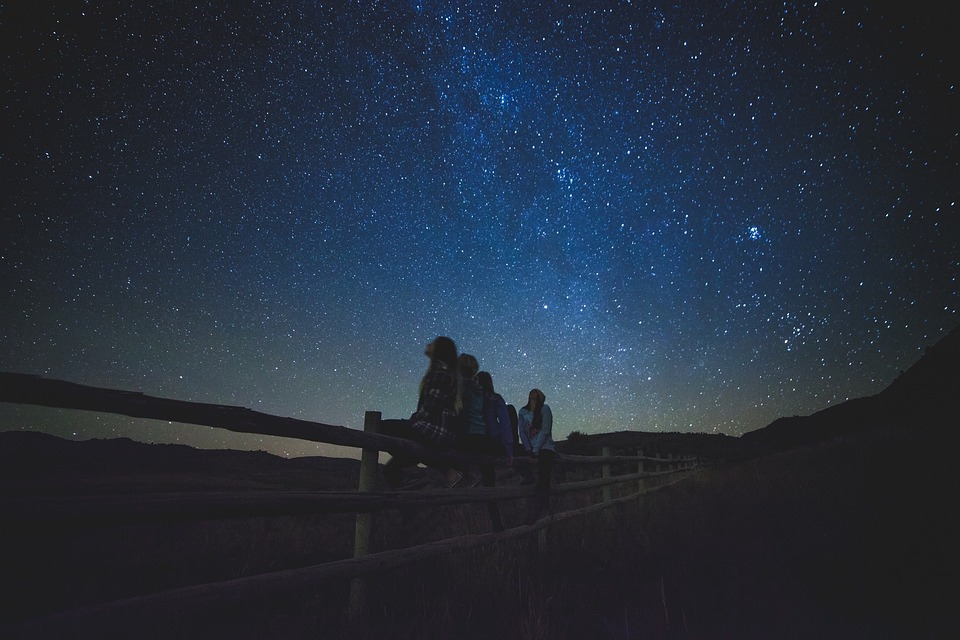
Image released under Creative Commons CC0 public domain, courtesy of Pixabay.com.
1. The eyes have it
Forget the myth that to be a 'proper' astronomer you need to have a telescope — this is complete rubbish! There are myriad things you can see with the naked eye alone — from the constellations to meteor showers, the band of the Milky Way and even the occasional galaxy. If you want to take things further, consider investing in a pair of binoculars before a telescope — you'll be able to see more of the night sky without dealing with the practicalities of setting up.
2. Keep out the cold
We know it's not rocket science (if you'll excuse the pun), but astronomy involves a lot of time outdoors being still, so it's important to stay warm. Several layers of thin clothing are recommended, as are waterproof shoes, a hat and gloves. If you have pages to turn or equipment (especially touchscreens) to operate, fingerless gloves are ideal.
3. Give your neck a rest
If you stand still staring up at the sky you'll soon find that you get neck ache. So avoid the pain entirely by finding something that you can lie back on. A reclining garden chair or an old-fashioned deck chair are ideal, but your spine will thank you even if all you have on hand is a camping groundsheet, a yoga mat or a waterproof picnic blanket to spread over the grass.
4. Accustom your eyes
If you go outside from a brightly lit room you'll probably only see a handful of stars so it's vital to wait and let your eyes adjust to the darkness — ideally for 30 minutes — and you'll notice an incredible difference. Doing so should allow you to see much fainter stars.
5. Use a star chart
These are a great way to learn your way around the night sky. Astronomy magazines publish star charts every month or you can buy a book. You can begin by identifying patterns of bright stars. From there you can gradually learn your way around the constellations, and before too long they'll become familiar and you'll be able to navigate your way around the night sky without reference to a book or chart.
6. Bring a red flashlight and a compass
A red-light flashlight is a must when you've given your eyes time to adjust to the dark but still want to see your star charts. This is because dark-adapted eyes are much less sensitive to red light than they are to white. You can buy a red-light night vision flashlight, or make one by taking a regular flashlight and sticking a piece of red acetate over the front. A compass will help you find north, which is essential not only when using star charts but also in setting up your telescope mount.
7. Stay away from streetlights
If you can, head out to the countryside to take advantage of properly dark skies. But if you are observing in an urban area, shield yourself from any artificial light sources, as they will prevent your eyes from acclimatizing to the dark.
8. Slow and steady
No one has ever looked at the night sky and instantly understood how to find their way around; there really is a lot to see up there! Not even the legendary Sir Patrick Moore was immune to this — he honed his knowledge by memorizing one new constellation each night.
Copyright � Immediate Media. All rights reserved. No part of this article may be reproduced or transmitted in any form or by any means, electronic or mechanical without permission from the publisher.
{ width: 160, height: 160, defaultImage: '', layers: 'Artimg-BBC_ShootingStars' }

![]() Orion is proud to partner with BBC Sky at Night Magazine, the UK's biggest selling astronomy periodical, to bring you this article as part of an ongoing series to provide valuable content to our customers. Check back each month for exciting articles from renowned amateur astronomers, practical observing tutorials, and much more!
Orion is proud to partner with BBC Sky at Night Magazine, the UK's biggest selling astronomy periodical, to bring you this article as part of an ongoing series to provide valuable content to our customers. Check back each month for exciting articles from renowned amateur astronomers, practical observing tutorials, and much more!
Shooting Stars
Spotting a meteor streaking across the sky is a truly captivating sight to behold.

By C m handler (Own work) [CC BY-SA 3.0 (http://creativecommons.org/licenses/by-sa/3.0)], via Wikimedia Commons
You may know of meteors as 'shooting stars', but the truth is there is nothing stellar about them. The dramatic, bright trails that streak across the sky come from a much more harmless source — a dust particle the size of a grain of sand colliding with Earth's atmosphere, making it glow.
You will see several random, or 'sporadic', meteors an hour on any clear night, but a better way to catch them is during one of the annual meteor showers. These occur when Earth passes through the debris trail of a long-gone comet — a path of dust waiting to burn up in our planet's atmosphere.
Meteor showers are named after the constellation they appear to come from — and, sometimes, the closest star. Most major showers will be active over a period of at least a few days — and some for a few weeks. But they have what's known as a 'peak' — the night when you can expect to see the greatest number of meteors. The rates can vary quite a lot, but prominent displays, such as the Perseids, can produce an average of one meteor a minute under clear, moonless skies at their peak. There is also the chance a particularly dense patch of dust could lie along the path of debris, creating a surge in meteor numbers.
How to view
The best time to observe is shortly after midnight on the date when peak activity is predicted, when the sky is darkest and Earth's rotation faces the direction of the planet's motion in space, so the oncoming meteors seem to travel even faster.
As with any other form of observing, the best place to view is away from light pollution, so find as remote a location as possible and give your eyes at least 20 minutes to get really used to the darkness.
Don't look directly at the constellation that the meteor tracks appear to come from, concentrate your gaze high in the direction of the darkest portion of the sky that's free from obscuring trees and buildings. If the Moon is in the sky, try to make sure it's not in your field of vision or reflecting off walls or windows, as this will seriously degrade your night vision.
If you need to look at star charts or books to find your bearings, use a dim red light rather than a white one so that you don't lose your night vision. If you use a smartphone app, place a red cellophane filter over the screen.
Making meteors
By the time a comet approaches Earth, the Sun's heat has evaporated ice in its nucleus. This releases dust that follows the comet and, over time, can be spread out along all of the comet's orbit. When Earth intercepts this dusty path, lots of particles collide with the atmosphere and we see a meteor shower.
Meteor diary
Quadrantids
Peak: Around 3 January
Max possible activity: 120 meteors per hour
Activity window: Early January
Eta Aquariids
Peak: Around 6 May
Max possible activity: 60 meteors per hour
Activity window: Early May
Perseids
Peak: Around 12 August
Max possible activity: 80 meteors per hour
Activity window: Mid July to mid August
Orionids
Peak: Around 21 October
Max possible activity: 26 meteors per hour
Activity window: Mid to late October
Leonids
Peak: Around 18 November
Max possible activity: Usually 15 meteors per hour but can be higher
Activity window: Mid to late November
Geminids
Peak: Around 13 December
Max possible activity: 110 meteors per hour
Activity window: Mid to late December
Copyright � Immediate Media. All rights reserved. No part of this article may be reproduced or transmitted in any form or by any means, electronic or mechanical without permission from the publisher.
{ width: 160, height: 160, defaultImage: '', layers: 'Artimg-BBC_Europa' }

![]() Orion is proud to partner with BBC Sky at Night Magazine, the UK's biggest selling astronomy periodical, to bring you this article as part of an ongoing series to provide valuable content to our customers. Check back each month for exciting articles from renowned amateur astronomers, practical observing tutorials, and much more!
Orion is proud to partner with BBC Sky at Night Magazine, the UK's biggest selling astronomy periodical, to bring you this article as part of an ongoing series to provide valuable content to our customers. Check back each month for exciting articles from renowned amateur astronomers, practical observing tutorials, and much more!
Amanda Doyle looks at the evidence for life amid Europa's apparent plumes and examines the missions that could deliver proof
Europa by NASA's Planetary Photojournal
Europa is the smallest of Jupiter's Galilean moons, its strange icy surface riddled with fractures. But it is what lies beneath the surface that is of most interest to scientists: in September 2016, Hubble captured images of finger-like projections coming from Europa's limb.
One possible explanation for these findings is plumes of water vapour bursting out from Europa, a theory that is supported by earlier Hubble observations in 2012, when its spectroscope identified water vapour in the moon's south polar region. Both observations are strong evidence that Europa boasts a subsurface liquid ocean, making the moon one of the best places in the Solar System to search for alien life.
The first evidence for Europa's subsurface ocean came from the Galileo spacecraft. Jupiter's immense gravity causes a tidal bulge to be raised on Europa, and this tidal heating is sufficient to cause some of the ice to melt below the surface. Magnetometer readings from Galileo showed that Europa has an induced magnetic field, which can only occur if there is a medium in which a current can travel, such as salty water.
Water in the aurora
In 2013, a team led by Lorenz Roth from the Southwest Research Institute in Texas announced the detection of what appeared to be a plume rising into space in data. They used the spectrograph on Hubble to determine that an ultraviolet auroral glow from Europa's south pole — observed in 2012 — was possibly caused by water molecules being broken apart by Jupiter's powerful magnetic field.

Artist's Concept of Europa Water Vapor Plume
by NASA/ESA/K. Retherford/SWRI
The latest observation was announced in September 2016, when further evidence for these plumes was revealed. Initially searching for a tenuous atmosphere surrounding Europa by viewing the moon transiting in front of Jupiter, William Sparks from the Space Telescope Science Institute was surprised to find traces of a water plume.
"By an interesting coincidence, Roth and the team announced their discovery of evidence for plumes using [Hubble] STIS spectroscopy within a couple of weeks of our transit program beginning," said Sparks. "Our approach is independent, but that changed the landscape and people started looking right away for plumes."
Sparks' latest observation of the plumes adds weight to evidence for an active water cycle on Europa, but is this an environment that could support life? There are three key ingredients for life as we know it, and water is only one of them. The correct 'biogenic elements' need to be present in order to provide the building blocks for life and an energy source is also considered essential.
If life on Europa were to avail itself of photosynthesis as an energy source, it would have to be situated near the surface, where ice is potentially thin enough for sunlight to filter through. However, living near the surface has its pitfalls, as radiation from Jupiter would likely exterminate anything unprotected by thick ice.
As on Earth, so on Europa?
In the pitch-black depths of Earth's oceans, hydrothermal vents spew out enough hot material for ecosystems to thrive despite never seeing sunlight. If similar vents were to exist on Europa they could provide a safe haven for life. It is unknown how the tidal heating occurs on the icy moon but if the heating were to penetrate to the core, then the flow of heat up from the ocean floor could create vents. However, if the heating is restricted to the upper layers of ice, then venting would not occur.
It may seem far-fetched that life could exist in freezing conditions on Europa, but we know that there is microbial life on Earth that is extremely resilient to such hostile environments. Microorganisms are known to survive in Antarctic ice by producing their own antifreeze, and lakes situated far below the ice also have microbial life.
If some form of life exists on Europa, then could it be detected? "If the biomass in the plumes were high enough, it may be possible to find biosignatures," Sparks explains. "A more likely approach — and plumes are very relevant — is that presumably most of the plume material gets deposited back on to the surface. Along with all the other places on Europa where material appears to have seeped out onto the surface, that would certainly be a place you'd want to look."
The best way to explore Europa and the tantalising possibility of life would be to send a lander with a powerful drill, which would ultimately drop a probe into the ocean below. Such an ambitious project is still many decades away, but there are missions planned which will take the first steps in revealing the moon's secrets.
ESA's Jupiter Icy Moons Explorer (JUICE) is not a life-finding mission, but it does have the ability to finally confirm the existence of the subsurface ocean on Europa, as well as measure the thickness of the ice shell. JUICE will also explore the chemistry of the moon to ascertain if it has the right chemical soup needed for life. Meanwhile, NASA is planning the Europa Multiple-Flyby Mission, also known as the Europa Clipper. While the goals of this mission and JUICE are similar, the NASA mission will spend more time focused on Europa. There is also the possibility that this mission will include a small lander.
Both missions will further our knowledge of the surface of Europa and what lies beneath, thus paving the way for a mission dedicated to finding life.
Drilling Deep
The technology for drilling through Europa's thick ice crust has been tested
Drilling through the Antarctic ice to the lakes below is an excellent testbed for studying the type of life that might exist beneath Europa's surface, as such organisms are cut off from the atmosphere and from sunlight. These Antarctic lakes are kept in liquid form due to the immense pressure from the ice above.
There have been numerous drilling expeditions to such subglacial lakes, and the first successful breach of the overlying ice occurred in February 2012 when a Russian team reached the waters of Lake Vostok, some 4km below the ice. DNA analysis of the surrounding ice has shown that microbial life likely exists in the lake, although this has yet to be confirmed from the lake water itself.
Not all expeditions are so lucky. On Christmas Day in 2012, a UK-led project to explore Lake Ellsworth failed when they were unable to drill through the 3km of ice above the lake.
In 2013, an American team had more success when they broke through 800m of ice to reach Lake Whillans. There is also an extensive network of streams, and the entire area covers around 60 square kilometres. Analysis of the lake water revealed nearly 4,000 species of microbes.
Examining Europa
Several planned missions will further our knowledge of whether the icy Jovian moon's environment is right for life
James Webb Space Telescope
The James Webb Space Telescope (JWST), due to launch in 2018, will have the capability of confirming the existence of plumes of water emanating from Europa. It will also be able to observe Europa in regions of infrared light that are invisible to Hubble. If water plumes do indeed exist, JWST will detect the water signatures in the infrared. These observations are impossible from Earth, as the water vapour in the atmosphere blocks the view. However, as the plumes appear to be intermittent, it may be difficult to time JWST observations just right in order to detect the plumes.
Europa Multiple-Flyby Mission
NASA's mission to Europa was approved in 2015 and a suite of nine scientific instruments has been announced for the orbiter. These include high-resolution cameras, spectrometers, an ice-penetrating radar and a magnetometer. The latter will be used to determine the depth and salinity of the ocean by measuring the direction and strength of Europa's magnetic field. Thermal mapping of the surface will also reveal any recent eruptions of warmer water from below the ice. The mission is due to launch in the 2020s, and will perform 45 flybys of Europa over three years, with the orbits varying from a height of 25km to 2,700km.
Jupiter Icy Moons Explorer
ESA's Jupiter Icy Moons Explorer (JUICE) is due to launch in 2022 and reach the Jovian system in 2030, spending three and a half years studying the moons of Jupiter. It will perform two flybys of Europa before moving on to Callisto and then eventually settling into an orbit around Ganymede, the main focus of the mission. JUICE will study surface features on Europa to ascertain how they formed. By thoroughly analysing the Jovian system — including Jupiter itself — JUICE will shed light on planet formation and the conditions needed for life to emerge on icy moons.
About the Writer
Amanda Doyle is a postdoctoral researcher at the University of Warwick and editor of the SPA's quarterly magazine.
Copyright � Immediate Media. All rights reserved. No part of this article may be reproduced or transmitted in any form or by any means, electronic or mechanical without permission from the publisher.
{ width: 160, height: 160, defaultImage: '', layers: 'Artimg-BBC_AshenLight' }

![]() Orion is proud to partner with BBC Sky at Night Magazine, the UK's biggest selling astronomy periodical, to bring you this article as part of an ongoing series to provide valuable content to our customers. Check back each month for exciting articles from renowned amateur astronomers, practical observing tutorials, and much more!
Orion is proud to partner with BBC Sky at Night Magazine, the UK's biggest selling astronomy periodical, to bring you this article as part of an ongoing series to provide valuable content to our customers. Check back each month for exciting articles from renowned amateur astronomers, practical observing tutorials, and much more!
For hundreds of years, astronomers have pondered whether there is any truth to testimonies of a glow illuminating the dark side of Venus. Paul Abel explores this centuries-old astronomical anomaly

Cloud structure in the Venusian atmosphere in 1979, revealed by observations in the ultraviolet band by Pioneer Venus Orbiter - NASA Photo Gallery Venus
Over the past decade, our space missions have revealed some spectacular things about the worlds in our Solar System. We've seen water fountains on Enceladus, methane lakes on Titan and vast icy mountain ranges on Pluto. We know more about the other worlds that orbit our Sun than at any other point in human history.
Yet in spite of that, one of our nearest neighbours continues to tease us with a 400-year-old mystery. The ashen light of Venus is rather like an astronomical ghost story: it would be easy to dismiss the phenomenon as a romantic relic of a bygone era were it not for a small number of consistent observations made by seasoned planetary astronomers well into the 21st century. As we see Venus return to our evening skies, it brings this ancient puzzle, and now is a good time to ask: will we ever solve the riddle of the ashen light?
The story starts in the 17th century. On the evening of January 9, 1643, Italian astronomer Giovanni Riccioli turned his telescope towards Venus. On that date Venus would have appeared as a crescent, with a phase of about 29 per cent. As Riccioli looked, he noticed that the dark side of the planet — which is normally invisible — appeared to be glowing with a faint greyish light that he called 'The ashen light of Venus'.
The next reported sighting came in 1714 when William Derham, who was a Canon of Windsor, observed it with his telescope and described the ashen light as a 'dull rusty colour'. Sir William Herschel also observed the phenomenon on a number of occasions. The British astronomer Thomas William Webb caught sight of the light on January 31, 1878 with his 9.4-inch reflector. Using magnifications of 90x and 212x, he noticed that the light had a slight brown-ish cast. Webb may well have been the first person to recommend using an eyepiece with an occulting bar — a device that hides the brilliant crescent to reduce glare.
Many sightings, little proof
There were many sightings of the ashen light in the 20th century: in 1940, 1953, 1956 and 1957 a number of observers reported sightings on consecutive nights to the British Astronomical Association. Dale Cruikshank, a planetary scientist at the NASA Ames Research Center together with William K. Hartmann, also a planetary scientist, made an interesting observation of Venus in 1962. On November 12, 1962 at 7pm, when Venus was at inferior conjunction, both Cruikshank and Hartmann observed the night side of the planet enclosed within a thin ring of light (this would have been the extended cusps of Venus). The night side seemed to be glowing with a brownish colour, quite different from the surrounding blue sky. The effect was not uniform and appeared to be strongest closest to the thin crescent.
Sir Patrick Moore was another veteran planetary observer who recorded the ashen light. Although he sighted it numerous times during his long observing career, the event that convinced him of the reality of the light occurred on May 27th, 1980. Using his 15-inch reflector at 300x magnification, Patrick described the effect as 'striking', with the ashen light strongly resembling the effect of earthshine on the Moon.
One of the great problems with the ashen light is that it has never been photographed or imaged; all observations are visual and so there is no tangible proof that the phenomenon is real. Yet not all visual observers have been able to view it. Edward Emerson Barnard, for example, never managed to see it. I have been observing Venus regularly for over 18 years and I have never managed to see the ashen light.
A number of amateur astronomers now believe that it is merely an illusion. It is reasonable to suppose that under certain conditions the brilliant crescent of Venus combined with poor seeing tricks the human eye into thinking it can see the night side of Venus, when in reality it is not visible.
Those who believe in the reality of the ashen light have suggested a number of ideas as to its cause. We can probably dismiss the suggestion of 18th-century German astronomer Franz von Paula Gruithuisen, however. He believed the light to be caused by fireworks of the Venusians celebrating the ascension of a new emperor.
More theories, more problems
A more reasonable idea has been advanced that the thick atmosphere occasionally thins in places, allowing the hot surface to be seen. The problem is that this would only be visible in the infrared part of the spectrum, well beyond the threshold of the human eye. The idea that the ashen light is the result of multiple rapid lightning strikes in the upper atmosphere of Venus can likewise be dismissed, since the flashes would be too faint to be seen from Earth.
The only viable idea left is the oxygen emission theory. This suggests that when oxygen atoms combine in the planet's upper atmosphere on the night side of Venus, they emit light. This has been observed by two Soviet spacecraft, Venera 9 and 10. Moreover, the variability of oxygen emission might explain why the ashen light is not always observed.
It seems likely that the enduring mystery of the ashen light will not be settled until the phenomenon is imaged. Only then will we be able to say with any real confidence whether it is really a product of Venusian metrology or an artefact of the human visual system. As Venus becomes well placed in the evening skies at the start of 2017, now might be your chance to catch a glimpse of it — and decide.
Seeing is Believing
How to maximize your chances of catching the elusive ashen light
No one can say when or if the ashen light will next appear, but looking at the observational records a number of interesting things stand out. First, it seems that the light is more frequently observed when Venus is an evening planet (eastern elongations), but even then it is not sighted during every elongation and there can be many years between reports.
The phase of Venus has to be below 30 per cent, so mid February onwards would be the time to start looking. The ashen light can only be viewed in a dark sky, which means the seeing conditions are likely to be less than ideal. Don't use a really high magnification unless the seeing conditions allow for it. Personally I find about 150x quite suitable. It might be worth trying some filters, too. Observers who have seen the light report that orange and green filters may enhance the effect if it is present. It is important to realize that the brilliant crescent will give rise to all manner of spurious optical effects. Some observers get round this by using an eyepiece that contains an occulting bar. Hiding the crescent behind the bar can reduce the glow, but even then you need to be cautious.
Most reports indicate that the ashen light takes the form of a coppery brown glow on the night side of Venus. The glow may cover all of the night side, or just a part of it. If you suspect the light is present, try taking an image of it and of course, alert other astronomers so that other independent images can be taken. If you have more than one telescope, try imaging it with one and observing it with another, and make a drawing so you can compare what you have seen with what you have imaged. Finally, send your observations to the Mercury and Venus section at the British Astronomical Association (https://britastro.org/sections) so that they can be studied and analyzed by professional astronomers.
Imaging the Crescent Venus
Pete Lawrence reveals how capture the planet's crescent on camera
Imaging Venus against a dark sky through a telescope produces tricky imaging conditions, with multiple reflections and unwanted aberrations. Catching it with the Sun up, or immediately after sunset is a good way to tame the planet's brightness, the lighter sky reducing contrast.
A monochrome high frame rate camera with a red or infrared-pass filter is a good choice for this photo, as it makes the blue sky appear dark. These longer wavelengths also less affected by poor atmospheric seeing. Detail in the planet's clouds is tricky to record, normally achieved using either an ultraviolet-pass filter (around 350nm) or an infrared-pass filter (1,000nm plus). Be aware that some telescope coatings are quite effective at blocking ultraviolet light, and so produce a blank disc.
The basic imaging procedure is to centre the planet, focus accurately and capture a high frame rate recording. As Venus is bright, keep the frame rate high and the gain low, recording several thousand frames. Process the capture with a registration-stacking program such as AutoStakkert!.
The bright crescent can be captured using a DSLR camera attached to a telescope or by using the afocal technique of pointing a camera down the telescope's eyepiece.
Copyright � Immediate Media. All rights reserved. No part of this article may be reproduced or transmitted in any form or by any means, electronic or mechanical without permission from the publisher.
{ width: 160, height: 160, defaultImage: '', layers: 'Artimg-BBC_StarsOfWinter' }

![]() Orion is proud to partner with BBC Sky at Night Magazine, the UK's biggest selling astronomy periodical, to bring you this article as part of an ongoing series to provide valuable content to our customers. Check back each month for exciting articles from renowned amateur astronomers, practical observing tutorials, and much more!
Orion is proud to partner with BBC Sky at Night Magazine, the UK's biggest selling astronomy periodical, to bring you this article as part of an ongoing series to provide valuable content to our customers. Check back each month for exciting articles from renowned amateur astronomers, practical observing tutorials, and much more!
Astronomer Will Gater delves into the incredible astrophysics behind some of the season's most famous luminaries
Betelgeuse by Reid H.
Betelgeuse
Of all the stars in the winter sky, Betelgeuse (Alpha Orionis) is arguably the one that prompts the most excitement and intrigue. To the eye it looks like a sparkling, orange-hued point of light, but decades of scientific study — some conducted using the most powerful astronomical facilities in existence today — have shown that a thrilling story is unfolding far away.
"Betelgeuse is a red supergiant with a radius in optical light of about 4.5 astronomical units — in other words, almost the size of the orbit of Jupiter," says Dr Anita Richards, who has studied the star as part of her research at the University of Manchester's Jodrell Bank Centre for Astrophysics.
Betelgeuse hasn't always been this bloated, ruddy leviathan however. It was once a hot O-type star, like Mintaka in Orion's Belt is. It would have had a blueish-white color and would have also been more massive than it is now — perhaps around 20 times the mass of the Sun.
"Such massive stars have much hotter cores than the Sun with faster nuclear fusion, using up most of their hydrogen [in] a few million years," explains Richards. "Fusion [of] heavier elements such as helium and carbon takes over, but the outer layers cool and expand; the increase in size means that the luminosity grows as the star becomes redder."
It's this process that has created the Betelgeuse we know today, but it's what will happen at the end of its life that excites many astronomers. "It will probably take at least a hundred thousand years for Betelgeuse to exhaust [its] fuel for nuclear fusion," says Richards. "Finally when it runs out, its inner layers are no longer supported by radiation pressure and collapse, releasing roughly as much energy in an instant as the Sun radiates in 8,000 million years — a supernova."
This violent detonation will be a truly breathtaking sight in our skies. "It will be brighter, as seen from Earth, than any other supernova in recorded history so far," says Richards, "as brilliant as the full Moon and visible in daylight."
Where to find it
Betelgeuse is easily visible on the left shoulder of Orion as you look at it with the naked eye. Key to finding it is identifying Orion itself, which is probably best achieved by locating the unmistakable trio of stars known as Orion's Belt. Betelgeuse is just under 10� to the north-northeast of any of them.
Rigel
Like its bright companion Betelgeuse, the brilliant star Rigel (Beta Orionis) is a supergiant, nearly 80 times the size of our Sun. But even to the naked eye there's one striking difference between these two stellar behemoths: their colors. Betelgeuse is orange-white while Rigel sparkles with a blue tint. Why the difference? It all comes down to their temperatures. The hotter a star is the bluer it tends to shine, while cooler stars glow more red. And indeed Betelgeuse's surface temperature is about 3,300�C while Rigel's is roughly 11,800�C.
Where to find it
Rigel is one of the few stars in the winter sky that is so bright that it can be seen easily from heavily light-polluted city centres and suburban areas. From a dark-sky site it is a blazing point of light at the right foot of Orion.
W Orionis
Less famous than either Betelgeuse or Rigel, the scientific story behind the star known as W Orionis is no less intriguing. It has an atmosphere that swirls with large amounts of carbon.
"For a star to become carbon rich, something called the dredge-up needs to happen several times so that carbon from the inner parts of the star gets to the surface and [is] released to its atmosphere," explains Dr Lizette Guzman Ramirez, an ESO Fellow based at the Leiden Observatory in the Netherlands.
This churning has occurred within W Orionis as it has aged. The carbon can absorb blue wavelengths of light from the star; this, combined with its relatively cool temperature, means it has an exquisite red hue — something that's obvious through a telescope.
Where to find it
Although it's on the cusp of naked-eye visibility, it's easier to hunt down mag. +6.1 W Orionis with binoculars. One way of finding it is to imagine a rough equilateral triangle tilted on its side, the base of which is marked by Mintaka and Bellatrix (Delta and Gamma Orionis). W Orionis is at the apex.
Practical project
The deep red of W Orionis is a wonderful sight to see, but it's even clearer in photos. In this project we'll use a simple astrophotography technique to bring out the star's striking color and all you need is a DSLR, a lens with a focal length of 50mm or similar and a static photo tripod. First mount your camera on the tripod, check W Orionis is in the view and then focus the image. Then take four or five 30-second exposures and stack them together in software such as Startrails to create an image that shows the star field 'trailing' as the Earth rotates. By using a 50mm lens you should be able to capture some of Orion's other bright stars in the field of view and so when you compare their trails to that of W Orionis the remarkable ruddy hue of the latter should be very obvious.
The Trapezium Cluster
Cast your eyes towards the stars of Orion on a crisp winter's night and you may — if you're far enough away from the ravages of light pollution — be able to glimpse a fuzzy star at the heart of the Hunter's sword. What you are seeing is in fact not a star but the magnificent Orion Nebula, M42. This enormous, sprawling, mass of dust and gas clouds some 1,350 lightyears from us shines in our night skies due to a cluster of hot, young stars embedded within it, known as the Trapezium Cluster.
These infant stars are thought to have emerged from the nebula roughly one million years ago. Their story began as material in the nebula coalesced together to form dense clumps within the then cold, dark clouds. These clumps grew and grew until nuclear fusion reactions fired up in their cores and the stars within the cluster were 'born'.
As the stars started to shine they began to emit huge amounts of powerful radiation, which streamed out into the gas and dust around them. Slowly a vast cavern — whose sweeping walls glowed brightly due to this onslaught of intense ultraviolet radiation — was sculpted into their maternal nebula too. And that's what we see when we look at the Trapezium Cluster and the beautiful Orion Nebula around it today: an extraordinary tableau of star formation sketched in ethereal celestial light across the winter sky.
Where to find it
The Trapezium Cluster sits within the bright central part of the Orion Nebula, which is itself located within a pattern of stars often referred to as Orion's Sword. The easiest way to find M42 is to scan your telescope south from the central star in Orion's Belt, called Alnilam (Epsilon Orionis), by a little over 4� until you come across the nebula and the embedded cluster.
Practical project
Few celestial objects are as captivating as the Orion Nebula seen from a dark-sky site, but for keen stargazers just starting out in astronomy spying the four most prominent stars of the Trapezium Cluster, within M42, is a rite of passage; so in this project we're going to cover a few additional tips for tracking them down. Assuming you've managed to locate the Orion Nebula in your telescope using our tips above, the first thing to note is that the Trapezium itself is much smaller in angular diameter than you might think — you'll need to use a magnification of at least 75-100x to get a pleasing view of it. As we've already mentioned, the cluster resides in the brightest part of the nebula, but if you need another signpost to it, look for the nearby 'dark' region of nebulosity that 'points' the way to it.
Aldebaran
Compare Aldebaran (Alpha Tauri) to Betelgeuse and you'd be forgiven for thinking that the two are very similar stars — they're alike in color and not very different in brightness. Both are swollen, ageing stars in fact, but Betelgeuse is much more massive. "Aldebaran is only about 1.3 times the mass of the Sun," says Dr Anita Richards. This means that Aldebaran's eventual demise will be very different from Betelgeuse's. Instead of creating a supernova it will slowly shed its outer layers to form a beautiful glowing planetary nebula with a white dwarf at its centre.
Where to find it
At the start of January Aldebaran is high in the south at around 21:45 UT. The V of the Hyades star cluster is a helpful signpost to the star, but if you have trouble finding that use an imaginary line extending northwest from Orion's Belt to point you in the direction of the stars of Taurus, and thus the Hyades.
Sirius
No discussion of the science of the winter stars would be complete without mentioning dazzling Sirius, the alpha star of Canis Major. There's no other star that rivals it in the heavens at this time of year, and it's the brightest star in Earth's night sky full stop. So why does Sirius appear so impressive in our skies? Well, it's a relatively bright star in itself but it's also very close to us too at a distance of 8.6 lightyears. To put that in perspective, brilliant Rigel in nearby Orion is over 100 times farther away!
Where to find it
Though Sirius may be bright, if you're new to astronomy finding which one of the dazzling stars in the winter sky it actually is can still be a challenge. Thankfully there's a little trick you can use. If you can find the much more recognisable Orion's Belt, it actually 'points' in the direction of Sirius, if you follow the line of the belt down from right to left.
The Pleiades
If the Trapezium Cluster in the Orion Nebula is a vision of the birth of stars, then the magnificent Pleiades, or M45, in the constellation of Taurus shows what happens as these glittering collections of stars age and evolve. After open star clusters emerge from their maternal nebulae they drive away the gas and dust around them before slowly scattering into the surrounding Galaxy.
That's precisely what we're seeing when we look at the many members of the Pleiades, which are thought to be 125 million years old — we're looking at a grouping of young stars that are no longer swathed in the dense, often glowing, nebulosity associated with their formation. Over time the stars within the Pleiades will likely disperse further.
In fact it's thought that our very own star, the Sun, may have once belonged to a star cluster like M45. Astronomers believe they've even been able to track down one of the Sun's siblings, a star within the constellation of Hercules known as HD 162826. Its composition and orbital history within the Milky Way matches the Sun's, yet it is now 110 lightyears from us.
Where to find them
The Pleiades sit about 14� to the northwest of the bright star Aldebaran. At the end of January you'll find the cluster high in the southwest sky around 21:15 UT. If you can't spot it with the naked eye try scanning along a line roughly northwest from the Hyades star cluster with a good pair of binoculars.
About The Writer
Will Gater is an astronomy writer and journalist. Visit his website willgater.com and follow him on Twitter at @willgater.
Copyright � Immediate Media. All rights reserved. No part of this article may be reproduced or transmitted in any form or by any means, electronic or mechanical without permission from the publisher.
{ width: 160, height: 160, defaultImage: '', layers: 'Artimg-BBC_messier' }

![]() Orion is proud to partner with BBC Sky at Night Magazine, the UK's biggest selling astronomy periodical, to bring you this article as part of an ongoing series to provide valuable content to our customers. Check back each month for exciting articles from renowned amateur astronomers, practical observing tutorials, and much more!
Orion is proud to partner with BBC Sky at Night Magazine, the UK's biggest selling astronomy periodical, to bring you this article as part of an ongoing series to provide valuable content to our customers. Check back each month for exciting articles from renowned amateur astronomers, practical observing tutorials, and much more!
How a Frenchman's 18th-century list of objects to avoid became the definitive catalog for amateur astronomers
Messier 13 by Laurie A.
For budding and seasoned stargazers in the northern hemisphere, the Messier Catalog is the most famous observing list of astronomical deep-sky objects. Within the 110-strong catalog are examples of every known deep-sky object — a good assortment of galaxies, open and globular star clusters, nebulae and one supernova remnant: the famous Crab Nebula in Taurus, which is also the first object in the catalog. It bears the designation Messier 1, commonly written as M1.
Messier's catalog has become so ingrained into astronomical lore that objects are commonly described by their Messier number. So 'M42' is often used in place of, or in addition to, the name of the object, in this case the Orion Nebula.
The irony of this useful catalog is that it was never intended to be a list of objects for observers to hunt down with their telescopes: rather, it was a list of objects to avoid. This is because Charles Messier, the French astronomer who created the catalog, was a comet hunter, and many comets appear as faint, fuzzy blobs in the sky — just as deep-sky objects do. So he assembled these deep-sky objects into a list of 'red herrings', in order to make sure they could be discounted during his cometary searches. He conducted these in his observatory, a wood and glass structure atop a tower in the medieval H�tel de Cluny in Paris.
Growing Number
The Messier Catalog first arrived on the scene in 1771 as a list of 45 objects. Ten years later it had been expanded to 103, with some of the later observations being undertaken by Messier's assistant Pierre M�chain. The catalog stayed at this size for over 100 years. There were some interesting developments in the 20th century, as astronomers and historians made seven additions to the list. These were not just arbitrary objects, but ones that Messier and M�chain made observing notes about shortly after the final version of the catalog was published. It was only in 1967 when M110, a faint dwarf elliptical galaxy in the constellation of Andromeda, made its way into the catalog as the final officially recognised object.
There are several reasons why Charles Messier's 'list of objects to avoid when looking for comets' has become so readily accepted as targets to seek out with a telescope. One is that it isn't too long: 110 objects makes it a nice, manageable number. So manageable, in fact, that some amateurs like to undertake Messier marathons, where they endeavour to observe all 110 objects in one night.
Another reason is that Messier used a variety of different sized scopes in his comet searches, including a 3.5-inch refractor. The objects in his catalog don't need massively powerful instruments to be seen: they're within reach of small amateur telescopes.
Finally, it's a reasonably comprehensive list, encompassing almost all of the wondrous sights that novice stargazers would wish to see, many of them bright objects.
Of course, the Messier Catalog is not the only list — there are more than 110 objects out in space after all. The New General Catalog (NGC), for example, lists nearly 8,000 objects, followed by an extension known as the Index Catalog (IC) that adds more than 5,000 on top. You'll also find that many objects appear in multiple catalogs: M42, the Orion Nebula, is also designated as NGC 1976. However, the NGC and IC lists are little more than databases of deep-sky objects. They have less appeal for amateur astronomers because many of their entries are too faint to see without a professional telescope.
There is, however, one other list that's worth a mention: Patrick Moore's own compilation, the Caldwell Catalog. This is, in effect, an extension to the Messier Catalog. It includes many more bright, deep-sky objects that are perfect for you to train your telescope on from your back garden.
Top Naked-Eye Messier Objects
M42
RA 05h 35m 17s dec. -05� 23' 28"
The Orion Nebula is a vast cloud of dust and gas — what's known as an emission nebula, and is a star-forming region. It's easy to spot with just your eyes as a misty patch below the three belt stars in the constellation of Orion.
M45
RA 03h 45m 48s dec. +24� 22' 00"
The Pleiades, also known as the Seven Sisters, is an open star cluster in the constellation of Taurus. Depending on your eyesight and how dark the sky is at your location, you'll be able to see between six and 12 stars.
M13
RA 16h 41m 42s dec. +36� 28' 00"
The hundreds of thousands of stars that make up the Great Globular Cluster in Hercules are just visible to the eye from dark locations. It's one-third of the way south of a line between the stars Eta and Zeta Herculis.
M31
RA 00h 42m 42s dec. +41� 16' 00"
The Andromeda Galaxy is without doubt the most distant object visible to the naked eye, being about 2.8 million lightyears away. Find it in the constellation of Andromeda as a faint smudge in very dark, Moonless skies.
Top Small-Scope Messier Objects
M81
RA 09h 55m 33s dec. +69� 03' 55"
Looking at Bode's Galaxy in the constellation of Ursa Major with a 3- to 4-inch scope, you'll see it as the brighter of two fuzzy patches close to each other in the night sky. The second patch is another galaxy, the fainter M82.
M51
RA 13h 30m 00s dec. +47� 16' 00"
The Whirlpool Galaxy in the constellation of Canes Venatici is a face-on spiral galaxy. Small scopes reveal the basic shape and the smaller companion with which it is interacting. Larger instruments reveal more structure.
M3
RA 13h 42m 12s dec. +28� 23' 00"
This globular cluster, also in Canes Venatici, is an easy target for a small telescope - though it can be tricky to locate. It's one of the largest and brightest globulars in the sky; a small scope will reveal great detail and a compact core.
M57
RA 18h 53m 35sdec. +33� 01' 45"
The Ring Nebula in the constellation of Lyra is a shapely planetary nebula, and one of the easiest of its kind to observe. With a 3- to 4-inch scope it's easily seen as a misty but quite defined oval patch.
Copyright � Immediate Media. All rights reserved. No part of this article may be reproduced or transmitted in any form or by any means, electronic or mechanical without permission from the publisher.
{ width: 160, height: 160, defaultImage: '', layers: 'Artimg-BBC_Satellites' }

![]() Orion is proud to partner with BBC Sky at Night Magazine, the UK's biggest selling astronomy periodical, to bring you this article as part of an ongoing series to provide valuable content to our customers. Check back each month for exciting articles from renowned amateur astronomers, practical observing tutorials, and much more!
Orion is proud to partner with BBC Sky at Night Magazine, the UK's biggest selling astronomy periodical, to bring you this article as part of an ongoing series to provide valuable content to our customers. Check back each month for exciting articles from renowned amateur astronomers, practical observing tutorials, and much more!
The Moon isn't the only object orbiting the Earth you can take a look at

International Space Station by Jimmy E.
There are two types of satellite visible in the night sky — natural ones like our Moon and artificial ones that we have placed up in orbit. Of all the artificial ones, the International Space Station, or ISS, is probably the best known. Easy to predict, its constant, often bright passage across the heavens is a sight that instills wonder.
Humankind's orbital outpost typically appears as a dot, which gets brighter as it passes across the sky before fading again. Sometimes the ISS appears bright and then fades abruptly from view. The fading occurs when the ISS's trajectory takes it into Earth's shadow, and as most sightings tend to be in the early evening the disappearance occurs when the ISS has reached the eastern half of the sky. If you're an early riser, Earth's shadow will be to the west. This causes the ISS to instantly 'switch on' as it passes out of the shadow back into full sunlight.
Solar power
It's the interaction of sunlight with the surface of a satellite that makes things interesting. Spacecraft that have large reflective areas can flare in brightness, sometimes quite significantly. The best flares are caused by a group of satellites known as the Iridium constellation: 'constellation' being the collective noun for a group of satellites. When you see one of these spacecraft brighten rapidly, this is what's known as an Iridium flare.
The science behind the flare is unremarkable in that each satellite in the constellation has three large flat, reflective antennas. When the Sun's light happens to hit an antenna at the right angle, it will appear bright when seen from a fairly localised region on Earth's surface. What is remarkable, however, is the fact that there are ways to predict, with down-to-the-second accuracy, when a flare can be seen from your location. And we're not talking faint, indistinct flaring here: some Iridium flares can increase the apparent brightness of the satellite's dot from that of a dim star to something brighter than Venus.
The brightest flares tend to be around mag. -8.0, brilliant enough to easily illuminate any thin clouds that may get in the way. In theory, such a bright pass could even cast shadows — not that anyone ever looks behind them when a flare occurs! Not all Iridium flares will reach this brightness, of course; the flare may not be optimal and you may be located away from the position on Earth where the brightness of the flare peaks.
Other satellites can also show flare activity and it soon becomes obvious, especially to meteor imagers, that flaring spacecraft occur all the time. A flaring satellite that reaches peak brightness and is then rudely truncated by the camera shutter closing will look very similar to what you'd expect to see from a bright meteor trail.
It's possible to tell the difference by looking carefully at the brightest end of the trail. If the trail looks perfectly smooth and is cut off squarely at the brightest end, then it's either a rare meteor trail interrupted in its prime or — much more likely — a flaring satellite trail that wasn't allowed to complete its display before the camera shutter closed. Iridium flares also tend to record as white trails, while meteor trails often exhibit a pink start changing to green — an effect caused by the excitation of atoms in our atmosphere.
There are over 1,000 operational satellites orbiting Earth and an estimated 21,000 objects larger than 10cm. If you widen the net and include objects down to 1cm in size, the count moves beyond half a million. In fact, on any clear, moonless night, it would be unusual not to see an artificial satellite passing through the constellations, appearing as a moving dot among the stars.
Predicting a pass
There are many different ways to predict satellite passes — some more reliable than others.
Heavens Above
One of the most popular and respected methods is to use the website Heavens Above (www.heavens-above.com). You can create a free account that logs your location and generates visibility predictions for many different satellites. Sky charts accompany visible passes, and clicking on the date of the pass will typically bring up an all-sky chart showing the passage of the satellite among the stars. So long as you have a basic knowledge of the constellations then the track, adjusted for your location, should be pretty easy to identify. As an added bonus, if you don't know the stars that well, then this is a good way to have some fun while learning the night sky.
Other Prediction Sites and Apps
For the slightly more technically minded, there are many excellent programs available to download such as WXTrack (www.satsignal.eu/software/wxtrack.htm), which is able to predict the passage of many satellites directly from a Windows PC. Apps for other operating systems, including smartphones are also available; many are listed in a 'satellite tracking software index' at celestrak.com/software/satellite/sat-trak.asp. Some of these programs are commercial, requiring you to purchase a licence to use them, but there are plenty of freeware options available too.
Ensuring Accuracy
One problem with computer predictions is reliability. This could be down to problems with the program itself, or that you haven't set your location, date or time properly. And if satellite data isn't updated regularly, this too may affect accuracy. If doubts start to creep in, compare the predictions for an easy to identify satellite, such as the ISS, with Heavens Above. If they don't match, update the software's satellite data, and your time and location details, before trying another program.
Copyright � Immediate Media. All rights reserved. No part of this article may be reproduced or transmitted in any form or by any means, electronic or mechanical without permission from the publisher.
{ width: 160, height: 160, defaultImage: '', layers: 'Artimg-BBC_LunarEclipse' }

Orion is proud to partner with BBC Sky at Night Magazine, the UK's biggest selling astronomy periodical, to bring you this article as part of an ongoing series to provide valuable content to our customers. Check back each month for exciting articles from renowned amateur astronomers, practical observing tutorials, and much more!
When most people think of an eclipse, they think of totality, the apex of a total solar eclipse, where the Sun, Moon and Earth are in perfect alignment and the Moon completely covers the Sun. Even here, the Sun's light doesn't completely disappear. With the central brightness gone, it's possible to see the beautiful arcing curves of the Sun's corona, while Earth is plunged into a false twilight.
Totality can only be seen along a narrow corridor, known as the path of totality. Observers situated away from this track will see a partial eclipse of varying magnitude, depending on their distance from it. Some parts of the Earth are so far from the track that they won't see an eclipse at all.
That total solar eclipses can happen at all is the result of a fantastic cosmic coincidence — the Moon is both 400 times smaller than the Sun and 400 times closer to us, meaning they appear to be the same size in the sky — most of the time.
The Moon's orbit around the Earth is not a perfect circle, which causes the Moon's apparent size to change over the course of each month by 14 per cent. When the Moon appears smallest it no longer fills the Sun's disc. When eclipses happen during this time, they are annular instead of total: a thin ring of solar disc remains visible around the edge of the Moon's silhouette, and this can be just as beautiful as totality. There are also extremely rare hybrid eclipses, which transition from total to annular mid event.
We know solar eclipses occur when the Sun, Moon and Earth line up in the sky. Why then don't we see eclipses every month at new Moon? It's because the Moon's orbit is inclined by 5.3� to the ecliptic, the plane in which Earth orbits the Sun. That means that even if the Earth, Moon and Sun are aligned in a straight line as seen from above (known as a 'syzygy'), the Moon may be too high above or too low below the orbital plane to block the Sun's light.
While every eclipse is partial somewhere on the planet, there are some during which the darkest part of the Moon's shadow misses the Earth, meaning there is no totality anywhere on the planet. This happened on 23 October 2014, when there was a partial eclipse that could be seen from North America — but in order to see totality you would have had to have been several hundred kilometers above the North Pole.
Lunar eclipses, where the Moon passes into Earth's shadow, are much more relaxed affairs than their solar counterparts, typically lasting for over an hour rather than a matter of minutes.
Because the Sun is much bigger than Earth, it splits our planet's shadow into two parts: the darkest, called the umbra, and a lighter outer ring, called the penumbra. The intensity of a lunar eclipse depends on how much of the Moon passes into the Earth's shadow, and which part of the shadow it passes through.
In a total lunar eclipse, the entire Moon passes through the penumbra and into the umbra, gradually darkening until it is completely covered, a point known as totality. During totality no sunlight shines directly on the Moon, but some is refracted onto it via Earth's atmosphere. As our atmosphere filters out blue light, the Moon often gains a strange orange-brown color.
As the Moon goes into eclipse and dims, the sky gets darker too. You may not have realized how bright a full Moon can be. It lights up the sky around it with a blue haze, out of which only the brighter stars are visible. During a total lunar eclipse, the darker Moon means that the fainter stars can come out and we end up with the eerie sight of a deep-red Moon surrounded by twinkling stars.
The darkness of the Moon gets during a total lunar eclipse is described by the Danjon Scale, which runs from L0 through to L4. As the Moon is only lit by light that has passed through Earth's atmosphere, its precise color and darkness will depend on how much dust, volcanic ash and water vapor is in the atmosphere to affect the sunlight's path. The eclipse in 1884, after the huge volcanic eruption of Krakatoa, was so dark that the Moon could only just be made out, such was the amount of dust in the atmosphere.
There are two other types of lunar eclipse: partial, where only a portion of the Moon passes through Earth's dark umbral shadow, and penumbral, where part of the Moon only passes through the lighter, outer shadow. Partial eclipses can be quite noticeable, but penumbral eclipses often only cause a slight dimming.
Lunar eclipses can be observed without optical aids. For solar eclipses, you always need to use equipment with certified filters, or project the event onto a piece of card. The one exception is during the brief window of totality during a total solar eclipse. This is the only time it is safe to look directly at the Sun. The simple rule is: if you're not absolutely sure about safety, don't do it.
The Phases of a Solar Eclipse
First Contact
The point at which the Moon first touches the solar disc, marking the beginning of the eclipse.
Second Contact
The moment the Moon is fully within the solar disc, marking the start of annularity or totality. Partial eclipses do not have second or third contacts.
Greatest Eclipse
The point of totality or annularity.
Third Contact
The instant the lunar disc touches the other side of the solar disc, ending totality/annularity and marking the start of egress.
Fourth Contact
The point when the edge of the Moon's trailing edge breaks contact with the solar disc, ending the eclipse.
Copyright © Immediate Media. All rights reserved. No part of this article may be reproduced or transmitted in any form or by any means, electronic or mechanical without permission from the publisher.
{ width: 160, height: 160, defaultImage: '', layers: 'Artimg-BBC_Jup_Sat_Moons' }

![]() Orion is proud to partner with BBC Sky at Night Magazine, the UK's biggest selling astronomy periodical, to bring you this article as part of an ongoing series to provide valuable content to our customers. Check back each month for exciting articles from renowned amateur astronomers, practical observing tutorials, and much more!
Orion is proud to partner with BBC Sky at Night Magazine, the UK's biggest selling astronomy periodical, to bring you this article as part of an ongoing series to provide valuable content to our customers. Check back each month for exciting articles from renowned amateur astronomers, practical observing tutorials, and much more!
The two huge gas giants are home to a staggering number of natural satellites
Jupiter's Moon callisto Cast Shadow Onto Jupiter's Cloud Top by Kim Mitchell
Jupiter is grandiose in all respects. Not only is it the largest of the planets — it would take 1,321 Earths to fill the volume of Jupiter — it's also more than likely that it keeps the largest entourage of moons. There are 67 that we know of, and though many of these are fairly small and can't be observed from Earth, the biggest four are easy to spot with just a small pair of binoculars.
These are Io, Europa, Ganymede and Callisto: the Galilean moons, so named because they were spotted by Galileo in the early 17th century.
A minimum size pair for spotting these four moons would be 7x50s, which magnify what your eyes see seven times and have front lenses that are 50mm in diameter. Your view will be much improved by resting the binoculars on a wall or fence, or even attaching them to a tripod with an inexpensive bracket. Through a 3- to 6-inch telescope the moons will appear brighter and fill more of the field of view. Don't worry if you don't see all four: as the moons travel around the planet they may be behind or in front of Jupiter when you're looking.
It's by using a larger scope with a front lens over 6 inches that you start to see detail on the planet itself, and this includes the occasional shadow cast by the Galilean moons.
Moon with a View
Fellow gas giant Saturn has 62 known moons, but only seven are visible. Due to its sheer size, the easiest of Saturn's satellites to see is Titan. This moon has a diameter of 5,150km, which makes it bigger than the planet Mercury. In the moon rankings, it's the second largest in the Solar System, only beaten by Jupiter's Ganymede. It's also the only moon with a substantial atmosphere. When you're gazing at it through your scope, you're not actually looking at Titan's surface but at its nitrogen-rich cloud tops. In terms of brightness, Titan can reach mag. +8.4, putting it well within the reach of binoculars, while with a small telescope you'll have no trouble seeing it.
The remaining six moons are all within the grasp of a 6-inch scope. In order of brightness, after Titan comes Rhea, which shines at mag. +9.7, Tethys at mag. +10.3, Dione at mag. +10.4, Enceladus at mag. +11.8 and then quirky Iapetus.
The unusual nature of this last moon quickly became apparent to its discoverer in 1671, the Italian astronomer Giovanni Cassini. He first saw the moon on the western side of Saturn but found it missing on a later search, when it should have been on the eastern side.
It wasn't until 34 years later, when telescopes had improved, that Cassini finally saw Iapetus to the east, because when it's here it's almost two magnitudes fainter. This is why it had been impossible to see it before. Cassini deduced, correctly, that this was because the moon has one very bright hemisphere and one very dark one, and is also tidally locked to Saturn.
This means, like our Moon, it always shows the same face to its planet. It follows that we see a different part of Iapetus from our Earthly viewpoint when it is to the east or west of Saturn. As a result, Iapetus varies between mag. +10.1 and mag. +11.9. However, the faintness trophy goes to Mimas, which at mag. +12.9, needs perfect viewing conditions without any light pollution to see comfortably.
Jupiter's famous Galilean moons
IO
Diameter: 3,640 km
The tremendous gravitational pull of Jupiter on this innermost of the four Galilean moons, together with its closeness to the planet, means Io whizzes round Jupiter in just 1.75 Earth days. This fast orbital speed is easily seen in a small telescope: it visibly shifts position in just a few hours.
Europa
Diameter: 3,140km
The second Galilean moon out from Jupiter, Europa should theoretically be visible with the naked eye as it shines at mag. +5.3. But Jupiter's overwhelming brightness means it's difficult to separate moon from planet. Europa's brightness is due to its smooth, icy surface, with perhaps an ocean underneath.
Ganymede
Diameter: 5,260 km
The third major moon out from the planet is not only Jupiter's biggest, it's also the largest moon in the entire Solar System — but only by a whisker. This is a world with a cold ice surface, a large warm ice (possibly water) mantle, a rocky interior and a liquid iron core.
Callisto
Diameter: 4,820 km
The last of the four giant Galilean satellites is Callisto. It is the third largest moon in the Solar System, after Titan, the biggest of Saturn's moons. Callisto's entire icy, ancient surface is covered with impact craters that date right back to the time of the early Solar System.
Saturn's best moons to observe
Titan
Diameter: 5,152 km
The largest of Saturn's moons has a 16-day orbit. At its farthest, you'll find it about five of Saturn's ring diameters from the planet, mag. +8.4 at its brightest, which makes it visible in good binoculars. Titan makes up over 96 per cent of the mass of everything orbiting the planet.
Rhea
Diameter: 1,528 km
The second largest moon of Saturn, ninth largest in the Solar System, and currently the 20th catalogued in distance out from the planet. It makes an orbit in 4.5 days, reaching just under two ring diameters from Saturn. It is mag. +9.7, making Rhea an easy target for a 3-inch refractor telescope.
Iapetus
Diameter: 1,469 km
This is the third largest and most distant of the main moons of Saturn. Its 79-day orbit, which is the most inclined of the inner satellites, takes it out to 12 ring diameters from the planet. The visual magnitude ranges from +10.1 to +11.9, so Iapetus needs about a 6-inch scope to see it at its darkest.
Dione
Diameter: 1,123 km
This moon orbits up to 1.5 ring diameters from Saturn over 2.7 days. Its visual magnitude of +10.4 makes it visible on dark nights with a 3-inch refractor. This is the densest of the moons, meaning it may have a large rocky core. Helene and Polydeuces, two smaller moons, share its orbit.
Tethys
Diameter: 1,060 km
This moon orbits about one ring diameter away from the planet and takes 1.9 days to do so. It has a magnitude of +10.3 and so can be seen in a 3-inch refractor. Tethys has a great canyon that stretches three-quarters of the way round the moon, and two co-orbital moons, Telesto and Calypso.
Copyright � Immediate Media. All rights reserved. No part of this article may be reproduced or transmitted in any form or by any means, electronic or mechanical without permission from the publisher.
{ width: 160, height: 160, defaultImage: '', layers: 'Artimg-BBC_SeeingTransparency' }

![]() Orion is proud to partner with BBC Sky at Night Magazine, the UK's biggest selling astronomy periodical, to bring you this article as part of an ongoing series to provide valuable content to our customers. Check back each month for exciting articles from renowned amateur astronomers, practical observing tutorials, and much more!
Orion is proud to partner with BBC Sky at Night Magazine, the UK's biggest selling astronomy periodical, to bring you this article as part of an ongoing series to provide valuable content to our customers. Check back each month for exciting articles from renowned amateur astronomers, practical observing tutorials, and much more!
The movement of the atmosphere can affect your ability to observe stars and planets to a surprising extent
The weather is generally considered to be the biggest hindrance to astronomy. What's the betting that the night you decide to head out for the night that spell of fine weather changes for the worse? So you'd have thought that when the skies finally clear, your problems would be over. Surprisingly, though, even a clear night may not be the best time to go out and observe.
The issue is the 'seeing'. In astronomy, this doesn't mean how you look at something. It's a term that describes how much the view you see through your telescope is disturbed by what's going on in the atmosphere above you.
At times of good seeing, you'll get sharp, steady views through your telescope. But bad seeing produces turbulent, unstable telescope views of the Moon and shuddering, shaky images of stars. On the other hand, deep-sky objects like galaxies and nebulae aren't as badly affected by bad seeing.
This is thanks to the layers of moving air between you and the object you're looking at, the effects of which are magnified by your telescope. In the atmosphere, air at different temperatures is always moving around and mixing together. Light travels through hot and cold air at different speeds, so it is continually bent this way and that before it finally arrives at your telescope all shaken and stirred.
Sometimes there are very few moments of clarity. One of the best ways to see this distortion is to watch the Sun setting on a clear horizon. It will have a jagged appearance, thanks to the sunlight moving through layers of turbulent air.
The other factor that affects observing conditions is the transparency of the night — just how clear the sky is. After it's been raining, the sky is transparent because the rain clears away particles of dust and smog from the air. However, when it's been raining it also tends to be windy, which means that the seeing is bad. You'll notice that the stars are twinkling because of this. Transparent conditions are, however, good for large, faint objects like nebulae and galaxies, which really benefit from the better contrast. Poor transparency generally means the air is steady with good seeing, but dust and particles are sitting in the still atmosphere. These conditions are good for looking at the Moon and stars.
A good way to think of seeing and transparency is to imagine a swimming pool with a coin resting on the bottom. The water represents our atmosphere and the coin the starry object you're looking at. Through completely still water with no currents, the coin looks still, crisp and clear. In this case the seeing is perfect and so is the transparency. If the water is made to move — causing ripples — the coin's image will shake around; the transparency is still good but the seeing is bad. And if some milk is spilt in the pool so you can't see the coin very clearly, the transparency will be reduced.
It goes to show that you're at the mercy of the atmosphere ... and that moments of clarity are a wonderful thing.
Clear and present
You can't do anything about 'high-level seeing' — the air currents far above you — but you can influence the 'low-level seeing' to create steadier air conditions immediately around you and your scope. Here's how:
1. Leave your scope outside to cool to the ambient temperature, eliminating any air currents in the tube.
2. Observe on grass rather than concrete. Concrete absorbs more heat from the Sun and radiates it out to the air above it for longer.
3. Air currents tend to stay low to the ground, so it can be a good idea to raise up your scope on a platform.
4. If you build an observatory, make it using thin materials such as wood that can cool quickly.
5. The geography of your observing site affects how air behaves. Being near the sea gives you calmer air than if you're near a range of hills, where air is forced upwards, causing turbulence.
Using the Antoniadi Scale
It's very useful to note down what the seeing is when you're observing. Many astronomers use the Antoniadi scale as a measure of what the atmosphere is up to. It's a five-point scale using Roman numerals. I indicates the best conditions, while V describes the worst.
I. Perfect seeing, without any quiver of turbulence whatsoever.
II. Slight shimmers; moments of stillness last several seconds.
III. Average seeing; larger air tremors blur the view.
IV. Poor views, with constant troublesome undulations of the image.
V. Bad views with severe undulations; so unstable that even quick sketches are out of the question.
Copyright � Immediate Media. All rights reserved. No part of this article may be reproduced or transmitted in any form or by any means, electronic or mechanical without permission from the publisher.
{ width: 160, height: 160, defaultImage: '', layers: 'Artimg-BBC_Myth' }

![]() Orion is proud to partner with BBC Sky at Night Magazine, the UK's biggest selling astronomy periodical, to bring you this article as part of an ongoing series to provide valuable content to our customers. Check back each month for exciting articles from renowned amateur astronomers, practical observing tutorials, and much more!
Orion is proud to partner with BBC Sky at Night Magazine, the UK's biggest selling astronomy periodical, to bring you this article as part of an ongoing series to provide valuable content to our customers. Check back each month for exciting articles from renowned amateur astronomers, practical observing tutorials, and much more!
Eight of the biggest astronomical myths, collected and comprehensively busted to help you become an expert in no time at all

Meteor (Perseid's) and M45 (Pleides) by Mark Bell
The Moon can't be seen in the daytime
There's a common conception that just as the Sun can only be seen in daylight hours, the Moon only comes out at night. But Earth's rotation means that the Moon must be above the horizon for 12 hours out of every 24, regardless of the length of the night. As such, the Moon is often somewhere in the daylit sky. Whether we see it is down to two things — its altitude in the sky and its phase.
Polaris is the brightest star in the sky
Polaris is certainly among the most famous, being the star closest to the north celestial pole, but this usefulness does not make it the brightest in the sky. Spend an evening outside and it will become obvious that this honor falls to Sirius, in the constellation of Canis Major.
Stars twinkle
'Twinkle, twinkle, little star' has a lot to answer for. Stars often appear to flicker in the night sky, but this has nothing to do with the star and everything to do with our turbulent atmosphere. Once it reaches Earth, starlight is reflected, bent and contorted by this turbulence, until it reaches your eye. Viewed from space, stars would not twinkle at all.
Earth's distance from the sun causes the seasons
Not so — Earth is actually closest to the Sun during the northern hemisphere's winter. The real reason is due to Earth's 23.5-degree axial tilt, which means each hemisphere gets varying durations of sunlight over the year.
Polaris has always been the pole star
Polaris' position next to the north celestial pole is a temporary one, a result of Earth wobbling on its axis as it spins. The change is about 1 degree every 72 years, with a full cycle taking around 26,000 years. In 3,000 BC the pole star was Thuban in Draco, but in 2,000 years time it will be Errai in Cepheus.
Shooting stars are really stars
If you have ever wished upon a star, you may be shocked to learn it wasn't a star at all. What you saw was the bright flare of a piece of debris, likely to be no bigger than a grain of sand, burning up in our atmosphere. They are properly known as meteors. If a fragment makes it to Earth's surface, it is called a meteorite.
The point of a telescope is to magnify celestial objects
While telescopes can make the denizens of the night sky appear bigger, this isn't their primary purpose. Their main function is to gather light, using a lens or mirror depending on the design, so that we can see objects too dim to view with the naked eye.
The Moon has a dark side
The phrase 'dark side of the Moon' is often and erroneously used to refer to the Moon's far side, which means something subtly different. The far side is the hemisphere of the Moon permanently turned away from Earth, but calling it the dark side implies it never sees any sunlight — which is not the case. The lunar far side goes through the same cycle of phases as we see on the near side from Earth, with the only period it can technically be called the dark side being the time of full Moon.
Copyright � Immediate Media. All rights reserved. No part of this article may be reproduced or transmitted in any form or by any means, electronic or mechanical without permission from the publisher.
{ width: 160, height: 160, defaultImage: '', layers: 'Artimg-BBC_StargazingSkillls' }

![]() Orion is proud to partner with BBC Sky at Night Magazine, the UK's biggest selling astronomy periodical, to bring you this article as part of an ongoing series to provide valuable content to our customers. Check back each month for exciting articles from renowned amateur astronomers, practical observing tutorials, and much more!
Orion is proud to partner with BBC Sky at Night Magazine, the UK's biggest selling astronomy periodical, to bring you this article as part of an ongoing series to provide valuable content to our customers. Check back each month for exciting articles from renowned amateur astronomers, practical observing tutorials, and much more!
Is your son or daughter the next Patrick Moore? We look at ways you can encourage the astronomers of the future!

Winners of the 2015 SCAS Striking Sparks program pose with their Orion XT6 Classic Dobsonian telescope awards alongside proud sponsors, teachers and parents.
Ever since I can remember I have loved astronomy. As a boy of seven I used to gaze out of the window at the stars, curious about their names and the patterns that make the constellations. I learned much by myself, but it wasn't until I started at secondary school that, through some friends, I was introduced to our local astronomical society.
If, as a child, you had particularly encouraging parents who already knew something about the subject or were curious enough to learn with you, you were off to a good start. Joining an astronomical society is the perfect next step in the stargazing journey. These clubs offer friendship and experience — not to mention access to telescopes — and could even provide the spark that leads to a career in astronomy.
Summer Stargazing
Many societies take a break in August, but that's not because there's no astronomy to be done. In fact, for kids especially, this time of year has quite a number of benefits for stargazing. Though it doesn't get dark until fairly late there's no school to worry about, so a couple of late bedtimes on clear, starry nights hopefully won't be too much of a problem. Plus, the nights are usually considerably warmer at this time of year, so even though you still have to wrap up, you don't need to suffer the coldness associated with winter stargazing.
You don't need a telescope either: many fine deep-sky objects, such as globular cluster M13 in Hercules or the Coathanger asterism in Vulpecula, can be seen with a good pair of binoculars.
On that note, though, one thing that has massively improved since my early stargazing days is technology. One great tool is the video telescope eyepiece. This is linked to a screen to give live feeds of what the telescope is seeing &mash; particularly handy if you're out stargazing with several children and would rather not have them come to the eyepiece single file.
If you're thinking of running a star party for your kids, make sure you have a back-up plan in case the weather takes a turn for the worse. A space quiz with some chocolate prizes goes down a storm!
Wow-Factor Sights
The Milky Way
Equipment: Naked eye.
Where it is: Visible from summer through Christmas, running across the sky from the south to southwestern horizon.
What you'll see: A misty meandering river of light — it's made up of the combined light from millions of stars. For the best views, head out to a countryside location.
Fun fact for kids: This is just the visible section of our Galaxy, which contains between 200 and 400 billion stars in total.
The Pleiades
Equipment: Naked eye or binoculars.
Where it is: In the constellation of Taurus, the Bull.
What you'll see: This open cluster is known as the Seven Sisters, which is roughly the number of stars you can see with the naked eye. It's also a lovely sight in binoculars, which will reveal several dozen more stars.
Fun fact for kids: This family of several hundred stars sits about 400 lightyears from Earth.
The Moon
Equipment: Binoculars or telescope.
Where it is: Varies, but close to the ecliptic.
What you'll see: Head outside when the Moon is in a crescent or gibbous phase to see craters, mountains, valleys, escarpments, rilles and more. Steer clear of the time around full Moon - there are too few shadows to reveal the incredible surface detail on our satellite.
Fun fact for kids: The surface of the Moon covers roughly the same area as Africa.
Great Events for Kids
Be Galileo (or Einstein, or whoever!)
Instead of just having a general talk on, say, Galileo, why not ask around the club for someone with thespian tendencies? They could dress up and play the famous Italian astronomer, describing his own inventions and discoveries. It's a simple way to liven up the subject for young minds and you could have a lot of fun, too.
Treasure hunts
One meeting could be created as a themed 'mission', with stations around the society's hut or field containing challenges that need to be solved to complete the mission. By doing so, the younger members of the club would get to understand some aspect of astronomy. Each station could hold riddles, puzzles or simple questions.
Space writing, poetry or drawing competition
You don't need to narrow this one down, just allow minds to run wild! The competition could be inspired by a talk, such as the 'Be Galileo' event. You could also open it up to local schools, in which case the local newspaper might be interested. Put up a small telescope as a prize and the publicity could bring in some new faces to your club.
Copyright � Immediate Media. All rights reserved. No part of this article may be reproduced or transmitted in any form or by any means, electronic or mechanical without permission from the publisher.
{ width: 160, height: 160, defaultImage: '', layers: 'Artimg-BBC_IntroducingMoon' }

![]() Orion is proud to partner with BBC Sky at Night Magazine, the UK's biggest selling astronomy periodical, to bring you this article as part of an ongoing series to provide valuable content to our customers. Check back each month for exciting articles from renowned amateur astronomers, practical observing tutorials, and much more!
Orion is proud to partner with BBC Sky at Night Magazine, the UK's biggest selling astronomy periodical, to bring you this article as part of an ongoing series to provide valuable content to our customers. Check back each month for exciting articles from renowned amateur astronomers, practical observing tutorials, and much more!
The Moon was made way back when a large chunk of cheddar the size of Mars hit Earth. True? No! Hold on to your Double Gloucester as this myth, and others, are about to be disproved!
Sea of Serenity by Craig Heaton
To state a fact: the Moon is always around somewhere in the sky at some time or other. It sounds obvious, but this concept is wrapped up in urban myth and provoked a great discussion among planetarium presenters recently. The myth in question has two parts, both of which are entirely wrong: firstly, the Moon comes out at night; and secondly, it's invisible during the day. No names will be mentioned here to protect the guilty, but I was told by a science teacher just the other day (which makes the following even worse to absorb), that the myth is taught in a particular primary school because the pupils would be uncomfortable with the truth. I'd suggest that maybe the wrong teacher is in charge of science.
Myth-Busting
Understanding the Moon's orbit around Earth and the corresponding way it is lit by the Sun, which leads to its phases, is not easy. However, with a bit of patience it is possible to appreciate why the Moon can be visible during the day and does not only 'come out' when it's dark at night.
The question really should be: why don't we notice the Moon during the day? The simple answer is that the sky is brighter during the day than at night, so the Moon is not as prominent. There are lots of other reasons why, such as the fact that evenings are the part of the day when we generally have more time to gaze at the sky, whereas we're all busy rushing around during the day.
So, yesterday, after one such busy day at work I took the time as night approached to do some stargazing and watched the full Moon rise over the trees in the field in front of our house. To the naked eye, this is when the Moon is most magnificent: a low, golden-tinged globe slowly being carried into the sky by the rotating Earth. It's when the Moon is low that it's possible to notice this movement the most and, if you have time, it's worth noting where it is an hour later — you may be surprised how far it has moved.
A couple of other things that are deserving of special attention are the Moon's color and its movement across the sky as it orbits Earth.
The Moon moves at a blistering Mach 3, which is three times the speed of sound at sea level. The stronger goldish-to-reddish color of the rising Moon, as opposed to the grey-white view when it's higher, is explained by the fact that when it's low to the horizon, light from the Moon gets filtered through Earth's atmosphere. All the particles that make this up scatter the blue light, which leaves mostly red light to reach us when we're watching the spectacle on the ground.
A Moving Moon
As for the Moon's own travels, try and find a star very close to its left side. An hour later the Moon will have passed over the star, which should now be sitting to the Moon's right. The Moon may not completely cover the star, sometimes the star will just graze its top or bottom. You'll have more success seeing this if the Moon is not full, as its light washes out most nearby stars.
The passing of the Moon in front of the star or planet, blocking it, is known as an occultation and these are listed in the handbook of the British Astronomical Association. If you've never seen a star being blinked out by the Moon, then you have an assignment — go out and see one! Even better is a planet: Venus or Saturn are my favorites. Saturn is especially good: with a scope you can watch as the rings are slowly covered by the Moon, dipping in and out of the lunar valleys before finally disappearing.
Earthshine
The Sun is the main object that lights the Moon, but Earth also has an effect. Our planet is over 3.5 times the diameter of the Moon, so we reflect more light onto its surface than the Moon gives us when it is full. This is called earthshine and it can be seen as a faint glow on the unlit part of the Moon when it is a thin crescent (before and after a new Moon).
Phases of the Moon
The word Moon is responsible for our word 'month': one mooneth (or thereabouts) was the measurement of the time it took for the Moon to complete one orbit of the Earth in relation to the Sun. Although it's given in schools as 28 days, the Moon's changing appearance (it's cycle of phases) takes just over 29.5 days. This is known as the Synodic Month. It represents the period from one full Moon to the next (or any other identical phase, for example half Moon to half Moon).
The Sun is always shining on one half of the Moon — how much of the lighted side we see depends on where the Moon is in orbit around Earth. The new Moon happens when the Moon sits between us and the Sun, and so the far side is lit (this is also the only time a solar eclipse can occur).
As the Moon moves around Earth and each day passes, we see more and more of its lighted side, a waxing (growing) evening crescent first, then half Moon, waxing gibbous and finally full Moon. At this point, the Moon sits on completely the opposite side of the sky to the Sun. Now everything reverses and the waning (shrinking) phases go through gibbous, half and waning morning crescent, finally back to new.
Observing the Moon
The Moon: it's big, round and bright. Anyone can discover its finer details, whether it's with the naked eye or binoculars.
Some astronomers seem to get a complex about the Moon. It's not that they're affected by it in werewolfish ways, but rather they develop a loathing for our large, rocky satellite. Why? Well, these usually friendly astronomers come to see it as a natural light polluter, washing away all the faint, small and fuzzy galaxies and nebulae they like to view. To them, the Moon is more of a nuisance than an object that's worthy of observing.
This is a real shame as the Moon has so much to offer. There's simply no truth in the assertion that when 'you've seen it once, you've seen it all' — with binoculars and small telescopes the appearance of the Moon can change dramatically from one hour to the next. Another reason it's so good is that it's easy to find. There's no star-hopping or fiddling with finderscopes, as the Moon quite plainly hangs about just waiting for you to look at it.
Magnify the view
The Moon is a stunning object to look at, but there are times when binoculars or a telescope are the only things that'll do it justice: for example, the first few days after new Moon through to just before full Moon. During this period, when the Moon is waxing, we see a sunlit, happy side and a contrasting unlit, spooky side.
The views of the bright side give us the names of the phases: crescent, half, gibbous and full. After full Moon the phases reverse as it starts waning; these are equally worth a look. However, the post-full phases are generally seen very late in the night, when most people prefer to sleep.
The zone between the light and dark sections of the Moon is known as the 'terminator', and this is the place to concentrate on for the most stunning lunar views. It's along the waxing Moon's terminator that, if you were standing on the lunar surface, the Sun would be rising. The low light hits its mountains, craters, valleys, crinkly ridges, rilles, escarpments and all manner of other volcanic and impact features, casting dramatic shadows across the stark landscape. The view is further enhanced by largely flat, dark areas of solidified lava known as the lunar seas, over which shadows can stretch for tens of kilometres. All of this gradually changes as the Moon spins on its axis, but even at this slow rate you will be able to see hour-by-hour movement.
That the Moon spins on its axis may seem strange, as we know the same side always faces Earth. We are actually able to see 59 per cent of its surface as the Moon 'wobbles' up and down and from left to right, an effect known as libration.
We only see the one face because a long time ago the molten material inside the Moon caused it to become tidally locked to Earth. This 'synchronous rotation' means that the Moon spins once on its axis in exactly the same time it takes to orbit Earth. You can get an idea of how this works if you imagine yourself observing from the Sun. Over the course of a month you would see the Moon spin once.
Of course, leaving Earth takes a bit of mastering, but once you can imagine it, understanding the Universe becomes a breeze.
Latin Lingo
When you look at a map of the Moon, you'll notice that its physical features all have Latin names because they were named a long time ago when Latin was more widely used. Here's what those names mean in modern English.
| Catena | Chain of craters |
| Dorsum | Mare ridge |
| Dorsa | Group of mare ridges |
| Lacus | Lake |
| Mare | Seas |
| Mons | Mountain range |
| Montes | Mountain range |
| Oceanus | Ocean |
| Palus | Marsh |
| Promontorium | Cape |
| Rima | Fissure |
| Rimae | Group of fissures |
| Rupes | Escarpment |
| Sinus | Bay |
| Terra | Landmass |
| Terrae | Highlands |
| Vallis | Valleys |
Lunar Atlases
There are many atlases and wall charts vying to help you find the various craters, mountains and features of the Moon. They have their strengths and weaknesses, and you'll find some easier to use than others.
Watch out for any that flip the Moon so that south becomes north, or make any other change to orientation. These are fine for seasoned astronomers who use a specific telescope setup to observe the Moon, but for those of us who switch between correcting lenses, terrestrial telescopes, binoculars and the like, go for a plain and simple map with north at the top. It's also an advantage to have one with high-quality pictures.
Wall charts are also good for getting a general idea of where things are on the Moon. However, they're less use at the eyepiece unless they're safely wrapped up in a dew-proof coating, so it's worth getting a laminated version.
Experiencing Eclipses
Why do eclipses occur so infrequently? It all has to do with the Moon's tilted orbit.
Over the course of a year the Sun moves across the sky on a path known as the ecliptic. It rises in the east and sets in the west, in essence appearing like it travels around Earth.
If the Moon orbited Earth in this same plane, then each month we would get an eclipse of the Sun (when the Moon passes between the Sun and Earth) and an eclipse of the Moon (when the Earth is between the Sun and the Moon). We don't, however, as the Moon's orbit is tilted at an average of 5� from the ecliptic.
Most months this means that from our point of view on Earth, the Moon moves above or below the Sun at new Moon, and above or below Earth's shadow at full Moon. We only get an eclipse when the Moon's orbit intersects the ecliptic and all three bodies are in the correct alignment.
Due to a fantastic coincidence, the Sun is 400 times bigger than the Moon, but around 400 times further away. This means that they appear to be the same size. The Moon just covers the Sun during a total solar eclipse, allowing us to witness its ghostly outer atmosphere, known as the corona.
Top Ten Moon Sights
Our celestial neighbour has enough to keep astronomers busy for a lifetime, but here are 10 highlights for telescopes and binoculars.
Crater Grimaldi
Size: 173km across
Type: Basin
Appearance: Visible even to the naked eye, this dark basin reveals fantastic detail through binoculars and telescopes, such as eroded walls, ridges and low hills.
Rimae Sirsalis
Size: 425km long
Type: Rille system
Appearance: This series of fault lines is visible even in a small telescope, which will reveal Sirsalis's main crack running straight for over 300km through a cratered environment.
Crater Copernicus
Size: 94km across
Type: Impact crater
Appearance: One of the Moon's recognizable features and the result of quite a recent impact, a scope reveals terraced crater walls and central peaks rising from the floor below.
Vallis Alpes
Size: 155km long
Type: Valley and rille
Appearance: A clean gouge through a mountainous region, the 18km-wide fault line can be easily visible in small scope and binoculars as a dark stripe in a lighter landscape.
Crater Plato
Size: 109km across
Type: Lava-filled impact crater
Appearance: In binoculars and small telescopes the beauty of this crater is its jagged rim with 2km high mountains compared to its smooth lava-filled floor.
Montes Alpes
Size: 3.4km maximum height
Type: Mountain range
Appearance: Through binoculars you will just be able to make out this rangle of peaks; with a telescope they start to reveal really good detail, especially if the terminator is close by.
Montes Teneriffe
Size: 2.5km maximum height
Type: Mountain range
Appearance: When caught in the right angle of sunlight this 110km-long mountain range reveals good detail among its peaks using a small scope and around 150x magnification.
Mons Piton
Size: 2.2km in height
Type: Mountain
Appearance: Lying on its own in the flat region of the Mare Imbrium, use a small telescope when the Sun's illumination is low to reveal the shadow cast by this lone peak.
Rupes Recta
Size: 110km long
Type: Rille
Appearance: This popular target for binoculars and small telescopes is another fault line where the lunar surface suddenly drops by 300m. It's best seen when close to the terminator.
Vallis Rheita
Size: 450km long
Type: Valley
Appearance: A long, wide valley that many think is the result of a sustained meteor bombardment. A small telescope will show the crater Rheita next door has a central peak.
Copyright � Immediate Media. All rights reserved. No part of this article may be reproduced or transmitted in any form or by any means, electronic or mechanical without permission from the publisher.
{ width: 160, height: 160, defaultImage: '', layers: 'Artimg-BBC_Clusters' }

![]() Orion is proud to partner with BBC Sky at Night Magazine, the UK's biggest selling astronomy periodical, to bring you this article as part of an ongoing series to provide valuable content to our customers. Check back each month for exciting articles from renowned amateur astronomers, practical observing tutorials, and much more!
Orion is proud to partner with BBC Sky at Night Magazine, the UK's biggest selling astronomy periodical, to bring you this article as part of an ongoing series to provide valuable content to our customers. Check back each month for exciting articles from renowned amateur astronomers, practical observing tutorials, and much more!
Groups of stars against the blackness of space, clusters make great observational targets for the amateur astronomer

M3 Globular Cluster by Doug Hubbell
When you gaze up at the night sky, it looks like a lot of stars are on their own. But a solitary-looking star may be a member of a vast group that's travelling through space as a unit. If we wind the clock back millions of years, we may find these stars forming in the same vast cloud of dust and gas.
Known as open clusters, these families of anywhere from a few dozen to a few thousand stars are created in the dusty spiral arms of our Galaxy. They travel together through space, but gentle tidal forces eventually cause the stars to move apart until they begin to merge into the general starry background.
There are many fine examples of newer and older clusters out there, perfect for looking at with binoculars. As a rule of thumb, you can pretty much assume that the younger the open cluster, the more compact it appears, since the stars haven't had much time to drift apart.
There is another variety of star cluster out there: the globular cluster. These are much bigger than the open sort, consisting of hundreds of thousands or millions of generally reddish, older stars. Whereas open clusters are found and made within the plane of our Galaxy, globular clusters form a halo around it and their creation is much less well understood.
In terms of observing, this all means that the majority of open clusters are found in or close to that misty river of stars stretching across the sky, the Milky Way, while globular clusters are seen all over the sky. When looking at them with the naked eye you'll see only fuzzy patches, but a pair of binoculars will reveal some truly spectacular gems.
What To See: Deep Sky
Outstanding Open Clusters
M45
Constellation: Taurus
RA 03h 45m 48s, dec. +24� 22' 00"
The Pleiades, or Seven Sisters, is one of the most splendid clusters in the night sky. With the naked eye, six stars of the cluster are easy to see, but counting up to 10 is possible. The cluster actually contains many hundreds of stars, and a decent pair of binoculars will be able to reveal many of them.
NGC 869 and NGC 884
Constellation: Perseus
RA 02h 19m 00s, dec. +57� 09' 00
This is the 'Sword Handle', a wondrous double cluster with two star clusters sitting side by side. They are both 0.5� in diameter and are easily visible to the unaided eye. Try sweeping the area with binoculars — the hundreds of stars, set against the backdrop of the Milky Way, make for a fine sight.
M7
Constellation: Scorpius
RA 17h 53m 54s, dec. -34� 49' 00"
Also known as the Ptolemy Cluster, this appears to be twice the size of the full Moon. To the eye, the 80 stars of the cluster appear as a bright clump in the Milky Way, but through binoculars the stars are resolved.
M35
Constellation: Gemini
RA 06h 08m 54s, dec. +24� 20' 00"
This cluster contains upwards of 200 stars and can just be seen with the unaided eye on good clear nights. Binoculars bring out the brightest 20 or so stars, while the rest form a diffuse oval wash behind.
M44
Constellation: Cancer
RA 08h 40m 06s, dec. +19� 59' 00"
Known as the Beehive Cluster, M44 contains hundreds of stars and can be seen as a misty patch with the naked eye. Binoculars are the best way to see M44: through them you'll see a dozen or so of its brightest stars.
Great Globulars
M13
Constellation: Hercules
RA 16h 41m 42s, dec. +36� 28' 00"
Known as the Great Globular Cluster, this is the best of its kind in the northern hemisphere. From a dark site, M13 can just be seen with the unaided eye, but its bright, round form is a stunning sight through a pair of binoculars.
M5
Constellation: Serpens
RA 15h 18m 36s, dec. +02� 05' 00"
This is thought to be one of the oldest of all globular clusters. It is easily found in binoculars and has a slightly oval-shaped appearance. What you'll see is a fuzzy blob, hinting at the vast number of stars it contains.
M22
Constellation: Sagittarius
RA 18h 36m 24s, dec. -23� 54' 00"
One of the brightest globular clusters, M22 is easily visible with the unaided eye, and a great sight through binoculars. It's larger than M13, which is impressive, but its place in the Milky Way's river of stars makes this a real jewel in the crown.
M3
Constellation: Canes Venatici
RA 13h 42m 12s, dec. +28� 23' 00"
This is another stunning globular cluster. It can just be seen with the unaided eye, but binoculars will reveal its bright, round shape that holds around 500,000 stars. 274 of these are known to be variable, the largest number in any known globular cluster.
M15
Constellation: Pegasus
RA 21h 30m 00s, dec. +12� 10' 00"
Looking like a slightly more compact M13, this densely packed object is an ideal target for binoculars. It appears as a round smudge with quite a compact central region, giving this distant star cluster a real sense of depth.
Copyright � Immediate Media. All rights reserved. No part of this article may be reproduced or transmitted in any form or by any means, electronic or mechanical without permission from the publisher.
{ width: 160, height: 160, defaultImage: '', layers: 'Artimg-BBC_Galaxies' }

![]() Orion is proud to partner with BBC Sky at Night Magazine, the UK's biggest selling astronomy periodical, to bring you this article as part of an ongoing series to provide valuable content to our customers. Check back each month for exciting articles from renowned amateur astronomers, practical observing tutorials, and much more!
Orion is proud to partner with BBC Sky at Night Magazine, the UK's biggest selling astronomy periodical, to bring you this article as part of an ongoing series to provide valuable content to our customers. Check back each month for exciting articles from renowned amateur astronomers, practical observing tutorials, and much more!
These shining arks of stars come in all shapes and sizes, many the result of cosmic collisions
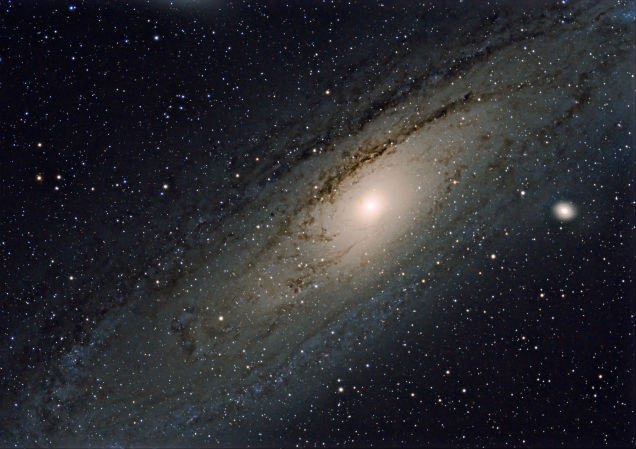
Andromeda Galaxy by Steve Peters
Galaxies are concentrations of millions or billions of stars, gravitationally bound together along with gas clouds and pockets of dust. There are probably over 100 billion of them in the Universe. Some of the largest nearby galaxies appear in the night sky as faint smudges of light, but it was only in the early 20th century that astronomer Edwin Hubble proved that they actually exist well beyond the Milky Way. Before then, they were thought to be spiral-shaped nebulae on the outskirts of our own Galaxy.
Hubble also established that galaxies vary in shape and size. Two-thirds have distinctive spiral patterns, while the rest range from neat ellipticals to irregular blobs. They can be dwarves containing millions of stars or giants harbouring trillions. Astronomers are still piecing together why this is the case, but collisions and mergers seem to be important in determining how a galaxy evolves. Central black holes also seem to govern how gas is consumed and when stars are formed within these cosmic conurbations.
Hidden Mass
Galaxies are much more massive than they look. Around 90 per cent of their mass is not in luminous stars and gas, but in unseen 'dark matter'. It's arranged in a spherical halo, which governs the motions of the stars within. This invisible cocoon explains why the outskirts of spiral galaxies spin faster than if they were influenced by the quantity of stars and gas alone. Dark matter also governs how galaxies clump together under gravity to form filaments and clusters. Yet dark matter remains an enigma, and astronomers are still trying to discern what it is. It must be exotic as it does not absorb or emit light.
Spiral galaxies such as the Milky Way are named for the arcs of bright stars that corkscrew into their centres. The spiral is a density wave embedded in a flattened disc of stars and gas that is arranged around a central bulge. Bright stars form where gas clouds are compressed. The disc is full of young stars and gas, and tends to be blue; the bulge appears redder. Discs form when a cloud of gas collapses under its own gravity, spinning faster as it shrinks vertically. Spirals are common across space, apart from in the centres of galaxy clusters, where discs are easily destroyed by collisions.
Shaped like rugby balls, elliptical galaxies are much like the bulges of spirals, but lack any disc. They contain little gas, and few stars are being formed within them. Old, red stars are the norm, travelling on inclined elliptical orbits. Groups of elliptical galaxies are often found in the centres of galaxy clusters.
Lenticular galaxies are lens shaped, their classification falling between spirals and ellipticals. Many are similar to spiral galaxies, containing a relatively small disc and large bulge, but lacking the spiral arms. These may be faded spirals, in which star formation has ceased. Others are likely to be the result of galaxy collisions, which could have ripped off part of a larger disc, or shut down star formation after a vigorous burst.
Irregular galaxies do not fall into any of the other main classification categories — they have no distinctive shape. This may be because they have been distorted in a collision or they may have formed that way. Some dwarf galaxies condensed in a haphazard manner from gas clouds and haven't settled into an ordered state.
What To See: Deep Sky — Glimpsing Galaxies
The Andromeda Galaxy, M31
Constellation: Andromeda
RA 00h 42m 42s, dec. +41� 16' 00"
The magnificent Andromeda Galaxy is the nearest large galaxy to the Milky Way, and it is possible to see it with the naked eye. Under dark, Moon-free skies, you should be able to find this spiral galaxy as a faint misty patch a short distance from the band of the Milky Way without optical aids. Using binoculars, you'll find it with little or no difficulty. It will be oval in appearance — although you won't be able to make out any of the individual stars within it. Through a 6-inch telescope the galaxy appears as a larger, elongated oval shape with a core that shows up as a slightly brighter area.
The Whirlpool Galaxy, M51
Constellation: Canes Venatici
RA 13h 30m 00s, dec. +47� 16' 00"
The Whirlpool Galaxy is a magnificent face-on spiral located in Canes Venatici. It can be found not far from mag. +1.9 Alkaid (Eta (—) Ursae Majoris). You'll need a large telescope to see its spiral arms clearly.
The Triangulum Galaxy, M33
Constellation: Triangulum
RA 01h 33m 54s, dec. +30� 39' 00"
M33 can just be seen with the naked eye under pristine dark skies, but light pollution means binoculars at least. It sits between mag. +2.2 Hamal (Alpha (a) Arietis) and mag. +2.1 Mirach (Beta (b) Andromedae).
The Sombrero Galaxy, M104
Constellation: Virgo
RA 12h 40m 00s, dec. -11� 37' 23"
Located just within Virgo, this spiral galaxy is easy to see in any scope. A 6-inch instrument shows an elongated glow, but its defining characteristic is a dark dust lane that cuts across the south of the central halo.
M81 and M82
Constellation: Ursa Major
RA 09h 55m 33s, dec. +69� 03' 55"
These galaxies in Ursa Major, M81 or Bode's Galaxy (co-ordinates above)and M82 the Cigar Galaxy, are close to each other in the sky, so we're treating them as one sight here. With a small telescope and a low magnification eyepiece, you'll be able to see them in the same field of view.
The Leo Triplet
Constellation: Leo
RA 11h 18m 55s, dec. +13� 05' 32"
The Leo Triplet is comprised of the spiral galaxies M65 (co-ordinates above), M66 and NGC 3628, and lies about halfway between mag. +3.3 Chertan (Theta (θ)Leonis) and mag. +6.6 Iota (ι) Leonis. Larger telescopes will show them clearly. Another group, M95 and M96, is nearby.
The Pinwheel Galaxy M101
Constellation: Ursa Major
RA 14h 03m 12s, dec. +54� 20' 57"
This face-on spiral galaxy is comparable in size to the Milky Way, and while it can be spotted in binoculars its magnitude of +7.9 means you'll need dark skies and a 6-inch telescope to see its spiral arms.
Copyright � Immediate Media. All rights reserved. No part of this article may be reproduced or transmitted in any form or by any means, electronic or mechanical without permission from the publisher.
{ width: 160, height: 160, defaultImage: '', layers: 'Artimg-BBC_AP_GuideTheSun' }

Orion is proud to partner with BBC Sky at Night Magazine, the UK's biggest selling astronomy periodical, to bring you this article as part of an ongoing series to provide valuable content to our customers. Check back each month for exciting articles from renowned amateur astronomers, practical observing tutorials, and much more!
View our nearest star in all its glory, with BBC Sky at Night Magazine's safety-aware guide to solar imaging
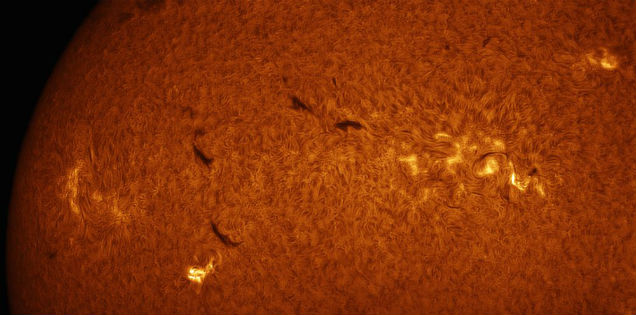
Hydrogen Alpha Closeup by Jimmy E.
Taking an image of the Sun is a fascinating astronomical pursuit that gives you the opportunity to study a star close-up. There are other advantages to solar imaging: it can only be done during the day, when the temperature is normally quite pleasant, and with plenty of light around you can say goodbye to fumbling around with red light torches.
The Sun has a visual activity cycle that is about 11 years long. The cycle starts at what is called a 'solar minimum', when activity is low. Roughly five to six years later activity reaches its peak at a point known as 'solar maximum', before receding back to solar minimum once more. The amount of detail you'll be able to capture depends on the type of kit you use, but there's usually something interesting and different to see from one day to the next, whatever equipment you have.
Of course, there are downsides to overcome. It's difficult to see your computer screen in sunlight and there's a real danger from the intensity of light — it's one of the only times that astronomy can pose a risk of physical injury. Over the next few paragraphs, we'll look at how to address these issues and how to image the Sun safely using different methods. We'll also discuss some of the solar features that are visible using different types of equipment and tell you how to take the best images of them.
So, if you're fed up with sitting outside under a cold, dark and frequently misty night sky, let's see if we can tempt you to come over to the light side.
Need to Know — The Dos and Don'ts of Solar Viewing
The Sun is a dangerous object and only the correct kit should be used to observe or image it. Never look through or even point an unfiltered reflector or compound telescope like a Schmidt-Cassegrain at the Sun: you'll cause physical damage to your eyes and the scope. Never use solar filters that attach at the eyepiece end of your scope, either — these may crack under the intense heat. Don't take risks by using uncertified filters. A piece of welding glass may look dark but it could still let through wavelengths that may damage your eyes. The golden rule when working with the Sun: if in doubt, don't do it.
What You'll Learn in This Article:
Equipment
Solar imaging equipment ranges from basic white light filters to precision narrowband filter systems. We discuss how to get started with white-light solar imaging and how to advance using hydrogen-alpha and calcium-K filters.
Technique
Constellation: Orion
We take you further into the world of solar imaging and explain the different types of narrowband filter systems available. We'll explain why certain filters are expensive and what benefits you're getting for your money.
Masterclass 1
White light imaging is the simplest way to start your solar journey. We'll discuss a number of methods for imaging the Sun. Our walkthrough will show you how to set up your kit for imaging with a white light filter and how to make your first capture.
Masterclass 2
An introduction to the dynamic world of hydrogen-alpha imaging using an entry-level Personal Solar Telescope (PST). We'll discuss how to take your first PST images and show you how to process them for maximum effect.
Software
As well as software to help you understand exactly what it is you're looking at, you'll need packages to control your camera, process your captures and make those final tweaks.
EQUIPMENT
From filters to scopes — all you need to capture the Sun
When taking images of the Sun it's important to use the right tools for the job. The dangers involved in pointing a telescope at the Sun mean that only proper certified equipment should ever be used.
Solar telescopes come in two varieties — those that are dedicated to the purpose and those that have just been temporarily adapted for safe solar viewing. A standard, equatorially driven mount makes a perfect platform for either variety, since the Sun's motion across the sky is not significantly different from that of the stars.
White Out
White light imaging involves removing most of the harmful light that could reach your camera sensor. There are various ways to do this, including projection using a 'Herschel Wedge', or by fitting a white light filter over the front of your scope. Projection and Herschel Wedges are discussed in 'Masterclass 1' (see below), but both are limited for use with refractors. The more flexible option is to use a white light filter such as Baader AstroSolar Safety Film. This type of filter is easy to make, and can be used with all telescope types. Never use cheap solar filters that fit onto eyepieces.
A white light filter will show sunspot groups that will appear and rotate across the disc over the course of a couple of weeks. But for really dramatic views, you'll need to use a narrowband filter that lets only a specific wavelength of light through, such as hydrogen-alpha or calcium-K. These filters are more expensive than white light filters and can only be used for solar work. Don't confuse deep-sky hydrogen-alpha filters with solar ones — deep-sky filters should never be used for imaging the Sun.
The cheapest hydrogen-alpha scopes are the Coronado PST and Lunt LS-35. They record all manner of exotic phenomena including solar prominences.
Both instruments have small apertures, but if you want something larger, you'll have to spend more. Both hydrogen-alpha and calcium-K filters are available pre-fitted into dedicated solar telescopes or as 'kits' that can be used to convert night-time scopes for narrowband solar work.
Whichever filter system you opt for, once it's been fitted, imaging the Sun is no more complicated than imaging the Moon. To capture the finest detail, a high frame rate camera like a webcam or planetary camera will produce the best results. For extra magnification, just use a Barlow lens. If you want to fit the entire disc in the frame, use a focal reducer. But do note that this kind of smaller scale is only possible with certain telescope and camera combinations.
Tech Talk — Cameras for Solar Imaging
DSLR
DSLR cameras are well suited for taking shots of the Sun through white light filters, but less so for narrowband filter shots where special processes are required to extract detail. Single images are also prone to atmospheric distortion.
Webcams
The effects of atmospheric seeing can be reduced by using webcams. These work very well for white light filtered imaging but the Bayer matrix colour filters fitted to a webcam's sensor will reduce its sensitivity when using narrowband filters.
High Frame Rate Cameras
As with other Solar System targets a mono, high frame rate camera will produce the best results, especially when used with narrowband filter systems. The high frame rates these cameras can achieve are ideal for reducing seeing effects.
Cooled CCD Cameras
A monochrome, cooled, astronomical CCD camera can work well with narrowband-filtered images. The best technique is to take lots of short-exposure images and stack them together using a registration and stacking program such as RegiStax.
Need to Know — Which Mount?
Solar imaging at low magnification can be done using a fixed mount such as a tripod, but a driven, polar-aligned, equatorial mount will make life much easier. While the Sun's apparent motion across the sky isn't quite the same as that of the stars, it is close enough not to have to worry about it while carrying out a typical imaging session, and a standard RA drive will do a perfectly adequate job.
As with any other type of imaging, a stable, heavy-duty mount is highly recommended to help avoid any unwanted wobbles.
TECHNIQUE
Tips and tricks for successful solar imaging
The techniques used to image the Sun are similar to those used to capture images of the Moon and planets. The difference is that the intensity of the light from the Sun must be reduced. There are different filter systems to do this and it's important only to use certified ones.
The best camera for imaging the filtered Sun, especially if you intend to use any magnification, is a monochrome high frame rate camera like a webcam or a dedicated planetary camera. Colour devices work for white light captures, but they may be lacking when using speciality filters as their in-built colour filters can reduce the sensor's sensitivity.
Two Techniques
Solar imaging falls into two categories: white light and narrowband. White light imaging reduces the amount of sunlight to safe levels, cutting out harmful, invisible wavelengths. With a white light filter on the front of your telescope, the Sun's light is dimmed to safe levels for imaging. The white light filter allows you to capture the Sun's visible surface (the photosphere).
Narrowband imaging is completely different. It calls for filters that are typically many times more expensive than a basic white light filter. The reason for this expense is down to the very fine optical tolerances that need to be met in order for the filters to work. These higher tolerances mean higher costs.
The main narrowband filter types used for solar imaging concentrate on hydrogen-alpha light, which has a wavelength of 656.3nm, plus calcium-K light with a 393.4nm wavelength. Less common filters include those that work with the 589.6nm wavelength of sodium-D light.
Narrow Bandwidths
How good a narrowband filter is can be measured by how wide its 'window' of extra wavelengths is, which lets light through either side of the central wavelength. This is also known as bandwidth. Narrowing the bandwidth allows ever-finer surface detail to be picked out. A low-cost hydrogen-alpha filter, like one from a Coronado PST, has a stated bandwidth of less than 0.1nm. Bandwidths can get narrower, to 0.05-0.03nm, and this is where the cost comes in: filters with windows this narrow can cost many thousands of pounds. Stacking two matched filters on top of one another — a technique known as double-stacking — can also help reduce bandwidth.
We've said that imaging the Sun is no more complex than imaging the Moon. While this is generally true, the lack of fixed features on the Sun's disc can lead to confusion, especially in relation to its orientation in the sky. Fortunately, if your scope sits on an equatorial mount, the solution is pretty straightforward. Begin by rotating the camera so that any features visible move parallel to the bottom edge of the imaging frame when you slew your scope in RA. The north edge of the Sun is found by using a finger to apply gentle upward pressure to the front of the tube. The last edge of the Sun visible if this motion were continued would be its northern edge if you're in the northern hemisphere, or southern edge if you're in the southern hemisphere. Finally, apply a similar pressure to push the tube over to the west. Again, the last edge of the Sun that would be visible if the motion were continued would be its western edge.
The Sun's axis tilts relative to Earth and changes throughout the year. A program called TiltingSun can help you visualise this tilt when you come to image the Sun (see 'Software' below for more information).
Pro Pointer — Viewing our Nearest Star in Three Different Ways
White Light
A white light view reveals the Sun's visible surface or 'photosphere'. With good seeing, a 4-inch or larger scope will reveal the photosphere's mottled texture. Called solar granulation, this looks a bit like lots of rice grains packed together. The photosphere looks darker at the edge of the disc due to a phenomenon known as limb darkening and it's here that you might find bright patches called faculae.
If the Sun is active, there may be sunspots on view too. Larger spots typically appear in groups called sunspot groups, pictured, or active regions. A typical sunspot has a dark centre known as the umbra, surrounded by a lighter region known as the penumbra.
Hydrogen-Alpha
Through a hydrogen-alpha filter, the photosphere is hidden under a blanket of hydrogen known as the chromosphere — only light from this outer layer gets through.
'Dark mottles' formed by dark jets of hydrogen are known as fibrils. Seen edge-on at the Sun's limb, fibrils look like tiny spikes and are known as spicules. Active regions are marked by huge swirls of hydrogen tracing intense magnetic field lines, in and around which bright regions called 'plage' appear. Where magnetic tension erupts, there are vast releases of energy from bright flares. Snake-like clouds of hydrogen known as filaments float above the chromosphere. When at the edge of the Sun, they are known as prominences.
Calcium-K
A calcium-K filter reveals detail in a low part of the chromosphere immediately above the photosphere. Consequently, the view is not dissimilar to that seen through a white-light filter. There are, however, some subtle differences — for example, a calcium-K filter is especially good at bringing out detail in and around active regions.
Bright plage can be seen within these regions and remain visible right across the Sun's disc. Solar granulation is hidden from view but the calcium-K Sun does show a large-scale network of bright interlinked paths known as the chromospheric network. Bright prominences may also be imaged as they extend off the edge of the calcium-K Sun.
MASTERCLASS 1
Cheap and easy, using a white light filter is a popular way to image the Sun
Imaging the Sun in its natural 'white' light is an inexpensive way to get into solar photography. When you pay attention to the safety issues, it can be a very rewarding way to monitor our nearest star.
One of the most basic methods is to use solar projection. For this you'll need a small refractor, ideally mounted on a driven equatorial mount. With your scope pointing away from the Sun, fit a non-plastic, low-power eyepiece and ensure the finder is removed or capped. Watching the scope's shadow on the ground, turn it to point directly at the Sun. A piece of stiff white card held behind the eyepiece will catch the Sun's image, while a tweak on the focuser will bring it into sharp relief. A card shield taped to the objective end of the tube may help improve contrast if the projection is difficult to see.
Now set your camera to automatic and take a shot of the image on the card screen. If the image comes out too bright, try moving the screen away from the eyepiece or, if you have manual controls, try under-exposing the shot. This basic method is capable of showing the photosphere, limb-darkening, sunspots and faculae — it is, however, only suitable for refractors.
A more sophisticated method, also limited to use with refractors, is to use a device called a Herschel Wedge inserted in the eyepiece holder. The wedge basically blocks most of the harmful heat and light from the Sun, reducing its intensity to safe viewing levels.
Using a Filter
A more universal method that is suitable on any type of telescope is to use a white light filter such as Baader AstroSolar Safety Film or a Solar Filter. See 'Step by step' below for instructions on imaging with a solar filter.
With a filter fitted you can image the Sun just as you would the Moon. In fact, the same constraints apply because the Sun's light is just as susceptible to our turbulent atmosphere. Stills cameras such as DSLRs are good for low-power shots, but webcams or, preferably, high frame rate planetary cameras are more suited for close-ups. For optimal results, however, screwing a solar continuum or green imaging filter onto your camera's nosepiece may enhance contrast in sunspot detail and solar granulation.
High frame rate captures are processed in the same way as lunar or planetary captures: by sending the capture file through a stacking program such as RegiStax or AviStack. See 'Software' below for more on processing solar images.
Tech Talk — Finding Your Focus
Focusing is a critical skill to master in any form of astronomical imaging — without it, you'll get poor results. If you're just starting out, accurate focusing can be quite hard to get to grips with, which can make the whole imaging experience rather frustrating. There's no real reason why this needs to be the case, so here are a few tips on how to get your images as sharp as possible.
First, make sure your camera is securely locked into your telescope's eyepiece holder and that the focuser tension adjustment is set firm. You want to be able to move the camera back and forth quite easily, but you also want it to stay where you've put it. Locate a high-contrast part of the Sun. For white light imaging, the best target is the Sun's edge. For more exotic filters, the Sun's surface is normally sufficiently detailed for you to lock onto that. Even here, though, it's good practice to choose a sunspot group or perhaps a dark hydrogen-alpha filament to give you a better focus target.
With a gentle grip on the focuser, move in towards focus, getting slower as you appear to be reaching the critical point. When you do reach this point, keep going, coming out of focus again on the other side. Then reverse direction again, passing slowly through focus, this time from the other side. Do this a few times until you're confident that you can recognise the real focus position; then adjust the focuser until you're in that position.
Need to Know — Seeing the Sun
Earth's turbulent atmosphere interferes with sunlight on its journey to your telescope and this makes fine detail on the Sun's surface appear to wobble and distort. Known as 'seeing', the Sun's own heat can make matters worse, causing heat thermals as the day starts to get going.
For white light imaging, poor seeing means the difference between viewing solar granulation or not, so it's a good idea to try and choose periods when the seeing is good. Mid to late morning is often ideal because it's a time before the Sun's heat has had a chance to take full effect.
Step by Step — How to Set Up and Capture Solar Images
1. Fitting the Filter
With the scope pointing away from the Sun, remove its lens cap and fit the solar filter; remove or cap the finderscope too. Make sure everything is securely fastened. If required, use a bit of low-tack electrical tape to hold the main filter in place securely. This is especially important on a windy day.
2. Line Up with the Sun
Lining the telescope up with the Sun without the use of a finderscope isn't as hard as it sounds. Without looking along the tube towards the Sun, roughly align the scope and then look at its shadow. As the scope approaches the correct alignment, so the tube shadow will reach minimum size.
3. Keep It in the Dark
If you find it hard to see detail on your laptop's screen in sunlight, you'll need a dark enclosure. A simple one can be made by putting a blanket over your head and the computer, but for something more sturdy, try placing the laptop in a closed cardboard box with a slit cut in it so you can see the screen.
4. Insert your Camera
If you have one, screw a solar continuum or green imaging filter onto your camera's nosepiece. Insert the camera into the eyepiece holder of your scope and fine-tune the scope's position so that an image can be seen on your computer's screen. Locate the Sun's edge and focus roughly.
5. Settings and Focus
Using the highest frame rate, reduce gain and then exposure until the image is correctly exposed and contains no white. If you can't, you may need to use a neutral density filter. Rotate the camera so that any spots visibly move horizontally across the frame while slewing in RA. Finally, fine focus the image.
6. Capture
For low image scale (magnification) setups showing all, or at least a large portion, of the Sun's photosphere, aim to capture 500-800 frames. Increase this to around 2,000 frames for larger image scales. If your control software offers it, reduce gamma slightly to make granulation and spot detail easier to pick out.
MASTERCLASS 2
Capturing hydrogen-alpha detail with a PST
The Coronado PST revolutionised hydrogen-alpha solar observing because it was both cheap and portable. However, as far as imaging was concerned there were a few hiccups, mainly due to a lack of inward movement when focusing high frame rate cameras and webcams. This resulted in being unable to reach prime focus, hindering the scope's usefulness for solar imaging.
But there are solutions. One of the easiest is to take the front lens off a standard 2x Barlow and screw it into the camera's nosepiece. The view isn't quite prime focus but it's not far off, and focus can generally be reached. You can also buy a low-profile nosepiece that puts the camera closer to the eyepiece holder.
Using a PST
The PST is a low-power instrument. Its 40mm objective works at f/10, giving a focal length of 400mm. Consequently, image scale tends to be quite modest and the PST is excellent for overview shots of the Sun's hydrogen-alpha disc. In terms of the camera, a monochrome, high frame rate camera is best. Colour cameras, including webcams, are fitted with a matrix of colour filters that severely reduces sensor sensitivity when working at one specific wavelength.
The PST is threaded for a standard photographic tripod, but if you can mount it on a driven equatorial mount you'll find things a lot easier. With the scope mounted, use its shadow on the ground to point it roughly at the Sun. Fine pointing can be achieved by getting the bright spot (a small Sun image) in the centre of the PST's built-in solar finder. You can then look through a low-power eyepiece in the PST's eyepiece holder to finish off the job if this proves necessary.
Screw the lens from a 2x Barlow into your camera's nosepiece and insert it into the PST's eyepiece holder. It's a good idea to place your head and laptop under a blanket or inside a dark cardboard box to make the screen easier to see. Once done, you should be able to see an image, probably unfocused, on-screen. Carefully focus using the thumbscrew at the base of the PST's body. If the image appears over-exposed at this point, that's fine — just make sure the Sun's edge and any visible prominences are as sharp as possible.
Once done, set your camera's gamma, contrast and brightness to their zero (default) settings. Using the highest frame rate available, decrease the gain and then the exposure so that the surface appears detailed but not over exposed — there should be no white showing. If the image is dim to start with, begin using a lower frame rate. Rotate the PST's tuning ring so that you achieve maximum hydrogen-alpha contrast in the centre of the image.
For the low image scale images that the PST offers, aim to record 500-800 frames per capture.
Tech Talk — How Dedicated Solar Scopes Work
At the heart of many hydrogen-alpha telescopes is an optical device known as a Fabry-P�rot etalon. This creates an optical cavity by bringing two optically flat glass plates together, separated by a precise gap. The two parallel facing surfaces are semi-silvered. As light enters the cavity through the first plate, it reflects back and forth between the semi-silvered surfaces. The reflecting beams interfere with each other so that certain wavelengths reinforce while others cancel out — this is a physical process that's known as 'constructive and deconstructive interference'.
The light that eventually passes out through the semi-silvered surface of the second plate contains bright wavelength peaks and dim wavelength troughs. A plot of wavelength vs intensity of this light looks a bit like an upside down comb, the peaks being represented by the tips of the comb's teeth. By passing the etalon's output through a less precise 'blocking' filter, it's possible to strip off all the unwanted 'comb teeth' and let just the one of interest through. The width of this peak defines the quality of the etalon and dictates how good a view you'll eventually get at the eyepiece or camera.
SOFTWARE
Programs every Sun worshipper should have
For best results in solar imaging, you'll need software for camera control and for grading and stacking multi-frame movie files, as well as for tweaking the end results. In addition, one highly recommended support program is TiltingSun, which is available from www.atoptics.co.uk. This provides valuable information about the Sun's orientation with respect to the Earth. TiltingSun can also be used to generate a grid that you can overlay onto your own image via a graphics editing program.
As far as webcams are concerned, there are more astro-specific camera control programs available such as wxAstroCapture (arnholm.org/astro/software/wxAstroCapture/) and K3CCDTools (www.pk3.org/Astro/index.htm?k3ccdtools.htm).
Higher end cameras typically come with their own control software, but even here there may be better options such as Lucam Recorder (www.astrofactum.de/Astrofactum/LucamRecorder/index.htm), which is capable of controlling numerous high end cameras from Lumenera and The Imaging Source.
The main registration and stacking contenders are both freeware. RegiStax (www.astronomie.be/registax) has been the mainstay of both beginner and experienced imagers for a while. A relative newcomer is AviStack (www.avistack.de/index_en.html), which is also proving to be a popular choice with astro-imagers. Both of these programs run on fairly modest computers but, as always, a bit of processing power and added memory will help speed things up a little.
For final tweaks, a layer-based graphics editor is a must — Adobe Photoshop or the freeware GIMP (www.gimp.org) are undoubtedly great choices. These can also be used to apply false color to monochrome solar images.
Tech Talk — Check Your Settings
Different camera control software can have different setting options, but the most common settings are 'exposure', 'gain', 'gamma', 'contrast', 'brightness' and 'frame rate'.
Typically, gamma, contrast and brightness should be left at their zero (default) levels. It might be tempting to adjust gamma down to improve surface detail clarity but, in reality, this can be emulated using a graphics editor after image capture.
Exposure, gain and frame rate need to be adjusted so that you get a strong signal at the fastest frame rate possible. If you can keep the gain as low as possible to achieve this, you'll also reduce the level of noise.
Step by Step — Refine and Sharpen Your Images with Post-Processing Software
1. Registax
Pass your capture files through a registration and stacking program such as RegiStax or AviStack. If you're using RegiStax 6, select your capture file, click 'Set Alignpoints' and then 'Align'. Drag the bottom slider to include the best frames on the 'RegiStrationgraph' and click 'Limit'. Click 'Stack' to finish the process.
2. Wavelets
Wavelets can sharpen your images. A typical PST result (using the 2x Barlow lens trick referenced earlier), sharpens well with 'Wavelet-scheme: Linear' and 'Wavelet-filter: Gaussian'. Check the 'Use linked wavelets' box and set the first slider to 30. Once you've found a scheme that suits you, save it via the 'Save Scheme' button.
3. Save and Load
Save your processed result as a 16-bit PNG or TIFF file and load it into a layer-based graphics editor like Photoshop. If necessary, crop the image to remove any white borders that may have appeared during the registration and stacking process. Duplicate the base layer for safety and work on the duplicate layer.
4. Working With Features
For images including prominences and surface, duplicate the working layer and make the top layer active. Select everything in the background sky down to the curved limb. Expand, feather the selection by two pixels, delete its content and deselect. Make the lower layer active. Adjust the mid slider.
5. Tweaking
Tweak the surface (top) layer by adjusting its 'Curves' to taste. A contrast tweak can work wonders. If applicable, tweak the prominence (next layer down) in the same way. Try to keep the join between surface and prominences as natural as possible. When you're happy that both layers look correct, merge them together.
6. Apply False Color
Make sure the mono image is in RGB mode and open its 'Levels' adjustment. Move the red channel's mid slider towards the black (left) end of the histogram. Move the green channel's mid slider slightly towards the black end too. Move the blue channel's mid slider slightly towards the white end of the histogram.
Copyright � Immediate Media. All rights reserved. No part of this article may be reproduced or transmitted in any form or by any means, electronic or mechanical without permission from the publisher.
{ width: 160, height: 160, defaultImage: '', layers: 'Artimg-BBC_Nebula' }

![]() Orion is proud to partner with BBC Sky at Night Magazine, the UK's biggest selling astronomy periodical, to bring you this article as part of an ongoing series to provide valuable content to our customers. Check back each month for exciting articles from renowned amateur astronomers, practical observing tutorials, and much more!
Orion is proud to partner with BBC Sky at Night Magazine, the UK's biggest selling astronomy periodical, to bring you this article as part of an ongoing series to provide valuable content to our customers. Check back each month for exciting articles from renowned amateur astronomers, practical observing tutorials, and much more!
Whether they glow on their own or reflect the light of nearby stars, these clouds of gas and dust are popular targets
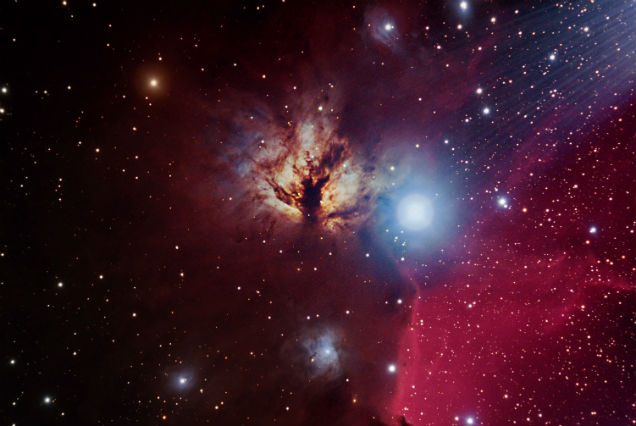
Flame Nebula by Doug Hubbell
Nebulae are clouds of gas and dust that are scattered throughout the Milky Way, mainly in the galactic disc, and it's here that stars are born. The word is Latin for 'little mists' — long ago, we considered all deep-sky objects to be nebulae, galaxies included, because they were faint fuzzy patches in the otherwise black night. These days, not only can we differentiate between nebulae and galaxies, but we know that several types of nebula exist.
The most famous nebula of them all, M42 in Orion, is what's known as an emission nebula. Nebulae of this type have a glow of their own, a result of stars within or nearby ionizing the gas cloud. On the other hand reflection nebulae, like the one around the Pleiades star cluster in Taurus, are only visible because there are some stars nearby that light up the gas and dust, just as the Sun lights up a cloud in an otherwise blue sky.
Dark nebulae, such as the Horsehead Nebula, don't glow at all, as they are so dense they absorb light. They are only visible because they are in front of a bright nebula or field of stars. We effectively see a silhouette of the cloud, but no detail in it.
You might think that planetary nebulae, such as the Ring Nebula in Lyra, have something to do with planets, but you'd be wrong. They get their name because, through a telescope, many have the appearance of a faint, small, fuzzy disc and can look a lot like a planet. These nebulae are formed during the death of a star of similar mass to the Sun. As it grows unstable, the star puffs off its gaseous atmosphere to form clouds around it. Stars larger than the Sun end their days explosively in a supernova, leaving a spectacular remnant in their wake.
Astro images will reveal that many nebulae have vivid colors — typically red in emission nebulae from ionized hydrogen atoms and hues of blue stars in reflection nebulae — but the view through binoculars or a telescope will be quite different. Visually, nebulae appear in shades of grey.
Stellar Nurseries
Nebulae are where stars are created. One idea of how it all starts is that a shockwave from a nearby supernova explosion compresses the cloud. Once the density of the gas passes a critical point, gravity takes over. Gravity causes clumps of the nebula to pull together. The pressure at the center of the clumps builds and the temperature rises dramatically. If there is enough gas to fuel the process, the region can become a protostar. If the temperature in the clump reaches 10 million degrees Celsius, the nuclear furnace that powers stars ignites. Over tens of millions of years it settles into normal life and joins what's called the main sequence, like our own Sun.
What To See: Deep Sky — Amazing Nebulae
The Orion Nebula, M42
Constellation: Orion
RA 05h 35m 17s, dec. -05� 23' 28"
M42 is the brightest nebula in the night sky and the only one that can be seen with the naked eye. With a casual glance below the three belt stars of Orion in a dark, light-pollution free sky, you'll see this emission nebula as a small misty smudge. A pair of binoculars will begin to reveal its curving shape. With a small telescope, you will start to see some structure. In the heart of the Orion Nebula are four stars. These are part of the Trapezium open cluster, named because of the shape the four stars form. It's the radiation from these stars that is energizing the entire nebula and causing it to glow.
The Crab Nebula, M1
Constellation: Taurus
RA 05h 34m 32s, dec. +22� 00' 52"
M1 is what remains of a cataclysmic stellar explosion witnessed from Earth in 1054. It can be spotted with a small telescope, but it's best seen through a really large aperture instrument — only then does its texture start to emerge.
The Lagoon Nebula, M8
Constellation: Sagittarius
RA 18h 03m 37s, dec. -24� 23' 12"
This easily noticeable emission nebula can be seen as a brighter patch with the beginnings of a core in 10x50 binoculars, even sitting where it does within the constellation of Sagittarius — a busy and star-rich area of the Milky Way.
The North America Nebula, NGC 7000
Constellation: Cygnus
RA 20h 59m 17s, dec. +44� 31' 44"
It takes a bit of practice to see emission nebula NGC 7000, also known as the North America Nebula, as it's such a large object. It's close to the bright star Deneb in Cygnus, and the surrounding area contains many targets for binoculars.
The Omega Nebula, M17
Constellation: Sagittarius
RA 18h 20m 26s, dec. -16� 10' 36"
This glowing emission nebula and star-forming region sits among the star fields of Sagittarius. It has a curved shape that can be likened to the Greek capital letter omega, Ω, hence its name, though it is sometimes called the Swan Nebula.
The Dumbbell Nebula, M27
Constellation: Vulpecula
RA 19h 59m 36s, dec. +22� 43' 16"
This fascinating and relatively bright planetary nebula appears as a misty oval in small telescope, with the Milky Way providing a marvelous backdrop. The 'dumbbell' shape only becomes apparent through large instruments.
The Horsehead Nebula, Barnard 33
Constellation: Orion
RA 5h 40m 59s, dec. -02� 27' 30"
The Horsehead Nebula, to the south of Orion's Belt in the Orion Molecular Cloud Complex, is a dark nebula that appears silhouetted against a brighter background of nebulosity. You will need a large aperture instrument and dark skies to make it out.
Copyright � Immediate Media. All rights reserved. No part of this article may be reproduced or transmitted in any form or by any means, electronic or mechanical without permission from the publisher.
{ width: 160, height: 160, defaultImage: '', layers: 'Artimg-BBC_Violent_Sun' }

Orion is proud to partner with BBC Sky at Night Magazine, the UK's biggest selling astronomy periodical, to bring you this article as part of an ongoing series to provide valuable content to our customers. Check back each month for exciting articles from renowned amateur astronomers, practical observing tutorials, and much more!
With orbiting telescopes now monitoring the Sun minute by minute, astronomers are witnessing ever more spectacular solar phenomena on our nearest star
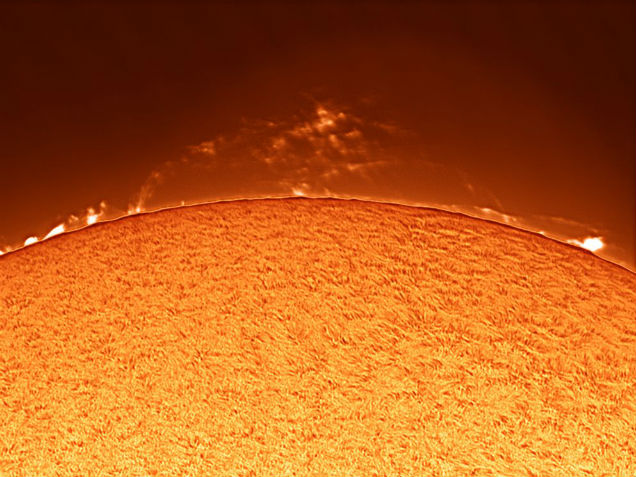
Solar Prominences by Craig & Tammy T.
In early March 2012 amateur astronomers watched with excitement as a monster began to appear over the limb of the Sun. The beast in question was an enormous new sunspot, slowly moving into view as our star rotated. Seething with energy and occasional flickers of activity, the sunspot quickly caught the attention of solar scientists. But unbeknown to those studying it here on Earth, its most violent act was yet to come.
Just after midnight on 7 March 2012 the sunspot let loose a violent blast known as a solar flare, sending waves of energetic radiation surging into the Solar System. Along with this intense burst a huge cloud of plasma, a coronal mass ejection, was flung out at over 3.5 million km/h.
Ferocious solar explosions are not the only violent events that cause the Sun to shudder.
In the 1980s and early 1990s solar scientist Alexander Kosovichev began working in the fledgling field of helioseismology — the study of the Sun's numerous surface and subsurface oscillations. Kosovichev wanted to know what effect solar flares have on their surroundings.
With the help of Valentina Zharkova at Glasgow University, Kosovichev modelled how the shockwave from a powerful solar flare could perturb the solar surface beneath it. Earlier research had indicated that solar flares might be able to boost the oscillations of the solar surface, but Kosovichev and Zharkova's models predicted that something far more dramatic could be produced — a sunquake. "We found that sunquake waves should be observed as expanding circular ripples on the solar surface," recalls Kosovichev. To see if the predictions were correct the scientists would need some way to study the Sun's tumultuous surface in great detail. Thankfully one spacecraft was about to revolutionise our view of our star. Its name was the Solar and Heliospheric Observatory (SOHO).
On 2 December 1995, NASA and ESA launched SOHO and sent it to orbit the Sun 1.5 million km from Earth. Its job was to scrutinise the Sun by observing it across a variety of wavelengths. On the ground, researchers like Kosovichev eagerly awaited the bounty of information the new solar observatory would provide.
"The first flare data was obtained in July 1996. I analysed it, and to my great surprise found the ripples," says Kosovichev. "The observational data corresponded very well to the previously developed flare and helioseismic models. The observations revealed a compact impact on the Sun's surface caused by the downward moving shock, and circular wave ripples travelling away from the impact place." They had found a sunquake.
Rage and Grace
SOHO's Michelson Doppler Imager (MDI) allowed the team to see, for the first time, the surface of the Sun rising and falling due to the shock of a solar flare. "The 'ripple' is observed as a displacement of the solar gases on the visible surface of the Sun," explains Kosovichev. "The MDI instrument measured the gas motions via the Doppler effect, by measuring displacements of the nickel [spectral] line in the Sun's radiation spectrum. When the solar material is moving toward us the wavelength of the radiation is shortened, called blueshift; when it is moving away from us the wavelength of the radiation is lengthened, called redshift. Using this technique the MDI instrument measured the up and down motions of the solar gases very accurately, to a precision of about 20m/s."
The size and speed of the sunquake was sobering. At their fastest, the 3km-high ripples raced across the Sun at more than 400,000km/h. Since that first observation of a sunquake by SOHO, solar scientists have been trying to understand exactly how these incredible events happen and what they can tell us about the Sun. Sergei Zharkov from the Mullard Space Science Laboratory in the UK has recently used NASA's Solar Dynamics Observatory (SDO) to study a pair of sunquakes. "SDO provides essentially continuous coverage of the Sun," says Zharkov. "The spacecraft provides a 4,096 pixel by 4,096 pixel image every 45 seconds."
It's this remarkable rate of observation that makes SDO so powerful, as it allows Zharkov and other solar scientists to watch our star's every twitch. There's a slight problem, however. "Sunquakes are relatively rare events," says Zharkov. "Since SDO's launch a couple of years ago we have seen four more or less confirmed sunquakes. It's possible that they happen but we just don't see them."
Finding a sunquake requires scientists to identify a ripple in a roiling sea of plasma. "The solar surface itself is constantly oscillating," explains Zharkov. "Depending on the strength of the source it may not be easy to find the signal behind all the oscillation that already exists, so that's one possibility [for why we are not seeing them]." Kosovichev also notes that location is a factor in whether a sunquake will be produced. "In many flares the magnetic energy is released high above the solar surface in the corona," he says. "Such flares don't cause significant impacts on the surface and don't produce seismic waves on the Sun."
The Secrets Within
The driving force behind each sunquake is still thought to be the initial solar flare — a product of a twisted, pent-up region of the Sun's magnetic field. "The magnetic field appears to be stable but within it there is quite a lot of energy," says Zharkov. "At some point it becomes unstable and releases all that energy. We see enormous heating and particles being accelerated, with much of the energy from the flare going into interplanetary space."
Yet some of the flare's almost unfathomable ferocity is directed toward the Sun itself. One of the sunquakes that Zharkov and his colleagues observed with SDO recently blasted across the solar surface with the same energy as the detonation of 478 billion tons of TNT.
Remarkably, the quakes themselves could work like a huge sonar device, allowing helioseismologists to study the interior of the Sun. "The shape of the ripples contains information about how the waves are created," Zharkov explains. "Several groups are now trying to analyze the ripples to decode the information they hold about the subsurface structures that they pass through."
Even with these latest observations, the exact mechanism by which sunquakes are produced is still unclear, says Zharkov, and several theories are being considered. "One involves some of the particles from the flare creating a pressure pulse, which generates a sunquake. The second theory, called 'backwarming', also proposes that a pressure pulse causes the quake, but this time the pulse is caused by the heat from a solar flare radiating towards the photosphere. Another scenario suggests that the recoil of the magnetic field during a flare creates a force with enough energy to generate a sunquake." Zharkov and his colleagues in the solar science community are now looking at the data produced by the SDO to establish which theory fits the bill.
While the mystery surrounding sunquakes rolls on, other images from SDO are throwing up yet more surprises. In September last year researchers from Aberystwyth University stumbled across an incredible event occurring within the Sun's fiery atmosphere.
"My colleague Xing Li had been browsing quick-look, low-resolution data from SDO and happened to see this strange event," recalls Huw Morgan from the Aberystwyth team. "He had the foresight to download the full resolution data, which confirmed the event's uniqueness and beauty."
The high-resolution images from SDO revealed a startling maelstrom of activity, the appearance of which would have been familiar to many of us — Li had spotted a swirling solar tornado. But even the boldest Earthly storm chasers would baulk at the enormous scale of this solar leviathan. The spinning vortex of plasma stretched more than 150,000km above the Sun's surface — that's more than 10 times Earth's diameter — swirling at a staggering 300,000km/h.
Unusual and Unexplained
According to Morgan there have been reports of tornadoes on the Sun as far back as the early 1900s, but the one studied by the Aberystwyth researchers stands out for several reasons. "It was very large, and the rotation was coherent for many hours," Morgan reveals. "Short-lived, smaller tornadoes often become apparent before a prominence eruption. This one remained in place for several hours. The strange dynamics within the structure were also quite unique."
As yet the team aren't sure how often solar tornadoes like the one spotted by Li form, but they're making progress in trying to understand what might be causing them. The tornado probably begins with a prominence — a huge wisp of plasma reaching up from the Sun's surface.
"The prominence that turns into a tornado is quiet for a few days prior to the event," says Morgan. "We believe that the Sun then pumps out helical magnetic fields like a Slinky into the prominence, activating the whole structure. Magnetic disturbances occur at the bases of the helices, which then pump plasma into the magnetic fields. As the plasma follows the helical shape, it appears as a tornado when we view the structure along the axis of the helix."
On the surface, understanding the detailed physics of a ferocious solar tornado might not seem that important to us, 150 million km away here on Earth. Yet the team's research into the helical magnetic fields in the Sun's atmosphere may well help to explain other violent events that can affect us.
"Perhaps this is one way that coronal mass ejections are formed," Morgan says. "Understanding such phenomena is a very important part of our work since they can have an impact on Earth and our society."
As the Sun becomes more and more active, scientists will no doubt relish the opportunities that solar maximum can provide. With the likelihood of more solar flares, eruptions and activity on the Sun's surface, who knows what new events they'll observe. What's clear is that with an impressive collection of solar observatories watching intently from space, we'll have a front-row view of the turbulent phenomena that define our violent star.
Copyright � Immediate Media. All rights reserved. No part of this article may be reproduced or transmitted in any form or by any means, electronic or mechanical without permission from the publisher.
{ width: 160, height: 160, defaultImage: '', layers: 'Artimg-BBC_SeasonsOfMars' }

![]() Orion is proud to partner with BBC Sky at Night Magazine, the UK's biggest selling astronomy periodical, to bring you this article as part of an ongoing series to provide valuable content to our customers. Check back each month for exciting articles from renowned amateur astronomers, practical observing tutorials, and much more!
Orion is proud to partner with BBC Sky at Night Magazine, the UK's biggest selling astronomy periodical, to bring you this article as part of an ongoing series to provide valuable content to our customers. Check back each month for exciting articles from renowned amateur astronomers, practical observing tutorials, and much more!
Not only does the Red Planet have seasons just like ours, they're also easy to see, writes Paul Abel
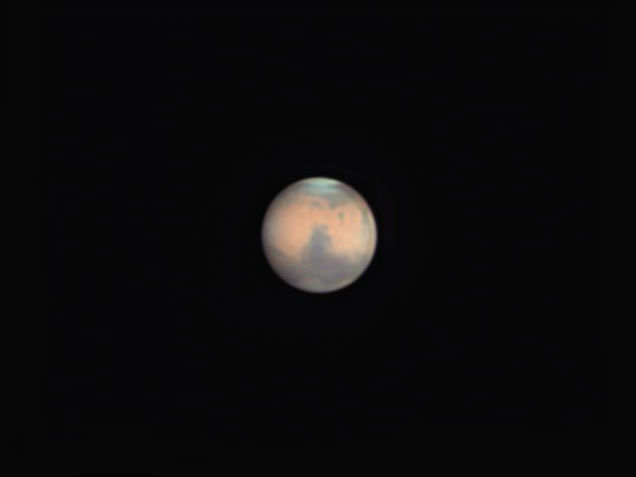
Mars by Jimmy E.
The changing of the seasons here on Earth can be quite spectacular. In many regions the whole landscape is transformed by the onset of spring: as the cold winter snows retreat and the days become longer, trees come into blossom and hibernating animals awaken. The people of ancient civilisations were particularly keen observers of these cycles, since their existence depended upon knowing when to plant seeds and harvest crops. It is no wonder that they constructed huge monuments to mark important dates like the spring equinox.
The well-defined seasons of winter, spring summer and autumn are the result of the Earth's 23.5° axial tilt. If the northern hemisphere is tilted towards the Sun it experiences summer, while the southern hemisphere experiences winter. Over the course of a year, both hemispheres experience all of the seasons, although because Earth's orbit is slightly elliptical they are not of equal length — summer in the northern hemisphere is longer than it is in the south.
Seasonal Similarity
Earth is not alone in having an axial tilt — all of the planets do, from Mercury's fractional 0.03° to Uranus' massive 82.2°. But Mars' tilt is the closest to Earth's at 25.2° and as such it experiences similar seasons — although being farther from the Sun means they last for longer.
Consequently, Mars is a very dynamic world, where the changing of the seasons can produce dramatic, planet-wide changes that are visible in small telescopes.
Mars has been closely scrutinised by Earthbound astronomers from the middle of the 19th century onwards, and although our early ideas about Martian seasonal changes being due to vegetation were wrong, the fundamental idea that its seasons have a lasting effect on its features is correct. All you need to do to see just how much Mars' surface has changed is compare a map of Mars from the 1950s to a current one.
In order to keep track of seasonal changes, we need to devise a calendar for Mars. Astronomers use a quantity called Martian solar longitude, or 'Ls', which is measured in degrees. Mars' orbit is divided into 12 months represented by 30° segments. For Mars' northern hemisphere, 0-90�° is spring time, 90-180° is summer, 180-270° is autumn and 270-360° is winter. Just like Earth, the Martian hemispheres experience opposite seasons, so if it is spring in the northern hemisphere it will be autumn in the south.
Month by Month
By the end of May, Mars will be a reasonably large 18 arcseconds, and its northern hemisphere will be slightly tilted towards us. By the time of opposition, Martian solar longitude has a value of 157°, so it is will be early summer in the north. You can look up the value of Ls in the freeware program WinJupos (www.grischa-hahn.homepage.t-online.de).
The large northern polar ice cap will now have shrunk dramatically, appearing as a small white patch in the far north. As the cap recedes, a dark band can usually be made out surrounding it. This is the Lowell band, which can sometimes be very prominent and appears a dark brown in color. With a 6-inch or larger telescope you may also be able to see an equatorial cloud band, which can give the northern part of Syrtis Major a distinctly bluish cast.
The melting of the north polar cap returns a lot of volatiles into the Martian atmosphere, and over the following months you should keep a look out for bright white clouds and fog patches. There are a number of well known places where they form: the Hellas, Argyre and Chryse basins for example. Sometimes they form around the vast shield volcano Olympus Mons or the other volcanoes in the Tharsis Plateau. Clouds and fogs sometimes encroach into the darker albedo features; you can enhance their contrast using a blue filter such as a Wratten number 80 (W80). If they form on the sunward limb, you can watch them dissipate as Mars rotates and the late morning Sun disperses them.
By the end of July, solar longitude on Mars will be 195°. Summer will have now given way to autumn and it will be slowly getting colder in the north. However, spring will have arrived in the south and the southern ice cap will now start retreating, and by the start of August the dust storm season will be underway. This is the time to keep a look out for storms which usually start off as small orange clouds. They may remain small or they can continue to develop until they have encompassed the entire globe, hiding all but the most prominent features.
By October, the southern hemisphere will be tilted towards us. It will be spring in the south, and if you have access to an 8-inch telescope you should be able to follow the shrinking of the south polar cap over the next couple of months. By the end of November, Martian solar longitude will be 271°, marking summer solstice for the southern hemisphere. The Martian disc will now be small, but imagers with large telescopes should still be able to pick out any dust storms.
Mars' Shifting Ice Caps
The extent of Mars' frozen poles varies greatly with the seasons.
The polar ice caps of Mars can be very striking and can be glimpsed in a 4-inch telescope when prominent. The caps wax and wane with the planet's seasons. At the time of opposition, it will be summer in the north, and so the northern ice cap will have shrunk to a small white patch, and it will probably be quite difficult to see.
As we move into September, Mars' southern hemisphere will start to tilt towards us. It will be spring in the south, and from the end of October onwards you should be able to watch the large south polar cap start to shrink. A blue Wratten 80 filter will help enhance the polar regions. By December, Mars will be quite small, and so you'll need at least an 8-inch telescope and a magnification of 250x or more to see the south polar cap.
Dust in the Wind
Tiny dust storms can develop into planet-wide events.
Although the Martian atmosphere is not very substantial, it can still produce winds that can develop into dust storms. The storms begin as small orange clouds, and can grow quite rapidly. There are three categories:
- Local: Small yellow-orange clouds usually less than 2,000km in size, but can encompass whole regions (such as the Hellas basin).
- Regional: These are much larger and may affect a whole hemisphere.
- Global: These cover the entire planet, and may hide the surface features for many months at a time.
In 2001, a dust storm was observed in the Hellas basin and developed into a global event shortly after. Another famous global dust storm occurred in 1971, obscuring the entire planet just as the Mariner 9 spacecraft arrived.
Dust storm season usually starts at a Martian solar longitude of 180°, so for this apparition the season starts in early July and will continue for the rest of the year. Small yellow clouds show up well in a red Wratten 25 filter, while a green filter can help to enhance larger storms.
A Martian Calendar
The 12 months of Mars, and some events to expect in them:
| Martian Month | Martian Solar Longitude (Ls) | Event |
|---|---|---|
| 1 | 0-30° | Spring equinox (northern hemisphere) at Ls=0� |
| 2 | 30-60° | Autumn in the south |
| 3 | 60-90° | Northern ice cap shrinking; white cloud activity |
| 4 | 90-120° | Summer solstice (northern hemisphere) at Ls=90� |
| 5 | 120-150° | White cloud activity still possible (March, April) |
| 6 | 150-180° | Autumn equinox (northern hemisphere) at Ls=180� (June) |
| 7 | 180-210° | Start of dust storm season (July, early August) |
| 8 | 210-240° | Spring in the south (August, early September) |
| 9 | 240-270° | Winter solstice (northern hemisphere) at Ls=270� (October, November) |
| 10 | 270-300° | Southern hemisphere now tilted towards us (November, December) |
| 11 | 300-330° | Winter for the northern hemisphere; Mars is now very small |
| 12 | 330-360° | End of dust storm season |
About The Writer
Dr. Paul Abel is an astronomer at the University of Leicester. Listen to him on BBC Sky at Night magazine's Virtual Planetarium.
Copyright � Immediate Media. All rights reserved. No part of this article may be reproduced or transmitted in any form or by any means, electronic or mechanical without permission from the publisher.
{ width: 160, height: 160, defaultImage: '', layers: 'Artimg-BBC_MoonMan' }

![]() Orion is proud to partner with BBC Sky at Night Magazine, the UK's biggest selling astronomy periodical, to bring you this article as part of an ongoing series to provide valuable content to our customers. Check back each month for exciting articles from renowned amateur astronomers, practical observing tutorials, and much more!
Orion is proud to partner with BBC Sky at Night Magazine, the UK's biggest selling astronomy periodical, to bring you this article as part of an ongoing series to provide valuable content to our customers. Check back each month for exciting articles from renowned amateur astronomers, practical observing tutorials, and much more!
How a view through a telescope as a boy kindled a life-long love of our planet's only natural satellite.

Mare Nectaris, Fracostorius and Piccolomini by Ronald Piacenti Jr.
I had my first telescopic view of the Moon when I was seven years old. A family friend, Major AE Levin, had his observatory in Selsey and I went there (long before I came to live there myself) to use his 6-inch refractor. The Moon was our first target; I looked through the eyepiece and saw the mountains, the craters and the valleys, obviously without understanding what they really were. I was fascinated, and I remember saying, "When I grow up I'm going to study the Moon." I did.
Of course, things were different in 1930. We knew much less about the Moon than we do now; it was thought that the atmosphere might be substantial enough for thin clouds to form and that a certain amount of volcanic activity might linger on. Our ignorance was complete about the far side, which is always turned away from Earth. As for travel there — well, even after the end of the Second World War, one very senior astronomer, Richard van der Riet Woolley, made the categorical pronouncement that the whole idea of space travel was "utter bilge".
So to me, as a boy, the Moon seemed to be far out of reach. All the same, I wanted to find my way around. So when I acquired my 3-inch refractor in 1933, I set about it. That telescope cost �7.10/-. I saved up for it and it remains one of my treasured possessions.
My observing and recording method worked for me, and I believe it will also work for other newcomers, so it seems worth passing on.
Lunar formations seem to alter in appearance according to the changing angle of solar illumination, and this can be really confusing. The large walled plain Maginus provides a good example of this. When seen near the terminator it is imposing, with peaks in its wall casting long shadows across its floor, but under high illumination it is difficult to identify at all. It was once said that "the full Moon knows no Maginus". Some craters with very dark floors (Plato, Billy, Grimaldi) or very bright walls (Aristarchus, Proclus) can be located whenever they are sunlit, but are exceptions rather than the rule.
What I did was take an outline map and make a pious resolve to make three drawings of every named object under different lighting conditions. The whole project took me over a year. I still have those sketches. Scientifically, of course, they are of no value, but when I finished the project I could find my way around the Moon more easily than I could my then home town of East Grinstead.
One lesson I learned during this project: don't try to draw too large an area at the same time; concentrate upon one thing. For example, the great dark-floored crater Plato is 109km in diameter. When drawing it, make it at least an inch across. Do the main outline first, then change to a higher magnification and fill in the fine details.
A new mare?
Today, a telescope such as my 15-inch reflector can be used to take photographs of the Moon far better than any professional observatory could have managed only a few decades ago. CCDs and similar devices have revolutionised everything. I didn't have CCDs, and depended on my eyes alone. But it was then possible for the amateur to make interesting discoveries and I thought I'd made two, though for one of them I later found out that I was 30 years too late.
When I finally took off my RAF uniform in 1945, I returned to the Moon. I was lucky enough to be given access to really large refractors, notably the 33-inch at Paris, the 27-inch at Johannesburg and the Lowell 24-inch at Flagstaff in Arizona, but I still used the modest reflectors in my own observatory at East Grinstead (it was 1967 before I settled down at Selsey). I concentrated on the formations right on the Moon's limb, which are very foreshortened and are carried in and out of view depending on the libration.
In the late 1940s I drew what seemed to be the edge of a mare, most of which was on the far side so that I could only see a tiny part of it — and then only under extreme libration. It wasn't on the maps I had. I called it Mare Orientalis, the 'Eastern Sea', and sent my results to the British Astronomical Association's Lunar Section. I was convinced that I was the first to see it. But ... I wasn't. It is clearly shown in the map produced in 1906 by the German astronomer Julius Franz — who also called it the Eastern Sea (because it lay at the eastern limb; much later the International Astronomical Union reversed east and west). Of course, we now have detailed maps of the far side, and know that the Mare Orientale is a vast ringed structure, unlike anything else on the Moon. At about the same time, I drew the large limb crater now named Einstein. I think I was probably the first to see this. Not that it matters!
An enduring fascination
At least my maps of the libration areas were used. The Russians asked me for them, and of course I sent them — they made me an honorary member of the USSR scientific society, and invited me to Moscow, despite the Cold War. I was an insignificant member of a very large team, but it was an exciting period, followed by the lunar landings. I was doing the TV commentaries during the Apollo missions; I was on the air when Apollo 8 carried men round the Moon for the first time. I was also broadcasting when Neil Armstrong made his "one small step" onto the barren rocks of the Sea of Tranquility. I can't remember my exact words, and unfortunately the BBC have lost all the tapes, but it was a moment never to be forgotten.
After Apollo, I concentrated my Moon observations on TLP, or transient lunar phenomena (a term I believe I invented). Much work remains to be done here, and there is no doubt that TLP are real; the Moon is not totally inert, though major upheavals belong to the remote past. The next stage will be the setting up of lunar bases, and the Moon will at last become a living world.
At the age of 86, I cannot hope to see this, or to carry out much more observation, but my interest and enthusiasm are as great as ever. A Moon man I've always been; a Moon man I'll remain to the end of my days.
Copyright � Immediate Media. All rights reserved. No part of this article may be reproduced or transmitted in any form or by any means, electronic or mechanical without permission from the publisher.
{ width: 160, height: 160, defaultImage: '', layers: '2008-08-01_Solar_eclipse_progression_with_timestamps-small' }

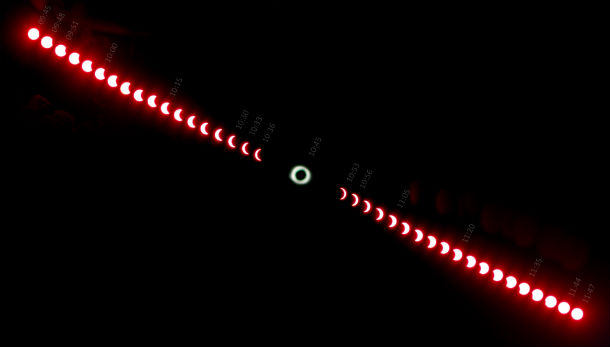
Photo courtesy of Kalan [CC BY 3.0], via Wikimedia Commons
As I mentioned in my last article, a total solar eclipse is a symphony of light and shadow, and you are the conductor. While key events will occur on schedule, only you can orchestrate how and when to observe the phenomena accompanying them. The following timetable of events can help prepare you for what to expect and when to expect it, for maximum enjoyment.
The Timetable
First contact (the eclipse begins). Look for a tiny black notch in the Sun's western limb. Like a finger striking a piano key three times in succession, the event occurs first in a telescope, then in binoculars, and finally to the unaided eye. Be sure to know exactly when and where to look along the Sun's limb to see it.
First 30 minutes. Make notes on the environment:
- Record the appearance of, and colors in, the landscape, sky, and clouds: Focus your attention along the horizon (north, south, east, and west), as the most dramatic changes will occur there.
- What is the quality of light, hard or soft? Hard light creates well-defined, high-contrast shadows; soft light renders shadows difficult to distinguish. The eclipse will start off hard but become increasingly soft, as totality nears.
- Open your senses: what's the temperature? Is there a wind? If so, what's the direction? How are birds and animals behaving? What sounds do you hear? How does the air smell (sweet, dry, moist)?
If you have a telescope with a safe solar filter, stare at the Moon's advancing limb. Does a band of light materialize just beyond it? It's an optical illusion — a bright afterimage of the Moon's black silhouette.
~ half eclipsed. Has the temperature dropped? Feel any wind or breezes? Project solar crescents onto your white cardboard: Use your fingers, straw hat, colander, or pinhole projector. Look for them occurring naturally on the ground under a tree (from sunlight shining through tiny spaces between leaves).
~ 30 minutes before totality. Repeat your observations of the environment. The intensity and quality of light should have changed perceptibly. If you cast a shadow of your finger against your card, it will appear fuzzier on one side than on the other; it will be fuzzier on the side where the Sun is being eclipsed. Move your finger further from the card, and it will appear more curved.
~ 20 minutes before totality. Repeat your observations of the environment: Colors should have begun to fade like an old print. You may see deeper into shadows as the quality of light softens. The eastern sky should turn yellow, while the western sky will look brooding.
~ 10 minutes before totality. Repeat your observations of the environment: The Moon's shadow should now be visible on the western horizon looking like a gathering squall. Bright planets should now be visible. The temperature may have dropped significantly. Birds may behave erratically.
~ 4 minutes before totality. Repeat your observations of the environment: birds may start to roost, cows and other animals may appear confused. Wedges of tangerine light will infiltrate the sky above the north and south horizons. The western sky looks dark and ominous.
~ 2 minutes before totality. Look for shadow bands — alternating dark and light bands that wash across the ground like waves in a pool. This atmospheric phenomenon arises when light from the Sun's narrowing crescent interacts with turbulent bundles of air in Earth's atmosphere.
~15 seconds before totality. The solar crescent breaks like quicksilver into delicate beads of sunlight. Called Baily's Beads, they are the dying rays of sunlight passing through lunar valleys.
~10 seconds before totality. Baily's Beads "dry up" — blinking out until one last one, the Diamond Ring, forms on the eastern limb of the Moon.
REMOVE YOUR ECLIPSE VIEWING GLASSES NOW!
~ five seconds before totality. Face west and sweep your eyes back and forth across the sky from north to south to see the large and spooky Moon's shadow crashing into the Sun in concert with the death of the Diamond Ring. Your descent into darkness has begun!
Second contact (Totality)! The Sun's ethereal corona will immediately steal your attention. If you're lucky, you will also catch a brief glimpse of the Sun's red middle atmosphere (chromosphere) and a bloody finger or two extending into the corona; these are actually giant prominences — eruptions of huge quantities of gaseous matter spewing from the Sun's surface.
Mid-totality. Repeat your observations of the environment. The sky does not turn completely dark during totality. The Sun's corona is about as bright as a full Moon, so it illuminates the landscape softly with a pearly light. The sky will glow orange beyond the blanket of the Moon's shadow, so the look and feel of the sky is more like deep twilight with a few bright stars and planets.
Third contact (end of totality).
PUT YOUR ECLIPSE VIEWING GLASSES BACK ON NOW! ...
Repeat all the observations above ... but in reverse.
Fourth contact. The Moon separates completely from the Sun, and the magnificent show is over.
CAUTION: Never look at the Sun, either directly or through a telescope or binocular, without a professionally made protective solar filter installed that completely covers the front of the instrument, or permanent eye damage could result. When using a truss tube telescope to view the Sun, both a properly fitting solar filter and light shroud are required.
 |
Stephen James O'Meara is an award-winning visual observer, whose writings, lectures, and numerous books on amateur astronomy have inspired observers across the globe to see the sky in new and wonderful ways. A contributing editor for Astronomy magazine, Stephen is an avid "eclipse chaser", having witnessed a dozen total solar eclipses dating back to 1959 (when he was 3 years old). |
{ width: 160, height: 160, defaultImage: '', layers: 'Solar_eclipse_1999_4_NR-small' }

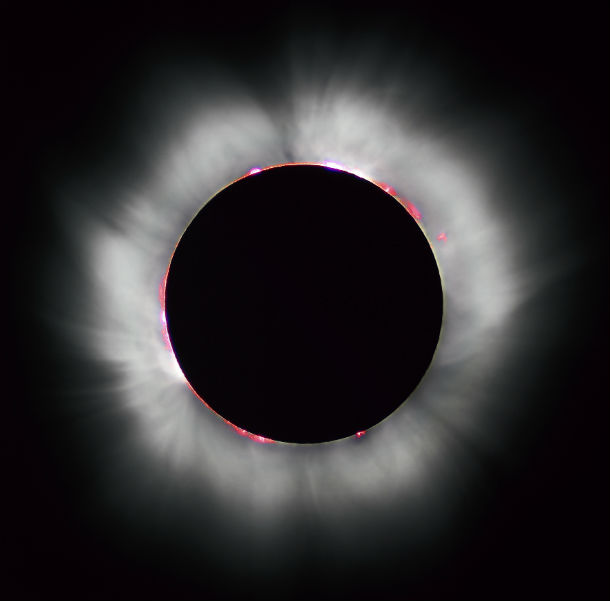
Photo courtesy of Luc Viatour [CC BY-SA 3.0], via Wikimedia Commons
A total solar eclipse is a symphony of light and shadow, and you are the conductor. Here's a list of items you may wish to have at the ready before the performance begins and why:
- Safe solar filters (for direct viewing). If you intend to observe the partial phases of the eclipse, you will need specialized solar filters designed specifically to protect your eyes. See You Can Watch Totality Without Eye Protection for more details about solar filters.
- A large white card (for projection). You don't need eye protection if you decide to project a magnified image of the partial phases. Here's what you do: if you have binoculars, cap one of its front lenses and turn your back to the Sun. Hold the binoculars over your shoulders (with the uncovered front lens pointing toward the Sun). Move the binoculars around and watch their shadow until you see an image of the Sun, which you can project onto the card; the view will be upside down. The further the card is positioned from the binoculars, the larger the image will be. If you do not have binoculars, make a smooth round hole in the card with a pin and use it to project a smaller view onto any surface (another large white card will do)
- Another large card (for artistic pinhole projection). Feeling artistic? Use your pin to make a fanciful design in another large card, and project the Sun through it when partially eclipsed; you'll see your creation made of multiple solar crescents. Test and modify the design on any sunny day before the next solar eclipse.
- A straw hat, colander, or other item with tiny holes will project multiple solar crescents — no artistic talent required.
- Creature comforts. Make sure you're comfortable and well stocked; the partial phases last about 90 minutes, both before and after totality, and you may be exposed to direct sunlight for a good part of the day, so be prepared (hat, sunscreen, etc.). Have plenty of water and food (cooler box with ice), and take portable chairs and a table. Make yourself at home.
- Watch or timepiece. Part of your pre-eclipse preparations should be to know the times of first, second, third, and fourth contact at your eclipse-viewing site (See A Timetable of Eclipse Events for definitions). A timepiece will help you prepare for the onset of these important events. You may also want to record the times of certain phenomena as you see them.
- Notebook, pens/pencils, sketchpad, art supplies, voice recorder. Don't rely on your memory; so much happens to the Sun, Moon, and environment during an eclipse, that you may want to record the most memorable events — the color and details of the eclipse, changes in light and color in the sky and landscape, the behavior of birds and animals, etc. — as they happen in your preferred style of note taking.
- Thermometer, flag, compass, and chocolate bar in wrapper. As the solar eclipse progresses, especially near totality, the temperature may drop noticeably; some people like to melt a chocolate bar in its wrapper during the partial phases, to see if it will harden during totality. Winds may also rise, fall, or shift direction, all of which is fun to record.
- Red flashlight. If you intend to take notes during totality, be sure to use a red flashlight, otherwise you will temporarily ruin the way your eyes adapt to the dark.
- Large white sheet. Lay a large white sheet flat and smooth on the ground and use it to watch for dim shadow bands (long alternating bands of light and dark) that slither across the ground in the minutes just before and after totality. Your compass can also be used to mark the cardinal directions around the sheet, so you can tell in which direction the bands move.
- Cameras and accessories.If you plan on taking pictures, make sure you have your camera and accessories: lenses, cable release, batteries and spares, selfie stick, tripod, etc. If you intend to video the event, consider turning it on in the minutes leading up to totality and letting it run until the end of totality to capture the emotion of the event.
- A car (full tank) and a good map. You never know what curve balls Mother Nature might toss your way. If clouds threaten your chances of seeing totality, you may have to drive a ways to get to clearer skies, i.e., do an eclipse chase (see An Unforgettable Eclipse Chase). To do so, you'll want a full tank of gas and a good map with the eclipse path and center line plotted on it.
It's always best to show up at least an hour before the start of the total solar eclipse. This gives you time to assess the weather, do an eclipse chase (if necessary), or set up your equipment without rushing. As always, enjoy the event and have fun.
CAUTION: Never look at the Sun, either directly or through a telescope or binocular, without a professionally made protective solar filter installed that completely covers the front of the instrument, or permanent eye damage could result. When using a truss tube telescope to view the Sun, both a properly fitting solar filter and light shroud are required.
|
Stephen James O'Meara is an award-winning visual observer, whose writings, lectures, and numerous books on amateur astronomy have inspired observers across the globe to see the sky in new and wonderful ways. A contributing editor for Astronomy magazine, Stephen is an avid "eclipse chaser", having witnessed a dozen total solar eclipses dating back to 1959 (when he was 3 years old). |
{ width: 160, height: 160, defaultImage: '', layers: 'Artimg-BBC_ImagingMoon' }

![]() Orion is proud to partner with BBC Sky at Night Magazine, the UK's biggest selling astronomy periodical, to bring you this article as part of an ongoing series to provide valuable content to our customers. Check back each month for exciting articles from renowned amateur astronomers, practical observing tutorials, and much more!
Orion is proud to partner with BBC Sky at Night Magazine, the UK's biggest selling astronomy periodical, to bring you this article as part of an ongoing series to provide valuable content to our customers. Check back each month for exciting articles from renowned amateur astronomers, practical observing tutorials, and much more!
Whether you have a phone camera or a pro camera, we show you how to take your first lunar astrophoto.

Crater Copernicus by Bob S.
The silvery Moon riding high in the sky on a crisp winter's night is a perennially alluring sight, and for the photographers among us its smooth seas, mountains and crater-flecked plains present a similarly inescapable attraction. For those just starting out in astrophotography, the Moon's brightness and large apparent diameter make it a superb target to cut your astro imaging teeth on. Indeed, nowadays you need little more than a smartphone camera and small telescope to snap detailed images of our satellite's spectacular, rugged surface.
Here, we're going to explore some of the basics of lunar imaging, from the techniques that can produce great results to the features and phenomena that make ideal subjects for beginner shots. We'll also use key astro imaging skills — such as composition and tracking a target — in two step-by-step projects.
Afocal Imaging
Capturing the view through your telescope with a smartphone.
If you own a small scope then you may have already tried one of the simplest methods for grabbing a picture of the Moon: afocal imaging. This is a fancy name for something that's really very simple - holding your camera up to the eyepiece of the telescope and snapping the view.
Traditionally, point-and-shoot cameras and the like have been used for afocal imaging with great success, but now - in the age of the camera-equipped smartphone - wonderfully detailed, sharp images can be captured with just the mobile in your pocket. One of the main challenges of afocal imaging is keeping the camera aligned with the eyepiece so that the Moon stays in view. Special adaptors are available to buy that will hold a smartphone or digital camera in place to make this easier, but if you're going the handheld route then we recommend using a low power eyepiece at first.
Basics of High Frame Rate Imaging
Learn how to cut through the wobbles of our atmosphere to create sharp lunar images.
Hold a digital camera or smartphone up to the eyepiece of a telescope and snap the Moon's disc afocally and you're likely to notice that from shot to shot the sharpness in the image varies. In one area of an image you might capture a crisp view of a crater field, whereas elsewhere in the shot the image is slightly blurry. In the next shot another area may be sharper or the whole disc may be noticeably soft.
This variation in detail from moment to moment is all down to the turbulent undulations of the atmosphere high above us. When astronomers talk of good 'seeing' conditions, what they mean is that these undulations are less pronounced and the view is steadier. But even on a 'normal' night there may be very brief moments of steadiness that provide a fleeting, sharp, view of the lunar surface. What if there were some way we could capture these transient moments and combine them all into one really sharp image?
This is precisely the principle behind high frame rate lunar imaging. By using a webcam or a specialist high frame rate camera and a computer, astrophotographers can capture a short video of hundreds, perhaps even thousands, of individual frames. Then, using software such as RegiStax (www.astronomie.be/RegiStax) or AutoStakkert (www.autostakkert.com), the frames from these videos can be sorted and only the best selected. These are then stacked together to form a final image that is carefully sharpened to produce a shot that's beautifully detailed.
Focal Length and Composition
Learning how to place your target properly within the image frame will improve your astrophotos.
When it comes to composition, the choice of what focal length to image the Moon at naturally makes a tremendous impact on the final picture.
A short focal length DSLR lens will produce a wide view, with the Moon appearing tiny - perfect for conveying a sense of the great expanse of surrounding sky or incorporating a large-scale atmospheric phenomenon.
Using a longer focal length lens, or small refractor, will change the feel of the image entirely: here faraway trees, hills or buildings can be brought right up close with the disc of the Moon looming over them. And then there's the high-magnification world of high frame rate imaging, where the field of view is generally very small. Even here it's worth considering where in the shot to place the surface feature you're imaging, and whether a carefully planned mosaic could draw the viewer's eye more effectively.
Step-by-Step: Capture the Full Moon as it Rises
Image the full Moon rise with a DSLR or bridge camera, a lens or small refractor, and a static tripod.
1. Choose your location
An interesting foreground makes for an attractive moonrise shot. A sea horizon offers a dramatic setting if you're planning to use a longer lens, especially with the atmosphere distorting and reddening the Moon's disc. Alternatively a high vantage point can give a great sense of depth and distance.
2. Timing and direction
The time the Moon rises and the direction it does so are also vital considerations. Planetarium software such as Stellarium (www.stellarium.org) and smartphone apps such as The Photographer's Ephemeris can be extremely useful for planning precisely where you need to be looking and when.
3. Set up your equipment
Set up 10-15 minutes before moonrise, just in case you have kit issues that need addressing. If you're at a new site, this will also give you a chance to choose the best view or foreground for the photo. You'll typically only have a short window to get the shot once the Moon is above the horizon, so preparation is crucial.
4. Compose the shot
Think about the composition of your shot. You may have decided on your foreground, but how do you want to include it? With a plain horizon you could offset the Moon, perhaps to include a feature of the landscape. If you have a sea horizon, the moonlight on the water might help create an attractive focal point.
5. Capture the shot
Once the Moon's up, experiment with the exposure and ISO settings to ensure you get detail in your foreground without overexposing the Moon. It's all about waiting for that ideal moment when the Moon's light is balanced with the fading twilight, the clarity of the sky and how high the lunar disc is above the foreground.
6. Edit and enhance
When you've captured your shots, it's worth loading them into photo editing software for final enhancements. Of particular use for moonrise images are the tools that allow you to lighten the 'shadows' or darker regions within an image - this can really help to bring out foreground detail that is slightly underexposed.
Step-by-Step: Imaging Earthshine
Discover how to image the portion of the Moon that's illuminated by the light scattered off Earth.
1. Consult a calendar
Find out when the Moon will be a thin crescent - there's a phase chart in every BBC Sky at Night Magazine, and you can also use smartphone apps or planetarium software such as Stellarium (www.stellarium.org). The four days either side of new Moon are ideal.
2. Get your kit set up
Depending on when you're imaging, the Moon will be relatively low in either the west or east, so ensure you have a clear view. Set up your mount, scope and camera as normal — you'll need a driven mount. We'll be using a DSLR and small refractor or long lens for this tutorial.
3. Bring the Moon into view
Once set up, move or slew your telescope to bring the Moon into the field of view. If your mount can track at the lunar rate, as opposed to the sidereal one, it's a good idea to select that now, especially if you intend to use a longer focal length lens or scope.
4. Focus the image
Getting a sharp image is the key to capturing a great earthshine shot, so confirm that the view is in focus. Here the live preview function on modern DSLRs is particularly helpful. Observing the ragged inner edge of the lunar crescent is a good way to judge the focus.
5. Finalize composition
Next look at the composition of your shot. If your field of view is fairly wide think about including some trees, a distant hedgerow or some buildings. If you're shooting close in, consider how the heavily overexposed crescent and the glow around it will look in the frame.
6. Capture
Be sure to shoot in RAW to give you greater flexibility when it comes to editing. Unlike other forms of lunar photography, earthshine generally requires only single shots. Using a remote shutter release cable will keep the image free from blurring caused by shake introduced when you push the shutter button.
7. Settings
The camera settings required will vary between equipment setups. Exposures of a few seconds at ISO 400-1600 should work, with the lunar crescent being overexposed by necessity. Longer, low ISO exposures, for example, will produce smoother images but may cause foreground blurring as the mount tracks.
8. Tweaks, crops and final edits
Editing programs like Photoshop (paid) and GIMP (www.gimp.org) allow you to tweak the 'Levels' to improve the colour balance, brightness and contrast. You may also like to employ the 'Unsharp Mask' tool to sharpen up fine detail on the lunar disc.
Top Lunar Surface Targets
If you want to try out high-magnification lunar imaging, here are eight top targets to get you going.
Catharina, Cyrillus and Theophilus
These three craters are some of the most photographed on the Moon. For a particularly dramatic shot, image them two days before first quarter.Aristoteles
Crater Aristoteles sits on the edge of the Mare Frigoris. Its intricate ejecta blanket and terraced walls make it a wonderful crater to image when it is being lit from a low angle.Gassendi
You'll find Gassendi on the northern shore of the Mare Humorum. When it comes to imaging it, good seeing conditions are needed to clearly reveal the interesting rille system within.Plato and the Vallis Alpes
The region on the northeastern edge of the Mare Imbrium is rich in attractive targets and the crater Plato and the nearby Vallis Alpes are two that no lunar imager should overlook.Rupes Recta
Also known as the Straight Wall, this huge fault is a fascinating feature to observe and image. You'll need to catch it when it's illuminated obliquely however, otherwise it's practically invisible.Schr�ter's Valley
Vallis Schr�teri, or Schr�ter's Valley, sits next to the prominent crater Aristarchus. Capturing the fine detail of this winding volcanic feature is a good test of a beginner's imaging skills.Tycho's Ray System
The bright material — known as a ray ejecta — blasted across the Moon's surface by the impact that formed the crater Tycho is one of the few lunar features which is best seen at full Moon.Copernicus
One of the most spectacular craters on the Moon, Copernicus has it all. Its grand terraced walls, prominent central peaks and surrounding ejecta blanket make it a great imaging target.
Copyright � Immediate Media. All rights reserved. No part of this article may be reproduced or transmitted in any form or by any means, electronic or mechanical without permission from the publisher.
{ width: 160, height: 160, defaultImage: '', layers: 'Artimg-BBC_visual_observing_07_16' }

![]() Orion is proud to partner with BBC Sky at Night Magazine, the UK's biggest selling astronomy periodical, to bring you this article as part of an ongoing series to provide valuable content to our customers. Check back each month for exciting articles from renowned amateur astronomers, practical observing tutorials, and much more!
Orion is proud to partner with BBC Sky at Night Magazine, the UK's biggest selling astronomy periodical, to bring you this article as part of an ongoing series to provide valuable content to our customers. Check back each month for exciting articles from renowned amateur astronomers, practical observing tutorials, and much more!
Paul Abel's guide to the closer planets shows how to get the best views and sketch the results.
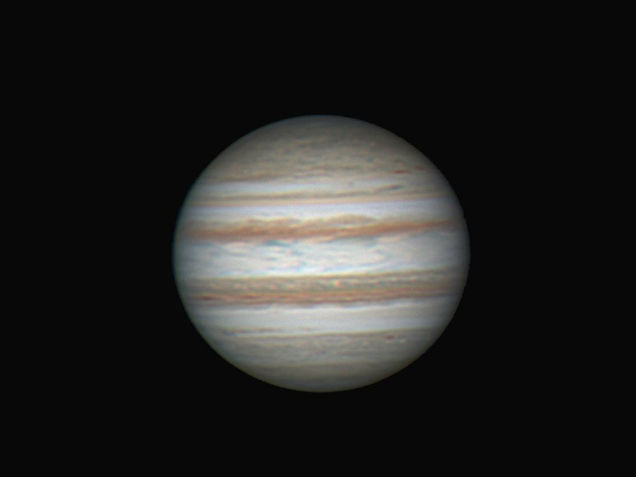
Jupiter by Mark Bell
There was a time before webcams and CCDs when photographic film had a resolution lower than that of the human eye. During this era, the only reliable tools astronomers could rely upon were their own vision and a pencil, but even with these limited resources some startling discoveries were made. The astronomers of this era seem to be like great explorers venturing out into a vast and complex cosmos, their drawings and observations rather like postcards from alien frontiers.
Today, the sensitivity and size of imaging equipment has improved immeasurably. Yet even in the 21st century, there are still areas of amateur astronomy in which visual observers can make valuable contributions. Visual observers need many specialist techniques to obtain reliable results that can go into the scientific record and here we introduce some of these observing skills with the aim of making you a better astronomer. We're going to look at the most rewarding planets for study: Venus, Mars, Jupiter and Saturn.
Venus
Venus can be a challenging object for visual observers, yet in the 1960s it was such astronomers who helped to establish that the planet's clouds have a three-day rotation period. With Venus, a visual observer's main objectives are to obtain disc drawings that correctly show the phase and to record elusive cloud markings.
A cursory telescopic view of Venus will reveal a bright white disc with a phase. The bright cusp caps covering the poles may be glimpsed, but that will probably be the only detail. Don't be put off, though: with time and patience subtle cloud markings come into view. The first thing to do is to find the correct magnification: one that gives a reasonable disc size and is suitable for the seeing conditions. I find 130-160x to be about right. Venus is also best observed in bright skies, as this reduces the glare from the disc.
As with all planets, don't expect to see all the fine details at once — you will need to engage with your visual system (one of the most remarkable adaptive optics kits on Earth). Ask yourself what you can see on the disc and slowly your eyes will respond. Spend about 15 minutes looking at the planet's disc before you start drawing.
To sketch Venus you'll need a circle 50mm in diameter. Draw in the phase and then, with a 2B pencil, gently shade in the subtle cloud markings. Eyepiece filters are a great help as they allow you to see into different depths of the atmosphere. Red and blue filters help to enhance cloud markings, while a yellow filter will bring out the polar collars.
The Schr�ter Effect
Look at Venus when it's predicted to be at half phase and you'll notice that the phase is actually slightly less than half. This is the Schr�ter effect, where Venus's observed phase is always less than the theoretical one, and it is particularly prominent in a blue filter.
The phenomenon was first recorded by Johann Schr�ter in the 1790s, and is due to light being scattered in the thick Venusian atmosphere. You can record it for yourself: on your drawing: simply measure the distance (in mm) with a ruler from the limb to the terminator and divide this distance by 50 to get the observed phase of Venus. Do this for all of your drawings and you can plot the decreasing phase against time on a graph and show how the effect changes over the course of an elongation.
Mars
The ochre disc of Mars is full of subtle, slowly changing features. Mars is a world of vast volcanoes, continent-sized canyons and majestic deserts. It's not uncommon for fogs to collect in the basins such as Hellas and Argyre, and the volcanoes attract brilliant clouds at their summits. Martian meteorology changes over the course of a few hours, and it can all be recorded and studied visually.
The well-defined Martian seasons produce different phenomena. During the apparition of 2013-14, it was springtime in the northern hemisphere, and the brilliant north polar cap shrank dramatically as it sublimated away. Recording the retreat and advance of the polar caps is important as it reveals information about the Martian climate.
The dust-storm season occurs during spring and summer in the southern hemisphere. Telescopically, these storms resemble small orange clouds, and they can engulf the entire planet. It may take many months for the dust to clear and afterwards there may be changes to the dark albedo features. You can track the progress of large dust storms, recording their size and changes to local surroundings. A green filter helps enhance them.
Mars tolerates high magnification well because red light is less affected by Earth's turbulent atmosphere. At powers of 300x, dark albedo features like the Syrtis Major will show a multitude of subtle structure.
Drawing Mars requires some patience. You can't spend any longer than 15 minutes doing so as Mars's rotation will have moved the features away from where you've placed them in the drawing. Sketch the phase first if it is present, then the polar caps. Spend seven minutes putting down the obvious features and use the remaining time to put in any bright clouds you can see. A blue Wratten No. 80A filter helps enhance white clouds. Aim to make two to three drawings over a night to show how the clouds change.
Jupiter
The restless clouds of Jupiter have generated plenty of work for visual observers for hundreds of years. Through a telescope, this gas giant is differentiated into darker belts and brighter zones. Powerful jet streams carry large storms along, presenting us with an ever-changing cloudscape.
Jupiter has a large disc and magnifications of 160x or more are sufficient to reveal a lot of fine detail. A red filter helps to enhance bluer features like festoons along the equator. Conversely a blue filter helps to enhance redder objects like the belts and the Great Red Spot. A yellow filter gives good all-round contrast.
It takes practice to record Jupiter correctly, but doing so will really hone your observational skills. A Jupiter drawing requires the correct blank: this planet is appreciably flattened due to its rapid rotation, so the standard blank is 64mm wide but only 60mm high.
Like Mars, Jupiter rotates quickly; in this case you have 10 minutes to make your sketch. First draw the main belts and large storms, recording the ones near the preceding edge first as these will vanish soonest. Spend the remaining time adding in the finer details.
Supermoon
Jupiter's most famous and persistent storm is the Great Red Spot, a vast hurricane situated in Jupiter's South Tropical Zone. Visible to a 5-inch scope, the Great Red Spot drifts in longitude at varying speeds; this drift rate can be measured.
When the storm is visible, watch as it moves towards the central meridian. When you think its centre is on the meridian, record the time. Use freeware software WinJUPOS to convert the time into longitude and repeat this whenever you observe the Great Red Spot. You can plot the resulting longitudes against time and look at how quickly the spot is moving in Jupiter's atmosphere.
Saturn
It is often said that majestic Saturn is a 'quieter' Jupiter. The belts and zones of Saturn's atmosphere are less well defined, but the storms that this planet can produce are even more ferocious.
Watching and charting storm activity is one of the main tasks for visual observers of Saturn. Storms are seasonal, occurring every 30 years, and usually take the form of a large white oval on Saturn's equator. The next outbreak is due near 2020.
Recently Saturn has produced other storms: quite unexpectedly in late 2010 a large storm erupted in the planet's northern hemisphere, lasting into 2011. This powerful storm churned up the North Tropical Zone, reminding us of the need for a constant vigil if we're to catch the next outbreak.
To really view Saturn, you'll need to use a power of 160x or more; 250x is a good all-round magnification. Drawing Saturn requires five accurately placed ellipses — so don't try to do it free-hand, use a carefully produced blank.
Saturn is also a quick spinner, so spend about eight minutes drawing in the main features on the disc and the rings, and use the final four minutes to finish the fine details such as the fainter belts and shadows. Filters work well for Saturn: yellow enhances the contrast between belts and zones, while light blue helps to emphasise redder features. Also watch out for a bi-coloured aspect of Saturn's rings: occasionally Saturn's outermost ring, the A-Ring, appears brighter in a blue filter than in a red one. Although rare, this phenomenon has been reported by visual observers and is worth keeping an eye out for.
Keeping a Log Book
Keeping a log book is an essential skill for any visual observer. It will keep your observations in a logical structure and you'll be able to look back and see how your drawing skills have developed. Your log book should be a sturdy bound notebook, and every observation should include the following information:
- The Date of Observation
- The Time, always in UT
- The Telescope and Magnification, along with the details of any filters used
- The Seeing Conditions, recorded using the Antoniadi scale, which runs in Roman numberals from I to V; I is perfect seeing and V is a very poor unfocused image
Tools of the Trade
Eyepieces
A selection of medium- and high-power eyepieces, giving a range of magnifications to suit your seeing conditions. A useful range is 160-190x for low power, 200-250x for medium power and 300x-plus for high power.
Filters
These help to enhance different features on planetary discs. Red, blue and yellow filters are invaluable.
Pencils
Some planetary features are more subtle than others, so you'll need a range of pencils from HB to 6B to capture as many as possible.
Red Light
White light destroys night vision, so always use a red light to draw.
WINJUPOS
This essential free software displays the features present on Jupiter or Saturn's disc at any date and time, and gives you the planetary longitudes for both gas giants so you can record the location of details. It is especially helpful as these planets have three systems of longitude due to their different bands of rotation.
About The Writer
Dr. Paul Abel is an astronomer based at the University of Leicester. You can listen to him on the BBC Sky at Night Magazine Virtual Planetarium each month.
Copyright � Immediate Media. All rights reserved. No part of this article may be reproduced or transmitted in any form or by any means, electronic or mechanical without permission from the publisher.
{ width: 160, height: 160, defaultImage: '', layers: 'Artimg-BBC_LunarObserving_07_16' }

![]() Orion is proud to partner with BBC Sky at Night Magazine, the UK's biggest selling astronomy periodical, to bring you this article as part of an ongoing series to provide valuable content to our customers. Check back each month for exciting articles from renowned amateur astronomers, practical observing tutorials, and much more!
Orion is proud to partner with BBC Sky at Night Magazine, the UK's biggest selling astronomy periodical, to bring you this article as part of an ongoing series to provide valuable content to our customers. Check back each month for exciting articles from renowned amateur astronomers, practical observing tutorials, and much more!
Explore the seas and craters that texture the lunar surface with our beginners' observing guide.

Sea of Serenity by Craig Heaton
The Moon is an ideal object to begin your observing odyssey because it is big, bright and covered with amazing detail. But the thing that surprises most novice observers is the variation it holds. Though the same hemisphere faces Earth at all times, what you can see on the Moon changes from one night to the next.
You may be forgiven for thinking that full Moon is the best time to examine our close companion — not so. While this is a good time to see the long, bright rays of ejecta surrounding prominent craters such as Tycho, the high altitude of the Sun in the lunar sky means no shadows are cast, resulting in a washed-out view of the Moon.
In general, the best time to view a given lunar feature is when the terminator, the demarcating line that separates lunar day and night, is nearby. This is the region where the Sun is either rising or setting, where crater rims and mountain peaks stand out in stark relief, casting inky black shadows across the lunar surface that exaggerate their presence. Those further from the terminator show hardly any shadows and are harder to make out.
At day zero of the lunar cycle — new Moon — the whole of the dark lunar hemisphere points towards Earth. Over the next 15 days the terminator slowly creeps across the lunar surface from east to west until the disc is fully illuminated at full Moon. Then the tables are reversed as the encroaching darkened hemisphere heads west with each passing day, until the diminishing crescent becomes lost in the pre-dawn twilight.
Peering Beyond the Limb
The nature of the Moon's orbit generates another effect that is a boon to lunar observers, a rocking and rolling motion that we call libration. The Moon's orbit is elliptical, and as a result its distance from Earth does not remain constant. When closest it speeds up slightly; when more distant it slows down. This small variation is enough to cause the Moon to 'nod' back and forth on its axis, giving us an occasional chance to see a little more around its eastern and western edges.
The orbit is also slightly inclined, and this causes it to sometimes appear above the Earth's orbital plane and sometimes below. This gives us an opportunity to peek over the top, and under the bottom, of the Moon over time. Taken together, this libration allows us to see a total of 59 percent of the Moon's globe, revealing tantalising features normally hidden from view.
With the naked eye it's easy to see the progression of lunar phases, full disc effects such as earthshine and the major lunar seas. Binoculars increase the detail you'll see: as well as dark seas, you'll now be able to spot individual craters and large mountain ranges, especially when they are close to the terminator. The smallest craters you'll be able to pick out will depend on how still you can hold your binoculars, but a pair of 7x50s should comfortably reveal features down to about 50km across.
A telescopic view of the Moon is amazing and one that never gets old. At low magnifications, the amount of detail visible is breath-taking, especially close to the terminator where relief shadows really help to emphasise the detail. Upping magnification by using shorter focal length eyepieces will get you in closer and give you opportunity to 'roam' around the lunar landscape.
Trifles and Troubles
The view you have of the Moon through a telescope will differ from what you see with the naked eye or binoculars depending on its optical arrangement. Through a refractor or compound instrument, the Moon will appear flipped west to east, while through a reflector the image will be inverted.
If you look at the Moon with a telescope you may also notice the surface appears to gently wobble or sometimes even shimmer. This effect is caused by air moving through the atmosphere of our planet, and the greater the turbulence the worse the views.
Such 'seeing' conditions can vary from minute to minute and night to night. The best views will always be had when the seeing is steady and these undulations are less intense; poor seeing, on the other hand, results in loss of detail and fuzzy lunar features.
For centuries, telescopic observers have also reported seeing short-lived changes in brightness on the surface of Moon, events that are collectively referred to as transient lunar phenomena, or TLPs. They have been described as luminous spots that suddenly appear and vanish, localised patches of colour and temporary blurring or misting of the Moon's fine surface detail. However, despite several high-profile reports — including those from Sir William Herschel in 1787 and French astronomer Audoiun Dollfus in 1992 — their existence remains debated to this day.
The problem is that TLPs, being transient by nature, are hard to independently verify and impossible to reproduce. Most are spotted by lone observers, or are only witnessed from a single location on Earth, casting doubt on whether they truly occurred at all. Some believe that TLPs are little more than the result of poor observing conditions or equipment issues. Assuming they do occur, the most popular theory to explain them is residual outgassing from below the lunar crust.
What does seem clear is that TLPs, whether real or imagined, are more prone to occur on some areas of the lunar surface than others, with more than one-third of official reports coming from the region around the Aristarchus plateau.
The Many Guises of the Moon
Even to the naked eye, our satellite is a beguiling subject.
Earthshine
The Moon is not solely lit by sunlight. When it is in a slender crescent phase in the evening or dawn twilight, it's sometimes possible to see its dark portion gently glowing due to sunlight reflected off the oceans and clouds of planet Earth. This effect is known as earthshine. Our planet actually reflects more light onto the lunar surface than the Moon gives us when it is full.Lunar Halos
On frosty nights, often when the Moon is or near full, you may be able to spot a faint ring of light caused by ice crystals refracting the moonlight in the upper atmosphere. Since the ice crystals are normally all hexagonal, the ring is almost always the same size; it has a diameter of 22�. Sometimes it is also possible to detect a second ring, 44� in diameter.Red Moon
There are two reasons the lunar disc may take on a ruddy hue. The first is if it is low in the sky, so light reflected from it passes through more of our atmosphere. Blue and violet light is scattered more easily, so we see a redder Moon. The other is during a total lunar eclipse: longer sunlight wavelengths are refracted by the Earth's atmosphere onto the eclipsed Moon.Supermoon
A supermoon is a full Moon that coincides with the closest point to Earth in its orbit, causing the lunar disc to appear larger by as much as 14 per cent. The word is rooted in astrology but, given the correct astronomical term is a 'perigee-syzygy Moon', you can see how it caught on. A supermoon also occurs with a new Moon at perigee — but you aren't able to see this one.
The Big Myth — The Moon illusion
Look for the Moon when it is low to the horizon and you may get the impression that it is unnaturally large — this is the phenomenon known as the Moon illusion, and it appears to be more pronounced around full Moon when the maximum area of its disc is illuminated. In reality, the Moon has more or less the same apparent diameter of around 0.5�, whether it is looming over the horizon or riding high in the sky.
One explanation for the illusion arises from our perception of the shape of the celestial sphere above us; instead of a hemisphere, we perceive the sky to be a flattened dome. Consequently the lower the Moon is in the sky, the farther away and larger it is perceived to be. When the Moon is high in the sky we conversely perceive it to be closer to us and therefore smaller in apparent size.
Few people seem to be immune to the Moon illusion, even though the viewer may be fully aware that for any given evening there is actually no appreciable difference in the Moon's apparent diameter, regardless of its height above the horizon.
The Rarest Moon
No doubt you've heard the expression 'once in a blue Moon' — meaning something that is exceptionally rare. But what exactly is a blue Moon, and does our neighbour ever adopt an azure appearance?
When astronomers use the term, they are most likely referring to one of two lunar events — neither of which cause the Moon to turn blue.
Traditionally, a blue Moon is considered to be the third full Moon in a season that has four. Normally, there are only three. The second and more modern interpretation is that it is the second full Moon that occurs in a calendar month, which can happen as a lunar cycle only takes 29.5 days to complete.
Why the discrepancy in definitions? It appears to be the result of a publication mistake that appeared in 1946 that confused the traditional meaning, which dates back to 19th-century editions of the Maine Farmers' Almanac.
And yet there is circumstance that can cause the Moon to truly appear bluish, as it did in the wake of the Krakatoa eruption in 1883, and it is exceptionally rare. The secret is that the atmosphere needs to be flooded with dust particles of a specific size — slightly smaller than the wavelength of red light — and that size alone. These particles scatter red light, causing the Moon to take on a slight cerulean cast.
Copyright � Immediate Media. All rights reserved. No part of this article may be reproduced or transmitted in any form or by any means, electronic or mechanical without permission from the publisher.
{ width: 160, height: 160, defaultImage: '', layers: 'Artimg-BBC_MagicOfSaturn_07_16' }

![]() Orion is proud to partner with BBC Sky at Night Magazine, the UK's biggest selling astronomy periodical, to bring you this article as part of an ongoing series to provide valuable content to our customers. Check back each month for exciting articles from renowned amateur astronomers, practical observing tutorials, and much more!
Orion is proud to partner with BBC Sky at Night Magazine, the UK's biggest selling astronomy periodical, to bring you this article as part of an ongoing series to provide valuable content to our customers. Check back each month for exciting articles from renowned amateur astronomers, practical observing tutorials, and much more!
To many, the Ringed Planet is the first 'wow' object they glimpsed through a telescope. Paul Money explains how you can see it for the first time.
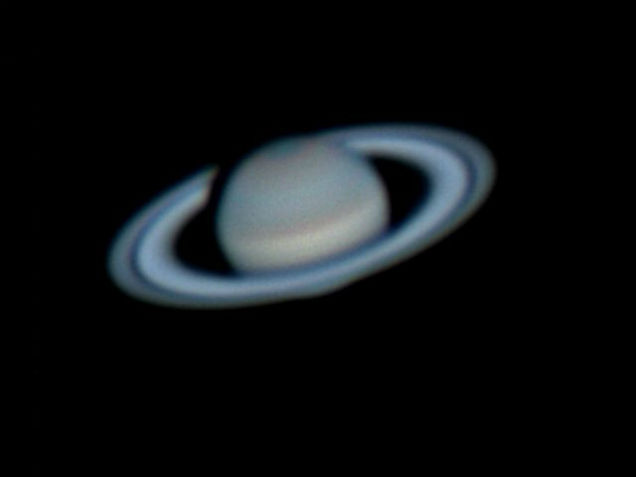
Saturn by Mark Bell
If there is one planet in our Solar System that captures hearts, inspires minds and invokes joy when seen through a telescope it surely has to be the ringed wonder that is Saturn. Even through a modest instrument such as a 2.5-inch spotting scope it is possible to see that the planet is more than a roundish globe. No other planet comes close to capturing the wonder and imagination of young or old when they see Saturn through a telescope for the first time.
Reactions to the view can be interesting. While running a public astronomy event with Saturn as the 'star', a nine-year-old boy took one look through a 10-inch telescope and, for one cheeky moment, exclaimed it had to be a picture stuck to the end of the tube! A tap on the tube as he took another look put him right: the view shimmered and he stepped back amazed, exclaiming, "Wow it really does have rings!"
It is this joy of discovery when someone takes their first look at the beguiling planet which is so inspiring and moving. Saturn, along with the craters on the Moon, is consistently voted as the favourite things to see through a telescope on outreach evenings.
It is a common mistake to think that you need a large telescope with lots of sophisticated equipment to get the best view of Saturn. The truth is you don't: even a pair of 10x50 binoculars will show that the planet is slightly extended either side of the disc and reveal Saturn's largest moon, Titan, when it is not too close to the planet. Using a 5- to 8-inch reflector or 3- to 5-inch refractor will show more detail. A scope with a long focal ratio of around f/9 to f/12 helps too, as this will make the disc and rings appear larger in the eyepiece.
Stark and Golden
Through such instruments the planet can take on a golden hue, in stark contrast to the gleaming white rings, which are currently angled towards Earth. Within the rings you should look for the Cassini Division, the black gap that separates the outer A ring from the brighter B ring. You might even see the inner C ring at times, if the air currents in our atmosphere are steady to provide good seeing. These certainly aren't the only rings Saturn possesses, but they are the easiest to pick out.
The planet itself may also show a dusky northern belt and a polar haze. Through a telescope you'll also be able to bag a few more of Saturn's moons, most likely Rhea, Tethys, Dione and Iapetus. Larger telescopes reveal more subtle detail on the planet, finer detail in the rings and three more moons: Mimas, Enceladus and Hyperion.
If you are showing the view to youngsters, make sure they can reach the eyepiece; perhaps keep a stool or sturdy chair handy for them. Not everyone finds it easy to keep one eye closed as they look through the eyepiece either, so an eye patch can be a useful aid. Some children (and even adults) can struggle looking through an eyepiece. If that's the case, try getting them to look through an empty toilet roll tube; it's surprising how effective this can be in getting them ready for the view through a telescope.
With Saturn best placed during the summer months, now is the time to plan a barbecue, get your friends and neighbors round, let the kids stay up a little later than usual and take a look at the second largest planet in our Solar System. With the added bonus of the spectacular ring system, it is sure to impress.
Getting the Best View — How to Make the Most of Observing the Ringed Planet
A good clear southern horizon is a must for spotting Saturn. Use binoculars first to home in on the planet, then a modest telescope such as a 5-inch reflector or a 3-inch refractor to gain a closer look. When using a telescope, make sure everyone can reach the eyepiece. With reflectors in particular, you can usually rotate the tube to bring the eyepiece to a better position, or have a stool or chair handy. Don't use too high a magnification: it's better to ensure the view remains sharp, even if that means keeping the magnification lower than you'd like.
Top 10 Saturn Facts
As well as being a beauty, the ringed wonder is also a fascinating world.
- Saturn has 62 confirmed moons.
- The planet is tilted on its axis by 26.7� and therefore has seasons. Each lasts just over seven years because Saturn takes 29.45 years to orbit the Sun.
- Saturn is a gas giant planet; it is mainly made up of hydrogen and helium. It's thought that a rocky core exists at its centre.
- On average, Saturn is 9.5 times farther from the Sun than Earth is.
- Each day on Saturn is only 10.55 hours long. This means that there are 24,470 Saturnian days in one Saturnian year — that's a lot of sunrises and sunsets!
- Saturn is slightly flattened: its equatorial diameter is 120,536km while its polar diameter is 108,728km. You could fit 9.5 Earths across its disc.
- The ring system out to the A ring is 273,550km wide, but only 1km thick.
- Saturn is a windy planet, with gusts measured by Voyager at 1,800km/h.
- Titan, Saturn's largest moon, has a nitrogen atmosphere and liquid lakes of methane on its surface.
- Roughly every 30 years, a great white storm appears in Saturn's northern hemisphere.
About the Writer
Paul Money is the BBC Sky at Night magazine reviews editor and an expert on running astronomy outreach events.
Copyright � Immediate Media. All rights reserved. No part of this article may be reproduced or transmitted in any form or by any means, electronic or mechanical without permission from the publisher.
{ width: 160, height: 160, defaultImage: '', layers: 'Artimg-BBC_ConstantCompanion_07_16' }

![]() Orion is proud to partner with BBC Sky at Night Magazine, the UK's biggest selling astronomy periodical, to bring you this article as part of an ongoing series to provide valuable content to our customers. Check back each month for exciting articles from renowned amateur astronomers, practical observing tutorials, and much more!
Orion is proud to partner with BBC Sky at Night Magazine, the UK's biggest selling astronomy periodical, to bring you this article as part of an ongoing series to provide valuable content to our customers. Check back each month for exciting articles from renowned amateur astronomers, practical observing tutorials, and much more!
A familiar sight in our skies from ancient times, the Moon is threaded through humanity's history.
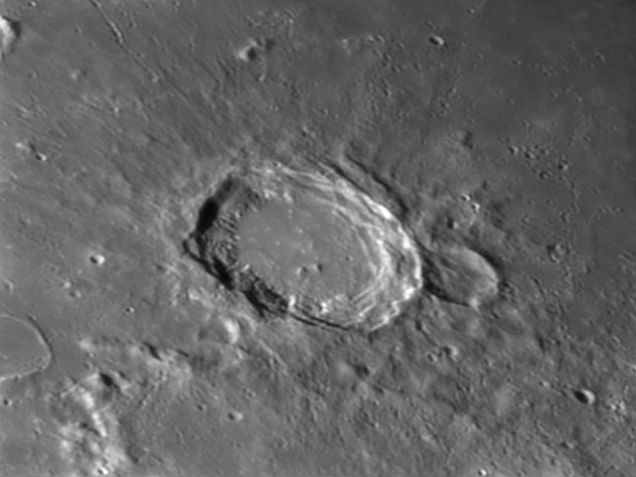
Bulliadus Crater by Mark Bell
The source of our ocean tides, subtle chronobiological cycles and the only other world that humankind has so far set foot upon, the Moon seems a familiar and tangible place. A quarter of Earth's diameter and just a quarter of a million miles away, it's 100 times closer than Venus. Given its proximity, brightness and large apparent size, it's easy to see why the Moon has enchanted humankind for centuries.
Before the emergence of widespread street lighting, the Moon was the primary source of light for nocturnal activities. Its sheer size and regular cycle of phases made it an obvious timepiece to our ancient ancestors, forming the basis of some early calendars, and in various cultures the Moon either had deities associated with it or was considered to actually be one. In the following centuries, when astrology and astronomy were one and the same, it continued to bear a supernatural significance, marking when certain activities and plans would go well — and when they were doomed to fail.
Pre-telescopic observers noticed an unchanging pattern of darker patches that would later become known as maria, or 'seas', because they were assumed to be vast bodies of water. They act as a Rorschach test for different cultures — the face of the 'Man in the Moon' observed in Western tradition, the 'Rabbit' pounding rice of East Asian folklore, or the 'Lady Reading a Book' from the southern hemisphere, to give just three examples.
Until the middle ages, the Moon was believed to be a smooth sphere, neatly slotting into the Aristotelian view of the 'perfect heavens'. It wasn't until after 1609, when Galileo turned his telescope to the Moon, that this perception was undone.
Galileo was not the first to examine the Moon through a telescope — that accolade falls to Englishman Thomas Harriot, whose sketches predate Galileo's by several months — but he was the first to publish. In his Sidereus Nuncius, Galileo revealed a world pockmarked with craters and mountains. He had seen that the terminator, the line that divides lunar day and night, was often jagged, correctly inferring that this irregularity must result from shadows cast by topographical features.
About a dozen lunar landforms can be distinguished with a keen eye. A typical pair of binoculars, if suitably steadied, will transform your view of the Moon into a scarred, airless world, and most likely will give you a better view than Galileo had in the 1600s. Through even the smallest modern scope innumerable impact craters appear, often fringed by long rays of ejecta. Alongside them sit grand basins of solidified lava, soaring mountain peaks, curious fissures and escarpments — it's a whole new world to explore.
Locked on Earth
You don't need a telescope to reveal that night after night we always see the same lunar features staring back at us. This is because the Moon has a synchronous rotation with respect to Earth, meaning that spins once on its axis in the same 27.3 days (the sidereal month) it takes to complete an orbit of our planet.
This is no coincidence. Earth's gravitational pull on the Moon has caused a bulge in the body of the Moon itself, similar to the tides in Earth's oceans. This bulge unbalanced the Moon's gravitational force, slowing its rotation until the bulge aligned with the Earth. Despite its appearance in the sky, our Moon is nowhere near round; it is closer to a lemon shape.
A consequence of this 'tidal locking' is that for much of human history the Moon held a closely guarded secret: no one knew what the far side was like. This didn't change until 1959, when the Soviet Luna 3 probe became the first to pass an image of the hitherto unseen side.
In a memorable episode of The Sky at Night broadcast on 26 October 1959, Patrick Moore announced the success of the Soviet mission, revealing the first shadowy photographs of the Moon's far side live on air. Luna 3's imagery was crude by today's standards, but it revealed that the 'dark side' was strikingly different in a number of ways.
While 35 per cent of the Moon's Earth-facing hemisphere is covered with mare lava, very little molten material made it to the surface on the far side, so maria account for just one per cent. It's thought this is because the far side's crust is thicker — it may be up to twice as thick as that of the near side — possibly due to the slow accretion of a companion satellite after an impact. This theory seems to be supported by the discovery of the far side's 3.9 billion-year-old South Pole — Aitken Basin, over 2,400km wide and around 13km deep. To date, our best views of the Moon come from NASA's Lunar Reconnaissance Orbiter, now in its sixth year of operations and, at the time of its launch, the first US mission to the Moon in 10 years.
The Sun Always Shines
It's equally obvious that the illumination of the Moon's Earth-facing hemisphere changes over the course of the month — a word, incidentally, that we get from 'Moon'. Although the Sun is always shining on a full half of the Moon, the proportion of the lit side we are able to see depends on where the Moon is in its orbit around Earth, giving rise to the phases we see.
Imagine you are looking down on the Earth, Moon and Sun from above. When the three line up with the Moon in the middle, the Moon's lit half points away from us on Earth, producing a new Moon. Slowly emerging from its new phase into the evening sky, the lunar crescent thickens from one day to the next. The term 'waxing' is used to indicate this thickening phase. The waxing crescent leads to the Moon appearing as an illuminated semicircle roughly a week after new.
This is somewhat confusingly called 'first quarter', referring to the Moon's position in its 29.5-day orbit rather than proportion of its disc is illuminated from our vantage point on Earth. The bulging phases after first quarter are known as waxing gibbous. These increase in size until roughly two weeks after new, the Moon is on the opposite side of its orbit from the Sun and appears fully lit as a full Moon. The point of new and full Moon, when our planet, satellite and star are aligned, is technically known as a 'syzygy'.
After full Moon the phases reverse, and the illuminated part of the Moon begins to shrink or wane. After passing through the waning gibbous phases, the Moon reaches the three-quarter point of its orbit, giving rise to the 'last quarter' phase. The Moon takes the appearance of a semicircle once again, although it's the opposite half that is illuminated than that at first quarter. After this, it takes approximately a week for the Moon to go through its waning crescent phases, visible in the early morning sky, before it once again becomes new again. It takes 29.5 days for the Moon to return to complete this cycle of phases or 'lunation', slightly longer than it does to complete an Earth orbit. This is known as a synodic month.
Ellipse and Eclipse
The Moon's elliptical orbit is inclined to Earth's by an average of 5�. This means that on most of the occasions that a full Moon occurs, it actually passes above or below the shadow Earth casts into space. But in the instances that the full Moon passes into Earth's shadow we see a different phenomena: a lunar eclipse.
Because the Sun is much bigger than Earth, it splits our planet's shadow into two parts: the darkest, called the umbra, and a lighter outer ring, called the penumbra. The intensity of a lunar eclipse depends on how much of the Moon passes into Earth's shadow, and which part of the shadow it passes through.
In a total lunar eclipse, the entire Moon passes through the penumbra and into the umbra, gradually darkening until it is completely covered, a point known as totality. During totality no sunlight shines directly on the Moon, but some is refracted onto it via Earth's atmosphere. As our atmosphere filters out blue light, the Moon often gains a strange orange-brown colour.
As the Moon goes into eclipse and dims, the sky gets darker too. You may not have realised how bright a full Moon can be. It lights up the sky around it with a blue haze, out of which only the brighter stars are visible. During a total lunar eclipse, the darker Moon means that the fainter stars can come out and we end up with the eerie sight of a deep-red Moon surrounded by twinkling stars.
There are two other types of lunar eclipse: partial, where only a portion of the Moon passes through Earth's dark umbral shadow, and penumbral, where part of the Moon only passes through the lighter, outer shadow. Partial eclipses can be quite noticeable, but penumbral eclipses often only cause a slight dimming.
When the same thing happens at new Moon the opposite occurs, and we may see a partial or total solar eclipse. By staggering coincidence, right now the Moon is both 400 times smaller than the Sun and 400 times closer, meaning that they appear to be the same size in the sky. The fact the Moon only just covers the Sun during a total solar eclipse allows us to glimpse our star's ghostly outer atmosphere, the corona.
A Changing Relationship
Life on Earth owes a lot to our rocky companion. Without it, our planet's axis would tilt wildly between 0� and 85�, albeit over a period of a million years, sending our hemispheres veering between chaotic ice ages and searing hellscapes. It would have been a death sentence for evolving life.
But our relationship with the Moon is becoming increasingly distant. When it formed, the Moon was only 22,500km from our planet. Today, it's nearly 10 times farther away and getting more distant by 3.8cm a year — around the same rate as your fingernails grow. As a result, Earth's spin speed is slowing down and our days are getting longer.
Eventually, there will come a point when the length of the day and the month will be the same, and the Moon will cease to cross our skies. There will be no new or full Moon, only a small static disc in the night sky visible from one side of the planet, a situation we see today in the Pluto-Charon system. By the time that happens, humans will hopefully be looking out at other moons from distant planets.
The Major Classes of Lunar Features
Valleys
There are 14 official valleys on the Moon, the longest around 600km. Most are named after nearby craters. One of the most familiar is the 180km-long Vallis Alpes (pictured), which cuts across the northern Montes Alpes and almost connects the Mare Imbrium and the Mare Frigoris.Seas
These vast dark plains of solidified magma are notable for both their dark appearance and the fact that they are largely absent from the Moon's far side. One of the most distinct is the 560km-wide Mare Crisium (pictured) which is just visible to the naked eye.Craters
The ubiquitous lunar feature, varying in size from microscopic pits to sprawling depressions up to 350km in diameter — anything larger is a basin. Some were formed through volcanism but the majority, like Tycho (pictured) are the result of ancient impacts.Basins
The oldest and largest impact craters on the Moon, exceeding 350km in diameter. All lunar maria are found within them. The South Pole-Aitken Basin on the Moon's far side holds the record for being the largest, at around 2,400km; the biggest on the near side is the Imbrium Basin, shown here, which stretches across 1,160km of the lunar surface.Mountains
The Moon's peaks are named in two ways: 'Montes' for mountain ranges and 'Mons' for singular peaks and massifs. The most spectacular of the 18 named lunar ranges is the gently curved, 600km-long Montes Apenninus (pictured), which form the southeastern edge of the Imbrium Basin. Mons Huygens, the Moon's tallest mountain at 5.4km, soars skyward here.
The Big Myth — The Dark Side of the Moon
The phrase 'dark side of the Moon' may evoke fond memories of Pink Floyd's 40-year-old prog-rock album to the baby boomer generation, but in an astronomical context it's often used to refer (erroneously) to the Moon's far side. The phrase is something of a misnomer, since the lunar far side goes through the same cycle of illumination as the phases of the Moon seen on the Earth-facing hemisphere. Technically, the far side is the 'dark side' at the instant of full Moon. The only places on the Moon's surface permanently bathed in shadow are a few deep craters at the north and south poles.
Where Did the Moon Come From?
Most scientists now believe that the Moon was formed around 4.5 billion years ago when an object the size of Mars (and since named Theia) collided with the early Earth, giving it a glancing blow. The impact spewed debris into Earth's orbit, which coalesced to form the Moon at just the right distance to be an independent body; any closer and Earth's gravity would have pulled the material back.
This theory was born from the chemical analysis of lunar samples returned by the Apollo missions, which showed a remarkable similarity between Earth's composition — hinting at a common heritage. But there is a problem: the compositions look too similar. If this collision occurred, the Moon should have more of Theia's material and should therefore be more different from Earth.
The Apollo samples were obtained from a very small area - could this explain the similarities? It would seem not, because we do have other lunar material. The Russian Luna programme returned 0.33kg of Moon samples and we also have a number of lunar meteorites. Analysis of this material brings up a similar problem, it is just too similar to the composition of Earth.
So where does this leave the collision theory? It still has a lot of support, but what would be a great help is having more lunar samples from known but more varied locations.
What's Our Moon Made Of?
Our natural satellite has a small core composed predominantly of iron, a distinct mantle, and a crust of varying thickness comprised of anorthosites and basalt.
Moon Facts
- Age: 4.5 billion years
- Diameter: 3,475km
- Mass: 0.0123 Earths
- Average distance: 384,400km
- Average orbital velocity: 3,679km/h
- Orbital period: 27.3 Earth days
- Lunar cycle: 29.5 Earth days
- Surface gravity: One-sixth that of Earth
Copyright � Immediate Media. All rights reserved. No part of this article may be reproduced or transmitted in any form or by any means, electronic or mechanical without permission from the publisher.
{ width: 160, height: 160, defaultImage: '', layers: 'Artimg-032015-Eclipse_square' }

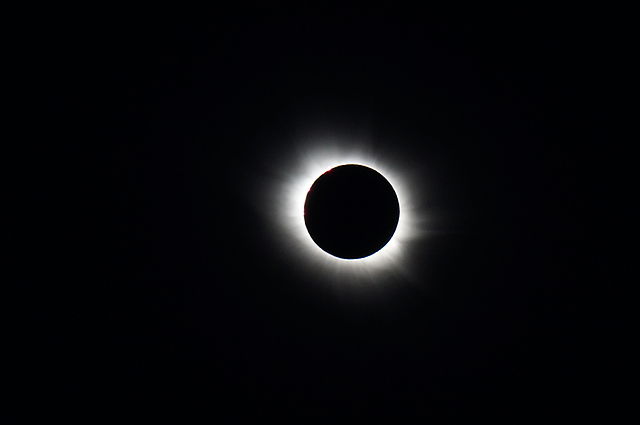
Photo courtesy of Damien Deltenre (Own work) [CC BY-SA 3.0], via Wikimedia Commons
When it comes to total solar eclipses, nothing can be more confusing than eye safety — because you need it for the partial phases but not for the total phase. Despite global efforts to build awareness as to when you should and shouldn't wear eye protection, the concept still isn't universally clear. So some people opt to use eye protection throughout totality for fear of damaging or losing their eyesight. But that defeats the purpose, because you cannot see totality using eye protection.
So let's wipe the slate clean and look at a total solar eclipse in a different way. Think this: Sun (bad); Moon (good). Every total solar eclipse has two parts: the partial phases, when part of the Sun is visible (bad); and totality, when the Moon is fully visible and the Sun is not (good)!
If you watch only the total phase a solar eclipse, you don't have to worry about eye safety because you are looking at the Moon — so you do not need eye protection. Just as you don't fear looking at the Moon at night, you shouldn't fear looking at the Moon during totality — because, literally, what you don't see (the Sun, which the Moon is blocking) can't hurt you.
Eye safety is only for those who wish to watch the partial phases of the eclipse, which last for roughly 90 minutes before and after totality.
Warning: Looking directly at the Sun without proper protection may result in retinal burns or thermal injury, which could cause or lead to blindness. Never look directly through binoculars or a telescope unless they are properly covered with specifically designed filters — filters that cover the front end of the binoculars or telescope and let only about one part in 100,000 through, reflecting the rest. If in doubt about the filter, don't use it!
Eclipse Phases and Eye Safety
We've all learned not to touch a stove when it is on, because it is hot and we may burn ourselves. Well, imagine the Sun as a stove. Anytime the Sun is visible, the stove is on, and we need eye protection. During totality, however, we cannot see the Sun, so the stove is off (and cold). Let's look at each of these examples more closely and how they pertain to a solar eclipse.
Eclipse Begins: Stove On (eye protection required). An eclipse begins at first contact — the instant the Moon first "touches" the Sun. To see this event, which appears as a tiny black notch in the Sun's western limb, you will need eye protection, such as safe eclipse viewing glasses or solar filters on your binoculars or telescope. First contact is followed by the partial phases — as the Moon's silhouette moves across the face of the Sun, it blocks more and more (but not all) of its illuminated disk. As parts of the Sun remain visible during the partial phases (bad), we need proper eye protection to view them. Even if the Moon covers 99 percent of the Sun, the remaining 1 percent of sunlight is enough to do retinal harm.
Totality: Stove Off (remove eye protection). About 15 seconds before totality, an anemic solar crescent splits like quicksilver into beads of sunlight. Second by second, these beads "dry up" ... until one last bead of sunlight forms on the eastern limb of the Moon; this last event, called the Diamond Ring, signals the start of second contact ? the instant the Moon fully covers the Sun and the beginning of totality (good). At this point it is completely safe to remove your eclipse viewing glasses and see the Moon as a dark silhouette crowned by a white and gossamer glow called the corona. The corona is about as bright as the full Moon, so it too is a lovely sight to watch throughout the duration of totality.
Eclipse Wanes: Stove On Again (eye protection required). Third contact marks the end of totality. A second Diamond Ring swelling into view on the western limb of the Sun announces the return of the Sun (bad), so we must immediately put our safe viewing glasses or instrument solar filters back on and keep them on for the remainder of the eclipse, which ends at fourth contact, when the last bit of the Moon slips off the Sun's disk.
What is proper eye protection?
Inexpensive "eclipse glasses" or "solar glasses" featuring solar polymer film and cardboard frames can be found from a variety of stores and online sources. It is important to only use glasses from reputable sources, featuring solar film that has been rigorously tested for safety. Another common filter for safe naked-eye solar viewing is a shade number 14 welder's glass, which is available for a few dollars from welder supply shops; a 10-centimeter-square (4-inch square) glass will cover both eyes. Do not use sunglasses, smoked glass, CDs, DVDs, CD-ROMs, film negatives, or polarizing filters to look at the Sun — they are not safe for this purpose! Again, if in doubt about a filter's safety ... do not use it!
CAUTION: Never look at the Sun, either directly or through a telescope or binocular, without a professionally made protective solar filter installed that completely covers the front of the instrument, or permanent eye damage could result. When using a truss tube telescope to view the Sun, both a properly fitting solar filter and light shroud are required.
|
Stephen James O'Meara is an award-winning visual observer, whose writings, lectures, and numerous books on amateur astronomy have inspired observers across the globe to see the sky in new and wonderful ways. A contributing editor for Astronomy magazine, Stephen is an avid "eclipse chaser", having witnessed a dozen total solar eclipses dating back to 1959 (when he was 3 years old). |
{ width: 160, height: 160, defaultImage: '', layers: 'Artimg-BBC-SolarEclipses_06_16' }

Orion is proud to partner with BBC Sky at Night Magazine, the UK's biggest selling astronomy periodical, to bring you this article as part of an ongoing series to provide valuable content to our customers. Check back each month for exciting articles from renowned amateur astronomers, practical observing tutorials, and much more!
Warning: Do not look directly at the Sun with the naked eye or any unfiltered optical instruments
The ancient Chinese thought solar eclipses were the Sun being eaten by a dragon. Today we know exactly what causes them - and where to get the best views
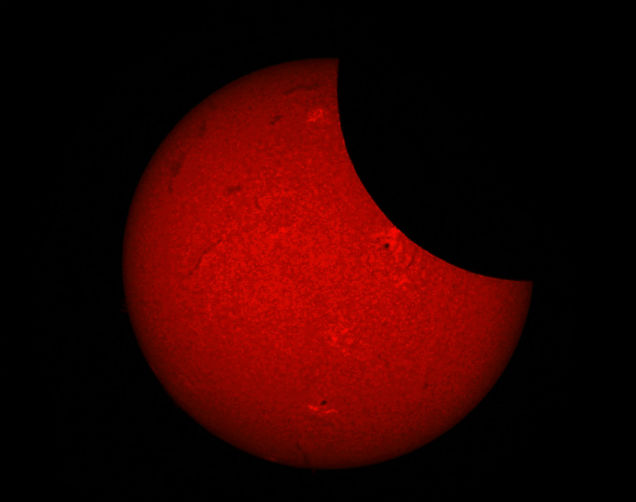
Annular Solar Eclipse by Ken S.
One of the most breathtaking astronomical events you can witness is a total eclipse of the Sun, also known as a total solar eclipse. Not only is it an experience you'll never forget, but it also shows the Solar System in motion through the fortunate alignment of three astronomical bodies.
The first object is our planet, Earth, which slowly orbits the second object, the Sun. The third object in the equation is the Moon. We get an eclipse when the Sun, Moon and Earth are temporarily aligned.
On Earth we're really rather lucky that the Moon is just the right size and orbits at just the right distance to make total solar eclipses possible. You may wonder how they happen at all since the Sun is so much bigger than the Moon. Well, due to one of the most amazing coincidences in nature, even though the Moon is 400 times smaller than the Sun, the Sun is around 400 times further away. As a result, the two objects can appear to be the same size.
However, we don't get a total solar eclipse every time the Moon moves between Earth and the Sun. The lunar orbit is tilted, so that it sometimes passes above or below the Sun. And because the Moon's orbit isn't circular but elliptical, like an oval, when it is furthest from us and an eclipse occurs the Moon is too small to cover the Sun completely. We then see an 'annular eclipse', in which a thin ring of sunlight can be seen circling the Moon.
Sun Blocked
When we witness a total solar eclipse it means that we are in the shadow of the Moon and, as the Sun is the bigger object, it makes the shadow of the Moon cone-shaped.
This shadow cone starts out as big as the diameter of the Moon at 3,476km (2,160 miles), but by the time it reaches Earth the shadow is much smaller — the biggest it can get is about 300km (190 miles) in diameter. If you're lucky enough to be within the zone of the shadow, you'll see darkness descend as the shadow sweeps across the planet.
During an eclipse the Moon will cover the Sun entirely for seven minutes 31 seconds at most, but you'll probably see a 'totality' lasting somewhere between two and four minutes. If you're not within the 300km circle of the shadow cone, however, you'll only see a partial eclipse because the Moon covers up less of the Sun as you move further away from the track of totality.
Do, however, be careful! Due to the intense light from the Sun, a total eclipse is dangerous to look at. The only time when it's safe to look directly at the eclipse is during the few minutes of totality when the Moon completely covers the Sun. For the rest of the event you must protect your eyes from the Sun's glare. Take appropriate care and you can fully enjoy this marvel of celestial mechanics.
How To See An Eclipse
Three ways to see it ...
Pinhole
A safe way of viewing an eclipse is with two pieces of card. Make a small hole in one and hold the other so that the Sun is projected onto it. You can then watch as events unfold.Eclipse Glasses
You can now buy safe eclipse viewers that you wear just like sunglasses. They cut out all harmful ultraviolet and infrared rays and 99.9 per cent of the Sun's visible light.Casting Shadows
See total coverage of the Sun in the umbra
During a total solar eclipse, if you're in the 'umbra' you'll see the entire Sun being slowly covered by the Moon and get the full glory of totality. There's also an area around the umbra called the 'penumbra', where the shadow isn't quite so dark. On the ground this forms a large circular zone where you see more and more of the Sun the further you get from the umbra until you don't see an eclipse at all. So whenever people in one location see a total eclipse, those in a large surrounding area will see a partial eclipse. There are a maximum of five solar eclipses in any given year.
Copyright © Immediate Media. All rights reserved. No part of this article may be reproduced or transmitted in any form or by any means, electronic or mechanical without permission from the publisher.
{ width: 160, height: 160, defaultImage: '', layers: 'Artimg-BBC-ObservingTheSun_06_16' }

Orion is proud to partner with BBC Sky at Night Magazine, the UK's biggest selling astronomy periodical, to bring you this article as part of an ongoing series to provide valuable content to our customers. Check back each month for exciting articles from renowned amateur astronomers, practical observing tutorials, and much more!
Warning: Do not look directly at the Sun with the naked eye or any unfiltered optical instruments
When the short summer nights and long sunny days come around, there's no need to fret about what to see — the daytime has its own highlight.
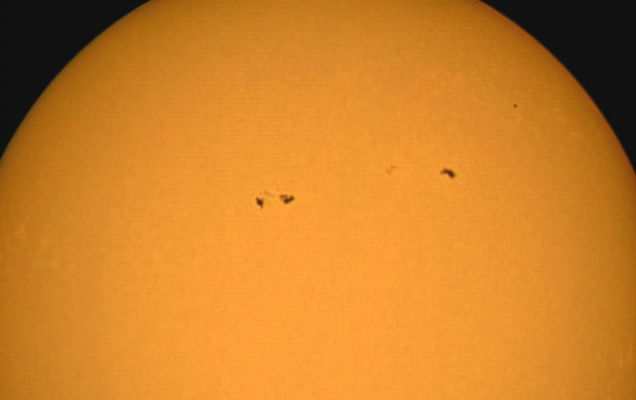
Sun with Spots by Orion Staff
Stars are fascinating things: at the simplest level they make the patterns of the constellations. Some brighter examples give hints of color, like red Betelgeuse in Orion. The trouble is, every night-time example is so incredibly far away. Fortunately, the Sun is one star that's right on our doorstep and it's available for everyone to look at, understand and, depending on how you're looking at it, gasp in amazement.
The Sun, our source of natural light and warmth, and the star that made life possible on our planet, is just next door in astronomical terms. On average, it's only 150 million kilometers away.
However, the Sun's close proximity makes it brighter and hotter than any other star in the sky. Never look at the Sun using just your eyes, unfiltered binoculars or telescopes — you risk permanent damage to your eyesight. There are a number of options to view the Sun safely.
If you have a refracting telescope, try the projection method. Line the telescope up with the Sun (remembering not to look at the Sun through the telescope) and then hold up a piece of card close to the eyepiece so that an image of the Sun falls onto it.
When projecting the Sun, you'll be able to see that its disc appears slightly darker around the edges than it is in the middle, an effect known as limb-darkening. You'll also be able to see sunspots — providing there are any around. Project the Sun over a few days and you might see the sunspots move and change shape because the Sun rotates quite slowly.
Filtering Option
If you want to move on from projecting, you can buy filters that fit over the big, front lens of your telescope. These objective lens filters allow you to look directly through the telescope at the Sun. Because it's quite risky to point your scope at the Sun, these filters must fit properly and must not be damaged in any way. Before you go out to observe the Sun, be sure to seek expert advice from a reputable astronomy shop.
Solar filters block out what you don't want to reach your eye: the Sun's infrared heat, its ultraviolet radiation and 99.9 per cent of its light. What you get is a greatly dimmed, safe image of the Sun. You'll be able to see sunspots and those dark solar edges through the scope and, depending on what kind of filter you buy, the Sun will be displayed in a different color. The cheaper 'white-light' filters are made of black polymer film (aluminum plastic sheet), which gives the Sun a blue tinge, while more expensive glass white-light filters give a more natural orange-yellow look to the Sun's disc.
Then there are the costly hydrogen-alpha (H-alpha) and calcium-K (CaK) filters and dedicated telescopes. These filter all the light and heat coming from the Sun except in wavelengths of hydrogen-alpha or calcium.
At the H-alpha wavelengths, you'll get orange views of the features in part of the Sun's atmosphere called the chromosphere, where dramatic solar flares and outbursts called prominences take place.
Looking through a CaK filter allows you to see magnetic storms that occur lower in the chromosphere, all in a fetching purple. So although these are two expensive options, they certainly produce the 'wow' factor when looking at the Sun.
Solar observing is the one time that astronomy poses a real risk of physical injury. Here's how to do it safely ...
Solar Projection
All you need is a piece of white card, onto which you project the image of the Sun from your scope or binoculars. You could also fix another piece around the front end of the scope to create a shadow around the projection. Good for eclipses and sunspots.Cardboard Sun Projector
These kits are simply a small telescope and mirror that projects an image of the Sun onto a white screen on the inside of the box. It will show much the same views as the solar projection setup — great if you don't have a scope.Solar Filters
These glass or film coverings fit completely over the light gathering front end of the scope, stopping all heat and virtually all light from the Sun entering the scope. Good for viewing sunspots and granulation.Personal Solar Telescope
The Personal Solar Telescope (PST) is made to reveal one specific wavelength of light and can show much more than your naked eye will see with film or glass filters. Good for prominences, active regions, filaments and faculae.
The Corona
The amazing sight of the Sun's outer atmosphere, the corona, only becomes visible to us on Earth at totality — the height of a total solar eclipse. Of course, the corona is always there, it is simply that its delicate pearly-white structure is usually drowned out by the brightness of the Sun and our daytime sky. Views of the corona can also change quite dramatically depending on how active the Sun is; its shape is influenced by the vast solar magnetic fields. During totality, it is the corona that defines the eclipse for many people, and it is only during this darkest part of a solar eclipse that you don't need special equipment or eye protection to marvel at it.
Sights on the Sun
You'll need a filter to view the sun safely and see the incredible activity on our nearest star. Here's what to look out for:
Sunspots
These features usually appear in pairs and are caused by magnetism, which draws away energy. Their resulting lower temperature makes these regions appear dark.Limb Darkening
The photosphere is translucent, so when you look at its center you're peering deep into the hotter, brighter part. This is why it appears lighter than it does at the edges.Photosphere
The light from the Sun is given off here. Its temperature is around 6,000�C and it is home to sunspots.Prominences
These are concentrations of gas, associated with sunspots, that move up from the chromosphere. In just an hour, active prominences can shoot to heights of 750,000km.Filaments
A filament is the same as a prominence, except that whereas prominences are seen outside the Sun's disc, filaments are seen against the disc — which makes them a little harder to pick out. Best seen with a PST.Faculae
Latin for little torches, these bright patches of the photosphere are found where sunspots have been or are going to appear.Flares
Flares are the most explosive features on the Sun and are associated with sunspots. They are believed to be caused by sudden changes in the Sun's magnetic field. They are best seen with a PST.
Copyright � Immediate Media. All rights reserved. No part of this article may be reproduced or transmitted in any form or by any means, electronic or mechanical without permission from the publisher.
{ width: 160, height: 160, defaultImage: '', layers: 'Artimg-BBC-GuideToSun_06_16' }

Orion is proud to partner with BBC Sky at Night Magazine, the UK's biggest selling astronomy periodical, to bring you this article as part of an ongoing series to provide valuable content to our customers. Check back each month for exciting articles from renowned amateur astronomers, practical observing tutorials, and much more!
Warning: Do not look directly at the Sun with the naked eye or any unfiltered optical instruments
It's possible to see the amazingly dynamic nature of our nearest star in white light and hydrogen alpha; Pete Lawrence tells us how

Solar Close Up by Mark Bell
Active Regions
Sunspot groups, or active regions, take on a whole new appearance in hydrogen alpha. Dark sunspots become harder to see, partially hidden under the surrounding chromospheric blanket. Around them, dark fibrils follow the intense magnetic fields associated with these regions. Large, bright areas called plage appear throughout and around sunspot groups.
Spicules
The edge of the Sun's disc seems to have a thin skin running around it. This is a cross-section of the chromosphere. Under good seeing you can make out that it's made up of tiny jets known as spicules. Together, they make the edge of the Sun appear 'furry'.
Prominences and Filaments
Giant clouds of magnetically influenced hydrogen plasma can often be seen hanging off the edge of the Sun through a hydrogen-alpha filter. Known as prominences, these can change appearance day-to-day or, in extreme circumstances, real time. When seen against the chromosphere away from the limb, they appear dark and are known as filaments.
Dynamic Brightening
Active regions may also show dynamic bright regions. Tiny star-like points of light called Ellerman Bombs may come and go, each releasing the same energy as several million atomic bombs. Larger ribbons of light called flares are associated with magnetic reconnection events, which may throw out huge clouds of charged particles known as coronal mass ejections.
Dark Mottling
A hydrogen-alpha filter shows the Sun's inner layer of atmosphere, known as the chromosphere, which sits on top of the photosphere. This is covered in a coarse, magnetically influenced light and dark pattern collectively known as dark mottling. The pattern is visible across the entire disc and makes the Sun resemble a giant orange.
Sunspots
Sunspots appear dark against the photosphere, often occurring in groups known as active regions. A typical sunspot shows a dark inner core called the umbra, and a lighter surrounding region called the penumbra. Sunspots appear dark because they are cooler than the surrounding photosphere.
Faculae
The limb-darkened edge of the Sun's disc provides excellent contrast for viewing faculae. These are magnetically affected regions where the Sun's 'surface' becomes more transparent, allowing you to see into the deeper, hotter areas below.
Limb Darkening
When the Sun's disc is viewed through a white light filter, the centre appears brighter than the edge. This is called limb darkening and occurs because at the centre of the disc you can see deeper into hotter, brighter layers.
Granulation
The Sun's visible surface, or photosphere, is covered in a fine pattern called solar granulation. This can be tricky to see and image as it's easily hidden by poor seeing. Granulation represents the tops of huge rising convective cells reaching the photosphere.
Ways to Observe the Sun: A Quick Guide to Observing
From DIY to precision engineering, you can view the Sun in safety.
Projection
Solar projection is suitable for small refractors. The idea is to point the scope at the Sun and place a screen, typically a piece of white card, behind the telescope's eyepiece. This method can show solar granulation, dark sunspots and bright faculae.
White Light Solar Filter
An inexpensive sheet of white light solar safety material can easily be fashioned into a filter for use with any type or size of amateur telescope. It allows you to view and image granulation, sunspot groups and faculae.
PST
An entry level hydrogen-alpha scope such as the Coronado PST is able to show prominences, dark mottles, filaments and many of the bright phenomena associated with active regions such as plage and flares.
H-Alpha Scopes and Filters
For finer detail, larger aperture, narrower bandwidth hydrogen-alpha scopes are available, typically for several thousand to tens of thousands of pounds. Solar hydrogen-alpha filter kits in a similar price range can also be used to convert night-time telescopes.
Copyright � Immediate Media. All rights reserved. No part of this article may be reproduced or transmitted in any form or by any means, electronic or mechanical without permission from the publisher.
{ width: 160, height: 160, defaultImage: '', layers: 'Artimg-BBC-JewelsOfSummer_06_16' }

![]() Orion is proud to partner with BBC Sky at Night Magazine, the UK's biggest selling astronomy periodical, to bring you this article as part of an ongoing series to provide valuable content to our customers. Check back each month for exciting articles from renowned amateur astronomers, practical observing tutorials, and much more!
Orion is proud to partner with BBC Sky at Night Magazine, the UK's biggest selling astronomy periodical, to bring you this article as part of an ongoing series to provide valuable content to our customers. Check back each month for exciting articles from renowned amateur astronomers, practical observing tutorials, and much more!
Will Gater takes us on an observing tour across the sparkling summer night skies.
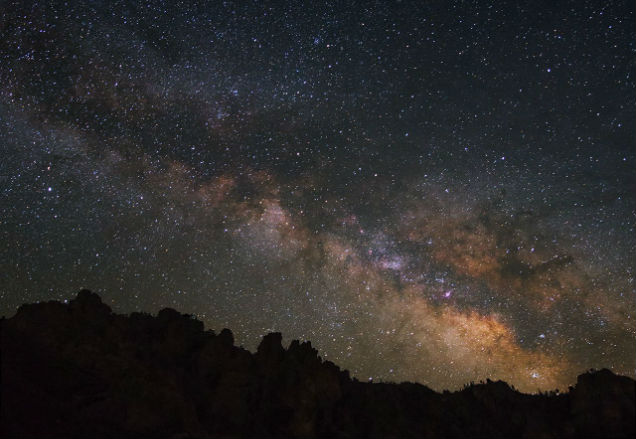
Milky Way over Pinnacles by Steve Peters
Summer's balmy nights are short but they pack in some glorious celestial sights. There are many deep-sky objects nestled in the rich star fields of the Milky Way and these will be our destinations on this seasonal star hop. The best time to take this tour is in the last week of June, when the Moon is out of the way. You can choose whether to spread the 15 objects here over a few nights, or observe them all in one. If you feel like doing them in a single session, to make maximum use of the darkness during June's short nights we've chosen a route that takes you through the 15 in the order that they reach their highest point in the sky.
1. M3
Let's kick off our observing session over in the western sky just after midnight. Hopefully the Moon isn't around and there are hours of clear skies ahead. Mag. +0.2 Arcturus (Alpha Bo�tis) is blazing away and it's the signpost we need to find our first object, globular cluster M3 in Canes Venatici. Once you've found Arcturus, imagine a line between it and mag. +2.9 Cor Caroli (Alpha Canum Venaticorum). The cluster is just less than halfway along this line.
2. M13
We've got a bit of a trek to our next object, the spectacular globular cluster M13 in Hercules. Thankfully we can get there with a few simple star hops. Probably the easiest method, from M3, is to use mag. +3.6 Rho and mag. +3.5 Delta Bo�tis as pointers. Scan along a line from Rho Bo�tis through Delta Bo�tis for just over 27� and you'll come across M13. The cluster is easily visible in binoculars from dark skies and through a small scope it appears as a fuzzy ball of faint light; larger aperture scopes will fare better at resolving the cluster's myriad stars.
3. M92
Once you've enjoyed M13 it's time to move to another globular cluster, M92, which is about 9.5� away. It's not as impressive as M13 in binoculars, but it's fairly easy to locate nevertheless. Just sweep along a line between M13 and mag. +3.8 Iota Herculis. You can also find the cluster with a telescope through a series of simple star hops: head northeast from mag. +3.1 Pi Herculis to mag. +4.6 69 Herculis and then onto mag. +6.0 HIP 84656, mag. +7.4 HIP 84559 and finally mag. +6.8 HIP 84118, which is just over 1.5� from the cluster.
4. Epsilon Lyrae
Having admired three fine globular clusters we're going to switch to a completely different type of object, the wonderful multiple star system of Epsilon Lyrae. From M92, head eastwards towards brilliant mag. 0.0 Vega (Alpha Lyrae). From Vega it is only a short hop to Epsilon Lyrae, which makes a triangle along with Vega and mag. +4.3 Zeta Lyrae. Epsilon Lyrae is most definitely a telescopic object. With a medium to high power eyepiece and a good-sized scope you should have little trouble seeing the two pairs of stars in the system.
5. The Ring Nebula
While in Lyra, there's one object that we really must visit and that's the charming Ring Nebula, M57. This is what's known as a planetary nebula, formed when a star like our Sun ejected its outer layers towards the end of its life. It appears as a little grey ring through the eyepiece. To find it we don't have to go far, though you will need a telescope and a medium-power eyepiece to see it well, as its angular diameter is rather small. You'll find M57 about 70 arcminutes along a line between mag. +3.3 Sulafat (Gamma Lyrae) and mag. +3.5 Sheliak (Beta Lyrae).
6. M22
It's time to head south from Lyra and into Sagittarius, and the beautiful Milky Way star fields in and around it. At the end of the month, the Milky Way will be low in the south at about 01:00 BST (00:00 UT). Our first object here is magnificent globular M22. To find it, first locate the famous Teapot asterism. The handle of the teapot is the key to finding M22. Imagine a line from mag. +3.3 Tau Sagittarii towards mag. +2.1 Nunki (Sigma Sagittarii). If you extend this line for about 5� beyond Nunki you'll reach the cluster.
7. The Lagoon Nebula
Next on our tour of this part of the sky is the wonderful Lagoon Nebula, M8. There are several ways you can go about tracking it down. Under dark skies it's visible to the naked eye, so if you're using binoculars you should be able to pick it out fairly easily about 6� above the 'spout' of the Teapot asterism. If you're using a telescope you'll find the glowing nebula and its sparkling star cluster by slewing roughly 7� to the west of M22. If you get stuck, remember that the nebula forms a rough isosceles triangle with mag. +2.8 Kaus Borealis (Lambda Sagittarii) and mag. +3.8 Mu Sagittarii.
8. M23
Heading away from the Teapot asterism, we're now traversing some of the dark dust lanes that criss-cross this region of the Milky Way. We're going in the direction of an exquisite open cluster, made of some 150 stars, catalogued as M23. If you're using binoculars, scan a line from Mu Sagittarii to mag. +3.5 Xi Serpentis. You'll find M23 just less than halfway along. With a small telescope you can star hop from the Lagoon Nebula to the glittering M23 by using four stars as waypoints: mag. +5.8 HIP 88298, mag. +6.3 HIP 88760, mag. +6.8 HIP 88362 and mag. +7.5 HIP 88297.
9. M25
From M23 we're going to cut right back across the band of the Milky Way to another lovely open cluster, M25, which is also in the constellation of Sagittarius. As you scan east across the sky with binoculars, take a moment to admire the stunning, densely packed star fields located roughly halfway between M23 and M25. Finding M25 with a small telescope is also fairly easy: simply point your finderscope at the 5th-magnitude star HIP 90806 and you'll find the glittering stars of M25 sitting around 45 arcminutes to the south of it.
10. The Eagle Nebula
Our final object on this leg of the tour is located a little higher up in the sky. It's the Eagle Nebula, M16. To get there we need to jump across the border from Sagittarius into the neighboring constellation of Serpens. Start by tracking roughly north from M25 to mag. +4.7 Gamma (g) Scuti. Once there, move west and up a little using mag. +6.7 HIP 90281 to guide you toward the nebula. With a small telescope you should have no problem seeing the cluster of stars in M16 and maybe a hint of the nebulosity itself.
11. The Wild Duck Cluster
We're now entering the third and final leg of our tour, which we begin in the constellation of Scutum, the Shield. This beautiful region of the summer night sky is home to edge of the Scutum Star Cloud and can be seen easily in binoculars. For a truly breathtaking view, use a telescope with a low-power eyepiece so you can really appreciate the open cluster and its starry environs.
12. The Coathanger
To get to our next object we're going to meander our way up the band of the Milky Way. The Coathanger, also known as Brocchi's Cluster, is a lovely grouping of stars that, you guessed it, looks like a coathanger — albeit an upside down one. To reach it from M11, use binoculars to work your way along the rich star fields in Aquila until you get to mag. +0.8 Altair (Alpha (a) Aquilae). Using Altair and the nearby mag. +2.7 Tarazed (Gamma (g) Aquilae) as pointers, head slightly northwest for about 12.5�. Dark skies and a good pair of binoculars are all you need to enjoy this gem.
13. The Dumbbell Nebula
Next up is the fascinating Dumbbell Nebula, M27, which sits in the constellation of Vulpecula. We don't have far to go, but we will need a change of equipment, as a small scope is the best instrument for observing this planetary nebula. There are ways you can star hop to M27, but an easy one is to simply point your scope's finder at the 3rd-magnitude Gamma Sagittae and track north for just over 3�. In a small scope M27 looks like a smudge of light, but in 6-to 8-inch instruments its dumbbell shape becomes much more obvious.
14. Albireo
If you've reached this point having observed all the objects so far in one night, we salute you! Your reward will come in the form of one of the most beautiful double stars in the whole night sky, Albireo (Beta Cygni). Albireo is 3rd-magnitude, meaning it is easily visible to the naked eye. It sits at the head of Cygnus, the Swan, which is marked out by a large 'cross' of bright stars with mag. +1.3 Deneb at one end and Albireo at the other. Through a telescope, at high magnification, the two stars sparkle gold and blue — a wonderful sight on a warm summer evening.
15. M39
We're now at the end of our journey and chances are, if you've been observing all night, the sky is now starting to lighten. We'll end our tour across the summer sky by looking at a lovely, if often overlooked, open cluster: M39. To find it with binoculars follow the body of Cygnus all the way from Albireo to bright Deneb, passing mag. +2.2 Sadr (Gamma Cygni) as you go. From Deneb, imagine a line running all the way to mag. +3.8 Alpha Lacertae in the head of Lacerta, the Lizard. M39 is situated almost exactly at the midpoint of this line.
Summer Astrophotography: Objects to Photograph in This Season's Night Skies
The nights may be short at this time of year but that doesn't mean there aren't plenty of imaging opportunities. Noctilucent clouds are extremely photogenic; a DSLR or compact camera on a photographic tripod should capture them well. Using a wide-angle lens and an exposure of between two and 10 seconds should be perfectly sufficient to reveal most displays.
The summer Milky Way in the constellations of Sagittarius, Scutum, Scorpius and Ophiuchus is also a fine photographic target in June. If you're just starting out in deep-sky astrophotography this region offers many bright and beautiful objects to cut your teeth on; the Lagoon Nebula, M8, is a good example, though you will need a clear southern horizon and excellent transparency for the best images of it.
For more experienced imagers, fainter objects such as the Cocoon Nebula (IC 5146) in Cygnus and the Iris Nebula (NGC 7023) in Cepheus provide a satisfying challenge. If you use narrowband filters in your deepsky imaging setup, old favorites such as the Eastern Veil Nebula (NGC 6992), the Witch's Broom Nebula (NGC 6960) and the Crescent Nebula (NGC 6888) — which are all in Cygnus — are also well placed this month.
Noctilucent clouds
Keep a close eye out for these high-altitude electric blue displays.
The twilight skies of the summer months are occasionally adorned with beautiful, glowing wisps of light known as noctilucent clouds. These polar mesospheric clouds, to give them their scientific name, reside high up in our atmosphere at an altitude of around 80-85km. They are clouds of minute ice crystals and it is their great height that causes them to shine — 'noctilucent' simply means 'night shining'.
While ordinary clouds, much lower down in our atmosphere, appear silhouetted against the glow of twilight, the high altitude of noctilucent clouds means they are still illuminated by the Sun, and so scatter the sunlight down towards us on the ground. It's thought that the tiny ice crystals may form on microscopic pieces of meteoritic dust, deposited into our atmosphere by the countless meteors that zip through this region.
Noctilucent cloud displays are usually seen in the UK during late May, June, July and early August. Unfortunately, predicting when a good display will be visible is not easy, so your best bet is to be vigilant and look out for them during the hours after sunset or before sunrise throughout the summer. From the UK, it's the northern horizon that you need to monitor closely for any possible noctilucent cloud activity. Some displays can be very weak and may only show up on camera, while others are bright and easily visible to the naked eye as bluish-white ribbons of light, perhaps containing striking ripple or tendril-like structures.
They are a wonderfully dynamic phenomenon and appear to change minute by minute — some displays look like flowing waves of light crashing over the horizon. Binoculars, or a fixed camera taking still images every five to 10 seconds, will help you pick out any changes in shape and structure, but be very careful not to accidentally observe the rising Sun.
About The Writer
Will Gater is an astronomy writer and journalist. He also appears on TV and radio to talk about space. Find him on Twitter: @willgater
Copyright � Immediate Media. All rights reserved. No part of this article may be reproduced or transmitted in any form or by any means, electronic or mechanical without permission from the publisher.
{ width: 160, height: 160, defaultImage: '', layers: 'Artimg-Totality-Culture-Fear_square' }


Total solar eclipses belong to a rich and diverse cultural heritage steeped in myth and superstition. Even today, the sight can stimulate primitive receptors in our bodies to react when we see daylight suddenly turn dark and behold the preternatural glow of the solar corona surrounding the "black hole" of the New Moon.
Little wonder many cultures across the globe imagined the event as a beast (dragon, frog, wolf, snake, giant, ghoul ... you name it) devouring the Sun, and made noises (like banging drums) to scare the offender away. In time the beast gave way to superstitious beliefs, and we can still see age-old rituals re-enacted. For example, during the October 1995 totality over northern India, 1 million people bathed in the sacred waters in Kurukshetra, believing that doing so would bestow blessings of peace unto them and other wandering and unhappy souls. That may sound funny, but it's no different from the age-old tradition (superstition) of voting along party lines; we just put our faith in a different kind of promise in the belief that life will suddenly get better.
During the 2016 totality over Indonesia, I met locals who were told (as children) that if they looked at the Sun directly, ghosts might steal them away when the sky turned dark; so it was best for them to stay indoors with the curtains closed. When older they learned to watch the partial phases of totality indirectly — reflected in a dark bowl of water. This behavior, I thought, is culturally no different from parents employing the idea of Santa Claus to instill fear in children who might otherwise behave badly — until they know better.
The world over, superstitions abound when it comes to pregnant women and total solar eclipses. The women are cautioned to stay indoors with the curtain closed or their unborn child might be born deformed, or blind, or ... well, does it really matter what they're told? The root superstition stems from the fear that the mother-to-be may do herself harm if she looks at the Sun (which is true, if she does so without proper eye protection), and therefore will not be able to care for her unborn child.
On the opposite end of the scale is the belief in totality's healing power. For instance, during the July 2009 total solar eclipse over Pakistan, some parents with disabled children buried them up to the neck in sand, hoping the event would help to heal them. It's no different, really, than bathing in sacred waters; it's another cultural belief that helps one's soul in a time of despair. Drastic? Yes. But who's to judge?
Some Native Americans will not look skyward during an eclipse largely out of respect. When a total solar eclipse occurs, it steals daylight from the sky causing an imbalance in what's known as the "cosmic order." Looking sunward at this time is regarded as taboo. The Sun is sacred and should not be watched for long; by staying inside and not looking skyward during an eclipse, one respects the Sun, allowing it to undergo a rebirth ... in private. Perhaps just as one shouldn't watch a couple consummate a marriage, one shouldn't interfere with the Sun as it undergoes its sacred and intimate union with the Moon.
On the other side of the coin, there's a fear component to this tradition. Watching a solar eclipse can adversely affect the mind, tilt life out of balance, and invite evil into one's life. In essence, one is left to weigh a minute or two of totality against a potential lifetime of turmoil and chaos. It's like the dieter's creed: a moment on the lips, a lifetime on the hips ... You decide!
Fears and superstitions will undoubtedly still lurk in the Moon's shadow when totality occurs over parts of the United States on August 21, 2017 — especially with the uninformed. Most of us, however, will have, by then, read articles and blogs, had casual conversations with experienced or prospective eclipse watchers, and learned proper safety measures (for eye protection) which, if followed, will provide a completely harmless, enjoyable eclipse experience.
As for the various traditions that continue to linger, what are they but "good lies" spoken by the uninformed with an aim to either protect those they love from forces unknown or to help them in times of need. "Unknown" is the key word. With education, we can help people disperse the mists of mystery and learn how to appreciate one of the world's most visually rewarding natural spectacles — totality.
CAUTION: Never look at the Sun, either directly or through a telescope or binocular, without a professionally made protective solar filter installed that completely covers the front of the instrument, or permanent eye damage could result. When using a truss tube telescope to view the Sun, both a properly fitting solar filter and light shroud are required.
|
Stephen James O'Meara is an award-winning visual observer, whose writings, lectures, and numerous books on amateur astronomy have inspired observers across the globe to see the sky in new and wonderful ways. A contributing editor for Astronomy magazine, Stephen is an avid "eclipse chaser", having witnessed a dozen total solar eclipses dating back to 1959 (when he was 3 years old). |
{ width: 160, height: 160, defaultImage: '', layers: 'Artimg-Unforgettable-Chase_square' }

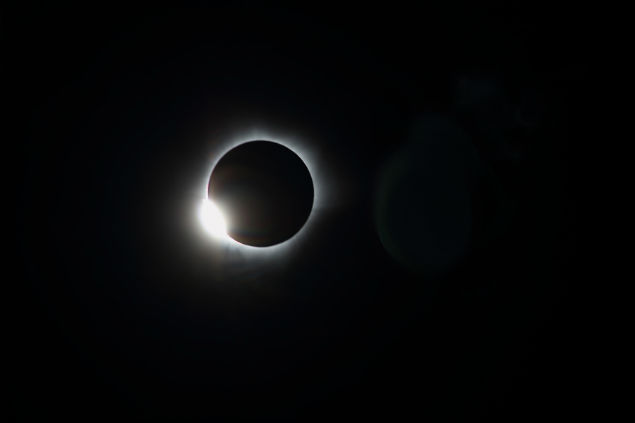
Over the past thirty years, I've made several successful eclipse chases — last-minute dashes to escape clouds threatening to obliterate the spectacle of the Moon obliterating the Sun — but none were as hectic and heart thumping as the one during the March 9, 2016, total solar eclipse.
 My partner Deborah Carter and I began planning for that event a year in advance. The March 9th path of totality swept across parts of Indonesia and the Pacific Ocean. Weather studies led us to select Ternate, a small volcanic cone jutting from the sea in northern Indonesia, as the prime viewing location. We arrived four days before totality, and, despite an atmospheric "monkey wrench" (El Ni�o), we enjoyed cloudless bliss until the day before totality.
That morning we awoke at dawn to partly cloudy skies. The once brisk trade winds had stopped, and the air felt muggy and hot. By late afternoon, storm clouds had gathered, only to unleash torrents of rain that lasted until midnight. Figuring the worst was over, we went to bed feeling cautiously optimistic — only 8 1/2 hours to go before the partial phases of the eclipse were to begin, and the rains had stopped.
When eclipse morning dawned clear, we cheered and rushed to the hotel's roof to set up our cameras, filters, and tripods. Two new friends from Java (Adrian and Heni Smith) joined us to watch first contact under a cloudless sky. About 20 minutes into the event, however, I saw a dark gray mass building on the eastern horizon. The mass turned into broken cloud, which began creeping toward the Sun at an uncomfortable rate. About 10 minutes later I saw the first cloud fragment brush past the Sun.
Deborah noticed my concern and asked what I thought.
I asked our new friends if they had a car.
They did.
I suggested we leave.
Deborah asked when.
"Now!" I replied.
We had everything packed in a flash and took an elevator to the ground level. Adrian got the car, we stuffed it with gear, crammed ourselves in, and made a mad dash toward blue sky.
But first we had to negotiate a maze of one-way streets jammed with motorbikes, cars, and crisscrossing pedestrians. Precious minutes passed before we got onto the main road. A nail-biting five-mile sprint took us to the southern edge of the island, where clouds still covered the Sun — just barely — we were literally right on the edge.
Fifteen minutes to totality.
But we had nowhere else to go ... except to the water. We saw a beach beyond the cliff, and Deborah had sighted an access road to it nearby. We made a five-point turn, zipped down the road, slipped into the alley, and bounced into a little seaside village.
Still not good enough; clouds continued to hide the Sun.
Ten minutes to totality.
Aha! There were boats and people up ahead. Heni swiftly negotiated with happy locals as we waded out to a narrow wooden fishing boat with pontoons.
Six minutes to totality.
After removing a canopy, we got on the boat, and the owners started to paddle.
My heart sank.
Deborah asked if the boat had a motor.
It did, but the tide was out, so they had to push beyond the reef.
Three minutes to totality.
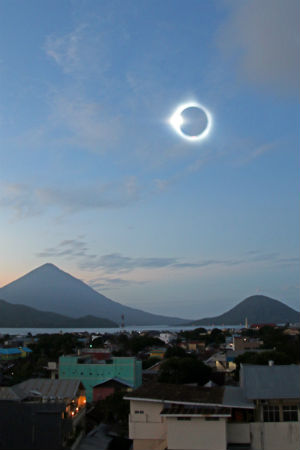 Seconds felt like hours. I pleaded that they start the motor. They agreed.
After a few tugs on the cord, the one-cylinder engine coughed to life, and we chugged southward at a possum's pace.
Kluck ... kluck... kluck....
We were traveling at about the same speed as the advancing cloud edge, which just covered the Sun. Another vital minute passed without gain.
Then I noticed a hole forming in the clouds. Gesturing, I stood up and shouted, "Head west!" After hurtful moments of confusion, the crew finally understood and set off on the new course.
Seconds before totality, we saw the Sun break free of cloud. We began whooping as the diamond ring formed, the Sun winked out, and the gossamer petals of the Sun's corona blossomed into view. After that, emotion overwhelmed thought. I'm not sure if sanity ever returned.
Thanks to our combined efforts, we watched totality for nearly three minutes through a magnificent hole in the clouds.
The lesson: if you truly want to maximize your chances of seeing this rare event, don't rely on the luck of the devil; if clouds threaten, chase blue skies as if the devil were chasing you!
|
Stephen James O'Meara is an award-winning visual observer, whose writings, lectures, and numerous books on amateur astronomy have inspired observers across the globe to see the sky in new and wonderful ways. A contributing editor for Astronomy magazine, Stephen is an avid "eclipse chaser", having witnessed a dozen total solar eclipses dating back to 1959 (when he was 3 years old). |
{ width: 160, height: 160, defaultImage: '', layers: 'Artimg-WhatsInTheSky_2016_square' }

Mark your calendars and plan star parties with your family, friends, and fellow astronomy enthusiasts to catch these noteworthy 2016 celestial events. Here are just a few of the exciting sights to look forward to in the New Year!
January:
Comet Catalina (C/2013 US10) moves northward in January, brushing past the Big Dipper about mid-month. The comet is expected to be a bit fainter than naked-eye visibility for most observers, binoculars might show a fussy "star" while a medium to large telescope should show the comet's core and faint wisps of tail.
Bundle up in warm clothes and keep your eyes peeled at night in early January to catch the Quadrantids meteor shower. Some meteors associated with the Quadrantids are expected to be visible from January 1st until the 6th, but the peak of activity will occur on the evening of January 3rd into the very early morning of the 4th, with up to 40 meteors expected per hour. Look for "shooting stars" radiating from the constellation Bo�tes.
It's worth rising an hour or two before the Sun on January 8th and 9th, to see a close pairing of planets Venus and Saturn in the pre-dawn sky.
February:
The second month of 2016 offers great views of the winter Milky Way, especially the evenings around February 8th, when the New Moon promises dark skies. Scan the "cloudy" Milky Way with big binoculars or a wide-field telescope to explore dozens of interesting star clusters and wispy nebulas.
Speaking of star clusters, use a telescope and look east of constellation Canis Major's brightest star Sirius to see two beautiful star clusters, M46 and M47 in the constellation Puppis. For more star cluster observations in February, look in the constellation Auriga and go after sparkling clusters M36, M37 & M38, or M35 in the constellation Gemini.
From late January through late February, get outside about an hour before dawn to see five planets line-up above the eastern horizon. For the first time in over a decade, planets Mercury, Venus, Saturn, Mars and Jupiter will all be visible at once before the Sun rises. While you may need binoculars to spot Mercury, which will be very close to the horizon, this planetary line-up is not to be missed.
March:
Get ready for great views of giant Jupiter this month as the gas giant planet will be at opposition on the evening of March 8th - the point in its orbit when it appears opposite the Sun from Earth. This will be the best night of the year to view Jupiter and its four brightest moons Io, Europa, Ganymede and Callisto.
Some of the best galaxies to see are spread across the night skies of March from Ursa Major to Virgo. Take advantage of the New Moon on March 9th and set sail for these island universes with a big telescope!
Grab a pair of 50mm or larger binoculars in March for great views of the Pleiades cluster (M45), the Beehive cluster (M44), and the must-see Double Cluster in Perseus. These sparkling sky gems are perfect fare for big astronomy binoculars and telescopes too.
April:
Don't miss the Lyrids meteor shower which peaks on the evening of April 22nd into the morning of April 23rd. Scan the skies near the constellation Lyra after midnight on the 22nd for your best chance to see meteors. Unfortunately, the Full Moon of April 22nd will outshine fainter meteors, but there will still be a chance to see "shooting stars" after midnight and into the early morning hours of April 23rd.
With the Virgo Galaxy Cluster and the Big Dipper and Coma Berenices well-positioned in the sky, April evenings are truly a gift for galaxy hounds. Check out a few of our favorite galaxies: M101, M51, and M106 near the Big Dipper asterism in Ursa Major; M86, M87, M84 and M104 in the Virgo Galaxy Cluster; and don't miss NGC 4565, M64, M99, and M100 in the constellation Coma Berenices.
A grouping of bright beacons Saturn, Mars, Antares and the Moon will adorn the night sky on April 25th and 26th.
May:
Grab a comfortable blanket or lounge chair and catch the Eta Aquarids meteor shower which peaks on the evening of May 4th into the early morning hours of May 5th. The New Moon of May 6th means conditions will be ideal to watch "shooting stars" created by debris from Halley's Comet. Look for meteors to radiate outwards from the constellation Aquarius.
On May 9th, planet Mercury will transit the Sun. This will be the first Mercury transit since 2006, and observers using solar filter-equipped telescopes will be able to enjoy the view as Mercury passes between the Earth and the Sun, appearing as a tiny black dot moving slowly across (transiting) the Sun's luminous disc over a 7.5-hour period. From locations in the western U.S., the transit will begin before sunrise, while the entire transit will be visible from the Midwest, southern U.S. and the east coast. CAUTION: Never look at the Sun, either directly or through a telescope or binocular, without a professionally made protective solar filter installed that completely covers the front of the instrument, or permanent eye damage could result.
May skies present great viewing opportunities for many globular star clusters, including M3 in the constellation Bo�tes, the Great Cluster M13 in the keystone asterism of Hercules, M5 in Serpens, and M92 in the northern section of Hercules.
The best time of the year to observe Earth's next-door neighbor planet Mars is the night of May 22nd, when it reaches opposition. The Red Planet rises at sunset and shines brightly with reflected sunlight all night. Look for Mars within the constellation Scorpius.
June:
Summer stargazing season kicks off in June with great opportunities to see a host of globular and open star clusters, emission nebulas, and more. Grab a pair of big binoculars or a wide-field telescope and scan the summer Milky Way for great views.
Gas giant planet Saturn will be at opposition on June 2nd, arguably the best night of the year to observe and capture astrophotos of Saturn and its majestic rings. Saturn will be visible all night long in the constellation Ophiuchus, and it will be brighter than any other night of the year. Saturn's brighter moons such as Titan and Enceladus make great targets for 6" and larger telescopes.
Catch a close pairing of the Moon and gigantic Jupiter on June 11th. At their closest approach, Jupiter will appear to pass within 1�25' of the Moon, making a nice target for binoculars and telescopes.
July:
With constellation Hercules almost directly overhead and Scorpius to the south, there's plenty to explore in July skies as summer continues. Check out globular star clusters M13 and M92 in Hercules, and explore Scorpius to find numerous deep-sky objects including open clusters M6 and M7, and globular clusters M4 and M80.
On July 9th, the Moon and Jupiter will make a very close approach to one another in the evening sky, appearing to pass as close as 0�48' from each other.
July winds down with the Delta Aquarids meteor shower. For the best chance to see meteors, get outside after midnight on July 28th and look towards the constellation Aquarius.
August:
Use 50mm or larger binoculars and/or a telescope with a low-power eyepiece to explore the summer Milky Way in August for nice views of various star clusters, galaxies, and cloudy nebulas.
Check out the skies after midnight on August 12th and in the early morning hours of August 13th to see meteors from the Perseids shower radiating from the constellation Perseus. This year, the waxing gibbous Moon will set a bit after midnight, leaving skies nice and dark to see lots of "shooting stars" streak across the sky.
On August 27th, look above the western horizon just after sunset to see an extremely close pairing of bright planets Venus and Jupiter. The two planets will appear to pass within a scant 0�3.6' of one another, presenting a wonderful target for binoculars and telescopes.
September:
The fall stargazing season begins with wonderfully placed spiral galaxies M31 (Andromeda Galaxy), M33 (Triangulum Galaxy), and M74 in Pisces. Use a big telescope to see these glittering island universes.
Three popular globular star clusters line up almost directly north-south in September skies. From a dark sky site, check out views M15 in Pegasus, M2 in Aquarius, and M30 in Capricornus.
October:
In early October, catch your last glimpse of the year of the galactic center in the constellation Sagittarius, low in the southwestern sky, where you can track down four great emission nebulas - M8, the Lagoon; M20, the Trifid; M17 the Omega; and M16, the Eagle or "Star Queen" nebulas.
Two great planetary nebulas are still well-placed in October skies - M57, the Ring Nebula; and M27, the Dumbbell Nebula.
Sit back and relax in your favorite backyard chair to watch the Orionid meteor shower, which peaks on the night of October 20th into the morning of October 22nd. Unfortunately, the bright Moon will outshine fainter meteors, but brighter "shooting stars" will be visible. The Orionids shower is notoriously irregular, so keep an eye out for meteors on any night from October 20th through the 24th.
November:
Bundle up for bright winter skies! See our namesake constellation Orion arch its way across the sky in November along with lots of bright star clusters to explore with big astronomy binoculars and telescopes.
Get outside after midnight on November 17-18 to see the Leonids meteor shower peak as meteors appear to radiate from the constellation Leo.
High in the northern skies of November, between the constellations Perseus and Cassiopeia, use a pair of big binoculars or a wide-field telescope to seek out the sparkling Double Cluster in Perseus -- two open star clusters NGC 884 and NGC 869 side by side.
December:
Don't miss the Geminids meteor shower which peaks after midnight on December 13-14. This year, the Full Moon of December 14th will outshine fainter Geminids meteors, but there's still a good chance to see "shooting stars" the evening of December 13th into the early morning hours of the 14th. Look for meteors to emanate from the constellation Gemini and the surrounding area.
The New Moon of December 28th will provide dark skies and great conditions to observe deep-sky gems with big binoculars or a telescope. Check out open cluster M42 (Pleiades), the Andromeda Galaxy (M31), and the many gems within our namesake constellation Orion, including M42 the Orion Nebula and the elusive Horsehead Nebula located near Alnitak - the easternmost star of Orion's easily recognizable belt.
{ width: 160, height: 160, defaultImage: '', layers: 'Artimg-WhatsInTheSky_2015_square' }

Mark your calendars and plan star parties with your family, friends, and fellow astronomy enthusiasts to catch these noteworthy 2015 celestial events. Here are just a few of the exciting sights to look forward to in the New Year!
January:
Bundle up and keep your eyes peeled on the evenings of January 3rd and 4th to catch the Quadrantids meteor shower. While the nearly Full Moon will unfortunately outshine many of the Quadrantids this year, there will still be opportunities to see brighter meteors streak across the night sky. Look for meteors appearing to radiate from the constellation Bo�tes.
On the night of January 23rd, train your telescope on Jupiter from 7pm PST to about half-past 11pm PST to witness a rare triple Galilean moon and shadow transit. The shadows of Galilean moons Callisto, Io and Europa will cross the face of Jupiter, followed by the moons themselves, all in one night!
February:
Get ready for great views of giant Jupiter this month as the gas giant planet will be at opposition on the evening of February 6th - the point in its orbit when it appears opposite the Sun from Earth. The second month of 2015 continues to offer good views of the winter Milky Way, especially during the evening of February 18th, when the New Moon promises dark skies.
Catch an early evening conjunction of the planets Venus and Mars on February 22, when our closest neighboring planets will appear to be just a half-degree apart in the evening sky.
March:
Some of the best galaxies to see are spread across the night skies of March from Ursa Major to Virgo. Take advantage of the New Moon on March 20th and set sail for these island universes with a big telescope! Grab a pair of 50mm or larger binoculars in March for great views of the Pleiades cluster (M45), the Beehive cluster (M44), and the must-see Double Cluster in Perseus. These sparkling sky gems are perfect fare for big astronomy binoculars and telescopes too.
April:
Skygazers get a treat this month in the form of a Total Lunar Eclipse on the evening of April 4th. You won't want to miss the show as the Full Moon gradually becomes darkened by the Earth's shadow and turn a reddish orange color. This Total Lunar Eclipse will be visible throughout most of North and South America, eastern Asia and Australia.
Don't miss the Lyrids meteor shower which peaks during April 22nd and 23rd. Scan the skies near the constellation Lyra after midnight on the 22nd for your best chance to see meteors.
May:
Grab a comfortable blanket or lounge chair and catch the Eta Aquarids meteor shower which peaks on the evening of May 5th and the early morning of May 6th. Meteors will appear to radiate from the constellation Aquarius.
May skies present great viewing opportunities for many globular star clusters, including M3 in the constellation Bo�tes, the Great Cluster M13 in the keystone asertism of Hercules, M5 in Serpens, M92 in the northern section of Hercules.
The best time of the year to observe Saturn and its spectacular rings is the night of May 22nd, when the gas giant planet reaches opposition. 2015 will be a great year to observe and photograph Saturn because its rings will be at nearly maximum tilt from our vantage point.
June:
Summer stargazing season kicks off in June with great opportunities to see a host of globular and open star clusters, emission nebulas, and more. Grab a pair of big binoculars or a wide-field telescope and scan the summer Milky Way for great views.
Around 10pm in mid-June, two face-on spiral galaxies M51 and M101 will both be well-paced in the night sky for observation and astrophotography. While you can see these galaxies from a dark sky site with a humble 60mm refractor, bigger telescopes will reveal much more detail. Use a 10" or larger reflector to see the spiral arms of M51.
July:
With constellation Hercules almost directly overhead and Scorpius to the south, there's plenty to explore in July skies as summer continues.
On the night of July 1st, get outside in the early evening to catch a close conjunction between bright planet Venus and giant Jupiter. The two planets will appear just 24 arcminutes away from one another in a very pretty pairing. July winds down with the Delta Aquarids meteor shower. For the best chance to see meteors, get outside the night of July 28th and look towards the constellation Aquarius.
August:
Get outside during the evening of August 6th to see a close conjunction between the planets Mercury and Jupiter, which will appear just 35 arcminutes away from one another.
Use 50mm or larger binoculars and/or a telescope with a low-power eyepiece to explore the summer Milky Way in August for nice views of various star clusters, galaxies, and cloudy nebulas.
Check out the skies after dark on August 12th and in the early morning hours of August 13th to see meteors from the Perseids shower radiating from the constellation Perseus. This year, the thin crescent Moon during the Perseids will allow summer stargazers to see plenty of beautiful meteors streak across the night sky.
September:
The fall stargazing season begins with wonderfully placed spiral galaxies M31 (Andromeda Galaxy), M33 (Triangulum Galaxy), and M74 in Pisces. Use a big telescope to see these glittering island universes.
Three popular globular star clusters line up almost directly north-south in September skies. From a dark sky site, check out views M15 in Pegasus, M2 in Aquarius, and M30 in Capricornus.
The end of September treats us to a Total Lunar Eclipse on the evening of the 28th. Get outside to see the Moon become a deep red color as it becomes darkened by Earth's shadow. This Total Lunar Eclipse will be visible from most of North and South America, Europe, western Asia and Africa.
October:
Sit back and relax in your favorite backyard chair to watch the Orionid meteor shower, which peaks on the night of October 21st into the morning of October 22nd. The Orionids shower is notoriously irregular, so keep an eye out for meteors on any night from October 20th through the 24th also.
Set your alarm to get up early on October 28th, to catch a glimpse of a rare triple-conjunction between the planets Venus, Mars and Jupiter before sunrise. These three planets will form a 1-degree triangle in the pre-dawn skies of the 28th.
November:
Bundle up for bright winter skies! See our namesake constellation Orion arch its way across the sky in November along with lots of bright star clusters to explore with big astronomy binoculars and telescopes.
Get outside on the evenings of November 17th and 18th to see the Leonids meteor shower as meteors appear to radiate from the constellation Leo.
High in the northern skies of November, between the constellations Perseus and Cassiopeia, use a pair of big binoculars or a wide-field telescope to seek out the sparkling Double Cluster in Perseus - two open star clusters NGC 884 and NGC 889 side by side.
December:
Don't miss the Geminids meteor shower which peaks during December 13th and 14th. Even though the peak is on the 13th and 14th, this popular shower will likely produce worthwhile meteors from the 6th through the 19th. Look for meteors to emanate from the constellation Gemini and the surrounding area.
The New Moon of December 11th will improve your chances of seeing the Geminids shower, as well provide optimal conditions to go after deep space telescope fare including the open cluster Pleiades (M42), the Andromeda Galaxy (M31), and the many gems within our namesake constellation Orion, including M42 the Orion Nebula and the elusive Horsehead Nebula located near Alnitak - the easternmost star of Orion's easily recognizable belt.
Some of Our Favorite Customer Astrophotos:

Bright planet Venus and a sliver-thin Crescent Moon make a pretty pair in the sky in this beautiful pic from Orion customer Aaron Collier.

Orion customer Frank Boegert captured this exquisite photo of ringed planet Saturn that clearly shows the Cassini Division and atmospheric cloud details.

Dedicated astrophotographer and longtime Orion customer Doug Hubbell sent us this dynamic photo of the Sun in Hydrogen-Alpha light captured using a Coronado PST.

This impressive astrophoto of NGC 253, the "Silver Coin" or "Sculptor's Galaxy", was captured by Orion customer Barry Brook from the dark skies of Adelaide Australia.

This impressive astrophoto of NGC 253, the "Silver Coin" or "Sculptor's Galaxy", was captured by Orion customer Barry Brook from the dark skies of Adelaide Australia.

Orion customer David Rankin sent us this great shot of M20 which displays the Trifid Nebula's beautiful coloring and delicate structure in wonderful detail.
{ width: 160, height: 160, defaultImage: '', layers: 'Artimg-og1' }

One of the nicest aspects of winter observing is the early sunsets and long nights. You can be outside and enjoy an hour or so of astronomy, and still be in early enough that mid-week viewing is an easy habit to acquire. All we need are clear skies. When you have them, get out and enjoy!
I find nothing more pleasing than an easy star hop from one great target to another. Take your binoculars or telescope out this week for a short but fun hop to four big and bright open clusters full of variety, as well as some interesting challenges. These are clusters that will become staples of your winter observing routine.

Gemini and Auriga
Find Gemini and Auriga rising above the eastern horizon in the early evening. M35 (discovered by Philippe Loys de Ch�seaux) is the lone Messier object in Gemini. The trio of M36, M37 and M38 form a nearly straight line, equally spaced in Auriga. Charles Messier discovered them while searching for comets from his observatory in Paris, France. He discovered 16 comets, but is more famous for objects he cataloged as "not" comets, so he wouldn't mistake them in his search. The list of non-comets became famous at the Messier Catalogue, 110 objects that represent the brightest and arguably most interesting deep sky targets in the northern skies.

M35 with NGC 2158 at lower left. Image courtesy Andr� Hartmann.
Let's begin with M35 in Gemini. It is very easy to locate off of one of the Twin's feet. Train your binocular or telescope finder on Eta Geminorum - the last star in the chain that begins with Castor. You should see the big open cluster as a bright fuzzy patch of light to the star's north-northwest. At magnitude 5.1, it is quite bright, so much so that there are reports of observing it without optical aid, meaning, naked-eye. Try this from a dark sky. In small binoculars, such as a 7x35, it appears as a 25' fuzzy patch with hints of resolution in periods of excellent seeing. In an 8" telescope it is best viewed at low power, so the cluster does not entirely fill the field of view. One description has it as somewhat donut shaped, with fewer stars in the center. The cluster is about the size of the Full Moon, has at least 120 stars of magnitude 13 or brighter, and is at a distance of 2800 light years. Do you see a dim unresolved glow 15 arcminutes to the big cluster's southwest? That's another open cluster, NGC 2158, 10 times older and five times more distant! NGC 2158 is a nice treat coupled with M35!
Use the finder chart at the start of this article to hop up from M35 toward Auriga, between its two closest stars, but stay on the M35 side. Your finder or binocular should show what most observers consider to be the prettiest open cluster, M37.

M37. Image courtesy Ole Nielsen.
M37 was discovered before 1654 by Italian astronomer Giovanni Battista Hodierna. The brightest of the three Messiers in Auriga, it is a very evenly distributed open cluster, with hundreds of stars of similar magnitude. The cluster has over 150 stars brighter than magnitude 12.5. It lies 4500 light years from us, and, with an overall magnitude of 6.2, it has been seen naked-eye. One observer has seen it in 8x21 binoculars from skies limited to magnitude 3. That's quite an accomplishment, but you should use larger binoculars or a telescope to enjoy the cluster at its best. Here is a nice description by Michael Geldorp using an 8" f/6:
"Magnificent cluster. Large and very rich cluster. The stars in M37 seem to form streams flowing outward from the center and there appears to be a relatively starless area near the center. Unbelievable sight at 98X with the cluster more than filling the field of view. There is a yellowish/orange bright star near the middle of M37."
Move just across the constellation line now, to M36, and you'll see a dramatic difference in appearance compared to M37.

M36 courtesy NOAO.
M36 will appear smaller, and sparse by comparison. It too was discovered by Hodiema. It shines at magnitude 6.3 and is 4,100 light years from us. Its size, though, is half that of M37. The difference will be very apparent. It has been reported as a threshold object naked-eye. Try for it that way from your darkest skies. In 7x35 binoculars, observer Lew Gramer reports: "This open cluster under these skies showed as a mere 15' irregular fuzzy patch NE of a pretty grouping of seven mag 5-8 stars, all lined up along a 2-degree path roughly North/South." Michael Geldorp in his 8" f/6 reports: "Nice bright cluster with streams of stars that give it the appearance of a crab to me. Less impressive than M 37, this cluster has fewer stars but more relatively bright ones. Located in a rich part of the sky."
The last of our clusters is M38, which is reminiscent of M35 in that it has a smaller open cluster paired in the field of view.
 and NGC 1907. Courtesy Sloan Digital Sky Survey")
M38 (above) and NGC 1907. Courtesy Sloan Digital Sky Survey
M38 is listed at magnitude 7.4, so the few "visual" observations (naked-eye) I've found are beyond the reach of most normal humans, but there are reports. In fact, one report says all four of these Messiers are visible at the same time, in one view, from a very dark (magnitude 6.7) location. I'll have to try it. What I do find reliable and interesting is the excellent observation by Michael Geldorp (again): "Large and rich cluster best seen at 49X. Not as many bright stars as M36 but richer in fainter stars. There is a conspicuous Y shaped asterism in the central part of M38. 98X showed more stars but the grandness of the cluster is lost with high powers. Striking contrast with nearby NGC 1907, reminiscent of the M35-NGC 2158 pair. 60-70 stars seen at 98X."
The cluster was also first observed prior to 1654 by the Italian Hodierna. Its 4,200 light years away and is nearly as large as M37 at 24 arcminutes. Unlike NGC 2158 near M35 thought, NGC 1907 is the same distance from us as M38.
All four Messier open clusters are around 4,200 light years distant. To give you an idea of what these clusters' distances mean, if we were to view the sun from within M38, it would appear as a magnitude 15.3 star. Go search for one in your telescope. Here's another fun fact, and chuckle — none of these four Messiers was actually discovered by Charles Messier!
I hope you've enjoyed this "hop". There are lots more, clusters, bits and pieces of nebulae strewn through our nearby home locale, and strings and chains of galaxies to explore.
Till next time under the stars,
Mark Wagner
{ width: 160, height: 160, defaultImage: '', layers: 'Artimg-CatsEyeNebula' }

Halloween is a great time to share astronomy. It's an appropriate time to do it as well. With families coming out in the early evening to trick-or-treat, you can greet them with your telescope (and short ladder), a few fun targets to show, and a Jack O'Latern of treats to hand out. You can even tell them a bit about the astronomy tie-in.
 Gibbous Moon
.
The best object to show on Halloween 2014 is the Moon. With an 8.4-da- old waxing gibbous phase, its light will dominate the sky to the south. But it is also a very easy object for first-time viewers to appreciate through a telescope. Bright and intuitively easy to relate to, what you see in a low power view are its dark seas and big craters. These will be seen both through the telescope and looking up at the moon with the unaided eye.
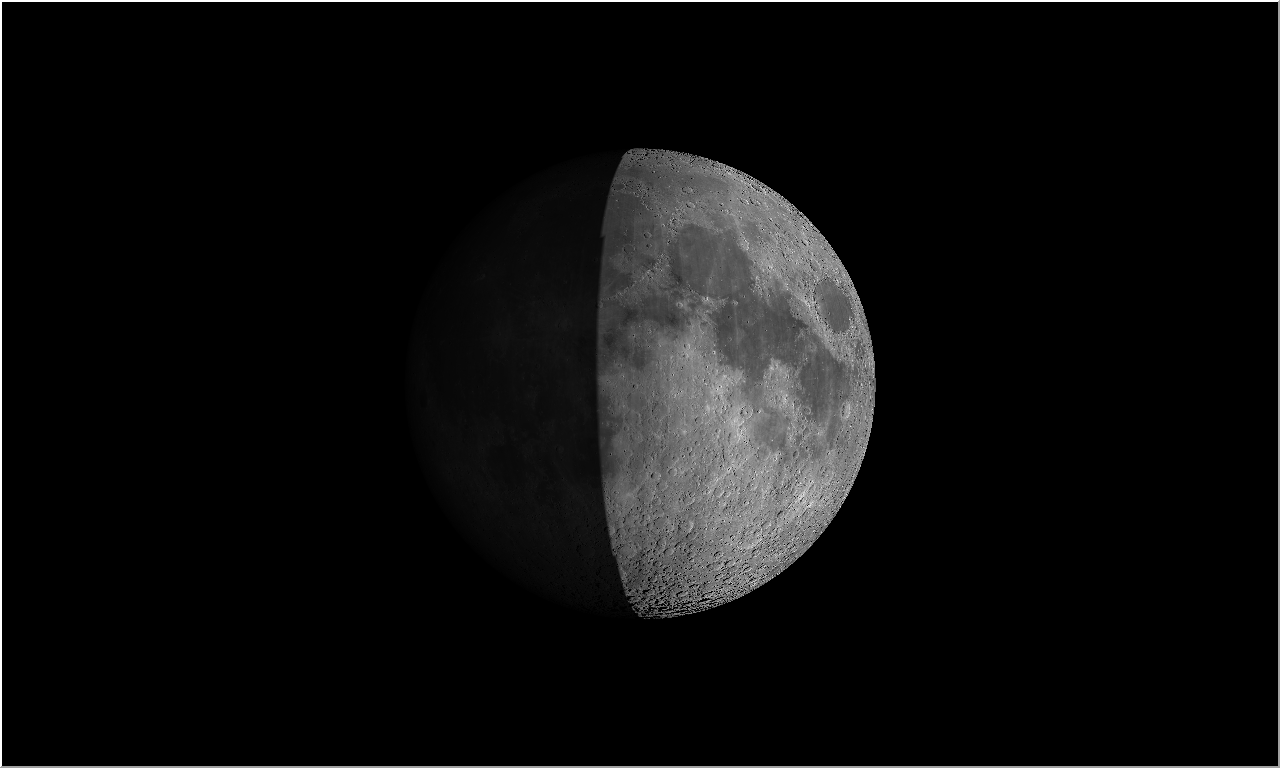 Low Power Telescope View
.
The Moon will be high in the south as darkness deepens. Here you can see what the Moon will appear like in a low power view. Most obvious will be three huge mares, or seas; the dark areas on the upper half of the moon.
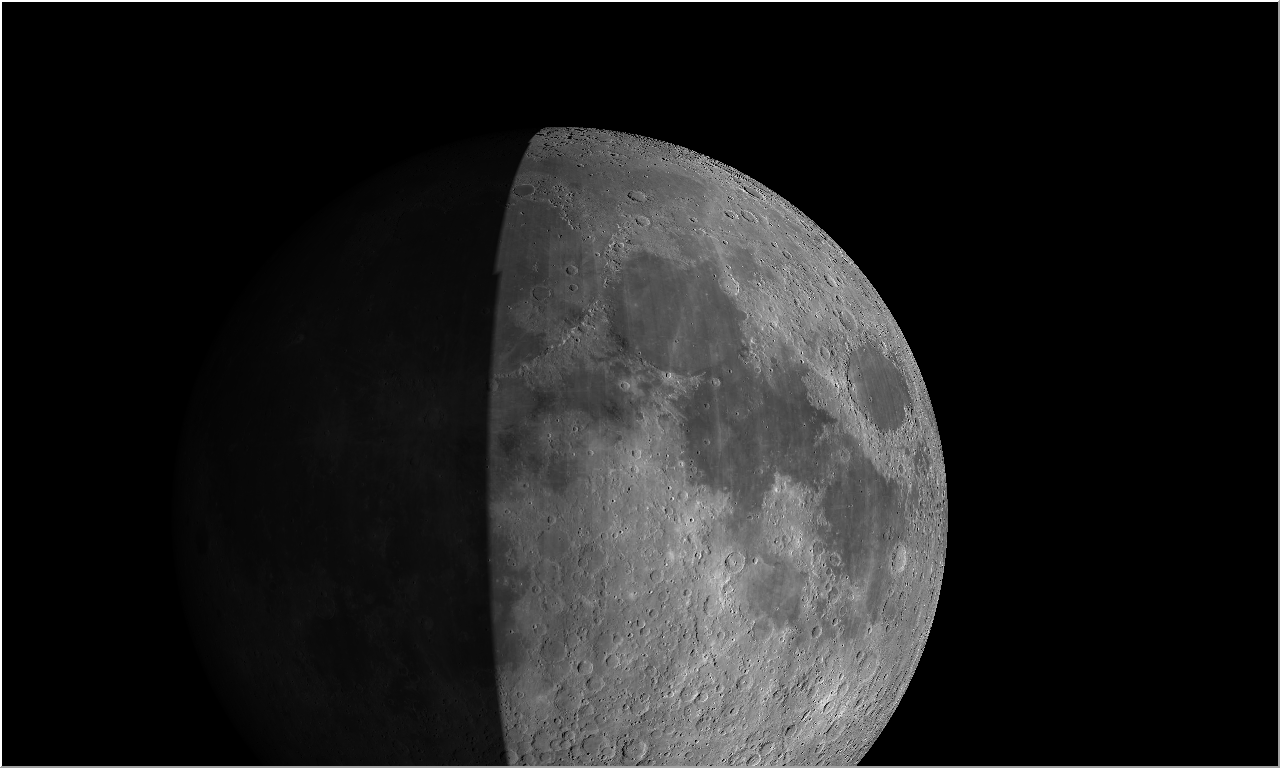 Half The Moon Is Sea
.
The largest sea is Mare Tranquillitatis, close to the lunar equator. Above and attached to it is Mare Serenitatis, appearing more circular. Toward the limb of the moon, above the eastern edge of the big mare, is Mare Crisium, the Sea of Crisis. It is very round, very dark, and distinct. All three are lava-filled basins. You can also get some nice views of half of Mare Imbrium high up next to Mare Serenitatis, along the shadow line, or terminator.
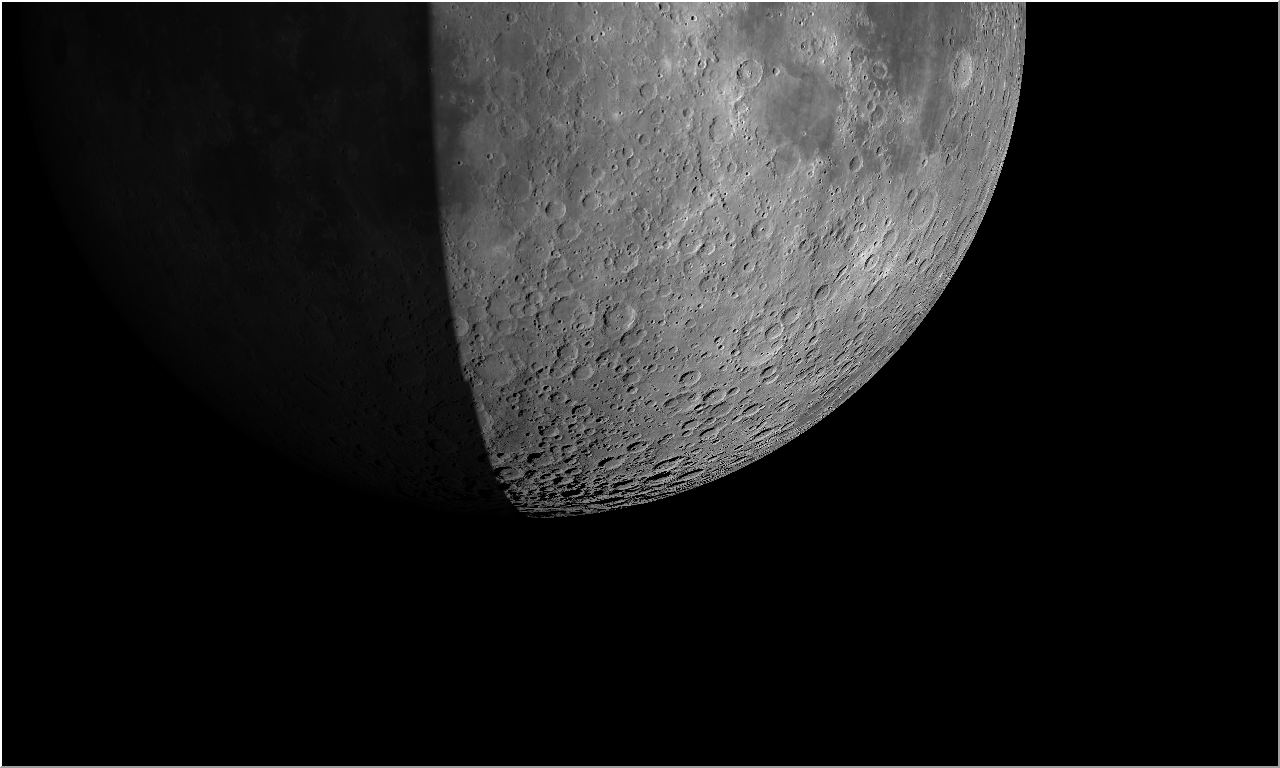 Half The Moon Is Crater
.
In contrast to the northern half, the southern visible portion tonight is pock-marked with craters. Scan around with your telescope, particularly near the south pole along the terminator for high contrast views of shadow and light inside the larger craters.
I mentioned Halloween has an astronomical history. So here's the story you can tell:
The celebration of Halloween dates our distant ancestry, and across cultures. Its astronomical tie-in has to do with recurring annual dates. Most of us know the four major time demarcations each year; vernal equinox where (northern hemisphere) day becomes longer than night, summer solstice; the most daylight of the year, autumnal equinox when night becomes longer than day, and winter solstice with longest night of the year. Between each of these is a half-way mark, called a "cross-quarter day."
Halloween historically fell on a cross-quarter day, the actual day being Nov. 7. It was the Scots and Irish celebrating it as "Samhain", between years 1,000 and 1,200, when the Pleiades star cluster would transit overhead at midnight. Samhain was a celebration of the deceased, the ghosts. At Samhain, the ghosts would leave for the season, going to their rest. Over many years this celebration became All Hallow's Eve, or Halloween, A cross-quarter day with a ghostly theme, halfway between the autumnal equinox and winter solstice. In Central American culture, friends and relatives are remembered in D�a de Los Muertos, or Day Of The Dead. It is the same celebration!
Other astronomical objects have a Halloween theme as well. They tend to be almost nebulae, as clouds of gas and dust, and we make shapes in their dark and light tones.
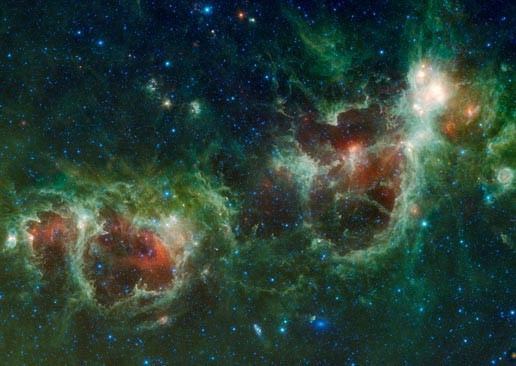 The Soul Nebula
.
Two difficult ones visually are the Soul Nebula and Witch's Head. The soul is ghostly in shape.
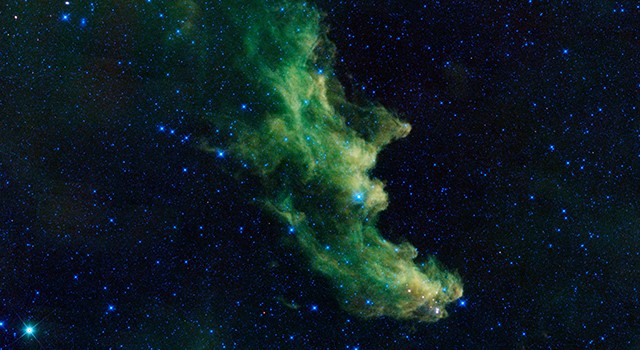 Witch Head Nebula
.
The Witch's Head really looks like its namesake!
There are two ghosts in the night sky! Can you name them? One is named because in early telescopes little detail could be seen, and these type of mysterious objects (planetary nebulae) looked like round planets. One of the ghosts appeared like the planet Jupiter. It is a spring object, so not visible this time of year. The other ghost is little, looks like a small "smoke circle" when viewed in amateur telescopes, and is setting in the evening with the constellation Ophiuchus. Can you name these planetary nebulae ghosts?
What would Halloween be without creepy spiders? The Red Spider Nebula and Tarantula Nebula are perfect for this night! The red spider may be viewed in amateur telescopes, but not much detail can be discerned. In comparison, The Tarantula is a treasure trove of complex nebulae for observer in the southern hemisphere.
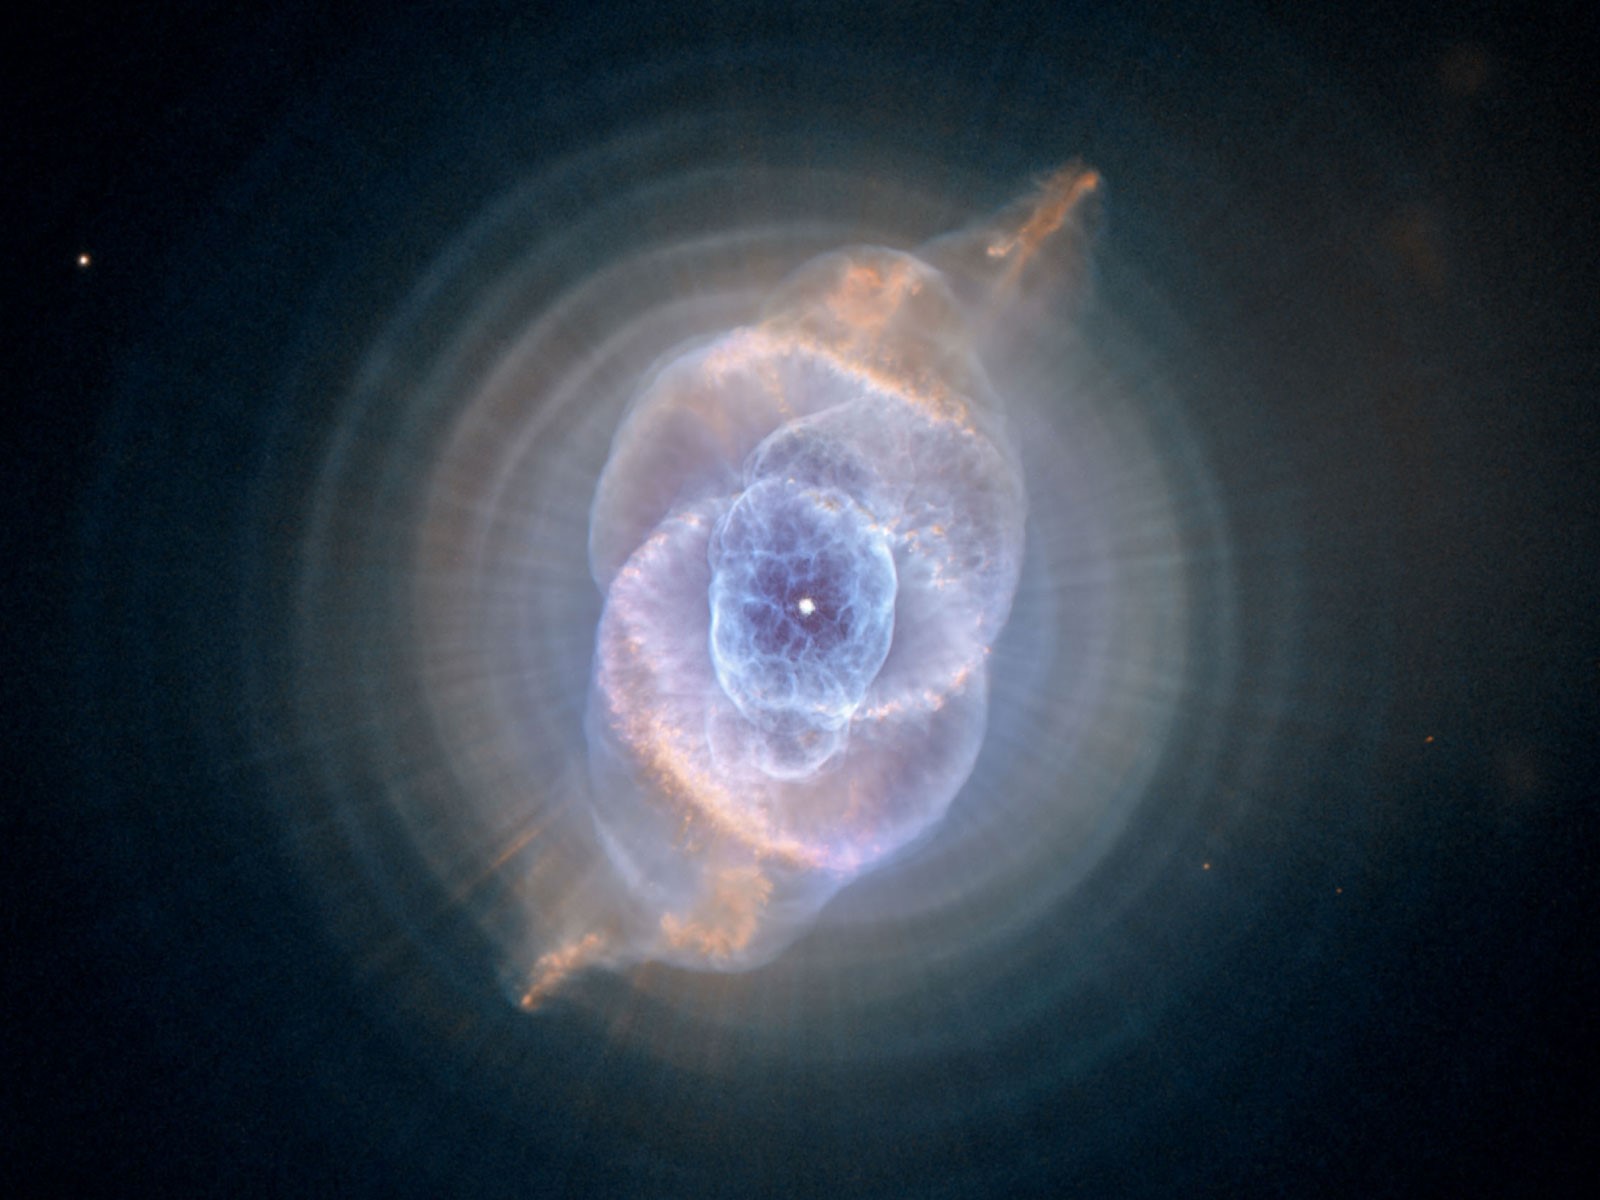 Cat's Eye Nebula
.
Ghosts, spiders, witches, what more could there be? The Snake Nebula is a dark nebula, part of a gigantic complex of dust toward the center of our home Milky Way Galaxy. It is a treat to see it in telescopes from a dark sky. The Owl Nebula fits our Halloween theme, as a creature of the night, and so does Cat's Eye Nebula in Draco, a fine sight in amateur telescopes.
The Medusa Nebula is large and dim, currently visible in Gemini in the morning sky. This is a large and dim planetary nebula, and very challenging to observe. But knowing what happens to humans seeing the Medusa, perhaps its better to just enjoy knowing its there.
With so many scary Halloween themed creatures in the sky we should feel fortunate to have the moon tonight, as some easy and even friendly "eye candy" to show visitors.
Get your telescope out in the early evening and share some treats. You might even consider handing out Milky Way and Mars bars.
Happy Halloween!
Mark Wagner
All maps are courtesy Virtual Moon Atlas. Photos are courtesy of NASA.
{ width: 160, height: 160, defaultImage: '', layers: 'Artimg-WhatsInTheSky_09-14_square' }

September nights hold lots of wonderful treats for amateur astronomers to see with binoculars and telescopes. See some of our top September stargazing suggestions below:
- The Northern Milky Way - Early in the month, around 9 PM, the "Summer Triangle" of three bright stars (Vega, Deneb and Altair) is nearly overhead. In the northernmost portion of the Summer Triangle, you'll see the brightest portion of the northern Milky Way. Point a telescope there and you'll discover that the fuzzy outlines of the Milky Way will resolve into fields of glittering stars.
- Planetary Nebulas in the Summer Triangle - Get a star chart and see how many of these you can find in September: the famous Ring Nebula (M57) in the constellation Lyra; the Dumbbell Nebula (M27) in Vulpecula; and the "Blinking Planetary," NGC 6826 in Cygnus. Not far outside the western boundary of the Summer Triangle is a small, but intensely colorful planetary nebula, NGC 6572. All these can be seen in a 6" or larger telescope. An Oxygen-III filter will help.
- Neighbor Galaxy - In early September, lurking low in the northeast sky is another galaxy, separate from our Milky Way - the Great Andromeda Galaxy (M31). From a very dark, moonless sky, M31 is visible with the unaided eye as a slightly fuzzy spot. A pair of 7x50, 9x63 or larger binoculars will give you a much better view and telescopes will reveal some of the subtle dust lanes in the neighboring galaxy.
- Saturn Comes Close to the Moon - On September 28th, grab a pair of powerful astronomy binoculars or a telescope to see ringed planet Saturn come within 43 arcminutes of the waxing crescent Moon. This pretty pairing of two popular solar system objects is sure to make a spectacular sight.
- More Extra-Galactic Treats - If you haven't tracked down "The Whirlpool Galaxy," M51, just off the handle of the easily recognizable Big Dipper asterism, do it now while you still can! It will be too low for most to get a good view after September and you'll need to wait until late winter or next spring to catch a good view of this truly picturesque galaxy.
- A Brilliant Open Star Cluster - Off the western end of the constellation Cassiopeia is the beautiful Open Star Cluster M52. You can find it with 50mm or larger binoculars from a dark sky site, but the view is definitely better in a telescope. With a larger scope, say 8" or larger, and with the aid of an Orion UltraBlock or Oxygen-III eyepiece filter, you may even be able to catch views of faint emission nebulas near M52.
- Two More Brilliant Star Clusters - If you liked sparkling M52, you'll love the popular favorite "Double Cluster in Perseus." Lying between constellations Cassiopeia and Perseus is a bright, fuzzy spot in the Milky Way, and a binocular or telescope will reveal two, bright open star clusters close to one another. In early September the "Double Cluster" appears low in northeastern skies around 9 PM, but it becomes a real showpiece later in the evening as it climbs higher in the sky.
- The Globular Star Clusters of September - Almost in a row, off the western side of the constellation Pegasus are three globular star clusters that line up almost north-south. These sparkling clusters are, starting with the most northern globular, M15 in Pegasus; M2 in Aquarius and M30 in Capricorn. From a dark sky site you can easily find all of them in binoculars!
- The Challenging Veil - A challenge object for September is the Veil Nebula, a supernova remnant, in Cygnus which is almost overhead as soon as it gets dark. With a star chart, aim your telescope at the naked eye star 52 Cygni. One branch of the Veil crosses over this star and to the east are brighter segments of this roughly circular nebula. While the Veil can be seen in big binoculars by expert observers under very dark skies, you will likely need at least a 5" telescope and an Orion Oxygen-III eyepiece filter if you are near city lights.
All objects described above can easily be seen with the suggested equipment from a dark sky site, a viewing location some distance away from city lights where light pollution and when bright moonlight does not overpower the stars. All objects have been verified by actual observations by Orion Telescopes & Binoculars Staff at Fremont Peak State Park, and/or Deep Sky Ranch, 60 miles and 90 miles respectively from San Jose International Airport, San Jose, CA.
{ width: 160, height: 160, defaultImage: '', layers: 'Artimg-WhatsInTheSky_07-14_square' }

Summer stargazing fun continues in July! Warm July nights are ideal opportunities to spend time outside with family and friends, exploring the heavens with your telescope or astronomy binoculars.
Here are some of our top suggestions for July stargazing:
- The Moon and the Red Planet - On July 6th, grab a telescope or pair of 50mm or larger astronomy binoculars to see the Moon positioned close to Mars in the sky.
- The Moon and the Ringed Planet - Just a couple days later on July 8th, you can enjoy a close pairing in the sky between the Moon and Saturn called a conjunction.
- The Summer Milky Way - At mid-month, around 10pm PT, the glorious Summer Milky Way shines down as a band of light that stretches from the Southern horizon to nearly overhead. You don't need binoculars or a telescope to see our home galaxy, but it is best observed from a site with inky-black dark skies. The Summer Milky Way will arch across the sky as the night progresses.
- Spectacular Saturn - Still well-positioned in July skies, ringed Saturn continues to be a wonderful summer planetary target. Look for it in south to southwestern July skies around 10pm. Use an eyepiece that will yield at least 40x in your telescope to see Saturn's beautiful rings, then use a Barlow lens or higher-power eyepiece to go in for closer views. Larger telescopes and clear, dark skies will help you see a thin gap between Saturn's largest rings, which is called the Cassini Division.
- Sparkling Open Star Clusters - In the constellation Scorpius, catch M6, the "Butterfly Cluster" and M7 in 50mm or larger binoculars. Point a telescope at these two open star clusters to try to see the subtle dust clouds nearby.
- Flaming Gas Clouds - Scan the Summer Milky Way with 50mm or larger binoculars or a telescope to reveal some of the best emission nebulas of July. Use an Orion Oxygen-III Nebula Eyepiece Filter for the most stunning views. In Sagittarius, track down M8, the "Lagoon Nebula"; M20, the "Trifid Nebula"; and M17, the "Swan Nebula." In the constellation Serpens Cauda, see the delicate "Star Queen Nebula, M16. Use big astronomy binoculars to frame both M16 and M17 in the same field-of-view, or use a really large telescope to coax out the faint violet glow of M16.
- Dying Stars and Glowing Balls of Gas - Look to the constellation Lyra with a telescope to catch one of the best Planetary Nebulas in the sky - M57, the famous "Ring Nebula"!
- Late July Meteors - Discovered in 1825 by the German astronomer Friedrich Georg Wilhelm von Struve, NGC 6572 is bright enough to be seen in a 60mm refractor telescope; but it is very, very small! At only 8 arc seconds in size, it takes a lot of magnification to distinguish this from a star. The easiest way to find it is to look in the target area for a green star. NGC 6572 is one of the most intensely colored objects in the night sky. Some say this is green, some say it is blue; what do you think?
- July Challenge Object - Hercules Galaxy Cluster: About half a billion light years from Earth in the constellation Hercules, not far from the star Beta Hercules in the southwest corner of the "keystone" asterism, lays the "Hercules Galaxy Cluster." This association is a group of 200-300 distant galaxies, the brightest of which is NGC 6050 at about 10th magnitude and can be seen with an 8" reflector under very dark skies with good seeing conditions. A larger aperture, 14"-18" telescope will begin to show about a half-dozen or more galaxies in one field-of-view. How many can you see in your telescope?

M20 Trifid Nebula, Doug Hubbell
All objects described above can easily be seen with the suggested equipment from a dark sky site, a viewing location some distance away from city lights where light pollution and when bright moonlight does not overpower the stars. All objects have been verified by actual observations by Orion Telescopes & Binoculars Staff at Fremont Peak State Park, and/or Deep Sky Ranch, 60 miles and 90 miles respectively from San Jose International Airport, San Jose, CA.
{ width: 160, height: 160, defaultImage: '', layers: 'Artimg-WhatsInTheSky_06-14_square' }

Get outside for summer stargazing fun in June! With weather warming up, June is a great time to enjoy relaxing evenings under starry skies with your telescope or astronomy binoculars.
Here are a few of Orion's top picks for June stargazing:
- The Moon & Mars Red planet Mars will appear to creep within about two degrees (about 4 lunar diameters) of the Moon on the night of June 7th. This conjunction will be visible from moonrise to moonset, so get outside and enjoy the view!
- Ringed Saturn Throughout all of June, the ringed planet will be an attractive target for stargazers. Use an eyepiece that will yield at least 40x in your telescope to catch views of Saturn's beautiful rings and brighter orbiting moons. Larger telescopes and clear, dark skies will help you see a thin gap between Saturn's rings, which is called the Cassini Division.
- Swirling Spirals - Around 10pm in mid-June, two glorious, face-on spiral galaxies M51 and M101 will both be in a great position for viewing and imaging. While you can see these great galaxies with a humble 60mm refractor, bigger telescopes will reveal finer details. Use a 10" or larger reflector under dark skies to see the delicate spiral arms of M51.
- Gems of the Summer Triangle - By 10pm in mid-northern latitudes, the Summer Triangle, comprising beacon stars Vega (in Lyra), Deneb (in Cygnus), and Altair (in Aquila), will be fully visible above the horizon. Several celestial gems lie within its confines, including the Ring Nebula (M57), the Dumbbell Nebula (M27), open star cluster M29, and the visually challenging Crescent Nebula (NGC 6888). To catch a glimpse of the elusive Crescent, you'll almost certainly need an Orion Oxygen-III Filter in a larger telescope.
- Pretty Pair - On June 24th during daylight hours, the thin crescent Moon passes within 1 degree of our neighboring planet Venus. One degree is about the width of your pinky held at arm's length. Knowing this proximity makes it easier to spot Venus in the daytime sky. Can you see it?
- Summer is Globular Season! - Globular star clusters are densely packed balls of stars that are concentrated towards the center of the Milky Way. June skies offer some of the finest globular cluster viewing opportunities. You can catch globular clusters in 50mm or larger binoculars, but a 6" or larger telescope at moderate to high power offers the best chances to resolve individual stars. In the constellation Hercules, look for M92 and the "Great Cluster" M13. In Scorpio, look for M4 and M80. The constellation Ophiuchus is home to six globulars - M10, M12, M14, M107, M9, and M19. Can you spot them all?
- The Virgo Cluster - A treasure trove of galaxies can be explored if you point your 6" or larger telescope towards the Virgo Galaxy Cluster. Aim your telescope at galaxy M87 in the constellation Virgo and start scanning the surrounding night sky. How many galaxies can you see?
- Summer Sky Challenge - Discovered in 1825 by the German astronomer Friedrich Georg Wilhelm von Struve, NGC 6572 is bright enough to be seen in a 60mm refractor telescope; but it is very, very small! At only 8 arc seconds in size, it takes a lot of magnification to distinguish this from a star. The easiest way to find it is to look in the target area for a green star. NGC 6572 is one of the most intensely colored objects in the night sky. Some say this is green, some say it is blue; what do you think?
All objects described above can easily be seen with the suggested equipment from a dark sky site, a viewing location some distance away from city lights where light pollution and when bright moonlight does not overpower the stars. All objects have been verified by actual observations by Orion Telescopes & Binoculars Staff at Fremont Peak State Park, and/or Deep Sky Ranch, 60 miles and 90 miles respectively from San Jose International Airport, San Jose, CA.
{ width: 160, height: 160, defaultImage: '', layers: 'Artimg-Moon_Day_2014_06_16' }

In a previous Telescope.com article, I gave a list of essential items needed to do urban/sidewalk astronomy. The list is good for any astronomy observing outreach, but best suited for light-polluted urban settings using a "public hands-on" approach.
So now you're ready to head out to the restaurant or pub patio, the coffee shop veranda, or just out on the sidewalk. What do you look at? City and business lighting may make it tough to see many stars in the sky. But really, all you need are two or three good things to view, and often there can be even more. Here's a list of the best objects to view from city locations:

First Quarter Moon through an XT8 Dobsonian, at Orion's last star party. Credit: Maria Grusauskas
1. The MOON: This is an easy, obvious target if it's the right phase-anything from about three days after New Moon to sometime around Last Quarter. While the Moon is hated by those hunting deep sky objects at a dark site, it's the object everyone wants to see in an urban setting. Binoculars are good for panoramas, especially if there are nearby trees and thin scattered clouds you can put in the FOV. The most modest scope can show amazing detail on the surface. It just blows people away, especially the craters-I'm always amazed they're so amazed by that. In larger phases, an adjustable polarizing filter can be a good thing to cut down the glare. I prefer using a wide-field eyepiece rather than tight-in magnification, so folks can track and follow easier when they run the scope-which I always encourage.
2. SATURN: The next-most-impressive object to the Moon. With a little scale on it, people will accuse you of pasting a picture in the scope. This is a good time to show them (if you're using a reflector) that there's just a mirror at the bottom and a small mirror at the top, bouncing light right into their eye-no tricks! They'll be especially impressed by any moons visible, and Titan, at least, almost always is. Like all objects, have a "cheat sheet" in hand or in your head with some basic facts, like size, distance, and number of moons. Depending on your scope, maybe a little more magnification is in order, but not TOO much: you want to make sure it's easy to track.
3. JUPITER: The "other" impressive target. Cloud bands and the Galilean moons are always visible unless conditions are terrible. People love watching the moons move around through the evening, and they're amazed that they can be spotted even with binoculars. This is a great object to show through both the binos and your scope. Thick haze can ruin it, though, so wait it out or pack it in! If at a tavern, and you're a bit of a gambler, an entertaining "wager" can be to see if your patron can name any or all of the Galilean moons. Don't believe they never can-I've lost this bet before, requiring all four. Pay up if you lose! As always, know which moon is which: this is very easy to do with any number of apps, tweets and sites which will keep you informed. Jupiter's Great Red Spot is not often visible from urban settings, even if face-on. But it's good to know when it is anyway, because someone will ask. And who knows, maybe you will be able to see it.
4. The SUN: There is no more-impressive object than our closest star. Obviously exclusively a daytime target, this requires a white-light solar filter or a hydrogen-alpha scope. It's a stand-alone target for daytime outreach, other than the Moon or Venus, which can sometimes be seen depending on their location in the sky. The H-alpha scope is by far the best way to go, as most people have never seen this view at all unless it's in a photo in a magazine or online. All you need is a clear day, the time and inclination to do it! This is THE target for daytime festivals and public events. It's also the one where I tend to do the aiming, rather than allowing the patron to do so, since it's tougher than aiming a Dob, and the H-alpha scope tends to be a little more fragile and pricey.
5. ORION'S SWORD/ORION NEBULA: For a light-polluted place, Orion's entire Sword through astronomical binoculars is the better of this pair of targets. While the Sword is probably visible naked-eye, the amount of stars, and the small view of the Orion Nebula in the middle, is a very easy and impressive sight from all but very bright places. If it's a bit darker, the Orion Nebula through a scope can be very good as well, but often it's not; it'll never look like that OIII filter view from your dark site. But I've had a viewer be able to see the four main Trapezium stars from a tavern patio; not bad!
6. PLEIADES: This is a real crowd-pleaser through binoculars, and of course too large to fit into any but a rich-field scope. People can see it in the sky, although they may have to shield their eyes from nearby lights. And the view in binoculars is simply stunning. It's a challenge to see how many stars they can see naked-eye (I can usually only manage five myself) versus the binocular view (generally over thirty if they take their time). And the various names of this object are of great interest to most: many have heard of the Seven Sisters if they haven't heard of the Pleiades, but most have NOT heard its name "Subaru", and are pleased to finally learn why those cars have those stars in the logo.
7. ALBERIO: A good object, easy to find at the right time of year, and wonderful for showing color to those who wish to see some. Many are disappointed by the lack of color in images, having imagined the view through a scope is like a picture in a magazine. This is great for showing color due to its blue and yellowish components. And it allows some conversation about the Milky Way, (which probably is not visible from the city), and the "Northern Cross", Cygnus.
8. BEEHIVE CLUSTER: Much like the Pleiades, this is an extremely pleasing binocular object. Often viewers will want the scope aimed at these clusters as well, and that's fine-they can steer around and see more detail, but they'll get a very visceral lesson in object size. That can lead to a great conversation on best viewing methods: naked-eye for meteors and aurora, binos for very large objects, scopes for objects from low-magnitude (large clusters, many nebulae) to high-mag (planets, planetary nebulae).
9. MARS (SOMETIMES): People always want to look at Mars, and sometimes it does look good; when it's close enough to Earth and your scope can give it enough scale. A lot of the time though, it's not very impressive. But when it is, and you can get enough magnification to make it worthwhile, folks can be extremely impressed to see a lighter polar cap and surface mottling. And it's always better than Neptune or Uranus, and someone cracking wise will always ask to see the latter.
10. HYADES: More huge star-cluster fodder for binoculars. Easy to spot via Aldebaran in proximity to Orion and the Pleiades, your viewers can be very impressed by the number of stars and the amount of sky it covers. I'm going to throw in the northern Perseus star fields as well, when they're visible, and also scanning many areas of the summer Milky Way.

Credit: Barstronomy
BONUS OBJECTS: The International Space Station and Iridium Flares. www.heavens-above.com is a great place to find out when and where, although it's not the only site doing this. And even though the ISS is just a bright white light slowly crossing the sky on a good day, people LOVE to see it. However, it's generally too hard for people to track successfully, although it shows structure in large binoculars and a scope. You can let them try if you wish. The brighter Iridium flares are impressive due to their predictability and the fact that they happen frequently, about two to four times per night; people are pleased to find out they can learn easily when and where they'll be visible. Then, they can impress the neighbors by saying "the aliens are going to signal me from this part of the sky at such-and-such a time tonight." New respect in the hood!
BELIEVE IT OR NOT, PROBABLY NOT: The next objects are usually NOT very much to look at from an urban setting in a scope 8" or less. You might think they'd be, but in my experience I've mostly given up on them. For a darker site, certainly; light-polluted urban site, not really, but they are worth a try. Your mileage may vary, depending on your scope and the exact conditions from your viewing stage.
M13, Lagoon Nebula, Swan Nebula, Andromeda Galaxy, M81/82, Leo Triplet, Comets, unless they're quite bright, say 5th magnitude at least.
If you've got an obvious object I missed in this list, please let us know in the comments. Hey, I'm not a scientist-I just play one on bar patios! Until next time, eyes to the skies!
CAUTION: Never look at the Sun, either directly or through a telescope or binocular, without a professionally made protective solar filter installed that completely covers the front of the instrument, or permanent eye damage could result. When using a truss tube telescope to view the Sun, both a properly fitting solar filter and light shroud are required.
{ width: 160, height: 160, defaultImage: '', layers: 'Artimg-MilkyWay_ap1418' }

Now that summer is arriving to the northern hemisphere, we are about to enter the best time of year to see and photograph the most beautiful part of our own Milky Way Galaxy. Not only are there millions of stars and some amazing dust lanes in the band of the Milky Way, there are also a host of Messier and NGC objects as well.
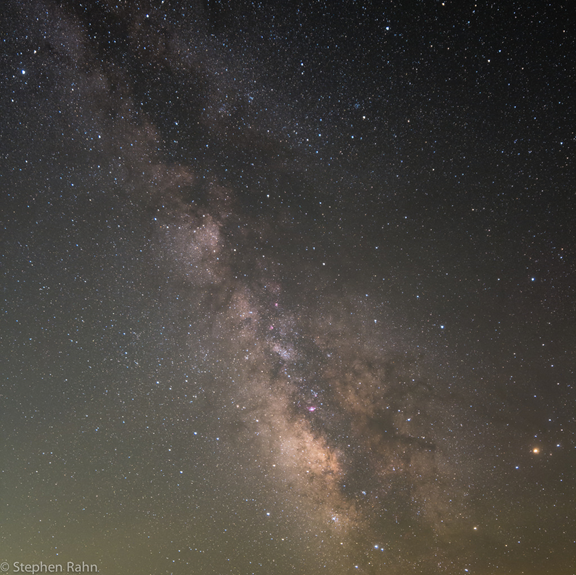
What equipment will I need?
- A camera with a large sensor, such as a DSLR or Micro Four Thirds camera. The sensor on most point-and-shoot cameras just isn't big enough to capture enough light at night to make photographing the Milky Way a worthwhile endeavor.
- A wide angle lens with a large aperture. The summer Milky Way encompasses a lot of the night sky, so you will want to shoot with a very wide field of view. I suggest at least 24mm or wider, with an aperture of at least f/2.8. You can still get decent results with smaller aperture lenses, but the goal is to try and get as much light into the camera as possible without too long of an exposure.
- A remote shutter release, or an in-camera timer option. Pressing the shutter with your finger causes camera shake, which can result in blurry images when shooting long exposures. See if there is an available remote shutter control for your camera. If not, most cameras have some kind of timer option. That way you can press the shutter button normally with your finger, but the camera will wait for a period of time before it actually opens the shutter. This allows the camera to stop shaking before taking the photo. A remote shutter release is the preferred option because it will also allow you to take exposures for several minutes in length if you are able to use a tracking device for even longer exposures. You will use the bulb setting on your camera and the remote to open and close the shutter.
- A good sturdy tripod. You don't want the wind to blow your tripod over with your nice camera on it. You also don't want a light breeze to shake your camera during a long exposure and cause blurry images. I would recommend a tripod with a weight rating of at least 5 pounds. Orion sells three tripods that meet this requirement.
- A couple of reliable memory cards with at least 16 gigabytes of storage each. You're probably going to be shooting a lot of images as you will likely have to experiment a good bit initially with your camera settings. I also recommend that you shoot with your camera in RAW mode so that you can have more control over processing them. Shooting in RAW mode comes at a price, however. The individual images will be much larger than if you were shooting in JPG mode.
- A fully charged camera battery and at least one fully charged backup battery. Or, you can use a field battery and adapter, like Orion's Dynamo battery and DSLR adapter (compatible with Canon cameras). It is an awful feeling to be out shooting something really beautiful and having your camera die because of battery power. Get charged up ahead of time!
Now that you have your materials list down, here are some other details you'll want to consider before you set out to shoot the Milky Way:
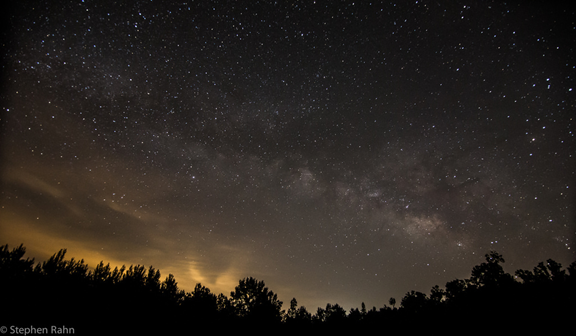
- You will of course want to find a location with dark skies. Light pollution is your enemy (and that includes the Moon). If you can't see any part of the Milky Way with your naked eye, then photographing it will be quite difficult. Get away from the city lights! Hopefully there is a national or state park with reasonably dark skies within a manageable driving distance.
- Keep an eye on the weather. You will want to consult the Clear Sky Chart website for this.
- Learn the phases of the Moon. The Moon is beautiful, but it interferes with our trying to shoot the Milky Way. Try to plan your shooting as close to the New Moon as possible so it won't interfere.
- Know what time the Milky Way will rise so you can maximize your shooting time. A good piece of free software that can help is Stellarium. This program shows you what will be in the sky at any time you'd like to know about.
- You will have to use both manual focus and manual exposure settings with your lens and camera. Automatic focusing and exposure will simply not give good results for shooting at night.
- For manual focusing, set your lens to infinity focus mode if available. If not, try to focus on the brightest star or planet in the sky. Vega is a really bright star that is right next to the Milky Way. It might take you several test shots to get the focus exactly correct, so be patient and if your camera has a zoom feature which allows you to view your images that can be very helpful for focusing.
Getting Started with Camera Settings
- Use the largest aperture your lens will allow.
- Start with your ISO at 3200.
- Set your exposure time to 20 seconds.
- Review your image in the camera. If it's too bright, then lower the ISO and/or exposure time. If you don't see much detail, try raising them a bit.
- You might find that setting the ISO too high will result in noise (or graininess) in your photos. Some cameras handle high ISO better than others; so take lots of test shots. Some noise can be reduced in post-processing.
- Be careful of star trailing. Because the Earth is rotating, the stars appear to move across the night sky. This will affect your exposure times. The wider your lens is, the longer you can shoot without star trails. This article from David Kingham talks about the "Rule of 500" and how to avoid star trails.
Other Suggestions for Shooting the Milky Way:
- Consider shooting with something interesting in the foreground. Trees, mountains, a lake, or any scenery you choose can add some real visual interest to your photos.
- Once you've gotten comfortable with shooting exposures of no more than 30 seconds, consider purchasing a tracking device that will allow you to take exposures that are several minutes long. The Orion StarBlast AutoTracker Altazimuth Mount will allow you to attach your camera so you can take much longer exposures. This will allow you to take photos with better detail and also reduce your ISO so you will have less noise in your photos.
- Combine several images for a panorama or mosaic. You can use a program like the free Microsoft Image Composite Editor to combine multiple images into one larger one.
- Use an intervalometer to create a time-lapse or extended star trails image. An intervalometer allows you to program your camera to take a series of exposures without your having to do anything. If you have a Canon camera, a free piece of software called Magic Lantern can do this for you without having to purchase a separate piece of hardware.
- Learn from others. There are astrophotography groups on places like Flickr and Google+. Most people will provide assistance and suggestions if you ask nicely.

Image Credit: Stephen Rahn
{ width: 160, height: 160, defaultImage: '', layers: 'Artimg-WhatsInTheSky_05-14_square' }

Get outside with your telescope on clear May evenings to see celestial treats in the sky! With weather warming up and skies clearing up, there's no shortage of celestial delicacies to view. Here are a few of Orion's top suggestions for May observing:
- Eta Aquarid Meteor Shower - Get outside on the night of May 5th, or well before dawn on May 6th to catch the peak of the Eta Aquarids meteor shower. You don't need a telescope to enjoy this meteor shower, which should deliver about one meteor per minute (60 per hour). Look for meteors appearing to radiate out of the water jug portion of the constellation Aquarius.
- Four Big Planetary Nebulas - Use a 6" or larger telescope and an O-III or UltraBlock filter to catch four relatively large planetary nebulas in May skies. See the "Ghost of Jupiter," NGC 3242 in Hydra; M97, "the Owl Nebula" in the Big Dipper; NGC 4361 in Corvus, and the famous "Ring Nebula", M57 in Lyra just a few degrees from bright star Vega.
- Four Glittering Globulars - Four picture-perfect examples of globular star clusters will be visible in May skies. Check out M3 in the constellation Bo�tes. M13, the "Great Cluster in Hercules" will be visible near the zenith. M5 can be found in Serpens, and M92 in the northern section of Hercules. Big telescopes will provide the best views, but even 50mm binoculars will show you these dense balls of stars from a dark sky site.
- Four Face-On Spirals - Use large telescopes to see the classic pinwheel shapes of galaxies M51 and M101 in the Big Dipper asterism, and M99 and M100 in the Virgo galaxy cluster. There are also dozens of additional galaxies to explore in the Virgo cluster with a big-aperture telescope.
- May's Challenge Object - May skies present perhaps the best opportunities to grab a view of Omega Centauri - the brightest globular star cluster in the sky! While it's big and bright, even visible as a "fuzzy" star in binoculars, the challenge Omega Centauri presents is its low position in southern skies, which can make it unobservable from higher northern latitudes.
All objects described above can easily be seen with the suggested equipment from a dark sky site, a viewing location some distance away from city lights where light pollution and when bright moonlight does not overpower the stars. All objects have been verified by actual observations by Orion Telescopes & Binoculars Staff at Fremont Peak State Park, and/or Deep Sky Ranch, 60 miles and 90 miles respectively from San Jose International Airport, San Jose, CA.
{ width: 160, height: 160, defaultImage: '', layers: 'Artimg-Barstronomy_2014_04_21' }

A successful night of astronomy outreach requires a few crucial ingredients to ensure both an awesome viewing experience for your viewers, a minimal amount of hassle for you, and the most fun for everybody!
.
Here is a fantastic, tried-and-true list of what you'll need, compiled by Duke Skygawker, a professional astronomy outreach coordinator and founder of "Barstronomy" in Columbus, Ohio.
1. A scope you don't mind being manhandled:
A bare-bones 6" or 8" Dobsonian telescope works best, like an Orion 8" Classic Dob (or the old Coulter Odyssey 8 I use.) Just point and push. In bright areas, you'll only be looking at the brightest targets, almost all seen naked-eye (with a handful of exceptions). Let the viewer, with a little help, do aiming and tracking. Be prepared for fumbling on their part, but most pick it up quickly. Let your participants get their hands on the scope to help them get over the fear of "ruining expensive equipment." You'll teach them quickly that a decent largish scope is not that expensive or difficult to use!
2. An inexpensive wide field eyepiece or two:
Leave your high-end eyepieces (and worry) at home. When doing astronomy outreach, your EPs will be used roughly, guaranteed. I suggest something like a GSO Superwide 20mm, which gives a great view of the Moon and a decent view of Saturn and Jupiter. If you need to bump up power a little, use a superwide 15mm or 12mm. Not tack-sharp FOVs edge-to-edge, but the wide view is what counts. Orion Sirius Plossl eyepieces are a little bit more expensive, but offer great views. Use high powers not at all or sparingly - make it easy for your patrons to track the target.
3. A unity finder with a bullseye reticle:
No finder scopes. Use an Orion EZ Finder Deluxe II or the venerable Telrad. They love it because it's like aiming a big gun barrel and putting the bull's eye on the target!
4. Binoculars on a tripod:
I recommend using inexpensive astronomy binos - I use 20x80's. Whatever tripod you use, consider strapping it to a patio rail or other object if you can, just to deter accidents. Binoculars excel for the Moon with clouds passing in front, and larger star groupings like Orion's Sword or the Pleiades. Bonus: Everyone already knows how to use them, and finds they already have astronomy-appropriate optics at home in many cases. It also keeps people busy while they wait for views through the bigger scope.
5. Signage:
Especially if you are using a dobsonian telescope, some people won't know that cannon-shaped object is a telescope, since they have a mental image of traditional refractors. A large sign or banner tacked to the wall or fence, or even stuck on your telescope will clue them in. You can tell them it's a T-shirt cannon if you want; I like to say it's a "reverse photon cannon." Have a sign that tells what you're viewing. You can print these on 8x11 paper at home, but if you re-use them much, laminate them before use.
6. A small star atlas and a planisphere:
Inexpensive, useful, and easy to show people. You may not actually need them for finding targets at your event, but they are valuable examples of what to buy to be able to navigate the sky at home. The Orion Star Target is a good planisphere, and in my opinion, the S&T Pocket Sky Atlas is the best small atlas available.
7. An adjustable stool:
It's always more comfortable to sit and view, although some won't want to do so. I'm a huge fan of the common "Airlift" hydraulic bar stool for outreach events or for taking on dark-sky trips. Though it doesn't transport flat, it's lightweight, easy to pack around, and looks great, all for about forty bucks. Trust me, you'll LOVE it. If you don't sit on it, it's also a small table!
8. Knowledge:
Stored in your brain, or on a "cheat sheet" or card. In some cases (like solar H-alpha scopes, if daytime), a small sheet posted or handed out, explaining what people will see at the EP, can spare you repeated explanations, saving your voice and perhaps sanity. The planisphere and small star atlas you brought belong count in this category as well.
9. Appropriate attire:
No-brainer, right? Dress for your locale and event as well as the weather. If you're going to be bringing your telescope to a bluegrass festival, don't wear a tux, and don't wear a swimsuit to a wedding. Your star-studded beanie might not fit at a corporate mixer, but your knit-hat-with-built-in-dreads might be perfect at a reggae festival. And as an astronomer already, you already know to dress in layers for the expected low temperature, minus 20 degrees F or so.
10. A sense of humor and an even keel:
If you have fun, so will they. We all know a few astronomy jokes, but make them appropriate for the setting. "Your world is spinning" has applicability where adult beverages are offered. "Heavenly bodies our specialty" can be good for some crowds. "Nothing's stupider than Jupiter" just sounds funny, even though it's far from true. I've kept informal track of how quickly after beginning someone will make the standard joke about the seventh planet. Record: 17 seconds, and you may hear that multiple times in an evening. Grin and bear (not BARE) it! And, if it happens to be a night you find yourself in a foul mood, FAKE IT! You'll probably wind up having a good time anyway.
Orion suggests:
An eyepiece video camera is also a great tool for astronomy outreach, especially when you're dealing with large crowds. By projecting the eyepiece view onto a larger screen, more people will be able to see what's in the eyepiece without having to wait in line for their turn at the telescope. This is also an great tool to use when there are children present. Finally, at our last Star Party, many people were excited to be able to take pictures of the Moon with their cell phones. Having a SteadyPix adapter for cameras and smartphones really helped this process!
{ width: 160, height: 160, defaultImage: '', layers: 'Artimg-Correct_Image_Diagonal_8787' }

After some 47 years of observing, Roger Ivester finally purchased an Orion 1.25" Correct-Image Star Telescope Diagonal for his Orion 102mm Refractor. The precision 90 degree diagonal is meant to deliver superior image fidelity, or a right-side-up, non-reversed image. Ivester, who observes visually and sketches through the eyepiece on a regular basis, was pleased with results. His full review is as follows:
I love to observe with my 102mm refractor, but I don't like the reversed mirror image view presented, due to the 90 degree diagonal. On many occasions I choose my Newtonian, as it's so easy to make a correctly oriented pencil sketch. For many years, I've wanted to try a correct image 90 degree diagonal, but thought the views might suffer. I've been using a 96% enhanced reflectivity mirror diagonal for many years.
The reason I dislike making a sketch using a mirror image reversed view is that almost all published images and sketches are oriented scientifically correct with N at the top and W to the right. It's also very easy to confuse the cardinal points with a standard view diagonal, when making a sketch or noting a faint feature of the object being observed.
One thing I should mention. A correct image prism diagonal such as this Orion, also known as an Amici: When observing a very bright star with any correct image diagonal will show a very thin thread of light crossing from edge to edge. This is not a defect, but is inherent to this type of diagonal. I only noticed it when observing Sirius, and found it not to be objectionable. I purchased this diagonal, not to observe the brightest of stars, but to observe the faintest of deep-sky objects possible with a 102 mm refractor.
I plan on much more observing, notes and sketching with my trusty 17-year-old Orion 102mm refractor. Again...I love a correct image view, and sketching with my refractor will never be the same again. I'm very happy with my new purchase.
While looking through the Orion Telescopes & Binoculars catalog last week, I noticed a 1.25-inch, correct image diagonal. After many years of wondering how this type of diagonal would perform, I picked up the phone and ordered one. After all, Orion has a fabulous return policy, should it not meet my satisfaction. I had nothing to lose...
Within just a few days, my diagonal arrived. I could hardly wait to give it a try. On March 5th, 2014, I set up my Orion 102mm refractor for the big test. I started with a very high magnification of 200x, to examine the Trapezium stars and see how the view would compare with my current enhanced mirror diagonal. The stars were beautiful in both, and even the "E" star could be glimpsed. First test: passed. I then went to my favorite galaxy pair, M81 and M82 at 57x. I immediately loved the non-reversed and correct image view of these two beautiful galaxies using my new diagonal. I really couldn't see any difference between the qualities of view. The next test would be Jupiter, and again both diagonals presented fabulous views. The cloud bands appeared very sharp with an incredible amount of detail visible.
It is my opinion, the correct-image Orion image diagonal, catalog #8787 seemingly passed all tests with flying colors. At this point, I put my beautiful enhanced solid aluminum mirror image diagonal in my eyepiece box, where it will probably stay. For the remainder of the evening I enjoyed using only my new "correct image" diagonal.
I can hardly wait to start sketching with my new refractor accessory. I just wish that I had made this purchase many years ago.
Read more of Roger's astronomy blogs and see his sketches at www.rogerivester.com.
{ width: 160, height: 160, defaultImage: '', layers: 'Artimg-Leo_Triplet_Lorand_F_ap1008' }

As spring begins, Leo is transiting due south in the early evenings, and presents us with some interesting bright, and not so bright, galaxy groupings. These can, for the most part, be viewed from a reasonably dark sky, in instruments as small as four inches. Of course, some will require larger optics, but that should serve to interest you in joining other amateur astronomers observing, getting away from light polluted skies, and seeing just what there is to see. Let's begin.
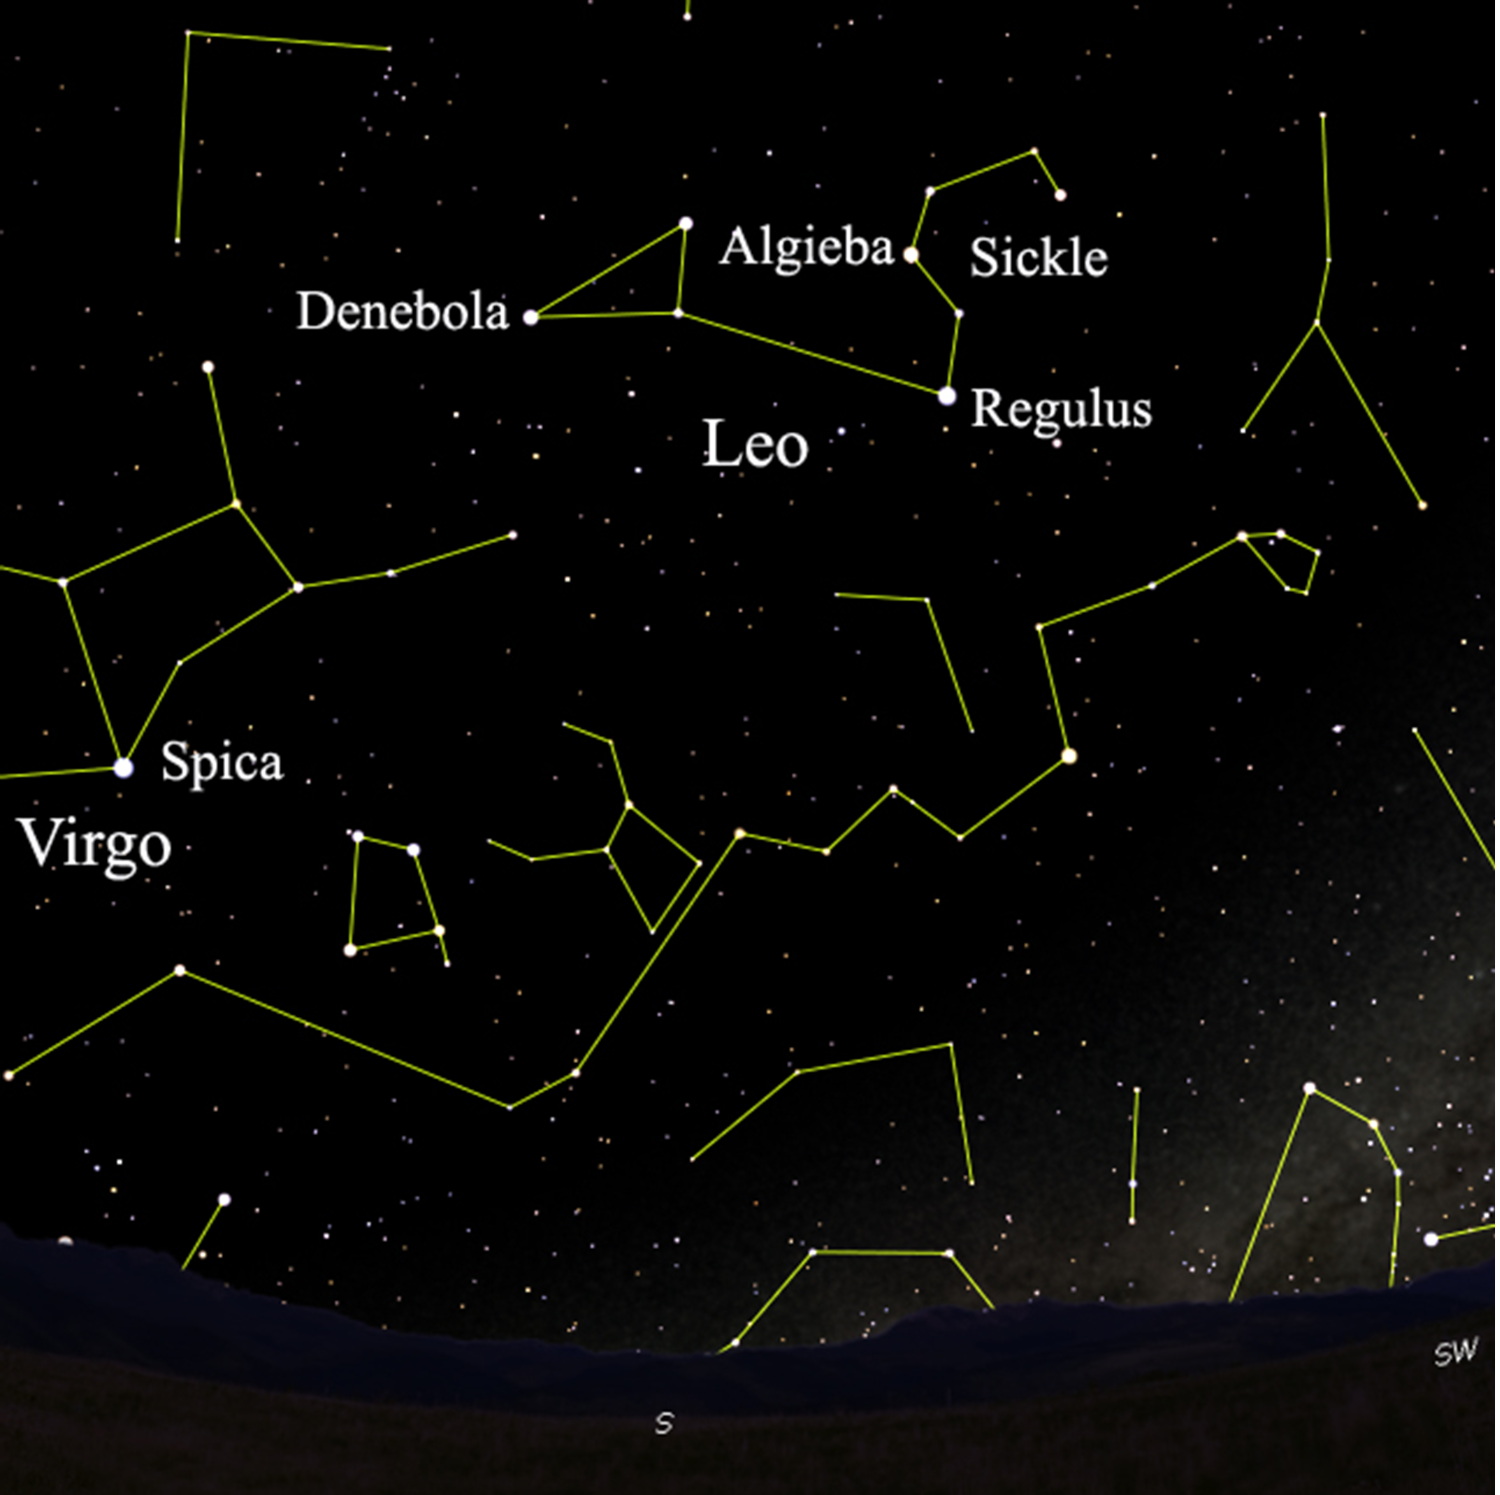
The image above shows our early April sky, two hours after sunset. Looking mostly south-southeast, you'll find bright star Spica in Virgo. Above it to the south is the constellation Leo, marked by its brighest start, Regulus, which anchors the Sickle asterism. In The Sickle is the fine double star Algieba. Leo's back haunches are punctuated by the star Denobola. We will use these stars to locate three galaxy groups.
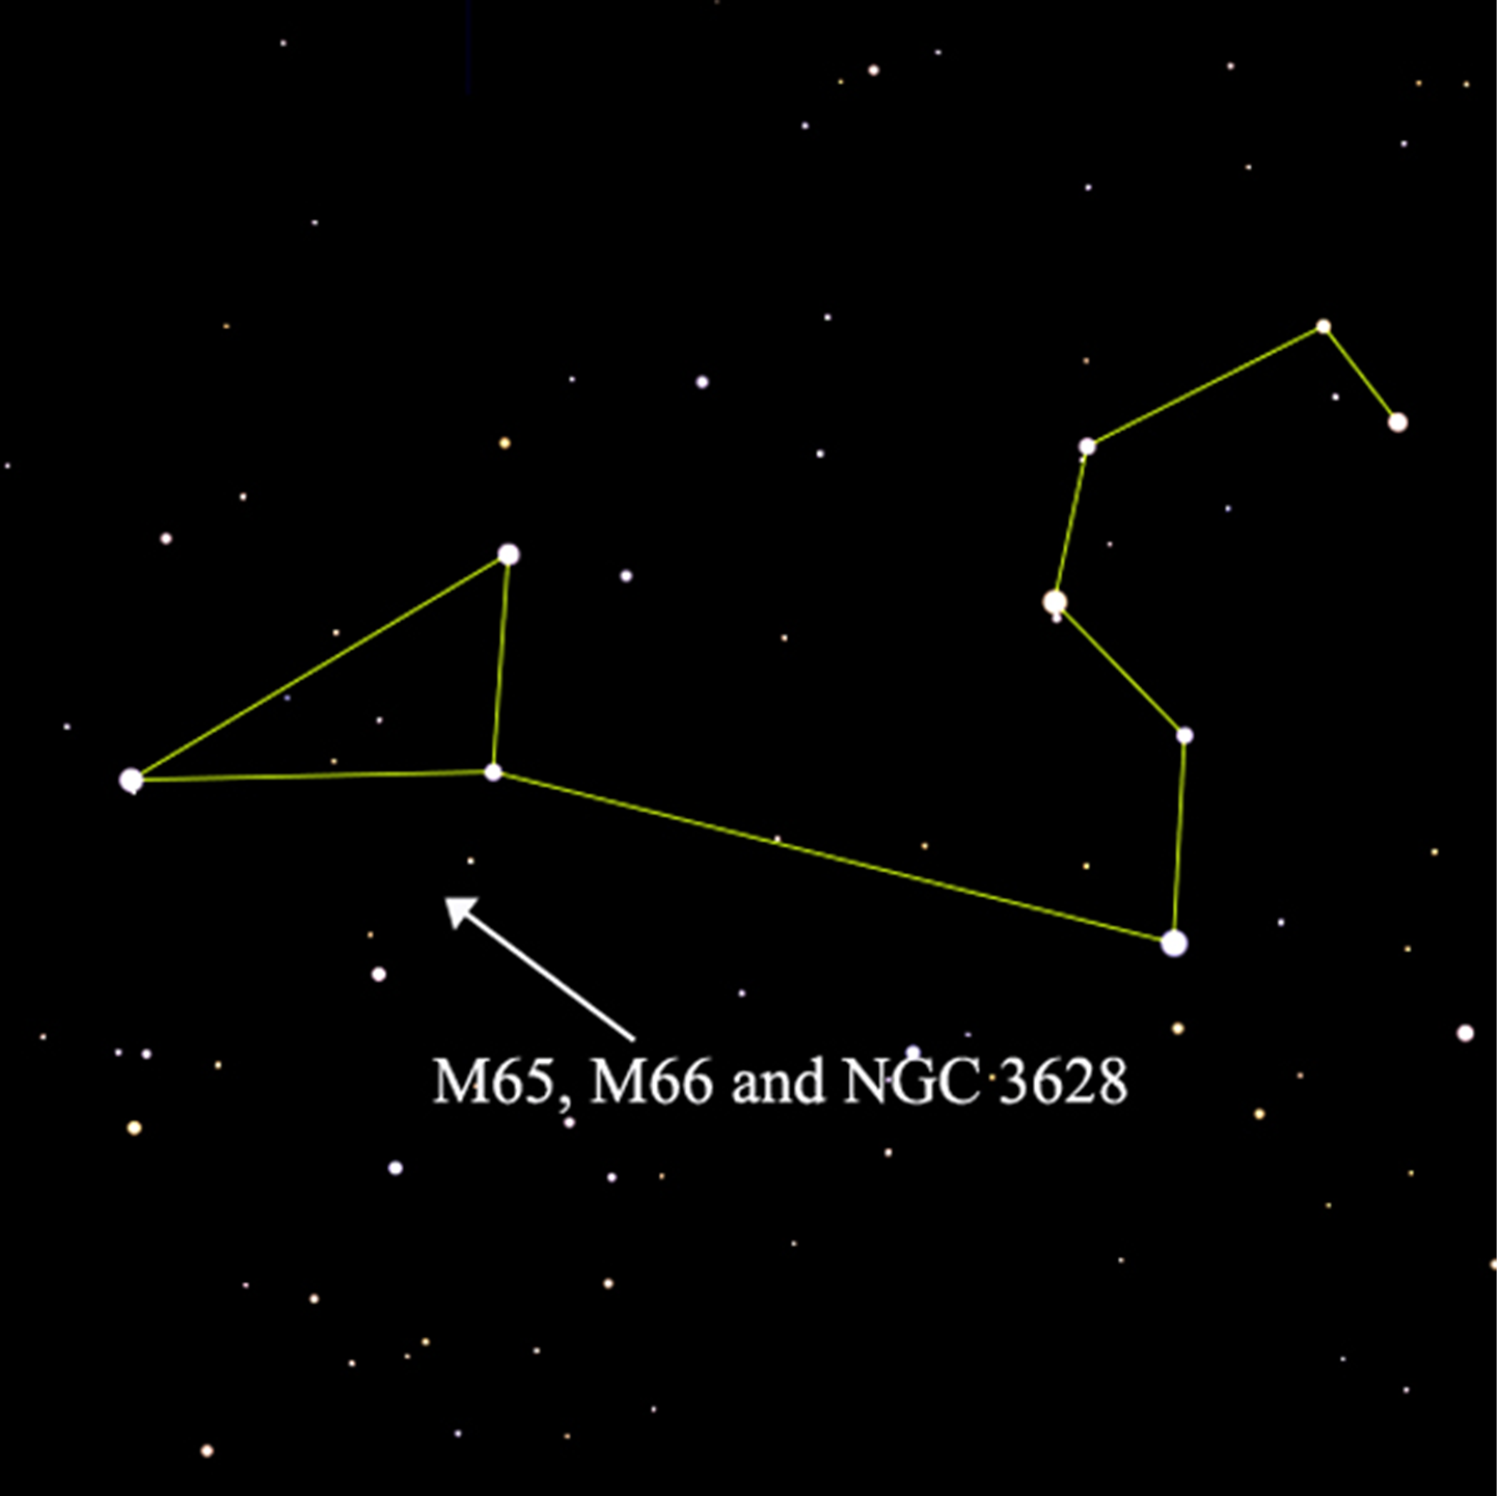
M66 is the brightest at magnitude 8.9, 36 million light years from us. M65 shines at magnitude 10.25, and along with NGC 3628 is 35 million light years from us. The three are gravitationally bound - as evidenced by their proximity to each other and distance from us. NGC 3628 is a challenge object at magnitude 10.26, appearing dimmer due to its large angular size - and to my tastes the most interesting due to its distorted appearance.
In deep images of the group, NGC 3628 shows a tidal tail about 300,000 light years in length. This is material streaming out of the galaxy as it moves through space, presumably the result of gravitational interaction with the two other members of the group. Here are images of the three together, courtesy of NOAO:
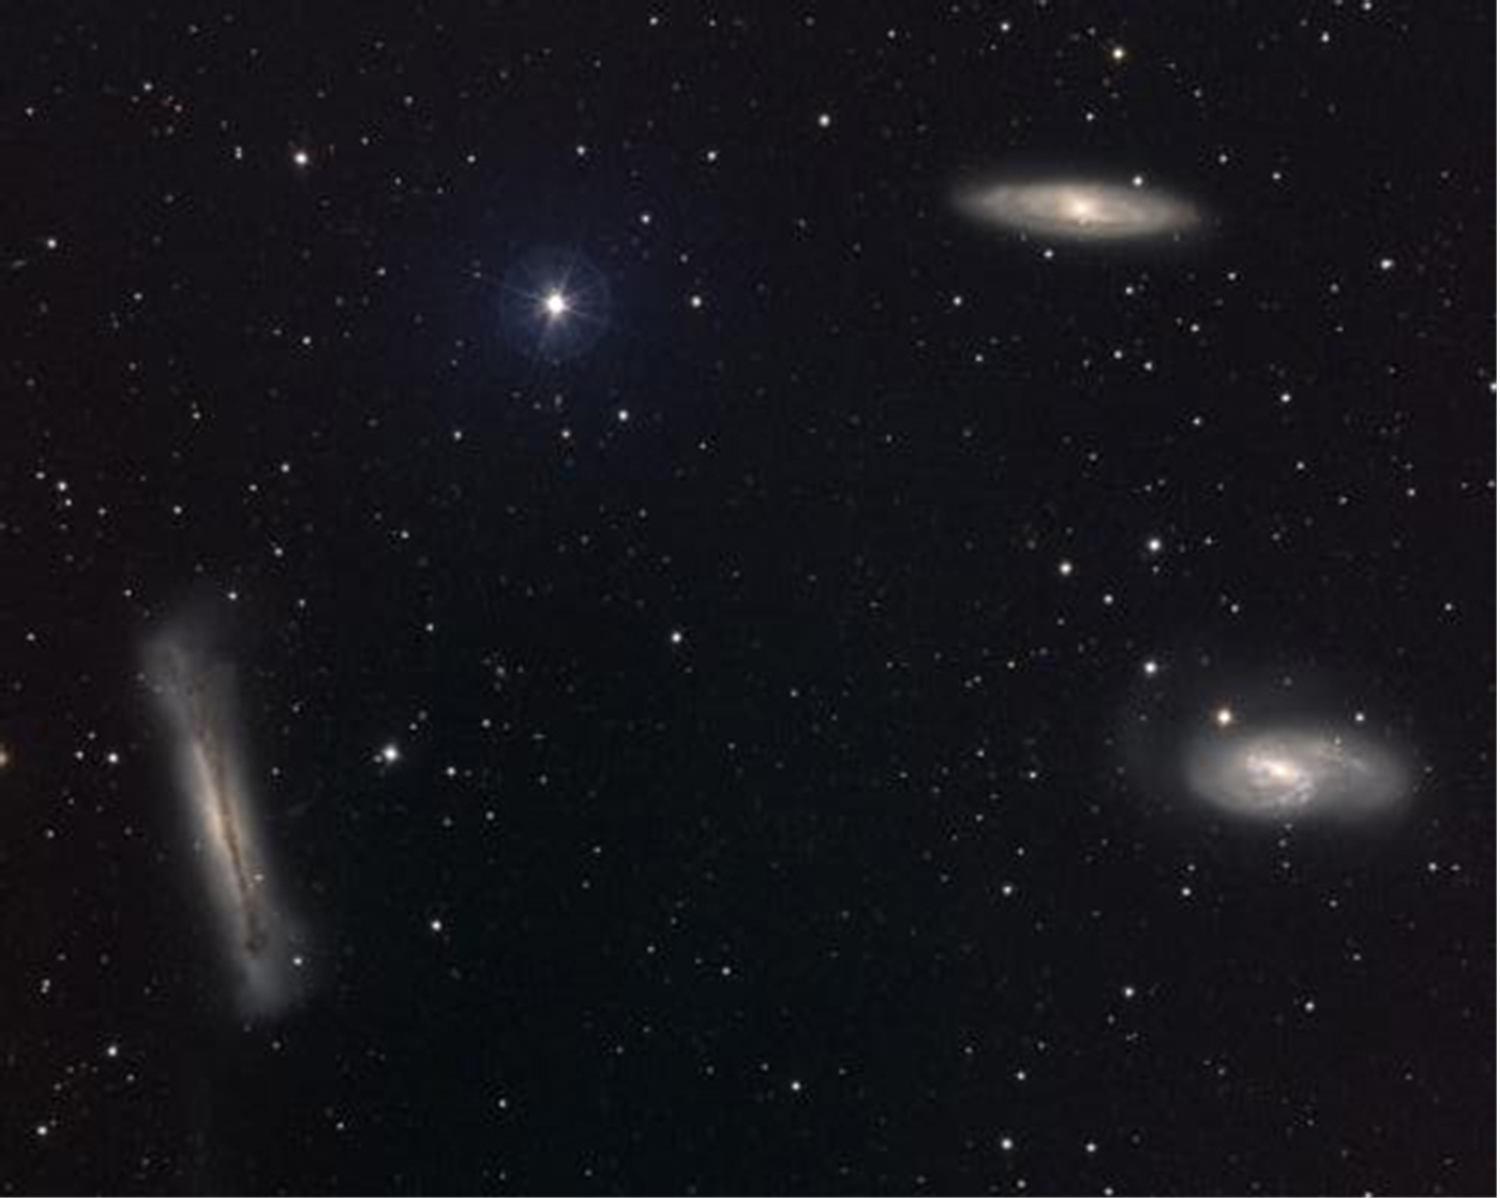
Can you tell which is which based on what you've read, and why NGC 3628 has been nicknamed "The Hamburger"?
Let's move to the next group in Leo - M95, M96 and M105.

Located just below and a bit over two-thirds along a line described from Regulus and the star used to hop down to the Leo Trio, this group of three galaxies - M105, M95 and M96 (the M96 group) is visible in a single binocular field of view.
All three galaxies are in the 10th magnitude range, varying in distance from 31 million to 36 million light years from us. The group also includes a few dimmer members surrounding M105. M95 and M96 were discovered by Charles Messier's prot�g�, Pierre M�chain, in 1781. M105 was added to the Messier catalog by Helen S. Hoag, after she found reference to it in a letter from M�chain referencing it. Here is how they look in a single image:
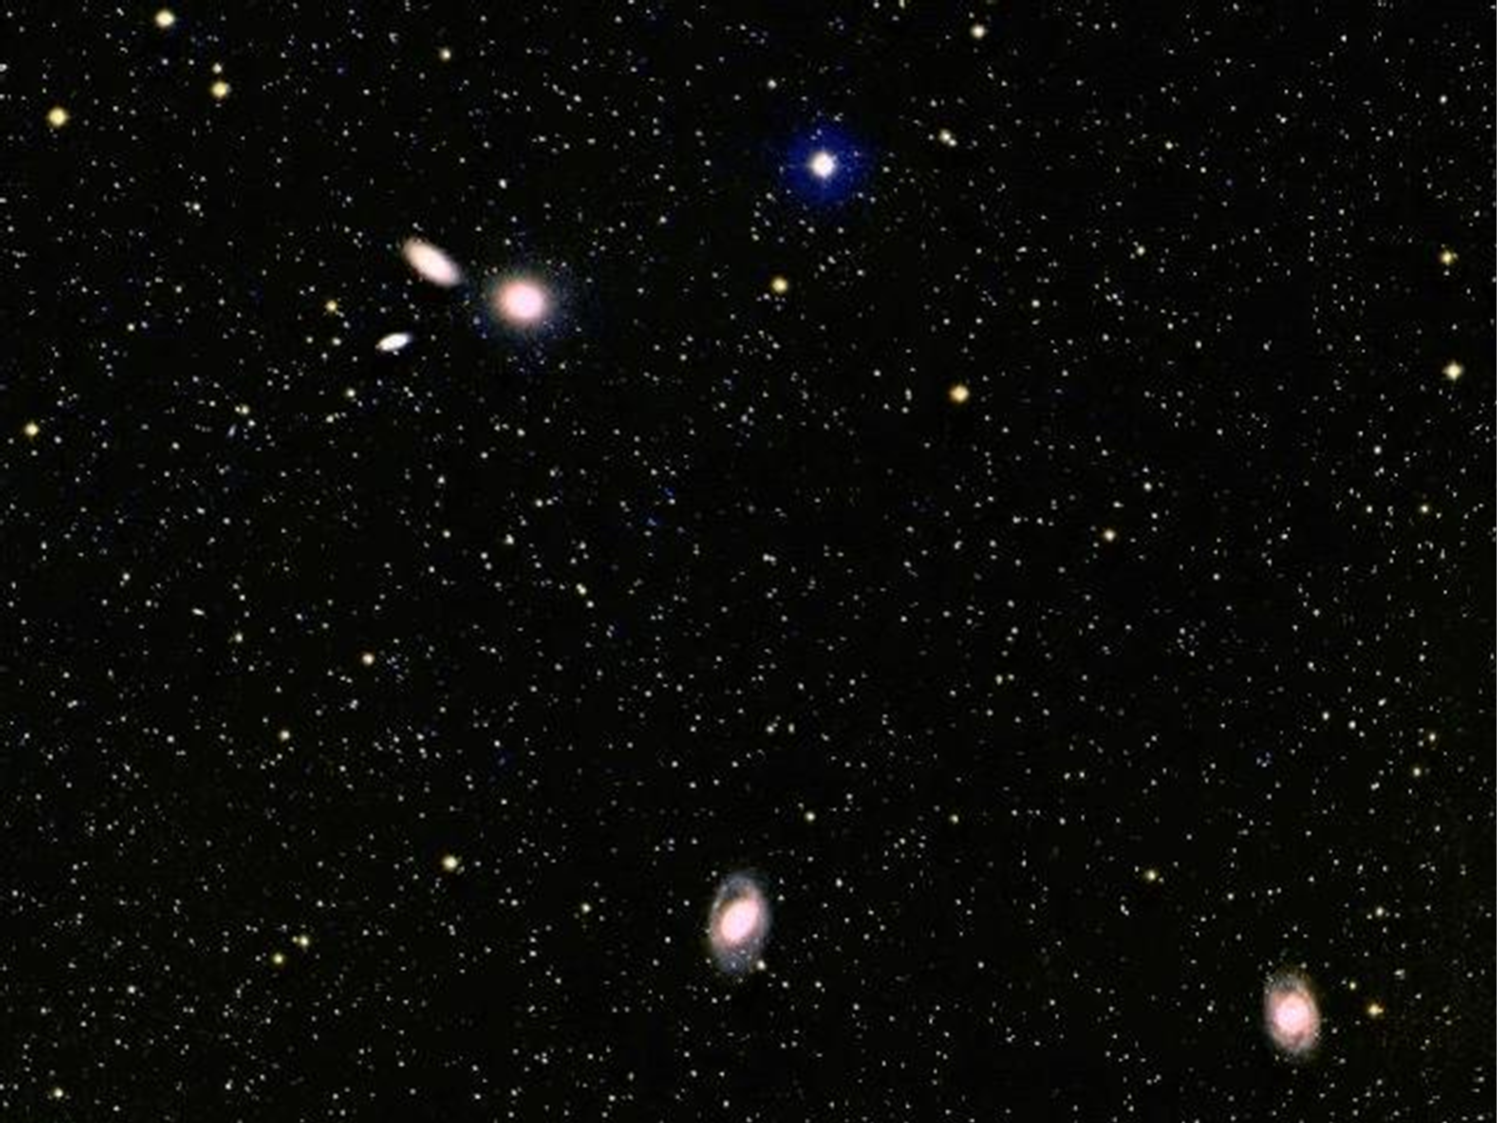
M95 is at the lower right, with M96 to its left. M105 is the roundish glow upper left, and nearly as bright is NGC 3384 - the elongated glow to its left. NGC 3389 will be the challenge object of the group, significantly dimmer at mag 12.4. The Messier members of this group will all be visible in a 4 inch telescope, as I expect NGC 3384 will be as well. NGC 3389 has been reported visible in a six inch telescope - maybe you'll give it a try in something smaller and let me know if you find it. Image is courtesy SEDS, Arizona.
The third grouping is an esoteric one. NGC 3226 and NGC 3227 are a pair of brighter galaxies with dimmer ones in the same field of view. The brighter pair are part of astronomer Halton Arp's Atlas of Peculiar Galaxies. NGC 3226 is a dwarf galaxy, paired and interacting with the spiral galaxy NGC 3227. These are very easy to find - next to the beautiful double star Algieba (Gamma Leonis), which you should pay a visit to on your way to these galaxies.
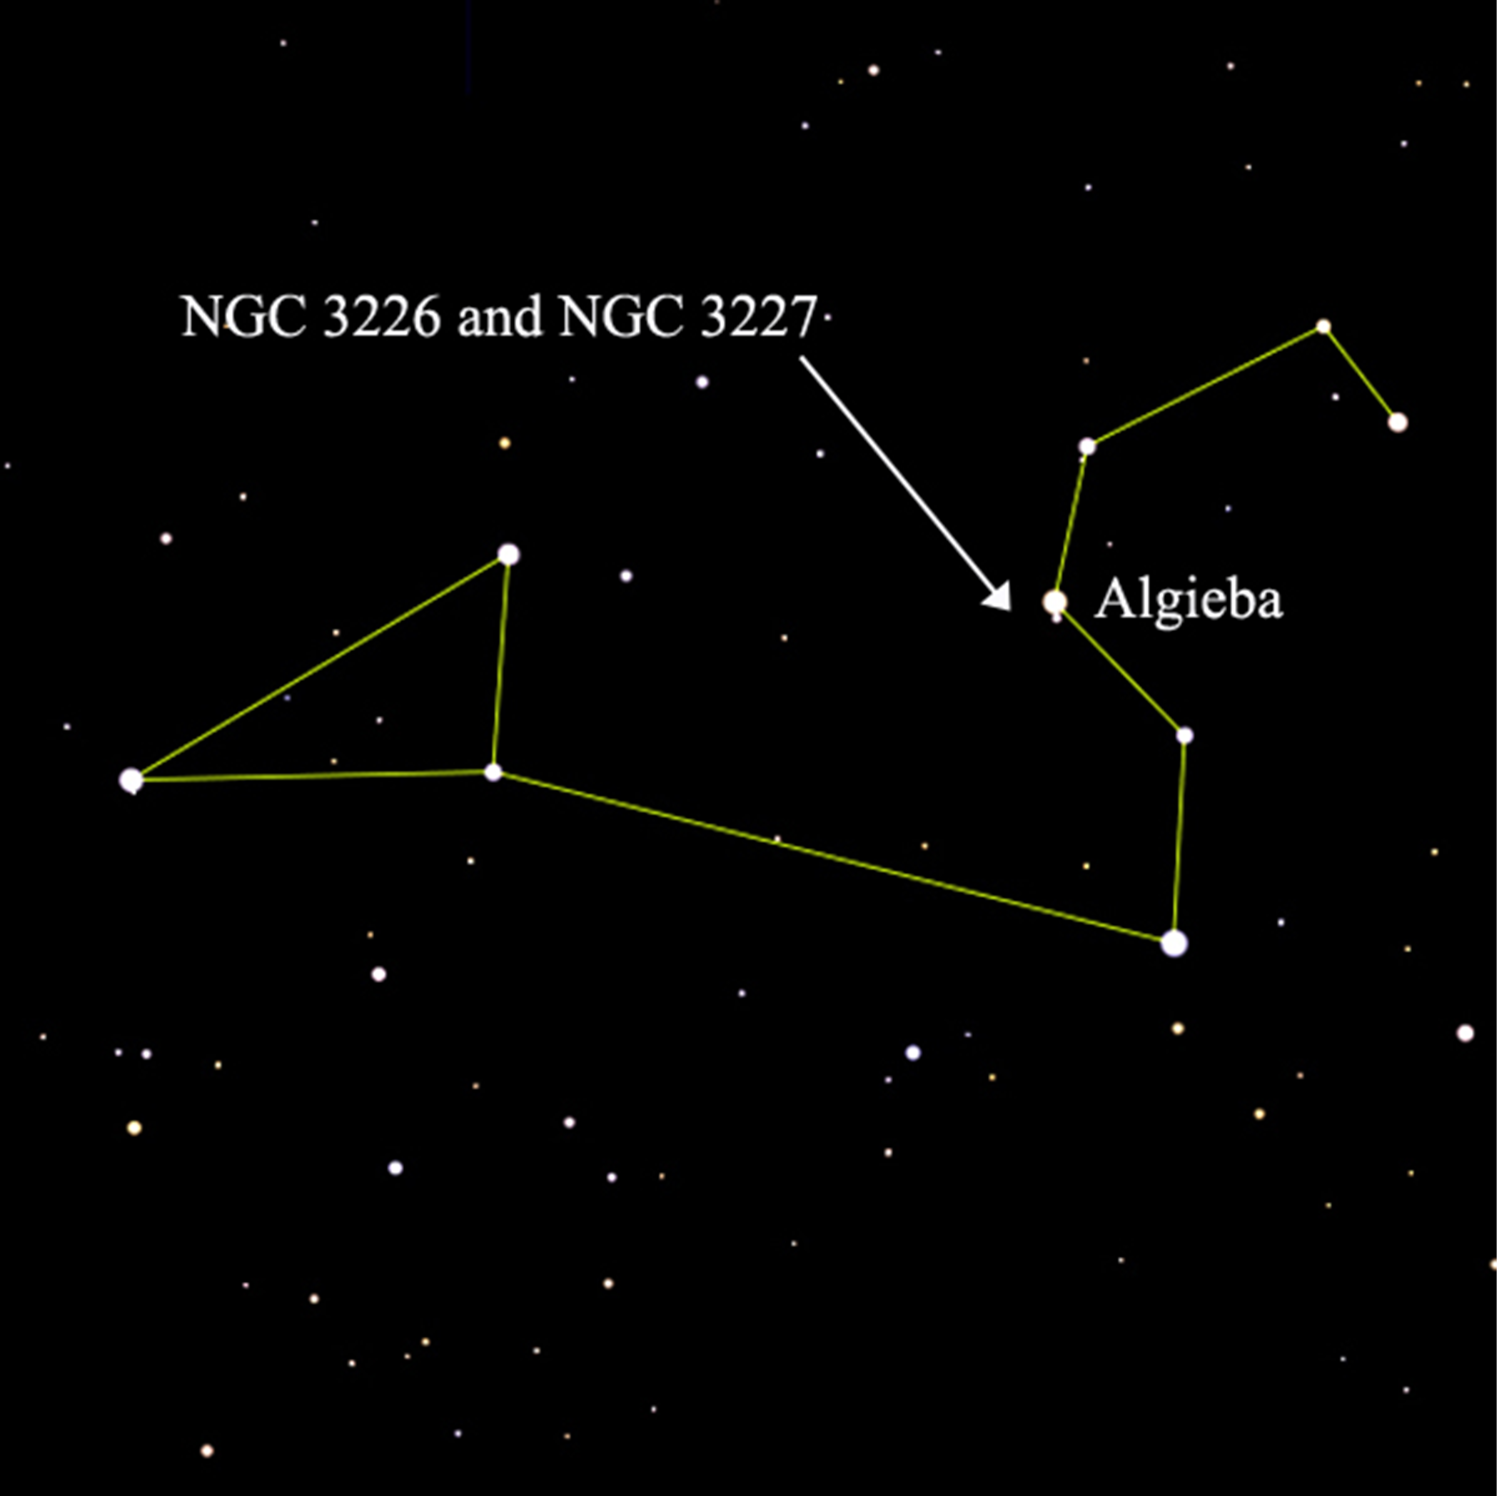
Here is how the pairing appears, although it will not appear photographic in your telescope like this image:
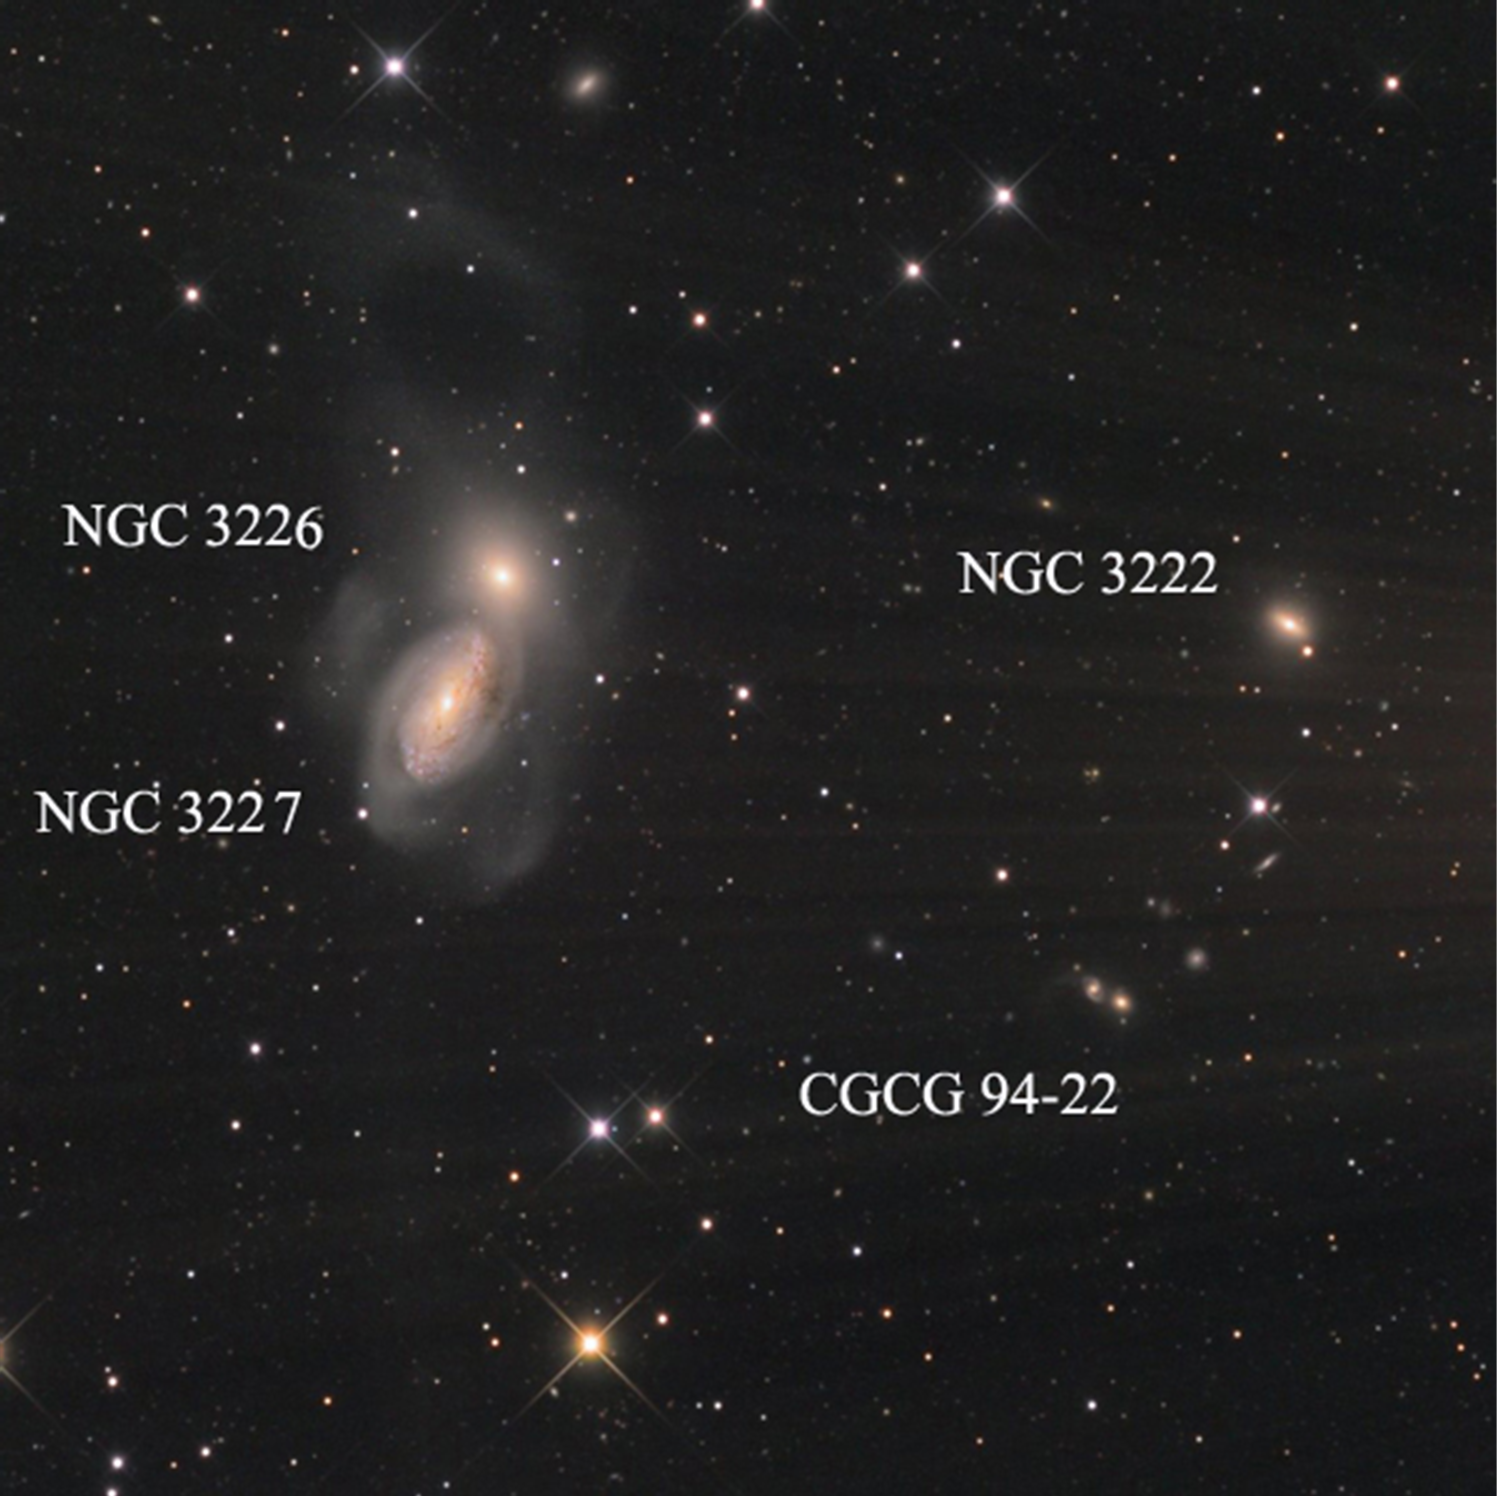
I've read one report of viewing the brighter pair in a 102mm telescope, but all other reports are in 8 inch or lager instruments. NGC 3227 is almost 66 million light years distant, and shines at magnitude 11.28. NGC 3226 is 70 million light years from us, shining at magnitude 12.3. If you can pick up those two, try for NGC 3222 - dim at mag 13.7, and an amazing 232 million light years away.
Want more? Here's the tough one: CGCG 94-22 (Catalog of Galaxies and Galaxy Clusters) is a tiny speck, a multiple galaxy system, shining at magnitude 15.4. This pair of galaxies is 595 million light years from us! Thanks to Bob Frankel for this beautiful image showing the tidal interaction between the large galaxies, and even hints of such in the tiny pair. You can easily see the "dance" the galaxies have been doing together by the trails of material around them. If you're wondering what the rays are from the right side of the image, it's the brilliant double star Algieba. Here is the original image on Bob's website.
I'm eager to hear from some of you who try hunting for any or all of these targets. The brightest members offer quite a bit of detail. I personally love The Hamburger, as it is visible without much work, and is an unusual target. The dimmer stuff? well, icing on the celestial cake.
Going galaxy hunting in Leo? Come back and leave a review of this article, and let us know what you used to find them, and which was your favorite.
Clear skies,
Mark
{ width: 160, height: 160, defaultImage: '', layers: 'Artimg-Lunar_Eclipse_ap1870' }

During the totality phase of a total lunar eclipse, the Moon is completely immersed in Earth's shadow. If you were lucky enough to be standing on the Moon during totality, the Earth would be completely dark, with a ring of sunshine around it. "And this brilliant ring would be bright enough to dimly light up the lunar landscape," says Alan MacRobert of Sky and Telescope magazine.
But, we're not on the Moon, at least at the time of writing this. And from Earth, what we see during a total lunar eclipse is a little less predictable, which kind of makes the whole thing even more exciting, and worth staying awake for.

Total Lunar Eclipse Montage, by Justin Van H.
While mainstream media usually buzzes with the promise of a "Blood Moon" before a total lunar eclipse, Michael E. Bakich, of Astronomy magazine is a little more real about it: the Moon's appearance during totality can vary greatly from one eclipse to the next, he says.
So while we all hope for a bright red Moon ? the result of shorter blue rays of light being scattered from the Sun rays which bend through our atmosphere and across the Moon's shadowed surface ? it's only one of several different possible outcomes. Variables that affect the Moon's appearance include the path the Moon takes through the Earth's umbra, which is not always completely centered, and the state of the Earth's atmosphere, which contains water droplets and solid particles like dust and ash, which reduce the air's transparency, says Bakich.
"A significant volcanic eruption before a lunar eclipse can darkest the Moon's face considerably by pumping our atmosphere full of particles that halt light. Lots of clouds along the edge of our planet also can cut down the light," writes Bakich in the April 2014 issue of Astronomy. You can see an example of this by googling pictures of the total lunar eclipse of December 9, 1992, which occurred just months after Mount Pinatubo blew in the Philippines.
In the time leading up to a total lunar eclipse, all we can do really is make a few predictions, get our telescopes, binoculars, cameras, and eyeballs ready, and wait. Bring your observing notebook outside too, so you can take notes about the characteristics of this particular eclipse.
How to Estimate the Luminosity of a Total Lunar Eclipse:
In 1921, the French astronomer Andr�-Louis Danjon created a five-point scale for estimating the darkness of a total lunar eclipse. The L value stands for various luminosities, starting with the darkest. Below is a chart of Danjon's system, as explained by Bakich:
| L Value | Moon's Appearance |
|---|---|
| L=0 | A very dark eclipse. The Moon is almost invisible at mid-totality. |
| L=1 | Dark, with gray or brownish coloration and details are distinguishable only with difficulty. |
| L=2 | The Moon appears deep red or rust colored; the central shadow is quite dark while the umbra's outer edge is relatively bright. |
| L=3 | The Moon appears brick red; the umbral shadow often has a bright or yellow rim. |
| L=4 | The Moon appears bright copper-red, or orange, and the umbral shadow has a bright bluish rim. |
"In evaluating L, you should record both the instrument you used (if any) and the time," says Bakich. "Also document any variations in the color and brightness of different parts of the shadow, as well as the sharpness of its edge. Pay attention to the visibility of lunar features within the umbra. Notes and sketches made during the eclipse will help you recall details later."
As far as estimating the darkness and color a total lunar eclipse, Bakich recommends notes as opposed to images, since cameras typically record more than the eye can see, and often vary.
{ width: 160, height: 160, defaultImage: '', layers: 'Artimg-Moon_2014_04_09' }

The Full Moon of April falls on the 15th of the month. As we look forward to the total lunar eclipse on the night of the 14th-15th, let's observe the Moon before it's completely full. After all, the best time to observe the Moon is when there is still a line of shadow falling across it. On Saturday, April 12, the Moon is waxing gibbous at 12.68 days old, and 95% illuminated.
The Moon is ever changing, and even the special features we tend to visit over and over take on new and interesting appearances, as the shadow line, named the Terminator, moves minute by minute. Here is our Moon as of Saturday, with a few interesting targets identified for you to observe:
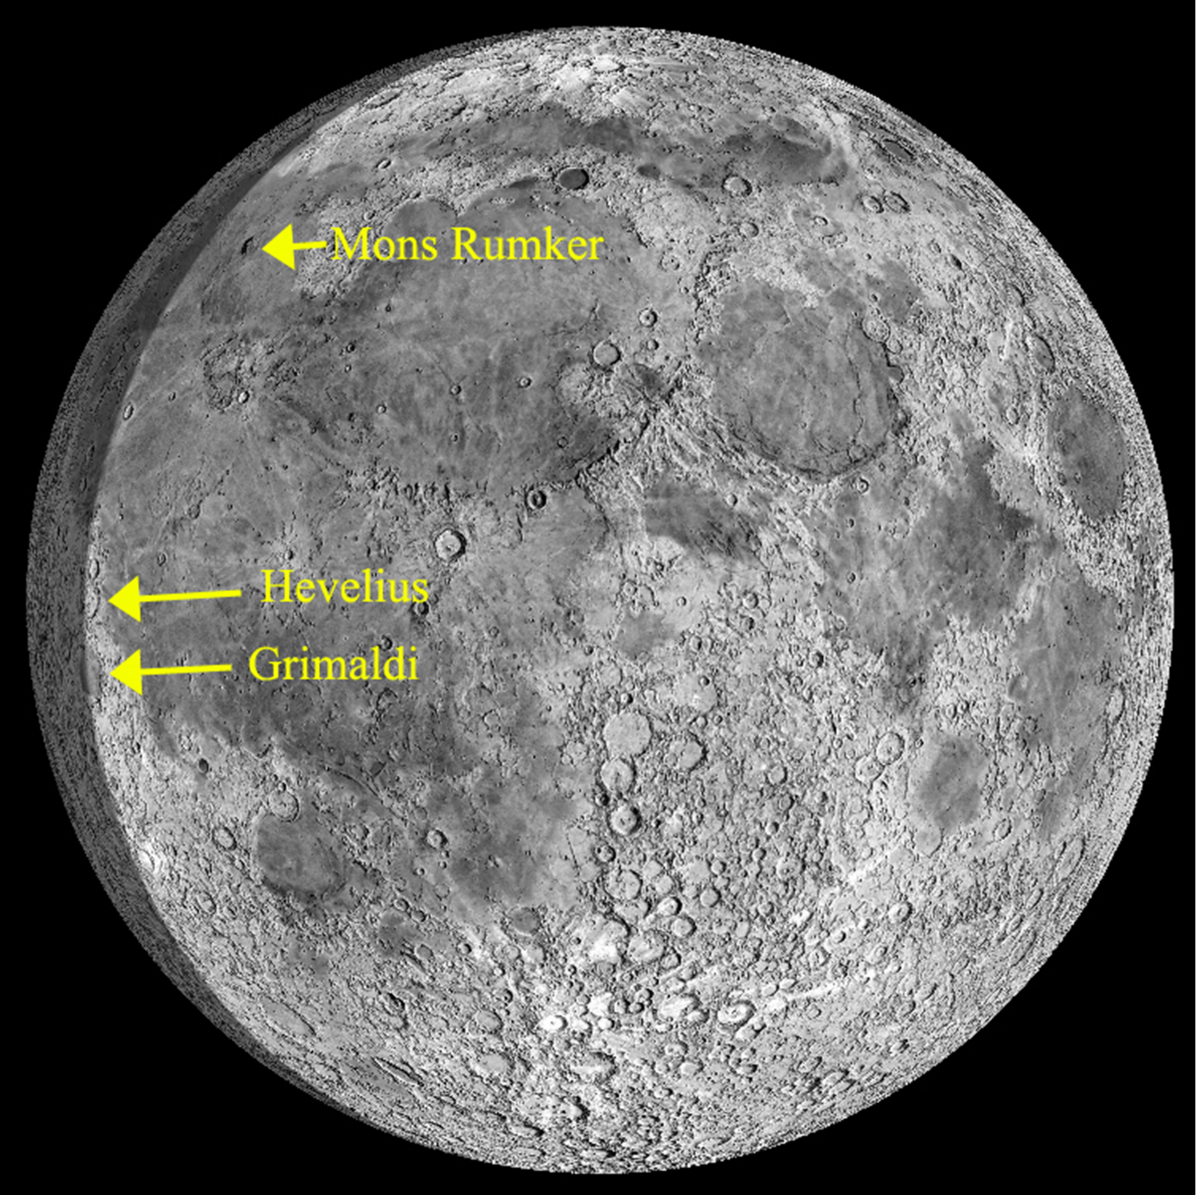
Below are detailed images and description of those areas. These are fun to view in a telescope under good conditions. I've heard people say the view feels like flying over the lunar surface!

Grimaldi is visible in 10 power binoculars. It is a very dark circular formation, appearing much like a sea, or Mare. You may see a number of small craters on its very flat and smooth floor, Grimaldi also has very high slopes, with pock-marked craters embedded in them. This is a great time to pick out details.
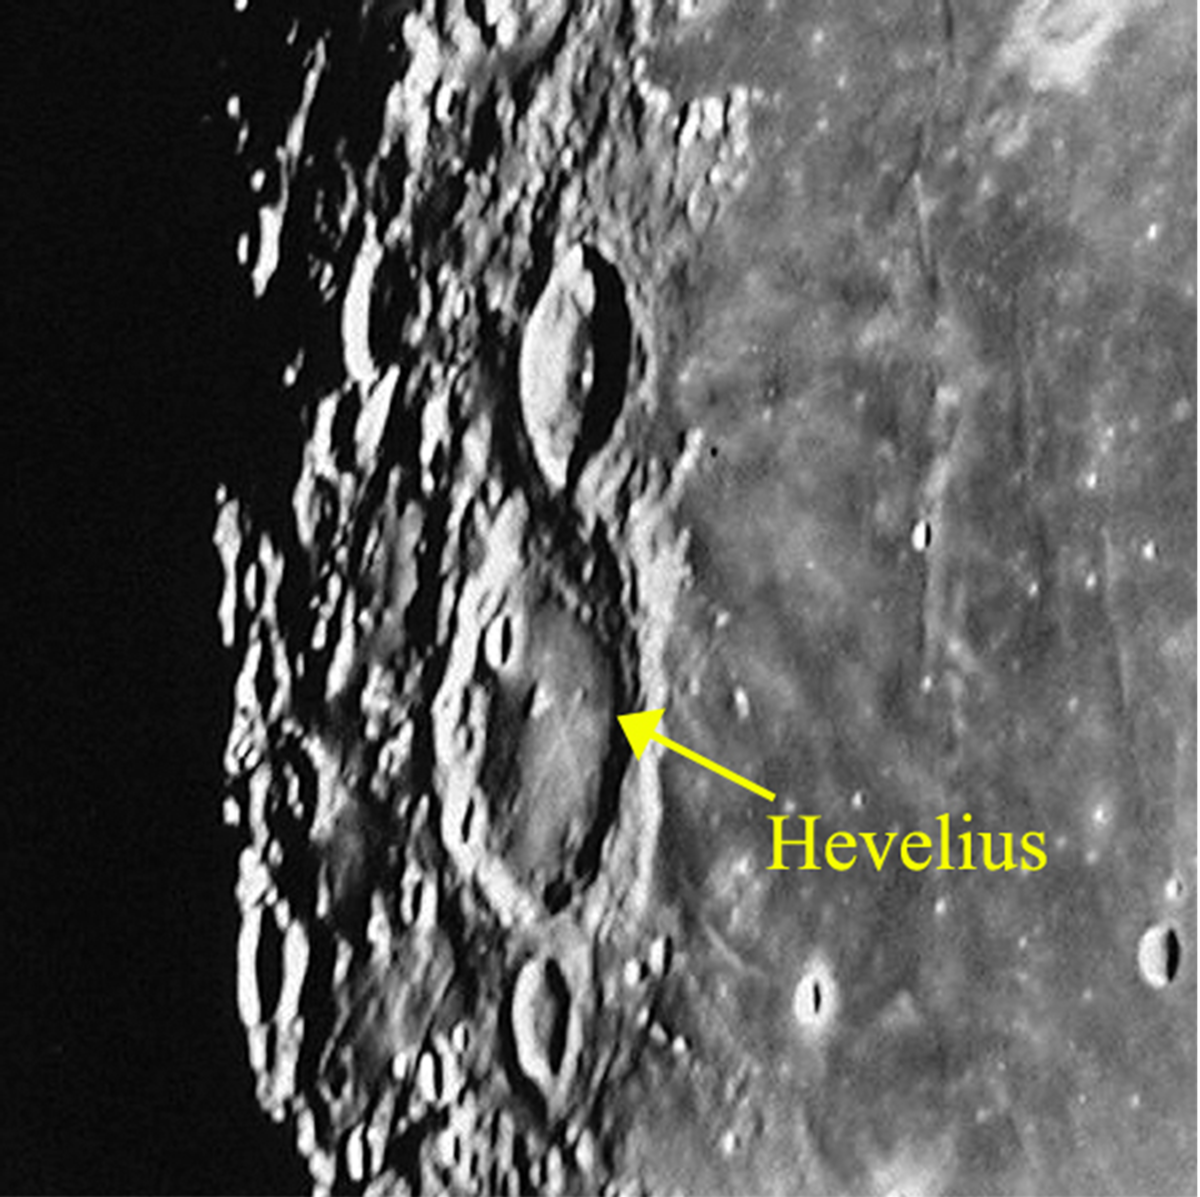
Hevelius is very close to Grimaldi, and forms a nice pair with Cavalerius just above it in this image. This crater too has steep slopes embedded with many small craters. The floor has a small central peak. See the cross-marks near the central peak? Those are part of Rimae Hevelius, rilles that criss-cross the floor. The main crater can give pleasing views in a 10 power binocular, but for details such as the rilles, you'll need something more like a 12" telescope.
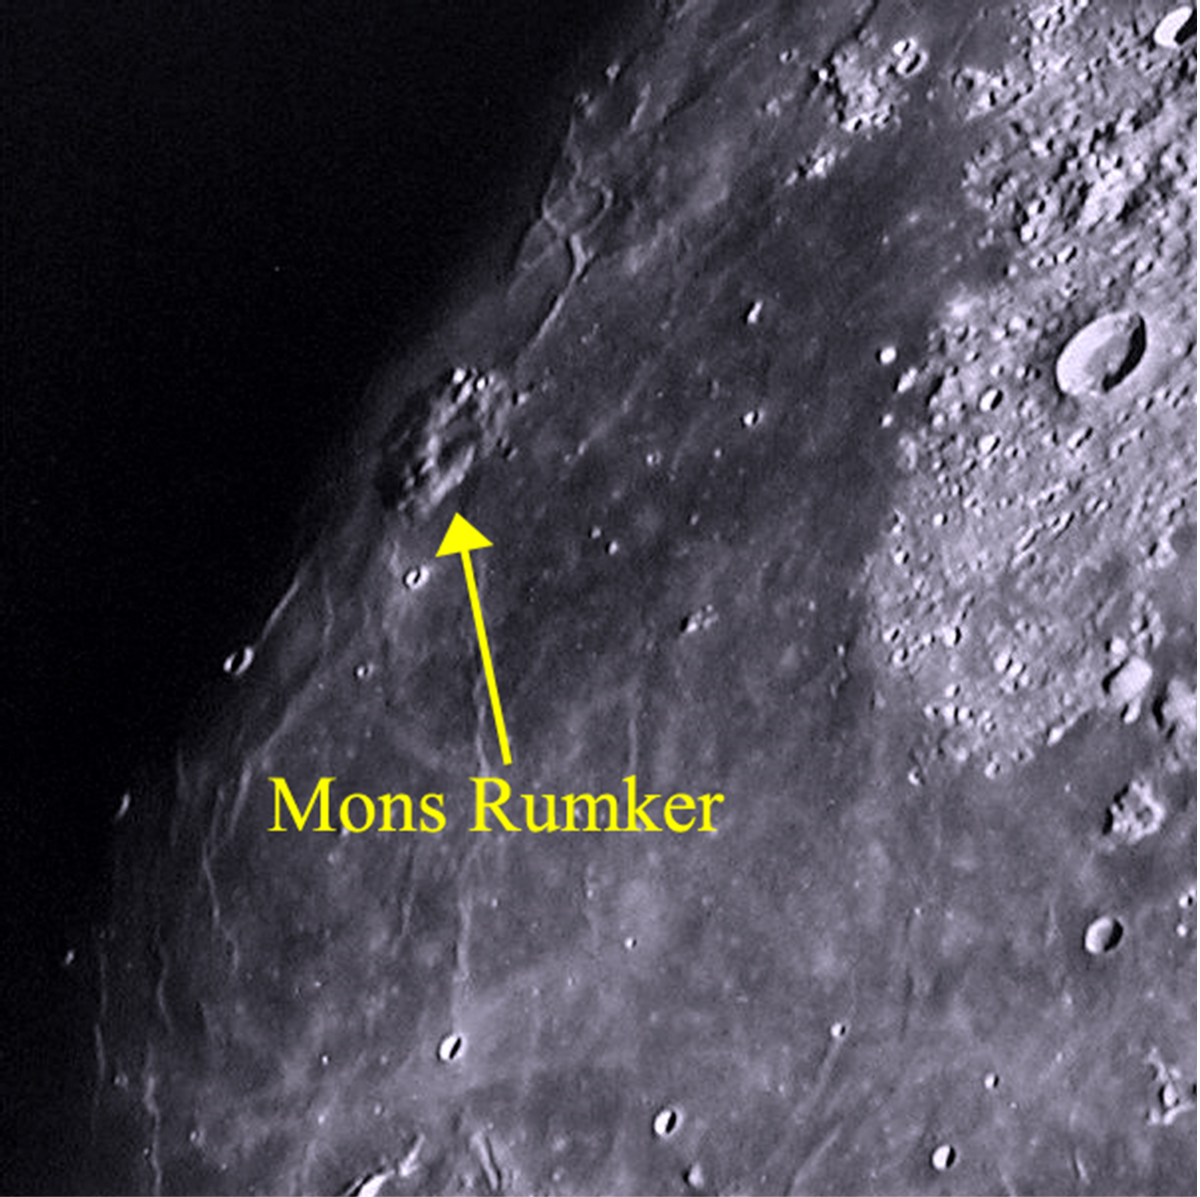
Mons Rumker can be viewed in an instrument as small as a 50mm refractor, and is a pleasant surprise among lunar targets. It is described as a tortured area of lunar domes forming a circle, and showing steep slopes. I think it is an anomaly among lunar features. In the large Sinus Roris (Bay of Dew) surrounding it, you'll find other small isolated lunar domes as well ejecta rays from ancient impacts splayed across the surface.>
There is so much to explore on the Moon, and following the Terminator makes it all the more enjoyable, since it is the area of highest contrast between shadow and light. The features really pop out in 3D.
On tonight's map at the start of this article, I point out Porrima - Gamma Virginis. This is a wonderfully tight double star. During my years observing, it has gone from a 2.5 arc-second separation (1995) to 0.4 arc-second in 2008. In 2010 it was back to 0.9 arc-seconds and now is back to over 2 arc-seconds, and significantly easier. You can "split" this double star now in a 50mm telescope. It is a true binary star, where both members are bound together by gravity, shining individually at magnitudes 3.6 and 3.5. They shine at a combined magnitude 2.6, 39 light years distant, and have an orbital period (around their common center of gravity) of 169 years.
Gamma Virginis is a star you'll enjoy watching year after year - as you can watch the changes in separation.
Finally, here is an image from Starry Night Pro, of what Mars will look like tonight:
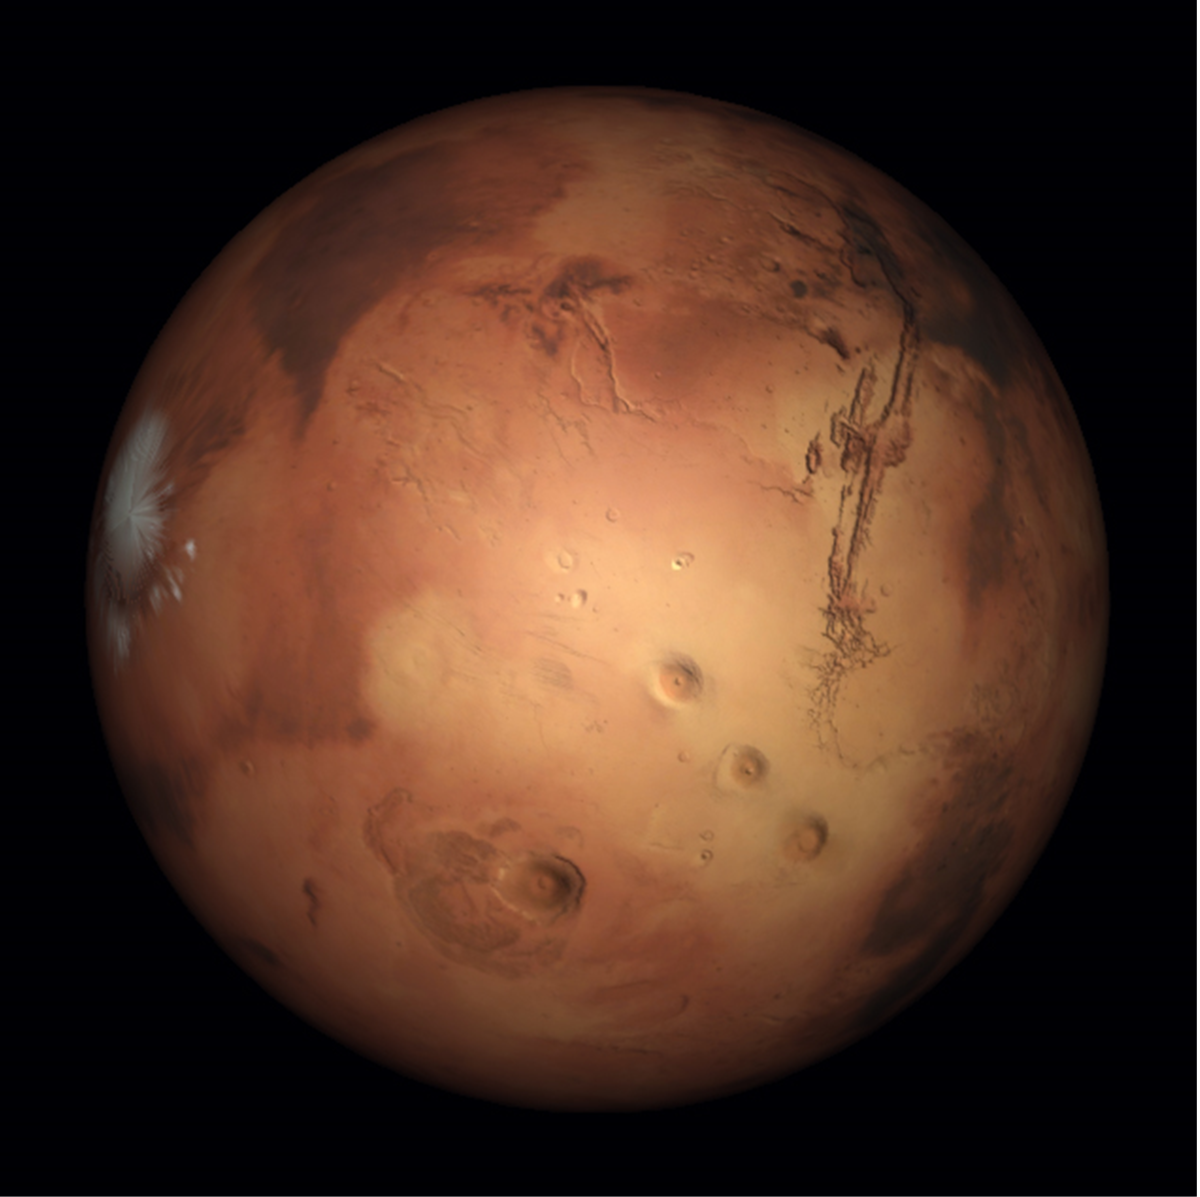
I considered describing its features (I love the Tharsis Montes craters lower right!) - but instead will refer you to the Mars Observing Guide already written on the Orion website, delineating the various features you should try to see.
Tonight is a great time to observe Mars, which is at its brightest. The good news is, even tonight's big Moon won't interfere with your views. Get your scope, family and friends out, because tonight is an observing delight!
Please leave a review on this article, and let me know what you observed in your telescope, and what features you were able to see.
Clear skies,
Mark Wagner
Images courtesy the Lunar and Planetary Institute From The Consolidated Lunar Atlas. Mars image from Starry Night Pro.
{ width: 160, height: 160, defaultImage: '', layers: 'Artimg-Barastronomy' }

Duke Skygawker of Barstronomy writes about the public outreach he does with his dobsonian telescope 'Big Red' in the middle of Columbus, Ohio.
It's called Barstronomy because that's where it mostly takes place; at taverns and music venues with an outdoor area, in the middle of the city in Columbus, Ohio. It began in my neighborhood at Woodlands Tavern, where I'd been a frequent attendee and sometime performer at their Wednesday Open Mic. It began with a dare.
While at Woodlands Tavern, I naturally talked about my astronomy hobby, and it was only a matter of time before a friend dared me to bring my dobsonian telescope to the bar and set it up on the patio. When I did, the response was greater and more positive than I'd ever anticipated, and that led to the founding of Barstronomy.
Since that first night three years ago, Barstronomy has been featured at Rumba Cafe, Skully's Music-Diner, and Brothers Drake Meadery as well, all in Columbus. The outreach also covers community and music festivals and other public events. If you note some similarity with John Dobson's "sidewalk astronomy," you're paying attention! In the "sidewalk astronomy" concept, you take astronomy to the people, rather than making the people come to the astronomy. The people just happen to be where astronomy is happening. So I just took astronomy off Dobson's sidewalk and onto the bar patio, and was surprised by the enthusiastic response.

The Barstronomy dobsonian telescope on the Woodland Tavern in the middle of Columbus.
Of course, Barstronomy also participates in more "traditional" astronomy outreach, through my local club, the Columbus Astronomical Society, at their site, the Perkins Observatory in Delaware OH. I also do outreach at schools, libraries, parks, and community centers. That type of outreach is definitely more common, and can have great impact. For example, Perkins is a "real" observatory with a (very small) staff and a wonderful building and history, and these aspects of attendees' visits to a program add much to their experience and perception. Traditional astronomy outreach programs such as these are generally at a darker site than downtown, and the expectations of the public and the astronomers presenting are not the same as those encountering a telescope at a music event or pub, in ways I'll explore in a future entry.

Astronomy binoculars at a Barstronomy outreach event.
But getting out in person, in public, isn't the only way astronomy outreach happens. Books and other publications were the first written outreach form, and still figure prominently as outreach, but probably tend to reach mostly those already possessing interest in the subject. Written outreach has also evolved to include all things Internet and World Wide Web, including social media (like Twitter and Facebook), agency and observatory websites, club websites, and astronomy blogs.
NASA, magazines like Astronomy and Sky & Telescope, observatories, astronomy clubs and individuals (think Canadian astronaut Chris Hadfield, Neil deGrasse Tyson, and others) have all embraced this approach to get the word out and help popularize the beauty of looking at the sky. The goal of this outreach may come from an internal passion, but may also inspire a certain number of people to be more directly involved, either as a hobbyist, a professional astronomer, or simply as an informed advocate. Outreach isn't important to every amateur or professional astronomer. Some of them (you?) prefer to do your observing alone, at home, or only with a few fellow enthusiasts.
 of Barstronomy, on the evening of the Venus Transit.")
Tony Miller (Duke Skygawker) of Barstronomy, on the evening of the Venus Transit.
But somehow, something or someone reached out to you to get you started - a parent, a program, a class, or just a look up at the night sky when you were in a contemplative, receptive mood. And you reached out in response, with your curiosity and talent, to see what it was all about. That's outreach in its best form!
What does astronomy outreach mean to you? Share your thoughts in the Review section of this article.
{ width: 160, height: 160, defaultImage: '', layers: 'Artimg-WhatsInTheSky_04-14_square' }

Explore the starry skies of April! There will be a number of intriguing celestial sights to enjoy during April with the help of a binocular or telescope. Here are a few of our favorites:
- Mars at Opposition - Earth will be positioned directly between the Sun and Mars on April 8th, presenting a great opportunity for backyard astronomers to observe the Red Planet with binoculars and telescopes. Use Orion's Mars Observation Filter Set to optimize your views of our neighboring planet. For more information on how to make the most of your Mars observations, read our Complete Guide to Viewing Mars in 2014 in the Orion Community section.
- Total Lunar Eclipse - The first total lunar eclipse in 2.5 years will occur in the very late hours of April 14th into the early morning hours of April 15th, 2014. The Moon will become eclipsed as it passes through the southern portion of Earth's dark shadow, which will make the northern half of the Moon's disk appear much darker than its southern half. With mid-eclipse occurring at about 12:45am PDT (3:45 EDT), and totality expected to last 78 minutes, you'll want to plan ahead to stay up late for this this must-see event which will be visible across North America and western South America.
- Saturn and the Moon - Use your favorite pair of 50mm or larger binoculars or a wide-field telescope to catch a nice view of the pairing of ringed planet Saturn and the Moon on the night of April 17th. Saturn will be positioned within just 23' of the Moon, making for an interesting celestial sight.
- Challenging Meteor - On April 23rd, the April Lyrids Meteor Shower is expected to peak, but unfortunately this popular perennial event will share the sky with the waning Moon, which will reach Last Quarter phase on April 22nd. The glare of the relatively bright Moon will hamper some meteor observations, but it will still be worthwhile to sit back in a comfy chair and try to sight meteors as they appear to radiate from the constellation Lyra in the northeastern sky.
- Binocular Bounty - Use 50mm or larger binoculars in April to explore our personal favorite constellation - Orion! The entire constellation is a treasure trove of celestial sights, but we especially enjoy observing M42, the Orion Nebula, with big astronomy binoculars. For even better observations of this cloudy nebula, use a 6" telescope like the popular Orion AstroView 6 EQ Reflector with a wide-angle, low-power eyepiece to obtain a nicely framed view of this stellar nursery where stars are formed.
- Last Call for Giant Jupiter - By mid-April, Jupiter will be approaching the horizon around 9-10pm, but the gas giant will still be high enough in the sky after sunset for some satisfying views. Bigger refractor and reflector telescopes and moderate to high power eyepieces will deliver the most rewarding views of Jupiter before it leaves the night sky for the season. Use an affordable Orion Jupiter Observation Filter to reveal cloud surface details and improve your view of the biggest planet in our solar system.
- Spring Brings Galaxy Season! - April skies provide stargazers with ample opportunities to observe far-off galaxies. With the Virgo Galaxy Cluster and bright galaxies in the Big Dipper and Coma Berenices well-positioned in the sky, April evenings are truly a gift for galaxy hounds. Check out a few of our favorite galaxies: M101, M51, and M106 near the Big Dipper asterism; M86, M87, M84 and M104 in the Virgo Galaxy Cluster; and don't miss NGC 4565, M64, M99, and M100 in the constellation Coma Berenices. While a humble 80mm telescope will show most of the galaxies we mention, a big reflector like our SkyQuest XT10 Classic Dobsonian will provide jaw-dropping views of these distant galaxies!
- April's Deep Sky Challenge: Leo Galaxy Cluster - You'll want a big reflector telescope and dark, clear skies to go after this month's challenge object; the compact galaxy cluster Hickson 44, also named the Leo Quartet, or Galaxy Cluster NGC 3190, after its brightest member. This grouping of distant galaxies is located less than halfway between the stars Adhafera (Zeta Leonis) and Algieba (Gamma Leonis) along the sickle asterism of constellation Leo. This grouping of faint galaxies is quite challenging to detect in telescopes, so we recommend using a large Dobsonian reflector to find out how many galaxies you can see. Learn more about April's Deep Sky Challenge in this info-packed Community section article.
All objects described above can easily be seen with the suggested equipment from a dark sky site, a viewing location some distance away from city lights where light pollution and when bright moonlight does not overpower the stars. All objects have been verified by actual observations by Orion Telescopes & Binoculars Staff at Fremont Peak State Park, and/or Deep Sky Ranch, 60 miles and 90 miles respectively from San Jose International Airport, San Jose, CA.
{ width: 160, height: 160, defaultImage: '', layers: 'Artimg-Orion_Nebula_2014_03_24' }

The Great Orion Nebula, or M42, is a favorite of deep sky observers, particularly in the northern hemisphere. In terms of visually available details and beauty, its only competition is the Eta Carina Nebula, visible in the southern hemisphere. Given its brightness, wealth and range of detail and ease to locate and observe with instruments from small binoculars on up, this M42 is a true crowd pleaser.

Sky chart of M42's location on 4.1.14. Starry Night Pro
In this guide to the Great Orion Nebula, I'll describe some of its physical features and its surroundings, as well as some of the cosmic processes taking place that make it intellectually interesting, in addition to its tremendous visual beauty. Every fall I attend a star party with a large number of other observers. We go out during New Moon between mid September and mid October. At this time in the northern hemisphere, nights are getting longer and cooler, and the summer Milky Way is transiting, making way to deep sky views in the east. But the biggest treat always turns up just before dawn, when Orion rises over the horizon, telling us winter is approaching. It rises earlier and earlier as the season continues, dominating the sky come December and January, and slipping out of prime observing position around early April.
So, why look at it now, just after the spring equinox? Winter has passed, and so will this great object. It's time to say one last farewell to the magnificent Hunter, until he returns in late fall next year.
Located in the star forming arm of our galaxy, along the Milky Way, the closest arm of our galaxy, M42 is visible without optical aid as a fuzzy patch in Orion's sword, which is made up of the three prominent unaided-eye stars descend from Orion's belt stars.
This is a huge object: it sits 1344 light years from us, and its greater extent is several hundred light years. Thought to be 3 million years old, it is home to some of our galaxy's youngest, and hottest stars (much hotter than those in Hollywood).

M42, Credit: NOAO
When you view M42 with magnification in a telescope, you will certainly notice the four brightest, and hottest stars in the nebula - they are appropriately named the Trapezium, forming a very tight trapezoid. These stars are know as the A, B, C and D star. Seen in the image provided, they are the four brightest stars at the visible core of the nebula. On very good night, you can see a few other stars in the group; the E and F stars. While they all look bright in this image, the F star can be challenging, and E can be downright frustrating! But on a good night, when the air is steady, and you can increase magnification, all six members of this hot cluster will reveal themselves.
Look at the great sweeping arms of the nebula, outstretched like a birds wings. This is an area of dust that has been excavated by the stellar winds of the hot stars in the Trapezium.

Wide field M42 image courtesy of Wikipedia Commons
At times, observers may see varying hues of color in the bright nebula around the Trapezium, and in the arms. Reds, browns and green tints - not vibrant, but suggestions, hints of color. What colors do you see? The arms themselves look like sculpted clay - amazingly fine detailed textures. It is a stunningly beautiful view!
Look too, just behind the Trapezium, and you'll see an area as black as can be found in space. This is a molecular cloud of hydrogen and dust that forms an inky black dark nebula.

Trapezium, courtesy of JPL
It's the stuff that stars are made of, and The Trapezium stars are some of the results! If your eyes could see in infrared, through the dust of the Orion Nebula, you'd see thousands of young stars and proto-stars that are hidden to our eyes, deep within this stellar nursery.
While you're in the area, take note of the other great objects very close by. If these others were not located so close to the Great Orion Nebula, they'd be famous on their own: M43, looking like a comma adjacent to the dark nebula behind M42. Further still, but close by, are the reflection nebulae NGC 1973, and NGC 1975 and NGC 1977, which show well in a dark sky, and are collectively called The Running Man. You'll see wispy suggestions of star stuff enveloping several bright stars. Just to the other side of that is the Open Cluster NGC 1981. Lots to look at! But I'm sure you'll agree, the main attraction is M42.

Orion area chart from Megastar
As you let your eyes relax and take in the view, you'll feel like you begin to see more and more, picking up on dim nebulae extending out from the arms. Allowing your eyes to take it all in, you'll come away feeling like the true size of the nebula is twice what you thought. In truth, its hundreds of time the size you thought!
Since you know M42 is visible naked-eye, try a pair of binoculars on it. The nebula will be very obvious. If you have a telescope, and the bigger the better applies, there is a fantastic amount of detail to see. You'll come away knowing that, on those early fall mornings later this year, a treat awaits you! Maybe I'll view it with you at our star party here in California.
Let me know what you think of the Great Orion Nebula. Tell me some of your observations and send in drawings. We'll do our best to answer you and show some of your works!
Clear skies,
Mark Wagner
{ width: 160, height: 160, defaultImage: '', layers: 'Artimg-Leo_Triplet_Lorand_F_ap1008' }
The sickle shape of Leo the Lion is easy to find in springtime skies, and it's a promising hunting ground for galaxies, with over 60 listed in The Millennium Atlas.
The challenging compact galaxy cluster, Hickson 44, also named the Leo Quartet, or Galaxy Cluster NGC 3190, after its brightest member, is located less than halfway between the stars Adhafera [Zeta Leonis] and Algieba [Gamma Leonis] along the sickle of Leo. (RA: 10h18m00.4s Dec:+21�48'44").
Paul Hickson defined a compact galaxy cluster as a "small, relatively isolated collection of four or five individual systems that are set in close proximity to one another, and that differ in brightness by no more than 3 magnitudes." Our challenge object is around 100 light years distant and consists of the four galaxies; NGC 3190, NGC 3193, NGC 3187, and NGC 3185. Two edge-on spiral galaxies are at its center; the dust lane-spliced NGC 3190, and S-shaped NGC 3187. NGC 3193 is an elliptical galaxy, and the face-on spiral galaxy NGC 3185 floats the farthest from the other three.

Image of NGC 3190 Galaxy Cluster by Jim Gianoulakis.
While this group of galaxies is evolving and interacting together across vast distances, you can collect them in one eyepiece view. But, they are by no means easy, says Tammy Plotner, who recommends a minimum of 150mm telescope to see them under dark, clear skies.
Recent observations and sketches by notable observers:
Roger Ivester of North Carolina:
The following observations were made using a 10-inch f/4.5 reflector, from a fairly dark site in the South Mountains of western North Carolina. The accompanying sketch was made at a magnification of 114x, with a 0.50� field of view.
At magnitude 11.0, NGC 3190 is the most prominent and most easily recognized member. This galaxy is bright, highly elongated, and oriented NW-SE. It also has a brighter elongated core.
NGC 3193 at magnitude 10.9, appears fairly small, round and highly concentrated in the middle. With higher magnification, a stellar nucleus can be seen.
NGC 3187 is the faintest of the group at mag. 13.1, and can be very difficult. It is located about 5 arc minutes NW of NGC 3190. This small and very faint galaxy is highly diffuse without concentration. On nights of less than excellent transparency, this galaxy is not visible with the 10-inch. A challenge for sure, and averted vision is mostly always required for me, and seldom can I hold this faint galaxy constantly.
NGC 3185 is faint at magnitude 12.2, and lies about 15 arc minutes SW of NGC 3190. The shape is mostly round, appearing as a very diffuse subtle glow, but fairly easy to see.
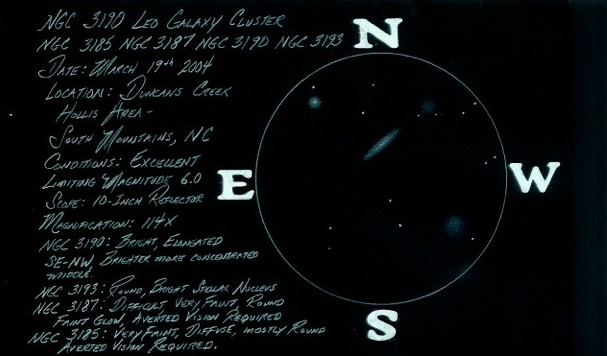
Jaakko Saloranta, of Finland:
Hickson galaxy clusters are generally considered to be objects for larger apertures but several of the galaxy clusters can be seen even with small telescopes. A good example is Hickson 44 - the second brightest of all the Hicksons - in which all of the member galaxies are brighter than 13.5 magnitude. This makes the two brightest members (NGC 3190 & NGC 3193) fairly easy targets for small apertures and the two fainter ones (NGC 3185 and especially NGC 3187) a great challenge for any telescope.
With a cheap 3 inch (80 mm) refractor I was able to see three of the four members from under a fairly dark location at the Teide caldera in Canary Islands (Spain) from an altitude of 7480 feet (2280 meters). The brightest member in the group - NGC 3190 appears as a fairly bright, elliptical 3' x 1' disk with a brighter nucleus. NGC 3193 an even brightness, round glow close to a 9th magnitude star. NGC 3185 appears only as a very faint, very small and slightly elliptical streak of light without details. With an 8 inch Orion DSE, all four of the members are visible at 96x under mediocre skies, although NGC 3187 remains very elusive.
Fred Rayworth, of Las Vegas, Nevada:
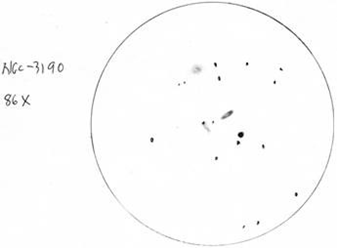
From the desert SW, using a 16-inch f/6.4 at 70X, the four galaxies were easily seen as variously shaped smudges. NGC 3190 is a fairly bright oval smudge right in the middle of the group, mostly featureless. Just a bit NE, and next to a relatively bright star is NGC 3193, a slightly brighter ball of light. It reminded me of an unresolved globular. WSW lies NGC 3185, appearing as a soft, mostly round glow. The most difficult of the group is NGC 3187 at mag. 13.0 and is by far the most difficult of the group. It lies just a few minutes, NNW of NGC 3190. By far the hardest one to see is NGC 3187. All four galaxies fit nicely in a 1/2� field of view.
Interested in contributing your observations to the next Deep Sky Challenge? Email mariag@telescope.com.
{ width: 160, height: 160, defaultImage: '', layers: 'Artimg-2014_03_04' }

More to The Picture: The Cave Nebula
If glancing at this image takes your attention immediately, it should. Not only is it ethereally beautiful and aesthetically pleasing, it's shrouded in bizarre cosmological coincidences. We see a dazzling array of multi-colored stars, but within this single area of space is a hidden ancient planetary nebula, a reflection nebula, a dark dust cloud, a Bok globule, a peculiar low-mass protostar, the edges of a massive X-ray bubble and the fringes of a supernova remnant. Hold on to the light of the Cepheus Flare and let's step inside Wolf's Cave...
In the northern fringe of Cepheus lay an enigmatic gathering of cosmic dust clouds that first gained the attention of astronomers in 1908 when Max Wolf and August Kopff first noticed its complex structure. Using a 28-inch reflector, Wolf took a 2.5 hour exposure of the dusty area which he described as a "long, dark lacuna" and positively identified the reflection nebula cataloged as Sh2-155. His assistant, Kopff, using the same photographic plate, was the first to note the Bok globule which later became cataloged by E.E. Barnard as B175.
Those were wonderful years for astronomy; years when poetic descriptions were still acceptable to the general consensus, and Wolf dubbed the area the "Cave Nebula." But this isn't a spelunker's dream, because the radiation emitted from the nearby bright, young OB star would obliterate any explorer into this thick knot of interstellar dust. But there was one traveler, who dared: a main sequence star whose course took it through the dust maul at nearly 12 km per second. Running headlong into the obscuring mass at nearly supersonic speeds, the star slammed into Bok globule B175, sending shockwaves rippling through the structure and producing collisional excitation and ultraviolet pumping. The result of this cosmic crash was, of course, noted by Wolf in 1908 on his photographic records, but it was while searching high above the Milky Way's galactic plane in 1934 that this dusty molecular cloud was spied by Edwin Hubble and became known as the Cepheus Flare.
Together, reflection nebula Cederblad 201 and Bok globule B175 are referred to as van den Berg 152, and sometimes called Lynds Bright Nebula 524. Yet, it is Cederblad 201 itself that so interests modern science. Why? According to studies done by Goicoechea (et al) with the Spitzer Space Telescope, "We present the detection and characterization of a peculiar low-mass protostar (IRAS 22129+7000) located 0.4 pc from the Cederblad 201. The cold circumstellar envelope surrounding the object has been mapped through its 1.2 mm dust continuum emission with IRAM 30 m/MAMBO. The deeply embedded protostar is clearly detected with Spitzer. Given the large near- and mid-IR excess in its spectral energy distribution, but large submillimeter-to-bolometric luminosity ratio (it) must be a transition Class 0/I source and/or a multiple stellar system. Targeted observations of several molecular lines from CO, 13CO, C18O, HCO+, and DCO+ have been obtained. The presence of a collimated molecular outflow mapped with the CSO telescope in the CO line suggests that the protostar/disk system is still accreting material from its natal envelope. Indeed, optically thick line profiles from high-density tracers such as HCO+ show a redshifted absorption asymmetry reminiscent of inward motions. We construct a preliminary physical model of the circumstellar envelope (including radial density and temperature gradients, velocity field, and turbulence) that reproduces the observed line profiles and estimates the ionization fraction. The presence of both mechanical and (nonionizing) far-ultraviolet (FUV) radiative input makes the region an interesting case to study triggered star formation."
Star formation? Not surprising, deep inside the cave of a molecular cloud, but, if you'll pardon the pun, the plot thickens. The entire complex is about 1400 light years away from us at the perimeter of yet another massive molecular cloud, and at the same time it is situated on the frontier of a massive X-ray bubble located between the constellations of Cepheus and Cassiopeia. And that's not all. Thanks to hydrogen-alpha imaging, the whisper thin strands of an ancient supernova remnant near Cederblad 201 have also been detected.
Like a radioactive Roomba, the interstellar dust is being swept up as the expanding debris field moves toward where the Cepheus Flare lights the entrance to Wolf's Cave. These shocked molecular gas filaments were discovered in 2001 by John Bally and Bo Reipurth and belong to SNR 110.3+11.3; an unfathomably huge supernova remnant positioned only 1300 light years way, one of the closest known. Add to that the output of ancient planetary nebula Dengel-Hartl 5 and the celestial stew thickens even more. It is estimated all the elements will combine in about a thousand years and the product could very well ignite an incredible burst of star formation.
But, a thousand years is merely a blink of an eye in the grand scheme of things, isn't it? According to the 2007 studies done of the Wolf's Cave region by Edwin Bergin and Mario Tafalla; "Cold dark clouds are nearby members of the densest and coldest phase in the Galactic interstellar medium, and represent the most accessible sites where stars like our Sun are currently being born. Newly discovered IR dark clouds are likely precursors to stellar clusters. At large scales, dark clouds present filamentary mass distributions with motions dominated by supersonic turbulence. At small, subparsec scales, a population of subsonic starless cores provides a unique glimpse of the conditions prior to stellar birth. Recent studies of starless cores reveal a combination of simple physical properties together with a complex chemical structure dominated by the freeze-out of molecules onto cold dust grains. Elucidating this combined structure is both an observational and theoretical challenge whose solution will bring us closer to understanding how molecular gas condenses to form stars."
Carbonates from the planetary nebula, dust, exciting energy, photoelectric heating, polycyclic aromatic hydrocarbons, molecular gas... Where will it all end? What we do know is massive, bright star clusters are created from the giant molecular clouds. Will the Cepheus Torch one day ignite a brilliant stellar display from the mouth of Wolf's Cave? I wonder...
{ width: 160, height: 160, defaultImage: '', layers: 'Artimg-WhatsInTheSky_03-14_square' }

Spring is on its way, so get outside for stargazing fun in March! There are bright planets to observe and it's the start of Galaxy Season, so there's plenty of celestial sights to enjoy in the third month of 2014. Here are a few of Orion's top picks for March stargazing:
- Mars gets bigger and brighter - In mid to late March, the red planet Mars will get brighter and bigger in the night sky. Mars reaches opposition - its closest yearly approach to Earth - in early April, but it will start to be an attractive target in the late night hours of March. The disk of the planet will grow in apparent size from 12 arc seconds to almost 15 arc seconds as its orbit brings it closer and closer to our own planet. While almost any size telescope will show you Mars, an 80mm refractor or 6" or larger reflector are really needed to see any detail on the planet. The Orion Mars Filter will help bring out the elusive darker markings on Mars!
- Catch Jupiter in the early evening - If you haven't sought out spectacular Jupiter with a telescope this year, now's your chance! Gigantic Jupiter will be well placed for visual observations and imaging in the early evening hours of March. Like Mars, any telescope will display the basic features, but bigger scopes show a wealth of detail. Look for Jupiter in the constellation of Gemini and try the affordable Orion Jupiter Filter to enhance contrast of the major cloud belts and the famous Great Red Spot!
- Get ready for Saturn - Saturn rises before midnight in the constellation of Libra and will be a good telescopic target in the late evening and morning skies of March. Just about any telescope can show the amazing ring system, and larger models will reveal the Cassini Division feature of the ringed planet.
- Hunt the hunter - March is still a good time to see the constellation of Orion and M42, the Orion Nebula. After March, our namesake constellation will get lower and lower in the west, making it harder to see as the Sun moves eastward in the sky. The wispy Orion Nebula can easily be seen with 50mm or larger binoculars, and using a telescope will reveal more detail.
- Brilliant binocular clusters - Grab a pair of 50mm or larger binoculars in March for great views of the Pleiades cluster (M45), the Beehive cluster (M44), and the must-see Double Cluster in Perseus. These sparkling sky gems are simply beautiful when observed with big binoculars.
- Galaxies galore - By about 9pm throughout March, Ursa Major, Leo, and the western edge of the Virgo galaxy cluster are high enough in the eastern sky to yield great views of some of our favorite galaxies. Check out the bright pair of M81 and M82 just above the Big Dipper asterism. Look east of bright star Regulus in Leo to observe M65 and M66, which can be seen in almost any telescope. In the northeastern sky, check out the famous Whirlpool Galaxy (M51). While the Whirlpool can be seen with modest 50mm binoculars, using a 10" or 12" telescope in a dark sky site will display the distant galaxy's beautiful spiral arms. With an 8" or larger telescope and a dark sky this region of the sky harbors dozens of galaxies - try to find them all!
- Challenge object, NGC 2419, "The Intergalactic Wanderer" - In the constellation Lynx, from a location with dark skies using a good 4.5" or larger telescope you can find NGC 2419, a globular star cluster. To make this glittering cluster an easier target to locate, we suggest a 6 or 8" telescope, and a larger telescope is needed to resolve the cluster into individual stars. NGC 2419 is a distant globular cluster, once thought to lie outside our Milky Way galaxy.
- Get ready for April's lunar eclipse! - Mark your calendars - there will be a total eclipse of the Moon on the night of April 14/15, the first in years for North America.
All objects described above can easily be seen with the suggested equipment from a dark sky site, a viewing location some distance away from city lights where light pollution and when bright moonlight does not overpower the stars. All objects have been verified by actual observations by Orion Telescopes & Binoculars Staff at Fremont Peak State Park, and/or Deep Sky Ranch, 60 miles and 90 miles respectively from San Jose International Airport, San Jose, CA.
{ width: 160, height: 160, defaultImage: '', layers: 'Artimg-Roger_Ivester_NGC2419' }

It wasn't until 1922 that NGC 2419 was finally determined beyond a doubt to be a globular cluster. For years the object baffled astronomers, who now also refer to it as the "Intergalactic Wanderer." The cluster's sky location is directly across from the Milky Way, which is unusual, but it's also extremely distant- some 300,000 light years from the Sun-and seems to be drifting through intergalactic space.
"Scanning the distances for globulars listed in Sky Catalogue 2000.0 reveals several other very distant objects, but none is even close to the brightness of NGC 2419," writes Walter Scott Houston in Deep-Sky Wonders. "Of the approximately 100 known globular clusters, almost all lie within a 65,000 light year radius of the galactic center."
The 'wanderer' is located about twice the distance from the Sun than the Large Magellanic Cloud, and magnitude estimates are between 9 and 10. Although it is one of the dimmest globular clusters, it is fascinating to peer at an object that is extragalactic.
Although this cluster can be picked up by smaller telescopes, it's quite a challenge, and we recommend using a 6-inch or larger telescope, especially if you're a beginner looking for it for the first time. NGC 2419 is located at RA 07hr 38.1m Dec. +38 53' 11.5M; at eastern end of 7-8 magnitude 2-star chain.
Below are two recent observations of NGC 2419 from seasoned observers. Take a stab at the March challenge object and share your own report in the review section of this article.
Roger Ivester, from his backyard in Boiling Springs, North Carolina:
When using my 10-inch at 191x, and averted vision, a very interesting feature was noted. The mostly round shape of the globular has a more concentrated area on the northern edge which creates a crescent shape. Can you see the brighter northern section? The following pencil sketch was made on a blank 5 x 8 note card with the colors being inverted using a scanner.
Kevin Ritschel of Orion, from Deep Sky Ranch, Paicines, CA:
Feb 22, 2014: SQM reading of 21.6
18" Custom Dob
6mm Eyepiece (305x)
NGC was immediately obvious in the eyepiece, easily recognizable as a round globular cluster. Myself and one other observer could easily see a "grainy" or sugar-bowl-like texture to the cluster. We both thought that the brighter members of the cluster would be intermittently observable, although the cluster was not "resolved" in the classical sense. While the cluster was "easy" in this size instrument, the member stars we were seeing was right on the limit.
Feb 23, 2014: SQM reading of 21.3
127mm f/7.5 triplet Refractor on Atlas Pro GoTo mount.
22mm ocular (43x)
5mm ocular (190x)
Using the GoTo, I slewed to NGC 2419, not necessarily expecting to see too much. But with 43x, the cluster was immediately obvious with direct vision! There are two fairly bright foreground stars, almost like a very wide double, that point directly at NGC 2419, the separations between the foreground stars and the distance to NGC 2419 are nearly identical making the entire asterism look like an exclamation point with a "fuzzy" period ( ..*). Since the globular was round and "fuzzy," it would have been easy to think this was a small galaxy; since there was no resolution of the cluster achieved, it would only have been the strong round symmetry that would cause someone to suspect it was not a galaxy.
At 43X, the cluster is visible with direct vision and quite noticeable. At 190x in this telescope, the cluster was so spread out that the cluster was far more difficult to see and the view was not satisfying (the power was too high for this small telescope and faint globular cluster).
Image of NGC 2419 by Jim Gianoulakis of Las Vegas:
Have you observed NGC 2419? Let us know what you see.
{ width: 160, height: 160, defaultImage: '', layers: 'Artimg-Doug_Hubbell_Astrophotography_Tutorials' }

Often times you'll see these wide field photos of astrophotography images. One way to obtain a wide field photo of the night sky is to create a mosaic of smaller images. Adobe Photoshop has a tool called "Photomerge" and it's very easy to use to create wide field images of the night sky.
To get started, you first must take "overlapping" images so Photoshop will know how to stitch the mosaic together. Ideally, try to get approximately 20-25% overlap on each photo.
The example I have is NGC 2264. Here's the top image:

NGC 226 Image 1
And here's the bottom image:

NGC 226 Image 2
Before you merge your photos, crop any "stacking feathers" from your image. When you "stack" your image you typically see feathered edges and if you try to merge these feathered edges your merged photo will show a seam or line where the images overlap.
Remember, you shouldn't start processing your image before you merge the photo. After you've merged the photo then you can start processing your image. If you process each panel separately you will see differences and the mosaic will look like a bunch of stitched together patches.
In Photoshop simply select FILE'AUTOMATE'PHOTOMERGE, this will bring up a dialog box like this:

Click the BROWSE button and select your 16 bit TIFF files. I leave the layout to "Auto" and Check blend images together. Then press "OK" and let Photoshop do its magic! Now you may think it doesn't matter which order you select your files, but it does make a difference! In this example I selected the Bottom FIRST:

The results when selecting Bottom FIRST:

When I selected the "Bottom" first, it didn't give me the best crop results. I really would like to keep the bottom part of the image "square" because there are more important details on the bottom.
However, if I select TOP First:

The results when selecting TOP FIRST:

Now when I crop the image the bottom details will be square and I will have a nice mosaic.
Here are the results after I merged the photos and then processed the image:

Results - NGC226 Mosaic
If you would like to view this tutorial in a video, please visit Astrophotography Tutorials by Doug Hubbell on YouTube: http://youtu.be/NRkLtM-8h4M.

{ width: 160, height: 160, defaultImage: '', layers: 'Artimg-Messier' }

At Orion, we spend a lot of time under the stars. Sometimes we use a telescope, sometimes we use our plain old eyeballs, but much of the time, we keep both eyes open and use a pair of binoculars. Just about any type of binocular will show you something in the sky, but we generally use binoculars of 40mm diameter or larger; a lot of people prefer 50mm or larger. As with a telescope, the darker the sky, the more you will see, and you'll be amazed what you can see with binoculars under a dark sky!
Some have even said that two eyes are better than one. If you've ever used a pair of astronomy binoculars, you have every right to chime in with your opinion.

Orion 10x50 UltraView Wide-Angle Binoculars
Having a pair of binoculars on hand opens up an easy possibility: a quick, five minute view of the cosmos that doesn't require any sort of set up or telescope dragging. If skies are clear, you can fit this in before bed, or while walking your dog after dark. You'll be amazed at what you can see in just a few minutes under dark skies, and the expanded perception it will leave you with in the weeks to come.
Without further ado, here is Orion's Top 25 Showpiece Binocular Objects in the night sky. We know you have probably viewed the following objects in a telescope, but have you seen them in binoculars? Let us know in the "review" section of this article, or in a comment on this article on our Facebook Page.
Good luck!
Orion's Top 25 Binocular Targets:
Spring
- M44, The Beehive
- M81 & M82, a face-on and edge-on Galaxy Pair
- M65 & M66, a Galaxy Pair
- NGC 253 & NGC 288, a Galaxy and Globular Pair
- M101, The Pinwheel Galaxy
- M51
- M108
- Omega Centauri
Summer
- M8/M20 Complex
- M16
- M17
- M22
- The North America Nebula
- M27, The Dumbbell Nebula
- M13, the Great Cluster in Hercules
Fall
- M45, The Pleiades
- NGC 869 and NGC 884, The Double Cluster in Perseus
- M31, The Andromeada Galaxy
- M33, The Triangulum Galaxy
- The Helix Nebula
Winter
- Orion Nebula, M42
- Rosette Nebula
- M36/M37/M38, a trio of Open Clusters in Auriga
- M47/M46, a pair of Open Star Clusters
- M78
Let us know if you were able to find any of these objects in binoculars, or have any favorites to add, by leaving a "review" of this article, or leaving a comment on this article on our Facebook Page.
{ width: 160, height: 160, defaultImage: '', layers: 'Artimg-Magnetic_Reversal' }

You may have heard recently that the Sun's magnetic field has undergone a reversal. It's true. While this though may sound a little terrifying, the fact is that our Sun does this about every eleven years or so. It's part of what is known as the solar cycle. During the flip, there is often solar activity like flares, which can affect space electronics, but we have safeguards in place for most flares. And while weather can be affected, the effects are usually subtle.
The first evidence of this solar cycle was seen in the early 1600s, when observations of sunspots showed there were periods of more and less sunspots. By the mid 1800s it became clear that sunspot frequency generally oscillated over a period of about 11 years.

Map of magnetic field lines on the Sun. Credit: NASA
We now know that sunspot activity is driven by the Sun's magnetic field. The sunspot cycle is just one consequence of the variations in the Sun's magnetic activity. When the Sun's magnetic field is quiet, there tend to be few sunspots. When the Sun's magnetic field is particularly active, there tend to be lots of sunspots, as well as other things like prominences and solar flares. It is during this active period that the Sun's magnetic field will undergo a reversal.
We're not entirely sure what causes this reversal. But we do know the Sun's magnetic field is due to a magnetic dynamo in its interior. The flow of charged plasma induces the magnetic field, similar to the way a flow of current in a wire produces a magnetic field. Changes in the behavior of that dynamo is what leads to the solar cycle. But the mechanism behind those changes is unclear.
Part of the difficulty in understanding these reversals is that while they usually occur roughly every 11 years, they do not occur like clockwork. There are cycles that are a bit shorter and a bit longer. Also, the Sun can enter extended periods of lesser activity. For example, from about 1790 to 1830 there was a period when the oscillations were smaller, and the periods of maximum sunspot activity were less intense, known as the Dalton minimum. We're not entirely sure why such minimums occur either.

Magnetic Loops on the Sun. Credit: NASA
Interestingly, our current solar cycle (known as cycle 24) has been noted to have some similarity to the early stages of Dalton minimum. Before the Dalton minimum, cycles got successively smaller, with the same drop to about half the activity that had been typical. If we follow a similar pattern, then cycle 25 will be about the same as cycle 24, and we will have several decades period of a relatively quiet Sun. What does this mean for humans and the Earth? Low solar activity correlates with slightly cooler temperatures, but that's about all people might notice. Our atmosphere is a pretty good barrier to anything dangerous.
But now that the Sun's magnetic reversal has occurred for this cycle, we know we're about halfway through the solar maximum. You can expect word of the next magnetic reversal to hit the news in about 11 years.
Did you know that the magnetic poles of the Earth also flip? The last time it flipped was 700,000 years ago, according to evidence found in geological strata. What will happen when it flips again? That is not entirely clear, but scientists have many speculations. Stay tuned for my next article on geomagnetic reversal.
Read more articles by Brian Koberlein here.
CAUTION: Never look at the Sun, either directly or through a telescope or binocular, without a professionally made protective solar filter installed that completely covers the front of the instrument, or permanent eye damage could result. When using a truss tube telescope to view the Sun, both a properly fitting solar filter and light shroud are required.
{ width: 160, height: 160, defaultImage: '', layers: 'Artimg-Jupiter_2014_01_22' }

Planetary photography can be very interesting and rewarding. We are lucky to have several planets in our solar system that are bright enough at various times of the year to see and photograph. Our solar systems most massive planet, Jupiter, is one of those, providing some breathtaking views and images. The planet features colorful bands, a Giant Red Spot, and four bright moons that are easy to see and capture in images.
The first thing you will need to photograph Jupiter effectively is a telescope with a relatively long focal length. I have an Orion APO refractor with 480mm of focal length, but that simply isn't enough to capture any noticeable detail on Jupiter's surface. That is more of a wide-field scope for things like galaxies, star clusters, and nebulae. My other telescope is an Orion Maksutov-Cassegrain model with 2700mm of focal length. Now we're talking! I would say that a focal length of around 1500mm would be the minimum that I would recommend for planetary work.

Credit: Stephen Rahn
Now what kind of camera should you use? Some prefer to connect a DSLR or Micro Four Thirds camera to the telescope and shoot in what we call prime focus. I have done that a few times myself, but the general consensus is that a CCD camera is a better option. I use an Orion Planetary Imaging Camera and I have had excellent results with it. A CCD camera is rather small and you will need to connect it to a laptop during your imaging session. The camera displays your target on the laptop, and you will use special image-acquisition software on the laptop to shoot videos of your target. Why shoot video? The idea is that you want to capture a lot of detail, and video offers hundreds (or thousands) of frames. You then use a stacking program such as AutoStakkert, AviStack, or RegiStax to align and stack your video frames. This will (hopefully) produce a nicely detailed composite of your video frames. You can then take that composite image and edit it in Photoshop, Lightroom, or any other image-editing program you prefer.
Another consideration for shooting a planet is how high it is above the horizon. When an object has just come up over the horizon, you will be observing it through a lot more of Earth's atmosphere than if it were up higher in the sky. So don't try to image Jupiter just after it has cleared the trees. Wait until it's at least about 45 degrees or higher if possible so you will be dealing with less atmospheric interference. Here is an example of a shot of Jupiter when it was just coming up.

Credit: Stephen Rahn
You can make out the bands, but they are pretty blurry.
Now here is a better shot that was taken when Jupiter was much higher in the sky.

Credit: Stephen Rahn
Here you can see much better detail and you can even see three of the Galilean Moons. Two are on the left and one is on the right.
Once you've set up your scope, connected the camera, and pointed at Jupiter you will now want to make sure that your focus is as accurate as possible. Poor focus will mean you get a blurry image and that is incredibly frustrating. You might want to consider a dual-speed focuser if you don't have one. I have a dual-speed Crayford focuser and it lets me do very fine adjustments to the focus and that has really helped with the quality of my images.
After you've gotten focused, it's now time to start shooting some video. Check to see how many frames per second your camera can shoot, and start with a video that will capture 500 frames. If your camera shoots at 15 frames per seconds, that's about 33 seconds of video. You might be surprised at how good of an image you can get from a video of that length.
Now that you've got a video file, you will have one of those stacking programs align the video frames and then stack them into one composite image for you. Consult the documentation for the program that you are using. I have found that I get the best results from AutoStakkert, but others prefer RegiStax or AviStacker. It couldn't hurt to process the same video file with multiple programs and see which one comes out best. I often do that myself.
When you finally get a composite image, feel free to use Photoshop, Lightroom, or whatever your favorite image-editing program is to do some processing. I often use the sharpen and levels adjustments to refine the image and try to bring out as much detail as possible. If your image isn't that great, try shooting 1,000 frames next time. If your focus is good and Jupiter is high enough in the sky you should be able to get some pretty good images.
After you've gotten some practice with Jupiter, try your hand at the other bright planets. Saturn and Mars will being coming into the night sky this spring, and they make excellent targets as well.
Happy shooting and clear skies!
Do you have any questions or experiences to share about imaging Jupiter? Share them in the 'review' section of this article.
{ width: 160, height: 160, defaultImage: '', layers: 'Artimg-Roger_Ivester_M82_SN' }

A bright supernova has appeared this week in the galaxy known as M82, or the "cigar galaxy." M82 is a starburst galaxy about 12 million light years away. On a cosmic scale, this is right in our backyard. In fact it is the closest supernova we've had since 1993.
If you've ever wanted to view a supernova (and you live in the Northern hemisphere) then now is your chance. M82 is in the constellation Ursa Major. If you find the big dipper, then it is diagonally up and away from the handle about the distance of the pan. Click here to consult star chart. It is a bright galaxy, so it is pretty easy to find with a pair of binoculars or a small telescope. This new supernova about magnitude 11, so is bright enough to view with a small telescope. See observing sketch of M82 SN by Roger Ivester, 1/22/2014.

The new supernova: E. Guido, N. Howes, M. Nicolini.
Although news of the supernova has just hit the media, we already know a few things about it. From its spectra we know it is a Type Ia supernova. The traditional view for Type Ia Supernovae is that they are the result of an interaction between a red giant and white dwarf in a binary system. A white dwarf is a star so dense that only pressure of electrons keeps it from collapsing under its own weight. But electron pressure can only hold up against the weight of gravity to a point: known as the Chandrasekhar limit, this is about 1.4 solar masses. If a white dwarf is in a close orbit with a red giant, some of the outer layer of the red giant can be captured by the white dwarf. The white dwarf then gains mass until it is pushed past the Chandrasekhar limit, resulting in runaway fusion that causes the white dwarf to explode.
But new evidence indicates that Type Ia supernovae are due not to a white dwarf being pushed past its limit, but rather due to a collision of two white dwarfs. Often, two white dwarfs in a close binary have a third star orbiting the pair. As this third star gravitationally interacts with the binary dwarfs, it can cause their orbits to degrade to the point where they collide with each other. The resulting explosion produces the supernova.
Type Ia supernovae are particularly useful to astronomers because they always explode with a similar luminosity. This means we can observe how bright the supernova appears and compare it with the actual brightness to determine its distance. Supernovae such as this one help astronomers determine the distance to M82 and other galaxies as distant as billions of light years.

Whenever a "close" supernova occurs, there's often speculation about when one will be visible in our galaxy. It turns out we're long overdue for one. In November of 1572 Wolfgang Schuler observed a supernova in the constellation of Cassiopeia. A few days later it was observed by Tycho Brahe, who began taking careful observations of this visiting star, which came to be known as Tycho's supernova. About 30 years later, in 1604, Kepler observed a supernova in the constellation of Ophiuchus. Since then, there hasn't been an observed supernova in our galaxy, which is unfortunate and a little perplexing.
Studies indicate that a galaxy of our size and type should have a supernova about once every 50 years. That we haven't seen another in 400 years seems to indicate that there's a crucial aspect of supernova physics we don't understand. Either that, or astronomers are having a 400 year long streak of bad luck.
Another topic that often gets raised is whether a supernova could occur close enough to threaten life on Earth. It turns out there is no need to worry. Although supernovae can outshine an entire galaxy at maximum brightness, one would probably need to be closer than 100 light years or so to pose any threat. Of the stars we know that could become a supernova, the red giant star Betelgeuse is perhaps the closest, at a distance of 650 light years. At some point in the next several millennia Betelgeuse will go supernova, and when it does it would have an apparent magnitude of about -11. That is brighter than any star or planet in our sky, but it isn't quite as bright as a full moon.
So even if Betelgeuse does explode in the near future, it won't be the end of the world. It will just be a short lived beacon in our night sky, casting shadows on moonless nights.
Have you observed the supernova in M82? Let us know if you see it, and what you used to find it.
Read more articles by Brian Koberlein here.
{ width: 160, height: 160, defaultImage: '', layers: 'Artimg-SETI_ATA_2014_01_22' }

By David Jay Brown
For fans of the science fiction film Contact--where a scientist played by Jodie Foster establishes communication with an advanced extraterrestrial species, the SETI Institute has almost mythic status.
However, SETI, which means "Search for Extraterrestrial Intelligence"--is the acronym for a very real organization which scans the skies every night in search of some type of evidence for the existence of intelligent extraterrestrials-in hopes of establishing contact.
Becoming an official nonprofit corporation in 1984, SETI's mission is to "explore, understand and explain the origin, nature and prevalence of life in the universe." Using optical and radio telescopes, SETI's team of determined astronomers and communicational specialists seek the answer to one of mankind's most gnawing question: are we alone in the universe?
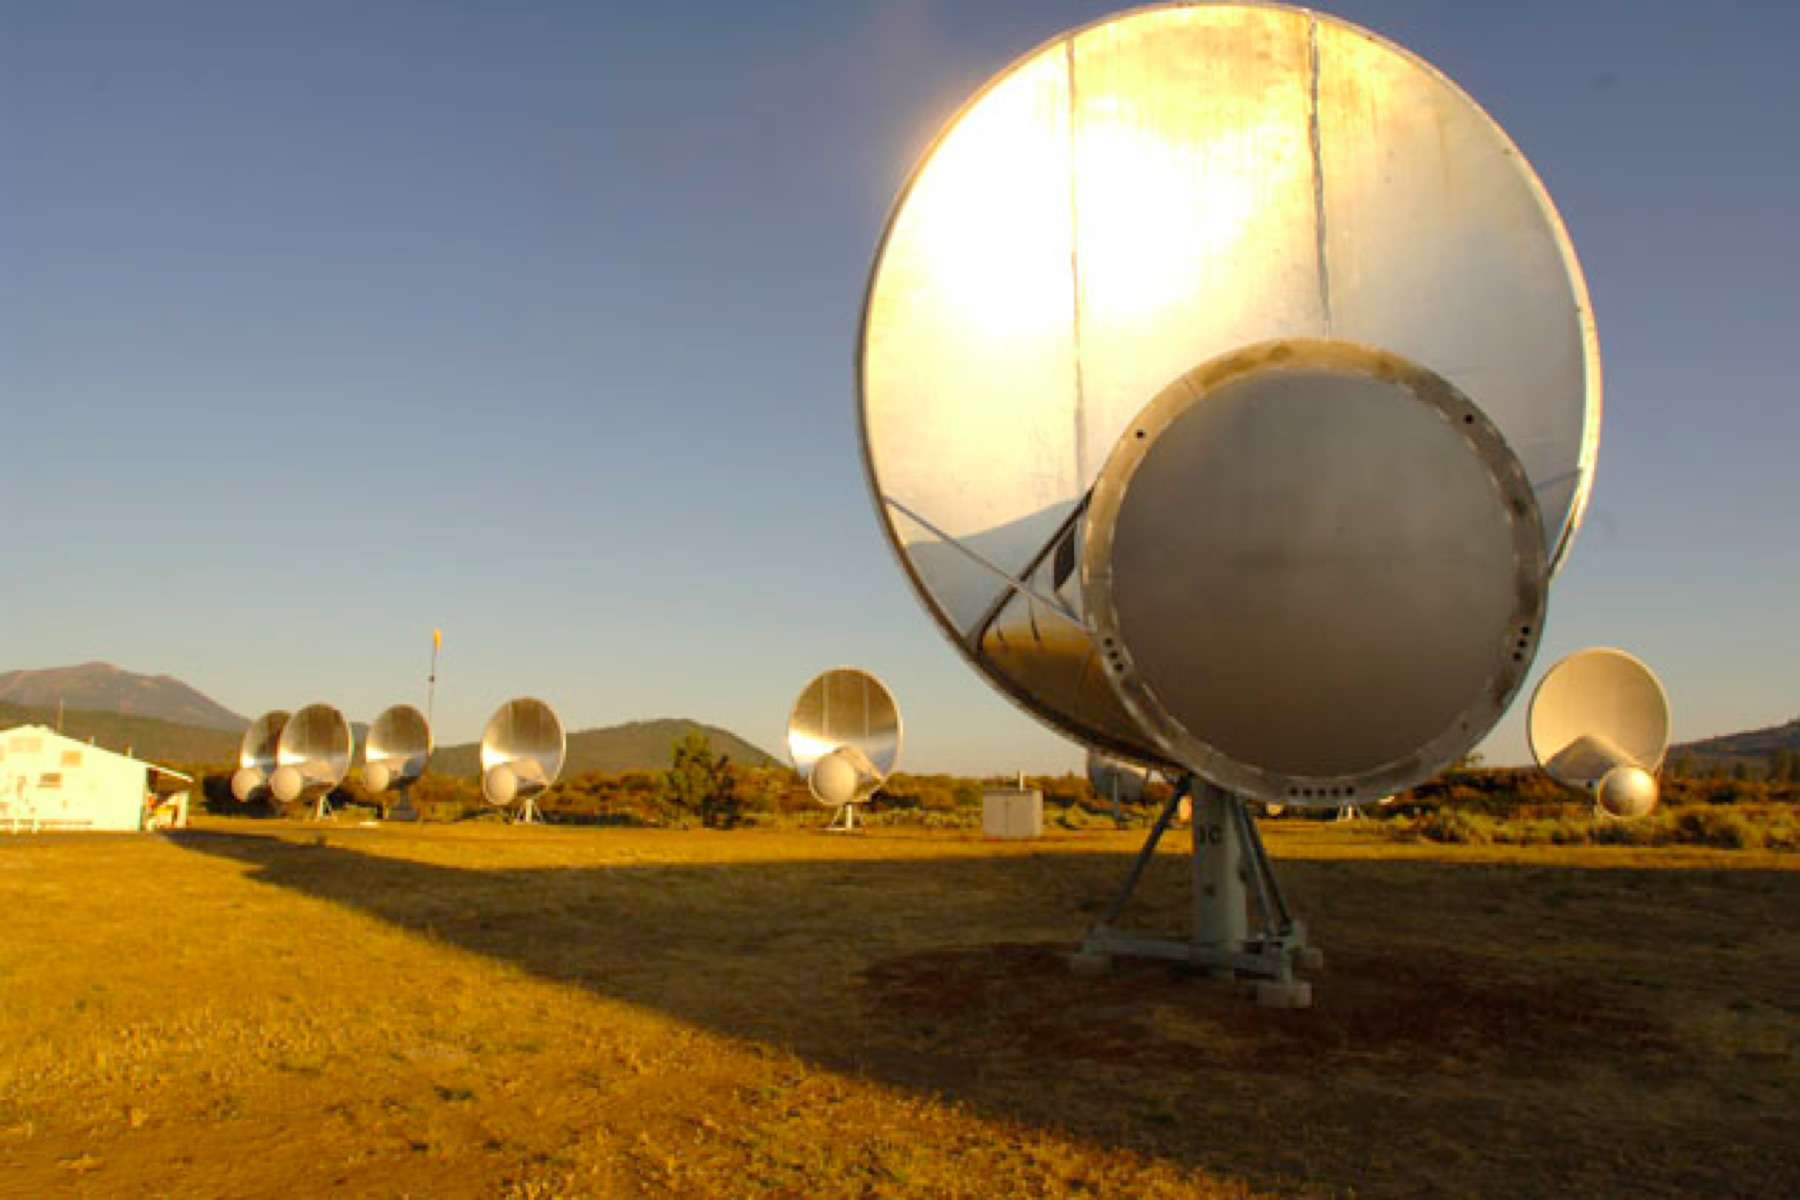
Allen Telescope Array (ATA) at the Hat Creek Observatory in Northern California scans known planetary systems for signals. Credit: Seti.org
Seth Shostak, Ph.D., is the senior astronomer for the SETI Institute, based in Mountain View, California. He hosts the popular weekly radio show "Big Picture Science," and is also widely recognized as a science educator. In 2004, Shostak won the prestigious Klumpke-Roberts Award by the Astronomical Society of the Pacific in recognition of his "outstanding contributions to the public understanding and appreciation of astronomy."
I spoke with Shostak on January 16, 2014. In conversation, Shostak combines open-mindedness and skepticism with a vast array of knowledge, and he is especially talented at seeing the "big picture." In the following interview of Shostak, he talks about SETI's current search for life in our galaxy, whether or not he thinks alien civilizations are benevolent, SETI's plans for the future, and what amateur astronomers can do to help in the search for extraterrestrial intelligence.
David Jay Brown: How did you first become interested in astronomy and the search for extraterrestrial intelligence?
Shostak: That all began as a kid, of course. I was interested in astronomy from the age of 8, since I was looking at a book that my parents had. It was an atlas, but in the back of the atlas there was a funny-looking diagram, which I didn't understand.
So I asked my mom about it, and she said, "Oh, that's a diagram of planets."
I had never heard the word "planets" before, but once I heard it, I got interested in that--and by the age of 11, I had built my own telescope.
As far as aliens go, well, that was also, I'm sure, from about the age of 8--because there were a lot of science fiction films in the movies those days featuring aliens. Aliens were always doing something terrible to humanity in these films--and I went to them all!
Brown: Can you tell us about some of the latest projects that SETI is working on?
Shostak: Our SETI projects are multiple. We use the Allen Telescope Array--with a large number of small dish antennas--so we're doing what's called "radio SETI." That's looking for the kinds of signals that transmitters would make.
We have another project where we're looking at the galactic center. That's something that I think is a good idea, because that's a special place in the Milky Way. Incidentally, my first published SETI experiment--in 1981--was to look at the galactic center, the center of our galaxy.
A really advanced society would know that everybody is going to be looking at the galactic center sooner or later--so they might put a big transmitter there to act as some sort of beacon. So we're doing looking there.
We're also looking at star systems that are known to have planets. Of course we do that. I wrote an article about this that's in the January issue of Astronomy magazine actually, about looking for signals from the neighborhoods of red dwarf stars.
I honestly think that that's a very good SETI strategy, because probably 1 in 5--certainly 1 in 6, at least--of red dwarf stars, will have a habitable planet orbiting around them, it seems. Red dwarf stars are also so numerous, and so old, that they're just perfect for a SETI search.

Brown: What research techniques do you think hold the most promise for establishing contact with a race of intelligent extraterrestrials?
Shostak: Of course nobody knows that. If we knew that, then we would put all our resources into the most promising techniques.
We're great fans of radio SETI, and that's the traditional form of SETI. That was used in the first SETI experiment, at least the first modern SETI experiment. It was a radio search in 1960 by Frank Drake.
Then we continued to do that, because--in terms of the energy required--it turns out, it's very easy and inexpensive to send bits of information from one star system to another using radio. So I do like that.
But it's also the case that optical SETI appeals to me, and I think that it will appeal to me more in another couple of years, when we have new detector technology that would allow us to survey the sky much more quickly, in the optical.
But there are also other things that are coming down the pike, if you will. These are the kinds of SETI experiments where you don't actually deliberately look for ET, as it were, but you mine data collected by other sorts of instruments. For example, large telescopes that are intended for other purposes, but might in fact reveal the activities of very advanced societies.
There could be engineering projects that are big enough for you to see. So those are, all to me, very interesting techniques.
Brown: Taking the recent discoveries of so many exoplanets into account, how common do you think intelligent life is in the universe?
Shostak: Well, that's a complete guess, but it's now looking like there are roughly a trillion planets in the galaxy. The current estimate is that 1 in every 5 stars has an earth-like world. If that's true, then there are on the order of 50 billion "Earths" in the Milky Way galaxy.
Now, what fraction of them have life? I bet most of them have life, actually. But what fraction have intelligent life? That is a different question. But even if it's one in a thousand, then that's still 50 million societies that have sprung up in the galaxy--a galaxy that we know for sure has supported intelligent life at least once.
So if intelligent life has any durability at all, if it can last for a million years, or something like that, then that means there are tens of thousands of worlds that are extant today, that are out there now with cosmic confreres, with intelligent beings.
That's a big number.
Brown: What type of patterns are you (or your computers) listening for when you search through the radio signals in the sky?
Shostak: It's actually very simple, because the searching is done by the computers. Of course there's a tremendous amount of data coming in. There's really a fire hose of data coming in, so you can't look for the Fibonacci series, or anything like that.
In fact, you wouldn't get it anyhow. Because you're adding up the signals coming in over a period of minutes, any sort of fast modulation or any sort of message would get smeared out anyhow.
But we're just looking for the kind of signal that a transmitter would make. A transmitter would make a signal that would have some narrow band component. It would have peaks of energy over a very narrow range of frequencies.
That's exactly what television, radar, and radio do as well. The energy is put into a narrow range of frequencies, although it is more narrow for AM than for FM. But it's still pretty narrow. So that's the kind of signal that we look for--narrow-band signals--and if we find one, and if the source is moving across the sky at the same pace as the stars, then you say, "That's not a bit of nature. That's not a pulsar, a quasar, or anything like that--it's too narrowband. That's some sort of artificial source."
Brown: Physicist Stephen Hawking has warned us not to attempt extraterrestrial communication, because he thinks that it makes us too vulnerable to the will of an advanced species, and in his new book, The Future of Mind, Michio Kaku says that you once told him that any battle between ourselves and an advanced civilization would be like a battle between Bambi and Godzilla.
How do you envision the friendliness of other intelligent species in our cosmos? Do you think that our science fiction films are paranoid, and that the universe is basically a friendly place, or do you think that we need to proceed more cautiously, and be concerned about the dangers of an intelligent extraterrestrial species, many years more advanced than ourselves, that may be seeking to exploit us or use our resources?
Shostak: To begin with, I don't think they would be interested in our resources. What do we have that they don't have much nearer by? But, aside from that, the facts are that we can't guess the sociology of the aliens.
A lot of people like that the idea of malevolent aliens, and in particular Hollywood likes it, as, of course, friendly aliens are a lot less interesting than hostile ones from a movie's point of view, so they have a vested interest in hostile aliens. As far as Stephan Hawking's point goes, I've written three articles on that. You can actually find one if you go to The Edge, for example. I wrote an essay last year about what I'm not afraid of, and I'm not afraid of that, largely because of the following:
You can't say whether the aliens would be friendly or hostile. I suspect most of them would be friendly, because, after all, I think advanced societies probably tend to be peaceful, otherwise they don't last very long.
But hey, I could be wrong. And in fact, if only 1 percent of them are not friendly, well that might still be dangerous. But my point is somewhat different. It's very easy to show that any society that has the ability to come here, and do some damage...(laughter) If they can do that, if they've got the technology to do that, they also have the technology to pick up all the signals we've been broadcasting into space since the Second World War.
So there's actually no point in being careful about this. There's no point in turning off the radar systems at the local airport. All that would do is kill people, and it's not going to make us any safer--because those signals are already on their way. And any advanced society, anyone that could ever pose a threat to us, could pick those up anyhow.
Brown: What does SETI plan to say to the first intelligent extraterrestrials that it makes contact with?
Shostak: I suppose we would just send a whole bunch of information, if we were to be responding to a received signal. Mind you, there's a protocol that says you wouldn't respond to a received signal without international consultation, and probably that means something like the United Nations... To be honest, I don't think that it matters. I honestly don't think it matters, because you could have said that maybe the natives of the Caribbean should have prepared what they were going to say to Spaniards in 1492, should their ships ever show up on the beach. It really didn't matter what they said actually.
Brown: Please tell us about the SETI Institute's radio program "Big Picture Science" that you host.
Shostak: Yes, it's a weekly show about science. We always try and put the show in the context of the overall picture of science, the overall picture of humanity, and what it means. We explore the scientific developments, and also ask how does that affect us in any way? So that's the kind of thing we do, and we try and make it fun. We have lots of very good scientists, lots of Nobel Prize winners, and so forth. We interview about 4 or 5 people every week. You can find us on the web at: www.bigpicturescience.org
Brown: What are some of the future research projects that SETI has in mind?
Shostak: Unfortunately, the future depends a lot on funding, but we would like to continue to increase the capabilities of the Allen Telescope Array, which is the instrument that we use.
This is because that would speed up the search, and speeding up the search means that, if there's going to be success, it's going to come sooner rather than later.
And as I say, there are these new approaches. I like the idea of optical SETI using two dimensional detectors.
I see that coming in, as something that right now is mostly waiting on technical developments that we won't make, but industry will.
Also, I have to say, I think that data mining would be a very interesting thing to do. There are some very big optical telescopes being built around the world, and they will provide enormous data sets that can be combed by anybody with a laptop and a little bit of time to look for anomalous features, things that aren't natural.
Brown: How can people at home get involved with SETI, using their personal computers?
Shostak: On our website we have something called SETI Live, where people can look at some of the actual data. People who are interested in participating should just look for interactive SETI programs with their internet browsers and check them out. It may be something that they want to do.
Brown: What excites you most about the search for extraterrestrial intelligence?
Shostak: That's a big picture question. I think that's the most exciting thing. This is something that everybody has some interest in. I mean, are we the only game in town? Are we the only kids on the block? Are there other kids? And if so, what are they like? I think everybody's interested in that. And of course no previous generation could answer this question, but we can--so, hey, that's exciting!
Read more Orion articles by David Jay Brown here.
{ width: 160, height: 160, defaultImage: '', layers: 'Artimg-09327_stars' }

If you're interested in investing in a pair of binoculars for observing both starry vistas and terrestrial subjects, then you might want to take a look at the Orion Giant View 15x70 Astronomy Binoculars. These porro-prism beauties are well designed, rugged and very versatile. What's more, they've been engineered to give lasting performance.

Weighing in at a hefty four pounds, the Orion Giant View 15x70's have been reinforced with an aluminum rod and the objective cell frame has also been beefed up for maximum structural rigidity. While this adds weight, it also ensures that no matter how many times these binoculars are flexed open to accommodate being stored, or adjusting to individual eye separation distances, they are going to remain in alignment. No one wants to pay good money for a pair of binoculars that feel like they are going to come apart where the barrels are hinged together! There is also a captive sliding 1/4"-20 mounting post located on the rod - a big bonus when considering mounting the binos to a tripod.
The next thing you'll notice about the Orion Giant View 15x70 Astronomy Binoculars is that each eyepiece is individual focus - a change over the traditional right eye diopter. This facet of the Giant View 15X70's construction means you get a more improved focusing precision over center-focus mechanisms, however you may wish to secure the binoculars to a mount and tripod arrangement to take advantage of this unique feature.
Another high quality addition is the BAK 4 prisms and internal baffling. This provides for excellent image contrast and sharpness. You'll also find the full multi-coatings to be exceptional - reducing glare and offering excellent color correction. The 4.6mm exit pupil is right on par with the average adult maximum exit pupil, and 18mm of eye relief means you're not dangling the binoculars out in space to see through them, nor do you have them crammed against your eyes.

The Orion Giant View Astronomy Binoculars come with a heavy duty aluminum case.
As for the view? At 15X and 70mm of aperture, you're enjoying a vision comparable to a small refractor telescope. However, instead of a constricted field of view, you're checking out a full sixty degree apparent field of view and a very nice four degree angular field. For astronomical purposes, that means being able to follow an extensive comet tail, or being able to take in expansive nebulae regions and admire large star clusters. The Orion Giant View Astronomy binoculars are quite capable of picking up brighter galaxies, too! Put these binoculars on a tripod and you'll be able to resolve out wider double stars and take on some serious crater action when it comes to the Moon. Don't forget the planets! Not only are they are capable of revealing the four Galiean moons of Jupiter, but you'll also be able to spot the shape of Saturn's ring system, reveal the orb of Mars, catch the bright form of Venus, pick Mercury out of the dawn or dusk and capture the distant twinkle of Uranus.
Hang on, because the Orion Giant View 15X70 binoculars are good for more. Pass them on to a hunter and they'll be delighted with the close-up view of distant game. You'll be able to see the foraging deer and spot antlers. With the 70mm aperture, you'll enjoy exceptional low light resolution. This is especially helpful at dawn and dusk when they are on the move. Maybe birds are more your thing. If so, set a pair of these big binos on a tripod and train them on a feeder. You'll feel like you're feeding with the flock! There's more. The Orion 15X70 Giant View binoculars also come with a deluxe hard case. You'll appreciate its added security. Now you can safely keep your binoculars with you in your car's trunk, take them along as carry-on luggage on an astronomy expedition, or add them right to your gear for hunting, hiking and camping trips.
Have you used Orion's 15x70 Giant View Astronomy Binoculars? Let us know how you liked them in the review section of this article.
{ width: 160, height: 160, defaultImage: '', layers: 'Artimg-Doug_Hubbell_NGC2264' }


NGC 2264 taken while forgetting the little things! One night, 30 - ten minute exposures, EON120 scope, Atlas Mount, StarShoot Pro IV Camera, post processing in Photoshop. By Doug Hubbell.
It's been almost three months since my last imaging session. As a seasoned veteran I've been imaging for more than five years. I typically wait for the new moon and hope for clear skies. When first starting my adventure in astrophotography I made meticulous notes. These notes help me get started. Whenever something works for you take notes! It's surprising how fast we forget these little things.
Having spent countless hours under the night skies I don't need stinking notes...right?
The night begins with crystal clear skies. I am in my favorite winter and spring location in Oak Grove California, just north of Palomar Mountain in San Diego county. The sky hasn't been this clear in months! The polar alignment was a little difficult because of the trees, but, I managed to finish this 1st step. My gear is powered by field batteries and I noticed the familiar "charging" icon in the task bar is missing. That's strange, immediately it's time to go into "debug" mode because the entire night requires more power to run the laptop. Reseating and re-plugging the power doesn't seem to help and the "charging" icon isn't coming back. Ok, at this point my frustration is starting to grow, and thoughts of a short night creep inside my head. After swapping the power source still no "charging" icon...jeeeezzzzz. Then I think; "Have you Rebooted your computer?" Yep...after a reboot the "charging" icon appears!
The dark skies are mine! I'm ready! Or am I?
Next on the list is star alignment. I begin by pressing the buttons on the hand controller...about three button pushes into the star alignment the controller locks up! Wow that's Fun? Ok I've learned my lesson with my computer: a simple reboot should fix the problem! Right? Nope. After several reboots and thinking this crystal clear night is about to vanish, a memory returns: I pressed one of the buttons too hard and the button is stuck under the case. Sure enough, that was it! I moved the stuck button a little and I was able to continue my star alignment.
My imaging session started and I had all of my software dialed in...or did I? Well I forgot to set the number of frames (photos) high enough to capture photos all through the night. After taking a little nap I woke up to see my imaging session stopped early!
It's amazing how overlooking the tiny details can stop an imaging session. This brings me back to the importance of taking notes when you image. You should note all of your successful astrophotography accomplishments for reference. When times get tough and you're at your wits end your notes may bring back some sanity. What notes did I make during this session?
- Don't forget to reboot
- Press the hand controller buttons carefully and deliberately
- Set the maximum number of photos high enough
Let's hope we don't forget these little things because next time there will be a different set of challenges!
View more of Doug Hubbell's images in Orion's image gallery, and keep up with his Astrophotography Tutorials on his Facebook Page.
{ width: 160, height: 160, defaultImage: '', layers: 'Artimg-Astro_Activities' }

Look for Gassendi, the Moon's "Sea of Moisture," the westernmost star in Orion's belt, Mintaka, and the Orion Nebula on the weekend of January 10-12, 2014.
Friday, January 10 - Robert W. Wilson was born this day in 1936. Wilson is the co-discoverer, along with Arno Penzias, of the cosmic microwave background, and in 1978 he won the Physics Nobel Prize. While we're "listening in," on this day in 1946, the US Army's Signal Corps became the first to successfully bounce radar waves off the Moon. Although this might sound like a minor achievement, let's look just a bit further into what it really meant!
Known as "Project Diana," scientists were hard at work to find a way to pierce the Earth's ionosphere with radio waves - a feat believed at that time to be impossible. Headed by Lt. Col. John DeWitt, and working with only a handful of full-time researchers, a modified SCR-271 bedspring radar antenna was set up in the northeast corner of Camp Evans. The power was cranked up and it was aimed at the rising Moon. A series of radar signals were broadcast, and in each case, the echo was picked up in exactly 2.5 seconds - the time it takes light to travel to the Moon and back. The significance of Project Diana cannot be overestimated. The discovery that the ionosphere could be pierced, and that communication was possible opened the way to space exploration. Although it would be another decade before the first satellites were launched into space, they were later followed by manned rockets. Project Diana paved the way for all those achievements.
Tonight let's spend some of our observing evening with the beautiful Moon as we begin with the ancient and graceful landmark crater Gassendi standing at the north edge of Mare Humorum.

Gassendi - Credit: Damian Peach
The mare itself is around the size of the state of Arkansas and is one of the oldest of the circular maria on the visible surface. As you view the bright ring of Gassendi, look for evidence of the massive impact which may have formed Humorum. It is believed the original crater may have been in excess of 462 kilometers in diameter, indenting the lunar surface almost twice over. Over time, similar smaller strikes formed the many craters around its edges and lava flow gradually gave the area the ridge and rille-overed floor we see tonight. Its name is the "Sea of Moisture," but look for its frozen waves in the long dry landscape.
Saturday, January 11 - Tonight in 1787, Sir William Herschel discovered two of Uranus' multiple moons - Oberon and Titania. If you'd like to see Uranus for yourself, it can be found just east of the circlet of Pisces (RA 0h 32m 52s - Dec 2�47'57") not long after skydark. It can be captured with mid-sized binoculars, but even a small telescope will reveal its slightly greenish orb!
As the Moon nears Full, it becomes more and more difficult to study, but there are still some features that we can take a look at. Before we go to our binoculars or telescopes, just stop and take a look. Do you see the "Cow Jumping over the Moon"? It is strictly a visual phenomenon-a combination of dark maria which looks like the back, forelegs and hind legs of the shadow of that mythical animal.

Mintaka - Credit: Palomar Observatory courtesy of Caltech
Tonight return again to Orion's belt as we have a closer look at its westernmost star - Mintaka. Located around 1500 light-years away, Delta Orionis usually holds a magnitude of 2.20, but orbiting it in a clockwise orbit of 5.7325 days is a nearly equal star around 8 million kilometers away. Mintaka is a prime example of an eclipsing binary star, and although visually you won't really notice a .2 magnitude drop in light, let's take a closer look with binoculars. As one of the few easy binocular double challenges, Mintaka will easily reveal its 6.7 magnitude companion star to its north. For over 100 years, the eclipsing physical AB pair has been closely watched and no movement between the half light-year apart physical pair has been detected. For those with larger telescopes - power up - and see if you can discover the 13th magnitude C star southwest of the primary.
No matter how you look at Mintaka, this fascinating star has been a part of history. It was the very first to display stationary spectral lines which proved the existence of interstellar matter!
Sunday, January 12 - Today in 1830 celebrates the founding of what, in 1831, would become the Royal Astronomical Society. The RAS was conceived by John Herschel, Charles Babbage, James South, and several others. The RAS has published its Monthly Notices continuously since 1831. Believed to have been born today in 1907 was Sergei Pavlovich Korolev. While few people recognize Korolev's name, he was a Soviet rocket engineer whose contributions to the science made him as important to the Russian space program as Robert Goddard was to that of the United States. His developments led to Sputnik, Vostok, Voskhod, and eventually the Soyuz programs.
Tonight the Moon will look nearly full and it is a good time to spot yet another lunar asterism, "The Rabbit in the Moon." Since the dawn of mankind, we have been gazing at the Moon and seeing fanciful shapes in large lunar features. The "Rabbit" is a compilation of all the dark maria. The Oceanus Procellarum forms the "ear" while Mare Humorum makes the "nose." The "body" is Mare Imbrium and the "front legs" appear to be Mare Nubium. Mare Serenitatis is the "backside" and the picture is complete where Mare Tranquillitatis and Mare Fecunditatis shape the "hind legs" with Crisium as the "tail." See the Moon with an imaginative mind and new eyes -- and find the "Rabbit." It's already out of the hat and in the heavens!

Orion - Credit: John Chumack
Despite bright skies, let's take a brief look towards the three stars that form Orion's belt. Starting with just our eyes, look around a thumb's length south to discover an asterism of stars referred to as the "sword." On a clear, dark night away from city lights you can spot a glowing cloud of dust and gas surrounding Theta that has long held a place in astronomy history. It was first noted only one year after Galileo first used his telescope, and the discovery is credited to Nicholas Peiresc in 1611. It wasn't until Christian Huygens sketched it in 1656 that it became well known for containing a "heart of stars."
Now, take out your binoculars and have a look. Stars are still being born in a dense cloud behind the nebula, and hundreds of them are less than a million years old. Compared to our own Sun's age of over four billion years, these would seem almost new! But think again at what you are looking at: the light you see tonight left this area around 1900 years ago.
So magnificent are the many details that can be seen in the Orion Nebula, that chapter upon chapter could be devoted to its riches. For now, feast your eyes upon this 30 light-year expanse of dust, neutral and ionized hydrogen, and doubly-ionized oxygen illuminated by the ultraviolet starlight of this stellar nursery. It is more than 20,000 times larger than our own solar system and its mass could form 10,000 stars like our own Sun!
Until next week. Wishing you clear skies!
{ width: 160, height: 160, defaultImage: '', layers: 'Artimg-NASA_GJ1214b' }

It's official. Someone on an exoplanet has obviously bought a new telescope because it's cloudy there... with a chance of more clouds. Thanks to the powerful range of the Hubble Space Telescope, astronomers have been able to study two of the most common types of planets in the Milky Way and discovered that both are probably swaddled in clouds.

Image: This is an illustration of the hypothetical appearance of the exoplanet GJ 1214b, which is known as a "super-Earth" type planet because it is slightly more than six Earth masses. Spectroscopic observations with NASA's Hubble Space Telescope provide evidence of high clouds blanketing the planet. These clouds hide any information about the composition and behavior of the world's lower atmosphere and surface. The composition of the clouds is unknown. Credit: NASA, ESA, and G. Bacon (STScI)
As far as distances go, the two planets aren't very far away. The first, GJ 436b, is located approximately 36 light-years away in the constellation of Leo and the second, GJ 1214b, makes its home in the constellation of Ophiuchus and is about 40 light-years distant. Try as they might, the researchers had been unable to pinpoint the makeup of the planet's atmospheres--until now. The latest findings are an incredible advancement to understanding the potentially habitable planets similar to Earth which reside beyond our solar system.
Just what are these planets like? According to the researchers, "the two planets fall in the middle range in mass, between smaller, rockier planets such as Earth and larger gas giants such as Jupiter. GJ 436b is categorized as a "warm Neptune" because it is much closer to its star than frigid Neptune is to the Sun. GJ 1214b is known as a "super-Earth" because of its size. Both GJ 436b and GJ 1214b can be observed transiting, or passing in front of, their parent stars. This provides an opportunity to study these planets in more detail as starlight filters through their atmospheres."
This new research includes an atmospheric study of GJ 436b founded on such transit observations with Hubble, led by Heather Knutson of the California Institute of Technology in Pasadena, California. The Hubble spectra were featureless and revealed no chemical fingerprints whatsoever in GJ 436b's atmosphere.
"Either this planet has a high cloud layer obscuring the view, or it has a cloud-free atmosphere that is deficient in hydrogen, which would make it very unlike Neptune," said Knutson. "Instead of hydrogen, it could have relatively large amounts of heavier molecules such as water vapor, carbon monoxide, and carbon dioxide, which would compress the atmosphere and make it hard for us to detect any chemical signatures."
If at first you don't succeed, try again. Observations much like those obtained for GJ 436b had also been documented beforehand for GJ 1214b. The initial spectra of this planet also showed no features, but indicated GJ 1214b's atmosphere was dominated by water vapor or hydrogen, with high-altitude clouds. Using Hubble, astronomers led by Laura Kreidberg and Jacob Bean of the University of Chicago took a closer look at GJ 1214b. A eureka moment? Quite possibly. They discovered what might be evidence of high clouds shrouding the planet and hiding information about the composition and behavior of the lower atmosphere and surface. The new Hubble spectra also revealed no chemical fingerprints in GJ 1214b's atmosphere, but the data sets were so precise they could rule out cloud-free compositions of water vapor, methane, nitrogen, carbon monoxide, or carbon dioxide for the first time.
"Both planets are telling us something about the diversity of planet types that occur outside of our own solar system; in this case we are discovering we may not know them as well as we thought," said Knutson. "We'd really like to determine the size at which these planets transition from looking like mini-gas giants to something more like a water world or a rocky, scaled-up version of the Earth. Both of these observations are fundamentally trying to answer that question."
Original Story Source: Hubblesite News Release
{ width: 160, height: 160, defaultImage: '', layers: 'Artimg-Roger_Ivester_Crab_Nebula' }

It was in the early morning of September 12th, 1758, when French astronomer and comet hunter Charles Messier, by accident, located a very faint nebula in the constellation of Taurus. This object would later come to be known as the the "Crab Nebula," or Messier 1, the first of over 100 galaxies, nebulae, and star clusters recorded in a catalog to prevent other comet seekers from confusing them as comets.
We kick off 2014's monthly challenge with none other but Messier 1: the Crab Nebula, a supernova remnant from a star that exploded in A.D 1054. It was first observed by both Chinese and Arabic astronomers, and was visible to the naked-eye, even during the daytime, for weeks.
The Crab Nebula can be seen in a small telescope, and my first view came many years ago using a 60mm refractor. In recent times, I've enjoyed observing this object with my son and granddaughter, using her 76 mm (3-inch) Orion FunScope Dobsonian, from Las Vegas. It appeared as a faint elongated gray smudge, however, it was very surprising to be able to see the Crab at all from the severely light-polluted location.
When using my 10-inch reflector, from my moderately light polluted backyard, located in the foothills of western North Carolina, the Crab appears pretty bright, with a brighter more concentrated central region. The NW section is much more broad than the SE, which I call the tail. The nebula is elongated in a NW-SE orientation. On a good night, and using averted vision, it can be fairly easy to see the 'S' shape in the brighter sections, as described by Skiff & Luginbuhl in The Observing Handbook And Catalog Of Deep-Sky Objects. One of the more difficult features is seeing the faint notch on the SE edge which takes a bite out of the nebula. I've seen this only one time on a night of excellent seeing and transparency using the 10-inch.
There's a faint triangle of stars on the NNE edge, and several faint stars touching the nebula on the SSW. I find the best overall magnification for this object is around 100X, and an Orion SkyGlow filter seems to improve the contrast. When using a 14.5-inch reflector, there are several very faint stars which can be seen embedded within the nebula.
The following sketch was made with a No. 2 pencil and a blank 5 x 8 note card, and the colors were inverted using a scanner.
Many have observed all 110 Messier objects, using telescopes as small as three inches, and you can too. If you haven't observed the Messier Catalog, why not let 2014 be your year to see all 110 objects? It has always been my opinion that an observing goal can be a great motivator. I often refer to this as "observing with a purpose."
There's nothing quite so rewarding as having a detailed note, and if possible, a simple pencil sketch of all the deep-sky objects you observe. If you're fortunate enough to see and document the entire list, consider pursuing the Astronomical League Messier Certificate. Just go to the AL website and find out what's required to be eligible to join the thousands of other amateurs who've achieved this feat. Be sure to spend plenty of time with each and every object. With careful observing and patience, you may be surprised at the faint details which will begin to emerge. This should not be a hurried quest, but of one of patient solitude and contemplation. Let it be a fun project and enjoy every object, to the fullest. It just might put you on the path to more difficult objects, maybe even the Herschel's. The more serious you are with your observing, the more likely you'll continue for many years to come. Let your pursuit of the heavens become a lifelong endeavor, and you'll gain much joy and satisfaction as the years pass. The changing constellations will become good friends as the seasons come and go.
Of course, one of the most interesting parts of observing carefully and recording what you see is comparing your notes to others. No two observations are ever exactly the same. Here are a few observation notes about M1 from notable observers in various locations:
Sue French from New York: Although the Crab Nebula is quite challenging for novice observers, it can be spotted as a ghostly little smudge through 7 X 50 binoculars under semi-rural skies. A 130mm refractor at 37x showed an oval nebula that was fainter around the edges and narrower at one end. At 102x, the Crab's interior appeared mottled, and the edges looked frilly. An O-III nebula filter considerably dimmed most of the nebula, but with study, it unveiled vague traces of the filaments that are so prominent in photographs. At 164X, the nebula's interior was strongly patterned, and its edges were faint.
Maria Grusauskas of Orion, from California: Using a 127mm f/7.5 refractor, at very low power (23X), the Crab Nebula was a promising smudge of white in a relatively starless area, with no stars resolved within the nebula that I could see. To the southeast, it was anchored by the bright blue star Zeta, and a hook-shaped asterism of six stars. At higher power (56x), the Crab "body" began to be more apparent, shaped very much like the body of a Dungeness crab, with a star flanking each side of the greatest distance across, to the northeast and southwest. A brighter central region was apparent with averted vision. A week earlier, in an 18-inch telescope, observing M1 resolved definite suggestions of spindly legs and a heightened dimension of nebulosity (with a high contrast multi-band nebula filter).
The Crab was also just barely detectable in 10 X 70 binoculars as a faint smudge, but only with averted vision. Observed on a frosty 32� night at a dark site known as Deep Sky Ranch in Paicines, California.
Kevin Ritschel of Orion, from California: In a 127mm f/7.5 refractor, at (56x), M1 preceded a fairly bright field star to the southeast of the nebula. The nebula, I would say, was of medium brightness, but not uniform in texture. It had a brighter irregular core, and fainter extensions. The nebula was oval shaped. It was somewhat mottled, with hints of filamentary structure, but very subtle. This observation was made with the Crab Nebula near the meridian, and without the use of any filters.
In an Orion StarBlast 62mm telescope at (21x), it appeared as a rather faint smudge, about half the field away from Zeta, as, again, mostly even, but brighter in the central region, with an oval shape.
Using a 12-inch f/8 reflector, on the morning of December 13, 2013, at 149X, the Crab definitely had two components, a smooth 'S' shaped inner core and a slightly less bright outer shell that, while oval, was far more circular than the smooth inner core. At higher power, the Crab filled between 1/2 and 1/3 of the field of view. The outer shell was on the verge of resolving into filaments and would likely have done so with the aid of an O-III or UHC narrowband nebula filters. With a 33-inch f/5 Newtonian, and an O-lll filter, the filaments were obvious, even to inexperienced observers who had never seen them before.
Jaakko Saloranta from Finland: Using an 8-inch Orion DSE Telescope at 300X with a UHC narrowband filter: "Bright, NW-SE elongated diffuse little peanut. Slightly brighter in the middle with several 14th magnitude stars visible in the vicinity."
Fred Rayworth from Nevada: The Crab Nebula usually appeared as a fat 'S' shape, though when seeing was superb, it would fill in as a ragged oval shape. During those moments of superb seeing, I could pick out mild mottling and filaments within the core and along the edges. However, nights of great seeing were rare, so mostly it was just the fat 'S' shape. An O-III narrowband nebula filter made the nebula worse, almost blocking it out, as did the H-beta, which blocked it out completely. Years ago, I tried an LPR filter (SkyGlow) filter and it helped just a tad. The best view, by far, is unfiltered. Magnifications ranged from 70-220x with the best views at 102x. Most observations were made with either a home-built 16-inch f/6.4 reflector or a commercial 16-inch f/4.5.
Jay Thompson from Nevada: Using a 17-inch Newtonian and a magnification of 227x on an exceptionally clear and steady night, in Meadview, Arizona, I was able to discern filaments superimposed on the oblong nebula. The glow from the main body is fascinating since it arises from synchrotron radiation.
The following image was made by Dr. James Dire from Wildwood Pines Observatory in Earl, North Carolina, using an 8-inch f/7 reflector:
Take some time to observe M1 with us. Come back and leave your observation notes in a "Review" of this article, below!
{ width: 160, height: 160, defaultImage: '', layers: 'Artimg-Radio_Galaxy_Zoo' }

Do you enjoy using your tablet or laptop computer? Many folks nowadays are taking the Internet with them wherever they go, but did you know that you can contribute to citizen science at the same time? Let's try a hunt for black holes while you're carpooling, riding the bus or taking the train to work!
The first Zooniverse project, Galaxy Zoo, was started by astronomers Chris Lintott and Kevin Schawinski in 2006 when they were both at Oxford University. Now there is "Radio Galaxy Zoo" - a brand-new project which just launched and allows anyone with computing power and an Internet connection to become a cosmic explorer.
Just what is Radio Galaxy Zoo? It's a project to help astronomers discover supermassive black holes observed by the KG Jansky Very Large Array (NRAO) and the Australia Telescope Compact Array (CSIRO). It works by matching galaxy images with radio images taken by CSIRO, to work out if a galaxy has a supermassive black hole at its center or not.
"It takes about a minute to learn what to do," said CSIRO's Dr. Julie Banfield, an Australian coordinator of the international project.
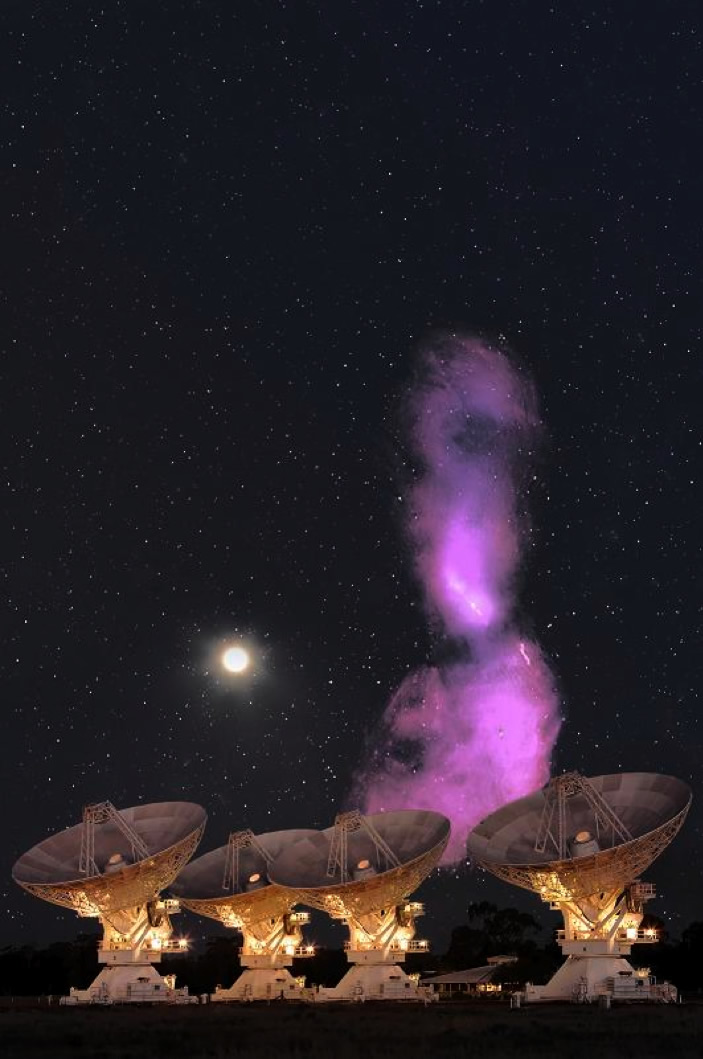
Centaurus A (purple): A giant galaxy with a supermassive black hole, typical of the galaxies in Radio Galaxy Zoo, super-imposed with CSIRO Image (radio) I Feain et al. (photo) S. Amy.
We know that almost all - if not all - galaxies have a black hole at their hearts. We also know that the larger the host galaxy is, the larger the black hole should be. These huge black holes have wide ranging effects on the galaxy in which they are contained. The supermassive variety can swallow up nearby materials and grow to billions of times the mass of the Sun! These monsters are known to produce incredible jets of material, which spew out at the speed of light. There are circumstances where these jets can't be observed in visible light, but can be detected in the radio end of the electromagnetic spectrum. Astronomers can use your help locating these jets and associating them to their host galaxies.
"To actually work with the images takes only a few seconds each - perhaps a couple of minutes for the really tough ones," says Dr. Banfield. "You just need match up a couple of pictures and look for what you think is the galaxy at their center."
Why do astronomers need your help in sifting through all this radio data? Imagine the hundreds of thousands of galaxies out there just waiting to reveal their secrets. Because not even light can escape a black hole, they cannot be directly observed, yet they have a huge impact on their immediate surroundings. There are many methods for detecting black holes in their neighborhoods, but the supermassive types are fairly easy. While optical and infrared light is usually blocked by copious amounts of dust and gas, the target of the project - those tell-tale jets - are readily apparent at radio wavelengths.
"There is a great deal of valuable information that can be obtained from the radio images of these jets, but we need to understand the host galaxy too," says the Radio Galaxy Zoo team. "For instance, observing the host galaxy allows us to determine its distance, which is critical to understanding how big and how luminous the black hole actually is."
Join up at Radio Galaxy Zoo and you'll be part of a community of almost a million people who work in the 'Zooniverse' - a set of citizen-science projects covering everything from galaxy shapes to cancer data and whale songs.
"Galaxy Zoo and the other projects have been producing real science, science that gets published," said CSIRO's Dr. Ivy Wong, who has also been working to set up Radio Galaxy Zoo. "Everyone, literally everyone, can now help to make discoveries."
Go ahead, team up! Instead of just aimlessly wandering around the Internet while waiting on an appointment, commuting, or site surfing for the fun of it, you could be contributing to a real science project and assisting astronomers in locating black holes!
{ width: 160, height: 160, defaultImage: '', layers: 'Artimg-WhatsInTheSky_2014_square' }

The year 2014 is filled with notable celestial events you won't want to miss. Mark them on your calendars and plan your star parties and observing nights around them.
Orion's 2014 Guide to the Sky begins with the most important dates to circle, followed by planetary and deep sky observing seasons, and finally, a detailed breakdown of sky events and Moon phases for each month. Follow Orion's Community on social media for up-to-date coverage on all of these events as the year unfolds.

Total Lunar Eclipse by Michael B. in Portland, Oregon, with Orion ED 80 80mm f/7.5 Apochromatic Refractor Telescope.
Most Important Dates to Circle in 2014:
March 20: Asteroid Occults Regulus - In the early morning hours, asteroid 163 Erigone has been predicted to obscure the bright star Regulus in Leo. Regulus will remain invisible for up to 12 seconds for those situated along the center of a 45-mile-wide path that extends from New York City to Oswego in New York and on up to Ontario, Canada. No telescopes or binoculars necessary to see the star flicker out.
April 14/15: Total Lunar Eclipse - Starting around 11p.m. on the night of April 14, watch the Earth's shadow cover the Moon in a total lunar eclipse. This is the first total lunar eclipse visible from North and South America in nearly 3.5 years. The Moon will be immersed in the Earth's shadow for 78 minutes, with a very good chance of turning a beautiful yet erie coppery red. On April 14, Mars will come within 57.4 million miles of Earth, the closest it's been since 2008. So while you're out watching the eclipse, make sure to train your telescopes on the fiery red planet, which will be as bright as Sirius! May 10: Astronomy Day - A human event, not an astronomical one, this is one of two days set aside to honor and celebrate the thrill of astronomy.
May 24: Meteor storm from Camelopardalis - Astronomers are forecasting that there may be a huge "storm" of meteors the night of May 24. If their predictions are correct, meteors may rip through the sky at a rate as high as 1000/hour! To best see this potentially historic event, plan to stay up most of the night and get away from city lights! Best views will be after the Moon has set. Stay tuned for updates on this potential spectacle, and plan on watching the skies for a day or two before and after, as these predictions may be a day or so off.
June 7: Moon & Mars Conjunction - The Moon and Mars will creep to within about two degrees (about 4 lunar diameters apart) on the night of June 7. Visible together from moonrise to moonset around 2 a.m. August 10: Supermoon - The Full Moon will come its closest to Earth all year on this date - 221,765 miles, making it the so-called "Supermoon" of 2014. Photographers, be sure to submit your images of the rising Supermoon to Orion's Facebook page. Those who live on the coast, expect a wide range in ocean tides, from extremely low to extremely high. August 12-13: Perseids Meteor Shower - The Perseids almost always delight, but unfortunately the Moon will interfere with the shower this year.
August 18: Venus and Jupiter Conjunction - The two planets will come within only � degree from each other in the morning sky. M44 is only a degree away as well. This will be a spectacular conjunction to observe a few mornings in a row as the planets move closer to each other.
October 4: Astronomy Day - A human event, not an astronomical one, this is the second day of the year set aside to honor and embrace the love of astronomy. A wonderful night for public outreach!
October 8: Another Total Lunar Eclipse - Visible to the western half of North America, Hawaii, the Pacific ocean and as far east as the eastern half of Australia, the Moon will pass to the north of the center of Earth's shadow, with one hour of totality. Binoculars or a telescope will reveal a 6 magnitude greenish point of light near the Moon: the planet Uranus. For those viewing in northern Alaska and northern Canada, the moon will occult Uranus.
October 19th: Comet Flyby for Mars - Comet C/2013 A1 (Siding Spring) has a 1 in 8,000 chance of smashing into the surface of Mars, around 11:45 AM PDT. More than likely, it will come within 73,000 miles from the red planet, with a chance of its coma enveloping mars, and a spectacular shower of meteors as seen from the Martian surface.
October 23rd: Partial Solar Eclipse - A partial solar eclipse will be visible at sunrise in far eastern Russia, and most of North America before sunset. While the Moon's shadow will miss Earth, meaning there will be no totality, the Moon will be obscuring a rather large bite of the Sun just before sunset, at its greatest point of partiality. This eclipse begins at 19:37:30 UT, and ends at 23:51:36 UT.
Planetary Observing Seasons:
")
Jupiter - On Sunday, January 5, Jupiter is at opposition; directly opposite the sun in the sky. It will rise at sunset and be high enough above the eastern horizon 2-3 hours after sunset to do some serious observing and imaging. This is the "start" of the prime observing season for many amateurs that will run till April or early May. Jupiter is one of the best targets in the sky for monitoring detail and changes on a daily basis - so get out your high power eyepieces and eyepiece filters if you want to look and if you have a telescope with a motor drive (will track the stars or a planet) this is a fun first planetary target for beginning imagers.

Mars, by Orion Staff.
Mars - Mars will be in opposition to the sun on April 8, showing a disk with an apparent diameter of 15 arc seconds (about half the size of Jupiter). Planetary cameras can capture usable information when the target is about 5 arc seconds in size or larger, so Mars is a definite target this year. The date of opposition (or close to it) is usually when a planet is its largest apparent diameter. So grab your equipment and grab a look at the Red Planet! Mars will be in a good position before this date if you what to stay up later in the evening; and in a good position to observe until about July.

Saturn - Saturn reaches opposition on May 10th. It will be in a good position to observe during the evening until about early September - basically most warm summer evenings! While Saturn is likely one of the most memorable sights in the sky, the planet's disk is not as detailed as Jupiter's (but the spectacular ring system makes up for that!). Like the other planets above, the bigger the telescope you have, the more likely you will have memorable views of the planets when the air is stable - but all of Orion's telescopes will show Saturn's rings.
Deep Sky Observing Seasons:
Galaxy Season - During spring evenings, the Earth faces away from the obscuring dust storms lurking in the Milky Way, and, luckily, it just so happens to face a few relatively nearby clusters of galaxies. So springtime, beginning in March, promises a load of interesting galaxies to explore, especially in the rich "Virgo Cluster of Galaxies."
From a dark sky site even Orion's StarBlast 62 can find dozens of springtime galaxies, but you'll probably want a 6-inch telescope or larger to really see the differences among the many galaxies you can capture in the springtime sky. And while low powers are great for sweeping up galaxies while star-hopping, don't be afraid to try medium or even high powers to see faint companion galaxies and to tease out some of the less obvious detail.
While there are wonderful galaxies to explore in nearly every constellation, they are concentrated in the triangle of the sky bound by Leo, in the west, Ursa Major in the North and Virgo to the southeast, the happy-hunting ground for galaxy enthusiasts. Galaxy season stretches for evening observers (as opposed to observers who get up after Midnight) from March through June.

Milky Way Season - Few sights in the nighttime sky can rival the spectacle of the Summer Milky Way from a dark sky location! When the Moon is absent and you are away from artificial light sources, the Milky Way will spread from the southern horizon arching overhead toward the north from July to October. Not only is our galactic arm a feast for the naked eye, its a treasure-filled delight to scan with binoculars or a wide-field ("Rich-field") telescope! The haze of the Milky Way is caused by the clumping of millions of individual stars, star clusters and gas and dust clouds.

The Jewels of Fall - Autumn brings crisp, clear nights and some of the brightest galaxies and star clusters in the sky, most notably: The Andromeda Galaxy (M31), the Pinwheel galaxy (M33), The Pleiades (M45) and the Double Cluster in Perseus. That's not all! Binocular and telescope users will find a veritable feast of telescopic targets that will delight the stargazer in everyone. The sparkling show jewels of in the fall sky is prominent during mid-evenings from October through January. The Season of the Hunter - Few sights are as dramatic as the path across the sky of one of the most recognizable constellations in the sky - Orion. But if you don't use optical aid you are missing the best part. Orion is chock full of amazing visual telescopic treats ranging from the Great Nebula in Orion to the planetary nebula NGC 2022. And to the east of Orion lurks the winter Milky Way: while far fainter than its summer version, it is rich in star clusters and emission nebulae.

Andromeda, M31. By Orion Staff.
Month-By-Month Sky Events of 2014:
January - Take advantage of the New Moon on January 1st and start the New Year with great views of galaxies, star clusters, and the winter Milky Way. Gigantic Jupiter will be a great planetary target for telescopes all month long, but the very best views of Jupiter will be during the evening of January 5th when the gas giant will be at opposition. Bundle up and keep your eyes peeled on the evening of January 2nd and into the early morning hours of January 3rd to catch the Quadrantids meteor shower! Look for meteors appearing to radiate from the constellation Bo�tes. New Moons: 1/1 & 1/30. Full Moon: 1/16.
February - The second month of 2014 continues to offer great views of the winter Milky Way and will also feature a handful of interesting conjunctions to enjoy. On February 11th, the Moon and Jupiter will appear about 5� away from one another, and on February 19th Mars will appear about 3.1� away from the Moon. Late February features two especially close conjunctions: look for Saturn and the Moon to appear very close to one another on February 21st, and on the 26th, look for a close conjunction between the Moon and bright planet Venus. There is no New Moon in February. Full Moon: 2/14. That's amore!
March - Some of the best galaxies to see are spread across the night sky from Ursa Major to Virgo in March. Take advantage of the New Moon on March 1 and set sail for these island universes with a big telescope! Mars and the Moon will share the skies on March 18th during a conjunction. A couple days later you can enjoy a very close conjunction between the Moon and ringed Saturn on the evening of March 20th, which is also the March Equinox - the Sun will shine directly on the equator and there will be nearly equal amounts of day and night throughout the world. New Moons: 3/1 & 3/30. Full Moon: 3/16.
April - Get outside during the evening of April 14th/15th to enjoy a total lunar eclipse! The Earth's shadow will darken the nearly Full Moon from approximately 11pm on the night of April 14 until about 12:30 a.m. PST April 15 during this exciting event. Be sure to check out Mars for the best views of the year when it reaches opposition on April 8th. Don't miss the Lyrids meteor shower which peaks during April 22nd and 23rd. Scan the skies near the constellation Lyra after midnight on the 22nd for your best chance to see meteors. Full Moon: 4/15. New Moon: 4/29.
May - Grab a comfortable blanket or lounge chair and catch the Eta Aquarids meteor shower which peaks on the evening of May 5th. Meteors will appear to radiate from the constellation Aquarius. The best night of the year to observe Saturn and its spectacular rings is the evening of May 10th, when the planet reaches its closest point to Earth in its orbit. Four days later on May 14th, the Moon and Saturn treat us to a very close conjunction as they appear to pass within about a half degree of each other. Full Moon: 5/14. New Moon: 5/28.
June - Summer stargazing season kicks off in June with great opportunities to see a host of globular and open star clusters, emission nebulas, and more. Grab a pair of big binoculars or a wide-field telescope and scan the summer Milky Way for great views. The night of June 7th will see a conjunction between the Moon and Mars, and a few days later Saturn and the Moon will appear very close to one another for a pleasing sight in binoculars or unaided eyes. Full Moon: 6/13. New Moon: 6/27.
July - With constellation Hercules almost directly overhead and Scorpius to the south, there's plenty to explore in July skies as summer continues. On July 6th, grab a telescope or pair of big binoculars to see the Moon positioned close to Mars in the sky. Just a couple days later on July 8th, you can enjoy a close pairing in the sky between the Moon and Saturn. July winds down with the Delta Aquarids meteor shower. For the best chance to see meteors, get outside the night of July 28th and look towards the constellation Aquarius. The Delta Aquarids is an average shower that can produce up to 20 meteors per hour. It is produced by debris left behind by comets Marsden and Kracht. Full Moon: 7/12. New Moon: 7/26.
August - Use 50mm or larger binoculars and/or a telescope with a low-power eyepiece to explore the summer Milky Way in August for nice views of various star clusters, galaxies, and cloudy nebulas. Get outside after dark on August 13th to see meteors from the Perseids shower radiating from the constellation Perseus, but keep in mind that the bright Moon will make spotting meteors a bit of a challenge this year. On August 18th, Venus, Jupiter, and the Beehive Cluster form a conjunction in the sky for a spectacular sight. Neptune is at opposition on August 29. The blue giant planet will be at its closest approach to our planet, and its face will be fully illuminated by the Sun. This is the best time to view and photograph Neptune! Due to its extreme distance from Earth, it will only appear as a tiny blue dot in all but the most powerful telescopes. Closer to home, Saturn and the Moon treat us to another close conjunction on the night of August 28th. Full Moon: 8/10. (Closest Full Moon of 2014.) New Moon: 8/25.
September - The fall stargazing season begins with wonderfully placed spiral galaxies M31 (Andromeda Galaxy), M33 (Triangulum Galaxy), and M74 in Pisces. While binoculars and small telescopes can find these objects in a dark sky, use a big telescope to really "see" these glittering island universes. The September equinox occurs at 2:29 UTC on the 23rd. The Sun will shine directly on the equator and there will be nearly equal amounts of day and night throughout the world. This is also the first day of fall in the northern hemisphere, and spring in the southern hemisphere. Full Moon: 9/9. New Moon: 9/29.
October - Stargazers are in for a spooky treat during the early morning hours of October 8th when a total lunar eclipse darkens the Moon's surface; this eclipse will best be seen in the western U.S. and near sunrise on the East Coast. If you stay up late, you can enjoy nightly views of Jupiter in October and see its four brightest moons (Io, Ganymede, Europa and Callisto) change position each night. See the Orionids meteor shower on the night of October 21st as meteors appear to radiate from our namesake constellation Orion. Many locations will enjoy a partial solar eclipse on October 23rd. Full Moon: 10/8. New Moon: 10/23.
November - Bundle up for bright winter skies! See our namesake constellation Orion arch its way across the sky along with lots of bright star clusters. Get outside on the evening of November 18th to see the Leonids meteor shower as meteors appear to radiate from the constellation Leo. Full Moon: 11/6. New Moon: 11/22.
December - Don't miss the Geminids meteor shower which peaks on December 13th. Look for meteors to emanate from the constellation Gemini and the surrounding area. On December 19th, bundle up to check out a nice conjunction between Saturn and the Moon. The solstice occurs on the 21st at 23:03 UTC. The South Pole of the Earth will be tilted toward the Sun, which will have reached its southernmost position in the sky and will be directly over the Tropic of Capricorn at 23.44 degrees south latitude. This is the first day of winter in the northern hemisphere, and first day of summer in the southern hemisphere. Full Moon: 12/6. New Moon: 12/22.
Follow Orion on Facebook, Twitter & Google Plus, or check our Community page for up-to-date coverage on all of these events as the year unfolds.
{ width: 160, height: 160, defaultImage: '', layers: 'Artimg-WhatsInTheSky_01-14_square' }

Make a New Year's resolution to stargaze in 2014! January kicks off the New Year with wonderful sights for backyard astronomers to enjoy with friends and family. Don't forget to bundle up and stay warm on clear evenings as you explore the sparkling night sky. Here are a few of our top picks for January stargazers:
Jupiter at Opposition - On January 5th Jupiter will be at opposition from the Sun, which means it is directly opposite from the Sun in the sky and will rise in the east as the Sun sets. Get ready to view and image the largest planet in the solar system! Any telescope will show the 4 Galilean Moons and the major cloud bands on a clear night, but you'll need about a 90mm diameter or larger telescope for serious viewing. Bigger scopes show more detail during periods of steady skies and good "seeing". The Orion Jupiter Observation Eyepiece Filter makes the Great Red Spot and the major equatorial cloud bands easier to see. If you have a telescope with a motor drive system, Orion has options starting at less than $100 to image the mighty gas giant planet - see our StarShoot USB Eyepiece Camera II or the versatile Orion StarShoot All-In-One Astrophotography Camera that can image everything from the Jupiter to entire constellations.
Meteor Madness - January 2 &3 should be the peak of the Quadrantids meteor shower radiating from the constellation Bo�tes. The Moon's phase is favorable for viewing meteors after midnight. You don't need a telescope to enjoy this show, just a clear, dark sky (which is priceless). If you want to image this spectacle, use the Orion StarShoot All-In-One Astrophotography Camera with the optional All-Sky Solution mounted on a tripod to capture time-lapse images of the meteor trails!
Two New Moons - The Moon phase will be new on both January 1st and January 30th, so break out your deep space gear and get ready to tackle some deep sky objects during the weekends of January 4th & 5th and February 1st and 2nd. The last weekend in December will also have lots of dark skies without moonlight to seek out "faint fuzzies" of deep space.
Orion on the Meridian - Our namesake constellation will pass the meridian about 10PM on January 15 - so objects in that constellation are the highest in the sky for best viewing. Some of our favorite targets in or near Orion are:
- M42, The Great Nebula in Orion - Visible as the middle star of Orion's sword, this emission nebula looks amazing in everything from binoculars to the XX16g! Can you see the trapezium, the 4-star system at the center? Even viewers from moderate light- polluted areas can get a good sense of the glory of this object if you use an Orion UltraBlock or Oxygen-III filter.
- M78 - Another, much fainter, emission nebula M78 is located just left and above the left- most star in the Orion's belt. Again, an Oxygen-III filter can help.
- NGC 2174/2175 - A large emission patch and star cluster, this complex is located near the top of Orion's raised "hand". Under dark and clear skies this can be seen in larger binoculars such as Orion's 15x70 or 20x80 Astronomy Binoculars.

Adam Block/NOAO/AURA/NSF
Hind's Crimson Star - Just South of Orion is the constellation Lepus, the Hare. In Lepus you can catch a glimpse of the rare winter globular cluster M79, as well as R Leporius - a well known variable star that varies between magnitude +5.5 (just visible to the naked eye) to +11.7 with a period of about 427 days. What's interesting about this star is that because it is a "carbon star" it is very red; when it is at its brightest, the red color is unmistakable.
January Challenge Object from Orion - Just west of Rigel, the bright blue/white star that marks the western "knee" of Orion lies the Witch Head Nebula (also called IC 2118), in the neighboring constellation Eridanus. The Witch-Head is a reflection nebula that shines from reflected light off of Rigel, like the reflection nebula in the Pleiades, M45. You don't need a big telescope; a wide field of view, low power and a dark sky are needed to see this challenging nebula - we've seen it from Deep Sky Ranch in California with a 110mm refractor at low power (Hint: Don't use filters). Can you see it? Let us know on Facebook!

Rigel and the Witch Head Nebula - Photo Credit: NASA/STScI Digitized Sky Survey/Noel Carboni
All objects described above can easily be seen with the suggested equipment from a dark sky site, a viewing location some distance away from city lights where light pollution and when bright moonlight does not overpower the stars. All objects have been verified by actual observations by Orion Telescopes & Binoculars Staff at Fremont Peak State Park, and/or Deep Sky Ranch, 60 miles and 90 miles respectively from San Jose International Airport, San Jose, CA.
{ width: 160, height: 160, defaultImage: '', layers: 'Artimg-NASA_RS_Puppis' }

Only the Hubble Space Telescope could deliver a "card-worthy" image of a distant star. In this case it's a Cepheid variable cataloged as RS Puppis, a star 200 times larger than our Sun and ten times more massive. As the Hubble watched over a five week span, this superstar grew brighter and then dimmed as it pulsated and created the illusion of a festive holiday wreath adorned with sparking lights. These stellar heartbeats are breathtaking examples of a phenomenon known as a light echo, where the light generated from the star plays across the nebula surrounding it.
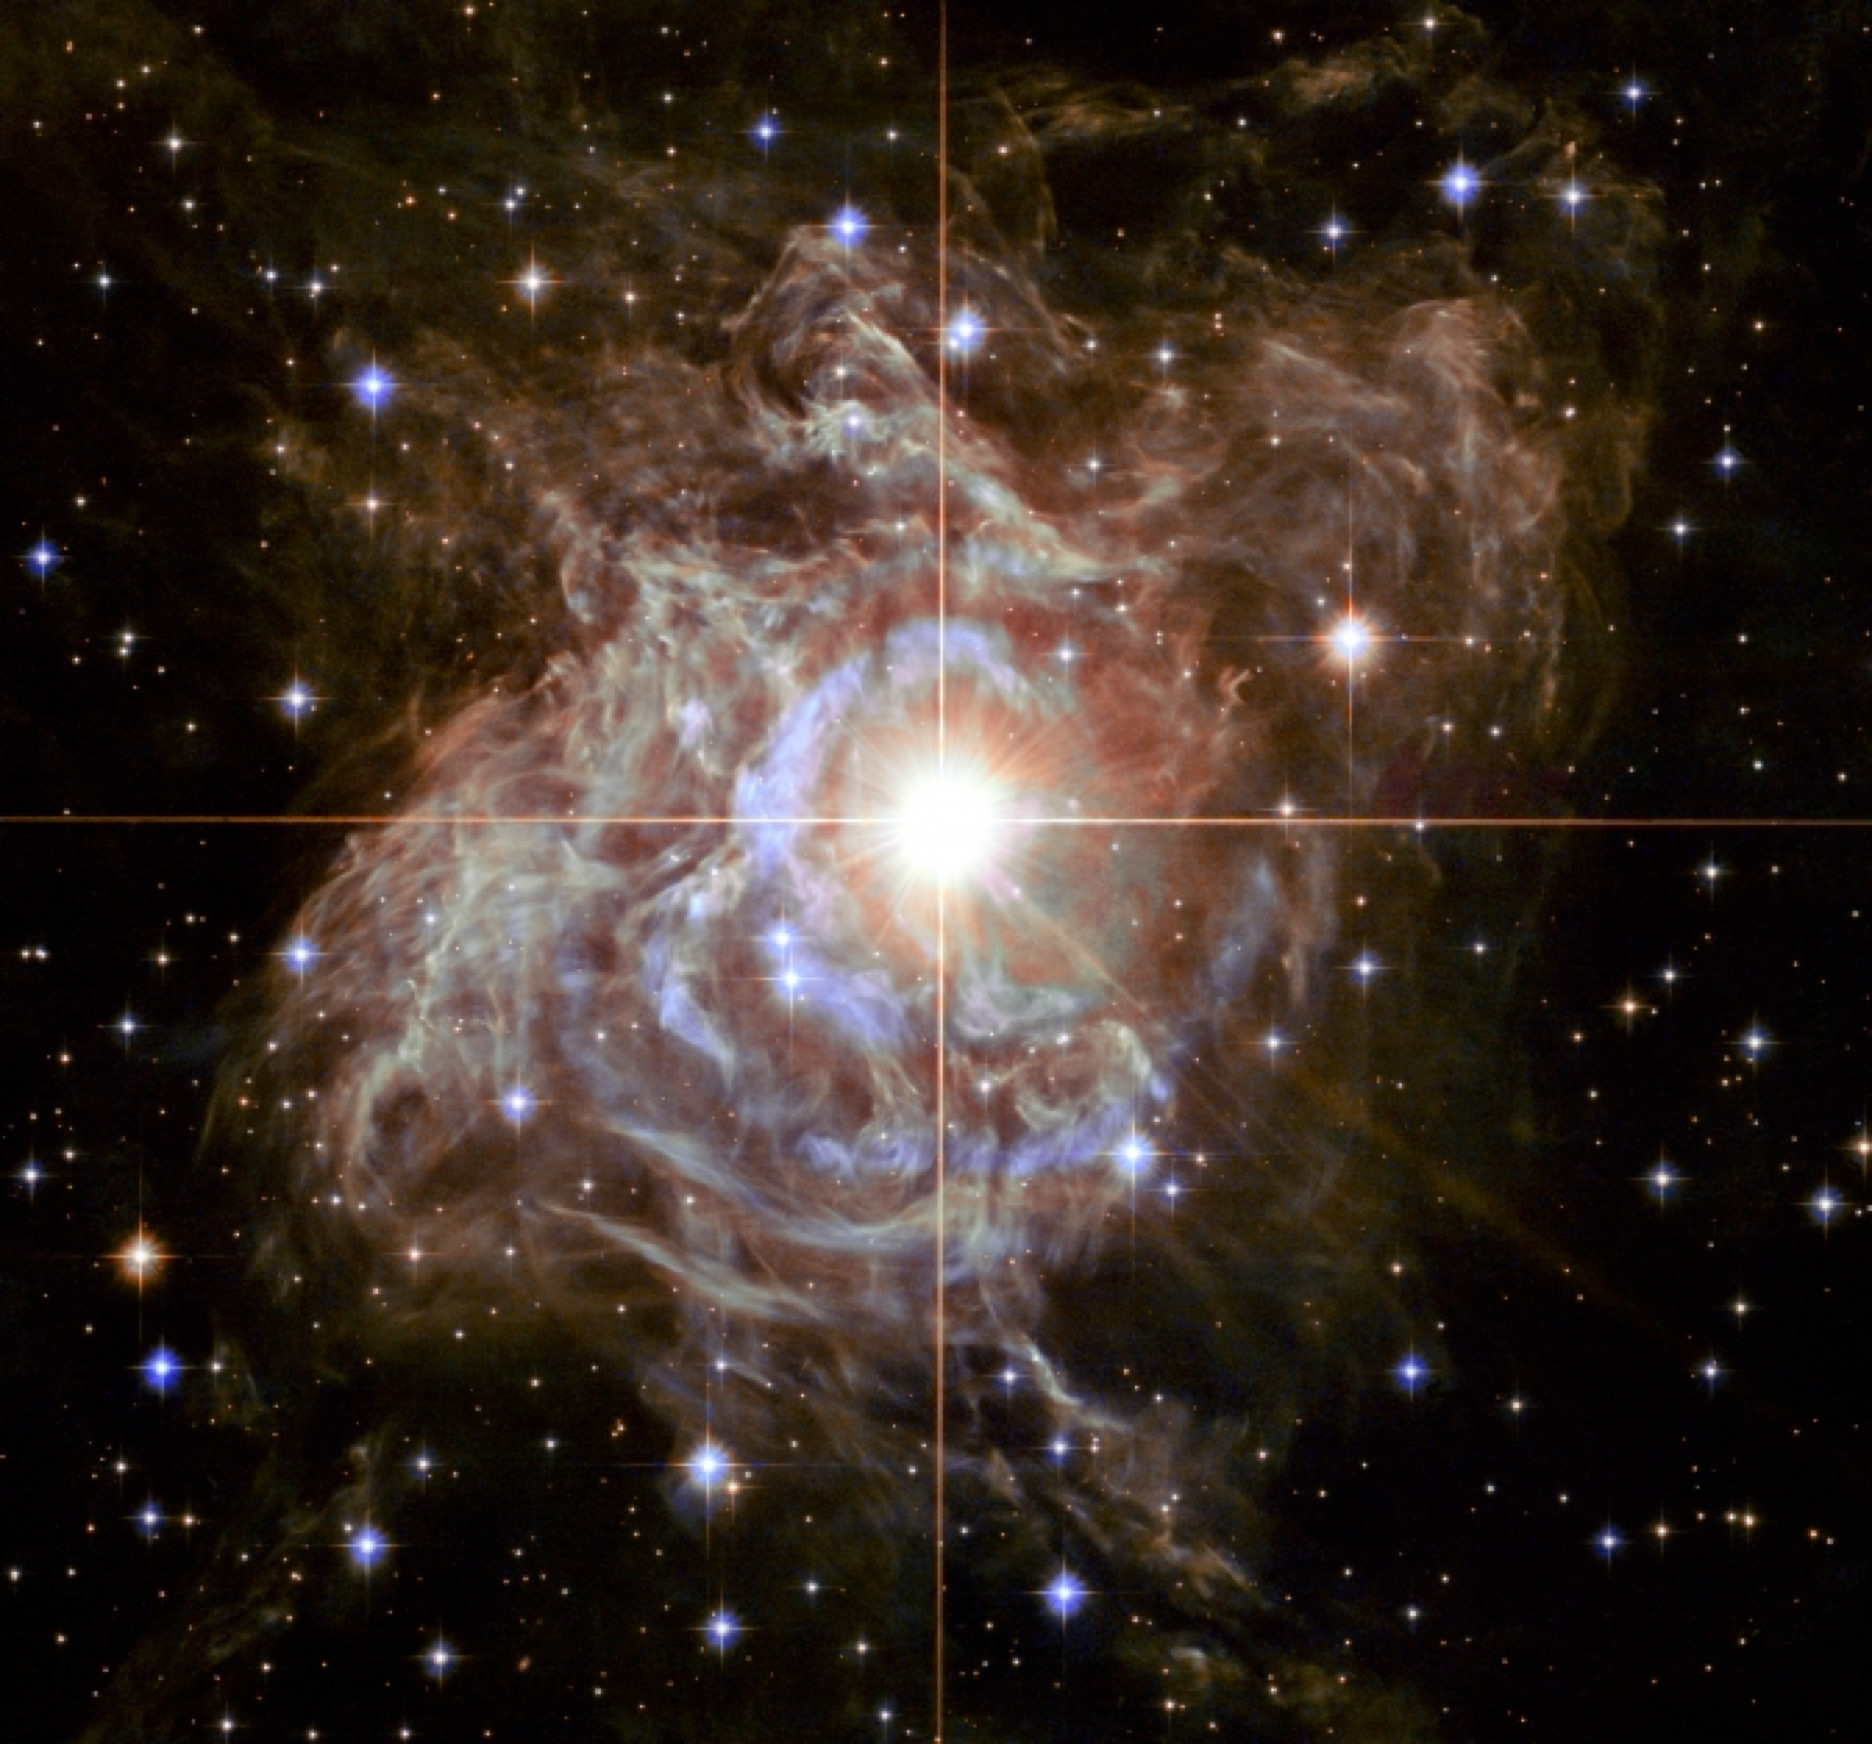
NASA/ESA/Hubble Heritage (STScI/AURA)-Hubble/Europe Collab.
RS Puppis is an unusual star. There are very few Cepheid variables which are encased in gaseous clouds of dust. However, its environment allows for observations of light echoes to be captured with immense clarity. As the star intensifies and expands, we can record the light after it is reflected from edge to edge of its dusty envelope, thus capturing the illusion of the gases moving outward. Since this reflected light must travel a greater distance, it arrives at our observation point slightly later than the light from the star itself. To understand that, think of the sound from a single car horn bouncing off tall buildings down a quiet street. This causes an audible echo and light can sometimes react in the same fashion. It's no little candle either: RS is 15,000 times more luminous than the Sun!
RS Puppis is well known to astronomers. Just five years ago they utilized the light echo around it to measure its distance, giving us the most accurate measurement of Cepheid variable so far known. The distance to RS Puppis has been narrowed down to 6,500 light-years (with a margin of error of only one percent). Even though the cloud around RS seems small, it's incredibly large. Even at a distance of around 6,500 light-years away from us, the light echoes can be captured in motion as they cross the nebula!
Video: Time-lapse of observations from NASA/ESA Hubble Space Telescope. Credit: NASA, ESA, G. Bacon (STScl), the Hubble Heritage Team (STScl/AURA) - ESA/Hubble Collaboration, and H. Bond (STScl and Pennsylvania State University.)
"This effect can make it appear that this propagation of light is happening at speeds greater than the speed of light," says the Hubble Team. "But this is just an illusion."
For the most part, stars stay pretty stable most of their lives, consuming the fuel at their cores quietly as they evolve. However, in some stars when the hydrogen is gone, they may turn into very different creatures - like pulsating stars. As they become unstable, brightening and dimming, expanding and contracting over a period of hours, days or weeks, they leave us with some very unusual findings. In the case of RS Puppis, it's finding incredible beauty and enjoying it during an incredibly beautiful time of year!
Happy holidays!
Original Story Source: NASA/Goddard News Release
About Tammy Plotner - Tammy is a professional astronomy author, President Emeritus of Warren Rupp Observatory and retired Astronomical League Executive Secretary. She's received a vast number of astronomy achievement and observing awards, including the Great Lakes Astronomy Achievement Award, RG Wright Service Award and the first woman astronomer to achieve Comet Hunter's Gold Status.
{ width: 160, height: 160, defaultImage: '', layers: 'Artimg-rey340' }

When introducing a child to astronomy, having a well written, informative, and imagination-inspiring book (or two) on hand can go a long way in the educational process. Astronomy books make for great reading on cloudy or subzero nights, and can serve as invaluable reference on observing nights with your family.
Orion's Staff has put together a top ten list of favorite titles that are great for children just starting to learn about the sky. But we've also thrown several titles with parents in mind.
Here are our favorite books to have on hand while learning the night sky.

Stars, personified. By Meredith Hamilton, in the book A Child's Introduction to the Night Sky.
1. Randy Riley's Big Hit, written and Illustrated by Chris Van Dusen.

Get young children thinking about the night sky with this adventurous story about Riley and his work to deflect an asteroid back out into Space.
Age Level: Picture book, great for young kids up to 8 years of age.
2. A Child's Introduction to the Night Sky, written by Michael Driscoll, illustrated by Meredith Hamilton.

Children will love the beautiful illustrations and wealth of information about the night sky this book has to offer in its 92 pages of colorful, fact-packed pages. The best part about this book, though, is that parents will indefinitely learn something too. A recipient of the Parent's Choice Award, A Child's Introduction of the Night Sky comes with a star wheel and glow in the dark stickers of the solar system.
Age Level: Young children & elementary school students.
3. Find the Constellations by H.A. Rey (Curious George author)
")
A classic children's book with wonderful illustrations that will nurture their curiosity about the night sky.
Age Level: 8 - 12
4. Discover the Stars, by former long-time editor of Astronomy Magazine, by Richard Berry.

A good beginner book with an observing orientation, with thorough coverage of the sky, and charts on every page to accompany the text.
Age Level: Aimed more at beginning adults than kids.
5. The Backyard Astronomer's Guide, by Terence Dickinson and Alan Dyer.

A complete guide to getting started in amateur astronomy, from the equipment you'll need, to the celestial panorama and advanced tips.
Age Level: Teens & up.

This excellent reference book was designed for use with Dobsonian telescopes, and is one of the most popular observing books of all time. One object per spread layout makes for clear and concise learning. An excellent reference, geared more towards adults or parents than children.
Age Level: Beginning adults and their children.
7. The Stars: A New Way to See Them by H.A. Rey (Curious George author)
")
Not just for children! The Stars is another classic to add to your collection, and a fantastic beginning astronomer's guide to the night sky. It's filled with star charts, constellation guides and details about observing seasons and the movement of objects in the sky.
Age Level: 12 and up.
8. Discover: Astronomy (Usborne Discovery) by Rachel Firth
 by Rachel Firth")
Practical advice about how to find stars, constellations, planets, features of the Moon, this introductory book is packed with interesting facts and is a great one for the classroom. It's a perfect companion to a pair of binoculars.
Age Level: 7 and up
9. NightWatch: A Practical Guide to Viewing the Universe by Terence Dickinson

Written by the renowned Terence Dickinson, this was the world's top selling stargazing guide for the past twenty years, complete with star charts for both the northern and southern hemispheres. The fourth edition boasts a complete update of the equipment section, with guides to computerized telescopes, as well as an enlarged and updated photography section.
Age Level: Young adults to Adult.
10. Observer's Handbook 2020, by The Royal Astronomical Society of Canada. Edited by James S. Edgar

Compiled by an experienced staff of more than 60 professional astronomers of the Royal Astronomical Society of Canada, the Observer's Handbook of 2020 is THE reference book for any serious observer. It will tell you exactly what will be in the sky and when, from sunrise and sunset times to lunar phases, eclipses, solar transits, occultation's, and much, much more. 352 pages of meticulously edited and updated sky events.
Age Level: Adults, serious observers, and parents of beginners who want to help teach.
{ width: 160, height: 160, defaultImage: '', layers: 'Artimg-NASA_Juno_Jupiter' }

For years, Ham radio operators around the world have been aware that they could send a signal into space. Such projects reach as far back as 1961 when the satellite OSCAR I (Orbiting Satellite Carrying Amateur Radio) built by amateurs on the U.S. west coast was launched. It held a simple radio beacon and worked successfully for 22 days and 570 amateurs in 28 countries picked up its signal.
Now, thousands of amateur radio heads were able to say "Hi" to NASA's Juno spacecraft when it made its recent slingshot around Earth and headed toward Jupiter.
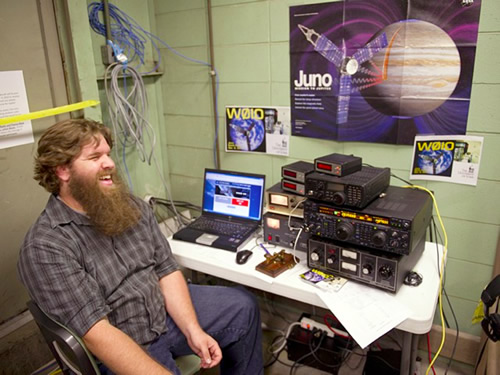
Tony Rogers, the president of the University of Iowa ham radio club, mans the equipment used to send a message to the Juno spacecraft in October. The simple message "Hi" was sent repeatedly by ham radio operators around the world. Photos by Tim Schoon.
According to Donald Kirchner, University of Iowa research engineer on Juno and one of the coordinators of the all-volunteer "Say Hi to Juno" project, all licensed amateur radio operators were invited to participate by visiting a website and following posted instructions. "The idea was to coordinate the efforts of amateur radio operators all over the world, and send a message in Morse code that could be received by the University of Iowa-designed-and-built instrument on the Juno spacecraft," he says. "We know that over a thousand participated, and probably many more than that."
Although the greetings were sent to the spacecraft, no replies were sent back. What's more, Juno didn't decode the message itself. After receiving the October 9 signal from amateur radio operators, the Juno team then surveyed the Waves instrument data. They found what they were looking for: The message sent from Earth was visible early in the fly-by when Juno was still over 37,000 kilometers, or about 23,000 miles, away. According to Kirchner, earlier space missions were able to detect shortwave radio transmissions as they passed Earth, such as Galileo on its way to Jupiter and Cassini as it sailed toward Saturn. Even though these messages were received, it wasn't possible to decode the transmissions from the data.
According to Bill Kurth, UI research scientist and lead investigator for the Waves instrument: "We believe this was the first intelligent information to be transmitted to a passing interplanetary space instrument, as simple as the message may seem," he says. "This was a way to involve a large number of people -- those not usually associated with Juno -- in a small portion of the mission. This raises awareness, and we've already heard from some that they'll be motivated to follow the Juno mission through its science phase at Jupiter."
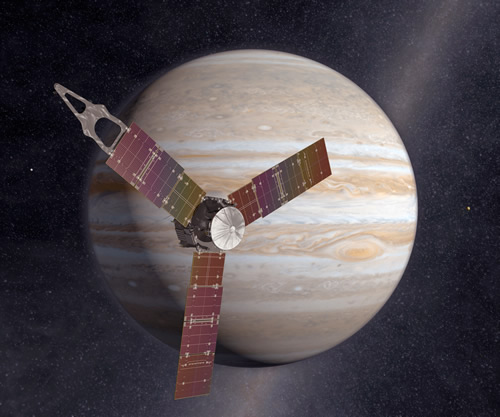
Artist depiction of Juno passing in front of Jupiter. Credit: NASA/ JPL-Caltech
Just where did the "Say Hi" ideas come from? Kirchner says the project first started when then public outreach staff at NASA's Jet Propulsion Laboratory in Pasadena, California became curious about the UI receiver. Would it be possible for it to detect a voice message? Even though this idea wouldn't work, Kurth and Kirchner brainstormed that a slow Morse code transmission just might fulfill the requirements.
According to the news release, Kirchner is also an amateur radio operator and took the lead in designing the project. His routine ham radio activities include being an assistant emergency coordinator with the Johnson County Amateur Radio Emergency Service, which works closely with the Johnson County Emergency Management Agency to provide backup and auxiliary communications. To facilitate the message to the Juno spacecraft, he turned towards the students, in particular, the UI Amateur Radio Club. The group then designed a temporary station on the roof of Van Allen Hall. Operating for a few days up to the flyby, he and other club members engaged hundreds of stations in 40 states and 17 countries to raise awareness of the project.
The "Say Hi" project was made possible by the fact that Juno passed within 350 miles of the Earth's surface on October 9, 2013, in a maneuver to gain momentum for its July 2016 encounter with Jupiter. If all goes well, Juno will orbit the giant planet 33 times. Plans for the mission include flying directly above Jupiter's poles and encountering both its northern and southern aurora regions to investigate the electrical current systems that cause them. What an amazing greeting that will be!
Original Story Source: University of Iowa News Release
{ width: 160, height: 160, defaultImage: '', layers: 'Artimg-Pleiades_2013' }

In winter, even just a casual glance at the sky will register the Pleiades star cluster. For northern hemisphere observers, the cluster is like winter's beauty mark, arriving with the darkening months and sitting high in the constellation Taurus, preceding the bright red star Aldebaran across the sky. It is easy to find, and punctuates the end of a beautiful sweep of stars beginning in Perseus with first magnitude Mirfak, along the eastern leg of the constellation.
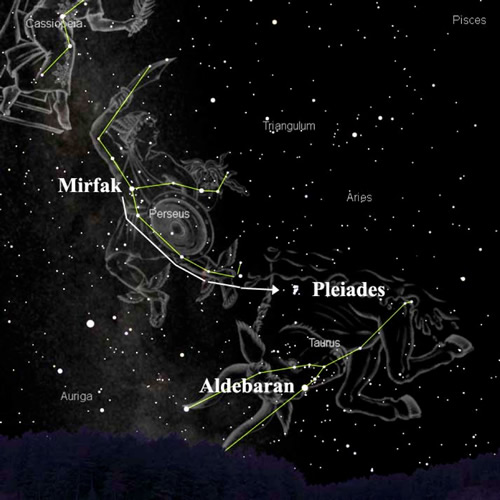
The Pleiades rises in the east.
This eye-catching cluster is quite young by astronomical standards, having emerged from the Merope Nebula within the last 100 million years, and some estimate it is as young as 20 million years, meaning it did not shine in the skies when the dinosaurs roamed the Earth. The cluster is our close neighbor, about 380 light years distant in our local arm of the Milky Way galaxy, and has about an 8 light year diameter. For perspective, only Alpha Centauri and Sirius are bright stars within 8 light years of Earth.
As Walter Scott Houston said of the Pleiades, "Even on the coldest of winter nights, when time spent at the telescope is better measured in minutes than hours, it would be a very un-amateur act not to look in on the Pleiades."
The cluster makes an excellent target for binoculars or a wide-field telescope, but require nearly two degrees to see all members in one field of view. The nebulosity is fleeting, and can be faintly glimpsed under excellent conditions, primarily around the star for which the nebula is named, Merope (the bottom star in the image below). In Deep Sky Wonders, Walter Scott Houston wrote of this fleeting nebulosity, saying: "On an ordinary night, there are usually a few wisps of nebulosity seen around the Pleiad Merope. But on really exceptional nights (or more likely, half hours), the glow swells out to encompass the entire cluster in a big cocoon."
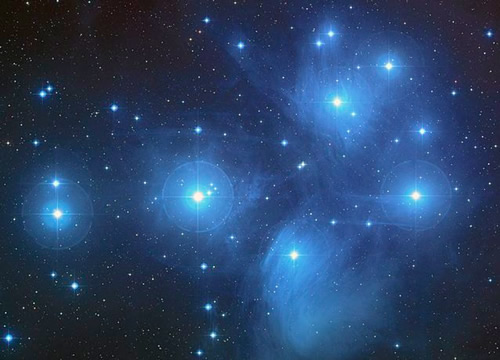
Charles Messier catalogued the Pleiades as Messier 45, or M45, but he was not the first to notice the Pleiades. The cluster goes by many names, and its fame crosses many cultures. Ancient Greeks called it The Seven Sisters and the Japanese call it "Subaru" - you can see it as the logo of the car company. Ancient Persians used "Soraya" - which was also the name of the former Iranian empress. The British and Germans called it the Chick with Hens. Many people today see it, and mistake it for the Little Dipper. Perhaps we should refer to it as The Littlest Dipper? There are many variations, but the cluster is part of human records reaching as far back as Babylonia. It was mentioned in Homer's Iliad and Odyssey, referenced three times in the Bible, shows up in the Quran and in ancient Hindu mythology as well. This may be history's most famous star cluster!
Bright Members of the Pleiades in the Merope Nebula.
On average, the naked eye sees the six brightest stars of the cluster. I've read reports of people counting up to fourteen members, naked-eye. My best is nine. The above chart shows the brightest members and magnitudes. How many can you see? Make a sketch then come back and compare it to the chart.
Despite the number of stars you're able to see, remember this: the cluster is actually comprised of over 1,000 confirmed members with a "tidal radius" of around 43 light years and total mass of around 800 suns. That's a big group of stars!
The Pleiades is an open cluster. Open clusters are comprised of young star systems. There are thousands of examples of these throughout our own Milky Way galaxy. They tend to occur in the spiral arms of galaxies, as that's where star formation is predominant.
In your pair of binoculars or telescope, you can see hundreds of open clusters, varying greatly in size, shape, density and brightness. Some, like the Pleiades, do not require anything other than your eyes and interest to see them. The Hyades in Taurus is an example of an older dispersing open cluster that can be seen without a telescope, as are the stars around Mirfak in Perseus. The stars of The Big Dipper are a highly dispersed old open cluster. Like children, growing up in their family home (their nebula, per se), the stars of open cluster eventually disperse - and move on, to new homes across our night skies.
The winter Milky Way is a fine sight, with many bright stars against a black background. The Pleiades are a jewel among them. Beautiful at the casual gaze, spectacular in almost any astronomical instrument, and should you try to discern the nebula, a challenge as well. Even on the coldest nights, take a few minutes to go outside and enjoy the great sight of Winter's Littlest Dipper.
Clear skies,
Mark
Constellation chart courtesy Starry Night Pro - sold by Orion Telescopes and Binoculars. Pleiades image from the Digital Sky Survey. Pleiades detail chart from The Sky software.
{ width: 160, height: 160, defaultImage: '', layers: 'Artimg-NASA_Rule_Breaking_Exoplanet' }

It's the University of Arizona's first discovery of an exoplanet and wouldn't you know - it's one that's breaking all the rules! An international team of astronomers led by a UA graduate student have picked up the signature of a planet orbiting a single, sun-like star. While that's nothing new, the planet's position most certainly is: it's more than 650 times the average Earth-Sun distance away from its host!
Weighing in at about eleven times the mass of Jupiter, this non-conformist planet cataloged as HD 106906 isn't like anything in our solar system and defies conventional planet formation theories. "This system is especially fascinating because no model of either planet or star formation fully explains what we see," said Vanessa Bailey, who led the research. Bailey is a fifth-year graduate student in the UA's Department of Astronomy.
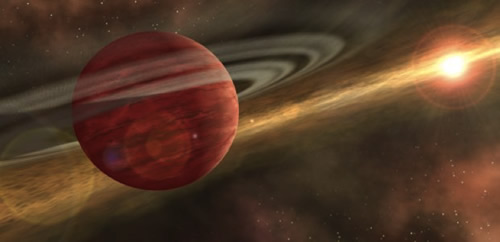
Image: This is an artist's conception of a young planet in a distant orbit around its host star. The star still harbors a debris disk, remnant material from star and planet formation, interior to the planet's orbit (similar to the HD106906 system). (Image courtesy NASA/JPL-Caltech)
But just what are the "rules" of planet formation? For the most part, astronomers believe that planets similar to ours form relatively close to the parent star, taking shape from the disk of primordial gases and dust which envelope it. This formation is slow and doesn't lend itself well to giant planets forming at great distances. However, other theories postulate that giant planets could be the result of a quick, direct collapse of disk material. While this is a good notion, primordial disks aren't really known to house enough mass at their periphery to permit a planet like HD 106906 to form. In this instance, many alternative hypotheses have been suggested - including the formation of a "mini" binary star system.
"A binary star system can be formed when two adjacent clumps of gas collapse more or less independently to form stars, and these stars are close enough to each other to exert a mutual gravitation attraction and bind them together in an orbit," Bailey explained. "It is possible that in the case of the HD 106906 system the star and planet collapsed independently from clumps of gas, but for some reason the planet's progenitor clump was starved for material and never grew large enough to ignite and become a star."
According to Bailey, one problem with this scenario is that the mass ratio of the two stars in a binary system is typically no more than 10-to-1. "In our case, the mass ratio is more than 100-to-1," she explained. "This extreme mass ratio is not predicted from binary star formation theories -- just like planet formation theory predicts that we cannot form planets so far from the host star."
What really makes this rule-breaking discovery incredible is the fact that researchers can still detect the remnant debris disk of material left over from planet and star formation. "Systems like this one, where we have additional information about the environment in which the planet resides, have the potential to help us disentangle the various formation models," Bailey added. "Future observations of the planet's orbital motion and the primary star's debris disk may help answer that question."
Just how did the UA research team discover this unruly planet? Because it is only around thirteen million years old, it still glows red-hot with embers left over from its formation. It measures at approximately 2,700 degrees Fahrenheit - much cooler than its host star - and emits most of its energy in the infrared spectrum rather than in visible light. To get a direct image with the quality of the Hubble from the ground requires some very specialized equipment - adaptive optics. The team used the new Magellan Adaptive Optics (MagAO) system and Clio2 thermal infrared camera - both technologies developed at the UA - mounted on the 6.5-meter-diameter Magellan telescope in the Atacama Desert in Chile to take the discovery image.
UA astronomy professor and MagAO principal investigator Laird Close said: "MagAO was able to utilize its special adaptive secondary mirror, with 585 actuators, each moving 1,000 times a second, to remove the blurring of the atmosphere. The atmospheric correction enabled the detection of the weak heat emitted from this exotic exoplanet without confusion from the hotter parent star."
"Clio was optimized for thermal infrared wavelengths, where giant planets are brightest compared to their host stars, meaning planets are most easily imaged at these wavelengths," explained UA astronomy professor and Clio principal investigator Philip Hinz, who directs the UA Center for Astronomical Adaptive Optics.
Of course, all new discoveries require confirmation. In this case, the researchers were able to confirm the planet is gravitationally locked to its parent star by utilizing Hubble Space Telescope data taken eight years ago for another research program. Using the FIRE spectrograph, also installed at the Magellan telescope, the team confirmed the planetary nature of the companion. "Images tell us an object is there and some information about its properties but only a spectrum gives us detailed information about its nature and composition," explained co-investigator Megan Reiter, a graduate student in the UA Department of Astronomy. "Such detailed information is rarely available for directly imaged exoplanets, making HD 106906 b a valuable target for future study."
"Every new directly detected planet pushes our understanding of how and where planets can form," said co-investigator Tiffany Meshkat, a graduate student at Leiden Observatory in the Netherlands. "This planet discovery is particularly exciting because it is in orbit so far from its parent star. This leads to many intriguing questions about its formation history and composition. Discoveries like HD 106906 b provide us with a deeper understanding of the diversity of other planetary systems."
{ width: 160, height: 160, defaultImage: '', layers: 'Artimg-Tanja_Sund_Milky_Way' }

Known to the online world as "AstroTanja," 34-year-old Tanja Sund of South Africa is a magazine editor by day, and a devoted astrophotographer by night. Oh, and she's also the mother of a 2-year-old daughter.
Though Sund admits to a "continual state of sleep deprivation," her images and blog have begun to impress a worldwide audience, and she shows no signs of slowing down. Sund counts an 8" Orion Astrograph and Autoguider among her gear, a fact that makes us immensely proud. Here is our interview of Tanja Sund, South Africa's hottest new Astrophotographer:
Orion: As publisher and editor of Fitness Magazine, SA, how was it that you got into astrophotography, and has it really been only 20 months since you started shooting the night sky?
AstroTanja: I've always been interested in science and astronomy, and yes, it's been 20 months since I first started imaging. I became a publisher in an industry that I'm passionate about, the fitness industry, due to my background in art, design and entrepreneurship. Starting the business just over 10 years ago now allows me a lot more freedom to chase my other passion, astrophotography.
Orion: What was the first night sky image you shot, and were you happy with it?
AstroTanja: First image I ever shot was the Orion Nebula, M42. At the time I was ecstatic, just to be able to capture something in the sky that's unseen to the naked eye. As first images go, it wasn't anything spectacular, but it got me absolutely hooked.
Orion: What are your favorite objects to image these days?
AstroTanja: Nebulae most definitely. The colors and structures fascinate me, and they all look different - each with its own challenges.
Orion: Have you noticed that there are very few women in the astronomy and astrophotography field, or is that not the case in the southern hemisphere?
AstroTanja: Yes, there aren't many women in the astrophotography field. I think it's mostly due to science and astronomy not being such a highlight for a lot of women, but also because it's quite technical and potentially physically strenuous (well my setup is anyway). There are imaging couples, and women mainly stick to post-processing rather than image acquisition, however I take pride in every aspect of my imaging. From packing up the scope, transporting, setting up, acquisition to post editing. I'm proud of my images because I know what went into capturing them, from start to finish. This statement is more of a generalization, but I think most ladies would rather spend an evening relaxing (or shopping) than being out in the dark all night.
Orion: What is the greatest lesson you've learned through your work?
AstroTanja: To put proper focus and time into setting up, prepping for an imaging session, and to be extremely precise with polar alignment. Don't overlook the small things - they make for a better end result.
Orion: How dark are the skies over Johannesburg, and is that where you do most of your imaging?
AstroTanja: Jozi is the most light polluted spot in Africa. That said, it's not impossible to image here. Having the right equipment and shooting shorter exposures, but many, many, more of them help increase SNR. I'm switching to narrowband imaging soon, so the light pollution won't bother me. But for the most part, I try and get away to image. My favorite spot is a 2400km round trip drive, Sutherland in the Northern Cape. It's a truly dark sky there. Sutherland is the home of SALT (South African Large Telescope)

Helix Nebula. Credit: AstroTanja. Shot with a 10" Orion Astrograph. Full blog post about capturing this image here.
Orion: Any must have equipment?
AstroTanja: A must have for superior images, is a guide scope/cam. Post editing software has come a long way to bridge the gap between average and superb optics, yet everything is irrelevant if you can't have long exposures and round stars. Even with excellent polar alignment you're not going to be able to get a 5min exposure on an entry level/average mount. I currently use the Orion's SSAG, (Star Shoot Auto Guider). It's easy to use, cost effective and works wonderfully with PHD Guiding and my Celestron mounts.
Orion: Has observing and astrophotography changed your life or sense of self in any way? If so, how?
AstroTanja: It's changed everything in my life. It's a challenging form of photography and I'm always striving to better myself. I'm indeed slightly obsessed with improving my images, and I'll chase dark skies all over the world to photograph the sky. It's awakened my sense of adventure and I see imaging opportunities as a way to explore the world. Whether it's driving 12 hours to get to a dark sky in South Africa, flying to the USA with my APO to image the northern sky, or getting to Iceland to capture some aurora - it's all a big adventure. Furthermore, astrophotography is the reason I found that one person I couldn't live without - this shared passion for photographing the sky brought Cory (@TheAstroShake) and I together.
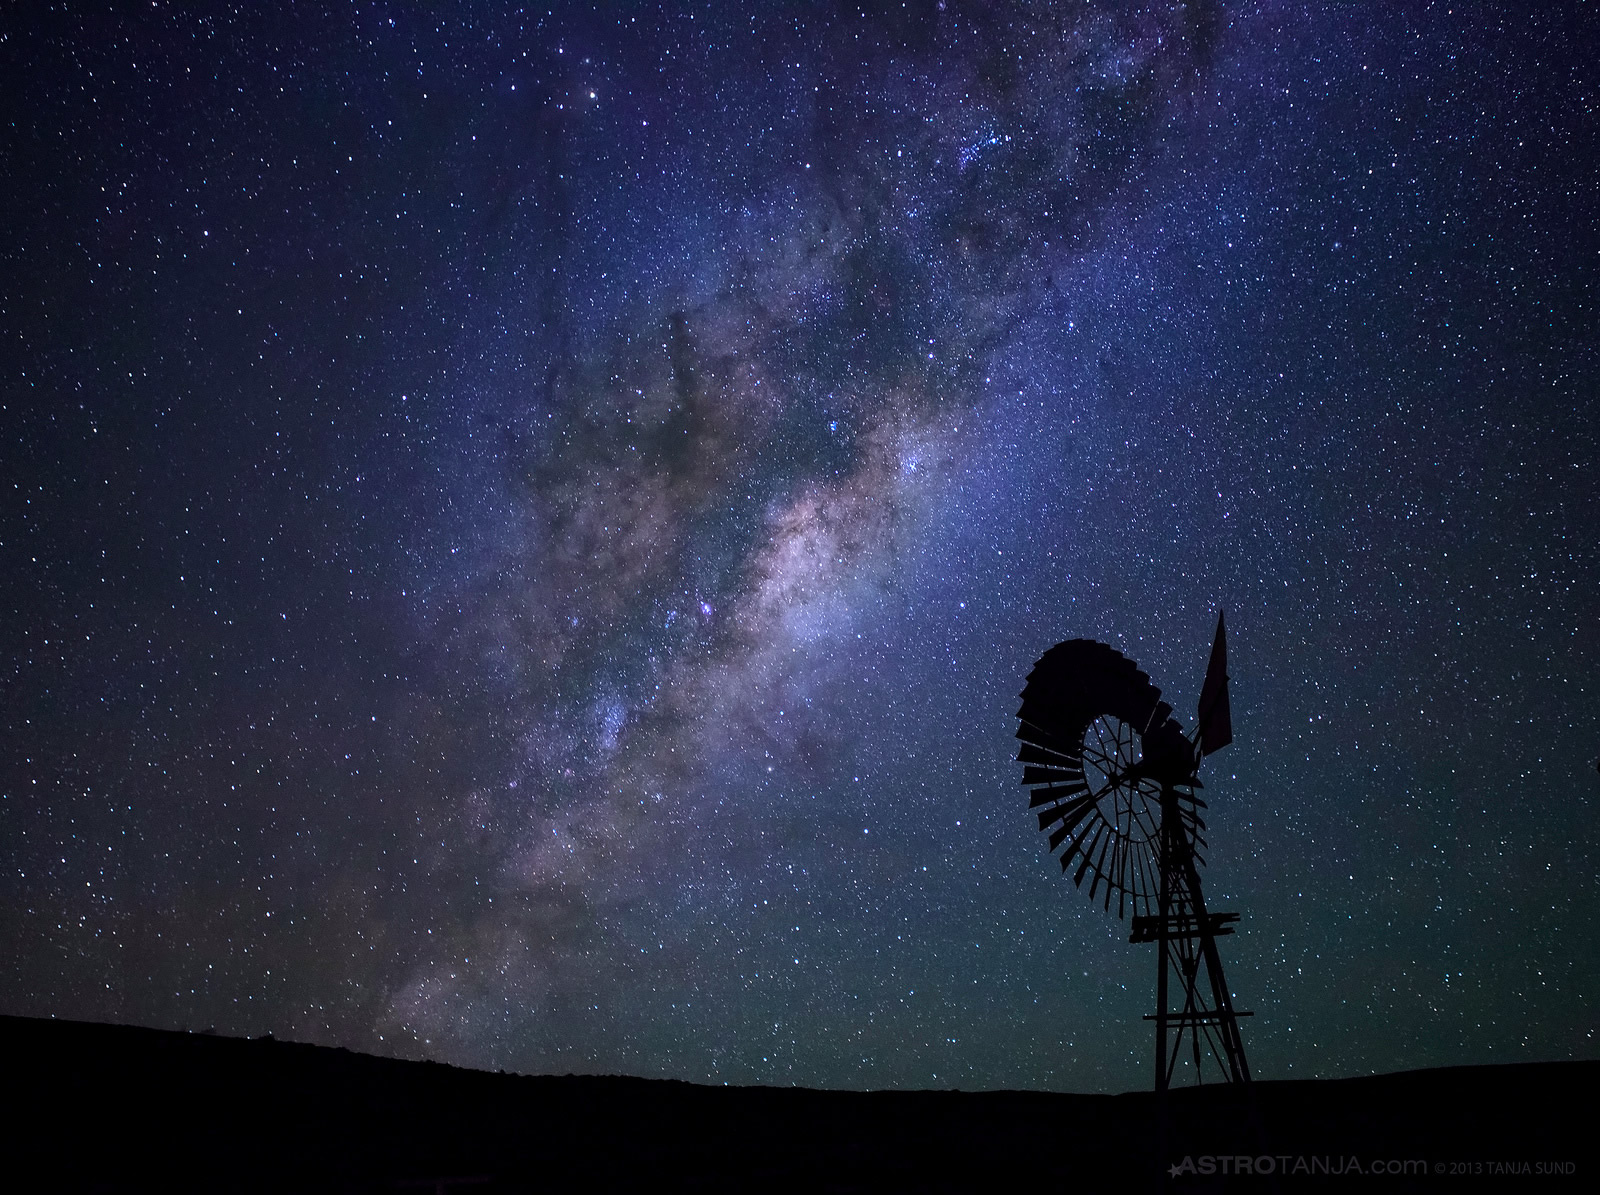
Our galactic core as it rises over the desert landscape of the Karoo, South Africa (Sutherland). Credit: AstroTanja
Orion: Have you been to the northern hemisphere to image yet? I'm very interested on your take on how the skies differ between the northern and southern hemispheres.
AstroTanja: Yes. In September I traveled to the USA to photograph the Andromeda galaxy and a few other northern targets. And in November I traveled to Iceland to photograph Aurora. It's slightly disorientating seeing objects rotate counter-clockwise around the celestial pole (in the south they go clockwise around the SCP), but it's great to see a few of the constellations I never see from where I live.
Orion: For us northern hemisphere observers hoping to travel, can you recommend some top targets to look for in the southern hemisphere?
AstroTanja: Top Southern Hemisphere targets are Omega Centauri, the largest globular cluster in the Milky Way Galaxy. Tarantula Nebula - NGC 2070, the most active starburst region known in the Local Group of galaxies, located on the rim of the large Magellanic cloud in the constellation of Dorado. The Small and Large Magellanic Clouds - as satellites of our Milky Way, these magnificent southern objects are only about 180,000 light years away, 15 times closer than the Andromeda Galaxy, M31. The Milky Way core overhead - the southern skies get a spectacular Milky Way core right overhead in our winter months. The Carina Nabula, one of the largest diffuse nebulae in our skies. Although it is some four times as large and even brighter than the famous Orion Nebula, the Carina Nebula is much less well known, due to its location far in the Southern Hemisphere. And finally, the Southern Cross and the Coalsack Dark Nebula. The Coalsack Dark Nebula is easily visible with the naked eye as a dark nebula in southern skies, in the constellation Crux.
I'll say Carina and Tarantula are probably two of the favorites with imagers as they carry more nebulosity and structure.
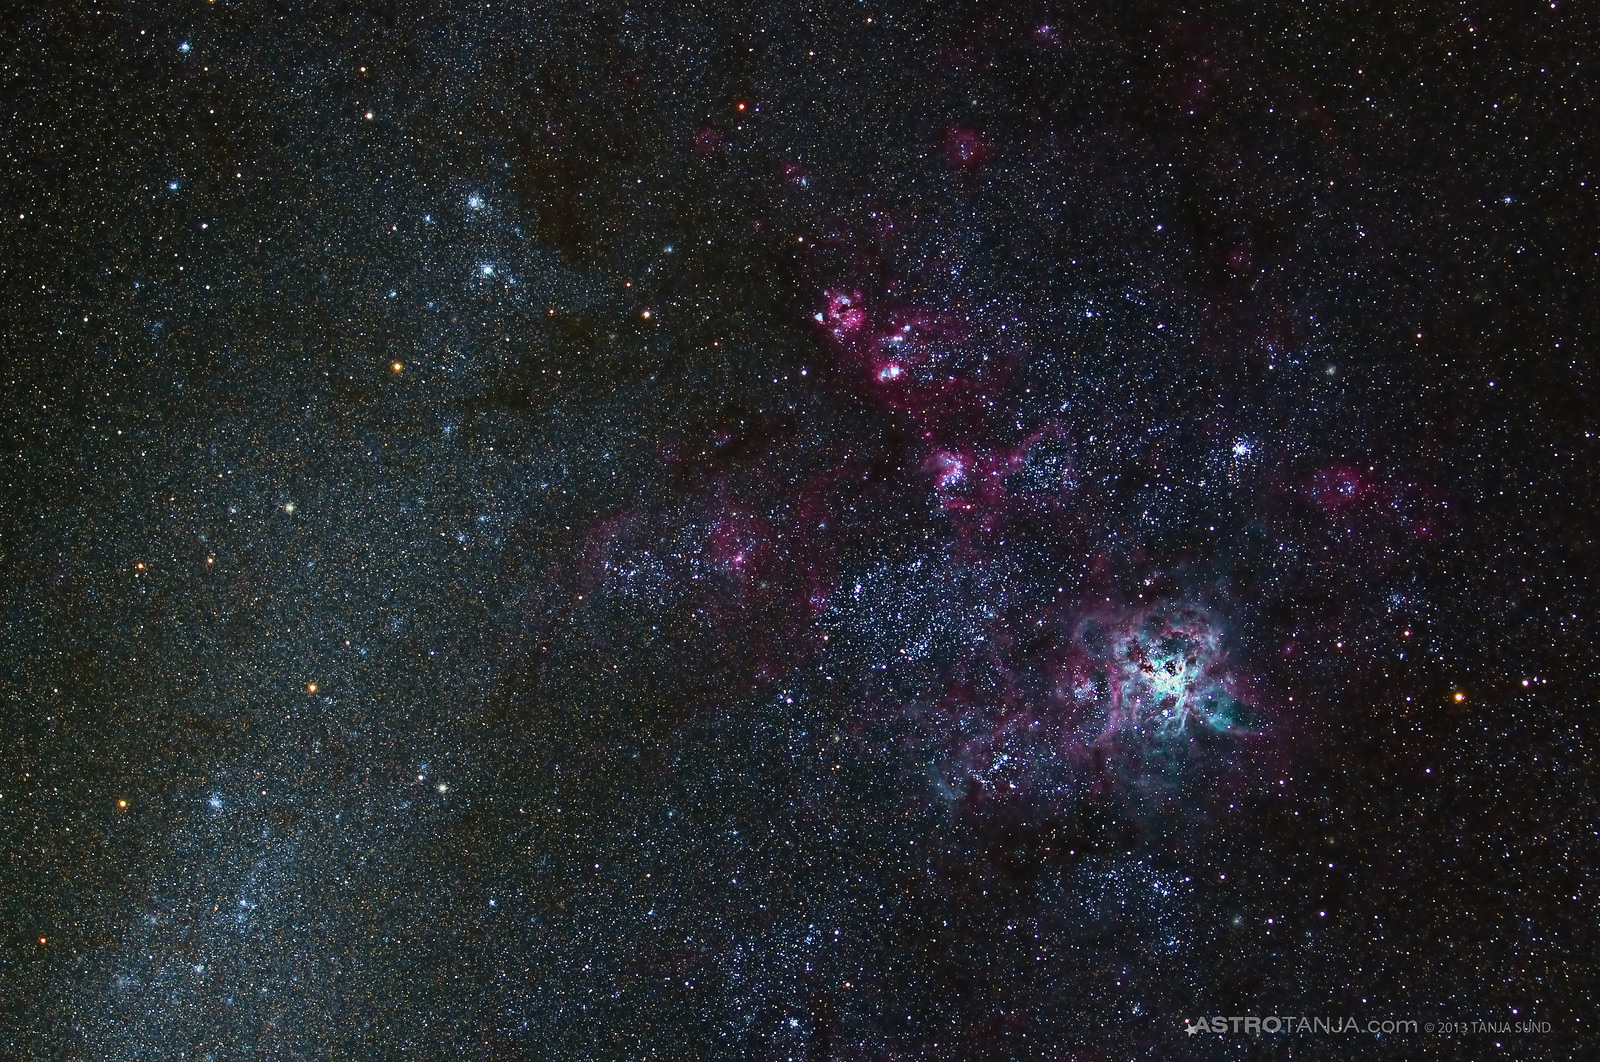
NGC 2070, Tarantula Nebula. Credit: AstroTanja
Orion: What would be your dream astrophotography trip?
AstroTanja: Any place dark, really dark - that's about it.... In both hemispheres. Oh - and I'd like to do star trails on the equator.
Orion: Any last words of wisdom for aspiring astrophotographers?
AstroTanja: Attaining great images requires dedication. Acquisition and processing isn't an easy feat. Persist - and you'll get great results. Don't always blame your optics, I've seen superb images come from mediocre equipment.
Keep up with AstroTanja on twitter (@astrotanja) and on her blog, Astrotanja.com, and on Flickr.
{ width: 160, height: 160, defaultImage: '', layers: 'Artimg-Hybrid_Solar_Eclipse_2005_04_08' }

A solar eclipse is one of the most amazing astronomical events to watch from Earth. But how, exactly, do they occur?
The diameter of the Sun is about 400 times larger than the diameter of the Moon. The Moon is about 389 times closer to the Earth than the Sun. This means that the size of the Sun and Moon in the sky are about the same, and that happy coincidence is what allows us to have the greatest show on Earth: the solar eclipse.

Hybrid Solar Eclipse of November 3, 2013. By Dan Ferry of Long Island, New York. See more of his eclipse photos here.
But having the same apparent size is just the first requirement for a solar eclipse. To see a solar eclipse on Earth, the Moon must pass in front of the Sun from our vantage point.
If the orbit of the Moon were exactly in line with the orbit of the Sun, then we might expect a solar eclipse once a month. But the Moon's orbit is tilted about five degrees relative to the orbit of Earth, and this means that the Moon is often slightly above or below the Sun from our perspective when it passes between the Sun and Earth. So most months there is no solar eclipse.
For the Moon to be lined up in the right way, it has to be located near the plane of the Earth's orbit when it passes in front of the Sun, and this only happens twice a year, about six months apart. This is why there are "eclipse seasons" in Spring and Fall. At least one eclipse occurs during each eclipse season.
Not all solar eclipses are alike. As seen in the image below, since the Sun is larger than the Moon, there are regions where only part of the Sun is blocked by the Moon, and the resulting shadow is called the penumbra. For a much smaller region where the Sun is completely blocked by the Moon, the shadow is called the umbra. The type of eclipse you observe depends in part on whether you are viewing it from the umbra or penumbra.

Geometry of a Solar Eclipse, courtesy of Wikimedia Commons.
If you are standing in the penumbra, then you will see the Moon block part of the Sun during the eclipse. This is known as a partial eclipse. Since the penumbra is much larger than the umbra, this is the most commonly observed type of eclipse.
Sometimes only the penumbra crosses the Earth, and only a partial eclipse is observed, but usually both penumbra and umbra cross the Earth. Most of us only see a partial eclipse if we are lucky, but those standing in the umbra see a very different view.
For those standing in the umbra, the Moon is directly in front of the Sun. One would therefore expect the Moon to completely block the Sun, producing what is known as a total eclipse. Often this happens, but not always. Although the Sun and Moon appear to be about the same size in the sky, their apparent sizes vary slightly. The orbit of the Earth is not perfectly circular, so sometimes it is slightly closer to the Sun, and other times slightly farther away. This means the Sun can appear slightly larger or slightly smaller. Likewise, the orbit of the Moon isn't perfectly circular, so the Moon can appear slightly larger or smaller as well.
These variations are small, so usually we don't notice them. But during an eclipse these variations matter significantly. When the Moon appears slightly larger and the Sun slightly smaller, the Moon can completely block the Sun, and viewed from the umbra it appears as a total eclipse, with only the Sun's corona visible. If the Moon is slightly smaller and the Sun is slightly larger, then the Moon can't completely block the Sun. Instead it mostly blocks the Sun except for a thin outer ring. This produces what is known as an annular (ring) eclipse.

Hybrid Solar Eclipse of April 8, 2005. Left: Total eclipse, Right: Annular. Credit: NASA.
The rarest type of eclipse is known as a hybrid eclipse. In this case the Moon is initially large enough to completely block the Sun, but as the umbra crosses the Earth the relative apparent size of the Sun and Moon shift, so that the Moon is no longer able to completely block the Sun. This means that what begins as a total eclipse changes to an annular one. The reverse is also possible, where an annular eclipse becomes a total eclipse. This means that some people can see a total eclipse, while others can see an annular one.
If you live in the United States and have never seen a total eclipse, make plans for August 21, 2017. On that day a total eclipse will cross the US from Oregon to South Carolina, making it within a day's drive of most of the country.

Shadows of an annular eclipse of October 3, 2005. By Nils van der Burg of Madrid, Spain. Via Wikimedia Commons.
CAUTION: Never look at the Sun, either directly or through a telescope or binocular, without a professionally made protective solar filter installed that completely covers the front of the instrument, or permanent eye damage could result. When using a truss tube telescope to view the Sun, both a properly fitting solar filter and light shroud are required.
{ width: 160, height: 160, defaultImage: '', layers: 'Artimg-ISON_Swap' }

Comet ISON gave everyone a thrill ride on Thursday, November 28, when it reached perihelion. While there are clear images from the Solar and Heliospheric Observatory that show the comet swinging around the Sun, there was one activity at the star party the enigmatic comet seems to have skipped over - the SWAP meet. The Sun Watcher using Active pixel system detector and image Processing solar telescope, on board the Belgium-based ESA mission PROBA2 was watching the encounter. Even though at least a part of the icy traveler may have survived its barbeque brush with the Sun, it failed to appear in images from extreme-ultraviolet (EUV) solar telescopes on Thursday, to the disappointment of many.
Image: A processed SWAP EUV image from the Comet ISON campaign shows no hit of the comet's passage. Credit: Royal Observatory of Belgium
Thanks to several space-based ultra-violet solar telescopes, solar physicists have had the opportunity to study a few sungrazing comets over the last two decades. Usually they appear very bright in the EUV images, showing themselves highlighted in the Sun's atmosphere as they skim past the surface. In 2011, Comet Lovejoy gave a fine performance, adding its signature data to not only comet studies, but the Sun's magnetic properties as well. It gave a glowing report that left a trail which could be followed along the flows of the magnetic field of the solar corona. Since there are very few comets which travel close enough to the Sun to be visible to these specialized instruments, scientists at the Royal Observatory of Belgium, which operates PROBA2 (Project for Onboard Autonomy), had high hopes that ISON would be among them, giving answers to questions about not only comets and the Sun, but the solar system itself.
"We made every effort to observe Comet ISON," said Dr. Daniel Seaton, lead scientist for SWAP at the Royal Observatory of Belgium. "Unfortunately, the comet simply didn't appear in our images. In principle, we had every reason to think our telescope would see it, so why we did not only deepens the mystery of a perplexing comet. "
Comet ISON has been something of a mystery since it was first sighted. This rocky collection encased in frozen gases has been orbiting in the Oort Cloud for some 4.5 billion years and may have originated as much as a light year away from the inner solar system. This means it was in a pristine state - nearly untouched since the time the solar nebula congealed into a full blown planetary system. Scientists were anxious to take a look at anything it had to offer, offerings which came from our solar system's first moments. Of course, they would be something akin to burnt offerings since ISON would pass the Sun's surface just a scant 1.2 million kilometers away!
"The last comet we saw with SWAP, Comet Lovejoy, passed barely 100,000 km from the Sun's surface," said Dr. Seaton. "That's closer than the Earth is to the Moon. So one possibility is that Comet ISON was simply too far away from the Sun to be visible. There are quite a few factors that determine whether or not SWAP can see something."
The UV telescopes which study the Sun each have their own personalities and capabilities. SWAP's specialty is its ability to make observations of iron and oxygen atoms in the solar corona as far distant from the Sun as 2 million kilometers, much farther than most other active solar observatories.
"One possibility is that the comet, despite its close approach to the Sun, simply wasn't composed of material our imager can actually see. Another is that the material evaporated from the comet didn't reach the million degree temperatures which would allow it to be seen with SWAP," said Dr. Seaton.
At first the baffling comet was reported to have been doomed. It appeared that ISON had simply disintegrated as it reached its solar encounter. However, the comet continued to amaze researchers by apparently surviving at least partially, its remains destined to be consigned to deep space once again. Dr. Laurel Rachmeler, also of the Royal Observatory of Belgium said that the comet would remain a mystery for solar physicists and other astronomers to puzzle over in the months to come. "Of course we were hoping to see something a little more spectacular in our telescope," she said, "but there is still plenty to do before we can solve this little riddle. The suspense for us has passed, but now the fun part starts as we begin to fit all of our information together."
Are we through with Comet ISON? Not hardly. Astronomers around the world will continue to observe the remains of the comet as it leaves our solar system. SWAP scientists will also be busy trying to solve the riddle of why they weren't able to image the comet.
"It's a mystery for sure," said Dr. Seaton, "but a non-detection is still important information. Our hope is that our data - or rather, our lack of data - will be combined with images and observations from the global effort to understand this comet and will help give us new insight into some of the most distant bodies in our solar system."
Original Story Source: PROBA2 Science Center News Release
{ width: 160, height: 160, defaultImage: '', layers: 'Artimg-Roger_Ivester_IC_342' }

This month's deep-sky challenge will prove to be a challenge indeed. You'll need a very dark sky with excellent transparency to observe the faint and difficult face-on galaxy, IC 342 located in the constellation of Camelopardalis. Begin your search by locating 4.5 magnitude Gamma Camelopardalis, and then about 3� south.
IC 342 is very large, but extremely faint due to the low surface brightness. When using my 10-inch f/4.5 reflector, it has been difficult to spot on many occasions. At a magnification of 57X, I could see a very feeble and faint glow, however, at times it required a bit of field motion (lightly tapping the side of the telescope tube.)
Increasing the magnification to 114X began to bring out some of the fainter details.I saw a brighter stellar nucleus and a hint of spiral structure began to show when using averted vision. The overall shape had a very subtle N-S elongation. The edges were ill-defined and faded very gradually outwards. A chain of six stars runs the length of the galaxy in a NW-SE orientation. There were a number of faint stars superimposed in front of the galaxy. The following sketch was made using a No. 2 pencil and a blank 5 X 8 notecard. The colors were inverted using my scanner.
Here are some observations of IC 342 by some other notable and skilled observers:
Jaakko Saloranta of Finland: 4.7-inch refractor at 60X: "A low surface brightness galaxy with a nearly stellar nucleus surrounded by a faint, slightly E-W elongated halo peppered with foreground stars. With averted vision, I suspected faint spiral arms."
Sue French of New York: "Through a 105mm refractor at 28X, IC 342 was a very nice, large, low-surface-brightness galaxy spangled with faint stars. At 68X, this pretty galaxy appeared somewhat elongated north-south and spanned about 12'. In a 10-inch reflector at 44x, IC 342 was quite fetching and faintly mottled. It seemed brightest around a little pile of faint stars and just north of them. The very faint outer reaches of the galaxy made it look rounder and stretched it to a diameter of 1/3�."
Tom English of North Carolina: "Using a 16-inch RCOS telescope, I observed this galaxy from Jamestown, NC. There was good transparency, but was hampered by a fairly bright moon. I could see the central core, but nothing else."
Gus Johnson of Maryland: "Through a 5-inch short focal length reflector, I found it on the edge of my imagination. I noted a faint star chain on the western edge."
Fred Rayworth of Nevada: "Using a 16-inch f/4.5 reflector telescope with magnifications of 70 to 102X from Furnace Creek Ranch in Death Valley. Viewing conditions were not that good. I saw a faint fuzzy star with a stellar core. Not bright enough to see shape. When observing from Redstone on the North Shore of Lake Meade, Nevada using 87X, I noted a bright core, and a spiral structure, however, it was very faint."
Add your observations of IC 342 in the comments below.
The following image was made by Dr. James Dire, from Wildwood Observatory in Earl, North Carolina using an Orion 190 mm f/5.3 Maksutov-Newtonian telescope and a CCD camera. The exposure time was 60 minutes.
{ width: 160, height: 160, defaultImage: '', layers: 'Artimg-Adam_Block_NGC1501' }

A few hours after sunset, rising in the north-northeast is one of the dimmer constellations, requiring darker skies to identify. With a GoTo telescope or skill at star hopping, finding treasures in this seemingly empty piece of sky is possible. The rewards are certainly worth the effort! Tonight let's observe three interesting and varied objects; a nice planetary nebula, a notable chain of stars, and a fine open cluster.
Dim Camelopardalis - The Giraffe
First though, let's locate this dim constellation with a name reminiscent of a safari. It is named Camelopardalis - the "camel leopard," otherwise known as giraffe! Its main stars lie between Perseus' brightest star Mirfak, Auriga's lucida, Capella, and Polaris, the North Star. Five stars define the constellation, with the brightest being magnitude 4.0 - Beta Camelopardalis. Do you know why a constellation's beta star can be brighter than its alpha star? Post a reply here, if you know the answer. All the stars in the constellation's figure at left are between magnitude 4 and 5. It is dim and challenging in urban and suburban skies.
Seek out a dark place and begin by looking for the compact open cluster NGC 1502. You can see a chain of stars above the cluster's location in this chart. Use that chain in your magnifying finder to sweep just over a degree from the arc.
NGC 1502 offers a double treat!
Along with NGC 1502 you'll find a chain of stars called Kemble's Cascade, named after Father Lucian Kemble of the Royal Astronomical Society of Canada by famous astronomy writer Walter Scott Houston.. Houston described it as "a beautiful cascade of faint stars tumbling from the northwest down to the open cluster NGC 1502."
Kemble's Cascade and NGC 1502
In this image from the Digital Sky Survey, I've "connected the dots" to more clearly show the chain. I'm sure you find it unmistakable. While the chain is visible in 7x50 binoculars, a telescope will resolve the cluster into a rich compact jewel, and the stars in Kemble's Cascade show off their colors.
Kemble's Cascade is an "asterism" - a recognizable pattern that is not a constellation. The cluster NGC 1502 shines at magnitude 6.9 and contains approximately 45 stars that are 2700 light years from us. It is considered a young cluster at an age of 11 million years old.

An easy hop from NGC 1502.
Near the open cluster and Kemble's Cascade is the nice planetary nebula NGC 1501. At magnitude 11.9 and 3600 light years distant, it is considered faint, but using a narrow bandpass filter (Orion's Ultrablock), you'll pick up some detail, in telescopes as small as six inches. Under dark skies you can find this target in a 4" telescope.
Expert visual observer Steve Gottlieb described it as: "fairly faint, moderately large, bluish, slightly elongated, sharp-edged." My observations say the disk is mottled. Its small size of 56" x 48" will require higher power to see the details.
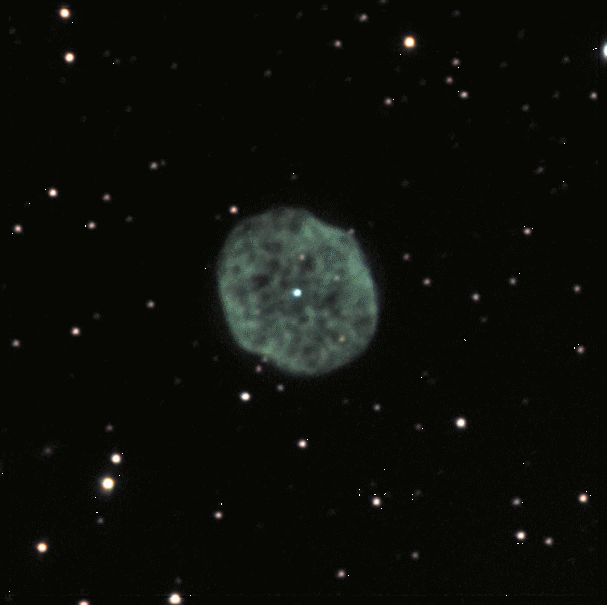
Can you see detail in NGC 1501?
This excellent image gives you an idea of the slightly elongated shape, and the slightly uneven disk. With a bit of patience, you may even pick up the central star in smaller telescopes.
There are many objects like these in our celestial galactic backyard. Open clusters, planetary and diffuse nebulae, multiple and colored stars - there is no lack of great sights to enjoCamelopardalis y on any given night!
Charts created with Starry Night Pro.
{ width: 160, height: 160, defaultImage: '', layers: 'Artimg-NASA_Lunar_Dust_Detector' }

Over four decades ago, Neil Armstrong took his first step on the lunar surface - a very dusty place. At the time, scientists didn't realize just how big the impact of lunar dust would prove to be. The abrasive particles stuck to everything they touched. This caused scientific instruments to overheat and even gave one astronaut - Apollo 17's Harrison Schmitt - a type of lunar dust allergic reaction! The presence of the dust gave rise to a scientific experiment to deduce how quickly it accumulated on surfaces, but over the years NASA's findings began to collect a dust of their own.
Even though it would appear the 44-year-old data was lost, researchers have resurrected the old findings to give us the first figures on how fast lunar dust gathers on surfaces. Unlike its prolifically pesky Earthly counterparts, the sparse lunar particles take their good, sweet time to gather - forming a layer about a millimeter thick every 1,000 years. While that might seem incredibly slow, it's still about ten times faster than scientists originally thought. Even at this snail's pace, it is still fast enough to be considered a potential threat to equipment such as power generating solar cells which may be part of future missions.
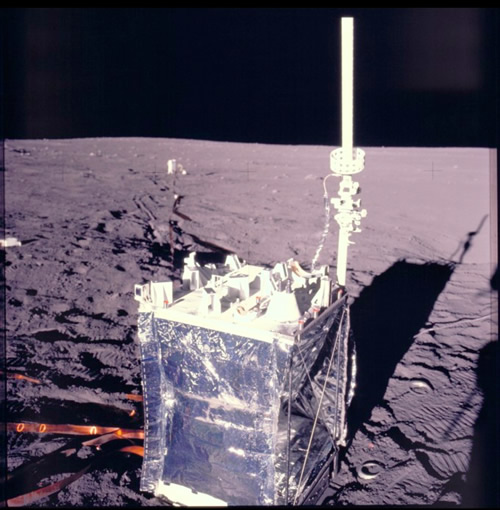
The Lunar Dust Detector, attached to the leftmost corner of this experiment package left by the Apollo 12 astronauts, made the first measurement of lunar dust accumulation. As the matchbox-sized device's three solar panels became covered by dust, the voltage they produced dropped. Credit: NASA
"You wouldn't see it; it's very thin indeed," said University of Western Australia Professor Brian O'Brien, a physicist who developed the experiment while working on the Apollo missions in the 1960s and now has led the new analysis. "But, as the Apollo astronauts learned, you can have a devil of a time overcoming even a small amount of dust."
The faster-than-expected pile-up also implies that lunar dust could have more ways to move around than previously thought, O'Brien added.
While a lunar dusting could be a very big deal, the experimental equipment which involved three Apollo missions was diminutive. To conduct his six year experiment, O'Brien used an arrangement of small solar cells connected to a matchbox-sized case. The tests were simple: measure the drop in voltage as the particles obscured the incoming light. The results: according to the test measurements, 100 micrograms of dust collected over a surface area of a square centimeter in a period of a year. At this rate, it would take about a year to cover a basketball court in a pound of particles.
Just what kind of impact could that have on scientific equipment? By comparing the effects the dust had on the cells from accumulation and from damaging high-energy radiation from the Sun, O'Brien deduced that shielded power supplies could suffer. Their output could be reduced, a situation with even more significance than those caused by a solar outburst. While potential radiation damage was factored into the design of solar cells, no one really gave a thought to a potential dust issue. "While solar cells have become hardier to radiation, nothing really has been done to make them more resistant to dust," said O'Brien's colleague on the project Monique Hollick, who is also a researcher at the University of Western Australia, in Crawley. "That's going to be a problem for future lunar missions."
However, this isn't the first time that NASA took on a housekeeping mission. When Apollo 11 departed the Moon, scientists knew the takeoff would stir up a sizeable amount of dust - dust which would deposit itself on nearby science experiments. Designing a way of circumventing the issue was problematic. Detachable covers would require a way of being removed after the lander left the surface. Everything from a small explosive charge to a robotic removal was considered, but these options simply left more room for errors to occur.
"Then I asked what I thought was a pretty common sense question," recalled O'Brien. "If we've got to guard ourselves against damage from the lunar module taking off, who's measuring whether any damage actually took place; who's measuring the dust?"
Utilizing his eureka moment, O'Brien then invented the Lunar Dust Detector experiment as a small add-on device to the larger experiments. Requiring little power and weighing only 270 grams (0.6 pound), the dust detector reported back to Earth alongside the non-scientific data. "It really got a free ride," O'Brien said.
The housekeeping hitchhikers were part of the Apollo 12, 14 and 15 missions until they were switched off in September 1977 due to budget cuts. Even though the detectors were doing their job, NASA didn't keep the archival tapes of the data the LDDs had collected. For thirty years, NASA just assumed the information was lost. However, in 2006 O'Brien caught wind of NASA's mistake and informed them that he had kept a set of backup copies!
There were three solar cells located in the experiment, each of them covered with a different amount of shielding. Employing his data set, O'Brien took a look at the damage caused to both the shielded and unshielded solar cells. With this information, he could determine that dust - not radiation - was the culprit which caused the most damage to the protected cells. Dust? According to previous modeling, lunar dust was only supposed to come from falling cosmic dust and meteor impacts. "But that's not enough to account for what we measured," O'Brien said.
So exactly where is this dust coming from? Because the Moon has no atmosphere, the regolith should simply remain in place. However, O'Brien said a popular idea of a "dust atmosphere" on the Moon could explain the difference. In this scenario, solar radiation should be strong enough to displace a few electrons out of the atomic dust particles each lunar day. These electrons could possibly build up a small positive charge. During lunar night, electrons from the solar wind could impact dust particles and impart a negative charge. When the illuminated and non-illuminated sides meet, the electrical forces could cause the charged dust to lift from the surface and populate the lunar sky. "Something similar was reported by Apollo astronauts orbiting the Moon who looked out and saw dust glowing on the horizon," said Hollick.
Levitating lunar dust? While it might seem a little far-fetched, it's a concept which could soon be confirmed by NASA's Lunar Atmosphere and Dust Environment Explorer (LADEE), launched in September. The spacecraft orbits 250 kilometers (155 miles) above the surface of the Moon, searching for dust in the lunar atmosphere. While LADEE closely examines the Moon's atmosphere, O'Brien celebrates the science experiment which took many years to complete, but has finally shown a worthy outcome. "It's been a long haul," said O'Brien. "I invented [the detector] in 1966, long before Monique was even born. At the age of 79, I'm working with a 23-year old working on 46-year-old data and we discovered something exciting -- it's delightful."
Original Story Source: American Geophysical Union
{ width: 160, height: 160, defaultImage: '', layers: 'Artimg-WhatsInTheSky_12-13_square' }

December brings cold winter nights and some of the clearest skies of the year for many locations. Bundle up to keep warm and get outside for some holiday stargazing fun!
Plan a Star Party - The weekend of December 28th and 29th will have nice dark skies thanks to the waning Moon, so it's a great time to plan a star-party with friends and family to break-in any new telescopes and binoculars Santa brings down the chimney!
Watch for Comet ISON - We're hoping Comet ISON survives its trip around the Sun in late November because if it does, it should be visible with unaided eyes in December. Assuming the comet survives, the best views will be during the first half of the month. The comet will be closest to Earth on December 26th, when it will be about 40 million miles away from our home planet - believe it or not, that's pretty close in space. Keep your eyes peeled and keep binoculars and telescopes handy for what we hope to be a spectacular show in December skies.
Geminids Meteors - During the nights of December 12th and 13th, the Geminids meteor shower will be in full force. Since the First Quarter Moon occurs on December 9th, the best time to see meteors will be in the early pre-dawn hours of the 12th and 13th. All you need to enjoy the show is a lounge chair, a warm blanket, and your eyes!
Big Jupiter - The largest planet in our solar system will be nicely positioned in the eastern sky throughout December. If the air is stable and seeing conditions are good, which is common on colder, windless winter nights, Jupiter can bear a lot of magnification, so don't be afraid to try catching views around 200x of the gas giant when it is high in the sky. Check in on Jupiter nightly to see its four brightest moons (Io, Europa, Ganymede and Callisto) change position night-to-night as they orbit the planet.
Enjoy great views of gigantic Jupiter with the Orion StarMax 127mm Equatorial Maksutov-Cassegrain Telescope and 1.25" Orion Jupiter Observation Eyepiece Filter. The long 1540mm focal length of the StarMax 127mm Mak-Cass is ideal for high-magnification observations of Jupiter and the Jupiter Filter helps to reveal subtle cloud band and storm details.
Best Binocular Targets - While 50mm binoculars are good for December stargazing, bigger 70mm, 80mm, or larger binos will reveal brighter and better views of celestial gems, of which there are plenty to enjoy in December skies. The glorious open star cluster Pleiades (M45) will be nearly overhead in the constellation Taurus. A little more north and overhead you'll find the Andromeda Galaxy (M31) which really shines in big binoculars. Slightly to the northwest of M31 you'll see the beautiful Double Cluster of Perseus. Finally, our namesake nebula, M42 The Orion Nebula, will be rising in the eastern sky during December nights and makes for a beautiful sight in binoculars. We suggest exploring these binocular targets with our value-packed Orion 15x70 Astronomical Binocular & HD-F2 Tripod Bundle or Orion 20x80 Astronomical Binocular & XHD Tripod Bundle for great views. You'll enjoy hours of binocular stargazing fun without tiring your arms since both bundles include stable tripods.
Best Telescope Targets - All of the binocular targets listed above also make great telescope quarry, but December skies also offer great opportunities to see objects that require a telescope. First, slew your scope just a few degrees southwest of M31 to find M33, a distant face-on spiral galaxy that's about 2.5 million light years (MLY) away from Earth. In the constellation Sculptor far to the south, try to find NGC 253, the impressive "silver dollar" galaxy. There's a swarm of other galaxies to see in the general area of NGC 253 - all part of the "Sculptor Group" of galaxies. Use a star chart or computerized object locator to hunt them down. In Pisces, look for M74, another face-on spiral galaxy like M33, but one that is almost 30 MLY farther away from us. Finally, check out NGC 1300, a classic barred spiral galaxy that is approximately 61 MLY away from Earth with a monster black-hole in its nucleus.
Chase down these deep-sky delicacies with the help of our Orion SkyQuest XT10i IntelliScope Dobsonian Telescope. With its IntelliScope object-locator system, the fan-favorite XT10i will tell you just where to find these elusive celestial treats and its 10" aperture will provide bright views.
December Challenge - With a 10" or larger telescope from a dark sky site, try to track down the picturesque Horsehead Nebula near the eastern star of Orion's belt, which is named Alnitak. An Orion Hydrogen-Beta Nebula Filter will help reveal this famous nebula's intricate details.
All objects described above can easily be seen with the suggested equipment from a dark sky site, a viewing location some distance away from city lights where light pollution and when bright moonlight does not overpower the stars. All objects have been verified by actual observations by Orion Telescopes & Binoculars Staff at Fremont Peak State Park, and/or Deep Sky Ranch, 60 miles and 90 miles respectively from San Jose International Airport, San Jose, CA.
{ width: 160, height: 160, defaultImage: '', layers: 'Artimg-NASA_Messier15' }

This incredibly intense image of globular cluster Messier 15, is comprised of observations from the NASA/ESA Hubble Space Telescope's Wide Field Camera 3 and Advanced Camera for Surveys in the ultraviolet, infrared and optical parts of the spectrum. To date, it is one of the most detailed images ever taken of this stellar senior citizen and reveals a wealth of information.
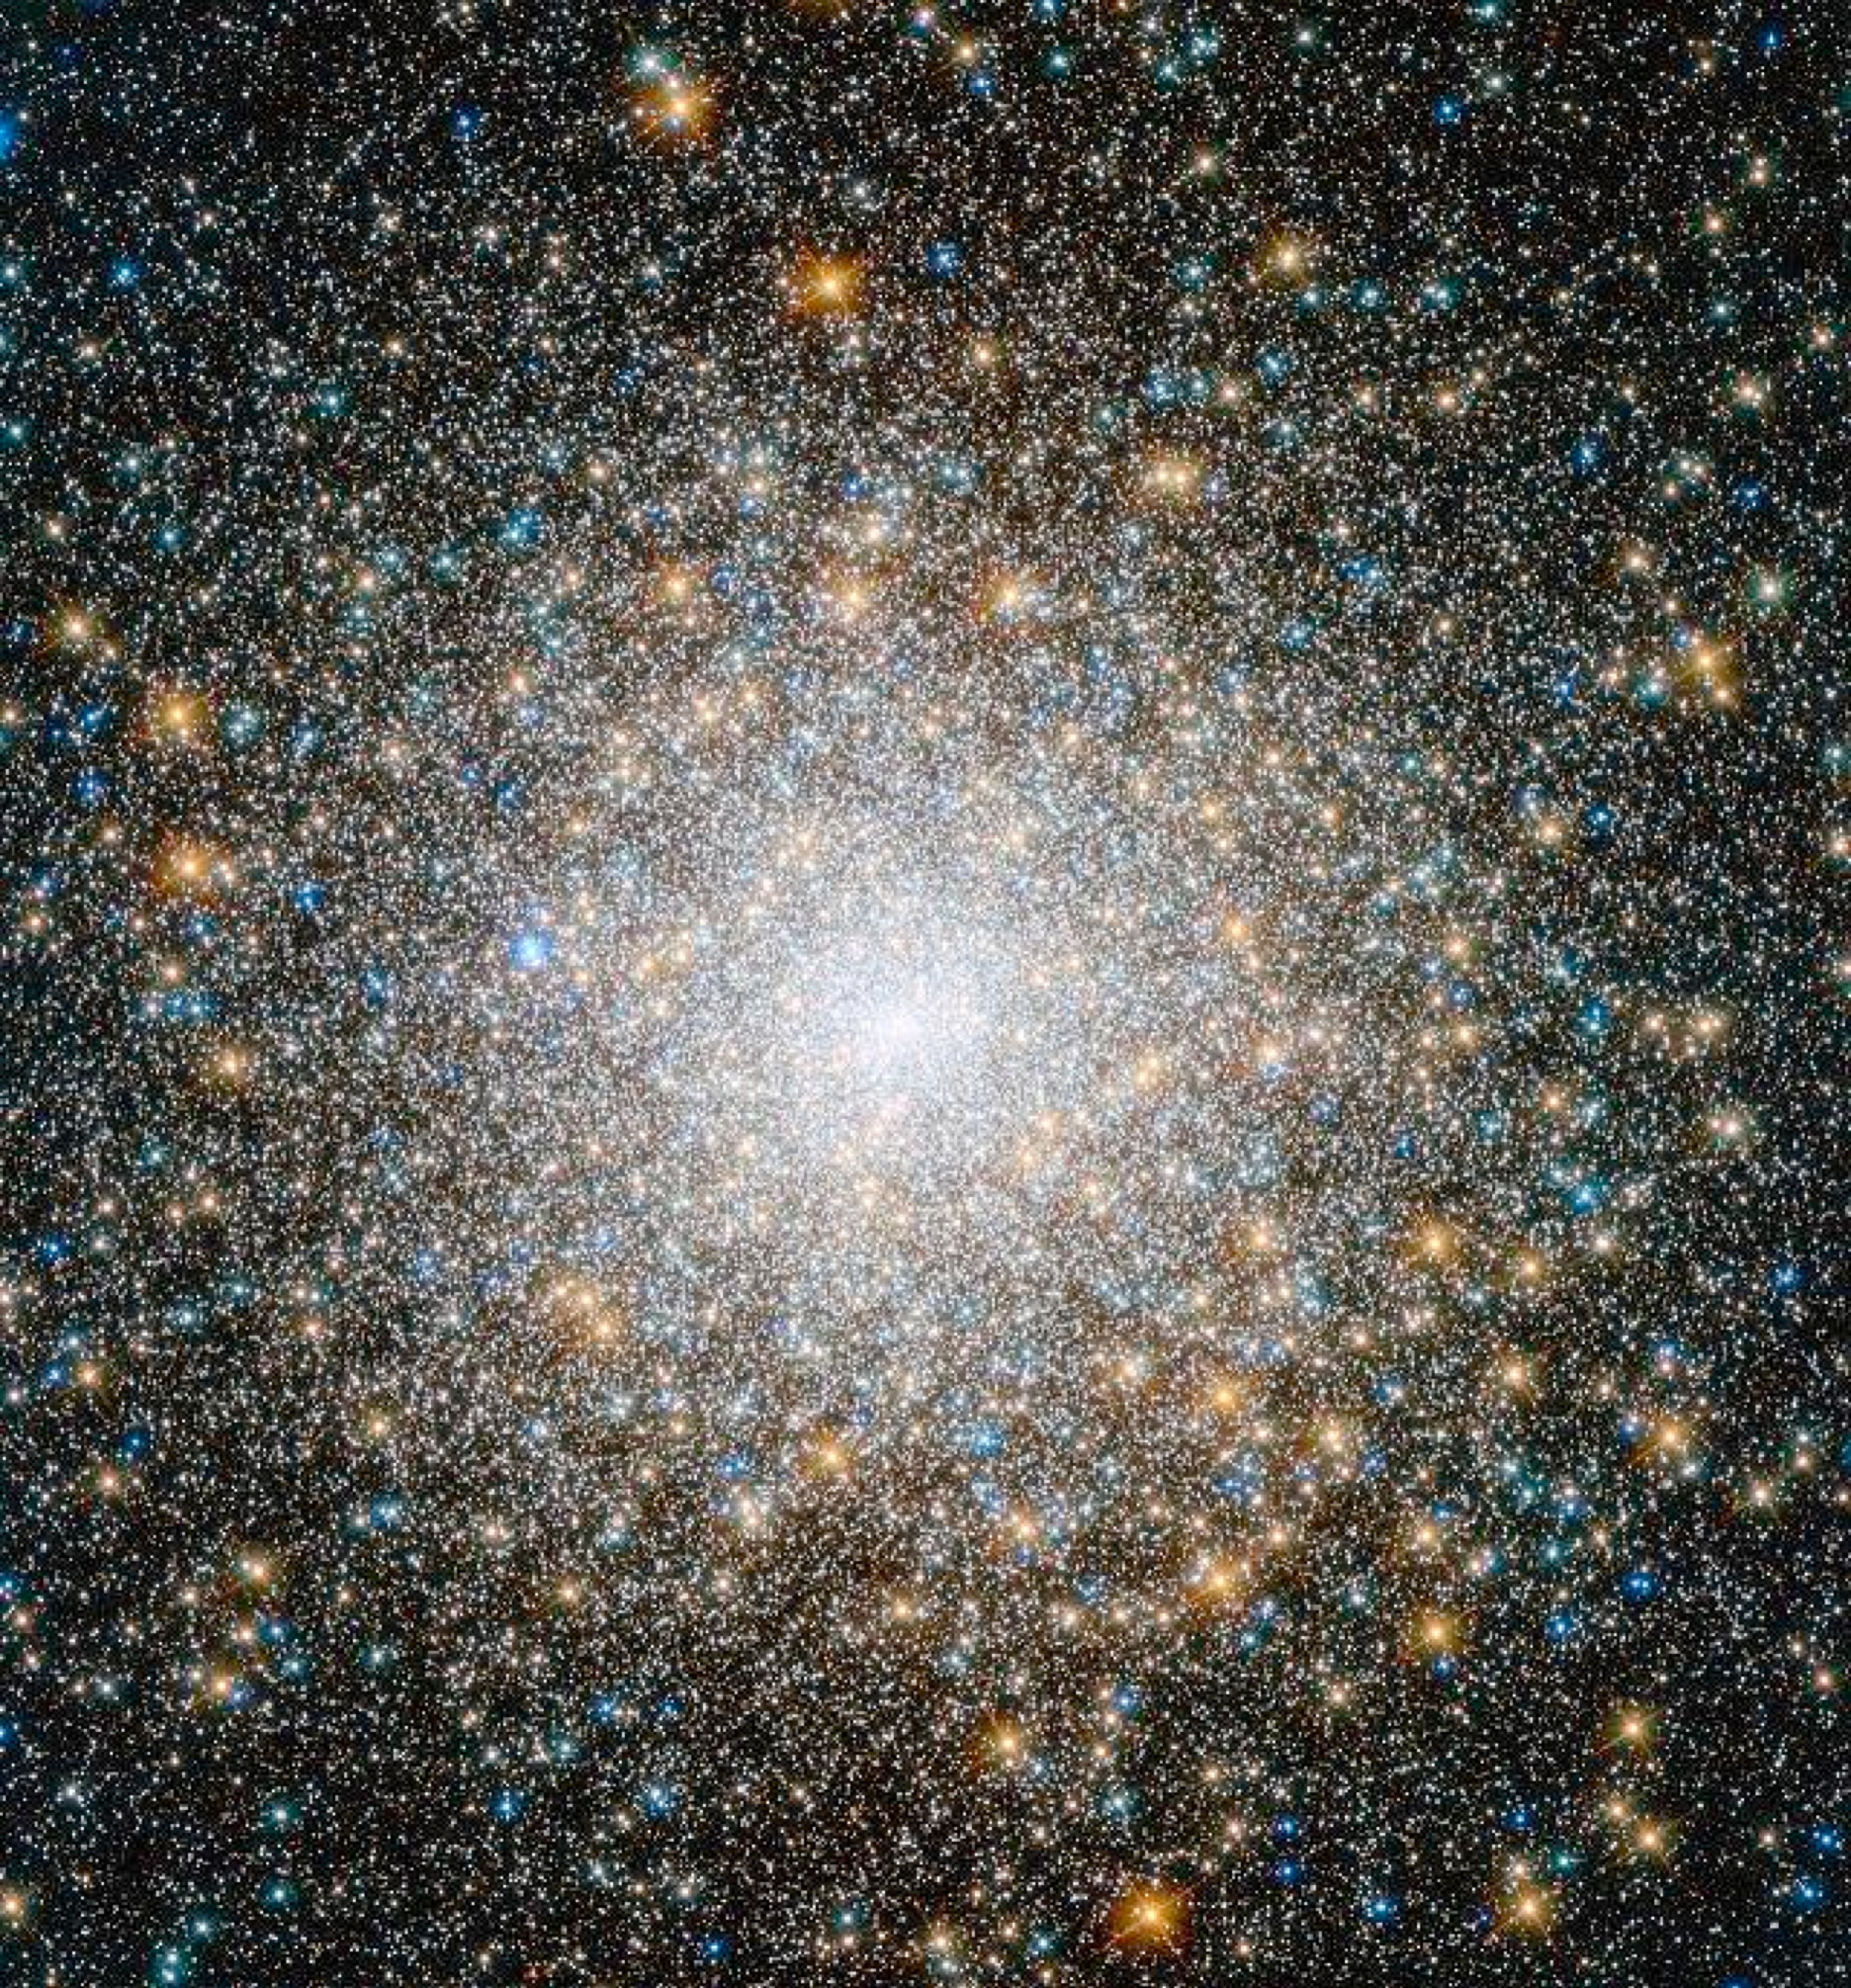
M15, Credit: ESA/NASA.
Orbiting the center of the Milky Way and located some 35,000 light years away in the constellation of Pegasus, this sparkling star cluster is home to more than 100,000 members and could be harboring a dark secret - a rare type of black hole located in its heart. Cataloged as Messier 15, this globular cluster holds many distinctions. Not only is it one of the most concentrated star clusters of its type, but it's also one of the oldest known, with an estimated age of around 12 billion years.
Here we see intensely hot blue stars sharing the field with cooler, golden-colored neighbors. Mutual attraction binds them together and most of the cluster's mass is concentrated at its core. However, there's more there than just beauty... there are hidden mysteries: In 2002, astronomers utilizing the Hubble found Messier 15 to have a dark enigma lurking in its core. It could be a gathering of dark neutron stars - or it could be an intermediate-mass black hole. According to researchers, of the two possibilities, chances are in favor of presence of a black hole, similar to the one spotted in massive globular cluster Mayall II.
Globular clusters contain some of the most ancient stars in the Universe - stars which are all about the same age. But M15 is a rule breaker. It may contain neutron stars which formed from the collapse of a massive star. They are very hot and very dense, with an average mass of around two solar masses contained within a radius of tens of kilometers. It is a scenario you could see happening where so many are gathered!
On the other hand, we have intermediate-mass black holes. These denizens of the deep are thought to be created when several smaller, stellar-mass black holes combine - or as the result of a collision between massive stars in dense clusters. Again, it's a scene that is likely, given the fact that Messier 15 is one of the most compact star clusters known.
Need more? Then take into account a third possibility. The intermediate-mass black hole may have been formed during the time of the Big Bang. By studying its mass, we might learn much more about how black holes evolve and grow, not only within clusters like M15, but in galaxies as well.
Did you happen to notice a blue fuzzy just to the left of the cluster's center in the image? As amateur astronomers well know, Messier 15 is also home to another anomaly: a planetary nebula. It is known as Pease 1 and it is the first planetary nebula to ever be discovered inside a globular cluster. Since its discovery, only three other globular clusters have been found to also contain planetary nebulae: Messier 22, NGC 6441, and Palomar 6.
Why so rare? Remember your globular cluster rules; usually the stars are all about the same age. In the case of planetary nebulae, they are low to moderate mass stars which live short, fast lives and really don't "belong" in a globular cluster!
Amazin' stuff...
About Tammy Plotner - Tammy is a professional astronomy author, President Emeritus of Warren Rupp Observatory and retired Astronomical League Executive Secretary. She's received a vast number of astronomy achievement and observing awards, including the Great Lakes Astronomy Achievement Award, RG Wright Service Award and the first woman astronomer to achieve Comet Hunter's Gold Status.
{ width: 160, height: 160, defaultImage: '', layers: 'Artimg-ObservDoubleStars' }

With the November Moon nearly full, the sky is too bright for most deep sky objects. But there is still plenty to see, and choosing a few good double stars to observe will satisfy that need to get out and observe.
As the Moon rises in the east, look to the west, for fine views in the constellations Lyra and Cygnus. Here you will find three of my favorite double stars for November skies. I am not including photos or drawings of these, so you can enjoy them without preconceptions!

Our area of Study for some November double stars.
A fascinating target, and one I return to over and over, is the multiple star Epsilon Lyra. It is known as "The Double Double." In a good clear sky, I can split the main pair of this multiple star system without optical aid, my eyes are just good enough. With a pair of binoculars, you will easily split the main components - and will see what appears to be a pair of stars. This "pair" of stars have a separation of just over three arc-minutes, at a distance from us of 162 light years. The brighter of the pair has an apparent brightness of magnitude 4.7, and the other of 5.1, so they appear quite similar.
If you point a telescope at the pair, you may have a nice surprise: each star in the pair is itself a pair of stars! That is why the target is called "The Double Double". The pairs of stars you'll see have different separations, and position angles (their position relative to each other). The wider pair is 2.6 arc-seconds apart, shining at magnitudes 4.7 and 6.2.
The tighter pair (and more difficult to split) is 2.3 arc-seconds separation and magnitudes 5.1 and 5.5. Can you split them? This system is in actuality two binary stars (with a common center of gravity) orbiting each other over a period of a hundred thousand years! Studies of other nearby stars associate a total of ten stars to this system, but The Double Double is the real star of the show for us!
Let's move to the constellation Cygnus, and the famous star Beta Cygni - also known as Albireo. Even a pair of binoculars will split this binary star. The primary component is a giant orange-red star, shining at magnitude 3.1, and its blue-green companion at 5.1. The color contrast of the pair is what has made it so well known. They are 430 light years distant, although estimates vary (I've read 320 light years as well), and have a 35 arc second separation - so this is a fairly wide pair, especially compared to the The Double Double.
A fun question regarding the stars of Albireo is which star would you expect to have a longer life, and why? Post your answers here. An interesting phenomena is to observe with others, looking at Albireo's colors. Color vision can vary greatly, and my experience is that people have very different perceptions of Albireo's colors! When you observe this, what do you see?
I'll finish with Omicron Cygni, a relatively unknown favorite I show people in my ten inch reflector. It is a contrasting color double star similar to Albireo, but not as bright. The stars are 30 and 31 Cygni, and can be spit in binoculars. The primary, 31 Cygni, appears orange is magnitude 3.8. The secondary star, 30 Cygni, is magnitude 4.8 and has a blue-green appearance. Why haven't I referred to them as companions or as a binary? The primary is 1400 light-years away, while the other is half that, at 720 light-years from Earth. So these are not a binary - they are an apparent double, or better described as a line-of-sight double, and are not physically associated with each other. If you look through a telescope, you'll also see that 31 Cygni is a binary star, with a "third" partner being blue star of magnitude 7.0!
As you get a feel for observing double stars, you may acquire a taste for a few of the types I've come to enjoy - colored doubles, which can be quite pleasing visually, and tight doubles that can be a challenge, requiring high power and excellent "seeing" (a very steady atmosphere) in order to split.
Even on a Full Moon night, there is plenty to see and do. Get your gear out, and give these a try!
Clear skies,
Mark
Chart courtesy Starry Night Pro.
{ width: 160, height: 160, defaultImage: '', layers: 'Artimg-2013_P5_Comet_Hubble' }

Just when you think NASA's Hubble Space Telescope has discovered everything it possible could, it comes up with something new. In this case, it's a "weird and freakish" object; something we're all aware exists, but it's doing something it shouldn't. Just what oddity have we plucked out of space now? Try an asteroid that has six comet-like dust tails! "We were literally dumbfounded when we saw it," said lead investigator David Jewitt of the University of California at Los Angeles. "Even more amazing, its tail structures change dramatically in just 13 days as it belches out dust. That also caught us by surprise. It's hard to believe we're looking at an asteroid."
When astronomers search for asteroids, they usually find just a small point of light, but this side-show attraction has streaks of material fanning out around it like spokes on a wheel. While some types of asteroids have been known to eject material, this unusual character, designated as P/2013 P5, or just "P5", is displaying behavior that astronomers have never seen: "It's hard to believe we're looking at an asteroid," remarked Jewitt. "We were completely knocked out."

Our two targets for 11/8/2013.
So then, is it a strange asteroid or failed comet? Jewitt further elucidated that P5 has an orbit which could make it a member of the Flora asteroid family. Just what makes Flora-types special? In this case, the odd-ball asteroid could be a fragment of a larger body - a "left-over" from a collision which happened about 200 million years ago. These asteroid pieces are still in similar orbits and are well documented. Meteorites from these fragments show they have been subjected to heating up to as much as 1,500 degrees Fahrenheit. This points to an asteroid comprised of metamorphic rock - a substance not capable of holding volatile ices in the way that comets do.
What could cause this orbiting space rock to have such an incredible formation? Scientists aren't quite sure, but they're willing to hypothesize. P5 was first recovered by the Pan-STARRS survey telescope in Hawaii. The multiple tails were discovered later in Hubble images taken on September 10, 2013. In follow-up observations taken with the Hubble on September 23, the asteroid's appearance had dramatically changed in that short amount of time: the tails had all appeared to have switched sides! This means that either the rotation rate increased to the level where it started flying apart, or something impacted it.
After five months of careful observation, the team was able to dismiss the collision theory. If there were another asteroid that wrecked into P5, the dust would have been released in a single blast. According to modeling done by Jessica Agarwal of the Max Planck Institute for Solar System Research in Lindau, Germany, these "tails" could have been formed by a series of events ranging over a time span that started in mid-April and ended in late August. The "tails" are nothing more than the Sun's radiation pressure acting on the dust and spreading it out in a fan-like formation. "The asteroid could possibly have been spun up if the pressure of sunlight exerted a torque on the body," Jewitt said. "If the asteroid's spin rate became fast enough, the asteroid's weak gravity would no longer be able to hold it together. Dust might avalanche down slope towards the equator, and maybe shatter and fall off, eventually drifting into space to make a tail. So far, only a small fraction of the main mass, perhaps 100 to 1,000 tons of dust, has been lost. The 700-foot-radius nucleus is thousands of times more massive."
What's next on the P5 observing agenda? Astronomers will keep a close watch on how the dust trails react. If they leave the asteroid in the equatorial plane, chances are good that this weird appearance is due to a rotational break-up. In the mean time, researchers will endeavor to calculate the asteroid's true spin rate. It is entirely possible that rotational break-up is a common phenomenon in the asteroid belt; it may even be the main way in which small asteroids die. "In astronomy, where you find one, you eventually find a whole bunch more," Jewitt said. "This is just an amazing object to us, and almost certainly the first of many more to come."
{ width: 160, height: 160, defaultImage: '', layers: 'Artimg-Comet_Lovejoy_Hubbell' }

Comets, Comets, Comets everywhere! But how do you find these comets? Many comets aren't visible to the naked eye, but, with a telescope, and an equatorial mount you can find comets. While telescope mounts may come with a hand controller containing 40,000+ objects in their database. But most hand controllers do not have comet data. You need a planetarium program to show you the comet coordinates. Stellarium is free software and you can download it for any operating system here: http://www.stellarium.org/
After you download and install Stellarium be sure to enter your location. Press "F6", and it will pull up the location window. Another handy tool in Stellarium is the "Date/Time Window" (F5). You can view your target in advance by moving the time clock forward.
To get started with comet hunting you must first download the comet database. I recommend visiting this site for step by step instructions on how to load the comet database: https://answers.launchpad.net/stellarium/+faq/1746
After you have your comet database loaded and Stellarium is setup, press "F3" to view the "Search Window".
In this example I entered in "lovejoy." Press enter, and Stellarium will pull up the comet data.
Stellarium will show you the comet data in the upper left corner. Write down the "RA/DE (J2000)" Coordinates on a piece of paper. In this example it shows "9h03m23.3s/+22 04'01.5".

Now, it's time to enter the comet coordinates in the hand controller. This works for all Synscan hand controllers and Orion's Atlas/Sirius equatorial mounts. Here's a trick to navigate through the hand controller menus, use the lower set of "arrow" keys shown here:
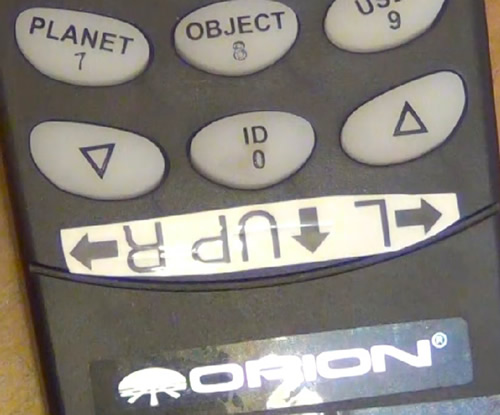
1. From the main menu on the hand controller navigate to "Object Catalog → User Objects" using the lower arrow keys and enter button:
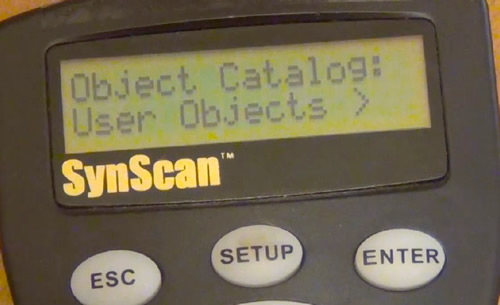
2. From the "User Objects" menu navigate to the "Edit Object" and press enter:

3. Next you will be prompted with this screen. Select "1) RA-DEC" and press enter:

4. The next screen will prompt you to enter the coordinates we wrote down from the Stellarium software. Please note the Declination entry, it could have a "+" or "-", to change these values use the lower arrow keys on the hand controller. To navigate the cursor left or right, use the upper arrow keys.
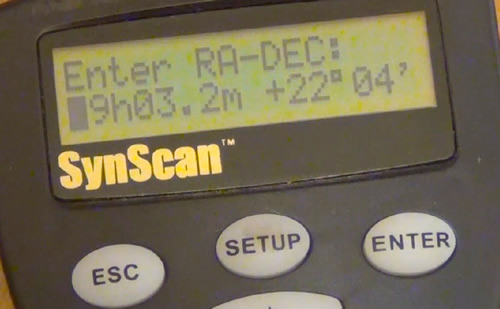
One thing you will notice is Stellarium has very precise coordinates, but, we do not have room to enter all the data. Truncate additional numbers; for example: Stellarium calls out "9h03m23.3s" but the hand controller will only accept "9h03.2m". This is plenty of precision to find the comet in your Field of View.
5. Next the hand controller will prompt you to "Save" the coordinates - press enter.
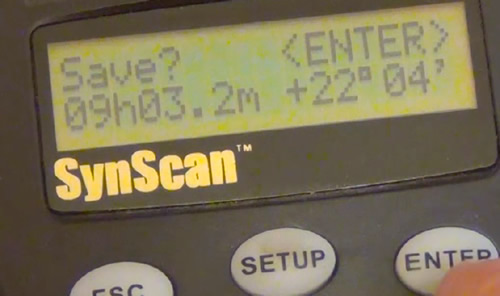
6. The next prompt will ask which User Object location to save your new coordinates. Use # 01 and press enter to save the coordinates.

7. The last prompt will ask "View Object?" Press Enter and your mount will slew to the comet coordinates you entered!
Remember to take your time when you setup your mount. You should make sure your mount is level and you have completed a "Star Alignment" before you begin your comet hunting adventure.
Good Luck and remember to submit your comet images to Orion's Image Gallery on the Community tab of telescope.com!
{ width: 160, height: 160, defaultImage: '', layers: 'Artimg-ap1976_1062013' }

Comet ISON has brightened and is now in the constellation Virgo in the predawn sky. As of November 9, from a dark sky location, Comet ISON is bright enough to see with any telescope that Orion offers, shining around magnitude 8.0. So grab your gear and see the comet! Some tips for comet viewers are below:
Comet ISON, imaged on 10.06.13 by Doug Hubbell.
Take a telescope. While comet ISON has brightened a lot, it is still needs a telescope the week of November 11 to see it. By the end of the week, it should be visible in large binoculars.
Use low power. You don't need a high power to see the comet. A low power eyepiece (with a larger number or focal length, say 18mm or larger) gives a wide field of view and a brighter image, perfect for comet ISON.
Get away from city lights. We can't emphasize enough that the comet is best seen from a dark sky location (one where you can see the milky way). City lights and moonlight vastly overpower most stars, galaxies ands comets.
Rise early. The comet is rapidly moving towards the sun in the morning sky, so you need to get out pre dawn to catch it now. The best viewing will be this week, about 4 a.m., and before 5:15 a.m. as the sky will brighten so much after about 5:15 that the comet is overpowered by the pre-dawn sky.
Know where to look. The comet is still relatively small and dim, so you can't walk outside, look up and see it - though it may get that bright later this year. Check out Orion's Comet ISON page in the Community section of telescope.com for maps and charts of its location, and any new updates. Resources such as Starry Night software will help you get an up-to-date star chart, but remember, the comet is moving pretty fast against the background stars and its position changes slightly every day.
{ width: 160, height: 160, defaultImage: '', layers: 'Artimg-June_Moon_ap984' }

Observing the Moon 11/8

Our two targets for 11/8/2013.
Friday, November 8 finds the Moon a 5.6-day-old waning crescent, as it approaches its First Quarter phase on Saturday. Since the Moon dominates the sky for nearly the first half of the night, let's pick out a few interesting features, and draw them at the eyepiece.
Yes, I'm recommending you add a pencil and pad of paper to your observing gear! The more you draw, the more you see, the better observer you become, and the easier it becomes to draw at the eyepiece.
The drawings needn't be professional, but simply "impressions" of what is seen. Give it a shot!
Tonight, let's visit challenging Rima Manelaus and easy Crater Delambre.
Rima Menelaus

Challenging Rimae Manelaus
This is a rille network from the Moon's Imbrian period (From -3.85 billions years to -3.2 billions years). It is 85.0 x 1.0 miles in size and best viewed six days after New Moon or five days after Full Moon. You'll need a 12" reflector for this target.
Located at 17.0� east longitude and 17.0� north latitude, in the southeast part of Mare Serenitatis.
The name Rilles of Menelaus is given for the 1st century BC Greek mathematician and astronomer.
Crater Delambre

Delambre - perfectly placed tonight!
This crater from the Upper Imbrian period (from -3.8 billions years to -3.2 billions years) is a round 32.0x32.0 miles in size. It rises as high as 15,000 feet.
The steep slopes of Crater Delambre support smaller craters along its western edge, and along its steep terraces on the inner portion. Note the rugged floor, and numerous cracks and craterlets. Observe this target in a 50 mm refractor.
Located at 17.5� east longitude and 1.9� south, The crater is named after an 18th century French Astronomer that collaborated with the famous astronomer M�chain.
Observing the Moon 11/9

First Quarter Saturday Night Targets.
Saturday, November 9 is a true First Quarter Moon; literally half way through the lunar cycle. The Moon will now leave its crescent phase and become gibbous.
Many people mistakenly think the First Quarter Moon is half as bright as a full moon, but it is only one-eleventh as bright because of the many shadows during the quarter phase - a Full Moon casts no shadows. First Quarter is also brighter than third quarter.
Tonight let's use those shadows to see some fine details.
Dorsa Smirnov

Smirnov - A large lava wrinkle-ridge.
Dorsa Smirnov is a wrinkle ridge from the Imbrian period (From -3.85 billions years to -3.2 billions years).
It is comprised of a system of wrinkle ridges running north-south. Its dimensions are 79.0 x 12.0 miles. The craterlet Very sites on its central part. A 50 mm refractor will be good for this target.
Find it a Longitude: 25.0� East and Latitude: 25.0� North in the South-East part of Mare Serenitatis
It is named for Serguej S. Smirnov, a 20th century soviet Naturalist born in U.S.S.R.
Rima Hyginus
Rima Hyginus area is a favorite target.
Rima Hyginus is from the Imbrian geological period (3.85 billions years to 3.2 billions years), and is 133 x 2.0 miles in size. It is a large rille running southeast to northwest and crosses the crater Hyginus, at which point it turns west.
It appears to be formed from a series of small craters. You'll need an 8" reflector for this one.
It is located northeast of the Mare Tranquillitatis area.
Rima Hyginus is named for Caius Julius Hyginus, a second century BC Greek born astronomer.
Lunar maps and some descriptions courtesy of The Virtual Moon Atlas. Lunar images courtesy of The Consolidated Lunar Atlas.
{ width: 160, height: 160, defaultImage: '', layers: 'Artimg-Paris_Observatory_Chi_Cygni' }

A variable star is a star which oscillates in brightness over time. The earliest known variable star is Mira, a red star in the constellation Cetus. While there is some indication that Mira was known as a variable star since ancient times, the earliest well-documented source dates to the 1500s.
We now know that Mira is a red giant star with a mass slightly larger than our Sun. It varies in brightness as it expands and contracts. Mira has nearly exhausted its hydrogen fuel, so it is chugging along like a car running out of fuel. As fusion slows in the core, the resulting drop in heat and pressure in the star allows gravity to compress the star further. This drives up the temperature and pressure in the star enough to allow fusion to continue for a bit, but the resulting heat and pressure causes the star to expand. The central temperature of the star drops, and the star again stops fusing hydrogen. Then gravity collapses the star again, and the cycle repeats itself.
There are about 6,000 known Mira-type variable stars. All of these are stars similar to our own, and in the last stages of their life. In a few billion years our Sun will become a Mira variable, so these stars provide a glimpse of our future.
Perhaps the most famous variable stars are Cepheid variables. These are named after the star Delta Cephei, first documented as a variable star in the late 1700s. Like Mira variables, Cepheid variables are also stars at the end of their lives. But Cepheid stars are much more massive than the Sun, typically 3 - 30 solar masses. Their variability is driven by the Eddington wave mechanism, which means their rate of variability is proportional to their absolute magnitude (brightness). This relation was first discovered by Henrietta Swan Leavitt in the early 1900s.
Since the absolute magnitude of Cepheids can be determined by their rate of variation, they are a powerful tool for determining the distance to galaxies as distant as 100 million light years. By comparing their calculated absolute magnitude with their observed apparent magnitude one can calculate their distance, as well as the distance of the galaxies in which they reside. Edwin Hubble relied on Leavitt's work with Cepheids when he compared the measured distances of galaxies with their redshifts, providing the first evidence of cosmic expansion.
Crucial to our understanding of variable stars is the determination of their light curves. Since variable stars are common, and their variations can span more than a year, this requires a great deal of long term careful observations.
In 1911, the American Association of Variable Star Observers (AAVSO) was established to coordinate, collect and analyze observational data on variable stars. The association currently has over 2000 members; many of them amateur astronomers. Collecting more than a million observations annually, the AAVSO has become a crucial resource for observational astronomy, and is often cited in refereed scientific journals. The data is of high quality, and made available to professional astronomers. AAVSO also has an active outreach program, and encourages anyone with an interest in observational astronomy to participate.
If you have a personal telescope, stars such as Mira and Chi Cygni are good variable stars to begin observing. They have variable periods of 333 and 408 days respectively, so they can be casually observed over the course of a year or two. Their magnitudes range from 2 to 10, which is well within reach of small telescopes under clear skies.
{ width: 160, height: 160, defaultImage: '', layers: 'Artimg-NASA_Proxima_Centauri' }

Only with the Hubble Space Telescope could we get such a brilliant view of our closest stellar neighbor: Proxima Centauri. Located in the constellation of Centaurus (The Centaur), Proxima is just slightly over four light years distant from Earth. Even though this recent Hubble image makes the tiny star appear bright, it really isn't. At around magnitude 11, it's barely visible to an average telescope - let alone the unaided eye!
So what makes this diminutive star special, other than the fact that it's the closest star to our Sun? In this case, it's the type. While Proxima Centauri has an extremely low average luminosity and is physically small compared to other stars (about 1/8th the mass of our Sun) it is what's known as a "flare star". This unusual stellar orb doesn't "burn" like others - it heats by the convection process - where the energy is physically moved up from the interior to the exterior, rather than radiated. As a result, the left-over hydrogen ash doesn't collect at the core... rather it circulates throughout the star. In the end, this means that Proxima will almost completely exhaust its nuclear fuel before the fusion of hydrogen comes to an end.
Proxima Centauri - Credit: ESA/Hubble & NASA
Not only is the life of a flare star unusual, but so are its appearances. Because of the convection process, Proxima is noted for drastic changes in brightness which can occur with no warning or pattern. Astronomers predict that stars such as Proxima will remain a main sequence member for around another four trillion years - or 300 times the age of the Universe as we know it!
Proxima was discovered in 1915 by Scottish astronomer Robert Innes, Director of the Union Observatory in Johannesburg, South Africa. At the time, he didn't know that it was the nearest star to Earth, only that it had the same proper motion as Alpha Centauri. Its name means "the closest," and while it applied to companion star, Alpha, it would be a name that would ring even more true when Dutch astronomer Joan Voute measured the star's trigonometric parallax and determined that Proxima Centauri was approximately the same distance from the Sun as Alpha. It has been the closest star to the Sun for about 32,000 years and will be so for about another 33,000 years!
Proxima Centauri is actually part of a triple star system ? its two companions, Alpha Centauri A and B, lie out of frame. However, they aren't the only ones sharing the same address. Six single stars, two binary star systems, and a triple star share a common motion through space with Proxima Centauri and the Alpha Centauri system. While it hasn't been proven yet, chances are they are all part of a moving group, similar to the Ursa Major System. Did these stars have a common point of origin? It's possible they may have all once belonged to a star cluster... a theory which will last at least until Proxima is shown not to be gravitationally bound to its companions!
{ width: 160, height: 160, defaultImage: '', layers: 'Artimg-Roger_Ivester_NGC891' }

Located about halfway between Gamma Andromedae and bright open cluster M34, lies our object of study this month; the highly elongated galaxy known as NGC 891. This is a very difficult object for anything less than a 6-inch telescope, but I've glimpsed it from my moderately light-polluted backyard in North Carolina, using a 102mm (4-inch) refractor.
When using my 10-inch f/4.5 reflector at a magnification of 57x, this galaxy appears as a very faint thin streak of light. When increasing to 143x, details begin to emerge. However, conditions must be very good to use a magnification this high, due to the very low surface brightness. The following sketch was made using a No. 2 pencil and a blank 5 X 8 notecard with the colors inverted using a scanner.
The galaxy's texture seems to take on a translucent effect, almost as if you're looking right through it. The slightly bulged and brighter central region is very obvious and easy to see. When using averted vision, it has a very faint and dim core. The galaxy is oriented NNE-SSW, and a magnitude 13 star can be seen on the very tip of the more extended, brighter SSW arm. A magnitude 12 star lies NNW of the brighter central region, almost touching the halo. This galaxy is indeed faint, but the edges appear well defined and very sharp, when using averted vision. A dark lane runs the entire length, but I've never been able to see this feature from my backyard using the 10-inch. Can you see the dark lane?
Fred Rayworth, using a 16-inch reflector from the desert SW in Nevada said: "I could plainly see the dark lane at a magnification of 109X, using averted vision. When increasing the magnification to 229X, the dark lane jumped out, using direct vision."
Rob Lambert, also observing from Nevada, and with the same 16-inch telescope said: "The galaxy appeared as an elongated smudge, with a perceived darkening along its' mid-line."
The following image was made by Dr. James Dire of Hawaii using the 20-inch Parallax RC Cassegrain telescope at the U.S. Coast Guard Academy Astronomical Observatory in Stonington, Connecticut. James said: "Amazing I picked up so much of the galaxy in a 10 minute exposure!!!!"
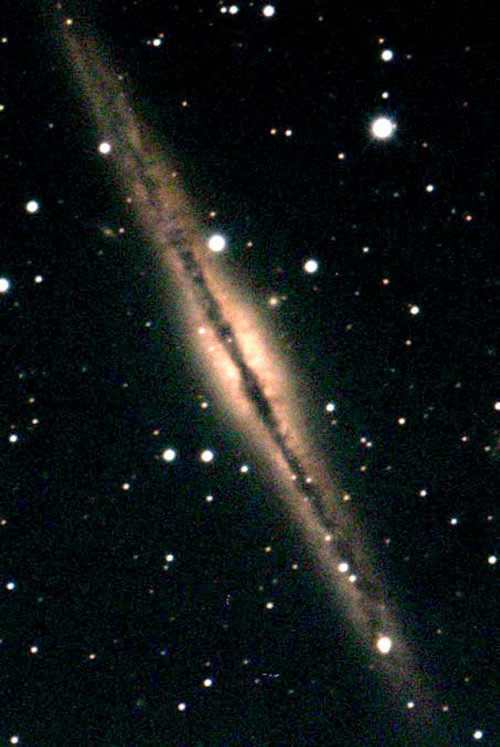
Sue French from New York, using a 10-inch Newtonian reflector at 115X said: "NGC 891 is gorgeous! The galaxy is greatly elongated north-northeast to south-southwest and appears very mottled. A star is pinned to the galaxies' western flank, north of the brighter core. Another star marks its southern tip. I can see just a hint of the dark lane that runs the length of NGC 891. At 166X, the dark lane is more readily visible, sketched through the galaxy midline. The lane is most apparent across the core, which is a flattened oval that slightly bulges out from the galaxies slender profile."
Jaakko Saloranta from Finland said: "You know, I was once able to see this galaxy using a 3-inch refractor under suburban skies! Of course, under dark skies it is not "too" difficult to see with a pair of 8x30 binoculars, although seeing it requires a tripod and a careful gaze...says my logbook. ack in 2009 I observed the galaxy with a 4.7-inch refractor. I wrote to my sketch: 8' x 1' discus -shaped, somewhat low surface brightness with several stars peppered within and around it. The galaxy is elongated in a NE-SW direction. When viewed at 204x the dust lane is fairly prominent, especially in the central bulge."
{ width: 160, height: 160, defaultImage: '', layers: 'Artimg-WhatsInTheSky_11-13_square' }

Clear November night skies offer incredible celestial treats for stargazers, so bundle up and get outside for stargazing fun! This November we'll hopefully have a visible visitor from beyond the inner solar system - comet ISON!
Comet ISON Starts to Shine - If all goes well, comet ISON will reach naked-eye brightness in the predawn sky this month! Even from early November, the comet should be visible to users of small telescopes (from a dark sky location). ISON passes closest to the Sun on November 28, when the comet may get as bright as the planet Venus. The real question is whether the comet will break up after it skims by the Sun. Watch our community center for frequent updates in November.
Leonids Meteor Shower - The night of Saturday, November 16 is the peak of the annual Leonids Meteor Shower. However, this year the full moon nearly coincides with the shower (Full Moon is the 18th), so only the very brightest meteors will be visible. The Leonids are the left-over debris of comet Temple-Tuttle, a comet that orbits the Sun every 33 years.
Big and Bright, Jupiter Season is here - In early November the gas giant planet Jupiter rises in the east about 10:30PM, but by the end of the month it will rise before 8PM and be quite high in the eastern sky by midnight - a perfect position to get great views. Jupiter will be the brightest object in the eastern sky. Nearly any telescope, and even good binoculars, should show the four brightest Galilean Moons (discovered by the inventor of the telescope, Galileo) and a 3" or larger refractor will show detail on the planet itself with moderate to high power. Use a blue Jupiter filter to enhance contrast of the planet's major equatorial cloud bands.
Best Star Cluster - M45, the Pleiades. November is sometimes called "the month of the Pleiades," since it is visible all night long for observers in the Northern hemisphere. From a dark sky site, it is easy to see with the unaided eye and resembles a small "teaspoon" in the sky, but this open star cluster is best appreciated in a good pair of binoculars or a low power telescope.
Best Galaxy - M31, The Andromeda Galaxy. If you view the sky often, you've been watching this object for months now; around 9 PM in early November the Andromeda Galaxy can be found in the constellation Andromeda and positioned high in the eastern sky for great telescopic views.
A Bright Spot in the Milky Way - High in the northern sky at 10 PM is a brighter knot in the Milky Way, between the constellations of Perseus and Cassiopeia. With binoculars you can tell that it is really two open star clusters side by side, the famous Double Cluster in Perseus. Also called NGC 884 & NGC 889, these star clusters are relatively very close to Earth, about 7-8,000 light years away. They're also very young star clusters. Astronomers believe these are only about 3-5 million years old, just "babies" on the cosmic timescale!
A Dark Sky Test - On the opposite side of Andromeda is another nearby galaxy, M33. Use a star chart to look for it in 50mm or larger astronomy binoculars. If you have a dark sky site to observe from, you can even detect this galaxy with the unaided eye. In fact, M33 is used as a test by many experienced observers to judge the darkness and transparency of a potential observing site.
Catch a Dying Star - High in the western skies of November, early in the evening, the constellation Cygnus is still prominently visible and topped off by the bright star Deneb at the top of the "Northern Cross." Use a star chart to track down the Veil Nebula on the eastern side of Cygnus near the star 52 Cygni. Use an Oxygen III filter and low power while you scan for this object. The Veil is a remnant of a supernova explosion, where a star has died! We recommend a 4" or larger telescope to catch it (but it has been seen in smaller scopes from good dark sky locations).
November's Challenge Object - Low in the southern sky, in the constellation Grus, lies a BIG planetary nebula called IC5148. You'll need at least a 6" telescope to see it, and an Oxygen-III filter really helps. This 13th magnitude planetary is 120" x 120" across, so it's nice and big, but it's tough for most observers to catch since it is so low in the south and the surface brightness is low. IC5148 is about 3000 light years away and is sometimes called the "Spare Tire" Nebula.

ESO Photograph of IC5148 with the New Technology Telescope
All objects described above can easily be seen with the suggested equipment from a dark sky site, a viewing location some distance away from city lights where light pollution and when bright moonlight does not overpower the stars. All objects have been verified by actual observations by Orion Telescopes & Binoculars Staff at Fremont Peak State Park, and/or Deep Sky Ranch, 60 miles and 90 miles respectively from San Jose International Airport, San Jose, CA.
{ width: 160, height: 160, defaultImage: '', layers: 'Artimg-M13_Hercules_Cluster_ap929' }

Each year as fall arrives, I wait with anticipation for my favorite objects to rise again, so that I can enjoy them for a new season. I always make sure to visit a few notable summer targets too, to savor them before they leave.
As Hercules is sliding further each day toward the western horizon, let's visit The Great Hercules Cluster, M13 - perhaps the grandest globular cluster in the northern sky. Now is the perfect time to observe its "Triple Treat" before it disappears into the evening twilight until next year.
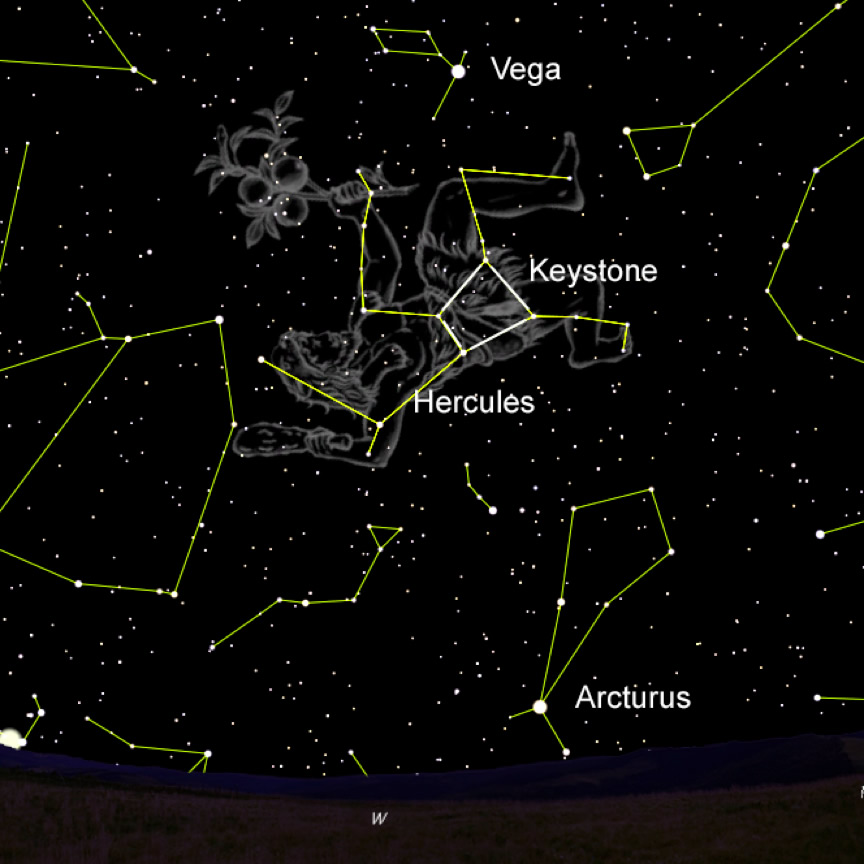
Finding the Keystone in Hercules will help located M13.
M13 is an easy to find target, as it is situated from our vantage point along a constellation line in the asterism known as "The Keystone," in the constellation Hercules.
The Keystone in Hercules is the four-star asterism many amateur astronomers use to find Hercules; located between the bright summer stars Vega and Arcturus. Search just west of Vega to find the Keystone. Hercules stars are not among the brightest, so the sky must be reasonably dark to locate it.

This is a Keystone.
The term "Keystone" comes from early stone doorway or arch construction. The keystone is the top piece whose symmetry locks the stones below on either side in place. Something of a parallelogram, but broader on one end, You'll come to recognize this shape in the stars of Hercules.
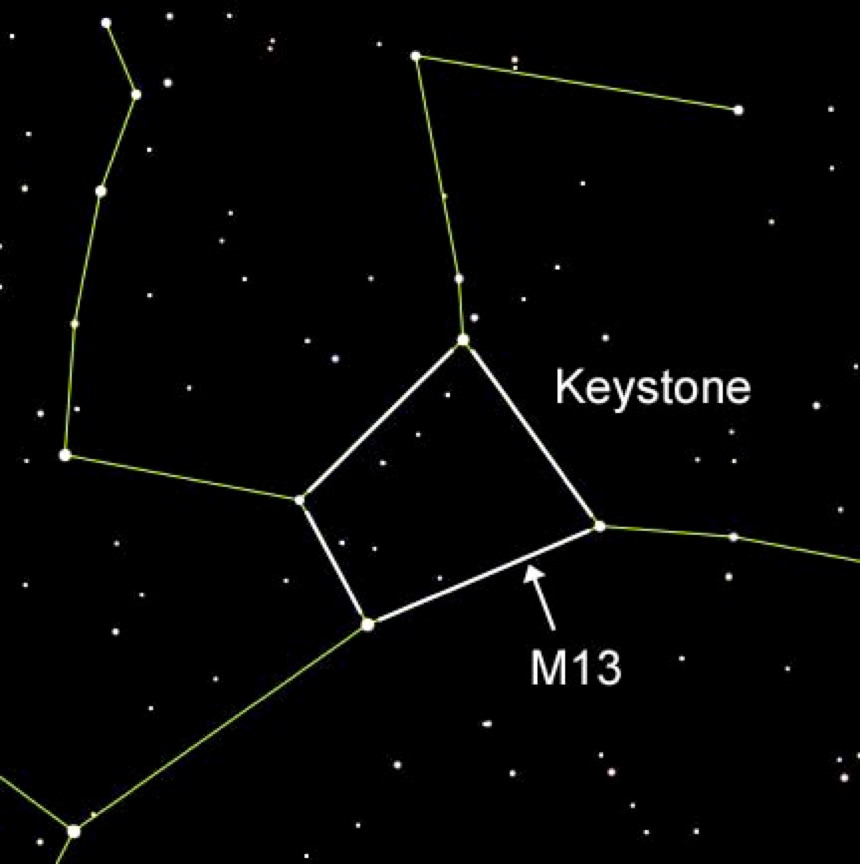
Locating M13 along The Keystone
Along the western edge of The Keystone, you'll find M13, roughly one third the distance toward the small end of The Keystone.
On a dark night away from light pollution, if your vision is average, you can see stars down to about 6th magnitude. The stars of The Keystone are all brighter than magnitude 6, so in a dark sky you'll easily see them.
M13 shines at magnitude 5.78, so you can see it as a faint glow with just your eyes.
With a pair of binoculars, or small telescope, it becomes instantly apparent that M13 is not a faint star, but a round hazy glow. That's the view you'll get in telescopes up to roughly eight inches, although the larger the instrument, the brighter the glow.
In telescopes ten inches and above, the stars in this great cluster begin to resolve - you can start seeing individual stars. The cluster will show hundreds of stars in a very round ball, like a globe of stars. It is stunning to see in larger instruments - dazzling in fact.
Visually, the cluster is incredibly dense toward its core. It thins gradually, about one third from the core the density appears to drop off, then after another two thirds you'll find chains of stars, strings, weaving their way out toward the far reaches of the cluster. It is truly hard to believe this object is real!
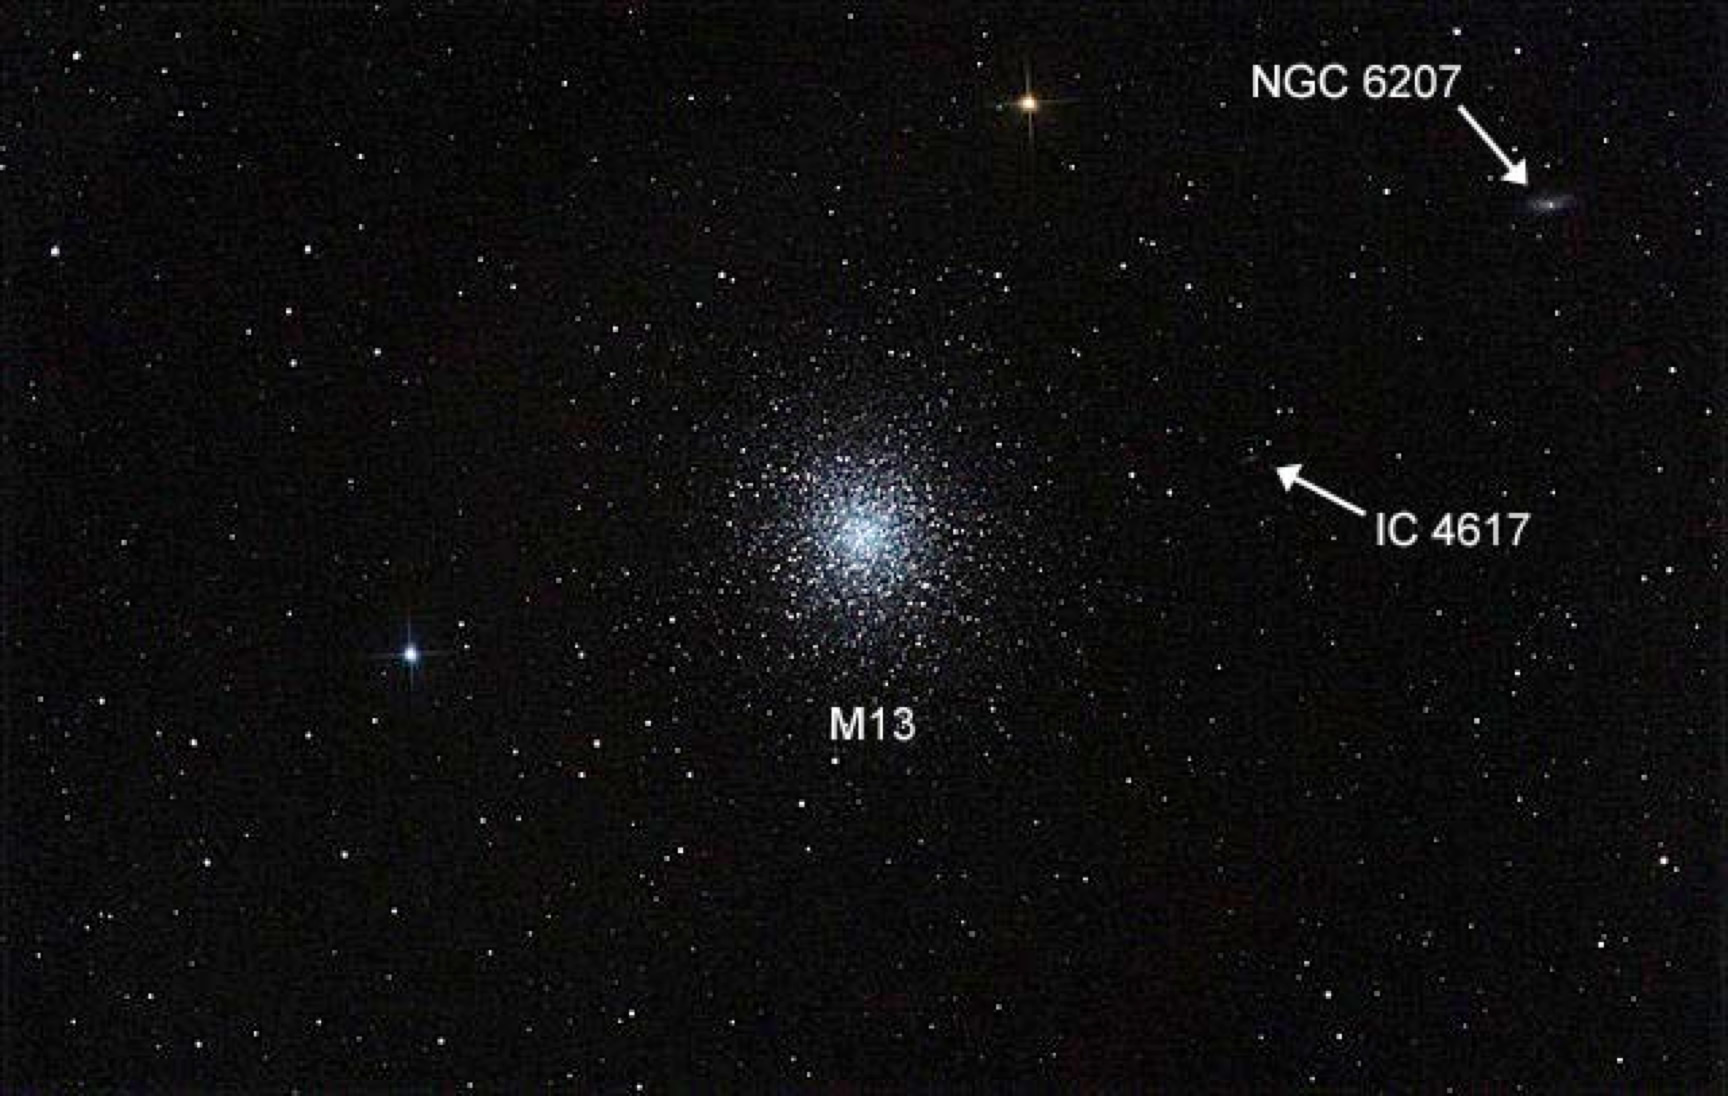
M13, NGC 6207 and IC 4617 - a Telescopic Triple Treat
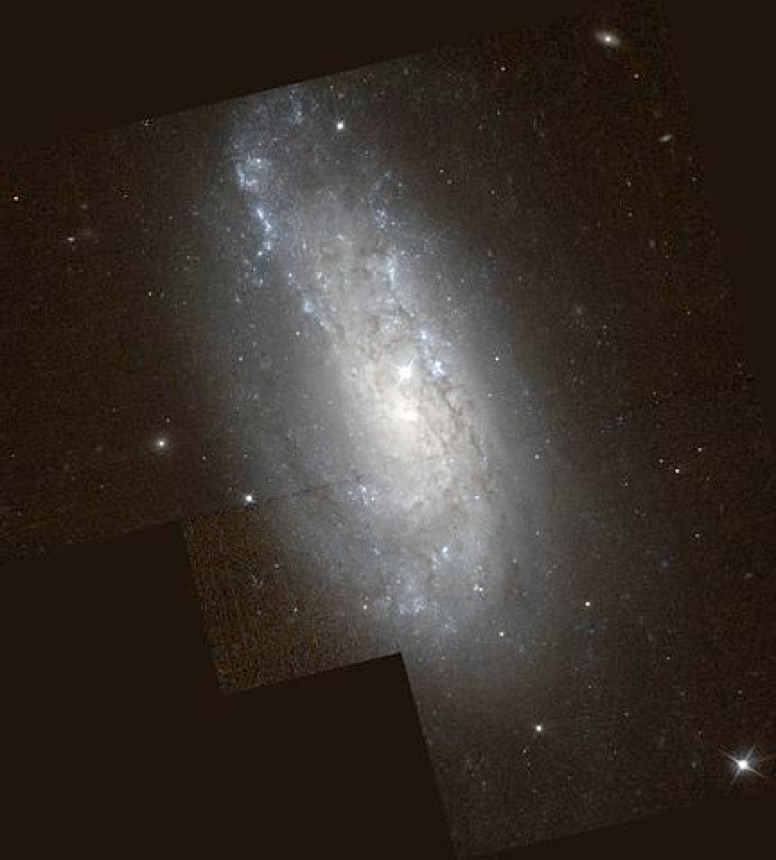
NGC 6207 - 45 million light years.
But why do I call M13 a "Triple Treat?" Two other targets sit within about one wide-field eyepiece view away. Just under 1/2 degree north of M13 is the spiral galaxy NGC 6207. At magnitude 12.5 it is within reach of smaller telescopes. I use the two bright stars off either side of M13 to provide direction, and follow along that axis from M13 to see the dim but obvious glow of the galaxy.
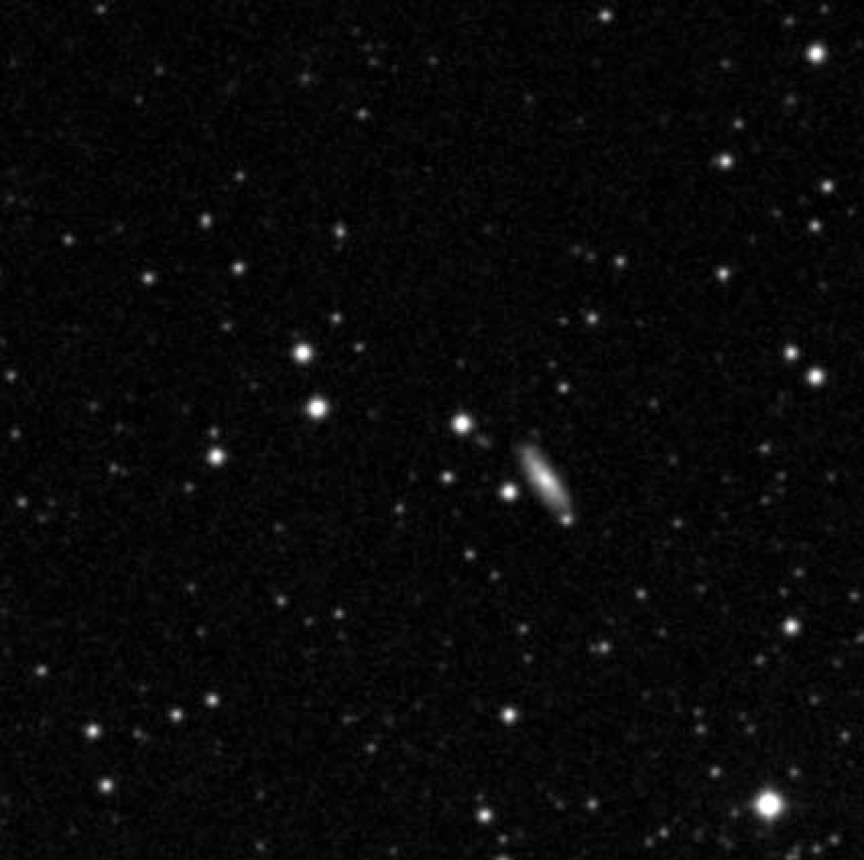
IC 4617 - challenge yourself to see it!
If you have a large enough telescope - perhaps 12 inches or more, you can try to observe what is considered a challenge object in the same field of view. IC 4617 is a distant spiral galaxy that, in most telescopic views, appears only as a "fuzzy" fourth star in a dim four-star parallelogram. It is listed at magnitude 16, so you will need very dark and steady skies, and patience (watch for a while to see if it "pops out" of the darkness.) It is located just over twelve arc-seconds from M13 in the direction of NGC 6207.
Of course, seeing these objects is pleasing. M13 for its aesthetic beauty, NGC 6207 for is relative line-of-sight proximity to the big cluster, and IC 4617 for its challenge.
But the "mind-candy" part of the observer's equation is equally enticing. M13 is, of course, in our own Milky Way galaxy, it is our galactic companion in a universe of other galaxies. Its light, when it reaches our eyes, is 25,000 years old, having left the cluster during the Earth's last great Ice Age. The cluster contains an estimated 300,000 stars, spans 145 light years, and incredibly, is thought to be nearly 14 billion years old - as old as the Universe!
Looking out to NGC 6207, you are viewing through open space about 45 million light years. Roughly the distance of the great Virgo Galaxy Cluster - which we'll observe next Spring. If you are lucky enough to detect little IC 4617 though, you've won the prize - as it is a mind-bending 489 million light years distant. Light that has traveled nearly half a billion years, into your eye, to tickle the optic nerve in your head! So you can put into perspective just how "local" M13 really is.
Get out and enjoy these beautiful and interesting views, before they leave for the season!
Charts created with Starry Night Pro. Other images courtesy Wikipedia. NGC 6207 from Hubble Space Telescope.
{ width: 160, height: 160, defaultImage: '', layers: 'Artimg-ESA_GAIA' }

With the largest camera ever to be sent into space, Mission Gaia will image one billion stars, revealing valuable information about the structure and evolution of our home galaxy, as well as discover supernovas, previously unseen asteroids and planets around nearby stars. On November 20, 2013 at Europe's spaceport in Kourou, French Guiana, the ESA will launch its surveyor, Gaia, to engage in a five year mission to map a billion stars with unprecedented precision.
Once in space, Gaia will head towards Lagrange Point, or L2, some 1.5 million km beyond Earth's orbit. Once there, the surveyor will take up its stable position in orbit around the Sun and begin imaging. It will observe an estimated billion stars, repeatedly.
Each observation will reveal information about individual star position and movement. However, that's not all: Gaia will also take measurements of each star's "vital signs," such as stellar temperature, luminosity and chemical composition. These observations will hugely assist astronomers in refining our understanding of our own galaxy, including its origins and evolution.
Artist's Impression of Gaia - ESA
Gaia isn't a lightweight. It consists of two telescopes which rotate slowly, sweeping the expanse of the entire sky and focusing the light of both telescopes simultaneously onto the CCD array of a single digital camera. The camera itself is the largest ever flown into space and has the capacity of nearly a billion pixels! At the Kourou launch area, the last two months have been flurry of tests for the Gaia mission and preparing for launch.
"Getting ready for launch is an extremely busy phase for the mission teams, but it's also extremely exciting and rewarding to see our mission so close to launch," says Giuseppe Sarri, ESA's Gaia project manager.
One of the most fascinating components of the Gaia craft is its sunshield. At the beginning of October, it passed its final deployment test and has now been tucked away in its final configuration, ready for launch. Once the spacecraft reaches its goal, the sunshield will deploy and create a 10.5 meter wide umbrella around the base of the surveyor. This will become a dual-purpose venture: the sunshield will protect the spacecraft's sensitive telescopes and cameras from solar damage - keeping them at a safe operating temperature of -110�C - while the solar panels on the other side will help generate electricity to power the systems.
"With this important milestone -- and others -- now completed, we are working through an intensive checklist of final activities that will culminate in the much-awaited launch of our 'discovery machine'," adds Giuseppe.
By now, at ESA's European Spacecraft Operations Center in Darmstadt, Germany, the Gaia Mission Control Team will have completed a full simulation for crucial launch functions and the beginning phases of the mission's orbit. The Gaia craft itself will have received its fuel supply at Kourou; its tanks topped off and ready to carry out the propulsion system's commands when it makes it into space.
At the beginning of November, Gaia will then be transferred to the Soyuz launch adapter where it will receive its upper stage that will help boost the space traveler along on its journey to L2. During the initial four minutes of launch, Gaia will be outfitted with a Soyuz fairing, a protective nose cone that will shield it against damage.
Then, on November 15, 2013, Gaia will be transferred to the launch pad where it will be mated with the Soyuz launcher and fueled for the ride. Five days later, on November 20, 2013, at 08:57:30 GMT, the spacecraft will take off! If you're interested in watching this historic event, it will be streamed live on the ESA Portal at http://www.esa.int
"We are excited to see the launch less than one month away, but there are still a lot of final preparations to complete," says Timo Prusti, ESA's Gaia project scientist. "Our quest to create an enormous stellar census to solve questions on the origin, structure and evolutionary history of our home galaxy, and to discover tens of thousands of supernovas, previously unseen asteroids and even planets around nearby stars, is finally about to begin."
Just like updating your GPS system, the Gaia Star Survey will update our astronomical catalogs and much, much more. Even given a billion stars, that's only about 1% of the number of stars astronomers estimate to be within the Milky Way. Ah, well. Move over, Hipparchos, there's a new kid on the block!
Original Story Source: ESA News Release
{ width: 160, height: 160, defaultImage: '', layers: 'Artimg-Star_Chart_Cassiopeia' }

Winter constellations are on the rise, and among everyone's favorite is Cassiopeia, with its distinctive 'W' shape, and famous lore in western mythology. Cassiopeia also happens to be filled with treasures; easily attainable in both binoculars and telescopes.
In mythology, Cassiopeia is the vain queen in the legend of Andromeda and Perseus. She is also the wife of King Cepheus. All these characters are found in the same part of the winter skies. Others that are related, in Greek mythology, are Pegasus and Cetus. We'll eventually visit them all.
Location of the double star Eta Cassiopeiae
My favorite object to observe in Cassiopeia is the double star Eta Cassiopeiae, visible to the naked eye at magnitude 3.43. There are some very fine open clusters throughout the constellation, and some challenging diffuse nebulae, but Eta is special for its amazing color combination: a creamy yellow-white for the larger (primary) star, with the secondary star shining like a copper penny, which is my nickname for it. Eta Cassiopeiae can be split in even the smallest of telescopes.
Eta is our close neighbor at a distance of 19 light years from Earth, and its stars orbit each other once every 480 years. The actual distance between the two stars is 70 AU, (Astronomical Units - the distance between the Earth and Sun.) For comparison, the planet Neptune is 30 AU from the Sun.
The main star is fascinating because it is virtually a twin of our own Sun: it is 97% the Sun's mass, is a G-type main sequence star like the Sun, and 101% the radius of the Sun. So, looking at that creamy yellow-white star gives you a very good idea of what our star would look like from 19 light years away!
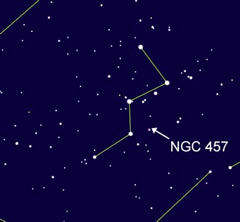
NGC 457 - The ET Cluster. It has also been called the Kachina Doll, Owl Cluster, Dragonfly and Skiing Cluster.
I also always enjoy sharing views of the open cluster NGC 457 at public star parties. It is bright and very easy to find by extending an imaginary line from the eastern "leg" of the W about one-third of the length in the opposite direction. This cluster shines at magnitude 6.40, so it is almost visible without optical aid. There are approximately 120 young stars in this group, estimated to be 21 million years old. NGC 457 is relatively distant for such a bright cluster, at 7,900 light years! The cluster has many names given by amateur astronomers. My favorite is the popular "ET Cluster."
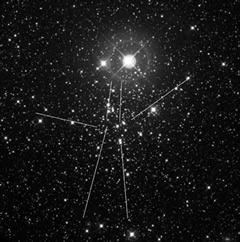
The ET Cluster with stick figure.
The bright stars Phi-1 and Phi-2 appear to be the eyes of ET, and dimmer stars of the grouping forming the body and arms of the famous movie character. Visually, in a telescope, you will immediately see the figure.
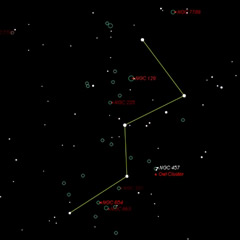
The many open clusters of Cassiopeia
There are many open clusters in Cassiopeia in addition to ET. I suggest also looking at NGC 654, (M103), and NGC 7789, which can only been seen in a dark sky. M103 is a brilliant triangular grouping, while NGC 7789 is a mysterious maze of dimmer stars all nearly the same magnitude.
Open clusters, young groupings of stars, are common along the band of the Milky Way. Cassiopeia lies directly along our winter Milky Way. Stop by this weekend, and take the tour!
Did you find ET, or did you see a Dragonfly? Were you able to separate Eta Cassiopeiae? Tell us in the comments!
Charts created with Starry Night Pro. NGC 457 image from the Digital Sky Survey.
{ width: 160, height: 160, defaultImage: '', layers: 'Artimg-NASA_Comet_German' }

If comet ISON becomes visible to the naked eye as it approaches the Sun, try imagining yourself watching it two thousand years ago.
At first glance you wouldn't have been able to tell that the new object was moving at all against the background of stars. Probably bewildering was the comet's tail - which seemed to flow away from an object that was just hanging in the sky. If the comet wasn't moving, why did it have such a magnificent train?
 Credit: NASA/JPL")
Woodcut showing the destructive influence of a 4th century comet, by Stanilaus Lubienietski's Theatrum Cometicum (Amsterdam, 1668.) Credit: NASA/JPL
There was no shortage of opinions about what the tail might mean. In the second century A.D., the Greek astronomer Ptolemy reported that comets contained everything needed to make a detailed prediction of earthly events: "They show, through the parts of the Zodiac in which their heads appear and through the directions in which their tails point, the regions upon which misfortunes impend. Through the formations of their heads they indicate the kind of the event and the class upon which the misfortune will take effect; through the time which they last, the duration of the events; and through their position relative to the Sun likewise their beginning."
Writing two thousand years ago, the Roman astrologer Marcus Manilius offered the typical opinion that comets were signs from Heaven of impending disaster. Included in his list of tribulations were failed crops, plague, wars, insurrection, and even family feuds. Anything could be blamed on comets!
Perhaps it was natural for soothsayers to take advantage of such a conspicuous opportunity to practice their art. At any rate, the art of cometary prophecy flourished, encouraged by the Church, which was quick to interpret comets as signs from God. You could read into the mysterious flare in the sky whatever your imagination suggested.
Most celestial bodies travel across the sky at intervals so regular that the motions of constellations could be mapped and predicted. But the movements of comets have always seemed erratic and unpredictable. This led people in many cultures to believe that the gods dictated the motions of comets and were sending them as a message. What were the gods trying to say?
To some cultures the tail of a comet gave it the appearance of a woman's head, with long hair flowing behind her. This symbol of mourning was taken to mean that the gods that had sent the comet were displeased. Others thought that a comet looked like a fiery sword in the night sky, a traditional sign of war and death. Such a message from the gods must mean that their wrath would soon be visited on the people of the land.
Unlike their Western counterparts, Chinese astronomers kept extensive records on the appearances, paths, and disappearances of hundreds of comets. Catalogs have been found dating back to the Han Dynasty, and they describe comets as "long-tailed pheasant stars" or "broom stars" and associate the different forms of comets with different disasters. These detailed records allowed later astronomers to determine the true nature of comets.
, 1980. Beijing")
Silk Atlas of Comets from the Hunan Provincial Museum. Credit: International Dunhuang Project, from the Album of Relics of Ancient Chinese Astronomy, Zhongguo Gudai Tianwen Wenwu Tuji, CASS (Chinese Academy of Social Sciences, Institute of Archaeology), 1980. Beijing
Beliefs about comets were influenced for more than two thousand years by the Greek philosopher Aristotle, who declared in the 4th century B.C. that comets were strictly atmospheric phenomena. In Aristotle's cosmology, Earth was stationary at the center of the universe, and all celestial bodies - the Sun, Moon, planets, and stars - revolved around Earth on spheres of pure crystal. So, any temporary aberration such as a comet had to be in the atmosphere below the crystal spheres.
According to Aristotle, comets were produced by gases that rose into the upper atmosphere where they caught fire, ignited by sparks generated by the motion of the heavenly spheres. If the gases burned quickly, they produced the sudden flash of a shooting star. If they burned slowly, the result was a comet.
Of all the ancient writers on comets, the one who came closest to the truth was Lucius Seneca, a Roman of the first century A.D. Seneca argued that comets were celestial bodies moving in orbits like the planets, and that therefore they might eventually reappear: "Men will someday be able to demonstrate in what regions comets have their paths, why they move so far from the planets, and what is their size and constitution," he wrote.
But in his own time, Seneca was ignored as a threat to the soothsayers' thriving business. Seventeen centuries passed before the first part of his prediction came true - that men would someday be able to determine comets' paths - but the second part, concerning the size and composition of comets, is only now being fulfilled.
Why do you think comets inspired such dread in our ancestors, while today they are enthusiastically anticipated? Leave a comment!
Article thumbnail: A view of Augsburg, Germany with the comets of 1680, 1682, and 1683. Credit: NASA/JPL
{ width: 160, height: 160, defaultImage: '', layers: 'Artimg-Melies_la_lune_drawing' }

This weekend our night sky is filled with moonlight, as the Full Moon, the Hunter's Moon, falls on October 18th. Even Full Moons can be fun and interesting!
Most of us in Western culture have heard of or seen the "Man In The Moon." However, not all of us can recognize it.
Left is a representation of the full Moon, from The Virtual Moon Atlas software. Can you see the Man in the Moon in it? Or other shapes?
The Man In the Moon is relatively easy to see. Mostly comprising of two Mare, Ibrium upper left, Tranquillitatis to the right, and Oceanus Procellarum lower left. The nose "area" is pronounced brightening between the three.
Surely, humans have been making this "face" on the Moon since antiquity.
The idea of a face on the Moon even found its way into "modern" culture in early films. Those of you who watched the 2011 movie Hugo saw the depiction of the Georges M�li�s characterization of the "Man In The Moon" in film, which depicted a Jules Verne style adventure. This iconic image of the Man in the Moon dates back to M�li�s' 1902 silent French film Voyage dans la Lune, or Trip to the Moon.
But did you know there are other shapes to be seen in the Full Moon? Here are a few:
There is a Lady in the Moon too. She and the Man in the Moon are eternal celestial companions!
Here you can see her hair, made from Mare Serenitatis above her forehead, Mare Tranquillitatis over her ear, and Mare Fecunditatis toward the back. Mare are dark areas of smooth lava flow on the lunar surface. Mare Humorum defines the area under her chin and in front of her neck, while smaller and brighter parts of the Moon create her face. The southwest part of Mare Serenitatis defines her dark eye.
Not all shapes on the Moon are human though. Particularly notable is the Lunar Rabbit, embraced by Mexican and Chinese cultures. The Rabbit is seen in two forms, which you too can trace out. Both encompass large areas of lunar Mare, and both are very believable shapes, sharing the ears, but differing in orientation of the hare's body - one is upside down, as shown below. Which one is easier for you to see?
Other examples of shapes seen on the Moon include The Drummer On The Moon, from the Ivory Coast, Tears On The Moon from Algeria, another Rabbit (and Frog) on The Moon, from China, and the Boy On The Moon from North America
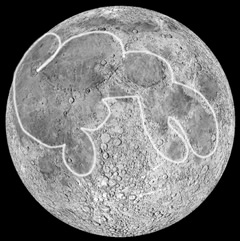
Finding shapes like this is called pareidolia, a psychological phenomena we have that creates what we consider significant images from random shapes. It is easy and fun to do, and is a great way to introduce your children to the night sky, with images they will never forget. Maybe you can come up with some new shapes!
-----------
Images of the moon from The Virtual Moon Atlas. Georges M�li�s Man In The Moon is public domain, from Wikipedia.
{ width: 160, height: 160, defaultImage: '', layers: 'Artimg-Pan_Starrs_Lonely_Planet' }

About 80 light years from Earth is a lonely planet. Its name is "PSO J318.5-22" and it was discovered by an international team of astronomers during a wide field survey. The little guy is about six times the size of Jupiter, with all the properties of a gas giant, and probably formed just a short 12 million years ago, making it a relatively young planet.
Thanks to the extreme sensitivity of the Pan-STARRS 1 (PS1) wide-field telescope on Haleakala, Maui, the unique heat signature of the newborn planet stood out against a massive field of data. This prompted astronomers to do follow-up observations - observations which show that PSO J318.5-22 is all by itself, drifting in space - with no host star or orbit to speak of.
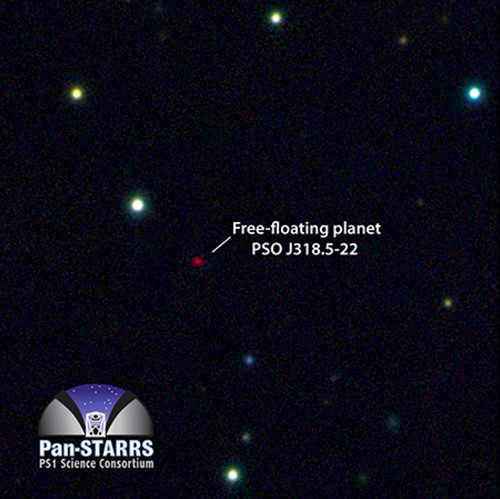
The Lonely Planet. Credit: N. Metcalfe & Pan-STARRS 1 Science Consortium
"We have never before seen an object free-floating in space that looks like this," said team leader Dr. Michael Liu of the Institute for Astronomy at the University of Hawaii at Manoa. "It has all the characteristics of young planets found around other stars, but it is drifting out there all alone. I had often wondered if such solitary objects exist, and now we know they do."
But finding undiscovered planets isn't exactly hot news. For the last ten years researchers have been swatting extrasolar orbs out of the starry sky like mosquitoes before moonrise.
Through techniques like the transit method and measuring stellar wobble, astronomers have identified about a thousand new worlds; yet only a very tiny few have been directly imaged.
What all of these alien worlds have in common is a parent star: a young star of less than 200 million years old. What makes PSO J318.5-22 so unique is its resemblance to these other planets in respect to energy output, color and size. The one exception is that it is probably the lowest-mass free-floating object known. "Planets found by direct imaging are incredibly hard to study, since they are right next to their much brighter host stars," said Dr. Niall Deacon of the Max Planck Institute for Astronomy in Germany and a co-author of the study. "PSO J318.5-22 is not orbiting a star so it will be much easier for us to study. It is going to provide a wonderful view into the inner workings of gas-giant planets like Jupiter shortly after their birth."
The lonely planet was discovered during a search for failed stars, more commonly known as brown dwarfs. Because of their "cool" nature, these not-quite stars are intrinsically faint and emit a red signature. Through the use of the PS1 telescope, Liu and the research team were able to accumulate images taken with a camera sensitive enough to pick up the red signature of a brown dwarf.
To the eye of the camera, PSO J318.5-22 stood out against the information like a solitary ruby. To give you an idea of how much data needs to be sorted through to find just one blip on the proverbial planetary radar, imagine the equivalent of 60,000 iPhone photos taken every night for 730 nights. The total dataset to date is about 4,000 terabytes. That digital sum equates to even more than all the movies ever made, all the books ever published and all the music albums ever released!
"We often describe looking for rare celestial objects as akin to searching for a needle in a haystack," said Dr. Eugene Magnier of the Institute for Astronomy at the University of Hawaii at Manoa and a co-author of the study. "So we decided to search the biggest haystack that exists in astronomy, the dataset from PS1."
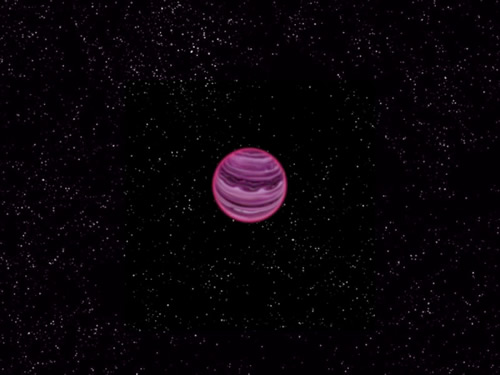
Artist's conception of PSO J318.5-22. (Credit: MPIA/V. Ch. Quetz)
However, this wasn't a one night stand. Not only did the team follow up the PS1 discovery with several other telescopes at Mauna Kea, they regularly monitored the position of PSO J318.5-22 over two years with the Canada-France-Hawaii Telescope.
The lonesome planet was imaged in the infrared with the NASA Infrared Telescope Facility, and the Gemini North Telescope verified that it was not a brown dwarf in disguise. It's a planet alright. One that belongs to a young collection of stars known as the Beta Pictoris Moving Group, because of its location within the boundary of the group. But while it shares the same proper motion as the moving group, the mysterious new planet is moving around on its own!
{ width: 160, height: 160, defaultImage: '', layers: 'Artimg-2013_10_07' }

Images of the fascinating galaxy cluster Abell 1689 would nearly as revealing if it weren't for the phenomenon known as gravitational lensing. But what is gravitational lensing? And what do the latest images reveal about the incredible galaxy cluster Abell 1689? Read on to find out!
Although our backyard telescopes will never reveal huge galaxy cluster Abell 1689 the way the Hubble Space Telescope does, even the Hubble gets an occasional "hand" with its vision. In the case of this spectacular Galaxy Cluster, it's a phenomenon known as gravitational lensing - an affect which magnifies the light beyond it. Like a gigantic zoom eyepiece in space, Abell 1689's huge amount of gravity warps and convolutes the space surrounding it, allowing astronomers to take an even closer look at distant objects. What appear to be smears and streaks of light are actually even more galaxies!
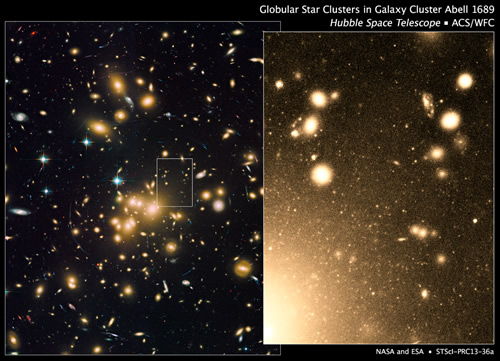
As you examine the image, you'll see intense stars, wads of star-stuff which look like golden cotton candy and distant, mysterious spiral galaxies. Here, you will witness huge, magnificent galaxies being ripped apart, their material pulled into space. The detritus leaves thin, blue trails which curve around the galaxies in the middle. This is where new suns are being formed at a break-neck speed. The hot, young, blue stars are imparting both their emissions - and colors - to the galactic pallet.
However, the distant galaxies are only a bonus to this Hubble observation. Abell 1689 is under study for its huge population of globular clusters. While the space telescope first examined this cluster 11 years ago, this new image includes infrared data from Hubble's Advanced Camera for Surveys (ACS). With a total imaging time of over 34 hours, the new data set unveils structure in greater detail than ever before. It verifies that Abell 1689 contains the largest population of globular clusters found so far... some 10,000 of them. By comparison, the Milky Way only contains about 150 of these ancient collections of stars, and researchers estimate the galaxy cluster could be home to as many as 160,000 in total.
As for gravitational lensing, this isn't the first time astronomers have used this trick for surveying ever deeper into this particular galactic neighborhood. Just three years ago, they used the technique to study the elusive phenomena of dark matter and dark energy by mapping the composition of Abell 1689. It also revealed the presence of the brightest and youngest galaxy so far discovered - A1689-zD1 - only five years ago.
Gravitational lensing is such a powerful tool that it will play a crucial role during Hubble's upcoming Frontier Fields program, as mankind peers even further into the distant Universe.
And just where will the Frontier Fields take us? According to the goals, "After considering valuable advice from the astronomical community and broad range of open questions in galaxy evolution, the committee has unanimously recommended a program of six deep fields centered on strong lensing galaxy clusters in parallel with six deep blank fields."
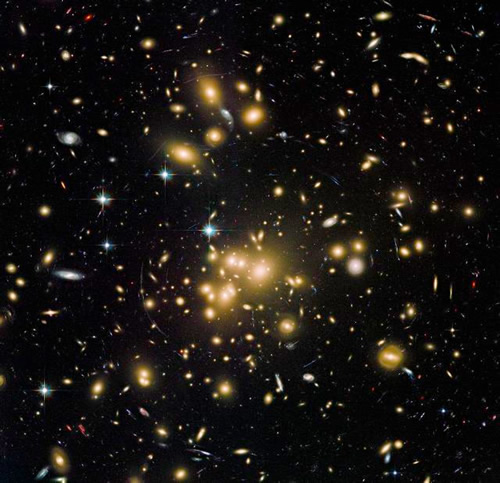
Hubble Image of Abell 1689
It will further our understanding of stellar mass and formation during our Universe's earliest times, shedding light on how the very first galaxies evolved. In addition, it will look at galaxies that are 10 - 50 times fainter intrinsically than any presently known and hopefully pick out enough internal structure to even be studied spectroscopically.
For now, enjoy this incredible image and remember the words of Walt Whitman: "I open the scuttle at night and see the far-sprinkled systems, And all I see multiplied as high as I can cypher edge but the rim of the farther systems. Wider and wider they spread, expanding, always expanding, Outward and outward and forever outward."
Image Credit: NASA, ESA, the Hubble Heritage Team (STScI/AURA), J. Blakeslee (NRC Herzberg Astrophysics Program, Dominion Astrophysical Observatory), and H. Ford (JHU)
{ width: 160, height: 160, defaultImage: '', layers: 'Artimg-Messier' }
This article written by Mark Wagner for Orion Telescopes & Binoculars explains how to find Andromeda in the sky, what to look for once you've found it, and several amazing facts you will never forget.
I love large galaxies with lots of detail, and the Great Andromeda Galaxy is one of the best. It offers a beautiful elongated glow with a bright, warmly-lit core, dust lanes, and interesting satellite galaxies in its immediate vicinity. The fact that it's hurtling towards our own galaxy at 250,000 miles per hour makes it all the more interesting to return to night after night.
Last week, one of Orion's readers wrote that he's been trying to observe Andromeda for two years. Here I will show you an easy way to find Andromeda. Once you know how to find it, Andromeda will always be an easy-to-locate object full of details to savor.
To star hop to Andromeda you'll be navigating the sky with only your eyes, and then using your telescope pointing skills.
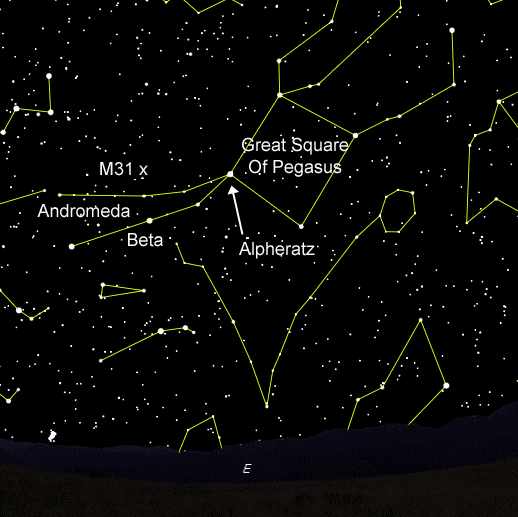
M31
How to find M31:
Just a few hours after sunset this time of year, the sky will be dark, and in the east the landmark constellation Pegasus will be up and easily recognizable. The Great Square of Pegasus is what makes Pegasus a landmark. It's not surprising that we use geometric shapes like a Great Square to find our way around the sky - geometric shapes are the basis for star hopping.
In the image above, you can see the Great Square rising in the east. Its brightest star is Alpheratz. This star is the Alpha (or lucida, meaning brightest) star in Pegasus. Uniquely, it is also the Alpha star in Andromeda, making Alpheratz an Alpha star shared by two constellations. To its left, you can see the constellation Andromeda; two chains of stars extending away from Pegasus. The lower chain contains Beta Andromeda.
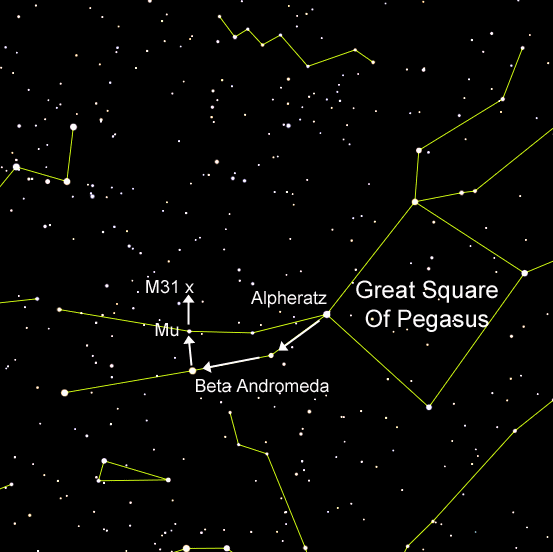
Great Square of Pegasus
So here's our star hop to Andromeda: Use the Great Square to locate Alpheratz. Hop from Aplpheratz to the next star in the lower chain, then hop again one more star along the lower chain to Beta Andromeda. Next, hop in a right angle up to the Mu Andromeda, in the chain of stars above the lower one. Once you're there, move again up and slightly right, a little less than the same distance, and you should see our target in a magnifying finder, or by scanning in widening circles with a low power eyepiece such as a 25 or 32 mm.
You'll know you've found M31 when you see: what appears as an elongated glow, with a brighter central portion. That central glow is the core of the galaxy. M31 is our "sister" galaxy, and one of 30 or so members in The Local Group. Our own galaxy and M31 are easily the largest. M31 is larger than us in size, but recent studies show that our Milky Way is actually more massive.
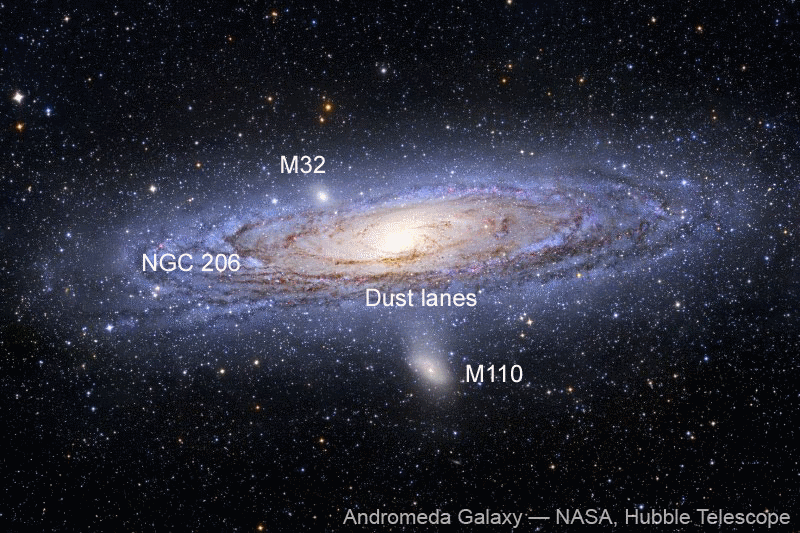
Andromeda Galaxy
Here is a Hubble Space Telescope image of M31.I have added pointers, to show what you can reasonably expect to see in almost any telescope, under good conditions. Just remember, you won't see anything like this Hubble image - you'll see tones of gray on a much smaller scale, although some people do see a warm glow coming from Andromeda. What do you see?
Features to look for in M31:
Note the two dark arcs that define dust lanes in the spiral arms of the galaxy. While you can't see the spiral structure, the dark lanes are obvious. If you have good conditions, you will see a curve on one of the dust lanes, that leads us to two other objects associated with the galaxy.
First is the satellite galaxy M32, a small and compact elliptical galaxy bound to the giant M31. In a small telescope, it will look like an out of focus star. With increased aperture, you will see it as a fuzzy ball.
Near M32, but farther out along the elongation of the spiral arms, is a cluster of blue supergiant stars - these will be a brightening in the arm, catalogued in the New General Catalog as NGC 206 - which is the brightest "star cloud" in M31. Then, back across the galaxy, across its minor axis opposite M32, is M110, a relatively large (but not in comparison to M31!) loose spiral galaxy, which if it were located away from M31 would have a reputation as a great galaxy on its own!
While viewing Andromeda (or any object for that matter), it's always a good idea to revisit a few facts about the object. More often than not, a little food for thought will provide a hair-raising experience as you look through the eyepiece.
Amazing Facts About Andromeda:
Andromeda is over 2 million light years distant. It is the most distant object you can see without optical aid.
At some point in the Milky Way's future, the two galaxies will collide. In fact, Andromeda is moving towards us at 250,000 miles per hour.
The two galaxies will not "crash," they will effectively pass through each other. However, their mutual masses will prove chaotic, with the normal galactic rotations of both galaxies being disrupted, which in turn will cause tremendous new star forming regions to develop.
A great example of such a collision can be seen by searching for images of The Antennae Galaxies in the constellation Corvus. Interested in hunting for the Antennae Galaxies? Stay tuned!
I hope you seek out M31 in your telescope. A mere fifteen minutes spent observing this true spectacle is all you need to fire your imagination, and those of your family and friends. Once you've seen it, you'll come back time and again, making the most of Andromeda and all these wonderful distant details.
Let me know how you do!
Charts created with Starry Night Pro.
{ width: 160, height: 160, defaultImage: '', layers: 'Artimg-Hubble_Stephans_Quintet' }

Jump from a fascinating spiral galaxy NGC 7331 in the constellation Pegasus, to a challenging group of five interacting galaxies known as "Stephan's Quintet." Beautiful Pegasus shines in late summer through autumn skies.
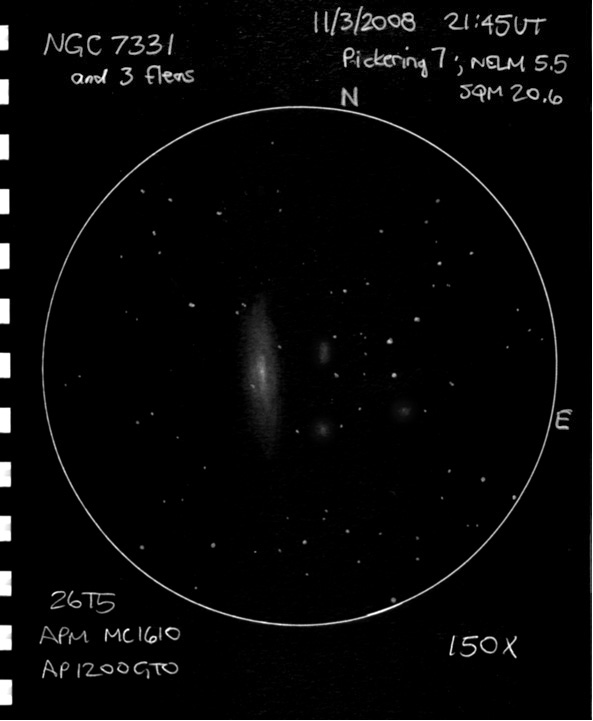
Sketch by Jeff Young
The first step of our galaxy hunt is the fine spiral galaxy NGC 7331, also known as the "Deer Lick Group." It sits 50 million light years distant in the constellation Pegasus, and was first observed by the famous astronomer Sir William Herschel in 1784. At magnitude 10.4, it is bright enough to be glimpsed even in darker suburban skies in a six inch telescope. But in dark skies, the other galaxies nearby can be viewed - the five galaxies that appear to be close to NGC 7331, sometimes referred to as "the fleas," are actually much more distant, appearing nearby only by line-of-sight. Left is a nice sketch by Jeff Young, an experienced observer in Ireland.
The galaxy has a very surprising "retrograde bulge" - its core rotates opposite the direction of the spiral arms! Until recently it was thought to be a twin of the Milky Way. However, new data has cast doubt on that suggestion.
This is one of the brightest galaxies that was not discovered by Charles Messier, and is a great way to dip your toes into the deeper end of what may be seen in the deep sky.
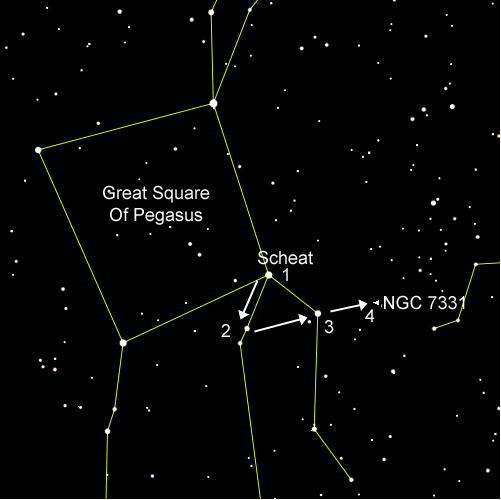
Great Square of Pegasus
When observing this group in your own telescope, look for it as an elongated glow. If you have a larger telescope, you may glimpse more of its extent - its inclined nature relative to us, and start seeing a few of the brighter "fleas."
When I've observed from in town, at our astronomy club's public star party nights, I use NGC 7331 to judge the transparency of the fall sky, and determine what other targets might be visible.
It is an easy star hop: Find the Great Square of Pegasus, locate the corner star Scheat (1), then the wide pair (2), make a triangle with the single star shown (3), and continue half that last distance (4). Scan around in widening circles with a wide field eyepiece, and you should find it as an elongated "smudge". Magnify and bring out more detail.
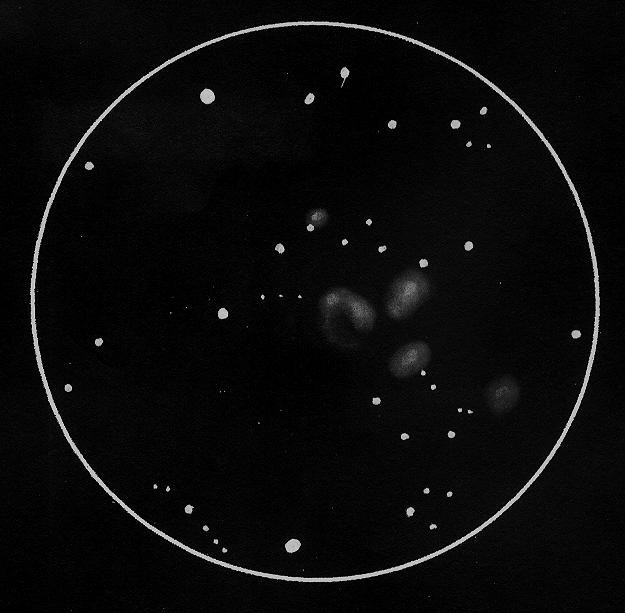
Sketch of Stephan's Quintet by Dale Holt
Stephan's Quintet is a mere 30 arc-seconds, or half a degree (diameter of the Full Moon), away from NGC 7331 to its south-southwest. So you can use the large galaxy as an easy way to find this more challenging group. It is well worth the view if you can get to a dark enough sky with enough telescope to make this fine grouping of five interacting galaxies appear.
Discovered by �douard Stephan in 1877 at Marseilles Observatory, it is a hotbed of star forming, due to the gravitational disruption caused by their close proximity to each other. This is also a member of the famous Hickson Compact Group Catalog - Hickson 92.
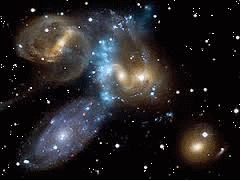
Hubble photo of Stephan's Quintet
The violent collisions of these galaxies (four of the five are physically close) have made them a target of intense scientific study. Here is a Hubble Space Telescope photo showing the interaction.
They are around 39 million light years from us, and although their individual magnitudes are in the 14's, they have been glimpsed in as small as an 8" telescope. You will need to use high power to see the individual galaxies, since they are all within a tight 4 arc-minute grouping.
Up for the challenge? Let us know if you can see Stephan's Quintent. Leave a comment in the "review" section of this article. Be sure to mention what kind of telescope you used, and the location you saw it from. Good luck!
Charts created with Starry Night Pro.
{ width: 160, height: 160, defaultImage: '', layers: 'Artimg-WhatsInTheSky_09-13_square' }

September nights hold lots of wonderful treats for amateur astronomers to see with binoculars and telescopes. See some of our top September stargazing suggestions below:
A Planetary Bonanza in September - Early in the month, Venus shines bright in the western sky shortly after sunset. Important conjunction dates for Venus watchers are: September 8th, when the Moon will be close in the sky to both the bright star Spica and Venus; also on September 8th and 9th Venus and Saturn will be only about 3.5 degrees from each other.
Jupiter is rising sooner and sooner, dominating morning skies. On September 28, Jupiter and the Moon will appear close to each other in the sky.
Mars is also visible in the morning skies of September and will make a couple of really sweet pairings. On September 8th and 9th, Mars crosses in front of the Beehive Star Cluster in the constellation Cancer. On the 27th, Mars and Comet ISON make a close approach in space with Mars appearing just 2 degrees north of Comet ISON. You'll need a fairly large telescope to see Comet ISON this early in the year - it took an 11-inch telescope to photograph it in mid-August.
The Northern Milky Way - Early in the month, around 9 PM, the "Summer Triangle" of three bright stars (Vega, Deneb and Altair) is nearly overhead. In the northernmost portion of the Summer Triangle, you'll see the brightest portion of the northern Milky Way. Point a telescope there and you'll discover that the fuzzy outlines of the Milky Way will resolve into fields of glittering stars.
Planetary Nebulas in the Summer Triangle - Get a star chart and see how many of these you can find in September: the famous Ring Nebula (M57) in the constellation Lyra; the Dumbbell Nebula (M27) in Vulpecula; and the "Blinking Planetary," NGC 6826 in Cygnus. Not far outside the western boundary of the Summer Triangle is a small, but intensely colorful planetary nebula, NGC 6572. All these can be seen in a 6" or larger telescope. An Oxygen-III filter will help.
Neighbor Galaxy - In early September, lurking low in the northeast sky is another galaxy, separate from our Milky Way - the Great Andromeda Galaxy (M31). From a very dark, moonless sky, M31 is visible with the unaided eye as a slightly fuzzy spot. A pair of 7x50, 9x63 or larger binoculars will give you a much better view and telescopes will reveal some of the subtle dust lanes in the neighboring galaxy.
More Extra-Galactic Treats - If you haven't tracked down "The Whirlpool Galaxy," M51, just off the handle of the easily recognizable Big Dipper asterism, do it now while you still can! It will be too low for most to get a good view after September and you'll need to wait until late winter or next spring to catch a good view of this truly picturesque galaxy.
A Brilliant Open Star Cluster - Off the western end of the constellation Cassiopeia is the beautiful Open Star Cluster M52. You can find it with 50mm or larger binoculars from a dark sky site, but the view is definitely better in a telescope. With a larger scope, say 8" or larger, and with the aid of an Orion UltraBlock or Oxygen-III eyepiece filter, you may even be able to catch views of faint emission nebulas near M52.
Two More Brilliant Star Clusters - If you liked sparkling M52, you'll love the popular favorite "Double Cluster in Perseus." Lying between constellations Cassiopeia and Perseus is a bright, fuzzy spot in the Milky Way, and a binocular or telescope will reveal two, bright open star clusters close to one another. In early September the "Double Cluster" appears low in northeastern skies around 9 PM, but it becomes a real showpiece later in the evening as it climbs higher in the sky.
The Globular Star Clusters of September - Almost in a row, off the western side of the constellation Pegasus are three globular star clusters that line up almost north-south. These sparkling clusters are, starting with the most northern globular, M15 in Pegasus; M2 in Aquarius and M30 in Capricorn. From a dark sky site you can easily find all of them in binoculars!
The Challenging Veil - A challenge object for September is the Veil Nebula, a supernova remnant, in Cygnus which is almost overhead as soon as it gets dark. With a star chart, aim your telescope at the naked eye star 52 Cygni. One branch of the Veil crosses over this star and to the east are brighter segments of this roughly circular nebula. While the Veil can be seen in big binoculars by expert observers under very dark skies, you will likely need at least a 5" telescope and an Orion Oxygen-III eyepiece filter if you are near city lights.
All objects described above can easily be seen with the suggested equipment from a dark sky site, a viewing location some distance away from city lights where light pollution and when bright moonlight does not overpower the stars. All objects have been verified by actual observations by Orion Telescopes & Binoculars Staff at Fremont Peak State Park, and/or Deep Sky Ranch, 60 miles and 90 miles respectively from San Jose International Airport, San Jose, CA.
{ width: 160, height: 160, defaultImage: '', layers: 'Artimg-Messier' }
Let's work this weekend in a smaller area of sky, for ease of star hopping to four interesting targets. We'll vary them a bit, visiting two big local galaxies, a highly detailed planetary nebula, and an interesting variable star. Here is the area of the sky we'll cover; from Andromeda, into Triangulum, and then to Perseus:

M31 is a nice hop from Beta, the brightest star in Andromeda, up to the next bright star up, then up again the same distance. In binoculars M31 is unmistakable, and will appear as a decently bright, elongated fuzzy spot.
M33 is about a third of the distance from the point of Triangulum to Beta Andromeda, and a touch west.
M76 is at the end of the chain of stars that define one long leg of Andromeda. And Algol, the great variable star, is easy to locate behind the shape of Triangulum.
So let's look at them!
M31 - The Andromeda Galaxy
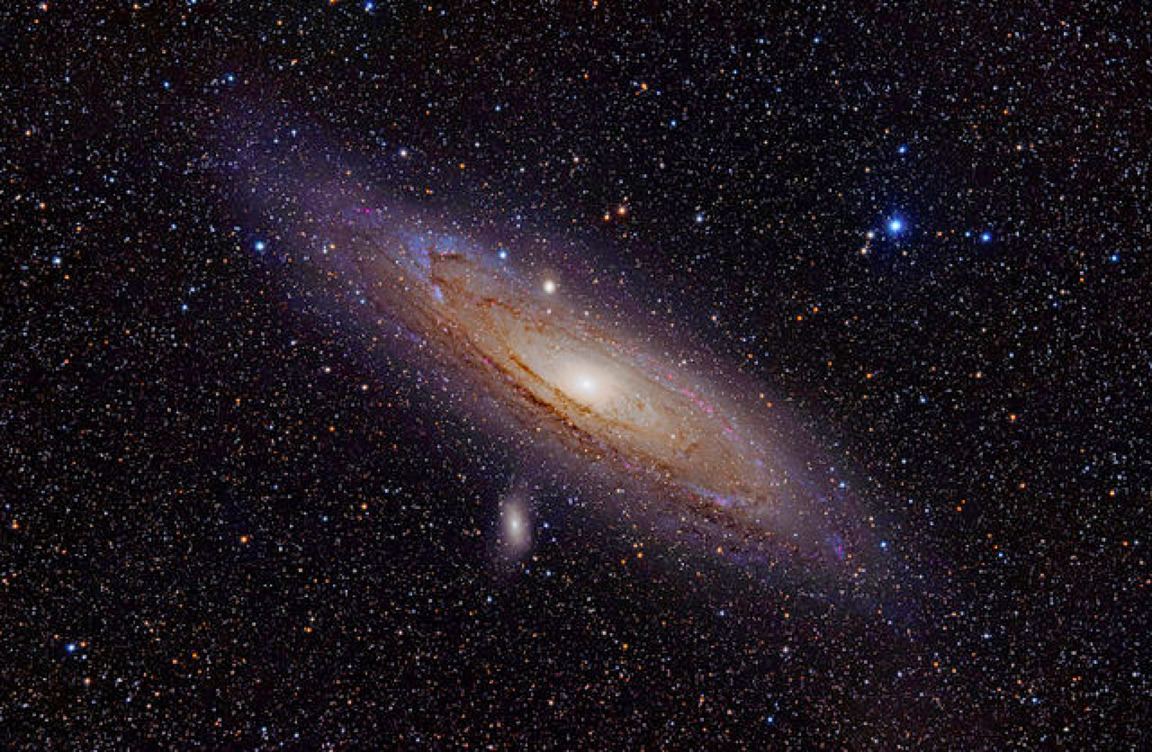
The Andromeda Galaxy is the big sister to our own Milky Way, and is a great target whether in binoculars or any size telescope. M31 is huge. If you follow its major axis from edge to visible edge, you'll have traversed six times the diameter of our full Moon. Tremendous! The Andromeda Galaxy is even visible to the unaided eye, given dark enough skies. It was one of the very first objects detected by the ancients. The Greeks referred to it (and other such objects) as a nebula, meaning "little cloud." Under dark skies, you'll see a number of features in Andromeda. Can you find the two sweeping dark lanes define its northern edge?
NGC 206, is a bright cluster of blue supergiant stars (visible in the above image) in its southwestern section. Two close-by satellite galaxies are also visible: M32, as a tight, small elliptical galaxy south of M31's core, and M110, a loose spiral floating nearby to the north
M33 - The Triangulum Galaxy
M33, or the Triangulum Galaxy, is another member of our local group of 30 galaxies. At a distance of 3 million light years, M33 is relatively close, and very large, but it appears dim. While it can be viewed without optical aid with good night vision in a dark sky, it is easy to see in a pair of binoculars as a distinct fuzzy patch. When viewed in a telescope you can see its main spiral arms, and several "HII" regions - areas of ionized hydrogen that are forming new stars, similar to our Orion Nebula. The brightest HII region has its own entry in the NGC (New General Catalog) - NGC 604, appearing as a bright knot.
M76 - The Little Dumbbell
At the end of one the two chains of stars that form the constellation Andromeda, and just into Perseus, is this beautiful and highly detailed planetary nebula, known as The Little Dumbbell. Its shape is distinct, and while it can be glimpsed in binoculars, it is relatively small, so the more aperture you have the more detailed its structure will appear. Much of the detail in this photo, other than colors, can be viewed through your eyepiece. A ten inch or larger instrument using an Orion Ultrablock filter will provide the most pleasing views. The Little Dumbbell is estimated at 2,500 light years distant, and gives us a view of our own Sun's future final stages.
Algol - In Perseus

This star, Beta Persei, is also known as the "Demon Star," and thought to be the eye of the Medusa. Algol is actually a triple star system. The brightest "A" component is eclipsed every 20 hours and 49 minutes by the "B" star. The result is a visible magnitude change from a near constant 2.1, to magnitude 3.4 when eclipsed. You can see this and gauge its brightness, using the nearby magnitude 3.3 star Rho Persei. Certainly we all can understand how bothersome, puzzling, and frightening, this sight may have been to the ancients, when teachings were that the heavens were unchangeable. Watch this star over a week, and see the changes for yourself.
Images from Wiki-Commons. Charts from Starry Night Pro.
{ width: 160, height: 160, defaultImage: '', layers: 'Artimg-NASA_Protostar_IRAS_20324_4057' }

If you love thought-provoking images of real space objects, then you'll love this one. It's a Hubble Space Telescope snapshot, combined with ground-based H-alpha observations taken with the Isaac Newton Telescope, of a protostar. Cataloged as IRAS 20324+4057, it is located 500 light-years away in the constellation Cygnus. While it looks like good-humored caterpillar from a childhood fairytale, this light-year-long clump of interstellar gas isn't a peaceful, playtime pal. Near this trunk of gas and dust lurk incredibly bright stars which are blasting out ultraviolet radiation at the "wanna-be" star and transforming it into this fanciful form.
Image Credit: NASA, ESA, the Hubble Heritage Team (STScI/AURA), and the IPHAS Survey
The protostar - IRAS 20324+4057 - shows itself as a knot. In real life, it's a star seen in the very first of its evolutionary stage. Inside the gaseous womb, it is gathering material and trying to grow. However, it's being stopped by 65 of the hottest and brightest stars known - the O-types. Even though they are 15 light years away from the "baby," their eroding radiation is tearing apart its gas crib. If they continue, this burgeoning star, which might eventually be one to 10 times the size of our Sun, will have a stunted growth.
But, don't feel bad for the little guy. There are still 500 less bright, but highly luminous B-type stars here. Together they make up a region known as the Cygnus OB2 association - a region of sky which spans nearly two degrees and is the closest of its type. If you were to put all of the stars in this area together, they would have a mass of more than 30,000 times that of our Sun! Yet there's even more... The entire association is lodged inside an even a broader area of star formation known as Cygnus X, which is one of the most luminous objects in the sky at radio wavelengths.
"Several OB stars in the Cygnus OB2 association are among the strongest stellar X-ray and radio sources in the Galaxy. The radio emission is particularly unusual, displaying a high level of variability and nonthermal behavior," says astronomer Wayne Waldron." For more than 15 years, the observed X-ray and nonthermal radio emission from OB stars has eluded explanation."
According to spectroscopic observations, the central star located in IRAS 20324+4057 hasn't lost its appetite. It is still quite busy taking on dust and gas... growing happily like any young star should. Although we don't know what may become of it in millions of years, it could eventually become a "heavy-weight" champ like NML Cygni, a red hypergiant star and the largest star currently known. It, too, makes its home in the Cygnus OB2 association. From little caterpillars to huge butterflies? You bet. NML Cygni is so large that if it were put in our solar system, it would extend not only beyond the orbit of Jupiter, but halfway between the orbit of Jupiter and Saturn! How much mass? It would take 4.5 billion Suns to fill a star its size.
Just don't "bug" them while they're eating!
Let us know what you think. Leave a comment and rate this article below.
{ width: 160, height: 160, defaultImage: '', layers: 'Artimg-NASA_Spacecraft' }

Just a few days ago, NASA sparked our space imaginations again when they released new photos and video animations of the planned missions to "find, capture, redirect, and study a near-Earth asteroid." The video [watch below] outlines the mission from lift-off to return landing, giving us front row seats to the Orion spacecraft leaving Earth, the crew's operations, and their trip to a 'captured' asteroid. There are even scenes depicting astronauts performing spacewalk activities and collecting surface samples.
"Part of President Obama's FY 2014 budget request for NASA, the asteroid initiative capitalizes on activities across the agency's human exploration, space technology and science programs," says Rachel Kraft from Headquarters. "NASA is enhancing its ongoing efforts to identify and characterize near-Earth objects for scientific investigation, and to find potentially hazardous asteroids and targets appropriate for capture and exploration."
 This conceptual image shows NASA's Orion spacecraft approaching the robotic asteroid capture vehicle. The trip from Earth to the captured asteroid will take Orion and its two-person crew an estimated nine days. Image Credit: NASA
So, what exactly are these plans and why are they important? According to the press releases, the FY 2014 budget proposal allows for a mission which will capture a small near-Earth asteroid robotically. Once this portion goes successfully, it will then be redirected to a safe and stable orbit in the Earth-Moon system. If this segment of the mission is also successful, astronauts will then be able to physically study and sample the asteroid. While there isn't a potential asteroid threat at this time, the possibility is very real. Astronomers have pinpointed a huge portion of larger near-Earth asteroids, but only about 1% of the smaller - yet equally dangerous - rocky travelers have been documented. We need to know that we human beings can pull together as a team and successfully redirect an asteroid, be it for scientific or life-saving reasons.
"NASA already is working to find asteroids that might be a threat to our planet, and while we have found 95 percent of the large asteroids near the Earth's orbit, we need to find all those that might be a threat to Earth," said NASA Deputy Administrator Lori Garver. "This Grand Challenge is focused on detecting and characterizing asteroids and learning how to deal with potential threats. We will also harness public engagement, open innovation and citizen science to help solve this global problem."
Next year should be an exciting one for furthering the asteroid initiative as engineers begin to work out the details of the upcoming mission. However, they aren't the only ones. NASA is also considering ideas from the public as well as scientists and engineers from around the world. The asteroid program involves many scientific disciplines, such as advanced solar electric propulsion as a viable power source. Ideas like this could mean expanded possibilities for both the spacecraft and those planning its operations. The Orion spacecraft and the Space Launch System rocket will benefit, as well as new technology.
Just weeks ago, NASA compiled the work of agency leaders from across the country to review the asteroid mission's formulation. This gave new insights into a myriad of concepts and alternative proposals for each segment of the mission - from programming angles to technical advice. Thanks to industrial venues, educational institutions and the public, NASA has currently more than 400 responses to their request for ideas. From September 30 to October 2, they will host a technical workshop at the Lunar and Planetary Institution in Houston to discuss these concepts and their potential to be added to the mission statement. Be on the lookout as virtual participation becomes available to the public very soon!
{ width: 160, height: 160, defaultImage: '', layers: 'Artimg-NASA_Milky_Way_Galaxy' }

If you're like millions of other people, I'm sure you've looked up at night and wondered about your place in the Universe - and maybe you'd like to experience just where you are. Fulfilling this wish doesn't take money. All it takes is a clear dark night, a safe place to view and an open mind.
What you're going to do is spend a summer night outdoors watching the Earth turn slowly and contemplate your position both in our solar system and within our galaxy. Before you say that you've been out all night before, stop to consider that you might have spent at least some of that time viewing through a telescope, or perhaps pursuing a meteor shower. On this night, all we're going to do is watch the sky.

"A Graceful Arc" courtesy of Tony Hallas
This experiment requires that you see to your comfort, so be sure to use a well-padded reclining lawn chair and see to your needs before you begin. Take along coffee (or another favorite beverage), things to snack on, perhaps insect repellent or a blanket. Be sure to grab sunglasses to put on before you need to make those "necessary" trips indoors to protect your night vision. Why not enjoy a radio while you're at it? Music hath charms...
As you relax and the sky becomes dark, look for the familiar constellations as they come out to play. If you conduct this experiment during the late summer months, the most important sky feature you'll be looking for is commonly called the Milky Way. If you are viewing from a dark sky location, you can't miss this huge swath of stars cutting its way overhead. This isn't truly the Milky Way - yes, it's our galaxy - but it is a single branch of the magnificent spiral in which we live.

Milky Way Arms Visualization (NASA)
If you look to the south, you'll see the constellation of Sagittarius. Can you see the spout of the teapot and how the stars seem to thicken in that area? There's a good reason for that - it's the direction of the center of our galaxy. When you look at the great arch of stars called the Milky Way, you see it as it appears from the constellations of Sagittarius, through Cygnus and into Cassiopeia. It looks like a single band, but it isn't. When you look towards Sagittarius, you're looking in the direction of the center of our galaxy, but you're actually seeing the huge spiral arm of the one next to ours.
As you move northward and into Cygnus, you're looking at our local spiral arm - the Orion - just a minor branch of the Sagittarius. When you've reached Cassiopeia, you're looking outward and into the spiral arm just outside the Orion. Any further and you're outside our galaxy! As time passes, you'll see more and more details like dark dust lanes known as the Great Rift, nebulous regions and concentrated star clusters. Note the direction it takes across the sky, because the movement is going to blow your mind as the night passes!
As you're watching, let's begin making mental notes. Have you identified any planets yet? Good for you! Perhaps there might even be a crescent Moon present on the night you're observing. These objects move on a path across the sky known as the ecliptic plane. For most observers, this imaginary line in the sky runs loosely from the east/southeast to the west/southwest. Maybe you'll be lucky enough as you're watching to see a body rise or set. It's quite an experience to notice how quickly this happens when it's near the horizon!
Ah, the Milky Way.... You're beginning to notice something, aren't you? Over the hours the constellations overhead have moved directly from east to west. Things positioned to the south have come and gone in a shallow arc, while the objects to the north have turned tightly around Polaris. When you take a stretch break, point to Polaris with one arm and with the other, point at that same angle to the ground. Wow! You've just captured Earth's axial tilt! Now, the way those stars seem to move across the sky makes more sense... But not the MilkyWay, eh?
As the hours pass, the most brilliant of the Milky Way's spiral arms doesn't just move from east to west like everything else. If you've observed, you'll see that it seems anchored somehow, and it is twisting overhead. That's because it resides along another path in the sky - the galactic plane. Just as the planets orbit the Sun on their own flat track, the ecliptic, we're looking both inward and outward from our position in the Milky Way to see where the galaxy's spiral arms are located around its center.

Milky Way Galaxy Artist Concept (NASA)
If you have been observant, you'll notice another concentration of stars is beginning to make an appearance as well - this time to the northeast. If you've guessed that it is another spiral arm, then you'd be correct. The Perseus spur is slowly beginning to curl around to join the Cygnus and Sagittarius. If your observations occur in the autumn, then you'll also be able to witness the rise, just before daybreak, of the edges of the Orion spur to the southeast as well. The Orion Arm is where our solar system calls home and its bright stars will soon march across the sky, hidden by the overpowering glow of day.
Are you dizzy yet? When you stop to think, you'll find you're on a spectacular cosmic merry-go-round. We are grounded by gravity here on a tilted Earth. As it spins, we see this movement as changes in the celestial sphere. Crossing it is the ecliptic plane where the Sun, Moon and planets journey from our point of view. At the same time, the Earth is orbiting the Sun and our entire solar system is lodged in a spiral arm of stars which is orbiting the galactic center. But, there's more. Don't forget our Universe is expanding and our galaxy itself is on the move, too!
Of all the things you can do in life, you owe it to yourself to spend just one night outdoors... wrapped in the loving arms of the Milky Way!
What's the most awe-inspiring fact you learned in this article? Share with us in the comments!
{ width: 160, height: 160, defaultImage: '', layers: 'Artimg-Collinder399_Coathanger' }

Two of the dimmer constellations, Vulpecula (The Little Fox) and Saggita (The Arrow) are often overlooked. They too, however, contain some excellent and varied deep sky targets, worth an hour or so in the evening before moonrise. These constellations will be placed high in the sky, allowing for the best transparency when viewing the targets we'll visit.

M27 - The Dumbbell Nebula - Image courtesy Luk�s Kalista
Let's s start with the most often visited, the famous Dumbbell Nebula planetary nebula. There is no bad view of this target - whether you use a binocular, small wide-field telescope, or magnify it in a larger instrument. It always has something to reveal. And a narrow-band filter such as Orion's Ultrablock, will aid in providing contrast to bring out the finer details. The Dumbbell unfiltered has a roundish shape, appearing as a hazy ball without detail, and will most certainly appear as such in your binocular or small scope. With more aperture though, and using a filter, detail will show, in shape and extent of the object. Note the "apple-core" our hour-glass shape, and the dimmer "bubble" surrounding the core. Can you pick out the faint central star? Star hop there from Alberio in Cygnus to Gamma Satittae - about 3/4 the distance, and sweep slightly north. The Dumbbell is large in apparent size and bright, as it is a relatively close planetary nebula at magnitude 7.5, 1360 light years distant, and 8x5 arcminutes. If you see the central star, you've seen the largest know white dwarf!

Collinder 399 - The Coathanger
Nearby the Dumbbell is a famous and fun asterism. An asterism is a shape, a figure, that can be seen, within a constellation - that is not a constellation. Examples of an asterism are The Big Dipper (part of the constellation Ursa Major) and The Teapot in the constellation Sagittarius. The asterism we'll view requires a binocular or small telescope to fully enjoy, although it was first noted before telescopes by the Persian astronomer Al Sufi in 964. Its proper name is Collinder 399, but has the popular name of The Coathanger. It is easy to get to from The Dumbbell, about 14-1/2 degrees to its west. When you see it, you'll have no doubt you've found it, the shape is very distinctively a classic coat hanger! You will be able to find this in a 50 mm binocular.

M71 - Hubble Space Telescope image.
Between and below the Coathanger and the Dumbbell Nebula is the small constellation Saggita. It is easy to pick out - its two "arrow feather" stars are close together and the shaft of the arrow form a straight line. Along the shaft you'll find the Globular Cluster Messier 71, visible as a hazy spot in binoculars. This is no ordinary globular. It is loose and was for a long time thought to be an open cluster. By scientifically aging that stars, it was determined they were far too old to be part of any open cluster. It will most likely appear unresolved in your telescope, more of a hazy ball without individual stars being apparent. M71 shines at magnitude 7.2 and is a close globular at only 13,000 light years distant.

NGC 6940 in Vulpecula is a treat of an open cluster, as it is very rich and easy to locate. We are once again back in the constellation Vulpecula, but at its northern end away from the Dumbbell and Coathanger. There have been reports of this target being seen in binoculars, but a 70mm telescope or lager will provide a more certain and pleasing view. Here is an observation and drawing by of Jaakko Saloranta of Finland in an Orion 8" Dobsonian (courtesy Deepskypedia.com): " A beautiful cluster spotted in somewhat unknown part of the sky. Size at least 25', consisting of roughly 50 stars magnitudes 11-14. Centered and slightly detached towards the 9th magnitude star in the middle. W side a bit richer. Well flanked by four 8th magnitude stars. The cluster is almost centered around the 9th magnitude FG Vul. Slightly concentrated towards the area SW from FG Vul."
{ width: 160, height: 160, defaultImage: '', layers: 'Artimg-NASA_Comet_ISON' }

After re-emerging from behind the Sun, Comet ISON is appearing a little earlier, and a little less bright than predicted. Tammy Plotner gathers up the arguments in the heated debate over Comet ISON's possible outcome.
With the glory days of Comet PANSTARRS now finished, amateur astronomers are turning anxious eyes towards C/20012 S1 ISON. According to the latest media buzz, amateur imager Bruce Gary in Arizona has become the first person to pick up Comet ISON upon its return to visible skies. While this is exciting news, it comes with a price: It would seem that things aren't quite as bright as anticipated.
At only six degrees above the horizon and racing just slightly ahead of dawn, Gary's photographic observations of Comet ISON place the distant traveler at roughly magnitude of 14.3 - about two magnitudes fainter than modeling predicted it should be. It would seem that the comet hasn't changed much since it was last observed at the end of May - again about two magnitudes less than figured. Is this lack of brightness an indicator that ISON might not perform like a sparkling firework? According to some researchers, track records of past comets that held a steady brightness for a certain amount of days meant the comet was going to fail. Reality check, it's just too early to favor any one opinion. Let's take a look at some facts.
When astronomers last had a good look at Comet ISON, it was doing exactly what it was expected to - spewing out carbon-dioxide and holding a steady magnitude. At the time, it was losing around 2.2 million pounds of mass on a daily basis and some of that material could be masking other volatiles which could make it brighter. However, that's not the only reason. At this point we really need to remember that Comet ISON is still too far from the Sun to be producing water and dust activity.
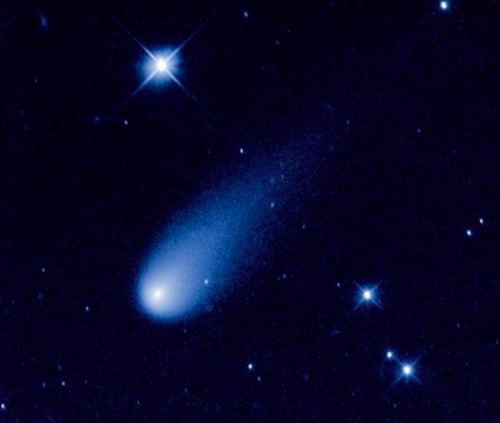
Image � NASA, ESA, and the Hubble Heritage Team (STScI/AURA)
"ISON's brightness remained more or less stable for much of the early part of the year, but this doesn't surprise us enormously," says Karl Battams, an astrophysicist and computational scientist based at the Naval Research Laboratory in Washington DC. "It is still outside of what we call the 'frost line' - - the point in space at which water-ice (the dominant component of comets) begins to sublimate. Once it passes this mark in late August, we expect to see a more significant increase in brightness."
Is Comet ISON still too cool to create much activity? As we know, comets display huge comas and long tails when the ices near their surface are heated to the point where they begin to sublimate into gas. As the gas escapes, it captures dust grains along with it, dragging it across space and giving the comet its characteristic appearance. The huge amount of materials escaping ISON leads to speculation - and the speculation is that the comet may have already run out of fuel and will fade away.
"Comets are notoriously unpredictable so there is certainly a chance that this is true. However, I see this as unlikely. As discussed above, ISON hadn't yet reached the frost line during all observations to date, so unless it had little to no water to begin with (something that is unheard of in a comet), it should not have already lost its water," says Matthew Knight (Lowell Observatory, Flagstaff, AZ), an astronomer specializing in comet nucleus and coma studies. "Comparisons to comets that had flat lightcurves before disappearing aren't really comparing apples to apples if one comet is in the region where water should have been vigorously active for a while, whereas ISON hasn't even begun water ice sublimation yet."
Comet ISON's position in our solar system is just one of many reasons it's not behaving like a circus act. You cannot demand an astronomical subject to perform in any expected way - especially if it's unique. According to NASA's Comet ISON Observing Campaign (CIOC), C/2012 S1 can be classified as a "sungrazer", but it's not a member of the Kreutz group of comets, which scientists believe may have been spawned by a series of splits from a single progenitor comet sometime during the last few thousand years. Kreutz comets have periods of 500-1000 years and are therefore not dynamically new since they (or their parents) have been through the inner solar system before and this is ISON's first journey around the Sun.
"To the best of my knowledge there has never been a dynamically new Oort Cloud comet that had a smaller perihelion distance than ISON. Note, however, that reliable orbits go back only about 200 years, and a comet must be well observed to conclusively determine that it is newly arrived from the Oort Cloud as opposed to just having a long period," says Knight. "There have been no known dynamically new sungrazing comets in at least 200 years. Comet ISON really is unique!"
And if you're a die-hard comet observer, the "from one extreme to the other" hype really doesn't matter. While it would be great fun to have another comet as splashy as Hale-Bopp to study, there's absolutely nothing wrong with following ISON's activity, no matter what the outcome.
"ISON still hasn't brightened as much as initial projections suggested it might. But, again, this shouldn't have been shocking news to those familiar with observations of comets making their first passage through the inner solar system," furthers Knight. "For reasons that are not entirely understood, these "dynamically new" comets tend to brighten at a much slower rate than comets that have been around the Sun before. ISON's initial rate of brightening was much higher than is typical for dynamically new comets and, sure enough, it slowed down dramatically soon thereafter."
Need even more fuel to add to the speculation fire? Then consider Comet ISON still has to survive its pass around the Sun, and exposure to the million degree solar corona. Can it last through the Roche limit? Will it be able to withstand tidal shearing and extreme pressure? No one can answer these questions with certainty. We simply don't know if ISON's nucleus is compact enough or large enough to survive a trial by fire. It might simply blow itself apart as it approaches the Sun, flaring up brightly and then scattering away like space seed on the solar wind.
For those of us who routinely observe comets, we're used to seeing nothing more than a very small fuzz ball and every so often, one that displays a tail. It's rare to see a comet that doesn't require optical aid and even rarer to have one which might become excitingly bright. While it's fun to think Comet ISON might outshine the full Moon, it's equally fun to think that Mars might be as large, too. It's all excitement in reporting, and reporting also means taking an accurate and scientific standpoint as well. For now, heartfelt congratulations go out to Bruce Gary for his excellent work in recovering Comet ISON and his well-done homework. We need to smile at the hype and simply wait and see what happens.
"Certainly if you browse around online you will find references to estimates of magnitude -10 or even -15, and the term 'Comet of the Century' has been tossed around with abandon," concludes Knight. "Those are not the words of the CIOC Team, and while they may perhaps turn out to be true, we think it highly unlikely. More likely, ISON will be one of the brightest comets in the past several years and, thanks to the global astronomy community, we hope one of the most broadly observed comets in history!"
Rock on...
About Tammy Plotner - Tammy is a professional astronomy author, President Emeritus of Warren Rupp Observatory and retired Astronomical League Executive Secretary. She's received a vast number of astronomy achievement and observing awards, including the Great Lakes Astronomy Achievement Award, RG Wright Service Award and the first woman astronomer to achieve Comet Hunter's Gold Status.
{ width: 160, height: 160, defaultImage: '', layers: 'Artimg-Mare_Crisium' }

August 16
Tonight the Moon is in Sagittarius, The Archer, just under three degrees west of the fine double star Mu Sagittarii. The Moon is 10-1/2 days old and in waxing gibbous phase, on its way to full on the 20th. Here are some beautiful lunar targets to look for, as well as an interesting star system.
 Crater Hippalius
Hippalus - This crater will be well placed tonight along the terminator, on the sunward side of Mare Humorum. You'll enjoy the craterlets, hills, damaged wall, and the Rimae Hippalus along the crater's eastern extremity. A 50mm instrument will allow you to see all of these features.
 Dome Mulichius
Dome Mulichius - Use a telescope or pair of binoculars of 100mm or more to find this isolated circular-shaped volcanic dome. Can you see its summit crater? You'll find Dome Mulichius on the eastern part of Oceanus Procellarum, and in prime viewing postion (right along the terminator)tonight. For targets such as this, contrast is key! You will certainly also enjoy the fine view of the great crater Copernicus to the east.
 Mu Sagittarii and the Moon
Mu Sagittari (Polis) - This magnitude 3.8 multiple star system is over 3,000 light years from Earth. Its A component (Polis) is 23 solar radii, has 115 times our sun's mass, and sports four companions. The B, C, D and E components are all within 50 arc-seconds and range in magnitude from 3.84 to 13.5. Can you find it with the Moon so close? Here is a chart to help you with this challenge.
August 17
The Moon will appear tonight as if cupped in the Tea Spoon asterism of Sagittarius, as shown above. Let's explore some more lunar features, then try a star hop.
 Gassendi and Doppelmayer, to the North and South of Mare humorum, respectively.
Gassendi is on the northern edge of Mare Humorum, and this crater is replete with spectacular features. You will want to return to it over and over. The craters Gassendi A and B define the northern edge, with A breaking the walls of the main crater. A nice rubble field will appear between these and the terminator, and you're certain to see astounding detail. The main crater has high walls and steep outer slopes to the north, disappearing in the south. Interior, the floor is very flat and covered by the fractured landscape of Rima Gassendi, a mountainous inner ring, and a fine double-peaked, 1200-meter-high central mountain. There is so much to see in Gassendi!
Doppelmayeris a circular crater 39 miles in diameter, at an elevation of 8,200 feet on the lunar landscape. It defines the southern edge of the Mare Humorum, and is overrun on its northeastern perimeter by lava from the Mare. Its high walls will be in stark contrast tonight, as they are on the terminator side of the crater. You may even see shadows of the wall's peaks on the crater's floor. Additional features include a flat northern and disrupted southern floor, as well as a notable central mountain. Your 50 mm telescope or mounted binoculars will show it all!
 Zeta Aquarii
Zeta Aquarii - Modern observers know this star as the center of the Mercedes symbol (an asterism). At magnitude 3.6, it is far enough from tonight's Moon to allow us to easily locate it. And this is a worthwhile find. Both components are yellow-white and appear nearly identical. The primary shines at magnitude 4.4, while the companion is magnitude 4.5. They comprise a close pair, but an easy split with a separation of 3.8 arc-seconds. Interestingly, this double star was directly on the celestial equator in 2004. Before then, it was a southern hemisphere star, now it is in the northern sky. It is an easy star hop from "The Moon In The Spoon" across to the bright pair in western Capricornus, through the line of bright stars in Aquarius, leading to the area containing Zeta Aquarii.
Lunar photos courtesy of The Lunar and Planetary Society. Charts from Starry Night Pro.
{ width: 160, height: 160, defaultImage: '', layers: 'Artimg-NASA_Milky_Way_Andromeda' }

NASA astronomers are predicting with certainty that the Andromeda Galaxy and our home galaxy, the Milky Way, will meet in huge merger event which will affect our entire solar system. But don't pack your bags to leave just yet... it's not scheduled to happen for at least another four billion years.
"Our findings are statistically consistent with a head-on collision between the Andromeda galaxy and our Milky Way galaxy," said Roeland van der Marel of the Space Telescope Science Institute (STScI) in Baltimore.
Astronomers have long speculated that our galaxy and one of the nearest members of our local group were destined to meet, but they were never sure of just how it might happen. Now, thanks to NASA Hubble Space Telescope measurements of the Andromeda galaxy's motion, the answer has become clear. Although it is some 2.5 million light years away, M31 is most surely feeling the force of gravity and moving towards us. It's only a matter of time before we combine.
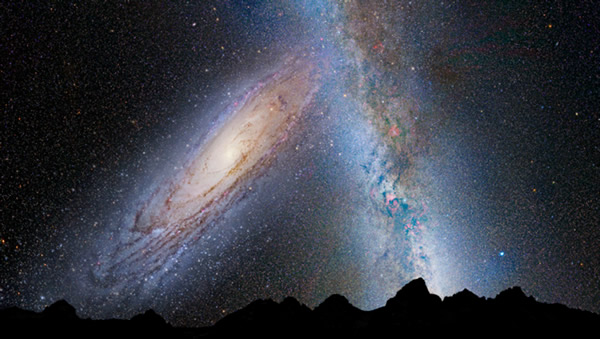
This illustration shows a stage in the predicted merger between our Milky Way galaxy and the neighboring Andromeda galaxy, as it will unfold over the next several billion years. In this image, representing Earth's night sky in 3.75 billion years, Andromeda (left) fills the field of view and begins to distort the Milky Way with tidal pull. (Credit: NASA; ESA; Z. Levay and R. van der Marel, STScI; T. Hallas; and A. Mellinger)
"After nearly a century of speculation about the future destiny of Andromeda and our Milky Way, we at last have a clear picture of how events will unfold over the coming billions of years," said Sangmo Tony Sohn of STScI.
Approaching us at over two thousand times faster than we're moving toward the Andromeda, it will still be at least four billion years before we combine. By using Hubble data and computer simulations, the scenario shows it will probably take another two billion years after we meet before our pair of interacting galaxies completely merge and reform into a single elliptical galaxy - the most common type in the local Universe.
But even though we'll "smash" head on, the individual stars contained within each galaxy are placed so far apart that very, very few will actually collide. But that doesn't mean there won't be confusion. The stars themselves will be catapulted into different orbits around a new galactic center. The simulations show our solar system will more than likely be much further from the core than at present. To add to the clash of the Titans, the Triangulum Galaxy - M33 - will also join in the fun. There's even a possibility that M33 may be the first to interact with the Milky Way.
What causes these huge cosmic collisions? Our Universe is constantly expanding and accelerating. Galaxies which reside close to each other are locked into place by the gravity of the dark matter which envelopes them. Through the Hubble Space Telescope's deep views, we're able to look back in time to see that encounters of this type were once commonplace when the Universe was smaller. Only a century ago, astronomers weren't aware the Andromeda galaxy was a separate entity - far beyond the reaches of the Milky Way. Edwin Hubble was the first to measure its distance by using a Cepheid variable star - a type of star that now serves as a "mile post" for cosmic distances. Hubble went on to discover the Universe was expanding... its many galaxies fleeing away from us.
Even so, it has long been known that M31 was moving our way at a speed of a quarter of a million miles per hour. That's a speed fast enough to make 12 round trips to the Moon in just one day! How did we know? Thanks to the Doppler Effect, we were able to measure the changes in frequency and wavelengths produced by a moving source and measure the compression of the starlight caused by Andromeda's motion.
Before this latest data set, it wasn't clear whether our combining future would be a side-swipe or a head-on blow. A lot depended on M31's tangential motion. Only recently have astronomers been able to measure the sideways motion necessary to make the call. The Hubble Space Telescope team, led by Roeland van der Marel, was responsible for the incredibly detailed amount of work it took to determine this motion.
"This was accomplished by repeatedly observing select regions of the galaxy over a five- to seven-year period," said Jay Anderson of STScI.
"In the 'worst-case-scenario' simulation, M31 slams into the Milky Way head-on and the stars are all scattered into different orbits," said team member Gurtina Besla of Columbia University in New York, N.Y. "The stellar populations of both galaxies are jostled, and the Milky Way loses its flattened pancake shape with most of the stars on nearly circular orbits. The galaxies' cores merge, and the stars settle into randomized orbits to create an elliptical-shaped galaxy."
Thanks to the space shuttle's servicing missions over a year ago, the Hubble Telescope has been upgraded with even more powerful cameras. This new equipment is responsible for allowing astronomers a sufficient amount of time to get the crucial measurements required to solidify M31's motion.
What would it look like if hundreds of thousands of years passed like seconds? Imagine the scene from Earth... The magnificent Andromeda Galaxy would start off being a small, smudgy stellar patch that accompanied the Sagittarius arm of the Milky Way in the night sky. As you watched, it would draw closer and closer - getting larger and larger. Rather than an indistinct haze, you would begin to see its galactic features, such as the brilliant core region and dark dust lanes. As it closes in on us, distant nebulae and star-forming regions would no longer need a telescope... the outer spiral arms becoming as distinct as our own. As they meet, chaos would ensue. Changes in gravity would push stars into new orbits and familiar constellations would no longer exist. The night would shine with the light of hundreds of thousands of new stars. Slowly, yet surely, the mixture would gradually calm once again. However, instead of the familiar spiral arms, the sky would hold the even light of an elliptical structure... like living on the edge of a huge globular cluster.
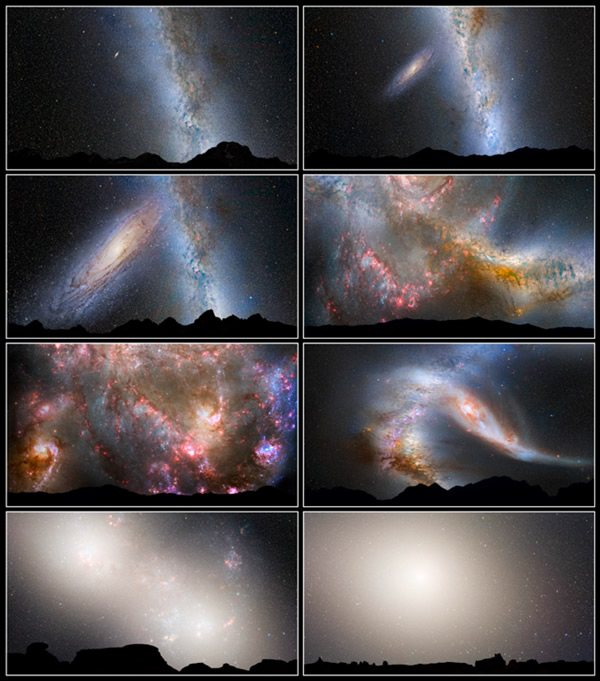
This series of photo illustrations shows the predicted merger between our Milky Way galaxy and the neighboring Andromeda galaxy. (Credit: NASA; ESA; Z. Levay and R. van der Marel, STScI; T. Hallas, and A. Mellinger)
It's the real clash of the Titans, and it will one day happen. We'll become the Andromeda Way!
Original Story Source: NASA Hubble Space Telescope News Release
{ width: 160, height: 160, defaultImage: '', layers: 'Artimg-Mare_Crisium' }
This weekend the Moon is still young, early in its new phase. While many people look for the first quarter moon to do their lunar observing, this is a great time to study other "less traveled" geographic features of Earth's closest neighbor. There will be many craters, rilles and seas in perfect contrast on this weekend's young Moon - some of them even visible through binoculars. Here are six easy-to-locate features and what you'll need to see them. If you're up for it, get out a pad of paper, some soft pencils, and try drawing a few of these. Drawing at the eyepiece is truly the best way to hone one's observing skills - you will literally see more!
Friday August 9

Mare Crisium is the most prominent sea on the Moon that you will notice tonight, covering an area of 375 miles by 345 miles. It is very circular and has a dark floor, flooded by lava during impacts on the Moon's surface. Notice as well the fine wrinkle-ridges and lots of craterlets. Obvious on the floor is the crater Pickard, 14 miles wide and over a mile deep. A 10x binocular is great for this feature, although you certainly will be able to note this Mare with the unaided eye.

Endymion is a crater containing steep outer slopes and very high inner walls, especially to the southeast. This too is a 10x binocular target, and will certainly make a beautiful sight in a telescope with its walls greatly detailed with razor-sharp shadows.

Cleomedes and Rima Cleomedes are excellent features close to tonight's terminator, or the line of contrast between light and shadow. Cleomedes is a walled plain easy to enjoy with 50mm of aperture. Its slopes have numerous craterlets, and its floor contains Rima Cleomedes and a small mountain. A 10x binocular will show these features. Rima Cleomedes will require a 200mm scope, but this will reveal a 36 mile long Y shaped feature crossing the crater's floor.
Saturday August 10

The crater Atlas and the Y shaped rilles inside it, called Rima Atlas, is a particularly interesting sight. The floor of Atlas is rough, and contains a central mountain and some craterlets. You can see all this with a 50mm telescope. To see Rima Atlas, a 200mm telescope is recommended.
Hercules is the close neighbor of Atlas, forming an outstanding pair. Hercules has very steep slopes, with the crater Hercules D to its southeast. The inner walls have remarkable terraces, and note the stained sinks on its floor, caused by darker lava. A 50mm instrument will get you there.

Cauchy Tau, Cauchy Omega, Rupes Cauchy and Rima Cauchy are all associated with volcanism. Cauchy Omega is a volcanic dome, with a crater on top. To its south is another dome, Cauchy Tau, which is crater-less. Rupes Cauchy is a fault line running south-east to north-west, while Rima Cauchy is a short rille in the form of an 'S.' Plenty to see, even a bit of challenge in this section identifying the numerous features. 100mm for the domes, 200mm for the finer targets.
{ width: 160, height: 160, defaultImage: '', layers: 'Artimg-NASA_ISON_track' }

Astrophysicist Brian Koberlein talks about the possible outcomes of Comet ISON.
 Comet ISON's path Image Credit: NASA/GSFC/Axel Mellinger
Comet ISON is showing up in the news recently because it has a chance of being quite bright. This irregular mass of rock, dust, ice and frozen gases is currently at about magnitude 13 in the constellation Gemini, but there are some predictions that it will be a "comet of the century," with an apparent magnitude of -10 or more (about as bright as the moon). A more realistic prediction is that it will peak at -3 to -5, or about as bright as Jupiter or Venus.
Predicting the maximum brightness of a comet is a challenge, because it depends not only on its path relative to the Earth and Sun, but also its structure and composition. Comets can flare up in brightness quickly as volatiles are outgassed suddenly, or they can remain unexpectedly dormant during their close approach to the Sun. ISON is no different in this respect.
The best we can do to estimate its maximum brightness is to compare its apparent magnitude over time with similar comets of the past. Typically this is done by a measurement known as Afrho. If you consider a line of sight from Earth to the comet, then rho is the radius of the dust surrounding the comet, and Af is a measure of the albedo. Using Afrho you can get an idea of just how much material is being ejected from the comet, as well as the brightness of the material.
What we've found is that ISON has a higher Afrho value than is typical for comets at its distance. This means it is more active than typical comets, with more gas and dust being ejected from its surface. It's this ejected gas and dust that forms the coma and tail that we see as a comet. Its level has also stayed fairly constant for several months, so this activity is not simply a short-lived outburst. It is likely that ISON will continue to be more active (and therefore brighter) as it nears the Sun.
That might seem like a good sign that it will become visible to the naked eye later this year, but ISON's orbit is almost parabolic, which means this is likely its first visit to the inner solar system. Comets that have visited the inner solar system before typically have elliptical orbits (just as planets and asteroids have elliptical orbits). Comets with parabolic orbits tend to come from the farthest reaches of our solar system. And since this is ISON's first trip into the warmth of the inner solar system we have to consider what that heat will do to ISON. The answer depends significantly on its makeup.
If ISON is fairly fragile, the higher than average activity could mean that it will disintegrate as it gets nearer to the Sun. This has happened to similar comets in the past, and would mean that ISON would move to the pile of forgettable dim comets that have passed through our solar system. If it remains intact, then its activity level would give it a naked eye brightness in November and December, providing a great view in the early mornings, just before sunrise.
Of course the outcome we all hope for is that its activity steadily increases as it journeys through the inner solar system, becoming visible to the naked eye in October, culminating in a spectacular, almost moon-bright vision in the December morning skies. This last case isn't particularly likely, but it is within the realm of possibility.
We'll just have to keep our eyes on it to find out.
What do you think will happen to Comet ISON when it enters our solar system? Will it put on a show or be a bust? Tell us in the comments!
{ width: 160, height: 160, defaultImage: '', layers: 'Artimg-Comet_stars' }


Hubble image of Comet ISON - Credit: NASA, ESA, and the Hubble Heritage Team (STScI/AURA)
Comet PANSTARRS has made its appearance, but what of the next great comet? It's time to take a look at Comet ISON again. In this photo taken with the Hubble Space Telescope's Wide Field Camera on April 30, 2013, we see ISON picturesquely posed against a field of foreground stars and distant galaxies. The icy traveler with the lengthening tail appears almost to be caught in a wonderland of celestial objects.
As we look at this image, we know the comet is much closer than the other objects. The Hubble team points out the nearest star to the Sun is over 60,000 times farther away, and the closest large galaxy is about 30 billion times more distant than it appears. Thanks to "Hubble Vision" we're able to see all the wonders of the universe in one image - from close comets to far-flung galaxies.
However, Hubble isn't the only telescope that's been busy checking out Comet ISON. Astronomers using NASA's Spitzer Space Telescope have seen what could be carbon dioxide emissions.

These images from NASA's Spitzer Space Telescope of C/2012 S1 (Comet ISON) were taken on June 13, when ISON was 310 million miles (about 500 million kilometers) from the sun. Image credit: NASA/JPL-Caltech/JHUAPL/UCF
On June 13, 2013, the Spitzer imaged Comet ISON with its Infrared Array Camera and observed carbon dioxide - along with dust - evenly spewing away from the comet's nucleus. This, in turn, is creating a spectacular tail which could be as much as 186,400 miles long. That's more than half the distance between the Earth and Moon!
"We estimate ISON is emitting about 2.2 million pounds (1 million kilograms) of what is most likely carbon dioxide gas and about 120 million pounds (54.4 million kilograms) of dust every day," said Carey Lisse, leader of NASA's Comet ISON Observation Campaign and a senior research scientist at the Johns Hopkins University Applied Physics Laboratory in Laurel, Maryland. "Previous observations made by NASA's Hubble Space Telescope and the Swift Gamma-Ray Burst Mission and Deep Impact spacecraft gave us only upper limits for any gas emission from ISON. Thanks to Spitzer, we now know for sure the comet's distant activity has been powered by gas."
At the time of this observation, Comet ISON was positioned about 312 million miles from the Sun - or about 3.35 times farther than Earth.
"These fabulous observations of ISON are unique and set the stage for more observations and discoveries to follow as part of a comprehensive NASA campaign to observe the comet," said James L. Green, NASA's director of planetary science in Washington. "ISON is very exciting. We believe that data collected from this comet can help explain how and when the solar system first formed."
So what of Comet ISON? Right now, scientists theorize the comet is about the size of a small mountain and could be around 3 miles in diameter and weigh between 7 billion and 7 trillion pounds. It is widely accepted at this point that C/2012 S1 is making its first pass through our solar system and will pass within 724,000 miles of the Sun on November 28, 2013.
As it nears perihelion, its mix of gases are heating up and disclosing themselves to monitoring equipment located both here on Earth and in space. According to researchers, carbon dioxide could well be the gas that powers emission for most comets located between the orbits of Saturn and the asteroids. When it was discovered by Vitali Nevski and Artyom Novichonok at the International Scientific Optical Network (ISON) near Kislovodsk, Russia, comet ISON was located roughly between the orbits of Saturn and Jupiter - and its abundance of carbon dioxide may have made this early detection possible.
"This observation gives us a good picture of part of the composition of ISON, and, by extension, of the proto-planetary disk from which the planets were formed," said Lisse. "Much of the carbon in the comet appears to be locked up in carbon dioxide ice. We will know even more in late July and August, when the comet begins to warm up near the water-ice line outside of the orbit of Mars, and we can detect the most abundant frozen gas, which is water, as it boils away from the comet."
Original Story Souce: HubbleSite News Release and JPL/NASA Spitzer News Release
{ width: 160, height: 160, defaultImage: '', layers: 'Artimg-Matt_Ziniel_Milky_Way_Mountains_Lake' }

Watching the Milky Way rise across the night sky is one of the most beautiful sights on Earth. And seeing it rise from a dark sky location for the first time can be an unforgettable experience for those who are accustomed to city lights. But capturing such a view through the lens of a camera is no small feat. There's a science to night sky photography, and a few basics you should know.

Milky Way over Wheeler Wilderness in New Mexico.
Orion caught up with Matt Ziniel, a Colorado-based photographer and cinematographer who is somewhat obsessed with the night sky. Or at least, the stars seem to appear in a large swath of his work. Well-known for his long exposure and time-lapse photography of nature, Ziniel shares his enthusiasm for the great outdoors in the following interview, as well as a few tips and tricks for capturing breathtaking images of the night sky.
Matt Ziniel on Capturing the Night Sky:
Orion: What are your favorite dark sky destinations for camping out under the stars and photographing?
Matt Ziniel: One of my favorite locations to camp and photograph the night sky is Canyonlands National Park in Utah. There is something very special about the desert landscape and the feelings that it evokes. Minimal light pollution, combined with the dramatic desert landscape, makes for endless photographic possibilities.
Orion: What are the ideal conditions for photographing the night sky?
Ziniel: There are many variables that affect your images when shooting stars, such as the moon cycle, light pollution, cloud cover, and time of the day. Rarely do all these conditions come together perfectly, so do not let any of these factors hinder you from going out and shooting. You do not need to be in the middle of nowhere to capture images of the stars. Some of my favorite night images have been captured within city limits, so no matter where you are, you can get out and experiment with long exposure night photography.
Orion: What equipment and gear do you find essential?
Ziniel: I always try to travel as light as possible, but here are a few items you will never find me without on my camping photo adventures:
1. Tripod. Long exposures require a static camera, so a tripod is a must.
2. A fast wide angle lens. I prefer an f2.8 lens or faster for capturing the night sky, and when shooting stars I like the sense of expansiveness and perspectives that a wide angle lens gives.
3. Headlamp/Flashlight. Although your eyes adjust to the night, a light is still an essential tool for seeing your way around, checking camera settings, and framing.
Orion: A red flashlight or headlamp might be great for this, since it keeps your pupils dilated and your eyes adjusted to the darkness. Can you share a few tips for photographing the night sky?
Ziniel: There are many tips and tricks for night photography, and the best way to learn is get out there and practice, but here are some simple, effective tips for the beginning night shooter:
1. One of the simplest, but most effective tips is to shoot your photos in RAW if your camera is capable of it. RAW allows for much more control in the editing of your images compared to JPEGs. Do note that shooting RAW requires an editing and processing software such as Adobe Lightroom or Photoshop in order to work with your images or print them.

Milky Way through the clouds over Santa Cruz Lake in New Mexico.
2. Good composition is a fundamental principle of photography, but composing your shots at night under the stars is not the easiest thing to do, so here are a few tips to nail your composition:
I use a high powered flashlight to highlight elements within the frame as I look into the eyepiece. I prefer the "Goal Zero Bolt" with its adjustable beam and brightness and it's ability to be solar powered on my camping adventures.
Secondly, take a test shot at your camera's highest ISO setting to get the brightest possible image in order to see your framing. Once you have your desired composition, lock down your tripod, and set your camera to the lowest ISO setting you can that will still achieve your desired exposure. The higher the ISO is, the more undesirable grain that will be visible in your photo.
Orion: Awesome. What is the longest exposure you've ever taken?
Ziniel: I have taken some exposures over 30 minutes, but most of my night shots are between 15 and 30 second exposures. Many of my photos are strung together into time-lapses, and in order to make the stars appear as they do to the human eye and not as trails, I rarely shoot over 30 second exposures. A formula I came across online to avoid star trails is known as the "500 rule." 500 divided by the focal length of your lens will give the maximum exposure time before your stars will trail.
Orion: Is there a sweet spot that you'd say works for most night sky shots or does it vary?
Ziniel: It definitely varies depending on shooting conditions, and the lens and camera you are using, but a good starting place is a 30 second exposure at ISO 3200 with your lens set to the most wide open aperture setting (lowest number f stop).
Like anything new, there is a learning curve with night photography, but every time you go out and shoot you will learn something new. Night photography allows for a lot of experimentation, so do not be afraid to try anything your mind can think up, and most importantly have fun!
Matt Ziniel is a freelance cinematographer / photographer based in Colorado, USA. He works in the action sports and outdoor lifestyle scene, and feels most in his element capturing people doing what they love in the beautiful outdoors. Matt is well known for his long exposure and time-lapse photography. To find out more about Matt and his work, or purchase one of his prints, check out his website mattZINIEL.com or his photo portfolio at 500px.com/MattZiniel/sets
{ width: 160, height: 160, defaultImage: '', layers: 'Artimg-Summer_Triangle' }

The following constellations and objects can be found on Friday and Saturday, July 26 and 27, 2013.
This weekend the moon rises early for deep sky observers. But you can still get in a few hours, hone your skills, and enjoy some nice views of deep sky objects. Let's get in some practice "mano a cielo" - turning off our electronics (if you use them) and practice a bit of star hopping - using patterns in the sky to find your way to some nice targets. Align your Orion EZ Finder and/or 9x50 optical finder, with a wide-field eyepiece (26-32mm), and you're ready. The idea is to make finding these objects easy and intuitive, by imagining and using straight lines in the sky.
Ready? Let's get hopping!

Our first object is a bright beauty, a giant Globular Cluster, Messier 22 (M22). Some observers like seeing this one as the sky is darkening, because the old red giant stars in the cluster show well in twilight. Use the "handle" and the Teapot shape (asterism) of Sagittarius, low in tonight's southern sky, and draw an imaginary line not quite one and one-half the handle's distance up toward the top. One, two, three, you're there! M22 is a great sight in almost any size telescope - large and bright, it is unmistakable.

The Ring Nebula, Messier 57, is a wonderful target for kids to find. An Ultrablock filter helps brighten its circular shape. The small constellation Lyra is two-thirds up the eastern sky tonight. The bright star Vega anchors Lyra, with a small parallelogram extending south. "The Ring" is about halfway between stars 2 and 3 of the parallelogram. Also peek at Epsilon Lyrae (4), the "Double-Double" Magnify this "double star" until you see each star as a double!

Here is a big picture star hop that you'll enjoy returning to over and over. Covering a wide potion of the sky, the triangle id described by the first magnitude stars Vega, Deneb (in Cygnus) and Altair (in Aquila, 45 degrees up in the southeast). This is called the Summer Triangle, and knowing it familiarizes you with a big swath of sky, making star hops in some of its constellations quite easy. For example, next we move to a star hop using Altair and Vega.

Sagitta - "The Arrow" is dim and diminutive compared to many other constellations. In the middle of the shaft of The Arrow is the star cluster M71, harder to resolve (visually break up into individual stars) than many of the other bright Messier star clusters, but its location makes it an easy target. Saggita's "feathers" (3) is almost on the line between Vega, and the bright star Altair (4), 1/4th the distance toward Vega. Then, by placing your finder in the middle of the arrow's shaft, and with a little luck, the star cluster should be a bulls-eye!
Star hopping is something of a treasure hunt. The prizes are in the sky, hidden, and waiting to be discovered and enjoyed. Part of the fun can be the hunt! If you'd like to make star hopping easier, I recommend purchasing a simple inexpensive tool called a Planishpere, which Orion can provide. It will show you the constellations and stars for any date and time of the year. Once you learn a few constellation shapes, star hopping becomes an easy and enjoyable endeavor, for observers of literally any age.
-----------
Mark Wagner is a life-long astronomy enthusiast and deep sky observer. He has spent the past twenty years popularizing amateur astronomy in the San Francisco bay area through his writing and community building. A past president of the San Jose Astronomical Association, he founded what is now the annual Golden State Star Party in California. Please post if you have comments, questions, sketches or images you've taken of the targets mentioned above.
{ width: 160, height: 160, defaultImage: '', layers: 'Artimg-Tent_Milky_Way' }


More often than not, camping destinations promise darker skies than you might be used to at home. It's a chance to really get in touch with the stars, but sometimes you don't realize this until you're looking up in awe.
Plan ahead for your next camping trip under dark skies. If you're backpacking or trying to pack light, a pair of binoculars is a surefire way to enhance your stargazing experience at night, not to mention bird watching and terrestrial views during daytime hikes and explorations.
We've identified three pairs of binoculars that have performed well on camping trips, thanks to the help of our Facebook fans:
- 10 x 50 UltraView Wide Angle Binoculars - Eyeglass friendly, light enough to haul around and great for both birding and stargazing.
- 10 x 36 VE Waterproof Compact Binoculars - Affordable, small enough to take anywhere, great for daytime views of birds and scenery.
- Orion Giant View 25x100 Astronomy Binoculars - These work best with a tripod, so if you're already planning on doing some night photography, these will give you a satisfying deep look at the sky, as well as your surrounding scenery on Earth.
Another small accessory that will enhance your experience camping out under the stars (besides a good quality red light) is a laser pointer:
"My laser pointer and a pair of binoculars is a big hit," said Rob F. "It's all impromptu - on the fly and opportunistic (as opposed to setting up and trying to orchestrate everyone) you point out constellations and put the binos on the Moon or Jupiter and its moons and people are blown away - some people are so impressed that they ask to join you on a proper star party."
Still, there are some hobbyists that can't bare to leave home without their telescopes, especially if they're headed into the wilderness where the sky is dark and the views are deep.
So what are the best telescopes to bring on a camping trip?
Orion photographer and astronomer Mark Bell, gives a simple answer: "The biggest telescope you can fit in your car." But we understand that's not everyone's ideal.
Here is a short list of tried and true Orion telescopes that performed well on camping trips, recommended by our Facebook fans:
- Orion StarBlast 4.5 Equatorial Reflector Telescope
- Orion StarBlast 4.5 Astro Reflector Telescope - Sits nicely on a picnic table.
- Orion Atlas 10 EQ-G Reflector Telescope with GoTo Controller
- Orion ShortTube 80-A Refractor Telescope - with Camera tripod
- Orion SkyQuest XT10 Classic Dobsonian - Okay, we wouldn't have recommended this 53.4-pound telescope for your camping trip, but somebody else did it, and lived to tell about it. His story follows.
Telescopes & Camping: Tiny Tabletop or Giant Dobsonian?
Amateur astronomer Christopher Doll of Washington State began stargazing several years ago to help with his Space and Astronomy art. He's brought telescopes camping with him several times, and shares his experiences, first with a small tabletop telescope, and later with a giant Dob:
On an RV trip to Michigan, Doll borrowed a friend's Orion 4.5" StarBlast Tabletop telescope. Doll reports:
At first glance, it looked to me like a toy. How could such a small telescope be any good? ... On our first stop at a wonderfully dark campsite just inside the Montana/Idaho border, I had the StarBlast set up on the picnic table and was viewing in about five minutes. What a Joy! My last telescope was a 3 �" wobbly reflector that was never collimated. The StarBlast was easy to move, point, focus and after tightening the bolt at the base, it would just stay wherever I pointed it.
Each night of our trip I looked forward to parking the RV and setting up that StarBlast for another view of the sky. I saw Andromeda for the first time, a couple of the brighter star clusters, and the views of the quarter Moon were stunning. I was quite impressed with the tabletop setup. There was no fussing with tripods, it was easy to point, and comfortable to use - and carrying it wasn't difficult at all. We even brought it across a lake in Michigan by boat to a remote cabin, covered in plastic bags for protection. I'm happy to see that a 6" version of the StarBlast is also available. These tabletop telescopes quickly went onto my short-list of telescopes I'd like to own. I can't recommend them enough.

Orion StarBlast 4.5 Astro Reflector Telescope -
Compact enough to sit on a picnic table under the stars.
But this spring, Doll decided to take it up a notch, and lugged two Orion XT10i Dobsonian telescopes on a tent-camping trip. Here is how it went:
A friend and I packed up our Orion XT10i Dobsonians for a weekend camping trip on South Whidbey Island, out in Puget Sound. This time, however, I did not take my RV. This was a tent camping weekend. We drove separately with our cars packed with gear and the Orion Dobsonians. At first I was a bit reluctant to pack such a large scope, but it fit well in the back of our Chrysler Pacifica. (Most of my camping gear was in a car top carrier, leaving me plenty of room inside the vehicle for the telescope.)
The campsite was surrounded by trees with only a small window above the tents for stargazing. We set up the telescopes, checked the collimation, and got them ready for the evening. Since the campsite offered a poor view, we scouted out other locations within the park. The parking lot of the park provided a wider skyline, and better yet, it led to picnic areas overlooking Puget Sound --A sweeping view from the southeast to the southwest, giving us wonderful views of Saturn and the Moon.
Unfortunately, these picnic sites were uphill from the parking lot and required us to move the telescopes over 40 yards of rough paths. It was a bit of work, but we took it slow and got both of them set up within fifteen minutes. While not as portable as the tabletop StarBlast models, the 10" Dobsonian made it well worth the effort. It was so impressive that the park ranger, who'd approached us to see what we were doing after hours in the parking log, stuck around the remainder of the night, sharing views through both telescopes.
I will admit that after spending the weekend moving the larger XT10i around the campsite, I was feeling it in my back and legs. My recommendation: Disassemble the tube from the base and move them separately. It's much easier to navigate short trails and uneven ground this way. The padded case available for the XT10i tube has carry straps that are well-balanced to help carry the tube (assuming you place the heavier side with the mirror on the short end) and I definitely recommend it as an option.
In conclusion, between these two camping trips, I've been fortunate to try out two different Orion Telescopes, and found them both to be wonderful tools to have on hand for those dark skies. Ironically, I ended up transporting the smallest (the 4.5" StarBlast) in a giant motor home, while the largest was packed into my Chrysler Pacifica. I have to return the Orion XT10i shortly, but I've enjoyed it so much that it's likely to be the first that I purchase for myself- both for home use and camping excursions. The smaller StarBlast models are certainly easier to pack into a smaller vehicle, but if you're motivated and pack efficiently, a larger 10" Dobsonian will provide better views. Whichever way you go, telescopes are a blast to take camping!
Christopher Doll is an accomplished Space/Astronomy Artist, UX designer for software, and builds award-winning scale model spacecraft from science fact and fantasy. He lives in the Pacific Northwest with his wife and two daughters, and has recently returned to the joy of amateur astronomy. You can read about his experiences and view samples of his work at: http://www.christopher-doll.com.
Have you ever taken a telescope camping? Tell us about it in the comments!
{ width: 160, height: 160, defaultImage: '', layers: 'Artimg-LCD_DVR' }

As a kid, I was captivated with television. Not to give away my age, but color television (and programs) didn't really become commonplace until I was in grade school. Back then, they were large, cumbersome things. A "portable" set was roughly the size of a suitcase. As technology advanced, the sizes became much smaller and I'd stand for hours at our corner gas station, staring in slack-jawed fascination at what was probably a 3-inch screen implanted in cereal box-sized housing.
Needless to say, as I got older, all things video never lost that sense of appeal. I cherished my ever smaller televisions, reveled in the VCR, embraced the DVD and succumbed to Blue Ray. I've owned several video cameras and video eyepieces, and I still grin like an idiot when it comes to a webcam. How George Jetson can you get?
Then I saw the Orion StarShoot LCD-DVR...

The Orion StarShoot LCD-DVR
I'm in love. Here's a tiny little beastie - no bigger than your average cell phone - that can record the video taken by your telescope's eyepiece camera and play it back. It can be either the normal video style, or the USB computer camera. This Orion Starshoot LCD-DVR can record video in MPEG format, images in jpeg format, and audio in WAV format. And there's more? A lot more! You can use it with any equipment that has an RCA function. That means it doesn't have to be strictly an astronomy tool. You can put a movie right on this diminutive dude and take it with you! It's quite a little player. Not only does it function as a DVR, but it also allows you to transfer what you have in its memory to your computer. You can convert your VHS tapes and plug right into your camcorder. It comes with a 2G SD card that gives you roughly 90 minutes of recording time, but you can add one up to 32G in size for even more space. Power hungry? Skip worrying about spending a fortune in AAA batteries. The Orion Starshoot LCD-DVR comes with a rechargeable 5V lithium battery and the charger. You can go for about 3 hours when loaded. It's even got a remote control.
Can you imagine all the things you can do with the StarShoot LCD-DVR? Let's say you have to wait somewhere. Just record a movie and take it along. Got grandkids? Share your latest videos of them with pocket-sized ease, or put some cartoons on it for the car ride. Do you have old videos that you'd like to have on DVD, but hate the thought of the expense of replacing them? Just use this little gadget as a go-between. Put them on the StarShoot, then on to the computer, then on to DVD!
The astronomy applications alone make the Orion StarShoot LCD-DVR worth its weight in gold. There's a nifty little bracket that you can add to it that attaches right to your telescope. Just hook it up with an eyepiece video camera and you can display what your telescope is seeing. The LCD screen isn't night vision invasive. Now visitors at public outreach functions can see what your telescope is seeing, without needing the eyepiece. That's a real bonus if you sometimes need a step stool for some guests to view! Just think?You could have the Moon on screen and be able to point out its features to several people at the same time!
Need more? Then save that video footage and share it with friends and co-workers. Put it into your computer as a type of "video observing log." Convert it and turn it into a YouTube video! Keep single images and enhance them. There's simply no limit to what you and your imagination can do with an Orion StarShoot LCD-DVR.
I guarantee you'll be fascinated, too!
Tammy Plotner is a professional astronomy author, President Emeritus of Warren Rupp Observatory and retired Astronomical League Executive Secretary. She's received a vast number of astronomy achievement and observing awards, including the Great Lakes Astronomy Achievement Award, RG Wright Service Award and the first woman astronomer to achieve Comet Hunter's Gold Status. Tammy Plotner has been a compensated contributor to the Orion Community since November 2012. Orion's product review policy is to post reviews regardless of the writer's positive or negative feedback of the product.
{ width: 160, height: 160, defaultImage: '', layers: 'bluesplanet2165b' }

Almost everyone has heard Carl Sagan's description of a "pale blue dot" describing planet Earth, and now the Hubble Space Telescope has captured another blue planet. However, this one is anything but Earth-like.
")
Illustration: Location of HD 189733b. Credit: NASA, ESA, and G. Bacon (STScI)
Located only 63 light-years away, the planet - HD 189733b - is one of the nearest exoplanets, and one of the most inhospitable. If seen from space, it would be a "deep blue dot," but its color doesn't arise from sleepy blue oceans. Like a brilliant blue gas flame, the coloration comes from extreme heat!
HD 189733b was discovered in 2005, orbiting only 2.9 million miles from its parent star. This places the planet so close to a major source of gravity, that it remains "tidally locked." This means one side of the planet always faces the star, while the other remains permanently dark. Scientists figure the planet's daytime atmosphere is heated to nearly 2,000 degrees Fahrenheit... a temperature so extreme that it literally rains molten glass-sideways. The huge differences in temperatures between the sides of the planet also drive intense winds - winds which could reach speeds of up to 4,500 miles per hour.
Why does it sing the blues? HD 189733b is classified as a "hot Jupiter" and its blue coloration may be the product of silicates in its high cloud formations. The condensation temperature of these silicates could form small drops of glass that would scatter blue light more than red. As one of the nearest exoplanets to Earth, this blue baby has been subject to intense scrutiny by the Hubble Space Telescope and other observatories. It can be seen transiting the parent star, revealing its ever-changing and exotic atmosphere. These observations are giving researchers new fuels for study about the chemical compositions of alien worlds and how the "hot Jupiter" class reveals its cloud structure.
Clouds are known to play critical roles in planetary atmospheres, and detecting the presence and importance of clouds in hot Jupiters is crucial, say researchers.
"We obviously don't know much on the physics and climatology of silicate clouds, so we are exploring a new domain of atmospheric physics," said team member Frederic Pont of the University of Exeter, South West England, the United Kingdom.
So, how did the astronomers deduce the "blue" coming from HD 189733b? By employing the Hubble Space Telescope's Imaging Spectrograph (STIS), the science team observed the planet during all phases of transit and eclipse - before, during and after its passages around the parent star. Because the orbit of the planet is seen from Earth as "edge-on", we're able to pick it up as it continually moves both in front and behind the star.

Artist's rendering of HD 189733b. Credit: NASA, ESA, M. Kornmesser
With Hubble eyes, a small decrease in light (about one part in 10,000) is detected as the planet goes into eclipse. This also means a small change in the color of the light as well.
"We saw the light becoming less bright in the blue, but not in the green or the red. This means that the object that disappeared is blue because light was missing in the blue, but not in the red when it was hidden," said Pont.
Earlier observations have reported evidence for the scattering of blue light on the planet, but this most recent Hubble observation gives confirming evidence, said the researchers.
However, Hubble isn't the only space-based telescope checking in on HD 189733b. Just six years ago, NASA's Spitzer Space Telescope took measurements of its infrared light - the signature heat from the planet. This observation was the very first time a temperature map was made of an exoplanet and it revealed that the two radically different sides varied in temperature by about 500 degrees Fahrenheit.
Such extremes would cause intense winds to sweep across the surface from day to night. By combining these information sets, researchers are able to peer past the planet's hot signature and take a closer look at the composition of its atmosphere.
According to Pont, it's not exactly clear what causes the color of a planet's atmosphere - even for planets we can study closely. Although we can literally almost touch Jupiter, its ruddy atmosphere is caused by unknown color-carrying molecules. We've even passed probes through the atmosphere of Venus, and all we know is that it doesn't reflect ultraviolet light, the UV absorber that lurks in its atmosphere remains unknown.
As for Earth? From space, it appears blue because our oceans absorb red and green wavelengths more intensely than blue light. What's more, the oceans also reflect Earth's blue sky... a process known as Rayleigh scattering where the shorter wavelengths of sunlight are selectively scattered by the oxygen and nitrogen molecules in our atmosphere.
The next time you feel like singing the blues, think of a rather large planet not so very far away. It might not be raining rain, but it's raining violets...
Original Story Source: NASA HubbleSite News Release
Tammy Plotner is a professional astronomy author, President Emeritus of Warren Rupp Observatory and retired Astronomical League Executive Secretary. She's received a vast number of astronomy achievement and observing awards, including the Great Lakes Astronomy Achievement Award, RG Wright Service Award and the first woman astronomer to achieve Comet Hunter's Gold Status.
{ width: 160, height: 160, defaultImage: '', layers: 'Artimg-Iris_Nebula' }


Image: Iris Nebula by Lorand F. Details below article.
As the very first of the summer flowers bloom in the fresh, green grasses of the northern hemisphere, so a cosmic flower blooms in the dusty star fields of the northern constellations.
While this image conjures up a vision of an iris delicately opening its 6 light-year-wide petals some 1,300 light-years away in Cepheus, this bit of flora is anything but a pretty little poesy...
NGC 7023 was first discovered by Sir William Herschel on October 18, 1794, and since that time it has had a rather confusing catalog history. As usual, Herschel's notes made the correct assumption when he wrote: A star of 7th magnitude. Affected with nebulosity which more than fills the field, it seems to extend to at least a degree all around: (fainter) stars such as 9th or 10th magnitude, of which there are many, are perfectly free from this appearance.
The confusion happened in 1931, when Per Collinder decided to list the stars around it as a star cluster Collinder 429. Then along came Mr. Sidney van den Berg, and the little nebula became known as van den Berg 139. Then the whole group became known as Caldwell 4!
So what's right and what isn't? According to Brent Archinal, "I was surprised to find NGC 7023 listed in my catalog as a star cluster. I assumed immediately the Caldwell Catalog was in error, but further checking showed I was wrong! The Caldwell Catalog may be the only modern catalog to get the type correctly!"
But what isn't wrong is the role molecular hydrogen plays in formations like the Iris Nebula. In a gas rich interstellar region near a hot central object such as the Herbig Be star HD 200775, atomic and molecular excitation occurs. The resulting fluorescence produces a rich ultraviolet and infrared spectrum--and interstellar emissions. Just what kind of interstellar emissions might occur from a region like the Iris Nebula? According to the 2007 Micron Spitzer Spectra Research done by K. Sellgren (et al) at Ohio State: "We consider candidate species for the 18.9 µm feature, including polycyclic aromatic hydrocarbons, fullerenes, and diamonds."
Now, we're not only bringing you space flowers? but diamonds in the rough. The discovery of aromatic hydrocarbons, diamonds, and fullerenes in interstellar space is a new puzzle to space science.
According to the work of K. Sellgren; "Emission from aromatic hydrocarbons dominates the mid-infrared emission of many galaxies, including our own Milky Way galaxy. Only recently have aromatic hydrocarbons been observed in absorption in the interstellar medium, along lines of sight with high column densities of interstellar gas and dust. Much work on interstellar aromatics has been carried out, with astronomical observations and laboratory and theoretical astrochemistry. In many cases, the predictions of laboratory and theoretical work are confirmed by astronomical observations but, in other cases, clear discrepancies exist that provide problems to be solved by a combination of astronomical observations, laboratory studies, and theoretical studies. Studies are needed to explain astrophysical observations, such as a possible absorption feature due to interstellar 'diamonds' and the search for fullerenes in space."
What this comes down to is this: carbon nanoparticles are out there in the interstellar medium. Polycyclic aromatic hydrocarbons, or PAHs, are molecules constructed of benzene rings that look like segments of single layers of graphite. If you were here on Earth, you'd find them everywhere? coming out of your car's exhaust, stuck to the top of your grill, coating the inside of your fireplace. Apparently we're picking up the signature of PAHs in Unidentified Infra-Red emission bands, Diffuse Interstellar Bands and a UV extinction bump in NGC 7023 - but what the heck is it doing there?
According to research, it's entirely possible these PAHs may have formed in the dust when the grains collided and fractured - releasing free PAHs. They could have grown between smaller unsaturated hydrocarbon molecules and radicals in the remnants of carbon rich stars. Science just doesn't really know. But one thing they do know: once a PAH is there, it is extremely stable and extremely efficient at rapidly re-emitting the absorbed energy at infra-red wavelengths.
Take the time to view the Iris Nebula yourself. Located in Cepheus (RA 21:00.5 Dec +68:10) and around magnitude 7, this faint nebula can be achieved in dark skies with a 114-150mm telescope, but larger aperture will help reveal more subtle details since it has a lower surface brightness.
Take the time at lower power to reveal the dark dust "lacuna" around it, reported so many years ago, and to enjoy the true beauty of this Caldwell gem. Remember your astronomy lesson, too! According to O. Berne, who also studied NGC 7023, "Unveiling the composition, structure and charge state of the smallest interstellar dust particles remains one of today's challenges in astrochemistry."
The image of the Iris Nebula was featured in Orion's Image Gallery. Details:
- Date Taken: 08/15/2011
- Photographer: Lorand F.
- Location: Piliscsev, Hungary
- Telescope: Orion 8" f/3.9 Newtonian Astrograph Reflector Telescope
- Mount: HEQ-5 Pro Goto
- Camera: Canon EOS 1000D
- Processing: Iris, PS
- Exposure: 5 hours
- Other Equipment Used: Televue Paracorr II, Lacerta MGEN autoguider
Tammy Plotner is a professional astronomy author, President Emeritus of Warren Rupp Observatory and retired Astronomical League Executive Secretary. She's received a vast number of astronomy achievement and observing awards, including the Great Lakes Astronomy Achievement Award, RG Wright Service Award and the first woman astronomer to achieve Comet Hunter's Gold Status.
{ width: 160, height: 160, defaultImage: '', layers: 'Artimg-Planets_Guy' }

By David Jay Brown

The late Carl Sagan, on top of the world. Credit: NASA/Cosmos Studios
When I was in college, every Tuesday evening at 8:00, my roommate and I would lock our dorm room door, pull down the shades, switch off the lights, and sit with our eyes glued to the television screen watching Cosmos.
Hosted by the late astronomer Carl Sagan, who had a remarkable ability to dazzle his audience with mesmerizing descriptions of the Heavens, Cosmos was instrumental in fueling my love of astronomy.
I wasn't the only one; Sagan's popular books, and his many television talk show appearances, inspired millions of people.
Gifted as both a visionary scientist and a charismatic spokesperson, Sagan was able to share his infectious passion and abundant knowledge with people of all ages and backgrounds.
Although he was best known for being a popularizer of astronomy, Sagan actually spent most of his career as a research scientist at Cornell University.
The author of more than 600 scientific papers, Sagan made some substantial contributions to the field of astronomy.
Sagan helped to determine the scorching temperature on the surface of Venus, (900 �F), and he helped us to better understand the planet's unusual atmosphere.
He also helped to figure out how the seasonal changes on Mars occur, and he was one of the first people to warn us about the dangers of global warming on our own planet.
Sagan was also one of the first astronomers to suggest that Saturn's moon Titan might possess a liquid ocean, and he helped to solve the strange mystery of Titan's reddish haze.
However, the majority of people would probably say that Sagan's most ambitious scientific research was centered around the search for extraterrestrial life.
Sagan demonstrated that the basic building blocks of life—amino acids—can be produced from common chemicals by radiation throughout the universe.
He was also one of the founders of the SETI project. That is, the "Search for Extraterrestrial Intelligence," an organization that uses large radio telescopes to scan the skies for radio signals that might originate from intelligent life elsewhere in the universe.
In 1977, when NASA launched the Voyager Spacecrafts to study the outer solar system and interstellar medium, engineers included 'golden records' onboard, which were created by a committee chaired by Sagan.

Image of the golden records. Credit: NASA
The golden records had instructions engraved on them that were supposedly in universal symbols--such as drawings, sound wave pattern imagery, and binary coding—that, hopefully, an alien intelligence might be able to decipher, and be able to play the records.
When played, on the accompanying phonograph, each golden record contained sounds expressing the cultural diversity of human beings and other life on Earth, including music, sounds of the surf, birds and whale song, along with abundant video images from our world, and data detailing our location in space.
What if these records are discovered by an intelligent alien species some day? Extraterrestrial contact is something that Sagan gave considerable thought to.
The author of more than 20 bestselling science books, perhaps Sagan's most popular book was a science fiction novel called Contact.
The novel--which was made into a motion picture staring Jodie Foster in 1997--is about what might happen if we make contact with an advanced extraterrestrial civilization.
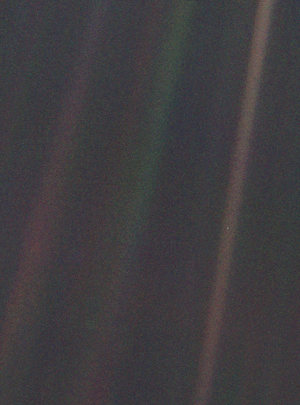
Image: "The Pale Blue Dot" in this image is Earth. At Carl Sagan's request, the Voyager 1 turned its camera towards Earth and captured this image in 1990, when it was 3.7 billion miles from Earth. Credit: NASA
Perhaps, some day, Sagan's dream will be realized, and we'll receive a jaw-dropping reply to our hopeful message on the far-flung Voyager that is, right now some 11 billion miles from our sun, journeying into interstellar space.
Something more to think about when we look up at the Heavens.
David Jay Brown is an award-winning science writer, whose work has appeared in Scientific American, Scientific American Mind, and Discover magazines. He is the author of 12 books about the evolution of consciousness, optimal health, and the future.
What do you think about Carl Sagan's golden records, and passionate search for extraterrestrial intelligence? Tell us in the comments.
{ width: 160, height: 160, defaultImage: '', layers: 'Artimg-Parkes_Radio_Telescope' }


Image: CSIRO's Parkes telescope with illustration of 'radio burst' flash in the sky. The red background is gas in our galaxy. Credit: Swinburne Astronomy Productions
If you have ever been out at night and thought you saw a strange flash in the night sky, imagine the surprise of astronomers when they discovered that enigmatic flashes of energy really do happen! Using the 210 foot dish of the Parkes Radio Telescope in Australia, a group of scientists from ten institutions in Australia, the USA, UK, Germany and Italy have caught four flashes of radio energy coming from different directions - each only lasting a millisecond. These brief encounters weren't from our neighborhood, either.
By judging how the frequency was "smeared out," the researchers figure these flashes may have originated from as much as eleven billion light-years away!
"Staggeringly, we estimate there could be one of these flashes going off every ten seconds somewhere in the sky," said research team member Dr. Simon Johnston, Head of Astrophysics at CSIRO Astronomy and Space Science.
The scientists began eliminating possible sources. According to their findings, no gamma rays or X-rays were detected in association with the flashes. They have also ruled out other flash active sources such as gamma-ray bursts, merging black holes or converging neutron stars. These new flashes are an important finding, because it's not the first time it's happened.
"A single burst of radio emission of unknown origin was detected outside our galaxy about six years ago but no one was certain what it was or even if it was real," said Dan Thornton, a PhD student with the University of Manchester and CSIRO, and the lead author on the Science paper. "So we have spent the last four years searching for more of these explosive, short-duration radio bursts."
So what can they be? Right now the answer isn't clear. The original radio flash, known as the "Lorimer Burst," was also found with CSIRO's Parkes telescope. It was buried in a 2001 radio survey of the Small Magellanic Cloud and basically discovered by accident since no one was looking for a singular event.
"Finding these things requires both a sensitive telescope and spending enough time looking, and that's what we've done with Parkes," said Dr. Johnston.
According to the news release, CSIRO's Australian SKA Pathfinder telescope, now under construction in Western Australia, will be conducting a major survey for transient radio sources like the ones just found with Parkes.
"With the ability to detect these very fast sources we are opening up a whole new area of astrophysics," said Dr. Johnston.
Will we one day know the answers to what causes these mysterious flashes? Could the answer be a disintegrating black hole or a phenomenon we have yet to discover? It's very possible they will unleash gravity waves which Einstein's theory of relativity predicts - yet has never been directly observed. One thing we do know for certain: the hunt is on for the source of these elusive events.
"Pulsar surveys offer a rare opportunity to monitor the radio sky for impulsive burst-like events with millisecond durations." says the phenomenon's discoverer, Duncan Lorimer. "Hundreds of similar events could occur every day and, if detected, could serve as cosmological probes."
Original Story Source: CISRO News Release
Any guesses as to what may have caused these short-duration radio bursts? Tell us in the comments.
{ width: 160, height: 160, defaultImage: '', layers: 'Artimg-ObservSun' }

When you're ready to take your solar observing seriously, you're going to want the right words to describe what you're seeing in your personal reports and/or reports to others. While the following is not a complete list, they are common terms you will encounter most often along with a brief description of what they mean.
Corona - the outer, plasma layer of the solar atmosphere which can extend across a huge distance of space. It is observed during a solar eclipse.
Photosphere - the visible surface of the Sun. It is a solid shell of gas approximately 250 miles thick with an average temperature of 11,000� Fahrenheit.
Chromosphere - the middle layer of the solar atmosphere. It measures approximately 1245 miles in depth.
Limb darkening - seen at the edge of the photosphere. This effect occurs because at the center of the disc we see deeper into the Sun where the temperatures are higher and the gas shines more brightly. At the limb, we are seeing cooler gas at higher elevations, therefore it appears darker.
Granules - cells of gas seen at magnification. Individual cells of gas contained within the photosphere form into specific areas. Since they are formed due to dynamic activity, each granule may last from several minutes up to a half an hour.
Granulation - term used to describe the overall pattern of individual cells, usually observable at the limb. Granulation occurs in the photosphere.
Faculae - large, irregular patches on the photosphere. They are normally observable near the limb. Faculae appear as "cracks" or "veins" within the granulation pattern.
Prominence - a "loop" of cooler plasma observable with a hydrogen-alpha (H-alpha) filter. This dynamic activity is attached to the photosphere and extends outward through the corona. Prominences can form within hours and last over a wide timeline - from hours up to a year.
Flare - a brilliant explosion of pent-up magnetic energy and radiation which affects all three layers of the solar atmosphere. Narrow band H-alpha filters are capable of revealing them, but only very rare "white light" flares from especially energetic emissions can be detected in a standard filter or Herschel wedge.
Sunspots - a dark, highly magnetic "patch" on the solar surface where the mean temperatures are about 3,600 degrees cooler. This is where the Sun's magnetic field has emerged through the photosphere and stopped the rising energy from reaching the surface. They're easily visible in affordable "white light" glass and safety-film solar filters. Sunspots indicate where a prominence or flare is located.
Umbra - the darkest, coolest portion of a visible sunspot. These black areas vary greatly in size, shape, and magnetic field polarization.
Penumbra - a striated, lighter colored halo surrounding the central umbra. Also varies greatly in size and shape.
Dispersion field - a term used to describe the umbra/penumbra region of a sunspot group.
Plage - a bright region which occurs in the chromosphere. They are also a visible perimeter that usually accompanies a sunspot group.
Sunspot area - the area of a sunspot measured in millionths of the Sun's visible hemisphere.
Sunspot groups - a collection of sunspots. Normally it is fairly easy to count the number of groups as they are spread out across the disk and in both hemispheres, but difficulties can occur when sunspots appear close together. It is wise to check a reliable information source as to their given numerical designation.
Spicule - a jet of gas which occurs in the chromosphere. It is dynamic activity which is visible along the solar limb and lasts about 15 minutes.
"Wilson Effect" - term coined by Scottish solar astronomer, Alexander Wilson, who described the indented, dimpled appearance of highly magnetized sunspots when seen near the solar limb.
Coronal mass ejection - a CME is an intense burst of solar wind and magnetic fields which occurs above the corona. The released material consists of plasma - protons and electrons - and sometimes small quantities of other material such as helium, oxygen, and iron.
Coronal hole - a darker, cooler, less dense area in the plasma with open magnetic field lines. Widely accepted to be the major source of solar winds.
Solar cycle - a periodic change in solar activity, usually lasting approximately 11 years.
Solar Maximum - or solar max. Time frame during the 11 year cycle when solar activity is at its peak.
Sunspot Number - also known as the Wolf Number, or Zurich Number. It is the relative measure of individual or groups of sunspots present on the surface for a given date and time.
Again, there will be many more terms you will encounter as you broaden your knowledge of solar observing. In the meantime, enjoy each feature you see through a variety of properly protected astronomical instruments and use the proper terms to describe them!
CAUTION: Never view the Sun, even for an instant, without a properly installed protective solar filter for your telescope or binoculars, or specialized solar telescope. Doing so could permanently damage your eyes.
{ width: 160, height: 160, defaultImage: '', layers: 'Artimg-NASA_MSFC_UCLan_sun' }

In results presented to the RAS National Astronomy Meeting on July 1, Professor Robert Walsh of the University of Central Lancashire revealed the latest findings on the solar scene.
Through the lens of a remarkable new camera located onboard a sounding rocket, an international group of scientists, including partners in the United States and Russia, have observed the Sun's outer atmosphere with amazing clarity. What they discovered was a network of "highways" and elusive sparkles which may help to answer some outstanding solar riddles.
Launched at the White Sands Missile Range in New Mexico, the NASA High Resolution Coronal Imager (Hi-C) managed to capture images of the solar corona five times sharper than any previous image. Not only did this set a new record, but they were also able to pick up new images at a rate of about one per every five seconds.
Aimed specifically at a large, magnetically active sunspot region, the Hi-C camera observed the activity in the extreme ultraviolet end of the magnetic spectrum. What it captured was several new features - including "blobs" of gas traveling along "highways" and electrifying "sparkles" which appear and disappear rapidly.
Just what causes this phenomenon? Small pockets of superheated plasma shoot along these coronal highways which are governed by the Sun's magnetic field. At about one million degree Celsius, these blobs are not only hot, but they're fast, too. They speed along at rates of about 80 km per second — or roughly 235 times the speed of sound on Earth. Their track isn't small, either. The average coronal "highway" is about 450 km across, or roughly the length of Ireland from north to south. They are traveling along what is known as a solar filament, a ribbon on dense plasma which can violently unleash its power in an event known as a coronal mass ejection (CME).
Like cracking a whip, a CME can fling billions of tons of plasma into space. If directed towards Earth, these events can disrupt everything from our terrestrial magnetic fields to power grids. It's a space weather event... and it could be as beautiful as causing aurora to as nasty as damaging satellite electronics.
Now, through the Hi-C expanded research, solar scientists can take a closer look at these solar "highways" and perhaps better predict when a CME could happen. By studying a magnetically complicated region, they were able to pinpoint areas of 1-2 million degrees Celsius plasma located in the outer solar atmosphere. Even more data will help further their understanding of why the solar corona is some 400 times hotter than the solar surface.
Perhaps the answer might be another new feature Hi-C has discovered - the sparkles. Lasting about 25 seconds, these bright anomalies are roughly the size of the UK and release about 10^24 Joules of energy each time they appear. To get a grip on that number, that's about one million million million million Joules... or about 10,000 times the annual energy consumption of the population of the UK!
These "sparkles" are a powerful force and an indicator that almost an unfathomable amount of energy is being poured into the corona - energy which may erupt and superheat the plasma.
Solar physicist Professor Robert Walsh, UCLan's University Director of Research, added: "I'm incredibly proud of the work of my colleagues in developing Hi-C. The camera is effectively a microscope that lets us view small scale events on the Sun in unprecedented detail. For the first time we can unpick the detailed nature of the solar corona, helping us to predict when outbursts from this region might head towards the Earth."
NASA Marshall heliophysicist Dr Jonathan Cirtain, principal investigator for the Hi-C mission said: "Our team developed an exceptional instrument capable of revolutionary image resolution of the solar atmosphere. We took advantage of the high level of solar activity to focus in on an active sunspot and obtained these remarkable pictures."
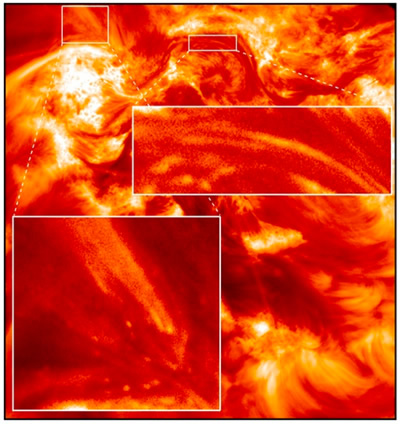
An image of an active, magnetically complicated region of the Sun captured by the new Hi-C instrument. It shows plasma in the outer solar atmosphere at a temperature of 1-2 million degrees Celsius. The inset box at bottom left shows 'sparkle' features that are releasing vast amounts of energy into the corona. The box at top right shows a close-up of part of a solar filament where 'blobs' of solar plasma flow along thread-like 'highway' structures. Credit: NASA MSFC and UCLan.
Original Story Source: Royal Astronomical Society News Release
CAUTION: Never look at the Sun, either directly or through a telescope or binocular, without a professionally made protective solar filter installed that completely covers the front of the instrument, or permanent eye damage could result. When using a truss tube telescope to view the Sun, both a properly fitting solar filter and light shroud are required.
{ width: 160, height: 160, defaultImage: '', layers: 'Artimg-StarShoot_Video_Camera_II' }

Did you ever have a guilty little pleasure? Maybe it's a weakness for peppermint patties... Or the soft spot behind a puppy's ears... Perhaps it's the smell of bacon frying. Whatever it is, that guilty little pleasure is something you know you probably should be able to resist, but can't. For me, it's the Orion Starshoot Eyepiece Camera.

My first Starshoot was the video model. It's nothing more than a little plastic contraption about the size of a prescription bottle. Its wiring is simple. You got your cords in, you got your cords out. Turn it on, adjust the balance, focus the image while you watch the television screen and poof! You're in like Flynn.
Given my predisposition towards video equipment — especially miniaturized video equipment — I was instantly fascinated by what this camera could do. So fascinated, in fact, that I even went out and purchased a color television that had a built-in VCR. Happy were the days that I spent with that camera! I recorded sunspots, lunar craters, Venus, Jupiter, Saturn and Mars. I dragged the TV with me everywhere I went. How cool was it to be able to put the Moon in the eyepiece and be able to explain to onlookers what craters they were looking at!
My family probably tired of my "documentaries", but I was having the time of my life. I would do hours of lunar footage and sit with the remote control, rewinding and pausing. It was actually one of the greatest things I ever did for myself. Thanks to these lunar home movies, I was able to stop the action at any point and reference my Moon maps. Unlike working with a red flashlight and bungling in the dark, I was able to freeze certain areas on the film, compare it to my reference guides, and positively confirm a huge amount of challenging craters that people don't even realize they are seeing.
The same held true with observing sunspots: I kept my telescope handy — armed with an Orion glass solar filter — and each day I would record the sunspots. By having them on a video, I could review them at my leisure, watching how the spots progressed across the surface, how the umbra and penumbra changed with time and even the emergence of new spots.
The Orion Starshoot Video Camera became my teacher and I became a willing pupil. Not only did I do solar system objects, but I also graduated on to double stars. While most folks wouldn't find a couple of small dots on a black background very exciting, I did! And there's more... I also got my paws on several diffraction gratings and built my own primitive spectroscope. While I wasn't exactly breaking new scientific ground, I was doing something that no one else was... I was filming spectral lines in bright stars.
Of course, it was only natural that when I was eventually able to afford a laptop computer I "graduated" to an Orion Starshoot USB Eyepiece. While the sensitivity was no different, it did open up an easier realm of working with the footage in some respects. Before I "computerized" I used a WebTV video capture card to turn paused images into jpg files. It was very amateurish, but I was happy. Now the USB version allowed me to do so much more with the images, right down to creating short videos that I could include with my personal observing reports!
I did say it was a guilty pleasure, didn't I? Yes. Next to the big guys who are out there with the expensive CCD equipment mopping up the night, me and my little eyepiece camera look kinda' childish. But all I can say is - who cares? I have had (and still do) a grand old time with that tiny video camera and even after years of use, it still performs. Peppermint patty, anyone?
Tammy Plotner is a professional astronomy author, President Emeritus of Warren Rupp Observatory and retired Astronomical League Executive Secretary. She's received a vast number of astronomy achievement and observing awards, including the Great Lakes Astronomy Achievement Award, RG Wright Service Award and the first woman astronomer to achieve Comet Hunter's Gold Status. Tammy Plotner has been a compensated contributor to the Orion Community since November 2012. Orion's product review policy is to post reviews regardless of the writer's positive or negative feedback of the product.
CAUTION: Never look at the Sun, either directly or through a telescope or binocular, without a professionally made protective solar filter installed that completely covers the front of the instrument, or permanent eye damage could result. When using a truss tube telescope to view the Sun, both a properly fitting solar filter and light shroud are required.
{ width: 160, height: 160, defaultImage: '', layers: 'Artimg-Space_Warps' }

When Albert Einstein proposed his theory of general relativity in 1916, one of his predictions was that light could be deflected by the mass of a nearby object. In 1919 Arthur Eddington took a trip to Principe and photographed stars during a total eclipse. The results confirmed Einstein's theory.
Einstein's theory revolutionized our understanding of gravity. Rather than a force between masses, as Newton proposed, gravity is a warping of the very fabric of space and time. A mass warps space around it, and the motion of objects in that warped space give the appearance of a gravitational force. As bizarre as general relativity is, we've come to depend upon its effects for things like the GPS in our phone, which needs to account for the warping of time to ensure we get to the right coffee shop.
Eddington had to take advantage of a rare event in order to observe the deflection of starlight. The right alignment of an eclipsed sun was a fortunate event. Much more common are the alignment of galaxies with more distant galaxies (or compact objects such as quasars). If a closer galaxy lies in front of a more distant one, light from the more distant galaxy is deflected by the mass of the closer galaxy. As a result, we can see a halo image of the distant galaxy, such as those seen in the image below. Taken by the Atacama Large Millimeter/sub-millimeter Array, they show the lensed galaxies in red.

Image Credit: ALMA (ESO/NRAO/NAOJ), J. Vieira et al.
In recent years, detailed sky surveys provide the opportunity to find large numbers of lens galaxies. Unfortunately, finding lens galaxies is not a task that is easily automated. Computers can do some of the filtering, but it really comes down to inspecting images by hand. Of course, to do that in a meaningful way you need lots of people looking at lots of images, which is why there are websites like SpaceWarps.
SpaceWarps is a website where anyone can comb through astronomical images, and with a little training start finding lensed galaxies. The site was developed by professional astronomers, and it serves a very real need in astronomical research. Large lensing surveys will allow astronomers to study the quantity and distribution of dark matter in our universe. For example, by looking at the relation between lensed galaxies and their distance, cosmologists can determine whether the amount of dark matter changes over time, which in turn will help refine our understanding of the evolution of the universe.
SpaceWarps allows everyone to contribute to real, cutting edge astronomy. You don't need a degree, or even a telescope. All you need is some spare time and an interest in doing astronomy. There aren't many scientific fields where professionals and amateurs can work together on scientific research.
But in that regard, astronomy has always been a bit warped.
Brian Koberlein is an astrophysicist and physics professor at Rochester Institute of Technology. When he's not professing, he writes about astronomy and astrophysics. He is also the author of Astrophysics Through Computation.
{ width: 160, height: 160, defaultImage: '', layers: 'Artimg-NASA_Deep_Sky' }

By Tammy Plotner
Thanks to the technology behind NASA's Spitzer Space Telescope, we're able to witness stars blooming in a celestial desert. Far away from the star-crowded core of the Milky Way, the images created by the Galactic Legacy Infrared Mid-Plane Survey Extraordinaire (Glimpse 360) project are providing us with a complete map of our galaxy's topography. This full, 360 degree view of the Milky Way plane will be available later this year, but anyone with a computer can access the Glimpse images and help catalog its many features.
Like a CD, our galaxy is a vast, spiral collection of stars that appears flat. However, there is a slight warp. If you were to take a look at the Milky Way from above, you'd find our solar system about two-thirds of the way out from the center, located in an area known as the Orion Spur, a branch of the Perseus spiral arm.
Through the use of Spitzer's infrared observations, astronomers are now able to refine their mapping capabilities, showing a more precise galactic shape. This includes the warp in an otherwise flat disc. Although other telescopes, including the Spitzer, have looked to the center outward and charted the galactic plane before, these new images are taking a closer look at where the stellar population is the thinnest.
"We sometimes call this flyover country," said Barbara Whitney, an astronomer from the University of Wisconsin at Madison who uses Spitzer to study young stars. "We are finding all sorts of new star formation in the lesser-known areas at the outer edges of the galaxy."
 are red.")
Image: Dozens of newborn stars sprouting jets from their dusty cocoons have been spotted in images from NASA's Spitzer Space Telescope. In this view showing a portion of sky near Canis Major, infrared data from Spitzer are green and blue, while longer-wavelength infrared light from NASA's Wide-field Infrared Survey Explorer (WISE) are red.
According to the news release, Whitney and the research team are using the data to locate areas containing young stars. Their mission has been successful and one of the notable achievements includes cataloging an area near Canis Major where more than 30 stars in their early phases have been observed sprouting jets of material.
But that's not all. Through the use of the Glimpse 360 data, the scientific team has identified 163 additional regions where this activity also occurs. This information shows the youthful stars not only as individual objects, but gathered in clusters as well.
The Spitzer information also has other uses, such as assisting researchers to better calculate stellar distances. Astronomers are taking note of "a distinct and rapid drop-off of red giants, a type of older star at the edge of the galaxy." Warp speed? You bet. This new data aides the mapping of the warp structure in the Milky Way disc.
"With Spitzer, we can see out to the edge of the galaxy better than before," said Robert Benjamin of the University of Wisconsin, who presented the results at the 222nd meeting of the American Astronomical Society in Indianapolis. "We are hoping this will yield some new surprises."
The Spitzer's infrared instruments are playing a crucial role in improving images of the most remote locations in our galaxy and information from NASA's Wide-field Infrared Survey Explorer (WISE) is providing even more details. WISE surveyed the entire sky twice in the infrared spectrum and Spitzer adds the finishing details. By combining their data, we're able to finally take a look at areas we simply don't know much about - the outer regions.
Now, Glimpse 360 has improved things further by mapping 130 degrees of the sky around the galactic center.
Is searching for stars in the most remote corners of our galaxy a solitary job? Not hardly. As exciting as these new results are, what makes it even more fun is the fact that it has had a lot of help from citizen scientists - astronomers like you and me.
Right now, members of the public are continuing to sift through earlier Glimpse data releases. They are participating in The Milky Way Project and searching for cosmic "bubbles," the possible sites of hot, massive stars. The results include the identification of an impressive bubble structure in a star-forming region named W39. When identified by the volunteers, the researchers took a closer look and found the smaller bubbles were the product of massive stars excavating their way through an even larger bubble.
"This crowd-sourcing approach really works," said Charles Kerton of Iowa State University at Ames, who also presented results. "We are examining more of the hierarchical bubbles identified by the volunteers to understand the prevalence of triggered star formation in our galaxy."
For more information about the Milky Way project and to learn how to participate, visit: http://www.milkywayproject.org
Original Story Source: JPL/NASA News Release
Tammy Plotner is a professional astronomy author, President Emeritus of Warren Rupp Observatory and retired Astronomical League Executive Secretary. She's received a vast number of astronomy achievement and observing awards, including the Great Lakes Astronomy Achievement Award, RG Wright Service Award and the first woman astronomer to achieve Comet Hunter's Gold Status.
{ width: 160, height: 160, defaultImage: '', layers: 'Artimg-M13-165' }

This weekend, with the third quarter moonrise cutting down our available observing time, let's maximize each view by selecting a few easy targets that give us "two-for-one" fun. Here are four pairs, each pair comprising objects that are at greatly divergent distances. As long as you get to a darker sky, each pair will be within the reach of even smaller instruments, like 6-8" telescopes. Of course, the larger your telescope, the more light it will gather, the brighter these objects will appear and the easier it will be to observe them!
 Start off in Serpens Caput, with the great globular cluster M5. Always a great sight, M5 competes in northern skies with M13 as the best of the best globulars. Pleasing enough by itself... but if you star hopped to it, you found it just with the star 5-Serpentis - which fits into a low power field of view with the globular. Look carefully at the bright star, less than half a degree southeast of the globular - it's a well known double! 5 Serpentis shines at magnitude 5.2, its components at 5.2 and 9.2, 2.1 arc minutes apart. 5 Serpentis is our close neighbor, only 80 light-years distant, while its eyepiece partner M5, still in our galaxy, is 24,500 light-years away.
 And speaking of M13, did you realize it too is a double-treat? It's always fun to compare M5 and M13 - which do you like best, and why? While viewing M13, check in your low power eyepiece just under a half degree north-northeast. See that "smudge"? It's the spiral galaxy NGC 6207, shining relatively brightly at magnitude 12.2. You should be able to determine its shape and size. M13 is listed at 21,000 light-years out, but its "little" buddy in the eyepiece... estimated at 22 million light-years. And you thought M13 was distant!
 Here's an interesting pair - NGC 6946 and NGC 6939 - you'll need a good wide field to fit both in one view, but it's well worth it. NGC 6939 is a rich open cluster, in our own Milky Way galaxy. It shines at magnitude 7.4, but its large size makes it seem dimmer. Just over half a degree southeast is the "Firecracker Galaxy," NGC 6946. Large and dim, it will appear as a faint haze, but with averted vision and patience, some of its spiral structure will show. Oh... the Firecracker? NGC 6946 has more recorded supernovae than any other galaxy! The open cluster is a mere 4,000 light-years away, while its "neighbor" is at 22 million light-years.
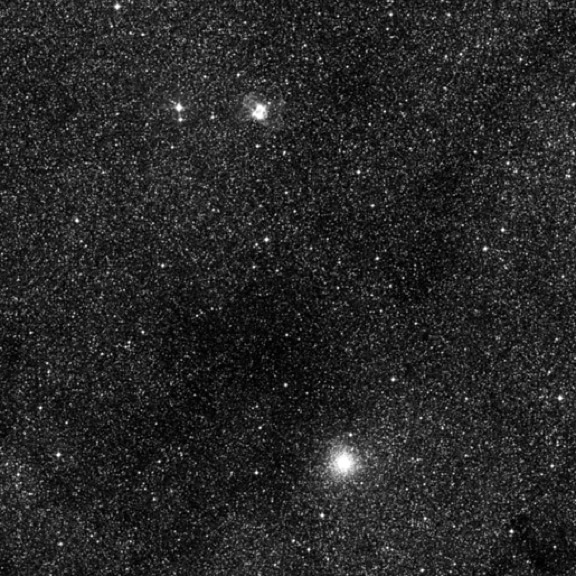 Here's a final fun "faint-fuzzy" pair. NGC 6440 and NGC 6445 are two galactic targets in our own Milky Way galaxy, in the constellation Sagittarius. When viewed together in a telescope, they appear quite similar. But NGC 6440 is a planetary nebula, while NGC 6445 is an "unresolved" (you can't see the individual stars) globular cluster. Separated by just 21 minutes, their magnitudes are 13 and 9.7, with distances estimated at 4,500 and 27,700 light-years. Try an Orion Ultrablock filter here to see the planetary jump out!
Do you have any other divergent eyepiece pairs you'd like to tell us about? Or, submit a comment with your impressions of these pairs.
Mark Wagner is a life-long astronomy enthusiast and deep sky observer. He has spent the past twenty years popularizing amateur astronomy in the San Francisco bay area through his writing and community building. A past president of the San Jose Astronomical Association, he founded what is now the annual Golden State Star Party in California. Please post if you have comments, questions, sketches or images you've taken of the targets mentioned above.
{ width: 160, height: 160, defaultImage: '', layers: 'Artimg-ObservSun' }
By Tammy Plotner
Observing the Sun with Balloons
Is there anything more exciting than watching a release of helium balloons? Isn't it majestic to witness a hot air balloon sail across the sky? If you love sights like these, then you'll be fascinated by one of the latest methods to study our nearest star... the SUNRISE Mission.
")
Caption: The balloon rises into the sky. Only when it is positioned exactly above the solar observatory, will the launching vehicle release its load. (Credits: MPS)
SUNRISE is a solar observatory that was conceived less than a decade ago by an international team of scientists. A helium-filled balloon carries the largest solar telescope to leave the Earth up to a height of 37 kilometers. When it reaches that lofty range of about 27 miles above our heads, the balloon expands to about 130 meters in size - or about 430 feet in diameter.
As it cruises the upper atmosphere, to a float altitude of 120,000 feet, it will have left all but 5% of Earth's atmosphere beneath it, allowing the instrumentation to function without the degrading affects on observing produced by the lower levels. From this vantage point, SUNRISE can watch the Sun with unprecedented clarity... viewing surface details and recording the distribution of magnetic fields with a resolution of up to 35 kilometers. That's like being able to spot details on a coin from a distance of nearly 63 miles away!
"Turbulence in the atmosphere inevitably blurs all images of ground-based telescopes," explains Dr. Peter Barthol from Max Planck Institute for Solar System Research (MPS) in Germany, SUNRISE project manager.
Once the observatory reaches its travelling height, the Earth's polar winds will embrace the balloon and gondola and carry them westward around the North Pole.
"Thanks to the midnight Sun in these latitudes north of the Arctic Circle, we will be able to look at the Sun nonstop," says Barthol.
Four years ago, SUNRISE embarked on its first, six-day journey and delivered the most detailed images of the Sun up to that date. Unfortunately, the Sun was "quiet" at the time, displaying very little activity.
Now, after two months of preparation, SUNRISE is sailing again.
"SUNRISE's first mission showed us, that this ambitious concept works", says Prof. Dr. Sami K. Solanki, director at the MPS and scientific head of the mission.
")
Caption: The white gondola carries the telescope and additional scientific instruments. (Credits: MPS, P. Barthol)
At around 2 a.m. CEST on June 12, 2013, the huge launching vehicle picked up SUNRISE from the large experimental hall at the Max Planck Institute for Solar System Research, which had been storing the solar observatory in the last two months, and brought it to the launch pad.
"The weather conditions are decisive for launching", says Solanki. "SUNRISE can only safely reach its travelling height, if the winds in the air layers below blow only very lightly. This is especially important on the first few kilometers."
After four or five days, the observatory could travel as far as the north of Canada, where it will land with the help of a parachute. As it sails along, the researchers plan on using every second of time to devote SUNRISE's sensitive instruments to gathering data. Perhaps it will be able to shed some proverbial light upon some of the greatest mysteries in solar physics, such as why the Sun's activity changes in an approximately eleven-year-cycle or why the outermost layer of the Sun, the corona, is approximately 500 times as hot as the photosphere below.
"Four years ago, the Sun showed us quite impressively, that this eleven-year-cycle is just a rough rule of thumb", says Solanki.
Will SUNRISE provide us with all the expected results? Although it will be months before the solar physicists are able to sift through all the information it gathers on this latest mission, the researchers are optimistic that the incredible balloon with its unique payload will give back great return. The first time the solar observatory was launched, the Sun didn't cooperate, but solar maximum is underway and the team is hopeful.
"For the second mission, this should be quite different," says Barthol.
Watch the SUNRISE ballon in real time here: http://www.csbf.nasa.gov/sweden/sweden.htm
Tammy Plotner is a professional astronomy author, President Emeritus of Warren Rupp Observatory and retired Astronomical League Executive Secretary. She's received a vast number of astronomy achievement and observing awards, including the Great Lakes Astronomy Achievement Award, RG Wright Service Award and the first woman astronomer to achieve Comet Hunter's Gold Status.
{ width: 160, height: 160, defaultImage: '', layers: 'penguinandegg165' }

As the northern hemisphere heats up for the summer season, the NASA/ESA Hubble Space Telescope's Wide Field Planetary Camera 3 (WFC3) is heating up our imaginations with this incredible image taken in both infrared and visible light.
")
Image Caption - Credit: NASA, ESA and the Hubble Heritage Team (STScI/AURA)
What you are looking at is a pair of interacting galaxies. Nicknamed "the Penguin" or "the Porpoise" by amateur astronomers, NGC 2936 used to be just a normal spiral galaxy before it got too close to a neighboring galaxy. Sometimes when galaxies are drawn together by a mutual gravitational attraction, they merge... and sometimes they get ripped apart!
Located in the constellation of Hydra about 326 million light-years away, galaxy NGC 2936 is slowly being torn to shreds by its cosmic companion. As you can see in this image, some of the spiral structure still remains - its central bulge lighting up the "eye" of the penguin - and the remnants of the spiral arms create the "body" where brilliant streaks of red and blue adorn the image. These streaks bend their way towards elliptical galaxy, NGC 2937. If you use your imagination, the companion galaxy looks almost like the penguin's egg, being carefully guarded by its parent.
This pair also goes by another name, Arp 142. While its name is a bit less fanciful, the Arp Catalog of Peculiar Galaxies is a well-respected collection. It was named after American astronomer, Halton Arp and published in 1966. This galactic assortment of weirdly-shaped galaxies was Arp's attempt to help understand how galaxies changed shape and evolved with time - something he felt was poorly understood. When he cataloged them, he did so by their unique appearances.
However, astronomers soon discovered that a large amount of the entries in Arp's work were actually interacting and merging galaxies. In some cases, the effects of these interactions can be violent... and the Arp 142 pair shows it.
Is this galaxy just chillin'? Hardly. Gas and dust are being pulling from the core and, as it is compressed, causes stars to form. These regions of stellar creation appear as blue clumps at the ends of the branches near the elliptical companion galaxy. Almost like veins, the reddish dust is being ejected from the galaxy's plane, highlighted by starlight left over from the nucleus and disk.
Look at the image again. In the upper portion you'll see two bright stars which are housed in the foreground. One of these shows an almost comet-like trail of material - this is another galaxy. At present, this galaxy is presumed to be about 230 million light-years from Earth and too far away to be part of the Arp 142 pairing.
The same is surmised of the other galaxies sprinkled around NGC 2936. They are part of the scene, but not part of the action. You'll see them blossoming like red and blue flowers in the background, and all captured by the incredible vision of the Hubble.
Did you find this article helpful? Give it a rating below!
Tammy Plotner is a professional astronomy author, President Emeritus of Warren Rupp Observatory and retired Astronomical League Executive Secretary. She's received a vast number of astronomy achievement and observing awards, including the Great Lakes Astronomy Achievement Award, RG Wright Service Award and the first woman astronomer to achieve Comet Hunter's Gold Status.
{ width: 160, height: 160, defaultImage: '', layers: 'Artimg-M13-165' }
The following field notes from Mark Wagner reflect deep-sky objects viewed during a recent new moon. These same deep-sky objects, or "faint fuzzies" are currently viewable from northern skies, ideally with no Moon. Skill is required, as some of the objects are fleeting, at the limits of perception.
It was a very good night of deep-sky observing with friends at Willow Springs, California. Seeing down low varied from average to poor, up high, a bit below average to very good. Thin clouds seemed to sit over the mountains to our west, but never did intrude on our observing. No dew, temps bottomed out at 48F around 4 a.m.
During the night a discussion ensued among the observers about color perception as it applies to viewing astronomical targets, both the physiological effects and how the brain sees "what it wants to see." It really becomes somewhat of a philosophical discussion. While we can't say we perceived "reds" in the Swan and Lagoon Nebulae, their tones were warm. The cool green hues were obvious in the gray filament of each target.
This observing site is an hour and a half south of the San Francisco bay area. Each time I drive there I am more enamored with California's quiet back roads. Each turn off the prior highway strips away another layer of my urban life, American music radio stations fade, and the sounds become short journeys south of the border, the static crackling Salsa and Country Mexican - y no habla Ingles, nada. The river cut valley, mountains so crisp and clear they contrast with a razors edge against a deep blue sky. Before I know it, I'm there - and the mood is set. It's not the destination, it's really the journey. A drive through the country is always a great way to begin a night of astronomy.
Here are notes for a few of the targets I observed in my 18" f/4.5 Dobsonian telescope.

Arp 185 UMi GX 3.0'x2.4' 11.8B 16 32 38 78 11 56
Arp 185 UMi GX 3.0'x2.4' 11.8B 16 32 38 78 11 56
12mm - Very bright, stellar nucleus, elongated oval with apparent streak through its major axis NNW/SSE. The 7mm shows it is brighter on SSE side, hints of spiral arm on NNW side, and foreground stars just SSE of nucleus. It does not have larger core, only very bright nucleus.

N6155 Her GX 1.3'x0.8' 13.2P 16 26 08 48 22 01
N6155 Her GX 1.3'x0.8' 13.2P 16 26 08 48 22 01
7mm - Appears fairly bright, amorphous, and rather tattered looking like its disturbed. Elongated N/S, and contains a brighter central elongation appearing slightly offset NNW/SSE. Central elongation appears to constitute a large portion of galaxy, with only a bit of dim extension around it. Its stellar core is only occasionally, very dimly, visible

NGC 6229 Her GC 4.5' 9.4 16 46 48 47 31 40
NGC 6229 Her GC 4.5' 9.4 16 46 48 47 31 40
7mm - This bright globular resolves well, but not to the core. Its core constitutes 1/4 to 1/3rd the obvious diameter of the extended object, which appears to be more populated to the west, and also extended more NNW/SSE. Very nice globular!

N6239 Her GX 3.3'x1.2' 12.9B 16 50 05 42 44 22
N6239 Her GX 3.3'x1.2' 12.9B 16 50 05 42 44 22
7mm - This is an odd galaxy. Elongated WSW/ESE, with strong concentration along major axis, it has an apparent dark intrusion on its S side or mottling. This is possibly a disturbed galaxy. No hint of nucleus.

AGC 2197 Her GXCL 89.6' 13.9 16 28 12 40 54 00
AGC 2197 Her GXCL 89.6' 13.9 16 28 12 40 54 00
This is an incredibly rich cluster. In the immediate area, I observed 29 galaxies. The brightest members are NGC 6146, NGC 6160 and NGC 6173. Fun to galaxy-hop in a field of view, picking out the dimmest "galaxy-ghosts" at the limit of perception!

NGC 6207 Her GX 3.3'x1.7' 12.2B 16 43 04 36 49 56
NGC 6207 Her GX 3.3'x1.7' 12.2B 16 43 04 36 49 56
7mm - Located in the same wide-field view as M13. It is extended N/S, with bright stellar core, and has an overall high surface brightness. With averted vision, the galaxy extends in width and shows hints of spiral structure. Note the small challenge galaxy, IC 4617, next to the parallelogram of stars at the bottom right of this photo, located between M13 and NGC 6207.

M13 GC 20.0' 5.8 16 41 41 36 27 37
M13 GC 20.0' 5.8 16 41 41 36 27 37
Gorgeous with 12mm eyepiece! Looks asymmetric elongated N/S with more stars to W than E. Resolves nicely to the core. There, a big sweeping chain of stars extends out to S from the propeller.

Abell 39 Her PN 2.9' 13.7P 16 27 33 27 54 33
Abell 39 Her PN 2.9' 13.7P 16 27 33 27 54 33
Very interesting planetary nebula, seen at low power easily. At higher power it virtually disappears. Use OIII filter.

N6181 Her GX 2.5'x1.1' 12.5B 16 32 21 19 49 29
N6181 Her GX 2.5'x1.1' 12.5B 16 32 21 19 49 29
7mm - The galaxy is extended mostly N/S and more so off the core to the N. Averted vision greatly increases the outer envelope's appearance. Contains a bright core, but appears to be mottled with some dark intrusions. With averted, core occasionally shows a stellar nucleus, and spiral swirls forming envelope around brighter core. Nice galaxy.
More observing reports next month!
Image Credits: The Space Telescope Science Institute (STSCI), except M13, which is National Optical Astronomy Observatory (NOAO)
Mark Wagner is a life-long astronomy enthusiast and deep sky observer. He has spent the past twenty years popularizing amateur astronomy in the San Francisco bay area through his writing and community building. A past president of the San Jose Astronomical Association, he founded what is now the annual Golden State Star Party in California. Please post below if you have comments, questions, sketches or images you've taken of the targets mentioned above.
{ width: 160, height: 160, defaultImage: '', layers: 'Artimg-NASA_Wormholes' }

By: David Jay Brown
Every science fiction fan is familiar with the concept of an interdimensional "portal," or an opening in the fabric of space and time that allows space voyagers to travel faster than the speed of light, through "hyperspace," as a quick shortcut to anywhere, or any-when, in the universe.
The fictional concept is based upon the theory of "wormholes" in quantum physics, which are short "tunnels" that superluminally connect distant points of the space-time continuum with one another through a higher dimension.
Image: This hypothetical spacecraft with a "negative induction ring was inspired by recent theories describing how space could be warped with negative energy to produce hyperfast transport to reach distant star systems. In the 1990's, NASA Glenn lead the Breakthrough Propulsion Physics Project, NASA's primary effort to produce near-term, credible, and measureable progress toward the technology breakthroughs needed to revolutionize space travel and enable interstellar voyages. Credit:NASA.
Related to the notion of wormholes in quantum physics are "magnetic portals" in astrophysics, as both types of phenomena allow for distant points in space to be closely connected in ways that seem to defy conventional logic.
NASA recently reported that University of Iowa plasma physicist Jack Scudder discovered that there are regions in the Earth's magnetic field that directly connect it to the magnetic field of the sun, across 93 million miles of space.
These mysterious regions, known as "magnetic portals" are thought to be opening and closing dozens of times every day.
The appearing and disappearing portals are generally located many thousands of miles above the earth, in the upper atmosphere, and a large number of particles flow back and forth through these openings.
The particles flow through these portals between our earth's magnetic field and the sun's, and this interchange can have dramatic effects.
According to the NASA press release about this discovery, "Tons of energetic particles can flow through the openings, heating Earth's upper atmosphere, sparking geomagnetic storms, and igniting bright polar auroras."
These magnetic portals come in variety of sizes and durations—some are small and disappear quickly, while others are large, expanding and longer lasting.
NASA, who funded this research, will be studying these enigmatic portals in more detail.
The national space agency is planning a mission that will launch in 2014 called the Magnetospheric Multiscale Mission (MMS), which will examine this strange phenomenon with 4 spacecrafts, equipped with powerful magnetic sensors and energetic particle detectors to gather new data.
Finding the magnetic portals in the upper atmosphere, when they pop into existence for a short time, may prove to be a bit of a challenge, as they're not only unstable, they're also invisible.
However, Scudder has developed a method to locate the curious portals by mapping out how the magnetic fields of the earth and the sun intersect with one another.
Magnetic portals are created when lines of magnetic force between the earth and the sun crisscross with one another; the center of the "X" spot, where the lines meet, is where the magnetic portals form.
The NASA spacecrafts will surround and observe the magnetic portals, and, hopefully, teach us how they work. Perhaps we can also gather some clues for the future application of this research.
When I interviewed quantum physicist Nick Herbert he told me about how quantum portals might one day be used for genuine superluminal space and time travel.
He explained that, "...wormholes are continually coming out of the quantum vacuum, popping back in again, and they're unstable. Even if you could go into one of these, it would close up before you could transverse it...So...how to stabilize quantum worm holes?"
"The way you do that is you have to have some energy that's less than nothing...negative energy, which is less than the vacuum...there's something called the "Casimir force" in quantum physics, which is an example of negative energy. So you thread these wormholes with this negative energy, and it props them open...then you can use these things as time tunnels."
So if we can figure out a way to prop open these temporary magnetic portals, and make them stable and transversible, maybe NASA's research really will lead to something like "warp speed" on Star Trek or the "hyperdrive" in Star Wars.
Then, perhaps, all of those star systems that are light years away from us, aren't really as far away as they seem.
Something more to think about when we look up at the Heavens.
Do you believe theres a way to "prop open" these temporary magnetic portals? Leave us your comment below.
David Jay Brown is an award-winning science writer, whose work has appeared in Scientific American, Scientific American Mind, and Discover magazines. He is the author of 12 books about the evolution of consciousness, optimal health, and the future.
{ width: 160, height: 160, defaultImage: '', layers: 'Artimg-NASA_GRAIL_Mission' }

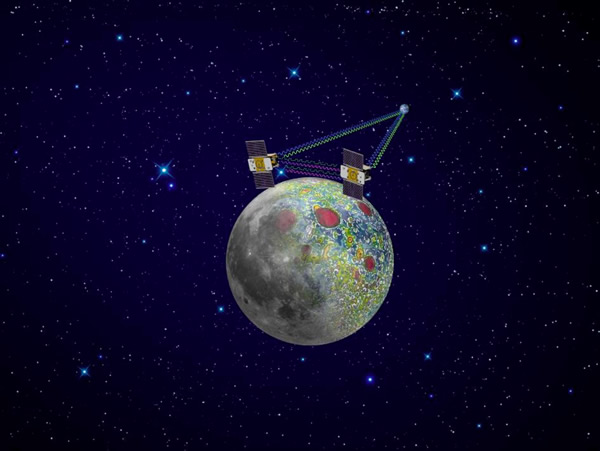
Using a precision formation-flying technique, the twin GRAIL spacecraft mapped the moon's gravity field,
as depicted in this artist's rendering. Image credit: NASA/JPL-Caltech
If you like to observe the Moon, perhaps you know about areas known as "mascons." These huge regions or "mares" contain rock of greater density that can cause lunar gravity anomalies significant enough to affect orbiting spacecraft. Thanks to NASA's Gravity Recovery and Interior Laboratory (GRAIL) mission, we now know much more about their origins.
Two orbiting probes, named Ebb and Flow, spent nine months in a nearly circular orbit near the poles of the Moon at an altitude of about 34 miles (55 kilometers) studying the lunar surface and uncovering mascons. Although their mission ended in December 2012, they taught us a great deal. As Ebb and Flow passed over areas of more and less gravitational pull, the distance between the twin probes altered slightly. Some mascons were visible features, such as mountains and craters, but others were hiding below the surface, out of reach for normal optical cameras.
So if they cannot be seen, how did the scientists know the mascons were really there? By combining the gravity data from GRAIL with computer models of large asteroid impacts, researchers added known details of the geologic evolution of impact craters to verify mascon sites.
"GRAIL data confirm that lunar mascons were generated when large asteroids or comets impacted the ancient moon, when its interior was much hotter than it is now," said Jay Melosh, a GRAIL co-investigator at Purdue University in West Lafayette, Ind., and lead author of the paper. "We believe the data from GRAIL show how the moon's light crust and dense mantle combined with the shock of a large impact to create the distinctive pattern of density anomalies that we recognize as mascons."
Unraveling the mystery of mascons hasn't been easy. Planetary scientists have searched for an explanation of their origins since their discovery in 1968. While most researchers agree they may have arisen billions of years ago from ancient impacts, they weren't sure of how much of this mass may have been caused by lava filling the crater, or the iron-rich mantle rising to the crust.
"Knowing about mascons means we finally are beginning to understand the geologic consequences of large impacts," Melosh said. "Our planet suffered similar impacts in its distant past, and understanding mascons may teach us more about the ancient Earth, perhaps about how plate tectonics got started and what created the first ore deposits."
So what exactly did the twin probes see? They created a lunar gravity field map where a mascon appears in a target pattern. A bulls-eye is a region of gravity surplus, encircled by a ring of gravity deficit. Around this is yet another ring of gravity surplus... a natural pattern which occurs when an impact crater is formed. At the point of bulls-eye, the density and gravitational pull is stronger, the result of "lunar material melted from the heat of a long-ago asteroid impact."
By furthering our knowledge of lunar mascons, we're also expanding our understanding of planetary geology - both here on Earth and our nearest celestial neighbor. Thanks to GRAIL, spacecraft missions to other celestial bodies will be able to navigate with enhanced precision.
"Mascons also have been identified in association with impact basins on Mars and Mercury," said GRAIL principal investigator Maria Zuber of the Massachusetts Institute of Technology in Cambridge. "Understanding them on the Moon tells us how the largest impacts modified early planetary crusts."
Original Story Source: JPL/NASA News Release
Did you find this article informative? Give it a rating below!
{ width: 160, height: 160, defaultImage: '', layers: 'Artimg-Astro_Activities' }
By Tammy Plotner
Friday, May 17 - Tonight no two features in the northern lunar hemisphere will be more prominent than craters Aristoteles and Eudoxus. Why not take some time to study them? They are easily spotted in a telescope and even viewable in small binoculars. Let's start our observing night by taking a closer look at larger Aristoteles—the northernmost of the pair.
As a Class 1 crater, this ancient old beauty has some of the most massive walls of all lunar features. Named for the great philosopher, it stretches across 87 kilometers of lunar landscape and drops below the average surface to a depth of 366 meters-a height which is similar to one of Earth's tallest waterfalls, the Silver Cord Cascade of Wyoming. While it has a few scattered interior peaks, the crater floor remains almost unscarred. As a telescopic lunar club challenge, be sure to look for a much older crater that sits on Aristoteles eastern edge. Tiny Mitchell is extremely shallow by comparison and only spans 30 kilometers. Look carefully at the formation, for although Aristoteles overlaps Mitchell, the smaller crater is actually part of the vast system of ridges which supports the larger.

Aristoteles Crater - Photo Credit: Damian Peach
When you're done, let's have a look at a binary star system in the constellation Virgo-the Gamma Virginis!
Better known as Porrima, this is one cool binary with almost equal spectral types and brightness. Discovered by Bradley and Pound in 1718, John Herschel was the first to predict this pair's orbit in 1833 and state that one day they would become indecipherable to all but the very largest of telescopes-and he was right. In 1920 the A and B stars had reached their maximum separation, and during 2007 they were as close together as they would ever be. Observed as a single star in 1836 by William Herschel, its 171 year periastron will put Porrima in nearly the same position as it was when Sir William first saw it!
Saturday, May 18 - Our first observing challenge for the evening will be a telescopic one on the lunar surface known as the Hadley Rille. Begin by identifying Mare Serenitatis and look for the break along its western shoreline that divides the Caucasus and Apennine mountain ranges. Just south of this break is the bright peak of Mons Hadley. You'll find this area of highest interest for several reasons, so power up as much as possible!

Hadley Rille - Photo Credit: Damian Peach
Impressive Mons Hadley measures about 24 by 48 kilometers at its base and reaches up an incredible 4,572 meters. If this mountain was indeed caused by volcanic activity on the lunar surface, this would make it comparable to some of the very highest volcanically caused peaks on Earth, such as Mount Shasta or Mount Rainer. To its south is the secondary peak Mons Hadley Delta-the home of the Apollo 15 landing site, just a breath north of where it extends into the cove created by the dark sands of Palus Putredinus.
Along this ridgeline and smooth floor, look for a major fault line known as the Hadley Rille. You'll find it winding its way across 120 kilometers of lunar surface. In places, the rille spans 1500 meters in width and drops to a depth of 300 meters below the surface. Believed to have been formed by volcanic activity some 3.3 billion years ago, we can see the impact that lower gravity has had on this type of formation, since earthly lava channels are less than 10 kilometers long and only around 100 meters wide.

Photo Credit: Apollo 15 Mission at Hadley Rille Courtesy of NASA
During the Apollo 15 mission, Hadley Rille was visited at a point where it was only 1.6 kilometers wide-still a considerable distance as seen in respect to astronaut James Irwin and the lunar rover. Over a period of time, its lava may have continued to flow through this area, yet it remains forever buried beneath years of regolith.
Now, let's head about four finger widths northwest of Beta Virginis for another unusual star-Omega. Classed as an M-type red giant, this 480 light-year distant beauty is also an irregular variable which fluxes by about half a magnitude. Although you won't notice much change in this 5th magnitude star, it has a very pretty red coloration and is worth the time to view.
Sunday, May 19 - Are you ready to go observing? Then let's dance! Tonight on the Moon, we'll be looking for another challenging feature and a crater which conjoins it-Stofler and Faraday.

Crater Stofler - Photo Credit: Damian Peach
Located along the terminator to the lunar south, crater Stofler was named for Dutch mathematician and astronomer Johan Stofler. Consuming lunar landscape with an immense diameter of 126 kilometers and dropping 2760 meters below the surface, Stofler is a wonderland of small details in an eroded surrounding. Breaking its wall on the north is Fernelius, but sharing the southeast boundary is Faraday. Named for English physicist and chemist Michael Faraday, it is more complex and deeper at 4,090 meters, but far smaller at 70 kilometers in diameter. Look for myriad smaller strikes which bind the two together!
If you're up for a bit more of a challenge, then let's head about 59 light-years away in Virgo for star 70. You'll find it located about 6 degrees northeast of Eta and right in the corner of the Coma, Bootes, and Virgo border. So what's so special about this G-type, very normal-looking 5th magnitude star?
It's a star that has a planet.
Long believed to be a spectroscopic binary because of its 117 day shifts in color, closer inspection has revealed that 70 Virginis actually has a companion planet. Roughly 7 times larger than Jupiter and orbiting no further away than Mercury from its cooler-than-Sol parent star, 70 Virginis B just might well be a planet cool enough to support water in its liquid form. How "cool" is that? Try about 85 degrees Celsius...
Until next week? Ask for the Moon, but keep on reaching for the stars!
Tammy Plotner is a professional astronomy author, President Emeritus of Warren Rupp Observatory and retired Astronomical League Executive Secretary. She's received a vast number of astronomy achievement and observing awards, including the Great Lakes Astronomy Achievement Award, RG Wright Service Award and the first woman astronomer to achieve Comet Hunter's Gold Status.
{ width: 160, height: 160, defaultImage: '', layers: 'Artimg-Astro_Activities' }
Friday, June 21
Tonight let's skip by the Moon and head straight for the stars. We're going to have a look at a tasty red orb, R Hydrae. You'll find it about a fistwidth south of Spica or about a fingerwidth west of Gamma Hydrae.
R was the third long term variable star to be discovered and it is credited to Giancomo Maraldi in 1704. While it had been observed by Johannes Hevelius some 42 years earlier, it was not recognized immediately because its changes happen over more than a year. At maximum, R reaches near 4th magnitude, but drops well below human eye perception to magnitude 10. During Maraldi's and Hevelius' time, this incredible star took over 500 days to change, but it has speeded up to around 390 days in the present century.
Why such a wide range? Science isn't really sure. R Hydrae is a pulsing M-type giant whose evolution may be progressing more rapidly than expected due to changes in structure. What we do know is that it is around 325 light-years away and is approaching us at around 10 kilometers per second.
In the telescope, R will have a pronounced red coloration which deepens near minima. Nearby is 12th magnitude visual companion star Ho 381, which was first measured for position angle and distance in 1891. Since that time, no changes in separation have been noted, which leads us to believe that the pair may be a true binary.

SS Hydrae - Palomar Observatory Courtesy of Caltech
Now let's take a look at another. While observing a variable star with the unaided eye, binoculars, or a telescope can be very rewarding, it's often quite difficult to catch changes in long-term variables, because there are times when the constellation is not visible. While R Hydrae is unique in color, let's drop about half a degree to the southeast to visit another variable star - SS Hydrae. SS is a quick change artist - the Algol-type. While you will need binoculars or a telescope to see this normally 7.7 magnitude star, at least its fluctuations are far more rapid, with a period of only 8.2 days. With R Hydrae we have a star that expands and contracts - causing the changes in brightness - but SS is an eclipsing binary. While less than a half magnitude is not a noteworthy amount, you will notice a difference if you view it over a period of time. Be sure to note that this is actually a triple star system, for there is also a 13th magnitude companion star located 13? from the primary. Watch if as often as possible and see if you can detect changes in the next few weeks!
Saturday, June 22
If you're up early, why not keep a watch out for the peak of the Tau Herculids meteor shower? These are the offspring of comet Schwassman-Wachmann 3, which broke up in 2006. The radiant is near Corona Borealis and we'll be in this stream for about a month. At best when the parent comet has passed perihelion, you'll catch about 15 per hour maximum. Most are quite faint and the westering Moon will interfere, but sharp-eyed observers will enjoy it.
Tonight let's have a look at a very bright and changeable lunar feature that is often overlooked. Starting with the great grey oval of Crater Grimaldi on the western limb, let your eyes slide along the terminator towards the south until you encounter the bright crater Byrgius. Named for Joost Burgi, who made a sextant for Tycho Brahe, this "seen on the curve" crater is really quite large with a diameter of 87 kilometers. Perhaps one of the most interesting features of all is high albedo Byrgius A, which sits along its east wall line and produces a wonderfully bright ray system. While it is not noted as a lunar club challenge, it's a great crater to help add to your knowledge of selenography!
Now let's try a visual double star for the unaided eye - Eta Virginis. Can you distinguish between a 4th and 6th magnitude pair?

Rho Virginis - Palomar Observatory Courtesy of Caltech
The brighter of the two is Zaniah (Eta), which through occultation had been discovered to be a triple star. In 2002, Zaniah became the first star imaged by combining multiple telescopes with the Navy Prototype Optical Interferometer. This was the first time the three were split. Two of them are so close that they orbit in less than half the distance between the Earth and Sun!
Binocular users should take a look at visual double Rho Virginis about a fistwidth west-southwest of Epsilon. This pair is far closer and will require an optical aid to separate. The brighter of this pair, Rho, is a white, main sequence dwarf with a secret? It's a variable! Known as a Delta Scuti type, this odd star can vary slightly in magnitude in anywhere from 30 minutes to two and a half hours as it pulsates.
For mid-to-large telescopes on a darker night, Rho offers just a little bit more. The visual companion star has a visual companion as well! Less than a half degree southwest of Rho is a small, faint spiral galaxy - NGC 4608 (Right Ascension: 12:41.2 - Declination: +10:09). At 12th magnitude, it's hard to see because of Rho's brightness - but it's not alone. Look for a small, but curiously shaped galaxy labeled NGC 4596 (Right Ascension: 12:39.9 - Declination: +10:11). Its resemblance to the planet Saturn makes it well worthwhile!
Sunday, June 23
Tonight the Moon is full. Often referred to as the "Full Strawberry Moon," this name was a constant to every Algonquin Indian tribe in North America. However, our friends in Europe referred to it as the "Rose Moon." The North American version came about because the short season for harvesting strawberries comes each year during the month of June - so the full Moon that occurs during that month was named for this tasty red fruit!
This evening as the Sun sets and the Moon rises opposite of it, take advantage of some quiet time and really stop to look at the eastern horizon. If you are lucky enough to have clear skies, you will see the Earth's shadow rising - like a dark, sometimes blue band - that stretches around 180 degrees of horizon. Look just above it for a Rayleigh scattering effect known as the "Belt of Venus." This beautiful pinkish glow is caused by the backscattering of sunlight and is often referred to as the anti-twilight arch. As the Sun continues to set, this boundary between our shadow and the arch rises higher in the sky and gently blends with the coming night. What you are seeing is the shadow of the Earth's translucent atmosphere, casting a shadow back upon itself. This happens every night! Pretty cool, huh?
For all you Stargazers, keep watch for the Omega Scorpiid meteor shower. Its radiant will be near the constellation of Ophiuchus, and the average fall rate will be about 20 per hour with some fireballs.
While you're out, take the time to check out Alpha Herculis-Ras Algethi. You will find it not only to be an interesting variable, but a colorful double as well. The primary star is one of the largest known red giants and at about 430 light years away, it is also one of the coolest. Its 5.4 magnitude greenish companion star is easily separated in even small scopes - but even it is a binary! This entire star system is enclosed in an expanding gaseous shell that originates from the evolving red giant. Enjoy it tonight.
Did you spot any of these objects and targets? Tell us in the comments!
Tammy Plotner is a professional astronomy author, President Emeritus of Warren Rupp Observatory and retired Astronomical League Executive Secretary. She's received a vast number of astronomy achievement and observing awards, including the Great Lakes Astronomy Achievement Award, RG Wright Service Award and the first woman astronomer to achieve Comet Hunter's Gold Status.
{ width: 160, height: 160, defaultImage: '', layers: 'Artimg-ObservSun' }
While simply observing the Sun at any wavelength is a wonderful experience, there is something very satisfying about watching sunspot activity with a white light solar filter and recording the changes which occur over a period of days. While you might think it would take sophisticated photography equipment, all it really takes is some patience combined with a pencil and paper and a solar-filter equipped telescope or binocular.
To begin recording sunspots, set up your equipment in a comfortable area. Inspect your solar filter(s) for any pinholes or scratches and then securely attach it to your telescope or binocular. Be sure to cover your finder scope before aiming at the Sun, unless you have a solar-filter equipped finder scope! Once you have the Sun in view, give your equipment a few minutes to reach thermal stability. Since the sunlight will also warm your telescope and cause some image waiver, it will be impossible for it to have a completely steady view. However, a few minutes allowance time for things to "warm up" helps significantly. To help you get the most from your viewing session, try draping a dark colored towel over your head when you are at the eyepiece — similar to an old-fashioned photographer. While you might think it looks silly, it helps to block the stray light and allows your facial muscles to relax and enjoy the view!
Now, let's take a look at the sunspots...
Like our Earth, the Sun is divided into two hemispheres — north and south. Sunspots occur on either side of the equator and they rotate across the solar surface from east to west. Sunspots which appear near the solar poles rotate quickly, making their journey across the visible face in just a matter of a few days, while sunspots appearing along the equator take a longer path and move more slowly. Each sunspot will be constructed of two parts — the very dark umbra and the more opaque penumbra. Regions of sunspots can also contain "fragments" as well.
When you're ready, it's time to begin sketching. Start by drawing a simple circle on your paper. (It's easy to trace around a saucer in advance and do several sheets for several days — or just in case you make a mistake and need another.) Now, sketch what you see! It's easy to make the dark patches which signify the umbra and then shade around them for the penumbra. Try to be as accurate as possible - not because anyone is going to grade your sketches, but because you'll be amazed at the small changes which occur. Be sure to note anything else you might see, such as signs of granulation or areas which appear brighter than others. When you are finished, turn off any drive on your telescope and allow the Sun to "drift" in the eyepiece. The direction in which the limb first goes out of view is west. Label your sketch accordingly. North and south can be completed later.
Once you have a finished sketch, it's time to put away your equipment safely and begin some investigations. All of the sunspots, or groups of sunspots, you have drawn have been assigned numbers. These numbers go by a sophisticated classification system and even more names. They might be referred to a Carrington Rotation Numbers, Wolf Numbers, or Mt. Wilson Numbers... just to name a few. No matter how you refer to them, you will need an accurate source to label your sketch. One of the best resources for sunspot numbers is the Solar Influences Data Analysis Center (SIDC) website at http://sidc.oma.be/index.php3. Once you have viewed the Sun for yourself, it's easy to match what you have on your sketch to their information. Checking with this website will also ensure that you have labeled east and west properly, and can now add the northern and southern hemisphere accurately. Before you put away your sketch, there's more information to be added. You will also want to include the date, time, location, instrument used, type of filter used and magnification.
As the days pass and you continue to observe the same sunspots, you'll notice many wonderful and exciting changes. Some umbra regions may break apart, forming smaller groups all located in the same penumbra. Other umbra regions may join themselves together, forming a large spot with a changed penumbral size. Some smaller spots may disappear entirely and other new ones might form. More sunspots may have rotated into view — while others may have passed around the limb. As a sunspot nears the limb, look for an unusual, dimpled appearance known as the "Wilson Effect". It's just one of many great things you can see using a white light solar filter!
Be sure to store your sunspot records in a safe place. As time passes and you learn even more about solar observing, you'll enjoy accessing your observing reports and seeing how much you have learned. With some practice, you might even find yourself accurately predicting the return of large sunspot regions - or even predicting events such as coronal mass ejections based on what you have seen. It's a wonderful hobby and a great way to enjoy your telescope equipment while observing our nearest star!
CAUTION: Never view the Sun, even for an instant, without a properly installed protective solar filter for your telescope or binoculars, or specialized solar telescope. Doing so could permanently damage your eyes.
{ width: 160, height: 160, defaultImage: '', layers: 'Artimg-ObservSun' }
CAUTION: Never look at the Sun, either directly or through a telescope or binocular, without a professionally made protective solar filter installed that completely covers the front of the instrument, or permanent eye damage could result. When using a truss tube telescope to view the Sun, both a properly fitting solar filter and light shroud are required.
Image: Solar flares, as seen through Orion 12.13"
Glass Solar Filter, and Orion SkyQuest XT10i
IntelliScope Dobsonian.
Photographer: Walt S. of Parker, CO.

If you didn't jump on the bandwagon during the Venus transit last June and buy a solar filter, then now is a good time to reconsider. Venus won't be traveling across the sun again until the year 2117, but the Sun happens to be putting on its own show. And while viewing the Sun in H-Alpha is an incredible experience, there is nothing more pleasing than following the march of the sunspots with a white light solar filter.
I began my personal solar journey some 15 years ago. At the time, astronomy wasn't a very popular hobby among my peers, and solar observing was rare. As a matter of fact, very few companies sold solar filters and those that did were quite expensive. However, I was determined to view a partial solar eclipse and I didn't want to do it with #12 welder's glass taped to a pair of binoculars, which was my other option. So, I set out to afford a full aperture glass solar filter for my 114mm reflector telescope. I took odd jobs scrubbing floors and detailing cars to make the money and it wasn't long until I placed my order with Orion.
How I admired that filter the day it arrived! And how many days I admired the clouds until I could use it. (That phenomenon of cloudy weather that always seems to follow the receipt of newly arrived and much anticipated astronomy equipment.) When the time came, I turned the telescope toward the Sun, watching the ground behind me as the shadows aligned. When the orange fuzzy came into eyepiece view, I locked the mount into place and focused.
I was blown away. Nothing could have prepared me for the deep, black, oily-looking spots edged by pepper. I knew absolutely nothing about solar observing, but I knew at that moment I was going to learn!
Each clear day I returned until I understood how sunspots rotated. Each trip into town became a trip to the library (pre-internet days, folks) to acquire books to tell me what I was seeing. I reveled in the solar eclipse and proudly began sketching sunspot activity. Eventually, pencil and paper gave way to a camcorder and parfocal imaging, then on to an eyepiece camera... and the years passed happily.
Even though my original Orion full aperture glass solar filter is almost old enough to drive, it is still in perfect condition and still serving me to this day. It provides very eye-pleasing orange colored images and when the telescope I am using hits thermal equilibrium, it provides sharp, study-worthy views of penumbral and umbral activity, the Wilson Effect, magnetic bridges and some granulation. I've even seen a white light solar flare! Not bad for a piece of equipment which was once a serious investment, but is now quite affordable.
Of course, I never wanted the solar adventures to stop. I have also added the inexpensive Baader AstroSolar? Film versions and even more recently added the black polymer.
Binoculars? I even have a set of solar filters for my good binoculars, too. Getting older means you're a lot less inclined to drag out a telescope every sunny day, but you'd be surprised at how often you'll look at the Sun if it means nothing more than slipping the filters on the lenses and stepping outside!
Yes, the Orion glass solar filter and I have been friends for many years. I never would have dreamed on the day that I first opened the box that I would eventually be sharing the view with my grandchildren. It has been one very quality product and deserving of a summer "What's Hot" label!
Tell us about your first time viewing the Sun through solar filters in the comments!
Tammy Plotner is a professional astronomy author, President Emeritus of Warren Rupp Observatory and retired Astronomical League Executive Secretary. She's received a vast number of astronomy achievement and observing awards, including the Great Lakes Astronomy Achievement Award, RG Wright Service Award and the first woman astronomer to achieve Comet Hunter's Gold Status. Tammy Plotner has been a compensated contributor to the Orion Community since November 2012. Orion's product review policy is to post reviews regardless of the writer's positive or negative feedback of the product.
{ width: 160, height: 160, defaultImage: '', layers: 'Artimg-ObservDoubleStars' }
By: Tammy Plotner
Have you ever wondered if what you observe in your backyard telescope could make a difference to astronomical studies? Before you put your equipment away and resolve that what you see isn't important, think again.
Just recently, a University of Alberta physicist teamed with professional researchers and amateur astronomers just like you to verify the enigmatic behavior of a pair of stars located about 300 light years away.
Cataloged as SS Cygni, this pair of stars is known as a binary system, because they orbit each other. Physics researcher, Gregory Sivakoff, and his international team became interested in this particular system because they wanted to validate a theory about periodic bursts of light emitted by the duo: SS Cygni may produce these bursts as part of an interaction between them.
One of the stars is quite ordinary - a low-mass relatively similar to the Sun which expels part of its outer envelope to be collected by its companion. The companion is a white dwarf star — as massive as the Sun, but compressed down to the size of Earth.
"Gravity continuously draws material from the normal star's envelope, but it is only when the material rushes toward the white dwarf that we get an outburst of light," said Sivakoff. "We see these outbursts happen about every 35 to 65 days."
")
Artist's conception of a white dwarf and a companion star. The white dwarf, the bright white object within the disk, sucks matter from its more sedate companion star. The star eventually emits a huge flash of light. (Image: NASA)
Sivakoff explains that the periodic light-flash theory of SS Cygni was first postulated over three decades ago. At the time, it was based on calculations of the distance between us and the binary system.
However, in 1999, researchers employing the Hubble Space Telescope delivered a different set of numbers. Apparently the distance from Earth to SS Cygni was a bit further than previously thought, and this put the light-flash theory into question.
Which set of distances was correct? For Sivakoff, it was time to go back to the drawing board. To help resolve the issue, he engaged researchers from Australia, Britain, the Netherlands and the United States to re-measure the distance between us and this mysterious binary star. For over two years, the team also included a network of 180 amateur astronomers, armed with their personal optical telescopes. These "citizen scientists" kept watch on the night skies and reported each time SS Cygni went into outburst.
Thanks to their quick time reports, the professionals were then able to alert ground-based radio telescopes to compute the distance. The information poured in, and by the end of 2012 the researchers confirmed that the shorter value of 370 light years was correct.
"That was what we need to reconfirm the theory for periodic bursts of light from SS Cygni," said Sivakoff.
Was this a triumph for backyard astronomers and their telescopes? You bet. Many of the telescopes used were of the Newtonian design and the light bursts which originated from SS Cygni left the star at roughly the time that Sir Isaac Newton was born!
It's a big win for citizen science, and Sivakoff gives credit where credit is due.
"We would not have been able to vindicate the theory if dedicated amateur astronomers using their own equipment hadn't volunteered to help us," he said.
So remember the next time you observe: it might be nothing more than just a flash on the Moon, but what you see can make a difference!
Have you ever spotted SS Cygni? For tips on observing Binary Stars click HERE.
Tammy Plotner is a professional astronomy author, President Emeritus of Warren Rupp Observatory and retired Astronomical League Executive Secretary. She's received a vast number of astronomy achievement and observing awards, including the Great Lakes Astronomy Achievement Award, RG Wright Service Award and the first woman astronomer to achieve Comet Hunter's Gold Status.
{ width: 160, height: 160, defaultImage: '', layers: 'Artimg-Roger_Ivester_Deep_Sky_Challenge' }

By: Roger Ivester
During the summer, the great globular cluster, M13 is located high overhead for observers in the northern hemisphere, allowing for excellent viewing. Observing this cluster back in 1977 with my 4 1/4-inch f/10 reflector, the most I could see was a moderately bright ball of unresolved stars.
While observing M13 with that small reflector, I was unaware of the three dark lanes cutting into the SE edge of the cluster, called the propeller. I'd never heard of the propeller at that time, and this scope was far too small to see this very faint feature. However, thirty-two years later, in May of 2009 using a much larger telescope, I saw it.
A 10-inch telescope might be considered the minimum aperture required to see this most unique shape. If you have plans to observe the "elusive propeller," a magnification of around 200X seems to be the optimum magnification.
The propeller challenge became popular due to Walter Scott Houston, columnist and writer of Deep-Sky Wonders, which ran in Sky & Telescope magazine every month from 1946 - 1994. Houston first wrote about the dark lanes in the July, 1953 edition of Sky & Telescope magazine. And although he brought it up several more times through the years, it has only been in recent times that the propeller has gained much attention in the amateur astronomy community.
Lord Rosse mentioned three dark rifts in the 1850's, and T.W. Webb in Celestial Objects for Common Telescopes noted that the lanes were seen by Buffham, using a 9-inch reflector.
John Bortle saw the lanes in 1980 using a 12.5-inch Newtonian reflector at 176x. During the Stellafane convention in 1981, Dennis di Cicco was surprised by how easily the lanes were seen with the 12-inch f/17 Porter turret telescope at about 180x. Both Bortle and di Cicco commented on the importance of magnification. (Source: Deep-Sky Wonders by Walter Scott Houston, selections and commentary by Stephan James O'Meara. Sky Publishing Corporation, Cambridge Massachusetts).
In May of 2009, I was able to observe the propeller with both a 10 and 12-inch reflector. My observation of the cluster with the 12-inch came from the southern rim of the South Mountains in North Carolina. I would rate this site as very good with a NELM of 6.5, and maybe even better on an excellent night.
The propeller was fairly easy to see with the 12-inch f/5 reflector from a dark site. Seeing it, however, proved very difficult using a 10-inch f/4.5 reflector from my moderately light polluted backyard with a Naked Eye Limiting Magnitude (NELM) of about 5.0 or slightly less.
Fred Rayworth and Ryan Rogers of Las Vegas were able to see it fairly easily, using a 16-inch reflector with a magnification 203X. Steve Davis of North Carolina reported seeing the lanes very easily using a 12-inch Newtonian reflector, with a magnification of about 200x.
The following sketch was made using a 12-inch f/5 reflector at 190X from the southern rim of the South Mountains, in Western North Carolina. The sketch was made with a No. 2 pencil and a blank 5 X 8 note card. The colors were inverted using a scanner.

12-inch f/5 reflector at 190X from the southern rim of the South Mountains, in Western North Carolina.
The following image was taken by Dr. James Dire of Hawaii, using a 190 mm Maksutov-Newtonian.

Image by: Dr. James Dire
Were you able to see M13 and the elusive propeller? Tell us about it in the comments!
Roger Ivester has enjoyed the wonders of the night sky since he was 12 years old. He is a visual observer and enjoys sketching and writing about what he sees. In 2009 he helped start the Las Vegas Astronomical Society Observers Challenge, and works with Fred Rayworth on a monthly basis to compile the report. Roger and his wife Debbie live in the foothills of western North Carolina.
{ width: 160, height: 160, defaultImage: '', layers: 'Artimg-Space_Warps' }
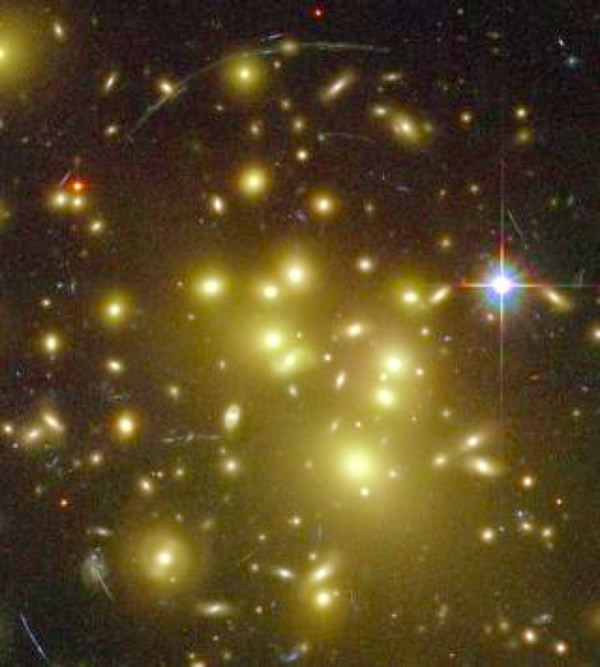
Image Credit: Hubblesite.org
Massive galaxies warp space-time around themselves, bending light rays so that we can see around them. It's a phenomenon known as a "space warp". These warps in space provide a very rare and valuable gravitational lens, and now, astronomers are calling on the general population to aid them in the hunt.
Just a couple weeks ago, on May 8, 2013, the SpaceWarps Project was launched as a way to invite everyday citizens to aid in the detection of space warps.
The SpaceWarps project is a gravitational lens discovery engine consisting of thousands of deep sky objects — like galaxies or clusters of galaxies — which may contain warps. With examples of both true and false gravitational lenses, humans are able to sift through the images and spot the unusual appearance of a space warp with relatively little training.
"Even if individual visitors only spend a few minutes glancing over 40 or so images each, [that is] really helpful to our research - we only need a handful of people to spot something in an image for us to say that it's worth investigating," said Dr. Aprajita Verma, a co-leader of the project from the University of Oxford.
The site gives easy instructions on what a space warp looks like and how to mark potential candidates on each image. After you have made your selections, you will then have a chance to discuss them with other volunteers and experts via an online forum. Citizen participation will assist in creating computer models, and the final collection of space warp candidates. The findings will then be published, allowing both amateur and expert the opportunity to further their studies.
See for yourself: visit www.spacewarps.org and see if you can spot any of these unique and ethereal astronomical objects. Even the "armchair astronomer" can enjoy discovering these incredible natural lenses. And, what you find could possibly help unravel the mystery that dark matter plays in galaxy formation.
"Not only do space warps act like lenses, magnifying the distant galaxies behind them, but also the light they distort can be used to weigh them, helping us to figure out how much dark matter they contain and how it's distributed," said Dr. Phil Marshall, co-leader of the project at the University of Oxford.
The initial set of deep space images to be investigated in this project is from the Canada-France-Hawaii Telescope (CFHT) legacy survey.
"We have scanned the images with computer algorithms, but there are likely to be many more space warps that the algorithms have missed," said Dr. Anupreeta More, co-leader of the project at the Kavli Institute for the Physics and Mathematics of the Universe (Kavli IPMU) and the University of Tokyo. "Realistically simulated space warps are dropped into some images to train volunteers to spot them and reassure people that they are on the right track."
But why would astronomers want to share their data with non-scientists?
According to studies, the human brain is far superior to computer algorithms when it comes to recognizing a gravitational lens in a photograph, and non-scientists are just as proficient as an expert in spotting them.
The team describes the project as collaboration between humans and computers - data from the human volunteers will help to train computers to become better space warp spotters.
The Canada-France-Hawaii Telescope legacy survey isn't the only group who will benefit from the Space Warps project. Other surveys will also use the information gathered by the experiment, such as the Dark Energy Survey led by the United States and the Hyper Suprime-Cam survey led by Japan.
Future large area surveys such as with Large Synoptic Survey Telescope and Euclid will also feel the affects of the SpaceWarps program, too.
Original Story Source: Kavli IPMU News Release
What do you think of the SpaceWarps Project? Let us know in the comments!
{ width: 160, height: 160, defaultImage: '', layers: 'Artimg-NASA_Asteroid_Earth' }

On May 31, at 20:59 Universal Time, the asteroid "1998 QE2" will make a majestic pass by planet Earth. While there is no danger of impact, it's the closest the asteroid will get to earth for the next two hundred years. Estimated to be 1.7 miles long, the flying space rock will pass as close as 3.6 million miles-that's a distance about 15 times greater than the Earth-Moon pairing.

Artist Visualization of Asteroid Slipping Past Earth - Photo Credit: NASA
While optical astronomers and amateur observers aren't particularly interested in this close pass (it will be difficult but not impossible to spot with a telescope) radar astronomers couldn't be more excited.
"Asteroid 1998 QE2 will be an outstanding radar imaging target at Goldstone and Arecibo [observatories] and we expect to obtain a series of high-resolution images that could reveal a wealth of surface features," said radar astronomer Lance Benner, the principal investigator for the Goldstone radar observations from NASA's Jet Propulsion Laboratory in Pasadena, California.
"Whenever an asteroid approaches this closely, it provides an important scientific opportunity to study it in detail to understand its size, shape, rotation, surface features, and what they can tell us about its origin," said Benner. "We will also use new radar measurements of the asteroid's distance and velocity to improve our calculation of its orbit and compute its motion farther into the future than we could otherwise."
Even though 1998 QE2 it will be some 4 million miles away, researchers armed with the Goldstone antenna hope to resolve features on the asteroid's face as small as 12 feet across. Like snowflakes, no two asteroids are alike. Thanks to their constant exposure to the Sun, they can be shaped in various forms and range widely in sizes.
While no one knows exactly what asteroid 1998 QE2 look like, if all goes well, we should be able to put a face to a name very soon.
From May 30 until June 9, radar astronomers using NASA's 230-foot-wide Deep Space Network antenna at Goldstone, California and the Arecibo Observatory in Puerto Rico will be conducting an exhaustive regime of observations. The two telescopes have complementary imaging capabilities which will enable astronomers to learn as much as possible about the asteroid during its brief visit near Earth.
"It is tremendously exciting to see detailed images of this asteroid for the first time," said Benner. "With radar we can transform an object from a point of light into a small world with its own unique set of characteristics. In a real sense, radar imaging of near-Earth asteroids is a fundamental form of exploring a whole class of solar system objects."
The last "close shave" occurred on Feburary 15 of this year, when a 130-foot asteroid 2012 DA14 passed by just 17,200 miles away, on the same day that a 55-foot object exploded over Russia.
According to Mike Wall, senior writer at Space.com, "our planet has been pummeled by space rocks throughout its 4.5-billion-year history, and more strikes are in our future."
But NASA stays on top of these future strikes, leading the global effort to identify potentially dangerous asteroids.
About asteroid 1998 QE2: Discovered on August 19, 1998 by the Massachusetts Institute of Technology Lincoln Near Earth Asteroid Research (LINEAR) program near Socorro, New Mexico. While its name isn't very exciting, it is assigned by the NASA-supported Minor Planet Center in Cambridge, Massachusetts, which gives each newly discovered asteroid a provisional designation. Its catalog number starts with the year of first detection, along with an alphanumeric code indicating the half-month it was discovered, and the sequence within that half-month.
Original Story Source: JPL/NASA News Release
{ width: 160, height: 160, defaultImage: '', layers: 'Artimg-App_LossoftheNight' }


Are you concerned about light pollution? Would you like to do something to help? Then you might want to take advantage of the new, free app developed for Android smartphones. Created by researchers for the German "Loss of Night" project, the new app can count the number of visible stars in the sky. Citizen science? You bet. The results will be used by scientists to help understand light pollution on a global scale.
"In natural areas you can see several thousand stars with the naked eye" says Dr. Christopher Kyba, physicist at the Leibniz-Institute of Freshwater Ecology and Inland Fisheries (IGB) and Freie Universit�t. "In Berlin, we can still see several hundred, but the situation in most large cities and world capitals is far worse."
What does it do? The smartphone app will calculate skyglow and assist the current citizen science project "GLOBE at Night" in its study of the impact of light pollution. The data it collects can then be translated into maps which show the distribution and changes in sky brightness. Information of this type will help researchers determine impacts on health, biodiversity, energy waste, and far more.
It's easy to use. The app prompts users to identify certain individual stars and whether or not they are visible. By determining the faintest star, researchers can then surmise how many stars can be seen at that location and reasonably determine how bright the sky is.

Illustrations Courtesy of Cosalux GmbH
"Life evolved from periodic changes of bright days and dark nights," says Dr. Annette Krop-Benesch of the Leibniz-Institute of Freshwater Ecology and Inland Fisheries (IGB). "The introduction of artificial light into the atmosphere is changing ecosystems worldwide, and might even have an impact on our health. Unfortunately, we have very little information about light levels in different habitats at night."
"With this app, people from around the world can collect data on skyglow without needing expensive equipment," says Fabian Kohler from The German Ministry of Education and Research (BMBF).
The app also allows users to compare the sky brightness at their home to other locations. This function had surprising results as some testers inadvertently learned the names of several stars and constellations. It was developed in partnership with the firm Cosalux (Offenbach am Main), and is based on the widely used Google Sky Map application. The development of the app was sponsored by the German Federal Ministry of Research and Education, as part of Science Year 2012: "Project Earth: Our Future".
Use of technology such as this is very important for many reasons. Right now, satellites which observe Earth's night sky can only measure the light radiated into the sky itself?not the brightness experienced terrestrially. This information can be used to create models which estimate skyglow, but the models need to be tested, and the new app will be able to help.
Need more reasons to use the new app? Then know that satellite observatories aren't sensitive to certain wavelengths?meaning areas lit by white LED light appear darker than they really are. Do your part to help! The app "Loss of the Night" can be downloaded in English and German HERE. It is free of charge and another triumph for citizen science!
Tammy Plotner is a professional astronomy author, President Emeritus of Warren Rupp Observatory and retired Astronomical League Executive Secretary. She's received a vast number of astronomy achievement and observing awards, including the Great Lakes Astronomy Achievement Award, RG Wright Service Award and the first woman astronomer to achieve Comet Hunter's Gold Status.
Original Story Source: Berlin Institute News Release
{ width: 160, height: 160, defaultImage: '', layers: 'Artimg-NASA_Keplar69c' }

As the number of known Earth-like planets in "habitable-zones" outside of our solar system increases, the chance of life being unique to earth grows ever smaller.
By David Jay Brown
. Image credit: NASA Ames/JPL-Caltech")
Relative sizes of all of the habitable-zone planets discovered to date alongside Earth. Left to right: Kepler-22b, Kepler-69c, Kepler-62e, Kepler-62f and Earth (except for Earth, these are artists' renditions). Image credit: NASA Ames/JPL-Caltech
When I was in college, my psychobiology professor told me that he was convinced that there was no intelligent life beyond our planet and that we were alone in the universe.
"Where are they?" he asked and laughed, not acknowledging any of the sensible explanations that could help to account for why our species hasn't yet discovered extraterrestrial life.
In the 1980s, when my professor made that arrogant comment about extraterrestrial life, there had yet to be another planet discovered outside of our own solar system-let alone one that might be able to sustain organic life, and where intelligent organisms might evolve.
Although long suspected by astronomers, it's only in recent years that planets outside of our solar system (known as "exoplanets") have been confirmed to exist. The first detection only came in 1992, two years after the launching of the Hubble Space Telescope.
Since then, astrophysicists have been scouring the universe, searching for exoplanets with life-sustaining properties like earth—where there is a similar chemical composition, and a temperature range where the water can easily convert from solid, to liquid, to gas.
Liquid water appears necessary for the evolution of life, and water is only a liquid at a very narrow temperature range.
Today we now know that many of these extrasolar "habitable zone" planets, (or "Goldilocks Zone" planets, as they are sometimes called) where it is possible for liquid water to exist-can be found throughout our galaxy alone.
For a little perspective, our galaxy consists of around 200 billion stars, and some galaxies consist of hundreds of trillions of stars.
After you digest those figures, then consider that there are 100 billion galaxies in the observable universe.
A recent collaborative analysis by the Institute of Astrophysics in Paris, the European Southern Observatory, and others, suggested that every star in the universe is orbited by at least one companion planet.
According to astrophysicist Jean Schneider at the Paris Observatory, who regularly updates the Extrasolar Planets Encyclopedia website, as of May 3, 2013, 884 exoplanets have been discovered.
In his book Exoplanets and Alien Solar Systems, astrophysicist Tahir Yaqoob, says that what actually defines a "habitable zone" is open to debate.
However, a general consensus among astrophysicists is that between 2.4 percent and 4.5 percent of exoplanets discovered spend more than 90 percent of their time within "habitable zone" boundaries.

Relative sizes of all of the habitable-zone planets discovered to date alongside Earth. Left to right: Kepler-22b, Kepler-69c, Kepler-62e, Kepler-62f and Earth (except for Earth, these are artists' renditions). Image credit: NASA Ames/JPL-Caltech
On April 28th, NASA announced that the Kepler space mission had discovered two new planetary systems, which include three "super-Earth-size planets" in the "habitable zone," including the smallest of the "habitable zone" planets discovered to date.
The small, newly discovered "habitable zone" exoplanet—known as "Kepler-62f"—orbits a star smaller and cooler than our sun every 267 days, and it is only 40 percent larger than Earth, making it the exoplanet closest in size to our own world.
It seems likely that more "habitable zone" planets will soon be discovered, and this means that life may exist all over the universe.
Indeed, some biologists suspect that life is an integral part of the universe, and that the universe itself may be alive in some sense.
Stars are known to eject massive amounts of water, which spray onto the surface of their orbiting planets.
Amino acid chains—the building blocks of genetic material, which encode for biological design—have been found inside of comets, and many biologists now believe that a comet crashing into the primitive oceans of earth, is how life began on our planet.
This may be how life begins over the universe, with comets splashing into the oceans of fertile worlds, like sperm fertilizing eggs on a cosmic scale.
The universe may be teeming with life, and our little blue world may not be as unique as it seems at first.
Something to think about when we look up at the stars.
David Jay Brown is an award-winning science writer, whose work has appeared in Scientific American, Scientific American Mind, and Discover magazines. He is the author of 11 books about the evolution of consciousness, optimal health, and the future.
{ width: 160, height: 160, defaultImage: '', layers: 'Artimg-ObservMoon' }

By Tammmy Plotner
Do you love your cell phone with its built-in camera feature? How about the view through your telescope? Have you ever wished you could send a friend or relative a photograph of what you're observing and include them in the fun? If this sounds like you, then there are two products that you'll be very excited to know about-the Orion SteadyPix Universal Smartphone Telescope Photo Adapter and the Orion SteadyPix Telescope Photo Adapter for iPhone. These two awesome gadgets are designed to work with your SmartPhone, iPhone, and most average cell phones with a camera.
What do they do? Check this out?
These inexpensive adapters are a rigid connection which holds your phone steady to the eyepiece of your telescope or spotting scope. You don't need anything special. It's basically a gentle clamp which holds around the eyepiece and a bracket, supporting the phone and aiming the camera lens into the eyepiece. What you see is what you get!
What you are doing is called "afocal imaging." In other words, you're using your telescope as a type of telephoto lens and the eyepiece is doing the work. You can use any magnification level you like and you focus the image by looking into your camera's real-time viewfinder.
Want video? You can do that, too. Any type of photography that your phone is capable of can be translated through the telescope. Don't forget your phone's camera also has adjustments. Experiment with the settings!
What can you expect to see? First off, you're not going to be able to get your phone to perform like the Hubble Space Telescope. As exciting as the technology is, your photography will be limited to relatively simple subjects, like the Moon, planets, bright stars and the properly-filtered Sun. However, don't rule out brighter deep space objects. It all has to do with your phone's camera sensitivity to low light- the lux factor. Lux is the amount of light the camera needs to provide an image. The lower the number, the less light the camera needs to reproduce a clear image. If you can see the object on the screen, then chances are it is going to appear in your photograph.

Afocal lunar image courtesy of Tammy Plotner
As you can see, even at low resolution and a very small size, afocal imaging produces some astounding results. With some focusing practice, you'll be able to take (and send) photographs of lunar features, the rings of Saturn, the belts of Jupiter, the phases of Venus, bright star clusters and stellar images. If you want to really heat things up, you can take images of the Sun, too! Just be sure to use a proper solar filter on the telescope at all times.
But, don't stop there. Once you've attached your phone to your telescope, you can also use the display image as a kind of "mini monitor" so others can see what your scope is aimed at. This can be a very handy tool when doing public outreach. Just center the image on something like a particular lunar crater you'd like to explain, and multiple observers can see what you're talking about at the same time! Using your phone to display images works especially great when you're stargazing with children, especially because young children don't always understand not to grab a telescope around the eyepiece when they want to look, and now they can see without touching!
Need more to convince you? Then think about all the things you can do with the images you take. Not only can you share them with your friends, family and co-workers, camera phone images can keep a photographic diary of craters, lunar features, planets and sunspots, record eclipses, transits and occultations. You can even create your own YouTube astronomy video or post to Facebook, or set up an Instagram account. Transfer the images to your computer and add them to your observing reports, or try your hand at enhancing them. The possibilities are only limited by your imagination!
Tammy Plotner is a professional astronomy author, President Emeritus of Warren Rupp Observatory and retired Astronomical League Executive Secretary. She's received a vast number of astronomy achievement and observing awards, including the Great Lakes Astronomy Achievement Award, RG Wright Service Award and the first woman astronomer to achieve Comet Hunter's Gold Status. Tammy Plotner has been a compensated contributor to the Orion Community since November 2012. Orion's product review policy is to post reviews regardless of the writer's positive or negative feedback of the product.
{ width: 160, height: 160, defaultImage: '', layers: 'Artimg-image1thmb' }

By Roger Ivester
This faint, five star asterism appears in the constellation of Virgo, and it's sure to become one of your favorite Spring objects.
Have you ever heard of the Virgo Diamond? No... I'm not talking about the large group of stars, comprised of Cor Caroli, Denobola, Spica, and Arcturus, also called the Virgo Diamond. I'm talking about a basically unknown and very tiny asterism in Virgo which makes a beautiful diamond shape, comprised of five faint stars. If conditions are not good this asterism can be difficult to spot, especially the faint companion of the western star.
When I first read about the Virgo Diamond back in 1993, I became immediately interested, and could hardly wait to see it for myself. The Virgo Diamond seems to be as unknown today as it was back in 1993. I know of only a very few amateurs who have observed this most intriguing deep-sky object.
"Virgo Diamond: In the December 1, 1991 Monthly Notices of the Royal Astronomical Society, Noah Brosch (Tel Aviv University, Israel) discusses his investigation of a newly discovered asterism in Virgo. Five stars all appearing brighter than 13th magnitude, comprise a diamond shaped area with sides only 42 arc seconds long. The diamond is located at: RA: 12:32.8 Dec: -0.7". Source: Sky & Telescope Magazine, May 1993, page 110.
My first observation of the Virgo Diamond came on the night of April 14, 1993. I was using a 10" f/4.5 reflector at 190x which presented a faint grouping of four stars. I was unable to see the fifth star. The stars range in brightness from 10.9 to 13.7 in magnitude. Please don't underestimate this very faint asterism. If conditions are not good, the four primary stars can be difficult, even using a 10".
Since that night in 1993, I have observed this object many times, however, always seeing only the four primary stars.
This changed on the night of April 12, 2012. The conditions were excellent, and using a 10" reflector, I saw the elusive fifth star at a magnification of 266x. I could not hold the fifth companion star constantly, and averted vision was required. I was very excited, after nineteen years I saw the fifth star, finally! It should be noted that excellent seeing and high magnification are essential for observing all components of the diamond.
The northernmost star is TYC 4948-53-1 (Magnitude 10.9) The brightest and easiest of the diamond. (RA 12h33m18.96s Dec. -00.38m32.3s) The western star (the double) is magnitude 12.1
The southern star is magnitude 13.7
The eastern star is magnitude 13.5
Tom English of North Carolina, using a 16" SCT described a fabulous view of all five stars using 194x and 387x. Fred Rayworth of Las Vegas, could see the fifth star using a 16" reflector at 130x, but could not hold the faint companion constantly, even from the desert southwest. Sue French of New York could see the faint companion using both a 10" reflector and a 130mm apochromatic refractor, which is the smallest scope that I'm aware of, used to see all five stars. French performed this feat in 2012 at the Winter Star Party. Jaakko Saloranta of Finland, using an 8" reflector, under less than ideal conditions, managed to see the elusive fifth star, even with a focuser that kept freezing up under extreme cold conditions.
The following is a pencil sketch from that special night of April 12th 2012, using only a No. 2 pencil on a blank 5 x 8 note card. The colors were inverted using a scanner.

The following image was made by Dr. Don Olive, from the Tzec Maun Observatory in Western Australia, using an Epsilon 180mm corrected Newtonian.

Remember, the Virgo Diamond is a faint and tiny asterism, so a good night and high magnification are essential to see all five stars
Good luck in your quest to see the Virgo Diamond!
Roger Ivester has enjoyed the wonders of the night sky since he was 12 years old. He is a visual observer and enjoys sketching and writing about what he sees. In 2009 he helped start the Las Vegas Astronomical Society Observers Challenge, and works with Fred Rayworth on a monthly basis to compile the report. Roger and his wife Debbie live in the foothills of western North Carolina.
{ width: 160, height: 160, defaultImage: '', layers: 'Artimg-CelestialEvents2012' }

Do you enjoy sky-watching? During the month of May, there is an exciting event which doesn't require the use of a telescope or binoculars. All you will need is your eyes, an unobstructed western horizon and clear skies

May 2010 Venus-Jupiter-Mercury Conjunction Courtesy of
Shevill Mathers
Beginning on May 10, there's a "line up" happening on the western horizon. If sky conditions permit, you will see a very faint, very slender crescent Moon, only hours old. It will be accompanied by bright Venus to the north and Jupiter high above them to the east-southeast. On May 11 the Moon moves its position and will be located directly between Venus and Jupiter. By May 12, the Moon has climbed even higher - taking station above Jupiter. By the evening of May 21 and May 22, the Moon will accompany Saturn and the bright star, Spica, in the constellation of Virgo. While the Moon will climb higher as it heads east each night, keep your eyes on the two western planets... they are about to dance.
Let's learn about what we'll see!
We watch it occur in the sky. We accept that it's natural. We even know this gathering of planets is called celestial mechanics. But exactly what laws govern these movements and how do we understand them? Let's take a look...
Once upon a time, just two days after Christmas in 1571, a very cool dude named Johannes Kepler was born. Like some of us, he had a pretty rough life. His dad died when he was 5, but he had a great mom. She was not only a waitress, but a herbalist as well. One of the best things she ever did for her son was to take him out to watch the Great Comet of 1577 and a lunar eclipse in 1580. Even though she ended up being later tried for witchcraft, the love of astronomy that she inspired in her son would shape the way we now understand planetary motion.
Kepler wasn't always lucky. Smallpox crippled his vision and hands, but that didn't stop him. He excelled at studying planetary motion in the astrological sense and kept busy as a math teacher. Not only did he like numbers, but he also liked to play around with lenses, too? and write letters to his friend Galileo Galilei. Even though he ran the risk of losing his job and getting in trouble with the church, Kepler defended Copernican theory of a Sun-centered system and went on to devise some formulae of his own. At age 24, he was teaching a class about the conjunction of Saturn and Jupiter when he realized that regular polygons bound one inscribed and one circumscribed circle at definite ratios, which, he reasoned, might be the geometrical basis of the Universe. Thankfully, his school supported him and published his work as the Mysterium Cosmographicum, or Cosmographic Mystery.
Fortunately, that was a good move and it landed Kepler a part time job helping out an astronomer named Tycho Brahe. To make a long story short, that was his introduction into the real world of astronomy and many long years and bad political times kept things from progressing. However, the astronomers of the time respected his work in their own ways and continued to test out Kepler's theories - right down to his predictions when Venus and Mercury would transit the Sun. Yep. It would be long after Kepler died before his ideas were finally recognized, but these three principles withstood the test of time:
1. The orbit of every planet is an ellipse with the Sun at one of the foci.
2. A line joining a planet and the Sun sweeps out equal areas during equal intervals of time. (Suppose a planet takes one day to travel from point A to B. The lines from the Sun to A and B, together with the planet orbit, will define a (roughly triangular) area. This same amount of area will be formed every day regardless of where in its orbit the planet is. This means that the planet moves faster when it is closer to the Sun.) This is because the Sun's gravity accelerates the planet as it falls toward the Sun, and decelerates it on the way back out, but Kepler did not know that reason.
3. The squares of the orbital periods of planets are directly proportional to the cubes of the semi-major axis of the orbits. Thus, not only does the length of the orbit increase with distance, the orbital speed decreases, so that the increase of the orbital period is more than proportional.
Now that we understand the law, let's go out and observe!

May Conjunction
If you paid attention to Kepler's laws, you'll notice that Venus climbs just a bit higher each night, while Jupiter lowers to the west. Around May 20, another player will enter as tiny, dim Mercury emerges from the Sun's glare and joins the show. On May 27, the trio will make a spectacular appearance as they triangulate low on the western horizon. This event is called a conjunction. Even though Momma said it ain't polite to stare, there's a very good reason we humans can't take our eyes off this celestial phenomenon!
"Your eye is like a digital camera," explains Dr. Stuart Hiroyasu, O.D., of Bishop, California. "There's a lens in front to focus the light, and a photo-array behind the lens to capture the image. The photo-array in your eye is called the retina. It's made of rods and cones, the fleshy organic equivalent of electronic pixels."
Near the center of the retina lies the fovea, a patch of tissue 1.5 millimeters wide where cones are extra-densely packed. "Whatever you see with the fovea, you see in high-definition," he says. The fovea is critical to reading, driving, watching television. The fovea has the brain's attention. The field of view of the fovea is only about five degrees wide. "Tonight, Venus, Jupiter and Mercury will all fit together inside that narrow angle, signaling to the brain, "This is worth watching!"
When it comes to our eyes, almost every photoreceptor has one ganglion cell receiving data in the fovea. That means there's almost no data loss and the absence of blood vessels in the area means almost no loss of light either. There is direct passage to our receptors - an amazing 50% of the visual cortex in the brain! Since the fovea doesn't have rods, it isn't sensitive to dim lights. That's another reason why the conjunctions are more attractive than the surrounding star fields. Astronomers know a lot about the fovea for a good reason: it's is why we learn to use averted vision. We avoid the fovea when observing very dim objects in the eyepiece.
Let's pretend we're a photoreceptor. If a light were to strike us, we'd be "on" - recording away. If we were a ganglion cell, the light really wouldn't do much of anything. However, the biological recorder would have responded to a pinpoint of light, a ring of light, or a light with a dark edge to it. Why? Light in general just simply doesn't excite the ganglion, but it does wake up the neighbor cells. A small spot of light makes the ganglion go crazy, but the neighbors don't pay much attention. However, a ring of light makes the neighbors go nuts and the ganglion turns off. It's all a very complicated response to a simple scene, but still fun to understand why we are compelled to look!
Many of us have been watching the spectacle of the planets as they draw closer over the last several days. How many of you have seen the Venus and Jupiter pair appear one over the top of each other - looking almost like a distant tower with bright lights? Once again, we've been observing Kepler's Laws of Planetary Motion in action - and it's a great way to familiarize your self with celestial mechanics. What's happening is called a conjunction. This is a term used in positional astronomy which means two (or more) celestial bodies appear near one another in the sky. Sometimes this is also called an appulse. No matter what you call it, it's an event worth watching!
{ width: 160, height: 160, defaultImage: '', layers: 'Artimg-WhatsInTheSky_05_13_square' }

Get outside with your telescope on clear May evenings to see celestial treats in the sky! With weather warming up and skies clearing up, there's no shortage of celestial delicacies to view. Here are a few of Orion's top suggestions for May observing:
Eta Aquarid Meteor Shower - Get outside well before dawn on May 5th to catch the Eta Aquarids. You don't need a telescope to enjoy this meteor shower, which should deliver about one meteor per minute. Look for meteors appearing to radiate out of the water jug portion of the constellation Aquarius.
Dancing Planets - Between May 10th and May 30th, there will be a wonderful conjunction of three bright planets and the Moon. Jupiter, Venus and Mercury will entertain us as they dance across the western sky, with Jupiter and Venus coming within a single degree of each other on May 28th. Use a telescope to see planetary details, or use unaided eyes to witness this great gathering of planets shortly after dusk.
Stellar Occultation - During the evening of May 24th, watch as the nearly Full Moon will cover up the bright star Beta Scorpii. This "occultation" will only be visible from the Midwest and Southeast, but lucky observers thereabouts can see the bright star "blink out" as the Moon covers it. If you've never had the pleasure of seeing an occultation, be sure to make the most of this opportunity - it's simply incredible to see how fast the star appears to "hide" behind the Moon!
The Ringed Planet - A perennial favorite of amateur astronomers around the world, ringed Saturn will be nicely positioned in May skies for telescopic study. Saturn reached opposition in April and will steadily rise higher in the night sky as May progresses. As it gets higher in the sky, views of Saturn and its stunning rings will get better and better! While you can detect the rings in a small telescope like the 76mm FunScope, bigger telescopes such as an XT6 or XT8 Dobsonian will provide significantly better views of Saturn.
Four Big Planetary Nebulas - Use a 6" or larger telescope and an O-III or UltraBlock filter to catch four relatively large planetary nebulas in May skies. See the "Ghost of Jupiter," NGC 3242 in Hydra; M97, "the Owl Nebula" in the Big Dipper; NGC 4361 in Corvus, and the famous "Ring Nebula", M57 in Lyra just a few degrees from bright star Vega.
Four Glittering Globulars - Four picture-perfect examples of globular star clusters will be visible in May skies. Check out M3 in the constellation Bo�tes. M13, the "Great Cluster in Hercules" will be visible near the zenith. M5 can be found in Serpens, and M92 in the northern section of Hercules. Big telescopes will provide the best views, but even 50mm binoculars will show you these dense balls of stars from a dark sky site.
Four Face-On Spirals - Use large telescopes to see the classic pinwheel shapes of galaxies M51 and M101 in the Big Dipper asterism, and M99 and M100 in the Virgo galaxy cluster. There are also dozens of additional galaxies to explore in the Virgo cluster with a big-aperture telescope.
May's Challenge Object - May skies present perhaps the best opportunities to grab a view of Omega Centauri - the brightest globular star cluster in the sky! While it's big and bright, even visible as a "fuzzy" star in binoculars, the challenge Omega Centauri presents is its low position in southern skies, which can make it unobservable from higher northern latitudes.
All objects described above can easily be seen with the suggested equipment from a dark sky site, a viewing location some distance away from city lights where light pollution and when bright moonlight does not overpower the stars. All objects have been verified by actual observations by Orion Telescopes & Binoculars Staff at Fremont Peak State Park, and/or Deep Sky Ranch, 60 miles and 90 miles respectively from San Jose International Airport, San Jose, CA.
{ width: 160, height: 160, defaultImage: '', layers: 'Artimg-Comet' }

The unofficial "Year Of The Comets" has indeed opened and the excitement hasn't ended yet. According to NASA's Jet Propulsion Laboratory in Pasenda, California, a relatively new comet discovery might very well make a tantalizingly close pass by the planet Mars on October 19, 2014. How close? According the Near-Earth Object Program Office, it should come within 186,000 miles of the Red Planet and there's a strong possibility it might be much closer.
Discovered by Robert McNaught on January 3, 2013 at Siding Spring Observatory, New South Wales, Australia, Comet C/2013 A1 has been observed as far back as October 4, 2012. just a small step in time from millions of years it has taken for it to journey from the Oort Cloud into our solar system. At present, it is theorized this is the comet's first pass through our neighborhood and it is just one of many objects identified by "SpaceGuard" — an amalgamation of ground and space-based telescopes which search the sky for potential asteroids and comets that could pose a threat to Earth.
However, this time it isn't Earth that's in the danger zone. It's Mars.

Comet Trajectory Visualization Courtesy of NASA
By using "pre-recovery" archival observations taken by the Catalina Sky Survey, astronomers have been able to forecast the comet's orbital plot. By combining this data set with current observations, they have been able to provide fairly accurate estimates of where the comet is headed. As of the beginning of March 2013, the NEO program office predicts Comet Siding Spring may come as close as 31,000 miles (50,000 kilometers) to impact. While that sounds dangerous for Mars, it's well over twice the distance of the orbit of Deimos, the most distant Martian moon. As more observations are obtained, the calculations for Comet C/2013 A1's orbital path — and how it coincides with Mars' orbit — will become more exact. This should allow researchers to totally rule out a collision scene, but current probability still has the chances as less than a one in 600. That's pretty close odds!
We know that a comet crashing into a planet within our solar system is entirely possible. After all, it has only been roughly twenty years since Shoemaker-Levy 9 slammed into Jupiter. Even if Comet C/2013 A1 Siding Spring doesn't impact Mars, there's more to a comet than just the nucleus. It also will carry with it the coma and tail — a combination of volatiles which will be boiling away from it as it approaches Mars. Does that pose any danger for the space-placed instrumentation or the rover missions? According to comet expert Leonid Elenin, it is certain that Mars will pass through A1 Siding Spring's detritus. Even if these remains are as small as microparticles, the concentration will be far higher than design specifications ever planned for and the space probes could possibly malfunction as a result of this exposure.
Is Comet Siding Spring observable? If you were on Mars, it might reach a visual magnitude of zero, but here on Earth we'll be lucky if it reaches a binocular-possible magnitude 8. It's not going to happen soon, either. C/2013 A1 won't be a target for the amateur telescope until mid-September/October 2014 and you'll also need to be in the southern hemisphere to spot it.
For now, we don't have enough highly accurate information to make too many predictions of what may happen with Comet A1 Siding Spring. We don't know exactly how large it is, nor can we forecast how it will react as it nears the Sun. We do know the comet is cruising along at 35 miles per second (126,000 miles per hour) and that it appears to be headed towards Mars, but so much can change with very little notice. Our orbiting and ground-based probes might very well be witness to one of the most spectacular events in Mars' history!
And maybe not...
{ width: 160, height: 160, defaultImage: '', layers: 'Artimg-Comet' }
Now having passed the Sun, Comet C/2011 L4 PANSTARRS ended its reign of the Southern Hemisphere skies and is now breaking the western horizon and is visible for Northern Hemisphere observers. So far the bright comet has made an awesome impression on those who have had a chance to both view and photograph it. Let's begin at the ending — and check out a report from Tasmania.

Comet PANSTARRS Courtesy of Shevill Mathers March 5, 2013
"I have observed/photographed Comet PANSTARRS on two successive nights just after sunset and with the comet about 10 degrees about the horizon." reports renowned astrophotographer, Shevill Mathers of Southern Cross Observatory. "I observed it naked eye, easily visible, and with 10x50 binoculars? a superb view. The fan-shaped tail is quite visible and covers perhaps three degrees of sky. The head is very bright and to me appeared to have yellowish hue. However, our skies are filled with varying degrees of bush fire smoke."
As he observed, Mathers was quite taken at how quickly that C/2011 L4 appears to set. Although the comet itself isn't actually moving that quickly, the position so near the horizon seems to be accelerated - an illusion all amateur astronomers well know. Remember to take this low position into consideration during the first few days after PANSTARRS becomes visible to the Northern Hemisphere. It would be very disappointing indeed to find out the comet had "set" before you had a chance to see it!
Now that Comet PANSTARRS has arrived on the northern scene, it's not far away from the setting Sun and it certainly isn't an easy target. Although it is anticipated to be as bright as magnitude 2, the twilight skies will greatly interfere with detailed sightings and the observing window to see the comet is roughly in the 30 minute range. However, don't give up hope! As time quickly passes, Comet PANSTARRS will climb higher each night -moving its way through Pisces, then on through Pegasus and Andromeda. For a very lucky few, the comet made an awesome appearance on the evening of March 12th, when it was just a few scant degrees south of the crescent Moon. Check out this image taken by John Chumack.

Comet PANSTARRS Courtesy of John Chumack March 12, 2013
As luck would have it, Comet L4 PANSTARRS didn't come to John — he had to go to it. His mission was to head west against great odds to catch this comet conjunction. Says Chumak, "Sometimes it's worth traveling to increase your chances of witnessing something astronomical, even if your original plan does not work out, I'm so glad I went to Indy. One should never give up hope... as opportunities can come your way at any time!"
Just how will this icy visitor look in the sky? During the opening of the show, you will most likely need 50mm or larger binoculars to pick it out of the twilight glow, but as it climbs higher it will match the brightness of the major stars of Pegasus and — once located — should be able to be seen without optical aid for a short period of time. As C/2011 L4 PANSTARRS moves northward — and further away from the Sun — it will require a small telescope or larger astronomical binoculars to be spotted. For the most part, the comet will appear as a thin scratch, very much like a tiny contrail and be roughly about half the length of your little fingernail when held at arm's length. It is not going to jump out and wave a sign. (But then, perhaps it will!) Look for this "scratch" on the sky no more than about a handspan above the northwestern horizon. Once you initially spot it, it will be much easier to locate on successive nights as it climbs slightly higher and moves more slightly more northward.
Don't be "underwhelmed" and by no means be discouraged if your views of PANSTARRS are mediocre. Even though this particular comet isn't a huge affair that dominates the night sky, it is still a rare occurrence and should be treated as such. For those of us who have routinely observed comets, they are normally very small, dim, fuzzy contrast changes... and PANSTARRS is a rare treat!
As you follow the Comet PANSTARRS, be sure to watch for changes. How does the nucleus appear from night to night? How bright is the coma? Does the comet have a duo tail? How far does the tail extend? Be sure to take a few moments to sketch the comet for your records and follow the "How To Log Your Comet Observations" instructions for getting the most out of your time. You'll be glad you did!
{ width: 160, height: 160, defaultImage: '', layers: 'Artimg-Comet' }
The year 2013 is certainly living up to its expectations as being the "Year of the Comets". With both Comet PANSTARRS and Comet ISON warming up on the sidelines, Comet Lemmon (C/2012) is already making Southern Hemisphere news as the star of the show.
While looking for Near-Earth objects, Alex Gibbs discovered Comet Lemmon (C/2012) on March 23, 2012 while participating in the Catalina Sky Survey (CSS). Back then, the five mile wide blip on the astronomical radar screen was glowing at a feeble magnitude 20, but it didn't take long before the comet began to change. At the moment, this traveling space rock is doing some pretty spectacular things - including being far brighter than anticipated. Currently near unaided eye visibility, the comet is expected to continue to intensify as it nears the Sun, possibly glowing as brightly as magnitude 5 at perihelion.
What makes Comet Lemmon (C/2012) so special? Presently it is being incredibly photogenic, sporting a long dust tail, an ion tail and brilliant color. Thanks to its chemical composition of a colorless, toxic gas called cyanogen and a companion volatile known as diatomic carbon, this icy visitor from the Oort Cloud appears green when exposed to sunlight. This makes Comet Lemmon quite beautiful in appearance and also makes for a wonderful opportunity for study. Astronomers are able to examine these pristine materials spectroscopically as the comet sublimates - a chance to study the impact of the solar winds and take a look at materials which share their origin with both stellar atmospheres and the interstellar medium.
As it approaches the Sun, Comet Lemmon will become even more visible - but where is it now? Easily seen in both binoculars and small telescopes, it is currently only accessible to Southern Hemisphere observers and about to reach the zero hour on the ecliptic plane on February 24th. It will be moving rapidly across the sky each night and soon be readily apparent to the unaided eye as it crosses into the constellation of Phoenix by March 7th. It will continue to head north and move into the constellation of Sculptor by March 17th. Don't delay your observations, because Comet Lemmon makes its closest approach to the Sun - perihelion - on March 24th. At this time it will be roughly the same distance from Sol (the Sun) as the planet Venus, but it will be hidden from our point of view by the Sun's glare.
As April opens, it is time for Northern Hemisphere viewers to begin planning for observations of Comet Lemmon. By mid-month it should become visible at lower latitudes as it enters into the constellation of Pisces. Since it will be placed just a few scant degrees ahead of the dawn glow, make sure to choose an observation point where you have an unobstructed eastern horizon and reasonably dark skies with good seeing. On April 19th, Comet Lemmon will cross the celestial equator and be ready to dazzle the sunrise skies. Comet Lemmon (C/2012) will remain in the direction of the constellation of Pisces as it exits our solar system - staying visible to most amateur telescopes for a short period of time. By the beginning of May, it will have dimmed to the extent that it will be very difficult to pick out of brightening skies, even with the help of a telescope.
As always, there are no guarantees that Comet Lemmon will continue to perform. As amateur astronomers well know, even the most celebrated of comets can be an incredible sight one night, only to break up and fizzle away when we least expect it. Even though it has been some 11,000 years, we do know this isn't Comet Lemmon's first trip through our neighborhood and there's always a chance it may disintegrate as it nears the Sun. However, never give up hope! Right now it is putting on an exciting show and there's no reason to believe it will stop. Just remember, there is only a small window of opportunity to view this comet, so plan accordingly. Choose your observing area in advance and have your equipment ready.
While getting up early in the morning isn't always an appealing prospect, having the chance to view one of the historic comets of 2013 is certainly worth the effort!
{ width: 160, height: 160, defaultImage: '', layers: 'Artimg-Comet' }
At one time, comets were referred to as dirty snow balls. Then they became known as dusty ice balls. Now they are considered icy rock balls. No matter what set of adjectives you use to describe them, what we have learned recently is that comets are as individual as, well, individuals!
Astronomers have hypothesized that comets began their lives as part of the solar nebula and orbit the Sun in two distinct periods — long or short. Comets which have short orbital periods are thought to come from the Kuiper Belt, an area of the Solar System beyond the planets, extending from the orbit of Neptune and similar to the asteroid belt. Comets with longer orbital periods may originate from the Oort Cloud, a suspected region of comet bodies that's located about a light year from the Sun. These comets might have orbital periods which last hundreds, or even thousands, of years, and some may just take a direct route towards the Sun when nudged by the gravity of the larger planets or a wandering star. There are even a handful of comets — hyperbolic — which make only one pass through our Solar System before being flung out into deep space.
Periodic comets which have an established orbital period of less than 200 years have the designation "P/" added to their name. For example, Halley's Comet is officially designated as 1P/Halley. This means it is the first periodic comet discovered and it was named after its discoverer, Edmund Halley. Non-periodic comets — or ones for which an orbital period hasn't yet been confirmed — are designated with "C/". Many non-periodic comets are located and named for the equipment which reveals them, such as ones discovered by the Lincoln Near-Earth Asteroid Research (LINEAR) and Solar and Heliospheric Observatory (SOHO). These may be less famous, but often turn into spectacular telescopic objects.
Hyperbolic comets make only a single approach into the Solar System and only a few hundred of them are known. A famous example of this type of comet is C/1980 E1 discovered by Edward L. G. Bowell. It left the Solar System faster than any natural object known!
These little icy bodies are somewhat similar to asteroids - measuring anywhere from tens of meters to a hundred or more meters across. They are composed of very ordinary materials, such as rock, water ice and dust. Another major component of a comet is frozen gases, such as ammonia, methane, carbon monoxide and carbon dioxide. Comets are even known to hold key organics, such as amino acids. While they might appear round when viewed through a telescope, comets are very irregular in shape due to their lack of mass.
While comets are distant in the Solar System, they remain frozen and most of their volatiles — frozen gases or liquids — are suspected to be hidden beneath a dry, dusty surface. Because of their small size, they are almost impossible to detect. As they near the Sun, they begin to warm and vaporize, causing the volatiles to stream away from the comet's nucleus and carry the dust away with them. This action creates a thin, visible atmosphere around the comet's body and is called the coma. The radiation pressure of the Sun and the solar wind causes the coma to extend away from the nucleus into the highly visible tail. This is what makes a comet so beautiful to view and creates its distinct shape. A comet's tail will always point away from the direction of the Sun.
As a comet passes through the inner Solar System, both the coma and the tail are illuminated by reflecting sunlight and can often be seen from Earth. Most comets are very faint and require a telescope to be seen, but there are a few which reach unaided eye visibility. Some may develop a dual tail, one from dust and the other from ionized gases. There are even a few comets which have unexpected outbursts of gas which can cause them to suddenly brighten and increase in size. While it doesn't happen very often, it's quite exciting when it does!
Comets can be very exciting for other reasons, too. Some have been known to break up into fragments for unknown reasons — while others have been observed smashing into planets or diving into the Sun. Some even "run out of gas" — a condition where the volatile material contained in a comet nucleus evaporates away.
How often do we see a comet? Comets visible to the unaided eye don't occur very often, but telescopic comets happen several times a year. Sometimes there is even more than one visible at any given time. How they appear is mostly due to their composition and how close they get to the Sun. While a comet's movements are fast compared to other astronomical objects, it appears slow when seen through the telescope eyepiece. Don't count out seeing movement, though. By patiently watching over a period of hours, it is very possible to physically detect the distance a comet has moved by the relationship with the surrounding background stars. Observing a comet (How Do I Observe A Comet?) is easy enough, but locating and tracking a comet takes some work. They can often move several degrees from night to night! Always be sure to use a good locator map to help you correctly identify a comet - or enter the proper coordinates into your telescope's computer control.
The year 2013 might just be a very good time for comets. Right now, there is one headed our way which should make a good apparition for the southern hemisphere — Comet C/2011 L4 PanSTARRS. It is projected to come within 45 million kilometers (28 million miles) of the Sun on March 9, 2013. This is close enough that it should have a visible tail. But hold on... An even more exciting new comet is expected to rock the mid-latitude northern skies! It is named Comet C/2012 S1 (ISON), and it was discovered by a Russian team, Vitali Nevski and Artyom Novichonok, at the International Scientific Optical Network (ISON). Currently Comet ISON is located about the distance of Jupiter's orbit, but it is expected to come within less than 2 million kilometers from the Sun at perihelion (its closest pass) by November 28, 2013. Will it be spectacular? No one knows for sure because comets are very unpredictable. It could be as breathtaking as Comet Hale-Bopp, or it might be a dud like Comet Kohoutek. If Comet C/2012 S1 (ISON) continues on its anticipated trajectory toward the Sun and doesn't break apart, it might even be visible during the day!
{ width: 160, height: 160, defaultImage: '', layers: 'Artimg-Comet' }
There are three ways to observe a comet: with your unaided eye, with binoculars and with a telescope. For all three types of observations, you will need a few simple tools to help you get the most from what you see. Before you begin, the most important thing you will need is a good locator map or the coordinates of where the comet will be at the time of your observation. There are several online sources which provide general charts, such as Heaven's Above . You can also get the ephemeris (a table which lists a comet's position over a period of time) from official websites, such as the Harvard Minor Planet Center. Once you have this information, you can use them to locate the comet on a star chart, enter the coordinates into a planetarium program to generate a map, or enter them into a computer-assisted telescope. Remember a comet can move a degree or more each night and you have to update your location information accordingly! Ephemeris information often lists the comet's magnitude as well. This will assist you in knowing if it can be seen visually, with binoculars, or if it requires a telescope. Generally, a comet will need to be at least magnitude 4 to be seen without optical aid, while larger (10X50) binoculars will reach to about magnitude 8 and an average (150mm) telescope can easily detect a magnitude 10 to 11 on a dark night with excellent seeing conditions.
The next step is to gather your observing materials and choose a location where you'll be able to see the comet over a period of several days. You'll need a red flashlight to read your chart (How Do You Read a Star Chart?) and to aid you while sketching. Before you panic at the thought of doing a little art work, this is essential to record keeping. It's fun and easy, too! Just use an ordinary sheet of white paper and trace four circles on it. These circles will be your eyepiece, binocular or visual field of view. You will need to label each of your little "mini sketches" with the date, time, location, equipment used, magnification factor and sky conditions. It may seem like homework, but it's really quite simple. It's not that hard to translate what you see onto paper when it is only a few dots and some symbols. Use large dots to denote bright stars and small dots to represent dimmer stars. The comet might be a dot which approximately represents the size and brightness of the nucleus with shading around it for the coma and shading for the tail. Make the comet sketch size as accurate as possible in relation to the star field in the eyepiece, binocular field of view or unaided eye section of the sky. These sketches will let you keep track of the comet's position over a period of time - allowing you to determine the direction in which it is going or how its appearance (such as the size of the coma and tail) may change. You might even catch an exciting event, such as a close pass to a planet or deep space object!
Now, let's get down to business.
Once you have located the comet, record the information for that night onto your observing sheet. This important information includes the date, time, your observing location (latitude and longitude), instrument used, magnification or eyepiece used and sky conditions. (How to Judge Sky Conditions). Now you are ready to begin sketching. You don't have to include every star that you see in the eyepiece, binocular field or sky into your sketch — just the major ones. Remember to use larger dots for brighter stars and smaller dots for dimmer ones. For example, the comet might be located to one side of a triangle of large stars with a Y-shaped asterism of smaller stars to the other side. You will need to label at least one star with a proper Greek letter or catalog number. This information is usually provided on your printed star chart. Look for a star which has a symbol or number printed beside it. If there isn't one, don't worry. Draw the field and use an arrow to the outside and label it with a direction towards a known star on your chart which has a symbol or number. Now, sketch the comet and label the outside of the sketch circle with the cardinal directions. Which way is which? That's easy. Turn off any drive units and watch which way the stars "drift" to the outgoing edge. That's west! Since this is your first sketch, you can't place an arrow which shows the direction the comet is headed just yet. That's why we need to do three to four observations. This same sketching technique holds true for all three types of observations. For the unaided eye, the sketch field might be something as large as a constellation. For binoculars, it's around three or four degrees of sky so choose a bright pattern of stars and label the primary ones.
Once you've done your paperwork, then it's time to have some fun! Try switching around eyepieces in your telescope to see which one gives the best view. Ask yourself some questions! If you'd like to determine the size of the comet, try locating an object which has a known size. For example, your observing catalog tells you globular cluster M80 is approximately 10' in size. How does the comet compare? Is there a tail visible? If so, how far does it extend? By knowing how many arc minutes a comparison object is in size, you can judge these simple measurements for yourself.
If you'd like to determine a comet's magnitude, you can do that, too. Just choose a star for which you have a value. Most star charts have a key to the edge which gives a magnitude. Just put the known star in the eyepiece and defocus. Compare what you see with the comet. For example, if you think the comet is brighter than its listed value of 5, try locating a 4th magnitude star and defocus your eyepiece. Is the star brighter than the comet — or the same? While this isn't a professional grade observation, it's certainly a good way of telling from night to night how a comet changes.
Be sure when you observe a comet to note how it appears. Does it have a stellar nucleus — a central "body" which appears as bright and as sharp as a focused star? How large is the coma — the fuzzy halo around it? How bright is the tail? What color does it appear to be? Does the tail split into two components? If so, you may be observing a comet with an ion tail and a dust tail!
Lather, rinse and repeat. For many observing programs, you'll need to observe a comet at least three or four times before your observations become "official". While it might be tempting just to head out with binoculars and take a quick shot at the sky, remember the lessons learned by Charles Messier — there's a lot of things out there that may look like a comet, but aren't. Even if you don't submit your records, you should still be very proud of yourself for being a real comet hunter!
{ width: 160, height: 160, defaultImage: '', layers: 'Artimg-Comet' }
The year 2013 looks to be a very promising time to observe comets. Because two of these events - the appearance of Comet C/2011 L4 PANSTARRS and Comet C/2012 S1 ISON - may be very spectacular, viewers may wish to take more careful notes of what they view and when.
Why bother? Although you may not be interested in observing programs such as those offered by the Astronomical League, there may be a time in the future when your observations will become important to you. Comet challenges take several years to complete and the ones you observe now might be the start of a great journey of learning and logging. Why not start out right?
While a comet is very dim and distant, such as C/2012 S1 ISON at the beginning of 2013, it will require the use of CCD equipment to both reveal and verify position. While many amateur observers do not take astrophotos, those who do are encouraged to image even faint comets as often as possible. These "comet snapshots" should be carefully labeled, giving the comet's position and known magnitude. These will act as a photographic record of your early observations. Some comets, such as C/2011 L4 PANSTARRS may be bright enough during their pass through our astronomical neighborhood to be captured with average DSLR cameras or inexpensive solar system imaging cameras.
As a comet nears the Sun, it begins to sublimate and become brighter - making it accessible to average telescopes and visual observations. For those who do not use CCD equipment, comets provide an ideal opportunity to begin logging your observations using simple sketches and labeling methods. Once your comet target has been located and verified, logging your observations becomes a fairly easy process. There may even be a time when you can observe a given comet with just binoculars or your unaided eye, depending on its magnitude. Who knows? In the case of Comet C/2012 ISON, which is expected to become very bright, you may even be able to observe it during daylight hours! All of these observations "count". Begin by logging the basics of your comet observation. Write down specifics such as the date, universal time, latitude and longitude of your physical position, equipment in use, magnification and sky conditions. Now draw a circle which will represent your eyepiece field of view. Once you have located the comet, start your sketch by drawing the brightest stars you can see in the eyepiece. When at all possible, label one or more of these stars with their proper designation. You can find this information on a good star chart or planetarium program. If there are no primary stars visible in the area, draw an arrow on your chart which points in the direction of a major star and label it. If you are using binoculars or just your eyes, the field will be much larger, but the principle is the same.
When your star field sketch is complete, it's time to add the comet. Be sure to make it proportionate in size to the stellar background. For example, if you are drawing a circle to represent the comet's coma, make sure the circle covers as close to the same approximate area as what you see. If the comet has a concentrated nucleus, do your best to represent this in your drawing. Does the comet have a tail? If so, be sure to add this into your comet portrait as well. Once these elements are in place, label the edges of your sketch with the cardinal directions. West will always be the direction the star field "drifts" out of the telescope or binocular's field of view. After your initial sketch, be sure to place an arrow on subsequent drawings showing which direction the comet is headed. Add any additional information you may have to your sketch as well... such as the official Right Ascension / Declination (R.A. and Dec) coordinates and estimated magnitude. This type of information is available through the Harvard Minor Planet Center.
While this might seem like a lot of extra work just to keep track of a comet, there may very well be a day when you'll appreciate the extra time you took to log your comet observations properly. Even if you never choose to use them in a structured observing program, you'll enjoy looking back at the nights you spent at the eyepiece and how you watched a comet change over a period of time. Who knows? You may very well catch the beginning of an exciting event, such as a comet break-up or a sudden flare in brightness! It's all part of good observing and you can do it!
{ width: 160, height: 160, defaultImage: '', layers: 'Artimg-Comet' }
Comet C/2011 L4 (PANSTARRS) is on its way and may give amateur astronomers around the world the opportunity to study a bright and interesting target. The comet itself has some very interesting properties. According to researchers, PANSTARRS appears to have a compact, asymmetric coma and is actively producing dust. This is very exciting news for observers because this dust production could make for breath-taking structure - of both of the comet itself and the tail. As it passes through the Solar System and nears the Sun, it may reach a maximum magnitude of -1 and be capable of being seen at a dark sky location as a +1 magnitude comet with a 10� to 20� long tail!
Right now, the question on everyone's mind is the location of Comet C/2011 L4 and its appearance. As of January 2013 PANSTARRS is a Southern Hemisphere object and should be gaining about a tenth of a magnitude of brightness on an almost daily basis. By January 19th, it will have reached the Scorpius / Corona Australis region (RA 18 15 15.0 Dec -43 06 27) and should be dancing in the skies at magnitude 8! This puts the comet well within reach of average backyard telescopes (4.5" to 6") and able to be picked up by larger binoculars at dark sky locations.
By Februrary 5 Comet PANSTARRS will have tracked to its most southerly declination (RA 19 47 51.9 Dec -45 37 32). After it reaches this area of the sky, it will begin its journey northward. According to predictions, it should be brightening fast - at a rate of between one and two-tenths of a magnitude per night. On Februrary 15, 2013 - if all goes as surmised - Comet PANSTARRS should have reached an unaided eye magnitude of 4.6 and be located in the vicinity of Microscopium (RA 21 11 14.3 Dec -43 40 56). Just remember that it will still be a Southern Hemisphere object at this time, so it would only be visible from locations in the Southern Hemisphere, and sky conditions will play a great role on whether or not it can be seen without optical aid.
As Comet PANSTARRS heads toward the Sun, it will continue to become more and more visible. By March 1, 2013 it should have achieved a bright magnitude of 1.9 and located in Pisces (RA 23 25 18.0 Dec -27 18 25). Comet C/2011 L4 will pass closest to Earth on March 5. No need to worry about a potential impact, though? it will still be about 1.10 AU from our home planet during its closest approach - just a little more distance than the Earth is from the Sun. At this point, it should reach magnitude 1 and still be located in the constellation of Pisces (RA 23 55 55.4 Dec -18 27 08). According to JPL/HORIZON predications the comet could be brightest between the dates of March 8-12, reaching a blazing magnitude near -0.5. However, it is still on the move and PANSTARRS will be closest to the Sun (perihelion) on March 10, 2013 at a distance of 0.30 AU.
March is the time for Northern Hemisphere observers to begin to get excited! If you live at very low latitudes, chances are that Comet PANSTARRS should be visible at your location - just 15� from the Sun - around the magic date of March 15th. If the comet's trends follow predictions, it will have probably dimmed to magnitude 1 by that time and be an incredible vision low on the sunset horizon and located in the constellation of Pisces (RA 00 33 07.8 Dec +07 10 29).
Mid-March is time for Comet C/2011 L4 PANSTARRS to begin its sojourn northward. Less than a week after its close approach to the Sun - around the date of March 20th - it should dim by a full magnitude as it reaches the border of Pisces / Andromeda (RA 00 35 20.4 Dec +17 50 42). However, there's still good news for observers! At an estimated magnitude 2, the comet will still be an easy unaided eye object from a dark sky location and glorious in any set of optics!
As Comet PANSTARRS moves further away from the Sun, it will begin losing a tenth to two-tenths of a magnitude per night. By April 1, 2013, it will have faded to magnitude 4.4 and be located in Andromeda (RA 00 31 16.6 Dec +36 33 27). A month later, on May 1, it will have returned to a much dimmer magnitude 7.5 and be located in the Cassiopeia / Cepheus region (RA 00 11 17.9 Dec +67 12 23). This means it should still be within reach of larger binoculars (with 50mm or larger objective lenses) from a dark sky location and well within the range of medium-sized telescopes (4.5"-6"). By May 28, 2013, it will have reached its most northerly declination (RA 19 28 57.2 Dec +85 13 44 and should be around magnitude 9.3.
Does this news mean you'll no longer be able to follow Comet PANSTARRS? Not necessarily. While Comet C/2011 L4 will continue to loose around one to two tenths of a magnitude in brightness per night, it will become circumpolar and be able to be viewed by most Northern Hemisphere observers at any time during the night. On June 1, 2013, it should be located in the Ursa Minor / Draco region (RA 17 20 23.9 Dec +84 31 17) and be at an estimated magnitude 9.5. If you have a larger telescope (12" and up), you should be able to continue to observe Come PANSTARRS for at least another two months. It will remain in the Ursa Minor / Draco region through July 1 (RA 31 13.3 Dec +66 57 34) at magnitude 11 and then continues on through August 1 towards the constellation Bootes (RA 14 40 55.2 Dec +51 29 45) at a very faded magnitude 12.
As always, each comet is unique, and predictions are just that - predictions. Comet PANSTARRS could perform exactly as the professional astronomers think it might, or it might become a surprise. Remember that all brightness and tail estimations rely upon how much the comet dissipates as it nears the Sun and viewing depends greatly on sky conditions at your location.
{ width: 160, height: 160, defaultImage: '', layers: 'Artimg-Comet' }
October, 2013
In October, comet S1 ISON will be spending some quality time with the planet Mars as it moves its way toward the constellation of Leo. By this time, it will become accessible to amateur telescopes at slightly brighter than magnitude 10. An Orion XT8, for example, will be able to pick up Comet ISON from a dark sky site.
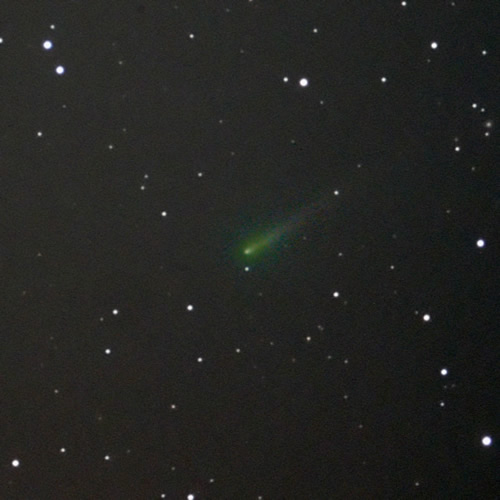
Comet ISON, imaged by Doug Hubbell on the morning of October 6, 2013 from Southern California. Hubbell used an Orion StarShoot Pro camera, Orion Atlas Mount, and Orion EON120 Telescope.
The Hubble Space Telescope imaged comet ISON on October 9, and NASA reported that the nucleus appears to still be fully intact.
"The comet's solid nucleus is unresolved because it is so small. If the nucleus broke apart then Hubble would have likely seen evidence for multiple fragments," says the Hubble Team. "Moreover, the coma or head surrounding the comet's nucleus is symmetric and smooth. This would probably not be the case if clusters of smaller fragments were flying along. A polar jet of dust first seen in Hubble images taken in April is no longer visible and may have turned off."
On October 26 comet ISON will be located within 3 degrees (RA 10 45 33.6 Dec +09 45 40) of the "Leo Trio" (M95, M96 & M105), presenting an excellent opportunity for astrophotographers to image. For even more clues to help you find the comet, on October 30 the Moon passes 6 degrees south of ISON. The comet is located at RA 11 02 43.9 - Dec +07 36 18 and should be very close to magnitude 8 - well within the reach of a small telescope.
November, 2013
As November opens, the race is on! Each night, comet ISON will be gaining in brightness; about two-tenths of a magnitude every 24 hours. It should have a visible coma and a concentrated, sharp nucleus, perhaps even beginning to show a tail!
On November 7 comet ISON passes less than a degree away from Beta Virginis. The comet will be located at RA 11 47 04.8 - Dec +01 46 57 and within reach of small optics at magnitude 7. It is heading towards the Sun and is accompanied in the morning sky by Jupiter and Mars. This comet is a sun-grazer and the closer it gets to our nearest star, the faster the gases and dust will begin to flow away. How much of a tail will it have by now? How big will the coma be? It's anyone's guess at this point in time, but predictions show it brightening between two and three tenths of a magnitude each night, and changing positions faster.
By mid-November, comet ISON will have rapidly moved towards the rising Sun and can be found buzzing through the constellation of Virgo. If predictions hold true, it should have reached at least magnitude 5 by this time and it is about to begin to blaze! Every 24 hours will see comet ISON gaining about 1/5 of a magnitude. Our "traveler" could be on the verge of becoming fantastic!
On November 14, comet ISON is located less than a degree away from 10th magnitude galaxy NGC 4697, making it an excellent target for astrophotographers.
It gets even easier to locate on November 18 as it passes less than half a degree away from bright star, Spica (Alpha Virginis). It will be located at RA 13 24 59.4 - Dec -10 48 47 and be just on the edge of unaided eye visibility at magnitude 5.
Be sure to set your alarm early for the morning of November 23 when you'll find comet ISON is located just slightly less than 5 degrees SSW of planets Mercury and Saturn. It will be located at RA 14 30 41.6 - Dec -17 38 00 and be faint, but visible to the unaided eye at magnitude 3.5.
The closer it gets to the Sun and its November 28 perihelion date, the more the tail will grow and the faster it will brighten. Just how fast will these changes occur? While we can't be entirely sure, it is predicted that ISON will jump several magnitudes in a period of three days - a jump which could possibly make it as bright as the planet Venus!
If comet ISON doesn't come apart, it should reach its maximum magnitude on November 29 and be located at RA 16 23 17.5 - Dec. -19 52 52. From this point forward, comet ISON will rapidly drop in brightness as its dusty "fuel" becomes exhausted. However, by no means is the show over.
December, 2013
The beginning days of December should still find it lighting up the skies at magnitude 1.0 and descending slowly - again just a few tenths of a magnitude every few nights.
By December 25, it should still be an unaided eye object at magnitude 4 and possibly remain as bright as magnitude 4.5 until the end of the year. Will comet C/2012 S1 ISON become one of the infamous "comets of the century"? Let's face it: we have no idea. Each and every comet has unique properties and ISON is no exception. There is just as much possibility that ISON could break apart and fizzle as there is for a spectacular performance. What we do know is that there is potential, and that's an exciting word for astronomers everywhere.
Have you imaged or viewed comet ISON yet? Let us know in the comments!
{ width: 160, height: 160, defaultImage: '', layers: 'Artimg-Comet' }
With the arrival of Comet C/2011 L4 PANSTARRS and Comet C/2012 S1 ISON about to occur during the year 2013, observers around the world are anxious to learn "how bright" this solar system pair may eventually become. While astronomers can only make estimates for any given date at this time, now is a great opportunity to learn how to judge a comet's brightness - also called magnitude - for yourself!
A comet is made up of four distinct sections: the nucleus, the coma, the dust tail and the ion tail. Not all of these parts may be visible at any given observing session, yet all four play an important role in how the comet can be observed. The brighter the comet becomes - it requires less optical equipment to be observed. When it is very distant, only the coma of a comet is visible? the nucleus is far too small to be seen and the whole structure isn't close enough to the Sun yet to have developed a tail. During this time comets are barely visible and usually only seen in CCD images. However, if you continue to follow a comet, changes will occur!
As a comet nears Earth the nucleus will reveal itself and the coma around it will become larger. It can be seen with telescopic aid and will appear much like an unresolved, fuzzy globular cluster or a small elliptical galaxy. The nucleus may be sharp and bright - or just a concentration. As a comet approaches the Sun and begins to sublimate, the tail will also appear - rocky debris creates the dust tail and frozen gases comprise the ion tail. When you can see a comet with ease, you can start to determine its relative brightness. For formal measurements, try using the Harvard Minor Planet Center information or a planetarium program. However, comets are notoriously fickle creatures and an estimated magnitude on a program could be subject to a real life major change in just a matter of hours! Here's where a little learning and fun come into play...
Once you have located and identified your comet target, try heading off to a nearby star for which you have a known magnitude. You can find this information on a printed star chart as a graduated circular scale which appears along with the given magnitudes - or the information may be located on a planetarium program. Once you have selected a sample star, go to the eyepiece, identify it and defocus it. While an "out of focus" star won't be as soft in appearance as the comet's coma, it will still give you a great suggestion of brightness! Use this same method to judge the magnitude of the comet's tail section(s) as well. However, when it comes to the comet's nucleus, it is best to leave your test star in focus to compare.
While these estimations won't replace genuine scientific measurements, it is great fun to experiment and a great way to teach yourself better observing techniques!
{ width: 160, height: 160, defaultImage: '', layers: 'Artimg-Comet' }
With the exciting appearances of both Comet C/2011 L4 PANSTARRS and Comet C/2012 S1 ISON expected to happen during the year 2013, observers around the world will be anxious to relate what they see to other amateur astronomers in a meaningful way... and one of these ways will be reasonably judging the size of a comet's coma and tail.
First let's begin by explaining comet "parts" and how they appear. The body of a comet is divided into two distinct regions - the coma and the nucleus - and not always will both be seen at the same time. While a comet is distant, its coma is basically the only thing visible. It will appear as a soft, fuzzy contrast change, somewhat similar to an unresolved globular cluster or small elliptical galaxy. Because a comet can masquerade as a deep space object, it is always very important to be sure of its position. (Small wonder Charles Messier's famous list of objects that weren't comets became so popular!) Because the nucleus of a comet is inherently small, it doesn't become visible until the comet nears Earth. When the nucleus makes its appearance, it could show as sharp and bright - or may just appear as a more concentrated region. The coma around it will continue to be hazy in appearance, but need not always be regular in shape. Be sure to watch for changes not only in size, but in appearance as well, over a period of time.
The next major part of a comet is its tail. Thanks to the solar wind, the tail will always point away from the Sun. For example, if a comet is making a morning appearance, the tail will appear to be roughly headed west? or if the comet is viewed just after sunset, it will be approximately aimed east. The tail may also appear in two sections. The most common tail appearance is the dust tail - created from the sandy, rocky volatile ingredients of the comet's nucleus. These particles stream away from the comet's body and are illuminated by sunlight and may have a slightly curved appearance. The other section of a comet's tail - the ion tail - can have a slightly blue tint and is formed from the gases flowing away from the comet's nucleus. The ion tail will always point directly away from the direction of the Sun.
Now that we understand the parts of a comet, it's time to be able to make a rough estimate of their size. When viewing through a telescope, try this simple trick: observe an easy deep space object and compare them in size. For example, you might wish to choose a globular cluster such as Messier 3. It spans around 18 arc minutes in size. Compare it to the comet. While you can't place them side by side, it will give you a rough idea. Another suggestion is to determine how many arc minutes your eyepiece reveals. For example, if the full Moon just fills the field of view, your eyepiece covers about 1/2 a degree of sky - or 30 arc minutes. If the comet is covering about a third of that area, its approximate size would be 10 arc minutes. The same holds true of judging the length of comet's tail using the eyepiece. If it extends for two eyepiece fields of view, then the tail would have an approximate length of 60 arc minutes - or one degree.
When using binoculars, judging size isn't difficult if you use your binoculars specifications. Most common binoculars cover between 5 to 6 degrees (5� to 6�) of sky - and your binocular manufacturer should be able to provide you with a specific number for your model. Simply make sure your binoculars are steady and estimate! For unaided eye observing, the principle is roughly the same. If you hold your hand at arm's length and make a fist, your fist covers about 10 degrees of sky. Your average thumb length is about 3 degrees and the width of a single finger is about 1 to 1.5 degrees.
While these aren't scientific measurements, being able to judge the approximate size of a comet's nucleus and tail is a great way to communicate what you see to your fellow amateur astronomers. Would you rather say; "I saw Comet ISON last night." Or "Comet ISON was great last night! It had a bright, sharp nucleus and a coma that was about 15 arc seconds across. The dust and ion tail stretched almost two degrees of sky!" It's great fun to learn and you can do it!
{ width: 160, height: 160, defaultImage: '', layers: 'Artimg-CelestialCoordinates' }

When it comes to astronomy, you will find the term "arc second" used in three ways: (1) to express a given distance in declination on a star chart, (2) as a given unit of an astronomical object's size, and (3) as an expression of telescope's resolving power. Let's take a look at each use of the term in more detail.
First, we'll examine how an arc second is expressed when applied to a star chart and to the visible night sky. Picture the entire dome of the night sky as the face of a clock. The clock is divided into hours, minutes, and tiny seconds. Much like this imaginary clock, the celestial dome is divided into degrees and each degree is comprised of arc minutes and arc seconds. There are 60 arc minutes in each degree, and each arc minute is made up of 60 arc seconds. But, just how big would that be? Let's use the full Moon as an example. It covers approximately 1/2 a degree of night sky - which equals 30 arc minutes or 1800 arc seconds. These measurements are abbreviated into a type of astronomical shorthand. Terms for the Moon's apparent size would read 30' for arc minutes or 1800" for arc seconds.
When you look at a star chart (How Do I Read a Star Chart?), you'll see degrees of declination - measurements from north to south — marked along the edge. Each degree of sky contains 60 arc minutes, or 3600 arc seconds. When using an astronomical catalog or observing instructions, you'll be provided with an "address" of coordinates to celestial objects which utilizes arc seconds. This address may read something like RA 12h 22m 13s — Dec +22� 44' 11". Look at the second set of numbers. This means your object is located twenty-two degrees, forty-four arc minutes, eleven arc seconds north of the celestial equator. Although a single arc second would be too small to visually determine when looking at the sky, it is very important to celestial surveys and catalogs. It is like assigning a celestial "house number" to a specific target and allows astronomers to locate targets with precision.
When expressing the size of an astronomical object, it is often given in terms of angular diameter as seen from Earth — not its true size. Most of the time, these angular diameters are very small since most objects are very far away from Earth, so they are expressed as arc minutes, or more frequently as arc seconds. An astronomical catalog or observing guide will provide an object's size to help observers better understand what to expect from a target before they try to locate it with a telescope. This is helpful if you have never seen a particular object. Let's use two samples to illustrate this concept - a globular cluster and a double star. For example, globular cluster M80 is listed as 10' (ten arc minutes) in size. A good star chart will show this object printed to scale in relationship to the stars around it. This makes identifying it from the surrounding stellar patterns seen in the eyepiece much easier. You knew in advance the cluster would cover a certain amount of distance between identifiable stars. However, the angular distance measurement between double stars is much smaller and is always expressed as arc seconds. A good example is Polaris. The main bright star, Polaris A, is separated from small faint star, Polaris B, by 18" (eighteen arc seconds). By knowing a double star's separation in advance, you can test your telescope's ability to resolve small distances and aid you in determining sky conditions (How Do I Judge Sky Conditions?). Most general star charts don't print separations that small, so you'll need to rely upon your astronomy catalog as a resource for those numbers.
Another place in which you will encounter arc seconds is in a telescope's specifications — the resolving power. This is your telescope's ability (under ideal observing conditions) to "see" or separate a given size or distance. While there are lengthy mathematical expressions used to determine arc seconds of resolution for telescopes, a simple way to understand is to use the known separation of a double star as an example. Let's return to Polaris. If a telescope has a stated resolving power of 1.0" that means it is capable of clearly resolving an object — or distance — of one arc second. That's just 1/18th the distance between Polaris and its companion! With this information, you know our example telescope with a resolving power of 1.0" (one arc second) will be able to "split" the double star Polaris under ideal observing conditions.
While these measurements might seem a little confusing at first, you'll soon understand and appreciate them. Knowing an arc second's distance on a star chart will help you better locate objects by further refining their positions. Being able to add arc minute and arc second directional numbers to a telescope's computer aiming system will make it far more accurate. Understanding an arc second in size will assist you in relating what you see to others. For example, you might observe a comet and want to record its size in your notes. If you know a given object's size in arc minutes or arc seconds, you can compare the two and make a more accurate assessment. By knowing your telescope's resolving ability in arc seconds, you'll also know if you're able to "split" a given double star in advance - or know if your telescope is capable of "seeing" very small separations, such as revealing individual members in a star cluster. Arc seconds might be tiny, but they're very important!
{ width: 160, height: 160, defaultImage: '', layers: 'Artimg-SeeingDark' }

When it comes to astronomical observations, it is important to note what your sky conditions are. The reason is simple enough - sky conditions affect how you see things. You may find, like most amateur astronomers, that you'll enjoy keeping a record of your observations. Understanding how to assess and log factors such as transparency, limiting magnitude and stability are important contributions as to how, and when, you can see certain astronomical subjects. By reading the tips below, you'll be better equipped to more accurately record sky conditions in your observing journals.
Transparency or Clarity
If you have ever taken notice of a blue sky, then you know there is more than one shade of blue. One day it might be pale, the next day a break-your-heart shade that seems like it almost has purple in it. This is caused by transparency - the volume of moisture in the atmosphere - and the amount of thin cloud cover (or even pollutants) at any given time. This same transparency factor carries over into the night. While it might be dark, just how dark is it? Darkness or transparency is judged on a scale of one to ten, with one representing totally cloudy and ten representing maximum clarity. For example, a slightly hazy sky would have a transparency of around five or six. A partly cloudy sky might be considered a three. A perfectly clear night high in the mountains with no Moon, where stars seem to have a life of their own could be a nine! You can even have a moonlit night where very little light is scattered by thin clouds... a seven! The most important thing is to be consistent on the numerical value you assign to any given evening's transparency factor because it affects limiting magnitude.
Limiting Magnitude
The next factor to help you judge sky conditions is limiting magnitude , which indicates the faintest star you can see without optical aid. To assist, you will need to know the magnitude of several stars visible at the time of your observation. You can find this information on almost all star charts. For example, if you were viewing during the summer in the northern hemisphere, you might use such stars as Alpha Cygni (Deneb) with a magnitude of 1.2. Now take a look at Beta Cygni (Albireo). It has a magnitude of 3.1. Next, try 61 Cygni, which has an apparent magnitude of 5.2. If you can see this star, then the limiting magnitude of your sky is at least 5. These stars are only examples, and you can use any star for which you have a given magnitude. Take your samples from various positions around the night sky and list the faintest you can see! Always be sure to wait until you are fully dark adapted.
Stability
The next factor in judging sky conditions is stability. This is how "steady" the sky - and the image in your eyepiece - appears to be. Stability can be attributed to atmospheric conditions, or it may be nothing more than rising heat. Using your telescope, take a look at several stars in different locations in the sky. You will be judging stability, like transparency, on a scale of one to ten. Stars seen near the horizon will almost always appear to twinkle, wink in and out and move around. This is an unstable viewing condition and would rate around a two. If you are looking high above the horizon and the view looks like it is under running water, you might have great clarity, but poor stability. To help you further refine your reading, take a look at something which relies on stability to be seen, like the reasonably close double star Polaris. Does the image split into two stars easily? Do you have to focus and refocus again? If so, you might have a slightly unstable sky. However, don't make a hasty judgment. Ask yourself two very important questions: (1) Are your telescope optics at ambient temperature? And (2) Is your telescope set up in a place that might cause temperature "waves" like a concrete or blacktop surface? These two factors also play a very important role in how you see things. An unstable sky won't stop you from viewing, but never being able to come to perfect focus because of image waiver could cause you to miss small details which would otherwise be visible.
Putting It All Together
Now that you've judged your sky conditions and marked your field notes, don't stop there. While you might have great transparency, great limiting magnitude and poor stability when the evening begins, these conditions can change in a short period of time. Sometimes you'll find the most unusual combination of conditions, too. For example, a night with poor transparency might be the most stable. After you have logged sky conditions for awhile, you'll also be able to judge what types of nights work best for certain observations. For example, very stable nights are great times to shoot for tight double stars and planetary details, while nights with exceptionally good limiting magnitude could be the time to find that extremely faint galaxy you've been craving!
{ width: 160, height: 160, defaultImage: '', layers: 'Artimg-CelestialCoordinates' }
With so many modern stargazers relying on computerized telescopes to locate objects, learning to read a star chart might seem like a lost art form. However, using a star chart is very easy, and it helps you really understand what you're looking at and the way the sky works. Additionally, not all telescopes have on-board computers and not all star gazers want to use them. There's a lot of satisfaction to be gained by learning to use a star chart and manually locating objects. By knowing a few simple instructions, you'll find using a star chart is like a recipe. All you need to know are some common measurements and how to find the key ingredients! Let's start with the basics.
Planispheres and All Sky Chart
The first type of star chart you'll probably encounter is a planisphere or an All Sky Chart. These are normally presented in a round format which depicts the brightest stars and constellations as they are seen during specific times of the year. A planisphere is printed on a wheel with dates and times to help you select a key "window" showing the general night sky for the selected time. Like the planisphere, the seasonal All Sky Chart is designed to be held over your head and aligned with the cardinal directions. Unlike a terrestrial map, all star charts have east to the left and west to the right - the correct orientation to match Earth's movements and the apparent movements of the celestial sphere. To help you understand the concept, hold an All Sky Chart over your head and face south. You'll notice east, the direction of sunrise, is to the left, north is behind you and west, the direction of the setting Sun, is to the right. Now all you have to do match up bright star patterns with what you see and identify the primary constellations. These types of star charts are like gathering together the ingredients.
Formal Star Chart
Once you have familiarized yourself with the constellations and key stars that you see, it is time to get more specific. First, choose an area of the sky in which you'd like to work. You'll notice two sets of numbers along the margin of the formal star chart. Like on a terrestrial map, which uses the alphabet in one direction and numerals in the other, these sets of numbers divide the map into sections. In reading from left to right - which (unlike a terrestrial map) represents east to west - you'll see hours, numbers and seconds. These numbers along the top margin are called Right Ascension and it is abbreviated in celestial coordinates as RA - the equivalent of terrestrial longitude. Each celestial "day" is divided into 24 hours (of rotation of the Earth) and begins on the point of vernal equinox. This "zero hour" is the place in the sky where the Sun crosses the celestial equator during the March equinox (equal times of day and night). The second set of numbers reads from top to bottom - north to south - and they are either positive or negative. This set of directions is the Declination and is abbreviated as Dec. It is the celestial equivalent of latitude. Positive numbers are located above a line on the charts, and an imaginary line in the sky, called the celestial equator. This is the dividing line between the northern half and southern half of the night sky. Negative numbers lay to the south.
Why are these numbers important? All astronomical objects, even stars, are given a set of celestial coordinates which use right ascension and declination. These coordinates remain constant. If you are looking for a specific object, you can use its assigned directional value as a recipe to help you find it! For example, if you wanted to view the Crab Nebula you might ascertain its coordinates from a resource such as an astronomy magazine, an astronomical catalog or an observing book. In this listing you would see the directions: RA 05 34 31 - Dec +22 00 52. This means you can locate it both on your star chart and in the sky at 5 hours, 34 minutes and 31 seconds in right ascension and north of the meridian at +22 degrees, 00 arc minutes, 52 arc seconds. Begin reading your star chart at the zero hour and count the hours across to the west (right) until you reach the fifth hour. Use the declination scale along the side margin and locate positive twenty-two degrees. By looking at the larger scale, you can determine the constellation in which it is located and the general area in which it can be found. Until you have become familiar with the night sky at all seasons, you may need to use a planisphere or All Sky Map to make sure the constellation where your object is located is visible. Once you've determined this, it's time to go on to the next step.
Take a look at the large, printed stars around your object on the map. These primary stars are the ones you'll be looking for when translating map to sky. Note they also have a designation. If you're thinking "That's all Greek to me!" then you'd be correct. Very bright stars are given a Greek letter designation such as Alpha, Beta or Gamma. These designations are not only stellar names, but indications of the star's brightness - starting with Alpha as the most luminous and descending in order. Most good star charts will have a key to these letters as well as a magnitude key where the printed star size is also given a brightness value. Common numerical designations on stars are called either Bayer or Flamsteed numbers. These are stellar catalog numbers assigned to bright stars and were originally created by historical astronomers, Johann Bayer and John Flamsteed. Most ordinary star charts use Bayer numbers - along with Greek letters - but Flamsteed numbers are used where no Bayer designation is given.
From Star Chart To Sky
The next step in using a star chart is to match what you see on the map with what you see in the sky. Begin with the constellation, and then identify the very brightest of the stars you see around your designated target and locate that pattern in the sky. For example, you know from looking at the map that your object is located about ten degrees west of Alpha X. The key is to start big and get smaller, but how do you translate degrees from a book to degrees in the sky?!
Don't panic. A simple way of measuring the sky is to use your hands. Hold your hand outstretched at arm's length. From the tip of your little finger to the tip of your thumb is approximately 20 degrees. If you make a fist, that is about 10 degrees. The width of your thumb is somewhere around 2 to 3 degrees. This easy way of measuring will assist you in finding the general location of what you're looking for. Take an even closer look at your star chart and you'll notice it is also divided into other, smaller sections - usually 10 degrees. While this might seem a little confusing at first, you can learn if you practice!
Now, look at your star chart again. You have found the primary stars around your target and your telescope is aimed in the general direction. Use your optical finderscope to assist you in locating and identifying even fainter stars which match the pattern on the star chart. By knowing how many degrees your finderscope reveals, you can even further refine your hunt.
If you use an equatorial mount, you're also in for a big surprise. Once you have reasonably polar-aligned your telescope and set the axis at least close to your latitude, take a close look at those numerical dials on the mount. Do those numbers look familiar? Darn right, they do! One set is Right Ascension and the other is Declination. It might be like comparing an abacus to a calculator, but these handy tools can also get you very close to the perfect recipe for a starry night!
{ width: 160, height: 160, defaultImage: '', layers: 'Artimg-Orion_Nebula' }

In honor of our 37th anniversary, we have compiled a list of 37 astronomy wonders:
- The Sun - Use a solar filter and look for sunspots.
- The Moon - A great site for beginning stargazing. Easy to find!
- The Perseid Meteor Shower - Happens every August, and you don’t need a telescope to enjoy this Celestial treat.
- Jupiter - The largest planet in our Solar System. You can see its four brightest moons with binoculars.
- Saturn - The disk and rings make for fantastic viewing.
- Mars - The red planet and still visible low in the southwest (Summer 2012).
- Venus - This cloud covered body goes through phases like the Moon and is our closest planetary neighbor.
- Mercury - You will need a clear view of the east or west horizon to find Mercury. Catch it in the early morning sky in August, 2012.
- Uranus - Uranus can be a challenge to find (you need a good star chart), but looks different enough from a star to make it distinguishable.
- Aurora - 2012 is a year of Solar Maximum, if you visit the northern US this summer you might catch these incredible displays caused by solar explosions - the sky looks like its on fire!
- The Milky Way - Easily the most spectacular sight visible to the unaided eye outside the solar System. Its easy to see with the naked eye when the moon is gone and you are away from city lights. Scan it with your binoculars or telescope to see details.
- The Pleiades - The seven sisters. Found above the constellation Taurus; as summer starts, the Pleiades are rising above the eastern horizon about dawn.
- The Orion Nebula - A winter favorite, spot the four stars that give this nebula its glow below Orion’s belt.
- The Double Cluster - NGC884 & NGC869 are two clusters in the Peruses constellation.
- Andromeda Galaxy - This galaxy is the furthest visible object in our night sky.
- Ring Nebula - M57 is a planetary nebula in the Lyra constellation.
- Albireo - One of the brightest double stars.
- Messier 13 - The Great Cluster in Hercules is a Globular Cluster with ten’s of thousands of stars
- Messier 67 - A vivid cluster of stars in the Cancer constellation.
- Dumbbell Nebula - M27 is another planetary nebula that so bright and large it’s easy to find in 10 power binoculars.
- M7 - A huge open star cluster; point your binoculars or wide field telescope a little north east of the "stinger" of Scorpio and you’ll nab it!
- Lagoon Nebula - M8 is in the constellation of Sagittarius and is one of the prettiest emission nebula in the night sky.
- Crab Nebula - M1 is a supernova remnant in Taurus that has a pulsar inside.
- Beehive Cluster - M44 is an open star cluster similar to the Double Cluster. It is in the constellation of Cancerand can be see with binoculars or wide field telescopes.
- Big Dipper - More specifically, the galaxies around the stars of the Big Dipper, including M81 and M82. There are dozens of fairly bright galaxies in this area; get a star chart!
- Eagle Nebula - M16 is best seen through telescopes when the moon is down. It is in the constellation Serpens.
- Swan Nebula - M17 is a glowing cloud of gas also known as the Omega nebula. It is in the Sagittarius constellation.
- Omega Centauri - NGC5139 is the largest known globular star cluster found low in the south in the constellation Centaurus.
- Trifid Nebula - M20 is in the Sagittarius constellation and is made up of smaller nebulas and clusters.
- Globular Star Cluster - M22, again in Sagittarius is one of the brightest clusters in the sky.
- Sirius - The brightest star in the night sky is in the constellation of Canis Major. It also is a binary star system.
- Whirlpool Galaxy - M51is a spiral galaxy in the constellation of Canes Venatici.
- M51b - This is a dwarf galaxy visible right next to the Whirlpool Galaxy.
- The Helix Nebula - NGC 7293, this exploded star is big enough to see with binoculars, but look for it from a dark sky site when the moon is absent.
- M83 - The Southern Pinwheel, is in Hydra and bright enough to see in astronomical binoculars.
- Lunar Eclipses - Check astronomy sites to find the next lunar eclipse visible in your area.
- Just Explore - A clear night sky is filled with an infinite number of astronomy wonders. Set up your telescope and explore from horizon to horizon.
{ width: 160, height: 160, defaultImage: '', layers: 'Artimg-ObservMeteors' }

On just about any evening under a dark sky, you’re likely to see a meteor or two streak across the starscape. They catch you by surprise, serving as a reminder that space is not static — things are moving out there, and fast.
What Are Meteors?
Often called "shooting stars," meteors are really particles from outer space — fragments of comets and asteroids — that burn up from friction as they enter the Earth’s atmosphere. While still in space, the particles are called meteoroids. A very bright meteor is about the size of a grape; typical meteors are more the size of tiny pebbles or grains of sand. A very large meteor may break up as it penetrates the atmosphere, throwing off sparks. Occasionally, a meteor may even make noise as it shoots through the air, though this is rare. The largest meteors do not completely incinerate and actually land on Earth as rocks, called meteorites.
A fireball is a very bright meteor loosely defined as being brighter than the planet Venus, whose maximum magnitude is -4.7.
Ordinarily, you can see about one meteor per hour at a dark-sky location if you watch the sky continuously. These are sporadic (random) meteors, not associated with specific meteor showers. You will see more meteors after midnight, since you are then on the "forward" side of the Earth as it moves along in its orbit.
Meteors En Masse — Meteor Showers
A meteor shower happens when the Earth enters a swarm of meteoroids, usually debris from a comet that trails along in the comet’s orbit. At certain times of the year, the Earth’s orbit intersects that of a comet, and we get pelted with the debris.
Then, the meteor rate rises to 10 or 20 per hour, and possibly even 100 or more per hour at the maximum of some showers! The meteors in a shower all appear to come from the same general area in the sky. More precisely, if you trace the path of each meteor backward, you’ll find that they converge near one point in the sky. That point is called the radiant, and it is different for different showers. Each shower is named for the constellation in which its radiant is located. For example, the Perseid shower in August has its radiant in the constellation Perseus. It is often hard to tell whether a meteor belongs to a particular shower or not, since even during a shower, some meteors appear far from the radiant or are moving in slightly different directions.
Because they occur at particular positions in the Earth’s orbit around the Sun, meteor showers recur on the same date every year. Most showers last two or three days; some are longer, and some are very brief.
Some meteoroid swarms have orbital periodicities of their own, so we don’t encounter them every year. For example, the Leonids were spectacular in 1933, 1966 and 2001. In the "off" years, few or no Leonid meteors are seen.
Below is a list of major showers; there are many minor ones producing smaller numbers of meteors. One major shower, the Quadrantids, is named for an obsolete constellation corresponding to part of Bootes.
Table of Annual Meteor Showers
| Date (every year) | Name of Shower | Remarks |
|---|---|---|
| Jan. 1-5 | Quadrantid | Brief maximum, Jan. 3 or 4. Radiant in Bootes. |
| April 21-23 | Lyrid | Brief and variable |
| May 1-8 | Eta Aquarid | Radiant in Aquarius |
| July 15 - Aug. 15 | Delta Aquarid | Maximum July 27/28 |
| July 25 - Aug. 18 | Perseid | "Old reliable" — strong and regular. Maximum Aug. 12. |
| Oct. 16-26 | Orionid | Maximum Oct. 21 |
| Nov. 15-19 | Leonid | Spectacular in 1933, 1966, 2001. Check astronomy magazines for predicted maximum. |
| Dec. 11-17 | Geminid | Usually a fine shower |
Observing Meteors
Meteor watching is like fishing. You cast your sights upward, sit back, wait a while, and see if you get any bites. You’ll increase your chances by going to a dark-sky location, away from suburban light pollution. Most meteors aren’t very bright, so you’ll see more of them if you go to a dark country site. Your chances of logging meteors are also improved when the Moon is below the horizon, or during the new Moon phase, as moonlight can wash out all but the brightest fireballs.
Observing meteors is a naked-eye activity. You don’t need, or even want, a telescope or binoculars to view meteors, as these will only restrict your field of view. You want to be able to visually canvas as much of the sky as possible, because meteors can flash anywhere. For scientific work you’ll need a star chart (for plotting meteor paths) and a ruler (to hold up against the sky to note exactly where a meteor went). More important is a lawn chair and, if appropriate, blankets to keep you comfortable during your vigil.
You will notice that meteors not only differ in brightness, but also in speed and length of travel. Some appear to move relatively slowly, glowing for a second or two while others streak quickly and are gone in a fraction of a second. Some of the brightest meteors leave vapor trails in the sky that can linger for several seconds after the meteor has disappeared.
While looking for meteors you’ll see plenty of airplanes and satellites, too. How do you distinguish them from meteors? For one, meteors move much faster. Another dead giveaway for an airplane is a blinking light. Binoculars will help you identify airplanes, which normally have more than one light. A satellite looks like a slowly moving star. An iridium satellite occasionally reflects sunlight so that it looks like a bright, slow meteor; however, the movement is much slower and it fades out rather than burning up suddenly.
Telescopic Meteors
Occasionally, you’ll see a tiny, distant meteor in binoculars or a low-power telescope. These are called telescopic meteors and are so rare that you probably shouldn’t spend time looking for them — but take note when you happen to see one while viewing other things.
Photograph a Falling Star
Photographing meteors is relatively easy — if you encounter a meteor at the right place and right time! The technique is to use a DSLR or camera with a manual exposure setting using anormal or wide-angle lens (preferably f/2.8 or faster) and take a long exposure of the stars. If a bright meteor comes through the field, the camera will probably catch it.
The camera can stand on a fixed tripod (recording the stars as trails due to the Earth’s motion) or on a clock-driven telescope (to get pinpoint images of the stars). Light pollution and your local sky qulaity conditions will limit how long the exposure can be before the image quality degrades. Experiment with different exposures and ISO settings to determine the best results for your set-up and location.
You’ll likely catch a lot of airplane and satellite trails in your pictures, too. You can distinguish them from meteor trails by their uniform thickness (or the regular-spaced, dots from an airplane’s blinking light). A meteor trail is usually not uniformly thick, but rather almost always exhibits a bright "head" where the meteor burned up.
{ width: 160, height: 160, defaultImage: '', layers: 'Artimg-ObservMoon' }
Of all the celestial sights that pass across the sky, none is more inspiring or universally appealing than our planet's lone natural satellite, the Moon. Remember the rush of excitement that you felt when you first peered at the rugged lunar surface through a telescope or binoculars? (If you haven't, you'll be amazed.) The first view of its broad plains, coarse mountain ranges, deep valleys, and countless craters is a memory cherished by stargazers everywhere.
A New View Every Night
Since the Moon orbits our planet in the same time that it takes to rotate once on its own axis, one side of the Moon perpetually faces Earth. Though the face may be the same, its appearance changes dramatically during its 27.3-day orbital period, as sunlight strikes it from different angles as seen from our standpoint. Due to the sunlight's changing angle, the Moon presents a slightly different perspective every night as it passes from phase to phase. No other object in the sky holds that distinction. (Note that it is actually 29.5 days from New Moon to New Moon; the added time is due to Earth's motion around the Sun.)
The Moon is the ideal target for all amateur astronomers. It is bright and large enough to show amazing surface detail, regardless of the type or size of telescopic equipment, and can be viewed just as successfully from the center of a city as from the rural countryside. But bear in mind that some phases are more conducive to Moon-watching than others.
The Best Times to View It
Perhaps the most widespread belief is that the Full Moon phase is the best for viewing, but nothing could be further from the truth. Since the Sun is shining directly on the Earth-facing side of the Moon at this phase, there are no shadows to give the lunar surface texture and relief. In addition, the Full Moon is so bright that it can overwhelm the observer's eye. Although no permanent eye damage will result, the Full Moon is uncomfortable to look at even with the naked eye. Instead, the best time to view the waxing Moon is a few nights after New Moon (when the Moon is a thin crescent), up until two or three nights after First Quarter (First Quarter is when half of the visible disk is illuminated). The waning Moon puts on its best show from just before Last Quarter to the New Moon phase. These phases show finer detail because of the Sun's lower elevation in the lunar sky.
 Using a Moon Filter Improves the View
No matter what the phase of the Moon is, the view is almost always better through a lunar filter. It screws into the barrel of a telescope eyepiece and cuts the bright glare, making for more comfortable observing and bringing out more surface detail. Some lunar filters, called variable polarizing filters, act something like a dimmer switch, permitting adjustment of the brightness to your liking.
Notable Surface Features
The Moon is dominated by large, flat plains known as maria; the singular is mare (meaning "sea"), which is pronounced (MAH-ray). Maria were first thought to be large bodies of water. In reality, the maria are ancient basins flooded by long-solidified lava created some three billion years ago when the Moon was still volcanically active. All are relatively free of craters except for a few scars from impacts that have occurred since. Their romantic-sounding names, such as the Sea of Crises, Sea of Fertility, Sea of Serenity, Ocean of Storms, and the Sea of Tranquility, are believed to date back to the mid-17th century.
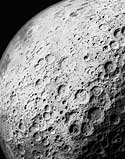 Surrounding the maria are the lunar highlands, dominated by nearly uncountable craters that measure up to several hundred miles across. Most are believed to have been created when debris from the formation of the solar system collided with the young Moon, leaving a permanent record of the barrage on its surface. Some of the more spectacular lunar craters include Tycho, Copernicus, Kepler, Clavius, Plato, and Archimedes, all named for figures of historical stature. Tycho, Copernicus, and Kepler are especially noteworthy, as each displays a broad pattern of bright rays radiating outward. These are particularly impressive during the Moon's gibbous phases (between Quarter and Full), when the Sun appears high in the lunar sky. The Moon also has several noteworthy mountain ranges, such as the Alps and Apennines, as well as straight cliffs, towering ridges, broad valleys, and small, sinuous rilles.
Focus on the Terminator Region
The greatest amount of detail is visible along the Moon's terminator, the line separating the lighted area of the lunar disk from the darkened portion. It is here that the Sun's light strikes the Moon as the narrowest angle. This casts the longest shadows, increasing contrast of lunar features and showing the greatest three-dimensional relief. Sometimes you will notice a bright "island" surrounded by darkness on the dark side of the terminator. That's a high peak, tall enough to still catch the light of the setting Sun, while the lower terrain around it does not.
A Great Target for Telescopes or Binoculars!
So, the next time the Moon is riding high in the sky, take time to visit our nearest neighbor in space. A binocular provides a terrific view; use a tripod or brace it against something to hold it steady. If you have a telescope, begin with a low-power eyepiece. Slowly scan across the lunar disk and try to imagine the emotion that the astronauts must have felt as they orbited that alien world, a world so close to our own, yet so astonishingly hostile and different — "magnificent desolation," as Edwin Aldrin put it during his and Neil Armstrong's historic visit on Apollo 11 in 1969. Then, switch to higher powers for close-up studies of specific areas and features. Get a lunar map or lunar atlas to identify specific craters and features.
 An amazing world, our Moon, so rich in detail and so easy to see.
Checklist of Observable Features
1) Maria — Once thought to be oceans of water, these "seas" are actually vast plains of hardened lava. In some of them you will see giant ripples.
2) Craters — Like snowflakes, no two appear exactly alike. In the center of some larger craters, look for peaks formed from the upsurging of molten rock at the impact point. Look for small craterlets inside craters, too.
3) Crater Rays — Long, bright "splash marks" radiating from a few craters, such as Copernicus and Tycho. Best observed at Full or Gibbous phases.
4) Mountains — Several major mountain ranges scar the lunar surface. Check out the largest one, the Apennines, in the southern half of the Moon's disk along the vertical centerline. You can't miss it!
5) Domes — These small, low mounds often have a tiny craterlet in the middle and tend to cluster in groups.
6) Rilles — Filamentous faults and channels, some of which were once meandering rivers of flowing lava.
{ width: 160, height: 160, defaultImage: '', layers: 'Artimg-ObservPlanets' }

First thought to be gods and goddesses, later believed to be inhabited by alien life forms, today the planets are well known as strange and marvelous worlds. Each has its own set of characteristics and personality; each is a wonder to behold through a telescope.
Most telescopes of any aperture will give pleasing views of the planets, at least of Saturn and Jupiter, because they're so big, bright, and distinctive. The telescope must have clean, high-quality optics, a sturdy mount, and good eyepieces. High-quality refractors have the edge for studying the planets because of their "clear apertures." Any time something blocks a portion of a telescope's aperture (such as a secondary mirror), some image sharpness and contrast are lost. While reflector and catadioptric telescopes need small, secondary mirrors to redirect light to their eyepieces, refractors have a clear light path straight to their eyepieces, keeping contrast at its greatest. Reflectors and catadioptric telescopes work very well on the planets, it's just that a larger aperture is needed to give the same view.
Regardless of the type of telescope, always use your best eyepieces to get the sharpest views. This is especially critical with the planets. Most telescopes come with one or two eyepieces that are fine to start off with, but usually cannot reveal a telescope's full potential. The same instrument will show much more planetary detail just by switching eyepieces. It's almost as good as getting a whole new telescope!
Use Reasonable Power, Not More
A common mistake made by beginners is to think that high power eyepieces are best for viewing the planets. Often, the exact opposite is true. A telescope's ability to gather light from a distant target is based on its aperture (the diameter of its main mirror or lens). Low magnification concentrates that light into a small, bright image, while high magnification spreads that light over a larger area, producing a dimmer image. Too much magnification will cause the image to become so faint that it becomes impossible to focus, or even see.
So, what magnification is best for viewing the planets? That's hard to say, but a rule often mentioned is the "sixty power per inch" rule. Never use an eyepiece that will magnify more than 60 times for every inch of aperture. In other words, 240x is the highest you should use in a 4-inch telescope, while 480x is the highest in an 8-inch telescope. But this also assumes that the telescope and eyepiece are optically perfect and that "seeing" ? the measure of how steady the Earth's atmosphere appears ? is calm. Many nights may only let you use 30x per inch, or even 20x. The best advice is to increase magnification until the image brightness and sharpness begin to deteriorate.
Good "Seeing" is a Must
"Seeing" is just as important as optical quality. Even the best telescope will show only fuzzy planetary blurs if the Earth's atmosphere is turbulent. A good way to judge seeing conditions is to check the stars. If the stars appear to be twinkling, which is caused by a turbulent atmosphere, then conditions are poor for planet gazing. Frequently, the steadiest nights appear slightly hazy, when our atmosphere is more tranquil and seeing is enhanced.
Even with steady seeing, however, a telescope still won't do the planets justice unless its optics are cooled to the outdoor temperature. Depending on telescope aperture and the change in temperature, acclimatization may take anywhere from ten minutes to more than an hour. To keep this time as short as possible, store your telescope in an unheated, but protected, place.
Many observers also recommend using color filters to enhance subtle features on some of the planets. While filters do help, their benefit is best appreciated by experienced observers. Filters are not a substitute for quality optics and steady skies.
Finally, the greatest tool for viewing the planets cannot be purchased anywhere: a trained eye. Most first-time observers only see small, round blurs when viewing the planets. That's normal, so don't be discouraged! Stick with it and observe the planets as often as possible. Don't merely take a quick look. Switch eyepieces (magnifications) until you find that perfect view and study it intently. As time goes on, your eye and brain will become accustomed to seeing fainter, more tenuous detail. Skill as an observer will only be gained by going out night after night and observing.
What Can You Expect to See?
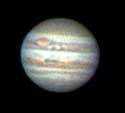 Jupiter: Cloud Bands and Dancing Moons
Of all our planets, none is more impressive through amateur telescopes than Jupiter. This largest planet of our solar system shows off its impenetrable atmosphere of parallel light and dark bands through even the smallest astronomical instruments. The bright equatorial zone dominates the center of the planet, framed on either side by the dark north and south equatorial belts. To either side of these lie the north and south temperate zones, and finally, the darker north and south polar regions. Four-inch and larger telescopes also reveal subtle markings and details within these broad regions. Most notable is the Great Red Spot, a cyclonic storm located on the outer edge of the south equatorial belt. The name is a bit misleading, as the spot usually appears more of a pale pink or orange.
The smallest telescopes will show four of Jupiter's satellites. They make a pretty sight: four small dots flanking the planet's large disk. All were discovered by Galileo, and are collectively known as the Galilean satellites. Which ones are in view depends on timing. Sometimes, two are visible on both sides of the planet, while at other times, three might be seen on one side and one on the other. If one or more is missing, it may be either behind Jupiter, hidden in its shadow, or passing in front of the planet's bright disk. Trying to identify each Galilean satellite by name through a telescope is a fun activity for observers. Astronomical periodicals such as Astronomy and Sky & Telescope publish charts that show satellite orientation during the given month.
Saturn: The Ringed Wonder
Jupiter may be the most impressive planet, but the stunning ring system surrounding Saturn casts it as the solar system's most breathtaking sight. Most people are amazed by the view. Best of all, Saturn's rings are visible with telescopes as small as 2-inches aperture and at magnifications as low as 25-power. Naturally, larger telescopes will show greater detail, including Cassini's Division, a tenuous band of opaque material that divides the outer A ring from the middle, broader B ring. The faint C ring lies along the inner edge of the B ring, but is usually very difficult to make out. Look for its subtle silhouette against the planet's brighter disk.
While Saturn's atmosphere is chemically similar to Jupiter's, it lacks the same prominent banding. Instead, most amateurs can only make out a whitish-beige equatorial region, slightly darker temperate zone, and a still darker polar region.
Saturn is encircled by 18 satellites, with the largest, Titan, visible through small telescopes. Six-inch instruments will show an additional four to five satellites, although all are considerably fainter than 8th-magnitude Titan.
Venus: Goes Through Phases
Venus is the brightest planet in the sky and is often the closest to Earth, yet it shows very little detail through telescopes. Its surface is forever hidden beneath a thick layer of carbon-dioxide clouds. Although this frustrates both amateur and professional astronomers, we can watch Venus go through phases like our Moon, from a thin crescent to a broad gibbous.
Nearly any telescope will show these phases easily. When nearest to Earth, just to one side or the other of the Sun in our sky, Venus shows a slender crescent phase that can actually be seen through 7-power binoculars. As it continues in its orbit, Venus pulls away from Earth, shrinking in apparent size, but broadening to a half phase. Finally, Venus widens to a gibbous phase before moving behind the Sun from our vantage point. As Venus pops out from the other side and moves farther away from the Sun in our sky, the order of phases reverses.
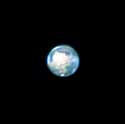 Mars: The Red Planet
Mars has always attracted wide attention among stargazers. Its appearance through a telescope changes dramatically depending on where it is in its orbit compared to Earth. When far away, its small apparent size makes it nearly impossible to see any surface details, except for perhaps a hint of its white polar caps. But when Mars is closest to Earth (at opposition), the Red Planet displays some interesting dark surface features. These dark markings were thought by some in the late 19th century to be man-made "canals," but that was merely an optical illusion.
Even when Mars is closest, 200x or more will be needed to see fine details, demanding a high-quality telescope and eyepieces. During an opposition, 4-inch and larger telescopes can certainly show Mars' two white polar caps as well as some amorphous surface features, but near-perfect seeing conditions are a must for the best view. The easiest dark marking to spot on Mars is called Syrtis Major, which looks like a triangular wedge extending North and South. A second, smaller feature is called Meridiani Sinus, which looks a little like a claw. Finally, take a look for the "Eye of Mars," Solis Lacus, a bright, circular area surrounding a dark middle.
Mercury: Low Rider
Mercury is the most difficult of the five naked-eye planets to see, since it is only visible very low in the west right after sunset, or low in the east just before sunrise. The best time to hunt for Mercury is when it is near greatest elongation from the Sun, when the distance between the two in our sky is farthest. Since Mercury takes only 88 days to orbit the Sun, greatest elongations occur often. Due to the tilt of the Earth compared to the plane of our orbit, the spring and early summer prove to be the best times of year for observers in the Northern Hemisphere to spot Mercury during evening elongations, while the fall and early winter are best for seeing Mercury in the early morning. The exact opposite is true from the Southern Hemisphere. Even then, seeing Mercury with the naked eye is difficult because of the bright, twilight sky. Binoculars and finder scopes can help isolate the planet.
In a telescope, Mercury appears as a tiny gray disk. Like Venus, it goes through different phases; the apparent size of its disk varies with phase. Because Mercury hugs so close to the horizon, the disk usually shimmers from atmospheric turbulence. A better image can be obtained when the planet is higher in the sky, during evening or morning twilight, even though the contrast between the planet and the sky won't be as good.
Uranus, Neptune, & Pluto: Challenging Quarry
Uranus and Neptune are challenges that can only be met using optical aid. The former is seen as a greenish, 6th-magnitude "star," while Neptune looks like an 8th-magnitude, turquoise point. Neither will show any detail through most amateur telescopes apart from their distinctive colors. Finally, Pluto shines faintly at about 13th magnitude. While Uranus and Neptune can be glimpsed through 7-power binoculars, Pluto demands at least a 6-inch telescope to be seen. All require a detailed star map to identify them from their surroundings.
Relish Those Fleeting Moments of Great Seeing!
The view of a planet is not continuously crisp and clear in the eyepiece. Usually the seeing conditions effectively "blur" the image to varying degrees, smearing out some of the finer detail. But there are brief moments when the planet's disk will appear very sharp, and these are the moments to relish. Under the right conditions you get enough of these moments of clarity to make the viewing highly worthwhile. Be patient, keep tweaking the focus to make sure it's right on, and adjust the magnification down enough so that your optics aren't blurring the image.
Each planet shows off a set of unique characteristics through telescopes both large and small. If one of the planets is visible in tonight's sky, take a moment to gaze its way and say hello to one of your celestial neighbors.
{ width: 160, height: 160, defaultImage: '', layers: 'Artimg-EnjoyAstro' }

For anyone who has dared to look up and wonder at the splendor of a starry sky, the appeal of astronomy may be beckoning. Submit to it in the slightest and you may get hooked! Once you do, the universe, and your place in it, will never look the same. And the more you learn, the more the picture changes. Astronomy is a hobby that allows you to pace yourself, so take heart, you can go as slowly or as quickly as you like. The universe is a patient place — one that doesn’t mind waiting while you take the first steps toward understanding.
The Milky Way, in all its glory, reveals itself wondrously to the naked eye. To experience the full impact of a meteor shower, the best optics in town are still two eyeballs. If you stare into the night long enough, gaseous nebulas, glittering star clusters, and curious fuzzy patches begin to emerge, and a blazing fireball may suddenly interrupt the calm. The stellar patterns of constellations take shape. Stars appear not just as uniform white specks, but as variously hued light sources, from barely perceptible to boldly bright.
Through a pair of binoculars, hundreds of stars appear suddenly where there was only darkness a moment ago. Colors jump out at you as you scan for red giant stars such as Betelgeuse or hot blue stars like Sirius. Dense star clouds and tight knots intermingle with inky, starless voids. It’s a view you’ll be drawn to again and again.
Even more compelling is a good long look through a telescope. Sure we’ve all seen the pictures, but nothing quite compares to seeing the ice crystal rings of Saturn for the first time, or Jupiter with its four perfectly aligned moons. Our closest satellite, the Moon, will stun even the most skeptical beginner with magnificent views of its rugged, crater-laden terrain.
And it gets better. The bigger the telescope, the more light it gathers, allowing you to see even deeper into space. Suddenly, the Great Red Spot of Jupiter appears in color, and the cloud belts in its upper atmosphere take on definition. Star clusters resolve into distinct stellar groupings, like snowflakes, no two of which look the same. Ghostly puffs of gas and dust called nebulas mark both the birthplaces and deathbeds of far-away suns. And a myriad of faint, mysterious "island universes," or galaxies, challenge our powers of perception as they reveal a multitude of different shapes and subtle structural intricacies.
Astronomy is truly a fascinating hobby. From your backyard, and with nothing more than your own two eyes and, if you wish, an ordinary pair of household binoculars or an inexpensive telescope, you can travel, visually, farther out into space than you ever dreamed, discovering wonders that boggle the mind. It’s a hobby you can enjoy by yourself in quiet contemplation, or together with family and friends.
So go ahead and take a look. You have nothing to lose, and literally a universe to gain.
{ width: 160, height: 160, defaultImage: '', layers: 'Artimg-StarsDeepSky' }

Galaxies
When you observe a galaxy, you're looking beyond the boundaries of our own Milky Way galaxy at a colossal stellar system millions of light years away. Spiral galaxies feature a central bulge of old stars surrounded by spiral arms containing younger stars and laced with gas and dust. Barred-spiral galaxies have an obvious central "bar" of material. Spirals are further classified as Sa, Sb, Sc, Sd, or Sm (or SBa, SBb, etc. for barred spirals) according to how tightly their arms are wound, with Sa being the tightest and Sm the loosest. Intermediate classifications are designated by ab, bc, and so on. SO galaxies are poorly defined spirals with bright disks but no discernible arms. Sp galaxies are peculiar spirals that don?t fit the standard profiles. Elliptical galaxies are armless masses of elderly stars. They vary from nearly spherical (E0) to highly flattened (E7). Irregular galaxies show no symmetry, exhibiting odd or chaotic structures. So-called peculiar galaxies do not fall into any of the above classifications.
Galaxies are tilted at different angles to our line of sight, from edge-on to face-on. The sense of dimensionality adds to the enjoyment of viewing galaxies. Note that the magnitude listed for galaxies or other "extended" objects can be deceiving. It represents overall light output; however, the light is spread out over an area of sky, reducing the object?s surface brightness. Thus, an 8th-magnitude galaxy will appear fainter than an 8th-magnitude star, whose light is concentrated at a single point.
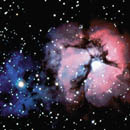 Nebulas
Ghostly clouds of gas and dust, nebulas reside in the spiral arms of our galaxy. Emission nebulas shine on their own, as intense ultraviolet radiation from nearby stars excites hydrogen gas, causing it to fluoresce. Reflection nebulas do not glow; tiny dust particles merely reflect the light emitted by nearby stars. Dark nebulas consist of cold dust and gas that absorb or scatter starlight. We infer their presence by the absence of light visible behind them. Planetary nebulas (PN) are the expelled shells of aging stars. They appear as small, bright disks. Although planetaries usually have a high surface brightness, their faint central stars can be difficult or impossible to detect in small instruments. The remains of more violent stellar explosions are called supernova remnants.
Star Clusters
Stars congregate in two different types of clusters: open and globular. Open clusters, also called galactic clusters, contain from a few to upwards of 100 young stars born from a common cloud of hydrogen gas and cosmic dust. These loose groupings, held together gravitationally, are found mostly in the Milky Way band. Many open clusters are best viewed with low power, making excellent targets for binoculars. Globular clusters are quite different, and more challenging to observe. They are tightly packed balls of thousands or hundreds of thousands of older stars that lie in a halo around the central hub of our galaxy. Part of the fun of observing globular clusters, as well as the challenge, is in trying to resolve individual stars. This is easier to do for the larger and less condensed globulars. Larger telescope apertures also help. Stars on the fringes of the cluster will resolve first. Asterisms are not clusters per se, but distinctive patterns of unassociated stars.
Double and Multiple Stars
Although most stars may appear to be single, the majority actually consist of two or more stars bound together gravitationally, orbiting around a common center of gravity. Some of these binary star systems can be separated into their component stars with a small telescope, revealing beautiful color and magnitude contrasts as well as varying degrees of separation. Optical doubles are not physically associated; these stars appear close together in the sky only because they lie along the same line of sight. Observing double stars requires a still atmosphere (good "seeing"), especially when trying to split very close doubles using high magnification. Large apertures will resolve more doubles than small apertures. Defocusing the stars a bit can accentuate their colors.
Variable Stars
Variable stars change in brightness over time. Estimating a variable star's magnitude at various time points and plotting its "light curve" is a worthwhile activity. To accurately estimate the magnitude, you must compare the variable to stars of known, fixed magnitude, preferably in the same field of view. Exact star magnitudes can be found in a star catalog or on special variable star charts.
Long-period variables, known as Mira-type variables after the prototype Omicron (o) Ceti, or Mira, in Cetus, are pulsating red giants whose magnitude varies over several months. The light fluctuations differ in duration and amplitude with each cycle. Cepheid variables, named after the prototype Delta Cephei, in the constellation Cepheus, exhibit very regular and precise brightness fluctuations ranging from one day to several days. A Cepheid's period (the time it takes to cycle from maximum brightness to minimum and back to maximum again) and its intrinsic luminosity are directly related: the longer the period, the more luminous the star. RR Lyrae variables have short, regular periods of less than one day. Irregular variables have unpredictable periods. Eruptive variables are stars whose brightness changes irregularly and often suddenly. R Coronae Borealis stars are in this class; they exhibit occasional sudden drops in magnitude. RV Tauri variables are pulsating supergiants with alternating primary and secondary minimum magnitudes. Eclipsing variables are really binary pairs of steady-shining stars that orbit each other edge-on to our vantage point. Periodically, one member of the pair passes in front of the other, temporarily blocking its light. Algol, in the constellation Perseus, is a classic example of an eclipsing variable.
{ width: 160, height: 160, defaultImage: '', layers: 'Artimg-Messier' }
Nicknamed the "Comet Ferret" by France's Louis XV, astronomer Charles Messier (1730-1817) charted the positions of certain celestial objects that he felt could be mistaken for comets. In doing so he hoped to reduce "false alarms" in the hunt for new comets.
Today, his "catalog" of 110 nebulas, star clusters, and galaxies comprises many of the more stunning gems of the night sky—compelling subjects for viewing with amateur telescopes. Various Messier objects are available to view on any given night. Indeed, there is no better way to learn the night sky and develop your observing skills than to locate and study these luminaries.
In doing so, you will be treated to a rich diversity: 26 open star clusters and 29 globular clusters; 28 spiral galaxies, 11 elliptical galaxies, 1 irregular galaxy; 7 diffuse nebulas, 4 planetary nebulas; 3 asterisms; and 1 supernova remnant. They reside in 36 different constellations.
Some M objects, like M42 (the Orion Nebula) and M31 (the Andromeda Galaxy), are easy-to-find celestial guideposts. Others take more diligence to spot. Most are visible in binoculars or a small telescope. They are popular quarry at star parties; enthusiasts have even formed Messier "clubs." Messier "marathons" are held each spring, when it is possible to "bag" all of the Messier objects in a particular night (should one be so inclined)!
Interestingly, Messier's list includes many objects that couldn't possibly be mistaken for comets even with the naked eye. The loose, bright cluster known as the Pleiades (M45) is one example. It is possible that his initial motivation for documenting the positions of "comet-like" objects evolved to a desire to catalog a broader repertoire of nebulas and clusterings for their own sake. His findings were bolstered by the inclusion of some 27 objects cataloged by a fellow astronomer, Pierre M�chain.
The irony of Messier's enduring legacy is that his aim, at least initially, was to steer observers away from these now famous treasures. Instead, get thee to a telescope and seek them out!
{ width: 160, height: 160, defaultImage: '', layers: 'Artimg-Constellations' }

Constellations are like countries on a wall map. They help narrow down the search for those tiny hard-to-find little cities or deep sky objects you would like to visit. By learning the constellations, you also share in the imagination of the people who created them thousands of years ago. Today there are 88 internationally recognized constellations. From either hemisphere, forty-five to fifty should be visible throughout the year.
Most northern constellation names come from the Greeks and Romans, who had vivid imaginations and no television to watch at night. They depicted the lives of the gods and goddeses, heroes and monsters that made up their legends. The southern constellations were mostly named during the seventeenth century by European astronomers who gave them mundane names like the Microscope, the Telescope, and the Sextant.
Expanding Your Horizons
Not all the constellations look like what they’re supposed to, and there are so many of them, it’s tough to keep them all straight.
First, get a good star chart. A revolving star wheel, called a planisphere, is an excellent choice. When you set it for the current time and date, it shows what stars and constellations are visible from your location right then. Monthly star charts that appear in astronomy magazines also work well. Use a flashlight that emits red-colored light to read your star chart. Red light works best because it does not spoil your night vision like white light does. Stay away from porch and street lights too.
The next step is to decide just what constellations you want to tackle. On any given evening, set your sights on mastering no more than four new star figures. Carefully trace them in the sky as you learn them and then go back and review the ones you found earlier. On your next night out, before you push off again into uncharted waters, go over what you memorized the previous night.
Studying the constellations over a period of a few hours also serves as a dramatic reminder that the Earth is spinning in space. Constellations near the equator rise and set while those near the North or South poles always seem to be hanging around in the sky. The circumpolar constellations located near the North Celestial Pole include some very famous star groups such as the Big Dipper, the Little Dipper, and Cassiopeia.
What’s Your Sign?
When pointing out constellations to someone else, be prepared for someone to ask the big question. "Can you show me my astrological sign?"
Twelve constellations make up the signs of the Zodiac. The reason these particular star groups were chosen is because they form the "Highway of the Gods." If you point your arm to the east where the Sun or Moon came up and move it across the sky to where it set, you have just traced out the ecliptic, or the pathway where all the major members of our solar system can be found. The early Greeks and Babylonians thought the planets, the Sun, and Moon were gods walking across the sky. They also recognized that the constellations visited by these gods must be very special. That is why these twelve particular constellations were chosen.
Incidentally, there is a lot of confusion when people go out on their birthdays and try to locate their sign in the night sky. When the ancients put this whole thing together they reasoned that the constellations must be at their greatest importance when the King of the Gods, the Sun, was visiting them. So, on your birthday, you will not find your sign in the nighttime sky. It is straight overhead at 12 noon right behind the Sun. Unless you are blessed at that very moment with a total solar eclipse (when some stars are briefly visible in the daytime), you will have to wait six months before your special constellation rolls around to the nighttime sky.
Capturing the Constellations on Film
Putting together your own personal set of constellation photos is fast and easy. All you need is
1) a 35mm camera capable of time exposures
2) a 50mm or 55mm lens
3) a steady tripod
4) a shutter release cable (with lock)
5) slide or print film (ISO 400 to 1000)
To create your own set of constellation photos, first set your lens at f/2.8 to prevent stars from looking like footballs around the edges of your photograph. Set your focus at infinity. Then frame the constellation in the camera finder, and open the shutter for about 20 seconds. Exposures longer than 20 seconds will begin to record the rotational movement of the Earth, and the stars will "trail" on the film instead of appearing as nice sharp points. You will be amazed at the sheer number and different colors of stars visible in the photographs that were invisible to your eyes alone.
{ width: 160, height: 160, defaultImage: '', layers: 'Artimg-SeeingDark' }
You've probably noticed that when you first go outside from indoors on a starry night, you can see relatively few stars. But then, as your eyes adjust to the darkness, many more stars come into view. This phenomenon is called dark adaptation, and it is crucial for visual astronomy, especially for observation of faint objects, such as galaxies and nebulas.
There are many ways you can improve and maximize your night vision. But first we must understand how night vision works.
Dark Adaptation: A Complex Process
Dark adaptation begins as soon as you enter a dark environment, and it happens in several steps:
- The iris of your eye opens the pupil, the "black hole" in the center, to its maximum width, usually 5 to 7 millimeters. Though this is the most visible aspect of dark adaptation, it is only the first step.
- Next, a pair of chemicals in the eye, rhodopsin and iodopsin, begin to take effect. These two chemicals are always present in the eye, but they break down in the presence of light, so when the eye is exposed to bright light these chemicals have no effect. But when in the dark the concentration of these chemicals begins to grow and the rod cells and cone cells in the retina become more and more light sensitive.
- At first, most of the increase in night vision comes from the cones, which are densely concentrated in the center of the retina. They are highly sensitive to color and are important for distinguishing fine detail. After 7 minutes or so the cones have reached their maximum sensitivity, while the rods, which are insensitive to color but are more sensitive than cones to low levels of light, keep gaining in sensitivity for another 20-30 minutes.
At the end of a half-hour or so the eye has achieved almost all of its dark sensitivity, with a small increase continuing until about 1 hour or so.
The Rods Have It
When your eye is fully dark adapted, most of your night vision comes from the rod cells in the retina. But the rods are not color sensitive, which is why in the dark you can see only shades of gray. The bright colors you see in pictures of nebulas and galaxies are typically only visible in photographs (film being much more sensitive to colors than a dark-adapted eye).
Most people are aware that night vision is not in color, but few realize that you see less fine detail at night as well. This is because the rods are not as tightly packed as the cones, so they cannot distinguish detail nearly as well. To prove this to yourself you need only look at a tree about 50 feet away: In the daytime you can clearly make out the leaves in the tree; at night you can make out the outline of the tree, but not the individual leaves.
Ten Tips For Improving Your Night Vision
So now that you know how night vision works, here's how to maximize your ability to see in the dark.
1) Observe from a dark site. Any amount of light will reduce your dark adaptation, so get away from street lamps, porch lights, car headlights, and urban skyglow.
2) Avoid bright sunlight as much as possible during the day prior to an evening's observing session, especially later in the afternoon. Exposure to intense light can hamper your dark-adaptation for a long time! Wear sunglasses when you have to go outside.
3)  If you are in a light-polluted location consider wearing dark glasses or special red night-vision goggles at all times except when looking through the eyepiece. It may seem odd to wear dark glasses at night (and certainly don't do that when you're driving), but it can be a real help.
4)  When you need some light to see what you're doing, use a dim red flashlight, the dimmer the better. A red light with adjustable brightness is very handy because it allows you to dial down the brightness to the bare minimum required. (Red light works best because it is less efficient than white light at breaking down the iodopsin and rhodopsin that allow your eye to see in the dark.)
5) Your eyes adapt to darkness independent of one another, so if you have to look at something bright do so with one eye, saving the dark adaptation of your other eye.
6) 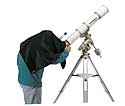 In light-polluted areas, do whatever you can to block ambient light from your eyes. For instance, consider using a dark shroud over your head to block out distracting light when at the eyepiece. Cupping your hand around your eye and the eyepiece helps, too.
7) When you take a break during a night of observing, say to go inside to warm up or grab a bite to eat, put on a pair of red goggles. If you don't need to see what you're doing, cover your eyes with a dark cloth and relax. Even though your eyes may seem fully dark adapted, after a half hour with your eyes completely sealed from light you may find that you gain a bit more acuity.
8) Use averted vision. The rod receptors, which are most sensitive to dim light, are more highly concentrated around the periphery of the retina than in the center. This means that you can see faint objects better by looking slightly off to the side of them rather than straight at them. Try it.
9) Breathe deeply. Avoid the tendency to slow your breathing rate or hold your breath when concentrating intently on a dim object. Reduced oxygen diminishes your night vision. Many experienced astronomers use the trick of "oxygen loading" before observing a particularly faint object, to enhance their visual acuity. Breathe deeply for 15 to 30 seconds just before looking into the eyepiece, and continue doing so as you observe. Don't go overboard, though. If you start feeling dizzy, breathe normally!
10) Avoid drinking alcoholic beverages before or during an observing session. Alcohol is a depressant and will decrease your visual acuity. Wait until after you're finished to crack open that cold one!
In astronomy the name of the game is seeing as much as you can possibly see. For that reason it pays to take a few extra steps to achieve and maintain your maximum dark-adapted night vision, particularly because it is so easy to do.
{ width: 160, height: 160, defaultImage: '', layers: 'Artimg-CelestialCoordinates' }
"It’s about 500 light-years away in the direction of one of the spiral arms of the Milky Way." Directions like those sound good in a science-fiction story, but they won’t help you find anything in the night sky. In this article, we will explain the coordinate systems that are actually used in astronomy.
The need for a coordinate system is obvious: it’s a way of pinpointing the exact locations of celestial objects in the sky.
The first thing to get used to, as a skywatcher, is that the Earth is the center of your universe, though not of the real one. That is, you are always standing on the Earth, and that’s what everything seems to revolve around.
Great Ball of Stars!
Specifically, it’s convenient to think of the sky as a gigantic celestial sphere, a globe surrounding the Earth. The sphere is assumed to be infinite in size; the planets and stars are so far away that their distances don’t matter. When you step outside and look up, the sky appears as a dome, a hemispherical bowl. It isn’t, of course, but the illusion works for our purposes.
As the Earth rotates, this bowl seems to twirl around. The Earth rotates from west to east, which causes the sky seemingly to rotate from east to west, once every 23 hours and 56 minutes (one sidereal day). The stars stay in fixed positions on the celestial sphere (because they’re so far away); the Sun, Moon, and planets gradually move around it in their orbits, so it takes four more minutes (making a total of 24 hours) for the Sun to get back to the same position.
Latitude and Longitude, Astronomy Style
On the celestial sphere, astronomers use lines similar to those of latitude and longitude on the Earth. The astronomical equivalent of latitude is declination, measured in degrees (°) of arc, positive for north and negative for south. Each degree is divided into sixty minutes (’), and each minute is divided into 60 seconds (’’). (Seconds are used only when great precision is needed.) "Declination" comes from a Latin word for "bending" or "angle."
The celestial equivalent of longitude is right ascension (a rather clunky term, for sure). It is measured in hours (0 to 24), minutes, and seconds, rather than degrees, for reasons we’ll get to presently. For example, the pole star, Polaris, is at right ascension 2 hours 32 minutes, declination +89° 16’. The Table below shows the right ascensions and declinations of some other bright stars.
Positions of some bright stars (Epoch 2000.0)
| Star | Right Ascension | Declination |
|---|---|---|
| Sirius (in Canis Major) | 6h 45m 09s | -16° 42’ 58’’ |
| Regulus (in Leo) | 10h 08m 22s | +11° 58’ 02’’ |
| Arcturus (in Boötes) | 14h 15m 40s | +19° 10’ 57’’ |
| Altair (in Aquila) | 19h 50m 47s | +8° 52’ 06’’ |
| Fomalhaut (in Piscis Austrinus) | 22h 57m 39s | -29° 37’ 20’’ |
The strange name "right ascension" has to do with the rising of a star as viewed from the Earth’s equator, where stars with low declinations rise (ascend) vertically (straight up).
The right ascensions and declinations of stars are essentially fixed, although they shift very slowly because of precession, a gradual change in the direction of the Earth’s axis. The reason most star charts say "Epoch 2000.0" is that they show star positions for the beginning of the year 2000. Earlier, we had Epoch 1950 and Epoch 1900 charts. The rate of precession is 1° every 72 years, but different parts of the sky are affected to different extents.
On the contrary, the Sun, Moon, planets, comets, and asteroids are not fixed relative to the stars. They move around. You have to look up their right ascension and declination for a particular date.
The declination of Polaris, +89° 16’, is almost 90° north, which means Polaris is less than a degree away from the north celestial pole. That’s the point around which the stars appear to twirl (for Northern Hemisphere viewers). You can line up the polar axis of an equatorial mount by sighting on Polaris. If you live south of the equator, you can’t see the north celestial pole; instead, you see the south celestial pole, which is not marked by a bright star (although Sigma Octantis is close). An old astronomers’ joke is to report the discovery of some interesting object "about ten degrees south of Sigma Octantis" — there’s no such place, because declinations range only from +90° to -90°.
The point directly over your head, the zenith, has a declination the same as your latitude on Earth. The point directly south of you on the horizon has negative declination of 90° minus your latitude; for example, declination -50° if your latitude is 40 north. That’s why objects such as the Magellanic Clouds, at declination -65°, are never visible from the continental United States.
We mentioned already that right ascension is measured in hours (0 to 24) rather than degrees (0° to 360°). The two are interconvertible, of course; one hour equals 15 degrees of arc. If you want to give right ascension in degrees, you can; celestial navigators do, and they call it sidereal hour angle (SHA).
The reason right ascension is measured in hours is of course that the celestial sphere seems to rotate as the Earth turns. Its rotation period is called one sidereal day, or 24 hours of sidereal time, which runs slightly faster than mean solar time. If a particular star is directly above you, it will be directly above you again 24 sidereal hours later, or 23 hours and 56 minutes later by the ordinary clock. The sidereal time at any moment is the right ascension of the point directly overhead, as well as points directly north and south of it (along a line called the meridian).
At the same mean solar time — midnight, for instance, or 10 p.m. — the sidereal time will be 4 minutes later each successive day. That’s because the Earth orbits the Sun. The celestial sphere seems to "slip" relative to the Sun (actually, the Sun is moving on the celestial sphere), and that’s why we see different constellations at different seasons.
Most objects rise in the east and set in the west. Along the way, they follow lines of declination, which are circles centered on the north celestial pole.
Some objects near the celestial pole are always above the horizon; they just whirl around and around without setting. They’re said to be circumpolar. Above the Arctic Circle, the circumpolar region is so large that the Sun gets into it and doesn’t set, resulting in the Midnight Sun.
What Does the Coordinate System Mean For Amateur Astronomers?
An object’s coordinates tell you where it is in the sky. If you have a telescope on an equatorial mount, you can locate celestial objects to view by "dialing in" their right ascension and declination coordinates using the mount’s setting circles. (We won’t go into how to do it here.) The setting circles on most equatorial mounts, and the mounts themselves, are not accurate enough to land you right on an object consistently, but they’ll get you close; then you merely have to sweep the telescope a bit using the slow-motion controls until you spot the object.
Conversely, you can use the setting circles to identify objects you happen upon in the sky. By noting the right ascension and declination values of an object your scope is pointed at, you can then look up the values in a star atlas or catalog to find out what it is.
Other coordinates are useful for other purposes. The most obvious are altitude (distance above the horizon, in degrees) and azimuth (compass direction; north = 0°, east = 90°, south = 180°, west = 270°). Computer programs can convert right ascension and declination into altitude and azimuth for a particular place and time.
Also important are ecliptic coordinates. The ecliptic is the line in the sky that corresponds to the Earth’s orbit around the Sun. The planets are always near the ecliptic, in a narrow band called the zodiac. Planetary orbits are always computed relative to the ecliptic, and ecliptic coordinates take the ecliptic as their "equator." Ecliptic latitude is the distance of an object from the ecliptic, and ecliptic longitude is measured along the ecliptic from the place where it passes through declination 0°.
There’s yet another set of coordinates that uses the center line of our galaxy as the equator. Galactic longitude is reckoned in degrees from the galactic center in Sagittarius; galactic latitude is the distance north or south of this center line. These coordinates are used in the study of the structure of our galaxy, but not for finding objects in the sky.
{ width: 160, height: 160, defaultImage: '', layers: 'Artimg-ObservDoubleStars' }
You might never guess it from looking at the sky, but estimates indicate that between one-third and one-half of all stars belong to star systems called double stars or binary stars. Double stars come in many different combinations. Some consist of a faint star teamed with a bright star, while others comprise two equal-magnitude suns. Still others have three or more members, and are called multiple stars. Then, there are optical double stars, two stars that only appear closely set from our vantage point. In reality, these celestial imposters are not physically linked, and in fact are nowhere near each other in space.
For amateur astronomers, binary stars offer both charm and challenge. Many pairs display beautiful color and/or magnitude contrasts, while others are so close together that "splitting" them becomes a good visual test of one’s optics and of the night’s seeing conditions.
In a double star system, the brighter star is labeled the primary or "A" star, while the fainter member is called the companion or "B" star. If the system has other members, they are labeled alphabetically C, D, and so on. Their apparent separations are usually expressed in arc-seconds, abbreviated ". (An arc-second is a small fraction of an angular degree. There are 60 arc-minutes in one degree and 60 arc-seconds in one arc-minute.) Seven-power binoculars will resolve, or separate, double stars separated by approximately 30". A 60mm refractor can split equal-magnitude doubles separated by 2" at high power. A high-quality 6-inch telescope can resolve binaries less than 1" apart, given nearly perfect seeing conditions (i.e., a very steady atmosphere at the time of observation).
Check Out These Pretty Pairs
Some of the prettiest doubles in the sky are made up of two color-contrasting suns, where both shine like glittering jewels against a velvety backdrop. One of the most dazzling binary systems is Albireo in the summer constellation Cygnus. Here, a golden primary star radiates in sharp contrast to its fainter companion, which is blue. Another gorgeous double is Eta Cassiopeiae in the constellation Cassiopeia. It features yellow and red members separated by about 13 arc-seconds.
The table below lists some of the sky’s most interesting stellar couples. You’ll need to refer to a star atlas to find them.
| Star | Constell. | RA | Dec | Mag | Sep | |
|---|---|---|---|---|---|---|
| Spring | ||||||
| Xi Boötis | Bootes | 14 51.4 | +19 06 | 5,7 | 7" | |
| Cor Caroli (alpha) | Canes Venatici | 12 56.0 | +38 19 | 3,6 | 20" | |
| Alcor & Mizar (zeta) |
Ursa Major | 13 23.9 | +54 56 | 2,4 | 12’ | |
| Mizar (zeta) |
Ursa Major | 13 23.9 | +54 56 | 2,4 | 14" | |
| Summer | ||||||
| Albireo (beta) | Cygnus | 19 30.7 | +27 58 | 3,5 | 35" | |
| Nu Draconis | Draco | 17 32.2 | +55 11 | 5,5 | 62" | |
| Rasalgethi (alpha) | Hercules | 17 14.6 | +14 23 | 3,6 | 4" | |
| Epsilon Lyrae | Lyra | 18 44.3 | +39 40 | 5,5 | 208" | |
| Lyra | 5,6 | 2.6" | ||||
| Lyra | 5,6 | 2.3" | ||||
| Autumn | ||||||
| Algedi (alpha) | Capricornus | 20 21.0 | -14 47 | 3,6 | 3’ | |
| Almach (gamma) | Andromeda | 02 03.9 | +42 20 | 2,5 | 10" | |
| Eta Cassiopeiae | Cassiopeia | 00 47 | +57 5 | 3,7 | 13" | |
| Delta Cephei | Cepheus | 22 29.2 | +58 25 | 4,6 | 41" | |
| Polaris (alpha) | Ursa Minor | 02 31.8 | +89 16 | 2,9 | 18" | |
| Winter | ||||||
| Rigel (beta) |
Orion | 05 14.5 | -08 12 | 0,7 | 9" | |
| Pollux (beta) | Gemini | 07 34.6 | +31 53 | 2,3 | 3" | |
| Sigma Orionis | Orion | 05 38.7 | -02 36 | 4,8, 7 |
13", 43" |
|
| Theta1 Orionis | Orion | 05 35.5 | -05 23 | 7,8, 5,7 |
9", 13", 22" |
|
Notes:
"Mag" is the visual magnitudes of the A and B stars, respectively.
"Sep" is the separation of the component stars, usually expressed in arc-seconds (").
Resolution and the Dawes Limit
While all of the doubles in the listing here should be resolvable through nearly all amateur telescopes, others challenge both our eyes and our telescopes to be seen. Just how close will your telescope be able to resolve a double star? In the 19th century, a British astronomer named William Dawes experimented to find how close he could resolve a pair of 6th-magnitude stars with different apertures. This value, called Dawes’ Limit, can be estimated by dividing 4.54 by the aperture of a telescope in inches. In other words, a 6-inch telescope should be able to resolve a pair of 6th-magnitude stars separated by 0.8 arc-seconds, while an 8-inch telescope can resolve stars to 0.6 arc-seconds.
But this is not set in stone. While Dawes’ Limit is a good guide for testing a telescope’s optical quality, resolving power can be greatly affected by a number of things. Above all, seeing conditions play a tremendous role. "Seeing" is a measure of how steady the Earth’s atmosphere appears. A good way to judge seeing conditions is to check the stars. If they appear to be twinkling, which is caused by a turbulent atmosphere, then Dawes’ Limit will never be reached. Frequently, the steadiest nights appear slightly hazy, when our atmosphere is more tranquil and seeing is enhanced.
Easy on the Power
Equally important is the optical quality of a telescope’s optics as well as those of the eyepiece and the observer’s eye. Refractors are often favored for splitting tight binaries, but reflectors and catadioptric telescopes can be equally adept provided their optics are precisely collimated. The secret to success is not to overpower the telescope. Use moderate powers for the best results, as high magnification will also amplify atmospheric turbulence and optical faults.
To test Dawes’ Limit for yourself, choose a binary star that has two equally bright components, both as close to 6th magnitude as possible. A large disparity in star brightness will render the test null and void. Beside steady seeing, be sure to use a moderate-power eyepiece, wait for the telescope’s optics to cool to the ambient outdoor temperature, and move away from any buildings and other objects that may be radiating the heat of the day. Dawes’ Limit will never be reached if test conditions aren’t just so, but under the right circumstances, some observers can actually exceed it.
Observing double stars is a great project for anyone who is looking for an enjoyable and varied observing program as well as an enjoyable way of testing the acuity of both your telescope and yourself. Dozens, even hundreds of targets are waiting for you in tonight’s sky. Perhaps best of all, double stars can be studied from anywhere any clear night of the year. Unlike other, diffuse deep-sky objects that are badly hampered by light pollution, double stars look striking even from urban or suburban skies, even at Full Moon.
{ width: 160, height: 160, defaultImage: '', layers: 'Artimg-Generic_Scope' }

In honor of our 37th anniversary, we offer 37 ideas to celebrate the hobby we love.
- Remember why you got it in the first place - Revisit the joy of stargazing.
- Scan the sky - The sky is constantly changing; there are always new wonders in astronomy.
- Share your hobby - This doesn’t need to be a solo hobby. Share the fun.
- Explore the Moon - Get a field map and log details on the moon.
- Get Ready for Jupiter - Visible now before dawn, the best planetary show in the sky is coming this fall and winter (visible in the early evening); filters help bring out the belt detail.
- Catch Saturn - Saturn is still well placed in the evening sky. You can see the rings with almost any telescope.
- Track Neptune - Neptune is in opposition in August, but still a challenge in a small scope.
- Zodiac - Work your way through the constellations of the Zodiac.
- Star Charts - Having a roadmap makes it easier to find things. Orion offers a monthly chart online
- Find the Orion Nebula - Our all-time, personal favorite!
- Find a Bright Planetary - Even in a city, during the summer, the Ring Nebula is frequently visible. To boost contrast use an OIII eyepiece filter.
- Galaxies - Explore the galaxies. Go beyond the Milky Way to Andromeda and beyond.
- View all Messier objects - Try to find as many of the Messier objects as possible.
- Go Deeper with the Caldwell catalog - Try the same thing with the Caldwell catalog
- Camera - Try astrophotography to take your hobby to a new level.
- Filters - Experiment with color filters on the planets and with SkyGlow filters for nebula.
- Sun - Break out that solar filter. Sunspots come and go all the time.
- Adjust your finderscope - Being unable to find things is frustrating. Taking the time to adjust the scope will make things much easier (or get one if your scope doesn’t have it)!
- Smartphone astronomy - Smartphone’s have astronomy apps available. Keep yours handy.
- Take Pictures with your iPhone - Orion has the adaptors to mount your iPhone to snap pictures of the moon, planets and more.
- Astrogoggles - Astrogoggles protect your night vision when you run inside. For the same reason, get a red-beam flashlight when outside reading charts.
- Laser Pointer - A laser is a fun way to share astronomy with friends.
- Use Binoculars - Binoculars are a great complement to a telescope.
- Take a course - You’ll not only learn, but meet new hobbyists.
- Earth Gazing - Turn your scope earthward. Find a high spot and explore the world around you.
- Subscribe to a blog - Learn about events. It’s over 100 years to the next Venus transit. Don’t miss another once-in-a-lifetime event.
- Join a club - Meet people and go stargazing together.
- Eyepieces - Get a new high power eyepiece for planets or a wide-field to more easily catch nebulae.
- Get a chair - Find a swiveling stool at the right height so you don’t have to stand or bend over.
- Hold an event - Invite friends and fellow hobbyists and make a night of stargazing.
- Catch a Meteor Shower - A great one is coming in August, the Perseids.
- Try finding and following the Space Station - This is about as bright as Jupiter!
- Look for Satellites. Try to spot satellites and other man-made objects.
- Bird watching - Use your scope for watching birds and other animals.
- Try sketching what you see - You don’t have to be an artist, but this can help catalog your finds. Sketch your moon findings.
- Test how far can you see - What’s the most distant object you can track down?
- Just have fun -That’s why you bought the telescope in the first place!
{ width: 160, height: 160, defaultImage: '', layers: 'Artimg-ObservVariable' }

Before the invention of the telescope, our ancestors marveled at the permanent nature of the stars at night. Planets, the Sun, and Moon moved, and comets occasionally appeared in the sky, then faded, but the stars remained constant and fixed to the celestial sphere. They were considered a source of great stability in an otherwise unstable world. At least, most were. There were exceptions.
Even in ancient times, some rogue stars were known to misbehave and were regarded with awe and fear. One such star was located in the constellation Cetus, the Whale. At times, it could be seen easily with the unaided eye, while at others, it was only dimly visible, if at all. Early skywatchers named this star Mira, which means "wonderful." Then, there was the case of the Demon star, Algol, marking the evil eye of Medusa's decapitated head in the constellation Perseus (hey, nobody said constellation mythology was pretty!). Algol winked at stargazers, varying from dim to bright over the course of about three days. What could be causing these amazing sights?
Once the telescope was turned to the heavens, astronomers began to discover more stars that changed in brightness like Algol and Mira. Today, thousands of these so-called variable stars are known and cataloged. Some fluctuate in brightness by only a few tenths of a magnitude, while others may vary by five or ten full magnitudes, or even more!
For amateur astronomers, observing variable stars can be an interesting and challenging pursuit, a different twist on typical stargazing. Before we get into the how-to of observing them, let's review the different kinds of variable stars.
Pulsating, Erupting, Eclipsing — They Vary
Variable stars like Mira are classified as pulsating variables. Known to be old, red giant stars, they actually expand and contract in diameter like a beating heart. Their rhythmic pulsations usually take weeks or months to complete a cycle.
A second class of variable stars suddenly and unpredictably change in brightness in just a few days, hours, even minutes, and so, are called eruptive variables. One example of an eruptive variable star is a nova. Here, a white dwarf star lying close to a normal star abruptly increases in brightness by five or more magnitudes, only to fade slowly back to its original, pre-eruption brightness over the course of several weeks. Another example of an eruptive variable are called R Coronae Borealis stars. These peculiar suns actually drop in brightness due to the formation of clouds of "soot" in their atmospheres.
Algol represents a third class of variable stars called eclipsing binaries. In these cases, the stars themselves do not fluctuate in brightness, but instead, are alternately covered and uncovered by unseen, orbiting companions. When a companion passes in front of or behind the system's primary star, their combined brightness fades, only to return after the eclipse ends. By measuring the period and amplitude of the fluctuations, astronomers can tell how far the two stars are apart and how long the companion takes to orbit. In the case of Algol, the orbital period is 2 days 20 hours 49 minutes, with the two stars separated in space by about 10 million kilometers (about 6 million miles).
How Bright is That Variable?
It?s fun to estimate the apparent magnitude of variable stars. This is usually done by comparing their brightness with that of neighboring stars of known (and fixed) brightness. The American Association of Variable Star Observers (AAVSO) has a collection of special finder charts for variable stars, which give the magnitudes of surrounding stars. The variable may appear to be the same brightness as one of the reference stars, which makes estimating its magnitude easy. Or, if the variable is brighter than comparison star A, but dimmer than comparison star B, then the variable?s magnitude lies somewhere in between. If star A is magnitude 8.0 and star B is 8.8, then the variable star may be about magnitude 8.4. This is called interpolation.
See the "Z": Check Out this Big Dipper Variable
Here?s a variable star that has long been a favorite among variable star observers. Z Ursae Majoris is categorized as a red, pulsating star, fluctuating between magnitudes 6.5 and 9.4 over a period of 195 days. What makes Z such a favorite is its location inside the bowl of the Big Dipper, about 2.5 degrees to the west-northwest of Megrez, the star that joins the bowl to its handle. This northerly location also means that the star stays above the horizon year-round for many observers in the Northern Hemisphere.
You don?t need fancy equipment to make accurate estimates of the brightness of variable stars — just your eye! It's really not as hard as it might sound at first. Begin by locating the star right in the center of the chart below, labeled with a "Z."
Some of the stars on the chart are numbered, while others are not. Those numbers represent the magnitudes of those stars. The decimal point has been omitted, since it would be easy to confuse it for another star. The star labeled "72" is really magnitude 7.2, while the star marked "86" shines at magnitude 8.6, and so on. These fixed-brightness "comparison stars" can be used to estimate the brightness of the variable.
If it's clear tonight, bring a print of the chart outside and find Z through your telescope or binoculars (you won?t be able to see it with your naked eyes). Begin at Megrez, then shift slowly north and west, following the trail of stars to its position (see "Star-Hopping: How and Why" for more details about locating sky objects). Be sure to use a low-power eyepiece to show the widest field of view. Unless it happens to be near its minimum brightness, Z should be bright enough to be seen through most finder scopes and binoculars.
With Z in view, take a look around at the stars in the eyepiece and compare them with the stars on the chart. Rotate the chart around so that the stars' orientation matches the eyepiece view. Remember, if you are using a star diagonal in your telescope, the view will be flipped left-to-right, like a mirror.
Begin by locating the variable star through your binoculars or telescope. Any type of telescope can be used, but be sure to select just enough magnification to see the star. Low power is usually preferred, since higher powers have very restrictive fields of view. Take a look around and find some of the comparison stars. Look for one or two that appear a little brighter than the variable, and one or two that are a little dimmer, then estimate how much brighter or dimmer the variable is from the others. For instance, you may find that Z appears a little dimmer than the "80" and "83" stars, but brighter than the "86" and "87" stars. If so, the variable must be either magnitude 8.4 or 8.5. Narrow your view now and scan back and forth between Z and the "83" and "86" stars. Try to decide if the variable is a little closer to one of the other, and mark down your estimate.
By keeping track of your estimates over the course of weeks or months, you will be able to plot a "light curve," a plot of the stars changing brightness over time. Mark the passage of time in days along the "X" axis (horizontal) and brightness along the "Y" axis (vertical). Plot the points matching the intervals of days and your magnitude estimates, then connect the dots. You?ve created a light curve just as professional astronomers do when studying variable stars!
Interested in viewing more variable stars? Here is a short sampling of the sky's most interesting ones.
| Star | Constell. | RA | Dec | Mag | Per. | Type |
|---|---|---|---|---|---|---|
| Spring | ||||||
| R Coronae Borealis | Corona Borealis | 15 48.6 | +28 09 | 5.8 to 14.8 | Irreg. | Eruptive |
| R Leonis | Leo | 09 47.5 | +11 26 | 5.8 to 10.0 | 313 | Pulsating |
| R Virginis | Virgo | 12 38.5 | +06 59 | 6.0 to 12.1 | 146 | Pulsating |
| Z Ursae Majoris | Ursa Major | 11 56.5 | +57 52 | 6.5 to 9.4 | 195 | Pulsating |
| Summer | ||||||
| Chi Cygni | Cygnus | 19 50.6 | +32 55 | 3.3 to 14.2 | 407 | Pulsating |
| RT Cygni | Cygnus | 19 43 | +48 46 | 6.0 to 13.1 | 190 | Pulsating |
| Beta Lyrae | Lyra | 18 50.1 | +33 22 | 3.4 to 4.3 | 12.94 | Eclipsing |
| R Scuti | Scutum | 18 47.5 | -05 42 | 5.0 to 7.0 | 144 | Pulsating |
| Autumn | ||||||
| R Andromedae | Andromeda | 00 24.0 | +38 35 | 5.8 to 14.9 | 409 | Pulsating |
| Delta Cephei | Cepheus | 22 29.2 | +58 25 | 3.5 to 4.4 | 5.37 | Pulsating |
| Mira | Cetus | 02 29.3 | -02 59 | 3.4 to 9.2 | 332 | Pulsating |
| Winter | ||||||
| R Leporis | Lepus | 04 59.6 | -14 48 | 5.5 to 11.7 | 432 | Pulsating |
| Algol | Perseus | 03 08.3 | +40 57 | 2.1 to 3.3 | 2.87 | Eclipsing |
Notes:
Mag is the variable's range in brightness.
Per. is short for Period, the number of days it takes the variable to complete a full period, or cycle, in brightness
Amateur observations of variable stars are especially sought by professional astronomers worldwide. If you are interested in learning more about observing variable stars, or in obtaining a set of variable star charts, contact the American Association of Variable Star Observers at 25 Birch Street, Cambridge, Massachusetts 02178, or visit their Web site at http://www.aavso.org.
{ width: 160, height: 160, defaultImage: '', layers: 'Artimg-ObservSun' }
Amateur astronomers usually consider themselves creatures of the night, since that is when the stars come out. But one star, our most important, most impressive star, the Sun, is visible at a much more convenient hour. The Sun bathes the Earth in life-giving light and heat as we orbit a mere eight light-minutes away. By comparison, light from the nearest star beyond the Sun takes more than four years to reach Earth. Astronomers can learn much about the distant nighttime stars by studying the characteristics and behavior of our own, daytime star. For amateur astronomers, viewing the Sun with a telescope is both interesting and fun!
Rather than appearing as a point of light as all other stars do, the Sun displays a disk half a degree in diameter, large enough to reveal fine detail on its visible surface. But with the Sun being so close and its energy so intense, it must be observed cautiously to prevent it from damaging both our equipment and our eyes. The Sun should never be viewed directly without first exercising precaution (except during the short span of totality during a total solar eclipse), so it is critical to know how to look at the Sun before you try.
Safety First!
Extreme care is necessary when viewing the Sun. The intensity of its light, when focused by even the smallest lens, is strong enough to ignite paper. The retina of an unprotected eye will be instantly destroyed, causing permanent blindness! Never look directly at the Sun without a proper solar-protection filter.
Amateur astronomers usually use one of two methods to view the Sun safely. The first and simplest uses a telescope or binoculars to project the Sun's image onto a white screen. Move the screen closer or farther from the telescope to adjust both image size and brightness. Always try to tilt the screen slightly so that it is not in direct sunlight, but rather in shade, to increase image contrast.
 A second way to look at the Sun is with a solar filter. Proper solar filters are designed to fit over the front of a telescope or binoculars. By dimming the Sun's rays before they enter the instrument, the dangerously high levels of solar radiation and heat are reduced, preventing permanent damage to both observer and optics.
Never place the filter between your eyes and the eyepiece, since it will be quickly destroyed by the magnified solar energy. Many less-expensive telescopes once came with solar filters that screwed into an eyepiece (a few still do!). They are extremely unsafe, sitting right at the focus point of the light rays. The tremendous heat produced there can crack the filter, instantly frying your eye. If you have this kind of solar filter, discard it immediately.
Projection is wonderful for showing the Sun to a group of people all at once, but usually fails to reveal the fine level of surface detail visible with a filter. Filters provide a more detailed view, though they cost more and allow only one person at a time to view.
Another safety warning: Never look through the finder scope when aiming a telescope at the Sun. In fact, you should cover the front of it with an opaque material just to be safe. Crosshairs exposed to sunlight can melt in just a few seconds, and burns or blindness can result from unintentional exposure of your eyes to light passing through the finder.
Instead, keep an eye on the telescope's shadow on the ground as you move the tube back and forth, up and down. When the tube's shadow is shortest, the telescope should be pointed at the Sun.
What Can You See?
Both viewing methods show the Sun's photosphere, the visible layer of the Sun that produces sunlight. Scattered across the photosphere are dark markings called sunspots. Scopes as small as a 60mm refractor will reveal them. A close look shows that larger sunspots have a darker, central area, called the umbra, surrounded by a lighter region called the penumbra. Single spots can form, but usually spots appear in groups and clusters.
Try keeping a daily sunspot log, noting their number, sizes, shapes, and grouping patterns with pencil diagrams. Track their migration across the Sun's face as it rotates on its axis once every 3-1/2 weeks.
Sunspots are not permanent features on the photosphere, but instead, change in shape and size from day to day. Galileo was first to notice that spots move across the Sun. From his observations in the early 17th century, he inferred that the Sun rotates about once a month. It is now known that the Sun's equator takes 25 days to turn once on its axis, while the poles require 36 days.
The number of sunspots is always changing, increasing, then decreasing over an 11-year period known as the sunspot cycle. During peak activity "solar maximum" there may be dozens of sunspots visible at the same time, while at solar minimum, there may be none at all.
The exact cause of sunspots remains a mystery, but astronomers know that they are associated with irregularities in the Sun's magnetic field. These irregularities lower the temperature of the Sun in their immediate area by as much as 1,500 degrees Celsius, forming sunspots. Appearance to the contrary, sunspots are not really dark. They only appear dark in contrast against their hotter, brighter surroundings. In reality, they are hotter than the surfaces of many stars.
Other Surface Features to Look For
Finally, when using a filter to Sun-watch, look carefully along the solar edge, or limb. Notice how it appears slightly dimmer than the center of the disk? This effect, called limb darkening, is caused by our looking through a thicker layer of the Sun's atmosphere toward the edges than toward the center. With sharp optics and a good eye, you might see some small, brighter areas along the limb. These are called faculae, and mark elevated regions of hot gases. Some observers may also notice that the Sun's surface looks "grainy," an effect called granulation. Each granule is a continent-sized cell of heated gas rising from the core of the Sun.
The Sun has a lot to offer those who want to enjoy the science and hobby of astronomy during daylight, too. And with solar max now upon us, it is a great time to meet the star of our sky show.
{ width: 160, height: 160, defaultImage: '', layers: 'Artimg-Sketching' }

Despite the advent of photography and CCD imaging, many amateur astronomers today prefer to chronicle their observations by making eyepiece renderings. Sketching at the telescope, however, does more than create a personal observing record. It hones the observer’s perception skills.
Say you look at a star cluster for a few minutes. In that time you may note whether it is rich or sparse, contains predominately bright stars or dim or a mixture of both. Afterward, you would come away feeling as if you "saw" this cluster.
But let’s say you sketch it. Now you may notice that some of its brighter stars appear reddish; that the chains form a kind of pattern; that what you thought was a sparse cluster actually contains myriad faint members. Instead if five minutes, you may spend half an hour scrutinizing this object, after which you would come away feeling that you "observed" this cluster.
All you need to get started is a red astronomer’s flashlight, an inexpensive sketchpad, and a sharp pencil or two. Before making your sketch, circumscribe a circle—not too small—representing the field of view and note where the cardinal directions fall in the eyepiece. Don’t forget to write down the date and time of the sketch, the telescope and magnification used, and a brief description of seeing conditions.
The eye may not be able to accumulate light like a photograph, but it often can see finer detail. That faint, fuzzy thing you saw last night might not appear as faint or fuzzy once you try sketching it!
{ width: 160, height: 160, defaultImage: '', layers: 'Artimg-AstroBinocs' }

Budding astronomers today have a greater variety of telescopes to choose from than ever before. Some are complex, computerized marvels, while others offer a more basic approach to stargazing. But even with all of these to entice us, none is more versatile than a pair of binoculars. Indeed, when it comes to touring the universe, two eyes are better than one!
Advantages of Two-Eyed Touring
Observing the night sky with binoculars has many advantages. One of the greatest is how friendly and comfortable binoculars feel. Perhaps this is because they can be used either while standing up or sitting down. What could be more enjoyable than casually scanning the heavens with a binocular while lying back in your favorite chaise lounge?
Another great advantage is their portability. Astronomy on the go! While a telescope can be bulky and takes time to set up, binoculars are compact, lightweight, and ready instantly, either for a casual glance at the night sky or for an in-depth study of the universe.
Binoculars show the "real" sky. Astronomical telescopes flip the sky around one way or another, either upside-down, left-to-right, or both. Thanks to both their upright image and wide fields of view, binoculars keep everything as it was meant to be, making it easier to find your way around when comparing the view you see to a star chart.
The wide fields of binoculars also let us enjoy some sky objects that are simply too large to fit into a telescope’s limited field of view. You are probably familiar with some already, such as the Pleiades and the Coma Berenices Star Cluster, but that’s just the start! Dozens of sky sights are better appreciated through binoculars than through telescopes.
Research: Binocular Vision is Better
Beyond aesthetics, research shows that an observer’s visual acuity is greatly improved by using two eyes instead of only one. Binocular vision enhances our sensitivity to subtle differences in contrast, resolution, and color. Some people experience up to a 25 to 40 percent increase in their ability to detect faint objects through a binocular than through a conventional telescope!
That’s a dramatic improvement, but why? Light entering the eye is focused by the lens onto the retina, which converts the image into electrical pulses and sends them onto the brain. The brain then interprets the pulses into the image that we sense. By relying on only one set of pulses (i.e., using one eye), any inconsistencies in the signals will interfere with the final image. With two sets of signals to interpret, however, the brain will merge the pair of electrical messages. The result is the ability to see fainter, lower-contrast objects.
Yes, there are many benefits to touring the universe through binoculars, but perhaps the greatest is that the binocular universe seems much more personal than that viewed through a telescope. By extending our natural, two-eyed view, the cosmos seems drawn to us, and us to it. It is a feeling, a sense of oneness and belonging, that cannot be duplicated any other way.
Choosing Binoculars for Astronomy
The nighttime performance of binoculars depends on the aperture (diameter) of the front (objective) lenses and the magnification provided by the eyepieces. The wider the objective lenses, the more light the binocular will collect and transmit to your eyes. For astronomy, objective lenses of 50mm diameter or larger are recommended. Indeed, 7x50 binoculars (7x power and 50mm objective lenses) are ideal stargazing glasses because they offer plenty of light gathering, good power, bright images, and a wide field of view (which makes it easier to find things). A 10x50 binocular, also a popular size, has the same light-gathering capability but provides higher magnification (10x). The higher magnification may result in a slightly shakier image if you’re holding the binoculars by hand. But for astronomy, it’s advisable to mount the binocular on a tripod anyway, to prevent arm and neck fatigue from prolonged overhead viewing.
Even better for stargazing are "giant" binoculars with 70mm, 80mm, or 100mm objective lenses. Because they admit more light, they can reveal fainter objects. But beware: such binocs are heavy and will require a tripod for support. Big binoculars often come in higher powers such as 14x, 16x, 20x, or even more. With smaller binoculars, high powers like that would yield very dim images, but larger apertures take in enough light to maintain good image brightness as magnification is increased.
Ten Favorite Binocular Targets
1) The Moon — Wow! You’ll see an unbelievable number of craters and rocky mountainous features, all in stunning clarity. Because its surface is so bright, the Moon is best observed during its crescent phases.
2) Jupiter and its Moons — Binoculars will reveal the bright disk of this giant planet, flanked by its four largest Moons, whose positions change nightly.
3) The Milky Way — Scanning along this dense band of stars on a summer night is immensely pleasurable. You’ll see countless clusters, knots, vacant dark patches, and nebulous puffs.
4) Sagittarius Star Clouds — The part of the Milky Way near the constellation Sagittarius ("the Teapot") reveals the richest detail in the night sky. It teems with interesting objects, including the Lagoon, Swan, and Eagle Nebulas, the M24 Star Cloud, and a wealth of open clusters. Use a star chart to help identify them.
5) The Pleiades — This sprawling cluster in Taurus appears as six or seven bright stars to the naked eye, but blooms to several dozen in binoculars.
6) The Andromeda Galaxy — Easy to spot with the unaided eye under a dark summer sky, this majestic "island universe" fills a good portion of the binocular field. You’ll see its bright core and faint disk, perhaps even the dark dust lane around the edge.
7) The Orion Nebula — One of the most beautiful gems in the sky, this expansive winter nebula glows brightly, displaying intricate wisps and tendrils. At its heart is an easily-split double star and a luminous quadruple star, called the Trapezium, which can be resolved with binoculars of 11x or more.
8) The Double Cluster — Residing halfway between the "W" of Cassiopeia and the constellation Perseus, these side-by-side stellar splashes are a true delight to behold in binoculars.
9) Albireo — A bright double star in the head of Cygnus the Swan, notable for its gorgeous color contrast: one star glows yellow, the other blue. Ten-power binoculars will split the pair cleanly.
10) Scutum Star Cloud — This impressive star field contains the compact open cluster called the Wild Duck and some dark, starless patches.
{ width: 160, height: 160, defaultImage: '', layers: 'Artimg-Messier' }
The stars that dot the night sky run the gamut from bright beacons to dim little pinpricks. To get a little more scientific about it, the brightness of a star (or any other celestial object) is described on a scale of "magnitudes". The brighter the star, the lower its magnitude.
Each digit on the magnitude scale represents a difference in brightness of 2.5 times. So, a 1st magnitude star is 2.5 times brighter than a 2nd magnitude star, and a 2nd magnitude star is 2.5 times brighter than a 3rd magnitude star, and so on. Extrapolating further, a star of 1st magnitude is 100 times brighter than a star of 6th magnitude, which is about as faint as you can see with your unaided eyes.
The brightest star is Sirius in the constellation Canis Major; it has a magnitude of -1.4. Polaris, the North Star, is dimmer at magnitude 2.0. There are about 8,500 "naked-eye" stars-stars of 6th magnitude or brighter.
With a telescope you can see much fainter stars-down to 11th magnitude with just a 60mm beginner's telescope, in fact. That's 100 times fainter than what you can see with just your eyes. Not bad!
But sky conditions also affect star visibility. Light pollution, moisture in the air, or atmospheric turbulence can make stars appear dimmer.
To "rate" your sky conditions on a given night, find the Little Dipper in the northern sky. Compare the stars you see with the chart above, which indicates the magnitudes of some of the stars in the Dipper. What is the dimmest star you can see? That is the naked-eye "limiting magnitude" for that night.
{ width: 160, height: 160, defaultImage: '', layers: 'Artimg-ObservDeepSky' }

One of the most fascinating aspects of the science of astronomy is the concept of distance. Everything in the night sky is so incredibly remote! Even the closest star to our solar system, the Alpha Centauri triple-star system, is 25 trillion miles away. The thousands of other stars that we see every clear night with the naked eye, as well as the millions of stars visible through telescopes and binoculars, are farther still!
Scattered among those distant suns are fascinating sights called deep-sky objects, a general catch-all phrase that includes a wide variety of celestial denizens. These include huge clouds of gas and dust called nebulas, which can be divided further into emission nebulas, reflection nebulas, and planetary nebulas. The first two are associated with stellar birth, while the latter are expanding shells expelled from dying stars. Star clusters form a second grouping of deep-sky objects. Open star clusters are made up of anywhere from a dozen to several hundred young, chiefly blue-white stars. Most of these stellar swarms lie within the spiral arms of our own galaxy, the Milky Way. Globular star clusters, made up of some of the oldest stars known, surround the hub of our pinwheel-shaped Milky Way. Each contains between 100,000 and a million constituents. Finally, beyond our Milky Way, are myriad island universes called galaxies. Some are spiral shaped like our own, while others are elliptical or irregular in appearance.
Messier and NGC: A Lifetime of Treasures
Deep-sky objects are usually designated by catalog numbers, such as M42 or NGC 869. The Messier catalog, is the most famous listing of deep-sky objects. Created by Charles Messier, an 18th-century comet hunter, this catalog consists of 109 of the finest objects the sky has to offer. Finding all of the "M" objects is a great introduction into deep-sky observing, since most are bright enough to be seen even through modest equipment. The New General Catalogue of Nebulae and Clusters, or NGC, was compiled in the 1880's by John Dreyer and based on observations by the father-son team of William and John Herschel. More than 7,800 objects are listed in the NGC, certainly more than enough to occupy the owners of even the largest backyard telescopes for a lifetime.
Spotting deep-sky objects through binoculars and backyard telescopes is one of the most exhilarating, challenging, and thought-provoking aspects of the hobby of astronomy. To help set you off on the right foot, here is our top ten list of splendors. Few celestial sights rival these exciting objects. All are visible through modest amateur telescopes, and most can even be seen with binoculars.
- M44 Beehive Cluster in Cancer (spring)
- M51 Whirlpool Galaxy in Canes Venatici (spring)
- M13 Great Globular Cluster in Hercules (summer)
- M57 Ring Nebula in Lyra (summer)
- M27 Dumbbell Nebula in Vulpecula (summer)
- M8 Lagoon Nebula in Sagittarius (summer)
- M31 Andromeda Galaxy (autumn)
- NGC 869 & NGC 885 Double Cluster in Perseus (autumn)
- M42 Great Orion Nebula (winter)
- M45 Pleiades Cluster (winter)
Beyond the brighter, showpiece members of the Messier and NGC lists are thousands of other deep-sky objects. Most will test your skills as an observer, but that is the thrill of the challenge.
Tips for Deep-Sky Observing
You don't necessarily need to be a veteran amateur astronomer to enjoy deep-sky observing. Here are a few tips from the experts to give you a head start.
- Always try to plan your observing session by knowing what objects you want to look for before venturing outside. By first locating each target object on a star atlas during the day, you can make the most out of the night by heading straight for your preselected sights. List the objects in the order in which they will be found, but limit the selection to no more than a dozen. This way, you won't feel the need to race from one to the next.
- While it is still daylight, check the optical collimation of your telescope. This is especially important with reflectors and Schmidt-Cassegrain telescopes, whose optics may be shifted out of alignment when they are moved. Then, after it is set up at night, check it again to see if it needs any minor tweaking. Also make certain that all optics are clean. A little grime on an eyepiece can make the difference between seeing an object and not.
- Try to find a dark observing site. While it is certainly possible to find deep-sky objects from the center of a city, there is no beating a rural sky. Better still, join a local astronomy club and attend their star parties. Observing is always more fun with a group.
- While some of today's telescopes feature computer-aiming devices, it is best to learn your own way around the sky. Star-hopping is the most popular technique for finding deep-sky objects. All you need, besides a telescope or binoculars, is a star chart of some kind and, for lighting, a red flashlight. Aim your telescope at a known, naked-eye star near the target object, then hop between fainter stars until the telescope is pointed at the target's location.
- Take your time when searching for faint objects and use averted vision. Instead of looking directly at the target area, look off a little to one side of the eyepiece's field of view. This is called using averted vision. The edge of the eye's retina is more sensitive to dim light than the center, which makes it possible to glimpse faint objects. Another trick for spotting difficult objects is to tap the side of the telescope tube lightly, just enough to jiggle the field of view.
- If at first you don't succeed, change eyepieces. It's best to start with low power (20x-50x or so), since images become dimmer at higher powers, and most deep-sky objects are already dim enough! Many people are under the false impression, however, that deep-sky observing can only be done with low magnification. Not true. Medium- to-high power eyepieces are perfect for uncovering small objects like planetary nebulas and galaxies.
- Narrowband light-pollution filters may also prove useful, but really only on emission and planetary nebulas. They enhance the contrast between the object and the background sky.
- Making a record of everything you observe by taking notes and making drawings is a great way to train your eye to see subtle details (and to remember what you see from one observing session to the next). Jot down all important details of the observation, including the object's catalog number, date and time, observing location, telescope and eyepiece(s) used for the observation, sky conditions and any interferences, and a description of the object. Afterwards, keep everything together in a large observing log.
Above all, sit down, relax, and enjoy the view. Dress warmly enough to be comfortable, but not so that you overheat.
As you peer through your eyepiece, remember this: you are seeing an object so distant that its light left there hundreds, thousands, even millions of years ago, and is only arriving here now. You are seeing this cosmic denizen as it was way back then; you're truly looking back in time. Even more amazing, you are not just looking at a photograph ? you are seeing it yourself, with your own telescope! That?s what makes deep-sky observing so exciting!
{ width: 160, height: 160, defaultImage: '', layers: 'Artimg-Astro_Activities' }
There are three "realms" to explore with your telescope. The first is sometimes called the shallow sky: our solar system, including the Sun, Moon, planets, asteroids, and comets. The second is what I call the starry realm: the stars in the immediate neighborhood of our Sun, which make up the familiar patterns of the constellations we see on any clear night. These include double and multiple stars, and variable stars. The third realm is usually called the deep sky: star clusters and nebulae within our own galaxy (the Milky Way), the cloud of globular clusters which orbit around our galaxy, and the countless number of galaxies beyond our Milky Way. All three realms can be studied with any telescope.
The Shallow Sky
The easiest realm for the beginner to explore is that of our own solar system. The Moon is probably the first object at which most people look. It is easy to find, and reveals a rich surface to explore with any scope at any magnification.  Even at 30x the moon is an enjoyable target. The basic eyepieces supplied with most scopes will provide for fantastic detail.
I usually recommend a Barlow for beginners as it immediately doubles the number of magnifications available with any telescope. It's worth spending a little extra and getting a good quality Barlow, such as the Orion Shorty Plus. Using the example of the SkyQuest XT6, the standard 25mm and 10mm eyepieces will yield 96x and 240x respectively when used with the Shorty Plus. I've found 240x to be the "just right" magnification for the Moon.
The best time to observe the Moon is while it's in its partial phases, because the surface features cast long shadows emphasizing their relief. Full Moon, while pretty to look at, is rather like the desert at high noon: no shadows, so no three-dimensional effects.

Some people find the Moon painfully bright to look at through the telescope. One way to handle this is with a Moon filter such as the Orion Neutral-Density Moon Filter; this will reduce the glare to a comfortable level. Another way is to light up the area where your telescope is located, since the Moon only seems bright because we are viewing it from a dark location in a dark sky. Even using a white flashlight will help a lot. Using a magnification over 200x also cuts the brightness.
The planets are another set of popular targets for amateur astronomers. Beginners often have a hard time spotting them, since they look much like bright stars to the naked eye. A telescope will soon reveal the difference: all the stars in the sky, no matter how large or bright, are so far away from us that they all appear as points of light. All the bright planets immediately show disks even at low magnifications. Venus and Mercury are always close to the Sun, so are mainly visible at sunset and sunrise; neither shows much in the way of surface detail, but will show a clear phase similar to the phases of the Moon. Mars is reddish in color and shows a small disk. Again a magnification of 200x or more is necessary.

Jupiter is probably the most rewarding planet for the amateur. 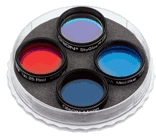 Its four bright moons are easily visible at the lowest magnifications, and can be watched as they change their positions from night to night, and even from hour to hour.
A higher magnification will reveal at least two dark cloud belts on the disk of Jupiter and, if you are lucky, you may catch a glimpse of the famous Great Red Spot, which nowadays is more of a pale salmon color. Colored filters will bring out extra detail.

I've saved the best for last: Saturn is a magnificent sight in any telescope. The rings are easily visible and, if you look carefully, you will spot four or five of its moons circling around it like tiny fireflies.
The Sun itself is also a wonderful object to view, but it requires a special filter and special care to observe safely. I'll talk more about that another time.
The Starry Realm
As I said above, all the stars are so far away that we can only see them as points. However, many stars are either double or multiple. These often provide striking contrasts of color and/or brightness. Two of the finest are visible in the summer: Albireo in Cygnus, a gorgeous pairing of a gold and a blue star, readily seen in any telescope, and Epsilon in Lyra, the remarkable "double double." This looks like a simple double star at first, but as you increase the magnification, you discover that each star in the pair is itself a very close double. Other stars are variable in brightness, and are studied by advanced amateur astronomers.
The Deep Sky
Beyond the stars in our immediate neighborhood lies the deep sky: star clusters, nebulae, and galaxies. Because of their distance, these objects are often faint and hard to see, and usually require a trip to a place with a darker sky, if you normally observe from the city or the suburbs.

Although scopes like Orion's IntelliScopes will guide you to these objects, most other telescopes require a bit of knowledge of the sky and some tools. First of all you will need a good map; Orion's Deep Map 600 Star Chart is a handy "road map" for the sky. Like a road map, it folds into a convenient pocket size, but, unlike most road maps, it is printed on plastic so that it won't get soggy with dew.  An ordinary flashlight will dazzle your dark-adapted eyes, so a red flashlight is essential for reading your map. I find the Orion RedBeam II flashlight to be particularly handy. Even better is the DualBeam version: it has the same red LEDs, but can switch to white light for observing the Moon and for finding those odds and ends that you drop into the grass at your feet! Both these come with nice lanyards so you can hang them around your neck and never misplace them.
There are so many deep sky objects that it's hard to know where to start. For that, I'd recommend a good guide book, such as Phil Harrington's Star Watch. If you want a better understanding of where all these objects fit in to the universe, I'd also recommend Terence Dickinson's NightWatch, one of my all time favorite books.
With your new telescope and these basic tools at hand, the sky is the limit!
July 2005
Geoff has been a life-long telescope addict, and is active in many areas of visual observation; he is a moderator of the Yahoo "Talking Telescopes" group.
{ width: 160, height: 160, defaultImage: '', layers: 'Artimg-Constellation_Focus' }

For those of us in mid-northern latitudes, it's probably best to start low; the underbelly of Scorpius skirts the horizon, making observation tricky.
The Scorpius Jewel Box is actually two open clusters in close proximity: the top one loose, and the lower one tight. A great binocular target.
NGC 6242 is an open cluster, and NGC 6281 is an open cluster with nebulosity.
C69 or "The Bug Nebula" (aka NGC 6302) is an interesting planetary which looks, at first glance, like a galaxy. The western side of the nebula has a prominent lobe with a tapered end while the eastern side is noticeably blunt.
NGC 6383 is a dim, wide cluster with nebulosity.
M6 is a bright and obvious open cluster which makes for an easy binocular target. Telescopes show rich detail and M6 is seen to be aptly named, "The Butterfly Cluster".
Three globular clusters sit close to Antares. M4 and M80 are well known, but a challenge is NGC 6144 because it sits so close to the 1st Mag red supergiant.
Antares itself is 600 lightyears away and glows with a luminosity 12,000 times greater than our own sun.
This area rewards binocular users generously. There are seemingly endless textures, patterns, star clusters and odd little clouds, all of which are well within the grasp of even basic optical aids.
July 2005
{ width: 160, height: 160, defaultImage: '', layers: 'Artimg-Astro_Activities' }
Late summer is the perfect time to begin exploring the deep sky: the objects beyond our solar system and local stars. Under a dark sky, the Milky Way stretches from the southern horizon to overhead and beyond to the northern horizon. As we look towards Sagittarius, we can see the most brilliant gems surrounding the center of our galaxy.
The birth of stars takes place in diffuse nebulae, clouds of glowing gas laced with dust, deep within our galaxy. After the dust and gas disperse, we are left with galactic star clusters, sometimes called open clusters. The last gasps of dying stars are seen as ghost-like planetary nebulae, looking like stellar smoke rings. On either side of the disk of our mighty galaxy are hordes of densely packed globular clusters, each containing a hundred thousand stars or more. And beyond our galaxy are countless more galaxies. Where to start?
Messier Hunting
Many amateur astronomers follow in the footsteps of Charles Messier, an 18th century observer of comets who made a catalog of objects in the sky which might be confused with comets, to make his searches easier. His catalog of 110 objects includes the brightest and best of the whole cosmic zoo of deep sky objects. Most astronomers refer familiarly to these objects by their "M numbers": the numbers Messier gave them in his list, though many of them have other names.
Take the Tour
If you have a computerized telescope, such as the Orion IntelliScope, you can call up "sky tours" for any particular night in the year. The IntelliScope tour for August starts out with two beautiful galactic clusters, the 6th and 7th objects cataloged by Messier,  Orion XT10 Intelliscopeknown as M6 and M7. Both these clusters had been described by Ptolemy in the 2nd century as "small clouds," but your telescope will resolve them into hundreds of tiny stars.
The next three objects on the tour are three of the finest diffuse nebulae in the sky: the Lagoon Nebula (M8), the Swan Nebula (M17), and the Trifid Nebula (M20). You have probably seen colorful images of all three made with large telescopes. The view through an amateur telescope is quite different. Our eyes are not sensitive to color in dim light, so we see these nebulae as shades of grey against a black background. In fact, if we try to observe them in the light polluted skies of a city, or on a bright moonlit night, we may not see them at all! These are true "nebulae," the Latin word for cloud, although they are clouds not of water vapor, but of hydrogen and oxygen gas, glowing in response to the bright young stars within them, to which they have just given birth.
Two more objects in the August tour represent the other end of a star?s lifetime. The so-called "planetary nebulae" are shells of gas blown off by stars towards the very ends of their lives. The Ring Nebula (M57) is a tiny smoke ring; you may need to use at least 100x magnification to see that it is a perfect little oval ring, and not a star. The Dumbbell Nebula (M27) is much larger and more diffuse than the Ring; it looks like a small puff of smoke.
The next two August objects are globular clusters, M13 and M92, both in the constellation of Hercules. Unlike galactic clusters, which are relatively small and located within our galaxy, globular clusters are much larger, denser, and located above and below the disk of our galaxy. In a small telescope, they appear like smudges of light, but as the aperture of the telescope increases, more and more of their thousands of stars are resolved into tiny pinpoints of light.
The August tour ends up with another open cluster, M11, and two of the finest multiple stars in the sky: the brilliantly colored Albireo and the Double-Double in Lyra. Use a high magnification on the last, and you will see that each of the "stars" in the double is in fact a very close pair, four stars in all.
You may have noticed that there are no galaxies on the August tour. That?s because our own galaxy, the Milky Way, dominates the August sky, and effectively blocks the light from lesser galaxies. On the whole, galaxies are much more challenging than the objects I?ve discussed here, and are best left until you have more experience with seeing the denizens of the deep.
Nebula Filters
As I mentioned above, planetary nebulae and diffuse nebulae may be hard to see under less than perfect conditions, but there is a way of enhancing their visibility. Both types of nebulae give off light of very specific wavelengths. 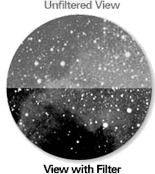 If you place a special filter in front of your eyepiece which only passes the light the nebulae give off, they will shine through, while the polluting light is dimmed. Such filters don?t make nebulae brighter; they just make everything else dimmer. The Orion UltraBlock is such a filter; I have used one for years to observe faint diffuse and planetary nebulae, and also to observe fine structure within the brighter nebulae. Orion has recently introduced a new O-III filter, which is more narrowly tuned to the two main emission lines of oxygen in these nebulae.
I put this new filter to the test on a recent night, using the objects on the August tour. To make matters tough, I made my observations with a bright 10-day-old Moon right in the middle of Sagittarius! The Lagoon Nebula was only 5 degrees from the Moon. I didn?t expect to see much, but the brighter western half of the nebula was faintly visible without a filter using the 25mm eyepiece in the Orion XT6. Using the UltraBlock made the western half much clearer, but switching to the O-III filter made the elusive eastern half plainly visible too. The Trifid Nebula was overwhelmed by the Moon (7 degrees away) without a filter and even with the UltraBlock, but could be seen as a faint glow with the O-III filter. The Swan Nebula was farther away from the Moon, 13 degrees, and was visible without a filter as a vague glow. Its swan shape became visible with the UltraBlock, and stood out very sharply with the O-III filter. The Dumbbell and Ring Nebulae were both about 60 degrees away from the Moon, and so not affected much by its light. Even so, the Dumbbell changed from a diffuse glow to a clear two-lobed shape as I switched to the UltraBlock and then the O-III. The Ring Nebula was the only object where I preferred the unfiltered view. Part of the beauty of the Ring for me is how it sits as an alien ring amidst the stars surrounding it. The filters dimmed the stars so that the ring appeared in isolation without its context.
 So, it's clear that the O-III filter offers enhancement of nebulae over the older UltraBlock. However, the UltraBlock would still be my first choice for scopes smaller than 8 inches aperture, because of the strong dimming effect of the O-III filter. The test objects I studied are among the brightest nebulae in the sky, so they were still visible in the 6 inch scope despite the dimming effect.
As a final test, I took a look for the famous Veil Nebula in Cygnus, the aftermath of an ancient supernova explosion. Even though it was over 70 degrees away from the Moon, it was totally invisible without a filter and with the UltraBlock. But with the O-III, it formed a huge glowing arc across the sky, overflowing my widest field eyepiece.
Deep sky filters are standard equipment in my astronomer's toolbox.
August 2005
{ width: 160, height: 160, defaultImage: '', layers: 'Artimg-Tips_n_Tricks' }

In an earlier article, I wrote about exploring the sky using the a computerized telescope's tour feature. But some telescopes aren't equipped with computerized tours to guide the beginner through the sky. Here is a guide to finding interesting objects in the sky if you don't have computer assistance.
Seeing Versus Finding
There's a difference between finding the location of an object and actually seeing it. Many of the objects we amateur astronomers look at are too faint to be seen with the naked eye. Some are too faint to be visible in our scope's finder. Some may be so faint as to be a challenge to see in the main telescope. Seeing can be difficult. Finding an object, on the other hand, involves pointing the telescope at exactly the spot in the sky where the object is located. This can be done with a computer, or manually using a technique called starhopping. It's not necessary to be able to see an object to point at it with the telescope.
Many beginners make the mistake of looking for objects which are easy to find (because they are close to bright stars or familiar constellations) but which are very hard to see, because they are very faint. For example, many go hunting for the galaxy Messier 101 in Ursa Major because it is located close to two bright stars in the handle of the Big Dipper. Unfortunately, M101 is one of the most difficult objects in Messier's catalog to see because it is large in size and very faint, so its dim light is spread over a large area. Unless you have very dark skies and a trained eye, you can be staring right at M101 and never see it! So it's important, when you're starting out, to go for objects which are both easy to find (located near bright stars or constellations) and also easy to see (bright clear objects, such as double stars and star clusters). Leave the dim galaxies (for the most part) until you have more experience.
Starhopping
Starhopping involves pointing your telescope using known guideposts in the sky: bright stars and constellations. This in turn requires some familiarity with the stars and their grouping. When you first look up into a starry sky, especially from a dark rural site, the view can be overwhelming. You wonder, "How will I ever be able to make sense of all these stars?" Learning your way around the starry sky is very much like learning your way around an unfamiliar city. It helps to have a map. It helps to have a familiar landmark or two to get your bearings. And it also helps to have a friend to show you the way. For a map, you have software programs like Starry Night� which will give you an overview of the territory. You may know a few "landmarks" in the sky to get you going, such as the Big Dipper, Orion, a bright planet, or the Moon. An astronomical friend is also very helpful in the early stages, someone who knows the stars a bit better than you do and can point out some landmarks. You may know such a person already, or you may need to find one by joining a local astronomy club. Although I'm not out there under the stars with you, I hope some of my suggestions here will also help you get started.
The first step is to print out a chart or two to take outside with you. Many of the charts you find in books or magazines are less than helpful for two reasons: they try to show all the sky, and they show it on too small a scale. I prefer to use charts which show only part of the sky, but which are on a large enough scale to approximate the actual spacing of the stars across the sky.
 Go out with this chart and face east. The top of the chart is overhead, the bottom is the horizon. The most obvious object in the eastern sky is Mars, glowing brightly about a third of the way from horizon to overhead. But our targets for tonight are farther away. As I said earlier, the Big Dipper is a poor starting place for deep sky hunting because it lacks bright objects. Let's look instead at Cassiopeia, a constellation which lies almost directly opposite the Big Dipper in the northern sky. In this chart, it's about two thirds of the way from horizon to zenith, an obvious lopsided W shape, visible even under city skies. Once you've identified Cassiopeia, you have some landmarks which will let you point your telescope at a variety of interesting objects.
Besides your star chart, you will need a red flashlight to read it. You will also find it very helpful to have a pair of binoculars with a field of view similar to that of the finder scope on your telescope. I find 10x50 binoculars particularly useful for this. Binoculars let you practice the "hop" in a more natural way than the view through the telescope's finder, which is usually upside down. After I've tried a "hop" a few times with binoculars, I'm ready to repeat it with the telescope finder.
Two Double Stars
Let's start by tracking down a couple of double stars. Many beginners are unaware that many of the stars which appear single to our naked eyes are double or multiple in a telescope. They are great targets for beginners because they are easy to see as well as easy to locate.
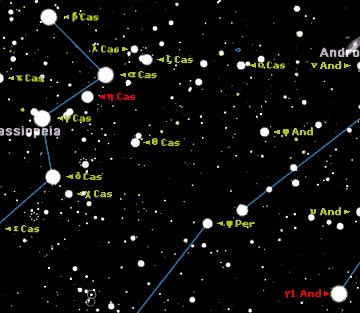 The five bright stars in Cassiopeia which mark the W are named, from top to bottom in this view: Beta β, Alpha α, Gamma γ, Delta δ, and Epsilon ε. We can find our first double star, Eta η Cassiopeiae, by looking a little less than half way between stars Alpha a and Gamma γ. You can see it there in the chart to the right, marked by the Greek letter Eta η. Place the crosshairs in the finder of your telescope on that star, and when you look through the telescope you will see it is actually two stars: a bright yellow one and a fainter red one.
The second double star is a bit farther afield, but illustrates the principles of starhopping. Look at the two top stars of the W, Beta β and Alpha α. Use the distance between these two stars as your "measuring stick." Extend the line from Beta to Alpha by two stick lengths to the lower right, which will take you to the star 51 Andromedae. Continue in the same direction about half the distance again, and you will reach a brighter star, Gamma γ Andromedae. This is our target: in the telescope it will appear as a double star, the two stars a bit closer than Eta η Cassiopeiae, and this time colored gold and blue.
Four Star Clusters
Now let's go after some deeper targets, some of the beautiful star clusters located in or near Cassiopeia. First take a close look at Delta δ Cassiopeia (second from the bottom in the W). In binoculars you will see a fairly bright star below and to the right of it, Chi χ Cassiopeiae. Use the line between Delta and Chi as the base of an equilateral triangle hanging below them, and put the crosshairs of the finder on the lower angle of this triangle. Through the telescope's eyepiece you will see a compact little star cluster, number 103 in Messier's catalog. Imagine a tall thin isosceles triangle on the opposite side of the same baseline, put your crosshairs there, and through the telescope you will see the star cluster NGC 457. It has two bright stars in it which many people see as eyes. Traditionally those are the eyes of an owl, the rest of the cluster forming the erect body of the owl with wings outstretched. But to our modern eyes, it looks rather like the character E.T. in the famous movie. So this cluster is called by some the Owl Cluster and by others the E.T. Cluster!
Let's go hunting farther away. This time use the line joining Gamma and Delta Cassiopeia as your measuring stick and pointer. Go twice its length downward towards the horizon and you should see a fuzzy patch through your binoculars and finder. Through the telescope you will see the Double Cluster in Perseus, one of the wonders of the night sky in any telescope. If you keep going in the same direction towards the horizon you will encounter a line of three bright stars, the last of which is at the center of a little known star cluster, Melotte 20. The trouble with this cluster is that it is so close to us that its stars are spread wide across the sky, too wide to fit in most telescopes, so that they can only be viewed with binoculars or the naked eye. This is one of the star clusters closest to our Sun, also called the Alpha Persei Moving Cluster because the star Alpha α Persei is at its center, and all the stars share a common proper motion across the sky.
And a Galaxy
Now that you've become better trained in starhopping, I'm going to end by giving you a special treat. I said earlier that most galaxies are difficult for beginners to see, but one exception is the Andromeda Galaxy, quite close to Cassiopeia. Here's how to find it. Look closely at the top three stars of Cassiopeia, Beta, Alpha, and Gamma. If you look closely, you'll see that there's a fourth star, Kappa κ Cassiopeiae forming a rather lopsided square with the three brighter stars. Use the line from Kappa to Alpha as your measuring stick, and follow the line from Kappa to Alpha two and a half lengths to the right. Through binoculars and your finder you should see a faint fuzzy patch. Through the telescope you will see a much larger fuzzy patch. Don't expect to see its spiral arms or much else (unless you have very dark skies and a large telescope), but be aware that the light you are seeing is coming from more than two million light years away—that's part of the magic of astronomy!
Geoff has been a life-long telescope addict, and is active in many areas of visual observation; he is a moderator of the Yahoo "Talking Telescopes" group.
{ width: 160, height: 160, defaultImage: '', layers: 'Artimg-Astro_Activities' }
I'm a sucker for action. I love change. My favorite planet is Jupiter because of its rapid rotation, ever-changing moons, and volatile cloud features. I love watching Near Earth Asteroids and comets as they move across star fields. Recently I've become addicted to watching solar flares and prominences in rapid action with my solar telescope. But most of all, I love to observe variable stars.
All stars vary in brightness to some degree. Even our Sun, which seems so stable, changes its brightness as more or less of its surface is obscured by sunspots. But there are stars in the sky that undergo vast changes in brightness and color. Many are highly unpredictable in their behavior, and need years of study to uncover the mechanisms that drive them.
The Variable Zoo
The most famous are the novas and supernovas which suddenly shoot up from obscurity to prominence. Supernovas are relatively rare in our neighborhood. The last one was over 400 years ago in 1604. Novas are more common, several being observable in any given year.
Some stars appear to vary for purely mechanical reasons. These are called eclipsing binaries: two stars in a close orbit where one star eclipses the other, as regular as clockwork. Algol in the constellation of Perseus is a famous example of an eclipsing binary.

Other stars expand and contract slowly because of processes going on within them. The most common of these "pulsating variables" are long period variable stars like Mira in the constellation Cetus. Mira is larger in diameter than the orbit of Mars, and changes size, brightness, and color over a period of just under a year. It ranges over nearly six magnitudes in brightness, meaning that at its brightest, it is a hundred times brighter than when it's at its dimmest. Another group of pulsating variables is called the Cepheids, named after the star Delta Cephei. These have much shorter periods than the Miras, ranging from 1 to 70 days, and their period is closely tied to their luminosity, which has led to their use as measuring sticks to determine the distance of globular clusters and galaxies.

Another group of variable stars is called "cataclysmic variables." These include novas, supernovas, and the so-called "dwarf novas." These last are the stars that interest me the most because they show the most action. My favorite is SS Cygni (TCY 3196-723-1), located close to the open cluster Messier 39. This star normally sits around twelfth magnitude, just visible in a small telescope, but every few weeks it shoots up unpredictably to about eighth magnitude. If you're lucky enough to catch it in outburst, you can actually see it get visibly brighter. Stars like SS Cygni are actually close double stars consisting of a red dwarf and a white dwarf. The white dwarf is surrounded by a disk of gas stolen from the red dwarf which is drawn down into the white dwarf where it ignites, causing the sudden outburst in brightness.

Observing Variable Stars
Professional astronomers realized over a century ago that there were more variable stars in need of study than they could handle, so they enlisted the aid of amateur astronomers to monitor the brightness of a number of stars well suited to amateur observation: stars which changed in magnitude over a wide range and which took a long period to complete their cycle of brightness. For many years this work required no more than a telescope and a good set of charts, and such simple visual observations are still useful today, although nowadays amateurs have access to photoelectric photometers and CCD cameras which are capable of studying just about any star. The American Association of Variable Star Observers acts as a central clearing house for all sorts of amateur variable star observations, providing instruction, charts, and other support, and giving amateurs a simple online system for recording their observations.
Why observe variable stars? Mainly because it's fun! You never know from night to night what you are going to find—remember what I said about action? No special equipment is needed other than a set of star charts which plot the variable star and give the brightness of non-variable stars around it, which are used to estimate the brightness of the variable.
If you are a deep sky observer, you already have one of essential skills of a variable star observer: you know how to locate objects in the sky. It doesn't matter how you do it. I used traditional starhopping for several years, but now I use my Orion SkyQuest XT6's IntelliScope setting circles to locate my variables. Once you've located the variable, you estimate its brightness as compared to other stars on the chart, and record the time of the observation. With a little practice you can make estimates to within a tenth of a magnitude. You can then log onto the AAVSO's web site and enter your observation. Within ten minutes it will be moved into their database of over ten million observations, and you can see your observation on a light curve along with those of hundreds of other observers around the world. What could be neater?!
Unlike most of the observations amateur astronomers make, variable star observations have a serious side. By making a numerical estimate of the brightness of a star at a particular point in time, you are logging a piece of scientific data. The AAVSO maintains records online of every observation submitted to them over the past hundred years, keeping the records available to researchers around the world.
On a typical night, I'll observe about a dozen stars from "my" list of about sixty stars visible at different times of year. I've added the database of the AAVSO's stars to my copy of Starry Night, and use this to prepare finder charts and plan what stars I'm going to observe on a given night. This database can be downloaded from:
- Macintosh:
AAVSO.sit from StarryNight.com - Windows:
AAVSO.zip from StarryNight.com
These files are in compressed format. After you have uncompressed them, you will find both the compiled databases and the text files which they were built from. Move the files ending in ".ssd" to the "Starry Night Pro 5/Sky Data" folder. Macintosh users will have to Ctrl-click on the Starry Night� Pro 5 application and select Show Package Contents to see the Sky Data folder. The next time you run Starry Night� Pro, you should see additional options in the menus for these datasets.
The biggest challenge in finding a variable star is that you're looking for something that may be quite bright, or may be below the magnitude limit of your telescope, totally invisible to you. So what you look for is the star field, the pattern of stars surrounding the variable. Once you've found the field, you then check to see how bright the variable is. You then consult your AAVSO charts to see which stars are closest in brightness to the variable. Comparison stars on the charts are marked with their brightness to the nearest tenth of a magnitude. Because a decimal point might be confused with a faint star, they are left out, so that a 9.7 magnitude star is marked "97" and a 11.4 is marked "114" on the chart. You try to find a couple of stars, one slightly brighter than the variable, one slightly fainter, and then estimate where the variable falls between them.
Equipment for variable star observing
For visual observing as I have described above, the equipment needs are very simple. There are many variable stars within range of a pair of small binoculars, and some that can be observed with the naked eye alone. On the other hand, access to a large telescope lets you follow stars that become very faint at minimum.
I have found it advantageous to use eyepieces with a wide field of view, since they show me more of the sky at any given magnification, and let me see more comparison stars without having to move the telescope about. My favorites are Tele Vue Naglers and Panoptics, and Orion Stratus.
My current strategy is to survey "my" variables using my Orion SkyQuest XT6 IntelliScope. I've programmed the controller with the coordinates of my variables, so I can quickly move through the list. Any variables which are currently too faint to be observable with the 6", I revisit the next night with my larger 11" Dobsonian.
Where to start?
If you're still not sure whether variable star observing is for you, I'd recommend reading Starlight Nights by Leslie Peltier (Sky Publishing). Peltier was the finest variable star observer of the 20th century, and his book is an entertaining introduction to a wonderful man and his love of the stars. It's probably my very favorite astronomy book.
The AAVSO web site includes everything you need to get started. It has a complete observing manual
I'd recommend starting on stars that are easy to find and visible all year round, such as these stars in and around the Big Dipper.
A final warning though: variable star observing is highly addictive. Variable star observers probably spend more time at the eyepiece than any other amateur astronomers because, unlike deep sky or planetary observing, they are not dependent on dark skies or steady seeing. For years I carried out regular variable star observing every clear night from the middle of a large city, even when the Moon was full. The only thing that can stop you is clouds!
January 2006
Geoff has been a life-long telescope addict, and is active in many areas of visual observation; he is a moderator of the Yahoo "Talking Telescopes" group.
{ width: 160, height: 160, defaultImage: '', layers: 'Artimg-Astro_Activities' }
The poet Walt Whitman said, "I do not want the constellations any nearer, I know they are very well where they are." But where are they, exactly? Constellations cover the sky. They also look flat — the stars all appear to be at the same distance. Appearances can be deceiving.
We often refer to stars that look bright as "big," and to their fainter companions as "small" stars. Are the bright ones really big? Are the faint ones actually small? Maybe the bright ones are closer and the fainter ones are farther away. Could it possibly be any other way? This is astronomy so the answer is "yes!"
The distance to any celestial object is one of the most important things we can know about it. Without that single critical piece of data, everything else is almost meaningless. To understand the structure and organization of things celestial, we must know distances. The Hipparcos satellite has provided us with accurate and precise stellar distances, revolutionizing our picture of the universe.
With Starry Night� it's easy to find distances to individual stars. In doing so, we discover that some nearby stars are dim, and some bright stars are nearby. We also find that some of the brightest stars are very distant. When a distant star is also a bright star, it means the star is highly energetic; shining with hundreds or thousands of times the output of our Sun!
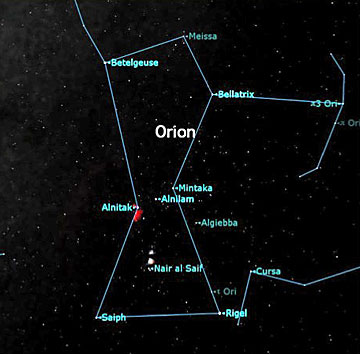 Figure 1: Some stars in the constellation Orion are much further away than others.
At this time of year, a prominent constellation is Orion (figure 1). Orion hosts some of the brightest stars in Earth's sky. Are they near or far? Table 1 tells us Orion's stars lie at distances ranging from 243 to 1,360 light years. Rigel is brightest with a magnitude of 0.2. (Magnitude describes brightness. The lower the number, the brighter the star.) Rigel is 777 light years away and 51,000 times as bright as the Sun. Bellatrix is closer at 243 light years, fainter at magnitude 1.6, and only (!) 6,000 times as luminous as our Sun.
Table 1. The Stars of Orion
| Star | distance (lightyears) |
Mag | Times Brighter Than our Sun |
| Betelgeuse | 429 | 0.4 | 59,000 |
| Bellatrix | 243 | 1.6 | 6,000 |
| Meissa | 1069 | 3.4 | 12,000 |
| Alnitak | 826 | 1.7 | 47,000 |
| Alnilam | 1360 | 1.7 | 112,000 |
| Mintaka | 919 | 2.3 | 28,000 |
| Algiebba | 906 | 3.3 | 21,000 |
| Saiph | 724 | 2.1 | 19,000 |
| Rigel | 777 | 0.2 | 51,000 |
Table 2. The Stars of the Southern Cross
| Star | distance (lightyears) |
Mag | Times Brighter Than our Sun |
| Gacrux | 88 | 1.6 | 1,300 |
| Delta Crucis | 364 | 2.8 | 3,200 |
| Acrux | 321 | 0.8 | 30,000 |
| Mimosa (Becrux) | 353 | 1.3 | 21,000 |
| Rigel Kentaurus (Alpha Centauri) |
4.4 | -0.04 | 2 |
| Hadar | 526 | 0.6 | 79,000 |
| Epsilon Centauri | 377 | 2.3 | 4,600 |
Table 2 shows information for stars in the Southern Cross (figure 2). Notice Rigel Kentaurus, also known as Alpha Centauri, our nearest stellar neighbor. It is bright at magnitude -0.04, and lies 4.4 light years away. But it has only twice the luminosity of the Sun. Now you know why we can't begin to understand stars until we know their distance.
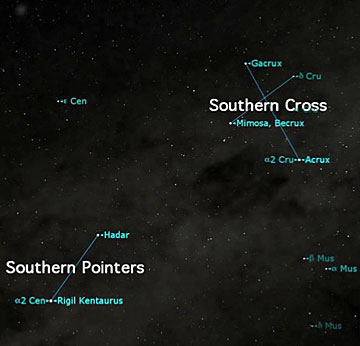 Figure 2: The stars of the Southern Cross and Southern Pointers vary in distance, but not over as great a range as those of Orion.
To really get a grip on stellar distances, we have to build a scale model. Try it. It's easy! Assume your doorstep is the Sun, and one step represents one light year. Start walking the distances to the stars in the Southern Cross or Orion.
Four steps will take you to Alpha Centauri. The Southern Cross stars will have you strolling from 88 to 364 steps, or roughly 70 to 300 metres. Orion will give you more exercise. You'll take 243 steps (200 m) to get to Bellatrix. Walking to Alnilam will take 1,360 steps. By then you'll be about 1 km from your door!
Try this with friends or a school class. With one person for each star, you'll soon have a 3-D constellation model that is definitely not flat.
The stars in a constellation are not bound to one another. They are random groupings of stars upon which we have imposed recognizable patterns. Different cultures have created different (and equally valid) constellation groupings. Astronomers have established 88 officially recognized constellations. These are based on the classic Greek and Roman star patterns, with boundaries defined by a celestial coordinate system.
A constellation's stars may lie in the same direction on the sky, but they are not connected to one another. Any star visible to the unaided eye can be anywhere from a few to a few thousand light years distant. The constellations are indeed very well where they are: extending far into the reaches of the starry night sky. Enjoy their distant light!
February 2007
{ width: 160, height: 160, defaultImage: '', layers: 'Artimg-Astro_Activities' }
Getting a new telescope, especially for the first time, is a thrilling experience. A telescope or binoculars of any size will open the universe to you. Here then is a list of bright and easy objects to help you get acquainted (or perhaps re-acquainted) with your telescope.
Tip: Use Starry Night� to find and print out star charts for these objects.
Our Solar System

The Moon
Many exquisite details can be seen on the lunar surface with nothing more than the smallest of telescopes or binoculars. In fact, no other object in the solar system will show you more detail than the Moon.
Seasoned Moon watchers know that the best time to observe the Moon's features is when they are near the terminator (the line that separates the lit and unlit portions of the Moon). The interplay between light and shadow bring out a three-dimensional aspect to the craters and ridges that is lost once the area becomes fully lit.
The Moon is the ideal first target for a new telescope user — it is easy to find and the view will not disappoint.
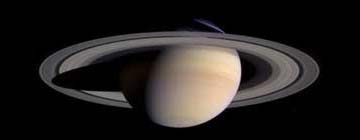
Saturn
It will blow you away — your mind that is. To earthbound eyes, Saturn is a bright orange star. Binoculars will accentuate Saturn's color and show its largest moon Titan, an 8th magnitude object.
But to see Saturn in all its glory you'll want to view it through a telescope. Share this moment with others; it's one of the greatest pleasures in amateur astronomy!
A magnification of at least 30X is required to see Saturn's rings clearly. The first thing you'll notice is how the ring system seems split into two. The void between rings A and B is named the Cassini Division and stands out as a dark dividing lane that is easily seen in small telescopes. Ring C, known as the Crepe ring, lies inside rings A and B and is more challenging to detect. Saturn's fainter outer rings cannot be seen with a small telescope.
You can find Saturn well positioned for viewing in the eastern sky at around 11 P.M. from mid-northern latitudes.
Within Our Milky Way Galaxy
Perseus Double Cluster
The night sky is full of jewels — in this case a pair of sparkling earrings. The Perseus Double Cluster (NGC 869 and 884) is made up of a pair of bright and large open clusters embedded in the faint glow of the Milky Way. The double cluster is visible without optical aid but binoculars are required to separate the two clusters, which are half a degree apart. A telescope gives the best view of the Double Cluster, with many stars of differing brightness visible. NGC 869 is more tightly packed than NGC 884. Both clusters are about 7000 light years away and are part of the Perseus arm, one of the spiral arms of our Milky Way. The two clusters are a few hundred light years apart.
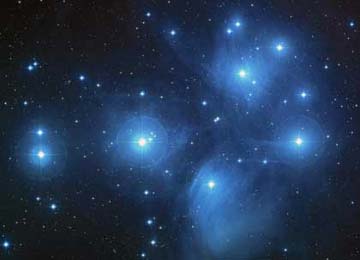
Pleiades Cluster (M45)
The Pleiades is the most famous of all open star clusters, containing around 500 members set against a black velvet sky. This young and bright open cluster is easily visible to the unaided eye and resembles a smaller version of the Big Dipper. At least 6 hot blue stars are readily visible and keen eyed observers can see more. Because of its large diameter, 2 degrees, M45 is best seen in binoculars (but a telescope will help you see the fainter members).
In some ancient cultures, ceremonies to honor the dead were held on the day when the Pleiades reached its highest point in the sky at midnight (this is around Halloween). Ancient Aztecs believed the Pleiades would be overhead at midnight the day the world ended.
Messier 41 (M41)
M41 is an open cluster about half a degree in diameter. 4 degrees to the north of M41 is Sirius, the brightest star in the sky. M41 is a naked eye cluster containing several bright stars, the brightest of which is a reddish star located near the center. The cluster is best seen under low power in telescopes. It was possibly noticed by Aristotle around 325 BC.
Orion Nebula (M42)
Easily visible to the naked eye as a fuzzy patch in the middle of Orion's sword (the ancients depicted the constellation of Orion as a Hunter). What we call the Orion Nebula is just the central part of a larger cloud that stretches across several hundred light years. Four bright stars in a parallelogram near the nebula's center form the Trapezium. These hot young stars heat up the surrounding gas clouds, causing the nebula to emit light.
Try to view the Great Orion Nebula on every possible occasion with any type of optical instrument as well as with the naked eye. The wealth of detail visible in this nebula is simply outstanding. Intricate wisps, shapes and the contrast between brighter and darker regions never ceases to amaze. A dark sky far away from city lights will help.
Outside Our Galaxy
Andromeda Galaxy (Messier 31)
The Andromeda Galaxy is one of the most magnificent objects in the night sky and undoubtedly the most famous galaxy outside our own Milky Way. Easily visible as a hazy patch to the naked eye, the galaxy covers as much of the sky as 5 full moons put together. Binoculars will show Andromeda in its entirety with a clear brightening towards the center. Binoculars will also show two of Andromeda's companion galaxies, M32 and M110. Careful observation of the nuclear region with a telescope will reveal faint dust lanes and other structures.
M31 was once thought to be a nebula inside our galaxy, but in 1923, astronomer Edwin Hubble showed that it lies outside the Milky Way. M31 is now thought to be about 2.9 million light years away. It is over 150 000 light years across, and has a mass 1.2 trillion times that of our Sun.
January 2006
{ width: 160, height: 160, defaultImage: '', layers: 'Artimg-Tips_n_Tricks' }
Even though Starry Night� offers a great system for generating lists of objects to observe, I've personally always found a graphical presentation more useful.
I've never really cared for the 180� all sky charts which you see in most books and magazines, and which Starry Night� generates automatically. I find the scale too small and the constellations appear distorted. I prefer to generate a set of four larger scale charts, each depicting a quarter of the sky, centred on the four points of the compass and each showing the sky from horizon to zenith.
Let's suppose I want to observe objects from Messier's catalog around 10 p.m. on New Moon night, August 12, from my farm in Coldwater, Ontario. I start by setting Starry Night� to this time and date. On the Options pane, I add the things I want on my chart: the constellation stick figures and boundaries, and the Messier objects. Since I?ll be observing with a Dobsonian, I also turn on the Alt-Az Grid.
The major trick I've discovered is how to generate a chart which includes exactly 90� from left to right and also from horizon to zenith. Here's how to do it.
First open the pane on the left side of the screen; it doesn't matter which tab you click. Between the pane and the tabs is a very narrow vertical blue strip with a single short vertical line in its middle. This is the handle which lets you adjust the width of the pane, but it also allows you to adjust the dimensions of the viewing window.
Put your mouse on this narrow strip and experiment with dragging it to the left and right.
As you do so, observe what happens in the Zoom window at the far right end of the tool bar. Strangely enough, the "width" dimension stays the same (100� is the default) while the "height" dimension changes. Adjust it until the two numbers are the same (100� say) and leave the blue strip there.
Now click on the arrow on the right side of the Zoom box and select 90� from close to the bottom of the menu. Drag the sky image downwards with the mouse until the two tiny arrows forming a circle appear at the top of the screen. Back up a tiny bit until they just disappear. Your window is now set to display 90� of the sky from east to west, and 90� from horizon to zenith.
To get four exact quadrants of the sky facing North, West, South, and East, turn on the scroll bars under the View menu. If you slide the scroll slider all the way to the right of the scroll bar, you will be viewing North. Print this chart with the following settings N.pdf:
- 1 Pane ON
- "Full Sky" Chart (180�) OFF
- Fill page when printing OFF
- Use current settings ON
- Print legend ON
Now click once in the scroll bar to the left of the slider. The chart will now be centred on the Western sky. Print this chart W.pdf. Click again to the left of the slider, and you'll get the Southern view. Print S.pdf. A final click will move the view to the East. Print the final chart E.pdf.
I find charts in this format extremely easy to use in planning my observations. I concentrate first on the objects towards the bottom of the South chart, because these are low in the sky and will never get any higher. Then I look for objects low on the West chart because they too will be setting soon. I can be more relaxed looking for objects on the East chart, and leave those on the North chart for last, because they are mostly circumpolar.
I avoid objects right at the tops of the charts because these are in "Dobson's Hole," the part of the sky hard to reach with a Dobsonian mounted telescope. In an hour or two, these objects will have moved to a more comfortable position.
I use charts like these for all my observations, for example plotting all of the variable stars currently on my observing program. I can prioritize my observations in seconds, and easily see which objects will be conveniently close to each other for observing.
When I was observing the Herschel 400 deep sky objects, I put together a customized Starry Night� observing list of the objects I had yet to observe, and then removed the ones I'd observed each morning after I finished an observing session.
It gave me a sense of accomplishment to see the plotted objects gradually disappear until all were gone, and I'd completed the list!
August 2007
Geoff has been a life-long telescope addict, and is active in many areas of visual observation; he is a moderator of the Yahoo "Talking Telescopes" group.
{ width: 160, height: 160, defaultImage: '', layers: 'Artimg-Astro_Activities' }
When Galileo first looked through his telescope at Saturn, he thought it had two large companion planets on either side of it. He probably saw something like this:

Once he saw them seem to shrink and disappear, and then return. We know now that Saturn has rings, which looked like large companions in Galileo's small and primitive telescope — and when they seemed to disappear, he was actually seeing the rings edge-on.
This happens every fifteen years, when the Earth crosses Saturn's ring plane. The last such crossing, in February 1996, was relatively easy to observe, as Saturn was setting a few hours behind the Sun at the time. This year we aren't so lucky; on September 4, when we cross the ring plane, Saturn will be a mere 10� away from the Sun in our sky. It won?t be safe to observe with an Earth-bound telescope.
Fortunately, Starry Night is here to simulate the view:
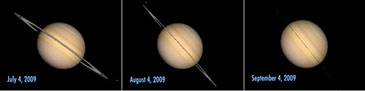
{ width: 160, height: 160, defaultImage: '', layers: 'Artimg-Constellation_Focus' }
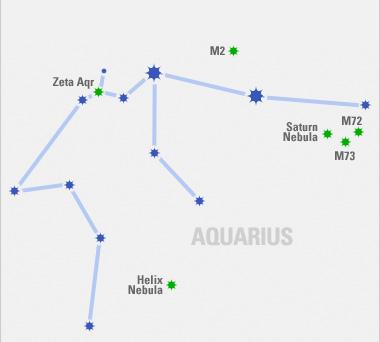
The Saturn Nebula (NGC 7009) is an oval Mag 8 fuzzy patch hanging in space about 4,000 lightyears distant. Medium-sized scopes show a ring with "knobs" on either side.
M72, close by, is a small remote globular cluster, difficult to resolve. The open cluster M73 is a tiny triangular collection of stars, barely noticeable. However, the same field of view contains a lovely Lyra-like asterism.
The Mag 7 globular cluster M2 is about 40,000 lightyears away. Although among the brightest of globs in the sky, M2's core is so concentrated that, as an observational object, it ranks as one of the less compelling.
The Helix Nebula (C63/NGC 7293) is a tricky target. Although it is the largest visible planetary in the night sky (about half the apparent diameter of the full moon) it's quite dim. Dark skies are a must. A low power eyepiece in your telescope, with averted vision, may give you some hint of structure.
Finally, 103 lightyears distant is one of the sky's finest doubles, Zeta Aquarius.
{ width: 160, height: 160, defaultImage: '', layers: 'Artimg-Constellation_Focus' }

Cassiopeia is one of the easiest constellations to spot during the autumn and winter months; its big "W" shape rotates overhead each night. Apart from being a generally pretty area to scan in binoculars, there are some terrific sights to pick out.
9,000 light years away sits NGC 457, a 6th-mag open cluster known as the Owl Cluster. NGC 559 a 9.5-mag open cluster is about 2.5� from NGC 663 a 7th-mag open cluster seen in binoculars.
Cassiopeia is also the area of sky where Tycho's Supernova of 1572 appeared slightly to the west of Kappa Cassiopeiae, changing the appearance of the sky for six months and cementing Copernicus' 1543 rebuttal of Ptolemaic theory; in that year Copernicus died and his great work De revolutionibus orbium coelestium was published, overturning the established doctrine that the Earth was at the center of the universe. Unfortunately, nothing is visible to amateur astronomers but the site is of obvious historic interest.
December 2005
{ width: 160, height: 160, defaultImage: '', layers: 'Artimg-Constellation_Focus' }
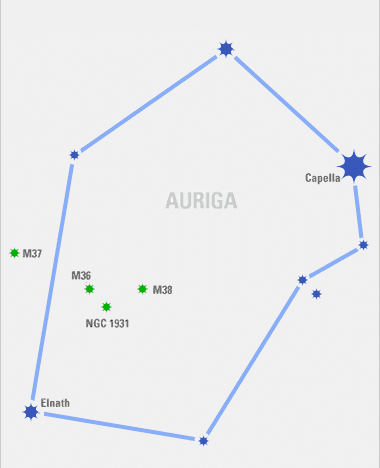
Auriga is most notable for its three bright open clusters and for sporting one of the ten brightest stars in the night sky, Capella.
In ascending order of interest are Auriga's three Messier-designated open clusters: M36, M38 and M37. All are clearly visible to the naked eye from a dark site and, in binoculars, appear as bright fuzzy patches; naturally, a telescope brings out the most detail. M36 will show around 50 stars in an 8" scope while M38 shows twice as many stars, some in apparent chain-like arrangements. But the most notable of the trio is M37. In a 12" scope, roughly 150 starts are visible in this neatly arranged cluster, some tinged red.
NGC 1931 is a bright emission nebula surrounding a very small open cluster. With high magnification in an 8" telescope, the nebula is quite apparent.
February 2006
{ width: 160, height: 160, defaultImage: '', layers: 'Artimg-ObservSun' }
Eclipse Lore and Legend
Imagine living in a world without advanced astronomical reckoning. Imagine your world plunging into sudden darkness, the animals growing eerily silent. Imagine witnessing the sun, your source of warmth and life, being consumed by a swiftly encroaching shadow, leaving only a blinding hole in its wake.

The solar eclipse has always been seen as a powerful omen, variously ill and auspicious. This awesome sight has influenced wars, ended lives, made regular appearances in literature and, even with a modern comprehension of the forces at play, still holds a powerful hold over our collective imaginations. It is no wonder that the solar eclipse, which occurs only once in most life times, is the stuff of legend.
The history of the eclipse is divided between those who were able to predict its occurrence, and those who were taken by surprise. Though the tale may be apocryphal, the oft-repeated example of Columbus' manipulation of native Jamaicans is illustrative. The fellow apparently became stranded and ran out of supplies during his fourth trip to the new land, and he needed help. Rather than replenishing his resources, the inhospitable locals expressed their displeasure at his appearance by refusing sustenance and aid. It was only Columbus' ability to predict a fortunate lunar eclipse that saved him; announcing the great displeasure with which heavenly forces viewed the natives' reticence, Columbus claimed that the moon would be struck from the sky should the natives fail to assist him. How would the course of history have been affected, had the eclipse not come to pass?
Others have been less fortunate with their predictions. Advanced knowledge of the eclipse has been used to schedule important events, thereby "proving" their auspiciousness to the na�ve masses. However, when two early Chinese court astronomers failed to notify their Emperor of an upcoming solar eclipse circa 2000 BCE, they paid for it with their heads!
When eclipses occur unexpectedly, they have profound influence on world events. Take this tale of two wars; in 413 BCE a surprise eclipse convinced Athenian strategists of the Peloponnesian war that a planned retreat was ill advised. Delaying the move led to the easy slaughter of their troops; an early and unnecessary defeat at the hands of the Syracusans. Contrarily, in 585 BCE both the Lydians and the Medes saw the eclipse as evidence of heavenly displeasure with their years of war. In this instance, the magnificent sight inspired an early armistice and saved many lives.
This duality in our perception of the eclipse is apparent in world mythology, as well as in our history books. In many places, the disappearance of the sun is an alarming occurrence, attributed to mythical beasts (variously dragons, dogs, birds and demons) that come to consume our life-source. There is a widespread fear that, without intervention, the skies would be permanently darkened and life ever altered. It is only through scaring the Mongolian Sun Eater away with firecrackers, drumming and general cacophony that balance can be restored.
While this perception of eclipse as an ill omen is pervasive, there are also many cultures where the event is viewed positively. In Tahiti the eclipse is understood as the lovemaking of the Sun and Moon. Amazonian myth describes a passion so great between these lovers that the earth becomes scorched by the Sun's heat and drenched from the Moon's tears; to protect us from their excess, the two will only touch through the shadow of eclipse. This perceived concern for our well-being is reflected again in various Native American mythologies wherein the sun or moon absent themselves from the sky during an eclipse, to check that all is well on earth.
While there is often disparity between scientific understanding of the eclipse and mythological explanation, in Vedic tradition eclipse myth clearly demonstrates an accurate understanding of the principles at play. In this tale, the demon Rahu Ketu has come between the sun and moon to steal a sip of immortality nectar. Angered by this presumptuousness, Lord Visnu strikes the demon in half, separating head from body. As the demon was successful in procuring the heady libation, he is not killed but positions his two components at the north and south lunar nodes, ever after to seek vengeance on the two celestial bodies by swallowing them at the time of eclipse.

� Sanskrit Religions Institute
The eclipse as a portent and harbinger of change is a common theme in history, literature and religion. The New Testament Gospels of Matthew, Mark and Luke all describe a solar eclipse during the crucifixion of Christ, causing his lament "My God, my God, why hast thou forsaken me?" Indeed, this use of eclipse as metaphor in classical texts has helped scholars to place events in historical context. We can, for example, compare Amos 8:9 of the Old Testament "and on that day, I will make the sun go down at noon, and darken the Earth in broad daylight" with Assyrian historical records, to conclude that "that day" occurred on June 15th, 763 BCE.
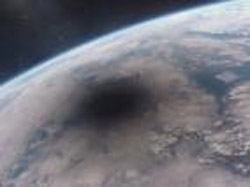
Shadow of the 1999 Total Solar Eclipse as Seen from Space
Our advanced astronomical understanding of eclipse phenomena has done nothing to diminish our fascination with the event. The convenience of modern travel now allows millions of spectators to flock to the path of totality for each occurrence. Perhaps there is something here of wonder; the only place in our solar system where the celestial bodies are of the necessary relative size and distance for complete obfuscation just happens to occur where there is life to appreciate the magnificence of the sight!
March 2006
Claire's long-time interest in mythology brings a different perspective to our understanding of the night sky.
{ width: 160, height: 160, defaultImage: '', layers: 'Artimg-Constellation_Focus' }
Lying quietly between Gemini and Leo, Cancer is not the most exciting of constellations. Nonetheless, it holds some modest riches worth checking out.
M44, the Beehive Cluster, is a great target for your binoculars or finderscope. More magnification than that and you'll loose the lovely sense of loose structure. Can you spot it naked eye? This month, M44 is easier to locate by eye, thanks to the presence of Saturn, shining a little to the West at Mag 0.
Even from your back yard 2,500 lightyears away, you should be able to scoop up M67 in your finderscope or binos. The individual stars of this Mag 6 open cluster will resolve nicely in your telescope's eyepiece.
NGC 2775 is a bright spiral galaxy whose core is visible in 8" scopes. Larger scopes will show hints of its spiral-arm structure. Spiral galaxies are the most common kind of galaxy, making up four fifths of all galaxy types, including our own galaxy, the Milky Way. And close by are two more galaxies, NGC 2777, a true gravitational companion of 2775, and NGC 2773 which is four times farther away from us but happens to lie along the same line of sight; you'll need a 10" scope to spot either.
At the opposite end of Cancer, Iota Cancri is a nice orange/green double star and well placed to point you just over Cancer's constellation boundary, into Lynx, where the edge-on 10th Mag galaxy NGC 2683 sits.
March 2006
{ width: 160, height: 160, defaultImage: '', layers: 'Artimg-Constellation_Focus' }
The fifth largest constellation in the sky, Hercules is perhaps most famous because of the Great Hercules Cluster, M13, perhaps the most prominent of globulars visible to northern hemisphere observers.
At least 149 globular clusters in the Milky Way have been discovered, and more than 100 are in the NGC-IC catalog. Their distribution forms a spherical halo, centered on the core of our Milky Way. "Globs" are densely packed balls of stars. Up to two million stars can be found bound together with a radius of no more than 100 light years.
The Great Hercules Cluster is visible to the naked eye at dark sites. The glob is about 14 billion years old and contains more than a million suns.
Because of its proximity to M13, M92 is often overlooked even though it's one of the brighter clusters available to northern viewers. One of Johann Elert Bode's discoveries in 1777, it was rediscovered by Charles Messier in 1781 and has been clocked speeding toward us at 112 km/sec.
NGC 6229 is another globular cluster that's worth a look. Mistaken for a nebula by Herschel in 1787, it was revealed to be a "very crowded cluster" in the mid 1800s.
NGC 6210 is a planetary nebula, a sun not unlike our own in the final stages of its life. It has a very high surface brightness and is a good target for high magnification.
July 2006
{ width: 160, height: 160, defaultImage: '', layers: 'Artimg-Constellation_Focus' }
M6 and M7, two open clusters, are bright and obvious in Sagittarius, and make for easy binocular objects. Telescopes open up both in rich detail and M6 is seen to be aptly named "The Butterfly Cluster".
NGC 6416 is a small open cluster and NGC 6383 is a dim, wide cluster with nebulosity.
M8 "The Lagoon Nebula" is the brightest nebula after the great Orion nebula. It's actually more massive than M42 but is farther away: 4,500 light-years distant compared with 1,500 light-years. M8 is best viewed with a wide-field eyepiece. Less spectacular, but still worth some time, M20 "The Trifid Nebula" is also easily seen in binoculars; a telescope will bring out the dust band that gives the nebula is shape and name. M21 is a small rich open cluster in the same field of view as M20.
M23, excellent in small scopes, is an open cluster seen in binocs, as is M25.
M24 "Delle Caustiche" is a large and lovely "frothy" looking region seen easily in binoculars. It's actually part of the Milky Way and only stands out as a distinct patch because, like M23 and M25, it sits in front of a dark nebula that obscures our line of sight to the core of the galaxy. (By the way, the very center of our galaxy is marked above with a red target symbol.)
M22 is a sweet globular cluster, the third-brightest in the sky. Populated by half a million stars, it's distant by a mere 10,000 light-years, making it the nearest glob to Earth.
M16 and M17 are two nebulae, the latter in particular a rewarding target. M16, however, is notable for being the location of "The Pillars of Creation," the iconic image produced by the Hubble Space Telescope. M18 "The Black Swan" is a pretty open cluster with about 40 members, surrounded by fainter background stars in the band of the Milky Way.
August 2006
{ width: 160, height: 160, defaultImage: '', layers: 'Artimg-Constellation_Focus' }
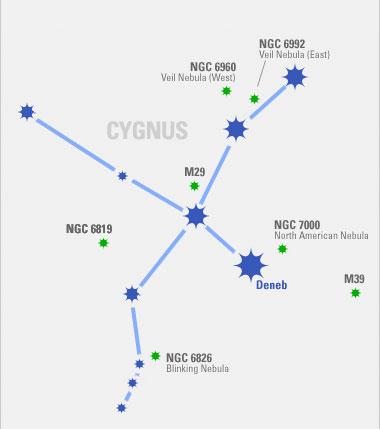
NGC 6960 & NGC 6992, the West and East Veil Nebulas, are part of the Cygnus loop, the remains of a supernova that exploded over 100,000 years ago. Two other sections, NGC 6995 and 6979 are close by.
M29 is an unimpressive open cluster, notable only in that it was one of the original discoveries of Charles Messier.
NGC 6819 is a small open cluster with about two dozen stars from 10th to 12th magnitude within a 5' circle. Its discovery in 1784 is attributed to Caroline Herschel.
Deneb, which marks the tail of the swan, is one of the 20 brightest stars in the night sky. Just three degrees away lies NGC 7000, the North American Nebula, so-called because of its obvious shape. This is an active star forming region and quite large, though it's difficult to see without the aid of astrophotography.
M39 is an open cluster, and is a nice binocular object with 30 or so stars spread over its seven lightyear diameter. It's also "pretty close" to Earth, at "just" 800 lightyears.
Finally, NCG 6826, the Blinking Nebula, gets its name from an odd phenomenon: its central star appears to blink on and off when you look toward and away from it quickly.
September 2006
{ width: 160, height: 160, defaultImage: '', layers: 'Artimg-Constellation_Focus' }
Triangulum is well placed at this time of year for observations of M33, a spiral galaxy. However, at 2.4 million light years and only 5% as massive as our own galaxy, it's a dim fuzzy object in 8" scopes and requires good dark skies to show any detail.
Follow a line from M33 through Mirach in Andromeda to find the brightest spiral in the sky, M31, the Andromeda Galaxy as well as its satellite galaxies M32 and M110. As with M33, the photons from M31 have travelled 2.4 million years to pass through the pupil of your eye and end their journey on your retina. The Andromeda Galaxy is also one of the few galaxies that's blue-shifted, meaning that is traveling toward us: almost all others are red-shifted and speeding away. Once you've found M31 with the aided eye, you can practice picking it out with the naked eye. You can then congratulate yourself that no-one can see any farther than you; the barely visible faint smudge you can just make out is the farthest object visible to the unaided eye.
At the tip of the constellation's brightest limb, is Almach (Gamma Andromedae) a very sweet orange/blue double. And finally, below Triangulum, in Aries, is Mesarthim (Gamma Aries) another lovely double, orange/green, sitting 207 light years away with an angular separation of 7.5".
October 2006
{ width: 160, height: 160, defaultImage: '', layers: 'Artimg-Constellation_Focus' }

M15 is one of the most densely packed globular clusters in our galaxy, with a high number of variable stars and pulsars. Viewable with the naked eye from dark sites, binoculars and small scopes will bring out some detail of the collapsed, superdense core. M15 is also one of only a handful of globular clusters known to contain a planetary nebula.
NGC 7331, a Type 2 Seyfert galaxy about 43 million light-years away, shows a superb spiral structure.
51 Pegasi is an unexceptional 8th Mag star, but it's notable because it is orbited by the first true extrasolar planet to have been discovered.
November 2006
{ width: 160, height: 160, defaultImage: '', layers: 'Artimg-ColdWeather' }

For those of us who live in northern climes, winter astronomy is a mixed blessing. Some of the finest objects in the sky are best placed in winter time, but the cold weather often keeps us from enjoying them. In this article I'll give some tips for winter observing, and then highlight some of the sights that will make it worth braving the cold.
Preparing yourself
Crisp winter days can be enjoyable when the Sun shines brightly and you can walk/ski/snowshoe briskly. It's a different matter standing or sitting very still peering through an eyepiece under a winter night sky. The first thing to do is to dress warmly, in layers, in order to retain your body heat. Because astronomy doesn't involve much physical movement, you should dress as if the temperature was at least 10 degrees colder than predicted. The clothing sold for other winter outdoor activities serves very well. I recently discovered jeans lined with flannel at a work clothing store, which serve well on milder nights; I have a fully insulated one-piece boiler suit for really cold nights. A warm hat is especially important, as we lose much of our body heat through our head: I usually wear a wool watch cap. On really cold nights, a ski mask or balaclava is really welcome. It's also important to keep your feet warm: cold feet will kill your observing interest faster than anything else. Insulated working boots will do the trick, but it also helps if you put down an insulating mat under your observing area.
There are some serious safety concerns in winter observing. Hypothermia can creep up on you very subtly. If you?re observing from a remote location, always use the buddy system, and make sure your buddy has his own car, in case you have trouble starting yours. I prefer observing close to home, where I can step inside every hour or so to warm myself up. Be very careful around the metal parts of your telescope: it's extremely easy to freeze your flesh to any exposed metal parts of the scope. If it happens, warm things gradually and separate with great care. A warm beverage in a thermos can help to keep you comfortable, but avoid caffeine and especially alcohol.
Preparing your telescope
Most telescopes are manufactured in parts of the world warmer than where we live. The only telescope I own which seems really happy in winter is my Russian-made Maksutov-Newtonian, which seems to feel right at home at sub zero temperatures! Telescopes give trouble in two specific areas: lubrication and batteries. The lubricants used in telescope mounts, focusers, etc. turn into glue at low temperatures. It's best to strip off the supplied lubricant and replace it with the lithium-based greases designed for snowmobiles.
Batteries depend on chemical reactions to generate current, and chemical reactions go more slowly at lower temperatures. Generally, the smaller the size of the battery, the sooner it will fail at cold temperatures. I often store my telescopes in an unheated garage or shed, but I always store the batteries inside my heated house. The little AA and 9v cells used in most astro equipment are next to useless below freezing. If you?re close to home, use an AC adapter to power your equipment. If you?re in the field, look into the "power tanks" sold by many astronomical suppliers. But before spending a lot of money on one of these, check your local auto supply store for less expensive alternatives. Once again, the larger the physical size of the battery, the longer it will last, and be sure to store it indoors on a trickle charger. It may be tempting to run your equipment off your car?s battery, but you don't want to find yourself with a dead battery when you want to head home.
It's best to store your telescope in an unheated garage or shed, rather than subjecting your scope to drastic temperature changes, plus the heavy condensation which can occur when you bring the scope indoors. If you must bring a very cold scope indoors, cap it tightly while still outside to minimize internal condensation. The same applies to eyepieces and other accessories.
The Rewards!
Is it worth going to all this trouble, rather than staying indoors and viewing Hubble images on the internet? Definitely! Some of the sky's finest sights are overhead in wintertime.
 The Orion Nebula (Messier 42 and 43)
This is without argument the finest emission nebula in the sky. It is easily found as the middle "star" of the Sword of Orion, hanging below his famous Belt. This is a fantastic site in even the smallest telescope, and only gets better the larger your telescope's aperture and the darker your sky. Try it with every eyepiece you own, with and without a nebula filter. Every view is different, and every one rewarding. I can easily spend an hour or two exploring this wonderful object on any clear night. Try to trace the outermost tendrils of its two widespread arms. Then put on your highest magnification and see how many stars you can see in The Trapezium, the glorious multiple star at its core.
The four brightest stars are pretty easy, but can you spot the elusive fifth and sixth stars? These require good optics and a dark sky, as they are buried in the glow of the surrounding gasses.
Rigel
This is one of my very favorite double stars. I discovered it quite by accident one night when I was testing a new telescope. I was looking for a bright star to use for a star test, and chose Rigel. When I cranked up the magnification, I was amazed to discover than Rigel was not alone, but had a tiny white speck of a companion. Though actually a white dwarf, this star gives the impression of a tiny planet circling a brilliant star. This discovery started me on a quest to observe double stars, for which I used the wonderful list of a hundred doubles recommended by the Astronomical League:
http://www.astroleague.org/al/obsclubs/dblstar/dblstar1.html
Double star observing used to be a mainstay of amateur astronomy, but got shoved aside by deep sky observing for many years. Recently it seems to be enjoying a comeback with several new books published on the subject.
Eskimo or Clown Nebula (NGC 2392)
Summer may have its Ring Nebula and Dumbbell Nebula, but winter's Eskimo Nebula will challenge both of these as the finest planetary nebula in the sky. Located close to the fine double star Wasat (Delta Geminorum), it is easily mistaken for a star at low power because of its small size and brightness.
The Pleiades (Messier 45)
The brightest and one of the closest open star clusters in our neighborhood, The Pleiades makes a fine sight on a crisp winter night. How many stars can you see with your naked eye? Most people can see six, but more can be detected with careful observation. Because of its large size, this cluster is best viewed with binoculars. Under really dark skies, see if you can detect the faint nebulosity which envelopes this cluster. Don't be fooled by haze in our own atmosphere. A good test is to compare the view with the nearby Hyades, which have absolutely no nebulosity associated with them.
Saturn
I saved the best for last! Saturn is now rising in the mid-evening, and is a treat for all astronomers. This planet can tolerate as much magnification as your telescope is capable of, so don't hold back. Look for the shadow of the rings on the planet and vice versa. See if you can detect the hairline Cassini division between the two main rings; how far around the ring can you follow it? Try to spot the faint inner Crepe Ring, most easily seen against the background of the planet, but sometimes visible against the sky. Can you see any belts on the globe, or its greenish polar region? Scan the area around Saturn for its moons. Use Starry Night� to print a map of their locations. Titan is easily seen in any telescope. Rhea is more of a challenge and Tethys and Dione require a good eye and telescope. Iapetus follows an odd orbit, and changes in brightness as it moves from west to east. Enceladus is extremely challenging, and tiny Mimas just about impossible.
So remember: Dress warmly, be prepared, and enjoy the wonderful sights of the winter sky!
January 2007
Geoff has been a life-long telescope addict, and is active in many areas of visual observation; he is a moderator of the Yahoo "Talking Telescopes" group.
{ width: 160, height: 160, defaultImage: '', layers: 'Artimg-Constellation_Focus' }
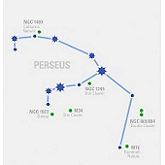
Perseus is the mythological hero who saved Andromeda from Cetus, the Sea Monster. Perseus used Medusa's head (lopped off in a previous adventure) to turn Cetus to stone. At this time of year Perseus is visible in the north-east after dusk. As the night progresses, it rises higher for excellent viewing, and there are a number of fabulous sights on show...
NGC 869/884, the Double Cluster, is a favorite target and with good reason. Use binoculars to get an overview of this jewel box, then a low magnification in your telescope to bring out the distinctly varied coloration of stars in each cluster. Both clusters are about 7000 light-years away and are part of the Perseus arm, one of the spiral arms of our Milky Way.
M76, the Dumbbell Nebula, is another favorite among observers because of its obvious hourglass/dumbbell shape. It's faint and small but responds well to magnification. Averted vision will help you see its two distinct lobes and nebulous wisps.
NGC 1245, an open cluster, is best viewed with low magnification. Most of the stars are hot blue, but there are some nicely contrasting bright orange stars, cooler and older than their blue house mates.
M34, another star cluster, contains about 60 members including several double-stars. The cluster is 1,500 light-years distant and is moving in the same direction through space as the Pleiades.
NGC 1023, an very elongated looking galaxy, hangs in space roughly 30 million light-years from the back of your eye. From that distance it's surprisingly bright, especially the middle. Try all magnifications to pick out structure and details.
NGC 1499, the California Nebula, is a large emission nebula. Under dark skies, it's bright enough to see with the naked eye. Use low magnification and a nebula filter if you have one. See if you can make out the shape of the state that gives the nebula its name.
January 2007
{ width: 160, height: 160, defaultImage: '', layers: 'Artimg-Constellation_Focus' }

At Mag -1.5, almost everyone knows that Sirius is the brightest star in the night sky. You may notice it driving home from work: visible from early dusk, it sparkles brilliantly above the southern horizon. What many people don't realize is that Sirius is actually a double star. Sirius B is a challenging target, just 5" from Sirius and quite dim at Mag 8.5. It requires excellent optics but, if you can nail it, it's surely a feather in your cap.
A little to the west of Sirius is a three star asterism, with the central star, V1, being an easy, pretty double separated by 17".
M41 (also known as the Little Beehive) is a fine open cluster lying about 2,000 lightyears from the back of your eyeball. It has about 25 bright stars spattered across a field about the size of a full moon; in reality, they're spread over an area 20 lightyears in width. Bright enough to be sometimes visible to the naked eye (Aristotle is said to have noticed it around 325 B.C.) M41 is a good target for binos or low magnification in your scope.
M46 and M47 are two open clusters just over 1� apart, making comparison very easy. Both are about 20 million years old but they're not connected in any way: M46 hangs in space about 5,000 lightyears distant, while M47 is closer at 1,700 lightyears. Of special interest is the planetary nebula that seems to be embedded near M46's center. Although the nebula is probably not actually part of the cluster (it simply lies along the same line of sight), it makes for a good opportunity to see two different types of deep sky object at the same time.
In larger scopes, NGC 2360 (a.k.a. Caldwell 58) is a pleasing open cluster almost half way between M46 and Sirius.
M93, the winter Butterfly Cluster, is a rich 6th Mag open cluster with about 80 visible stars. It's core resembles an arrowhead. While you're in the area take a look at k Puppis, a nice bright double.
NGC 2362, the Mexican Jumping Star (a.k.a. Caldwell 64), and NGC 2354 are another pair of closely placed open clusters worth comparing.
Finally, Mag 1.5 Adhara has a Mag 7.5 double just 7.5" due south. Adhara is a main sequence star that shines 9,000 times as brightly as our own sun. Good thing it's 432 lightyears away.
February 2007
{ width: 160, height: 160, defaultImage: '', layers: 'Artimg-Constellation_Focus' }
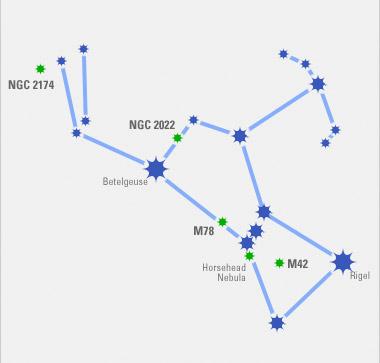
Visible towards the southern horizon from winter through spring in the northern hemisphere, Orion is one of the most easily recognizable and beloved constellations.
By far, the most popular celestial gem in the constellation of Orion is M42, The Great Orion Nebula. Although it is 1500 light-years away, M42 is a great target to view in small telescopes. This is due not only to its brightness, but also to its wonderful cloud structure, which in telescopes takes on a clearly three-dimensional shape.
Observers new and old come back to M42 time and time again because of the wealth of detail visible: pinpoint stars hang among uncanny, ghostly tendrils of glowing hydrogen that stream across space for trillions of miles.
Astronomers call M42 a stellar nursery; when you look at this giant gas cloud you are seeing what our own solar system might have looked like billions of years ago. The nebula's reddish coloration (visible only in photographs) betrays the ionized hydrogen that predominates the composition of the cloud, but carbon monoxide and other complex molecules have also been detected. When viewed through a large telescope, the cloud takes on a wonderful greenish hue.
The energy that keeps the nebula glowing so bright comes from the very hot, young stars in the brightest part of the cloud. Known as the Trapezium, this formation of four stars (from west to east: A, B, C, and D) is visible in most backyard telescopes.
A fun challenge for amateur astronomers is to "bag" the two 11th magnitude E and F stars, shown here in green. Their proximity to far brighter stars makes them difficult to separate on nights of so-so seeing. On great nights, discerning the E and F stars is a good test of your telescope's optics.
More Targets
The Horsehead Nebula was made famous from its beautiful photographs; it really does resemble what its name implies! The Horsehead can be found just below Alnitak (the leftmost/easternmost star in Orion's belt). The Horsehead is an extremely difficult target for medium aperture telescopes, and requires steady and dark skies to be seen even in a larger telescope.
A far easier nebular target in the same area can be found above Alnitak: Located above Orion's belt, M78 belongs to the same large cloud of gas and dust as the main Orion nebula (M42). It has 2 companion nebulae (NGC 2067 & 2071). All 3 are reflection nebulae, and M78 is in fact the brightest reflection nebula. It is visible in binoculars but best seen through a telescope.
NGC 2022 is a bright planetary nebula: a dying sun peeling off its outer shell. Because planetary nebulae are best viewed at high magnification, you should start out low (40x) to find the object, and then try 100x and 200x. The name "planetary" is misleading, as these objects are not planets at all but stars at the end of their life cycle. However, they do look something like cloudy planets, and this fact confused earlier observers whose incorrect naming convention has stayed with us to this day.
NCG 2174 is a bright but diffuse emission nebula, a cloud of hydrogen gas very close to a young hot star (or multiple stars). In such clouds, energy from the stars heats up the hydrogen to 10,000�K until it glows with the distinctive red color one can see in long-exposure photographs.
Betelgeuse is the only red star in Orion. Not only does this make it easy to identify, it also tells us we are looking at a giant star.
Betelgeuse (pronounced beetle juice by most astronomers) derives its name from an Arabic phrase meaning "the armpit of the central one."
The star marks the eastern shoulder of mighty Orion, the Hunter. Another name for Betelgeuse is Alpha Orionis, indicating it is the brightest star in the winter constellation of Orion. However, Rigel (Beta Orionis) is actually brighter. The misclassification happened because Betelgeuse is a variable star (a star that changes brightness over time) and it might have been brighter than Rigel when Johannes Bayer originally categorized it.
Betelgeuse is an M1 red supergiant, 650 times the diameter and about 15 times the mass of the Sun. If Betelgeuse were to replace the Sun, planets out to the orbit of Mars would be engulfed!
Betelgeuse is an ancient star approaching the end of its life cycle. Because of its mass it might fuse elements all the way to iron and blow up as a supernova that would be as bright as the crescent Moon, as seen from Earth. A dense neutron star would be left behind. The other alternative is that it might evolve into a rare neon-oxygen dwarf.
Betelgeuse was the first star to have its surface directly imaged, a feat accomplished in 1996 with the Hubble Space Telescope.
On the western heel of Orion, the Hunter, rests brilliant Rigel. In classical mythology, Rigel marks the spot where Scorpio, the Scorpion stung Orion after a brief and fierce battle. Its Arabic name means the Foot.
Rigel is a multiple star system. The brighter component, Rigel A, is a blue super giant that shines a remarkable 40,000 times stronger than the Sun! Although 775 light-years distant, its light shines bright in our evening skies, at magnitude 0.12.
Telescope observers should be able to resolve Rigel's companion, a fairly bright 7th magnitude star.
A heavy star of 17 solar masses, Rigel is likely to go out with a bang some day, or it might become a rare oxygen-neon white dwarf.
Don't forget to compare the colors of Betelgeuse and Rigel on your next outing under the stars!
March 2007
{ width: 160, height: 160, defaultImage: '', layers: 'Artimg-FindingOsiris' }

The first confirmed discovery of a planet revolving around a star other than the Sun was made less than 30 years ago by Canadian astronomers Bruce Campbell, G. A. H. Walker, and S. Yang. Since then, more than 200 more so-called exoplanets have been discovered. Most of the stars with known planets are fairly faint, and known mainly by their catalog number.
One of the most interesting has been the planet HD209458b, which revolves around the 8th magnitude star HD209458 in the constellation Pegasus. This planet, nicknamed Osiris after the Egyptian god, was discovered in 1999, and was the first known exoplanet to transit its star regularly. In other words, its orbit is such that the planet passes between us and its star once a "year," its year being 3.5 Earth days long. Its spectrum has been studied by the Hubble Space Telescope, and is known to contain water.
Like all stars except the Sun, HD209458 is too far away to show a disk, appearing in the largest telescopes as a point of light. But, simply because it?s known that this star has a planet with water, there is a real fascination of seeing it with our own eyes and, with the help of Starry Night� and a small telescope, this is quite possible.
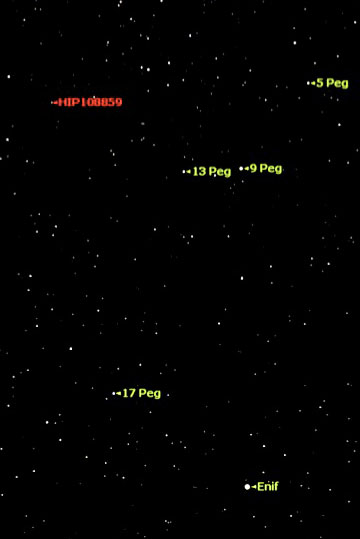
HD209458 is also known as HIP108859, and it is under that catalog number that you can find it in Starry Night. It is visible at present in the morning sky, between the stars 9 and 33 Pegasi in one of the "legs" of the winged horse Pegasus. You can find it easily by starting at the bright star Enif, Epsilon Pegasi. Sweep 7 degrees north to find 9 Pegasi, 4th magnitude. Look for 5th magnitude 13 Pegasi a little over a degree east of 9 Pegasi. From there, HIP108859 is 3.5 degrees northeast. This star is very similar in size and color to our Sun, but is located 154 light years away.
How to Mark Stars With Extrasolar Planets
Starry Night� Tip for Pro and Pro Plus version 6 users
- Open the Options Pane and expand the Star Options Layer.
- Check the "Mark Stars with Extrasolar Planets" box.
- Circles will appear around the stars that are known to harbor planets.
- If you turn on markers for extrasolar planets, the star's Info pane will include information about the extrasolar planet, such as the planet?s mass and distance from its central star.
May 2007
Geoff has been a life-long telescope addict, and is active in many areas of visual observation; he is a moderator of the Yahoo "Talking Telescopes" group.
{ width: 160, height: 160, defaultImage: '', layers: 'Artimg-Constellation_Focus' }

Lyra is currently well placed for observation. Overhead during and after dusk, it passes through the zenith around midnight.
Vega is the northern hemispehere's second brightest star; only Sirius, at a magnitude of -1.5, is brighter. Because the Earth's spin is slightly imperfect, its axis carves a circle on the sky every 26,000 years. The phenomenon, called precession, means that as time progresses each pole, north and south, points to different stars. 13,000 years ago, Lyra was directly above our north pole and therefore acted as our Pole Star. And in another 13,000 years or so, it will once again act in that capacity.
One of the best known planetary nebulas is M57, lying roughly half way between Sheliak and Sulafat. Its cosmic bagel structure is apparent even in a 3" scope and, with larger apertures, only becomes clearer and more detailed. Try several levels of magnification.
M56 is a fairly dispersed globular cluster.
Finally, Epsilon Lyrae is one of the most beloved double star systems. It's fairly easy to split the first double, but higher magnification reveals that each component is itself a binary system.
August 2007
{ width: 160, height: 160, defaultImage: '', layers: 'Artimg-Constellation_Focus' }
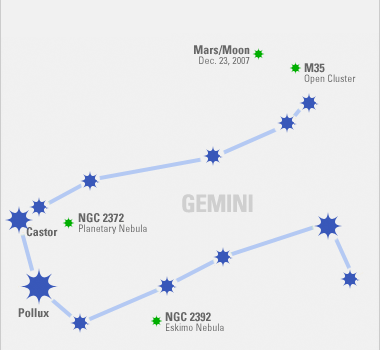
Gemini is well placed for observations in December, floating high overhead in the south-east by late evening.
Castor is an easy, pretty double which resolves nicely in small scopes. A true double, the stars revolve around each other every 510 years.
Close by is NGC 2372, a faint planetary nebula that looks like a mini-dumbbell.
The Eskimo Nebula (NGC 2392), photographed so magnificently by the Hubble Space Telescope, is also known the Clown Face Nebula. Only large scopes bring out the details you would associate with a face, but it's a fun target nonetheless.
M35 (NGC 2168) is a lovely open cluster by Gemini's left foot, with a smaller, dimmer but rich companion cluster NGC 2158; physically unrelated, they just happen to lie along the same line of sight.
December 2007
{ width: 160, height: 160, defaultImage: '', layers: 'Artimg-Constellation_Focus' }
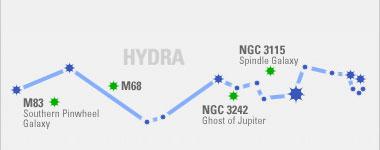
Don't let the scale of the diagram above fool you: Hydra is the largest constellation, and covers some 90� of sky. At this time of year, from mid-northern latitudes, it lies along the southern horizon at midnight.
To start, M83 is an impressive barred spiral galaxy that, from our vantage point in space, lies almost face-on. Even small scopes should pick up its obvious structure.
M68 is a nice globular cluster, 33,000 lightyears away. It's visible in binoculars but a telescope brings out the individual suns.
NGC 3242, the Ghost of Jupiter, is one of the finest planetary nebulae in the sky. It's a full magnitude brighter than the more famous Ring Nebula (M57) in Lyra. A small telescope reveals a pale blue disc with diffuse edges and the prominent 11th magnitude star. Due to its high surface brightness, this target takes high magnification quite well: try 200x or 250x to see the football-shaped interior and faint shell.
NGC 3115, the Spindle Galaxy, is actually in Sextans. In contrast to M83, this galaxy is seen almost edge on. It's a lenticular galaxy, meaning it's a disc galaxy with very little spiral structure.
April 2006
{ width: 160, height: 160, defaultImage: '', layers: 'Artimg-WhatsInTheSky_05-12_square' }

May evenings provide a great opportunity to grab your telescope and see some of the best celestial treats in the sky! With weather warming up and skies clearing up, there’s no shortage of celestial delicacies to observe. During mid-May nights, Saturn and its stunning rings will be due south of the bright star Arcturus. Just about any telescope will show you Saturn and its marvelous ring system at powers of 40x or above, but views through larger aperture scopes will be better than those through smaller instruments. Here are a few more highlights to keep your eyes peeled for during May
The Active Sun - We’re near solar maximum so it’s a great time to use a simple white light solar filter for dramatic views of ever-changing sunspots. (CAUTION: Never look at the Sun, even for an instant, without a properly fitted solar filter).
The Rings of Saturn - Saturn is visible to the naked eye as a bright disk following the ecliptic path, but you need a telescope and a fairly high power eyepiece (40x or higher) to see the rings and orbiting moons.
Mars - The Red Planet is visible to the naked eye as a reddish disk, but you need a telescope with a fairly high power eyepiece to see any details on our dusty neighbor.
Galaxies in The Big Dipper - including M81, M82 and M101. Use a telescope to catch glimpses of galaxies lurking around the recognizable Big Dipper asterism, use a star chart and track some down! Explore the Virgo Cluster of Galaxies - Point your telescope a couple of Moon diameters east of the star at the end of Leo, Denebola, and start scanning with a low power eyepiece; use a star chart to tell which ones you see!
Annular Solar Eclipse - Visible from many northwestern North America locations prior to sunset on May 20. With a solar filter-equipped telescope or pair of binoculars, you can enjoy the show as the Moon passes between the Earth and the Sun. (CAUTION: Never look at the Sun, even for an instant, without a properly fitted solar filter).
Venus - Cloudy Venus is a bright beacon in May evening skies. Train your telescope on our planet’s next-door neighbor and catch glimpses of its dense cloud-choked atmosphere.
The Great Devil Ball, Omega Centauri - The grandest globular star cluster of them all will be visible in May skies to telescope and binocular observers based in Southern U.S.A.
Extra-Galactic Treats in Leo - Use a telescope to hunt down faint fuzzies and deep-space phenomena in and around the constellation Leo under clear May skies. The bigger the telescope, the better your views will be!
Tracking Down M87 - Use big astronomical binoculars or a telescope to see the supergiant elliptical galaxy M87 (a.k.a NGC 4486) in the Virgo cluster and see where a black hole lurks! While we cannot observe the supermassive black hole at the core of this mysterious elliptical galaxy, it’s fun to track down this celestial showpiece.
{ width: 160, height: 160, defaultImage: '', layers: 'Artimg-WhatsInTheSky_06-12_square' }

Warm weather, clearing skies, and a variety of celestial events make June a great time to get outside and enjoy the wonders of the sky. The whole family will enjoy summer stargazing sessions in the backyard or at your favorite dark-sky site.
You don’t want to miss the action as Venus transits the face of the Sun prior to sunset on June 5th, but BE SAFE and remember to use protective solar filters for your telescope or binoculars. This is truly the solar event of our lifetimes, considering the next Venus transit won’t occur until December of 2117!
Here are a few more celestial highlights for June stargazing:
Partial Lunar Eclipse – Catch a partial eclipse of the Moon on the evening of June 4th from Northwestern locations of North America.
Solar Transit of Venus – Use a telescope or binocular fitted with a protective solar filter and catch the transit of Venus across the Sun before sunset on June 5th. Don’t miss it!
Mars - The Red Planet is visible to the naked eye as a reddish disk, but you need a telescope with a fairly high power eyepiece to see any details on our dusty neighbor.
The Active Sun – Our nearest star will provide great daytime views of sunspots and activity throughout June as we approach solar maximum. Don’t forget that safe solar filter!
Saturn – Throughout June, the ringed planet will be an attractive target for stargazers. Use an eyepiece that will yield at least 40x in your telescope to catch views of Saturn’s beautiful rings and orbiting moons.
Great Globular Cluster in Hercules – Track down popular planetary nebula M57 in the constellation Lyra in June skies. You’ll need a telescope with at least 4.5" aperture to see the interior hole of the ring. Use an 8" or larger reflector for more detailed views.
Colorful Double Albireo – While it may look like a single star to the naked eye, use a telescope to split popular double star Albireo into its two contrasting components. Albireo A shines a bright amber color, while Albireo B is blue-green in color.
Whirlpool Galaxy – On clear June evenings, use astronomical binoculars or a telescope to see M51, the Whirlpool Galaxy and its attached companion galaxy M51b in the constellation Canes Venatici.
Summer Milky Way – Get away from city lights this June to see the cosmic clouds of our own galaxy, the Milky Way with unaided eyes. Take a closer look with binoculars or a telescope for more detail.
{ width: 160, height: 160, defaultImage: '', layers: 'Artimg-WhatsInTheSky_07-12_square' }

Throughout July, as summer nights grow shorter, you’ll need to start observing about 10pm to see the best views of the summer night sky. If you venture out to a favorite dark sky site away from city lights, you’ll find some of the best celestial treats waiting for you in inky-black skies.
Here are a few of Orion’s top picks for July stargazing:
The Summer Milky Way – Our own galaxy, the Milky Way, will stretch across the July sky from roughly due north to due south embracing such constellations as Cygnus, Cassiopeia and Sagittarius. Under dark skies, the naked eye is a great tool to appreciate this deep sky wonder, but binoculars or a wide angle telescope will enhance your views of our home galaxy!
The Ringed Giant Saturn – Saturn is still visible lower in the Southwest portion of the night sky during July. Use a telescope with about 40 or more power and you’ll see Saturn’s stunning rings. Try and catch it during twilight when it is still higher above the western sky for the best views.
The Summer Triangle – Take a look at our monthly star charts online or a planisphere like the Orion StarTarget and you’ll see three bright stars that dominate the northern sky - Altair, Deneb and Vega; the Summer Triangle. Around 10pm throughout July, Vega, the western most star of the triangle will be nearly overhead.
M57, a Dying Star – Just Southeast of Vega, between the stars Sheliak and Sulafat in the constellation Lyra (consult a star chart or a smartphone program like Orion’s StarSeek app) is the famous "Ring Nebula" or M57. In large telescopes with high-power eyepieces, some observers have even seen the central star.
The Wild Duck Cluster – South of the southernmost star of the Summer Triangle, Altair, in the constellation of Aquila is M11, the Wild Duck Cluster. M11 is a small but rich open star cluster that can be seen with a telescope in even moderately light-polluted skies.
M22, a Grand Globular Cluster – Globular Star Cluster M22, an old, dense ball of tens of thousands of stars can be seen in July in the constellation of Sagittarius. Many amateurs like the appearance of M22 more than another popular globular, M13, since it is slightly more "open" and its stars are perhaps a little easier to resolve.
M8, the Lagoon Nebula – West and slightly south of M22 is M8, one of the "Four Grand Nebulas of Summer." M8 is in Sagittarius just off the "spout" of the teapot asterism. From a dark sky location it is visible to the unaided eye as a hazy patch. Binoculars and larger telescopes will reveal more of this nebula’s details.
M20, the Trifid Nebula – About a binoculars’ field-of-view northeast of M8 is another summer treat, the Trifid Nebula. The Trifid is visible in binoculars from a dark sky and larger telescopes show two distinct globs of lowing gas. The northern glob is dissected into three smaller lobes by dust lanes, giving the name Trifid to M20.
M17, the Swan Nebula – North of M20 is another nebula, the Swan Nebula, or M17. Like M8 and M20, the Swan is a glowing gas cloud where gas and dust are being gravitationally pulled together to form new stars. Use binoculars in a dark sky site or a telescope and Oxygen-III filter in areas of moderate light pollution.
M16, the Eagle Nebula – The last of the Four Great Summer Nebulas is the Eagle or "Star Queen" nebula. More delicate and fainter than M17, this is pretty easily seen with just binoculars from the good sky conditions of a national park, but difficult from a city. As with all deep sky objects, try to find M16 when the Moon is down for best results.
{ width: 160, height: 160, defaultImage: '', layers: 'Artimg-WhatsInTheSky_09-12_square' }

Here are a few of Orion’s top picks for September stargazing:
A Planetary Bonanza in September–In early September Mars, Saturn will put on a show low in the western twilight after sunset. In the morning sky, Jupiter is rising sooner and sooner, dominating the morning sky. Venus also graces the morning sky. If you want more of a challenge, Uranus and Neptune are in excellent position since Uranus reaches its brightest as it nears opposition in September.
The Northern Milky Way–In early September, around 9 PM, the "Summer Triangle" of three bright stars (Vega, Deneb and Altair) is nearly overhead. In the northernmost portion of the Summer Triangle, you’ll see the brightest portion of the northern Milky Way. Point a telescope there and you’ll discover that the fuzzy outlines of the Milky Way will resolve into fields of glittering stars.
Planetary Nebulas in the Summer Triangle–Get a star chart and see how many of these you can find: the famous Ring Nebula (M57) in the constellation Lyra; the Dumbbell Nebula (M27) in Vulpecula; and the "Blinking Planetary," NGC 6826 in Cygnus. Not far outside the western boundary of the Summer triangle is a small, but intensely colorful planetary nebula, NGC 6572.
Another Island Universe–In early September, lurking low in the northeastern sky is another galaxy, separate from our Milky Way, the Great Andromeda Galaxy, or M31. From a dark, moonless sky, M31 is visible with the unaided eye as a slightly fuzzy spot, a pair of 7x50 or larger binoculars will give you a good view and telescopes will reveal some of the dust lanes in the galaxy.
More Extra-GalacticTreats–If you haven’t tracked down "The Whirlpool Galaxy," M51, off the handle of the easily recognizable Big Dipper, do it now while you still can! It will be too low for most people to get a good view after September and you’ll need to wait till late winter or next spring to catch a good view of this picturesque galaxy.
Find Mirach’s Ghost–Go back to Andromeda and locate nearby Beta Andromeda, the bright star to the SE of M31. This star has also been named Mirach. If you have a 6" or larger telescope, take a close look at Mirach, off to side, almost lost in the glare you can see another galaxy, Mirach’s Ghost.
A Brilliant Open Star Cluster–Off the western end of Cassiopeia is the Open star Cluster M52. You can find it with binoculars from a dark sky but the view is definitely better in a telescope. With a larger scope, say 8" or larger, and with the aid of an UltraBlock or O-III eyepiece filter, you may be able to catch views of faint emission nebulas near M52.
Two More Brilliant Star Clusters–If you liked M52, you’ll love the "Double Cluster in Perseus." Lying between Cassiopeia and Perseus is a bright, fuzzy spot in the Milky Way, and a binocular or telescope will reveal two, bright open star clusters. It appears low in the northeast around 9 PM early in September; but, as it climbs as the evening wears on, it becomes a real showpiece.
The Globular Star Clusters of Fall–Almost in a row, off the western side of Pegasus are three globular star clusters that line up almost north-south. These sparkling clusters are, starting with the most northern globular, M15 in Pegasus; M2 in Aquarius and M30 in Capricorn. From a dark sky site you can find all of them in binoculars!
A Dying Star–A challenging, but wonderful object is the Helix Nebula in the constellation Aquarius. Don’t try this from the city; the Helix is big, but really faint. Wait until later in the evening at a dark sky site to catch this planetary nebula, since it will be easier to see the further it rises from the horizon. The best views will be in telescopes of 80mm or larger aperture, at LOW power and with an O-III eyepiece filter.
{ width: 160, height: 160, defaultImage: '', layers: 'Artimg-WhatsInTheSky_11-12_square' }

November presents some clear, cool nights for many locations (between winter storms). So bundle up and get outside for stargazing fun!
Milky Way-In early November, stretching from overhead to the southwestern horizon, you can still catch bright portions of the Milky Way. As the month goes on and Earth marches in its orbit around the Sun, the Milky Way will appear lower and lower to the western horizon. The Milky Way is a wonderful target to explore with 50mm or larger binoculars or a wide-field telescope; there are dozens of star clusters to pick out, even in moderately light polluted areas.
Big and Bright Jupiter-In Early November go outside about 9pm on a clear night. Face east and look about half way up towards the zenith, which is directly overhead. Here you'll easily see the bright and big planet Jupiter. Use a telescope to enjoy views of its four brightest moons (Io, Europa, Ganymede, and Callisto) and its striking equatorial cloud belts. A 3" or larger telescope will give rewarding views.
Fire in the Sky-On Saturday night, November 17 the Moon is only a few days old so the conditions are good for the late night appearance of the Leonids Meteor Shower. This shower is predicted to peak on the night of November 17 (and the morning of the 18th) and will have dozens of meteors per hour visible from a dark sky location. The Leonid shower is known for its bright meteors, the brightest of which leave a trail high in the sky that can take several seconds or longer to dissipate.
Best Galaxy Ever!-M31, The Andromeda Galaxy. Around 9pm in early November, M31 lies just north of the stars that form the constellation of Andromedea/NE of Pegasas. Use a star chart, planisphere, or your Orion StarSeek app to help find it with binoculars. You can take a better look with a telescope using a wide angle eyepiece. From a dark sky site this galaxy is an easy naked-eye object as well; Andromeda is the closest large galaxy to our own Milky Way, about 2 million light years away.
A Bright Spot in the Milky Way-High in the northern sky at 10pm is a brighter knot in the Milky Way, between the constellations of Perseus and Cassiopeia. With binoculars you can tell that it is really two open star clusters side by side, the famous Double Cluster in Perseus. Also called NGC 884 & NGC 889, these clusters are relatively close to Earth, about 7-8,000 light years away. They're also very young clusters. Astronomers believe these are only about 3-5 million years old, just "babies" on the cosmic timescale!
A Dark Sky Test-On the opposite side of Andromeda is another nearby galaxy, M33. Use a star chart to look for it in 50mm or larger binoculars. If you have a dark sky to observe from, you can even detect this galaxy with the unaided eye. In fact, M33 is used as a test by many experienced observers to judge the darkness and transparency of a potential observing site.
Catch a Dying Star-High in the western sky, early in the evening, the constellation of Cygnus is still prominent and topped off by the star Deneb at the top of the "Northern Cross". With a star chart, track down the Veil Nebula on the eastern side of Cygnus near the star 52 Cygni. Use an Oxygen III filter and low power while you scan for this object. The Veil is a remnant of a supernova explosion, where a star has died. We recommend a 4" or larger telescope to catch it (but it has been seen in smaller scopes from good dark sky locations).
November's Challenge Object-The Silver Dollar Galaxy, NGC 253. At 9pm, low in the south is the "starburst" galaxy NGC 253. From a dark sky, this grand galaxy is easy to see in binoculars and with a telescope, but can you see it with your naked eye? If you can see this challenging object without a telescope, you definitely have excellent skies (dark and transparent) and you are probably looking at the most distant object that a person can see without a telescope, about 11.5 million light years distant from Earth.
All objects described above can easily be seen with the suggested equipment from a dark sky site, a viewing location some distance away from city lights where light pollution and when bright moonlight does not overpower the stars. All objects have been verified by actual observations by Orion Telescopes & Binoculars Staff at Fremont Peak State Park, and/or Deep Sky Ranch, 60 miles and 90 miles respectively from San Jose International Airport, San Jose, CA.
{ width: 160, height: 160, defaultImage: '', layers: 'Artimg-WhatsInTheSky_12-12_square' }

December brings cold winter nights and some of the clearest skies of the year for many locations. Bundle up to keep warm and get outside for stargazing fun!
Here are a few of Orion's top picks for December stargazing:
December Meteors - On December 13th, take advantage of the dark, New Moon sky conditions to see the Geminids meteor shower. Leftover debris from the disintegrating asteroid 3200 Phaeton will streak across the sky at a rate of up to 120 meteors per hour. The best views will be from a dark sky location on the night of December 13th into the early morning hours of December 14th. Look for meteors to appear to radiate out from the constellation Gemini.
Big Bright Jupiter - In early December, go outside around 7PM on a clear night. While facing east, look about halfway upwards towards the zenith (the zenith is directly overhead) to find the bright planet Jupiter. This gigantic planet is a perfect target for telescopes of all sizes throughout the month. Jupiter reaches "opposition" on December 3rd, when it will be opposite the Sun in the sky and visible all night long.
Our All Time Favorite - Low in the eastern sky by 9pm you'll find the Orion Nebula (M42), a patch of glowing gas and dust where stars are formed. You can spot M42 just below Orion's belt; sharp-eyed observers can see it as a "fuzzy" star, easily seen in a pair of 7x50 or larger binoculars. By midnight it will be nearly due south, about halfway between the horizon and the zenith. The view through a telescope is spectacular.
Great Galaxies - Around 7pm in early December, galaxies M31 and M33 will be on either side of the constellation Andromeda and nearly overhead. Use a star chart or planisphere to catch them with 50mm or larger binoculars, or take a deeper, better look with a telescope.
Theta Orionis, the Heart of the Orion Nebula - Also known as the Trapezium, the four brightest stars in the core of M42, the Orion Nebula. The Trapezium stars are extremely hot and the ultraviolet light they release makes the surrounding gas fluoresce, or "glow". It will take a 4" or larger telescope to see all four Trapezium stars; they are very close together, so use a Barlow or a higher power eyepiece when M42 is higher in the sky and the seeing is steady.
Three Little Clusters, All in a Row - M36, M37 and M38. If you've ever thought all star clusters look alike, track three clusters down for a pleasant surprise. They are in the constellation Auriga which has the bright star Capella high in the northeast around 7pm in early December. The clusters can be seen with just about any telescope. You'll notice differences in the star patterns and intensities between the clusters. Use low powers to find objects like these star clusters, since you'll have a wider field of view, making it easier to sweep the sky.
December's Challenge Object, The Rosette Nebula - Wait until at least 10pm or midnight to see this nebula east of Betelgeuse, the reddish star in the eastern shoulder of Orion. About a binocular field away in the winter Milky Way will be the Rosette Nebula. It's an emission nebula like the Orion Nebula, but far dimmer and even larger. There is a star cluster, NGC 2244, in the center of the Rosette that you can see even with small 80mm telescopes. Use a low power, wide angle eyepiece and an Oxygen-III filter to tease out the nebula's glow around the cluster.
All objects described above can easily be seen with the suggested equipment from a dark sky site, a viewing location some distance away from city lights where light pollution and when bright moonlight does not overpower the stars. All objects have been verified by actual observations by Orion Telescopes & Binoculars Staff at Fremont Peak State Park, and/or Deep Sky Ranch, 60 miles and 90 miles respectively from San Jose International Airport, San Jose, CA.
{ width: 160, height: 160, defaultImage: '', layers: 'Artimg-CelestialEvents2012' }

Mark your calendars and organize star parties with friends and family to catch these noteworthy 2012 night sky events. In addition to key celestial events, we’ve also listed the First Quarter and New Moon phase dates for each month. The First Quarter Moon provides interesting views of the lunar terminator region and New Moon evenings are great opportunities to observe deep sky objects.
January
Kick off the New Year by watching the Quadrantids meteor shower peak on the 3rd and 4th, and enjoy great views of Jupiter all month long.
 January 1 – First Quarter Moon
 January 3 – Jupiter 5° South of the Moon
 January 3, 4 – Quadrantids meteor shower peaks. Look for meteors radiating from the constellation Bootes.
 January 23 – New Moon
February
Explore the Winter Milky Way and enjoy early evening views of Jupiter.
- January 31 / February 1 – First Quarter Moon
- February 21 – New Moon
 February 25 – Venus 3° South of the Moon
- February 27 – Jupiter 4° South of the Moon
March
Some of the best galaxies to view are spread across the sky from Ursa Major to Virgo during March.
- March 1 – First Quarter Moon
 March 3 – Mars at opposition. The best time to observe the Red Planet.
- March 5 – Mars closest to Earth
- March 11-14 – Conjunction of Venus and Jupiter. The two planets will be as close as just 3° apart in the night sky.
- March 20 – Vernal Equinox
- March 22 – New Moon
April
Mid-April is the best time of year to see ringed Saturn as it comes to opposition. Good views of Mars and spring galaxies continue.
- April 3 – Venus 0.5° South of Pleiades (M45). A great sight for binoculars and telescopes.
 April 15 – Saturn at opposition. The best time to observe the ringed planet.
- April 21 – New Moon
- April 22 – Jupiter 2° South of the Moon
- April 29 – First Quarter Moon
May
Saturn and distant galaxies are still featured in the evening sky throughout May.
- May 6 – Largest Full Moon of 2012
- May 20 – New Moon
- May 20 – Annular Solar Eclipse. A partial eclipse will be visible throughout parts of eastern Asia and most of
North America. - May 21 – Venus 5° North of the Moon
- May 28 – First Quarter Moon
June
Don’t miss the extremely rare transit of Venus across the Sun on June 6. Always use protective gear such as a solar filter when viewing the Sun. This is the last time in the 21st century that Venus will pass in front of the Sun as viewed from Earth.
- June 4 – Partial Lunar Eclipse. Visible throughout most of North and South America, Asia, Australia, and the
Pacific Ocean. - June 5, 6 – Transit of Venus across the Sun. Mid-transit will occur at 1:29 UTC on June 6. Visible from most
North America locations around sunset on June 5. CAUTION: Never look at the Sun, either directly or through
binoculars or a telescope, without a suitable protective solar filter used in a proper manner. - June 18 – Venus 2° South of the Moon
- June 19 – New Moon
- June 20 – Summer Solstice
- June 27 – First Quarter Moon
July
Summer stargazing season is in full swing this month, with the galactic core of the Milky Way positioned well for nighttime observations in mid-July.
- July 12 – Venus greatest illuminated extent. Venus will appear as a very bright waxing crescent.
- July 15 – Jupiter 0.5° South of the Moon. Venus 4° South of the Moon.
- July 19 – New Moon
- July 24 – Mars 4° North of the Moon
- July 26 – First Quarter Moon
August
Catch one of the best meteor showers of the year, the Perseids, as it peaks in mid-August, and enjoy warm summer stargazing sessions all month long.
- August 1 – An ideal evening to view the summer Milky Way and Sagittarius due South
- August 12, 13 – Perseids meteor shower peaks. Look for meteors radiating from the constellation Perseus.
- August 17 – New Moon
- August 22 – Saturn 5° North of the Moon. Mars 2° North of the Moon
- August 24 – First Quarter Moon
September
Seasoned stargazers look forward to September as the best time of year to observe the night sky, thanks to cooling temperatures and dry conditions. Kick off the fall stargazing season with great views of the planets, galaxies such as Andromeda (M31) and more.
- September 8 – Jupiter 0.6° North of the Moon
- September 12 – Venus 4° North of the Moon
- September 16 – New Moon
- September 18 – Saturn 5° North of the Moon
- September 22 –Autumnal Equinox. First Quarter Moon.
October
Cooler nights and great planetary viewing potential makes October a treat for astronomers.
- October 5 – Jupiter 0.9° North of the Moon, occultation
- October 15 – New Moon
- October 18 – Mars 2° South of the Moon
- October 22 – First Quarter Moon
November
Our namesake constellation, Orion, makes its way across the sky as planets dance close to the Moon throughout the month.
- November 2 – Jupiter 0.9° North of the Moon
- November 11 – Venus 5° North of the Moon
- November 12 – Saturn 4° North of the Moon
- November 13 – New Moon
- November 14 – Total Solar Eclipse (not visible from North America)
- November 16 – Mars 4° South of the Moon
- November 20 – First Quarter Moon
- November 27 – Venus 0.6° South of Saturn
- November 29 – Jupiter 0.6° North of the Moon
December
A great month for viewing gigantic Jupiter, December also provides great opportunities to observe galaxies and clusters.
- December 3 – Jupiter at opposition. The best time to observe the gas giant planet.
- December 10 – Saturn 4° North of the Moon
- December 11 – Venus 1.6° North of the Moon
- December 13 – New Moon
- December 13, 14 – Geminids meteor shower peaks. Look for meteors radiating from the constellation Gemini.
- December 20 – First Quarter Moon
- December 21 – Winter Solstice
- December 26 – Jupiter 0.4° North of the Moon
{ width: 160, height: 160, defaultImage: '', layers: 'Artimg-WhatsInTheSky_02-13_square' }

Clear February nights present some great stargazing opportunities. Be sure to bundle up and keep warm while you get outside for some stargazing fun!
Here are a few of Orion's top picks for February stargazing:
Lunar Pairing - On the evening of February 1st, the Moon will pass 0.3� south of bright star Spica in the constellation Virgo. You can enjoy this close pairing with unaided eyes, but you can also obtain a great view in binoculars or a small telescope.
New Moon Night - The dark skies presented by the New Moon on the evening of February 10th presents a great, albeit chilly, opportunity to get great views of deep space objects in larger telescopes.
Make the Most of Mercury - Speedy planet Mercury will be in its best observing position in the evening sky of February 16th, when it reaches its greatest elongation east. Look for the closest planet to the Sun to appear low in the southwestern sky (approximately 11� from a level horizon) about 30 minutes after the Sun goes down. Use binoculars to pick Mercury out of the sunset's glow.
Jupiter Shines Bright - The biggest planet in our solar system will be a splendid sight for stargazers throughout February. Look for gigantic Jupiter near the constellation Taurus in the western sky. Since Jupiter sets well after midnight throughout February, it will be a great planetary target for telescopes.
Great Binocular Cluster - Get out your 50mm or larger binoculars for a great sight of the Pleiades star cluster (M45), which will be high in the northwestern sky during February. You can see the Pleiades with unaided eyes, but the open star cluster is a spectacular sight in binoculars.
Orion Nebula - Around 9pm throughout February, almost due south and about halfway up from the horizon, our namesake constellation Orion will be in a great viewing position. Use binoculars or a telescope and look in the area below the three recognizable stars of Orion's belt for a great view of the striking Orion Nebula.
Winter Star Clusters - Look east of bright star Sirius with a telescope to see two beautiful star clusters, M46 and M47 in the constellation Puppis. For more great cluster observations in February, look in the constellation Auriga to go after glittering clusters M36, M37 & M38.
M35 in Gemini - Use a telescope and go after open star cluster M35 in Gemini, which will be high in eastern February evening skies. If you happen to be in an especially dark sky site, try to pick out its companion star clusters.
Bright Galaxies - In late February, the bright galaxies M81 & M82 will be about as high in the sky as they ever get for North American stargazers. Use a large telescope and chase these galaxies down just off the leading edge of the Big Dipper asterism. Many observers consider M81 & M82 the best pairing of visual galaxies in the sky!
All objects described above can easily be seen with the suggested equipment from a dark sky site, a viewing location some distance away from city lights where light pollution and when bright moonlight does not overpower the stars. All objects have been verified by actual observations by Orion Telescopes & Binoculars Staff at Fremont Peak State Park, and/or Deep Sky Ranch, 60 miles and 90 miles respectively from San Jose International Airport, San Jose, CA.
{ width: 160, height: 160, defaultImage: '', layers: 'Artimg-WhatsInTheSky_03-13_square' }

Get outside for stargazing fun in March! The entire astronomy community is hoping Comet PANSTARRS will put on a celestial show this month, which it will if it survives its close-approach to the Sun. However, even if PANSTARRS doesn't live up to expectations, March evenings still offer plenty of amazing celestial sights to enjoy! Here are a few of Orion's top picks for March stargazing:
First Comet of 2013 - Comet PANSTARRS - Starting about mid-March, this comet will swing around the Sun and could provide wonderful views if it survives the close-approach. During its race away from the Sun, assuming it stays intact, Comet PANSTARRS will initially be visible with unaided eyes, but you'll need binoculars or a telescope as it gets father away from the Sun.
Triple Conjunction - Get outside after dark on the evenings of March 15th through the 18th to see a wonderful conjunction in the night sky as the crescent Moon sails past the Pleiades star cluster (M45) and bright planet Jupiter.
Hunt the Hunter - March is prime time to see the constellation of Orion and the Orion Nebula. After March, our namesake constellation will get lower and lower in the west, making it harder to see. The wispy Orion Nebula can easily be seen with 50mm or larger binoculars, and using a telescope will reveal more detail.
Brilliant Binocular Clusters - Use 50mm or larger binoculars in March for great views of the Pleiades cluster (M45), the Beehive cluster (M44), and the amazing Double Cluster in Perseus. These sparkling sky gems are simply beautiful when observed with big binoculars.
Last Call for M31 - Don't miss the last good views of the season of the Andromeda Galaxy (M31) low in the northwestern skies of March. It's the brightest spiral galaxy in the sky (except for the Milky Way).
Gas Giant - Big and bright Jupiter continues to be a splendid sight in March skies. Still fairly high in the sky, Jupiter and its four brightest moons provide an excellent planetary target for observation and imaging. Don't forget to send us your astrophotos of Jupiter - we'd love to see them!
Galaxies Galore - By about 9pm throughout March, Ursa Major, Leo, and the western edge of the Virgo galaxy cluster are high enough in the eastern sky to yield great views of some of our favorite galaxies. Check out the bright pair of M81 and M82 just above the Big Dipper asterism. Look east of Regulus to observe M65 and M66, which can be seen in a 60mm refractor or larger telescope. In the northeastern sky of March, check out the famous Whirlpool Galaxy (M1). While the Whirlpool can be seen with 50mm binoculars, using a 10" or 12" telescope in a dark sky site will let you start to see its beautiful spiral arms.
Challenge Object, NGC 2403 - Use a telescope to look for the wonderful face-on spiral galaxy NGC 2403 in the constellation Camelopardalis. If you're using a fairly large telescope, you may even be able to catch the nearby faint satellite galaxies Holmberg II and NGC 2366.
All objects described above can easily be seen with the suggested equipment from a dark sky site, a viewing location some distance away from city lights where light pollution and when bright moonlight does not overpower the stars. All objects have been verified by actual observations by Orion Telescopes & Binoculars Staff at Fremont Peak State Park, and/or Deep Sky Ranch, 60 miles and 90 miles respectively from San Jose International Airport, San Jose, CA.
{ width: 160, height: 160, defaultImage: '', layers: 'Artimg-WhatsInTheSky_07-13_square' }

Summer stargazing fun continues in July! Warm July nights are ideal opportunities to spend time outside with family and friends, exploring the heavens with your telescope or astronomy binoculars.
Here are some of our top suggestions for July stargazing:
Binocular Highlight-On July 3rd, look for bright and brilliant Venus low in the north-northwestern sky about an hour after sunset. Venus will appear to be close to the popular open star cluster, M44, the Beehive cluster. Use 50mm or larger binoculars to see this beautiful pairing.
The Summer Milky Way-At mid-month, around 10pm PT, the glorious Summer Milky Way shines down as a band of light that stretches from the Southern horizon to nearly overhead. You don't need binoculars or a telescope to see our home galaxy, but it's best observed from a site with inky-black dark skies. The Summer Milky Way will arch across the sky as the night progresses.
Spectacular Saturn-Still well-positioned in July skies, ringed Saturn continues to be a wonderful summer planetary target. Look for it in south to southwestern July skies around 10pm. Use an eyepiece that will yield at least 40x in your telescope to see Saturn's beautiful rings, then use a Barlow lens or higher-power eyepiece to go in for closer views. Larger telescopes and clear, dark skies will help you see a thin gap between Saturn's largest rings, which is called the Cassini Division.
Sparkling Open Star Clusters-In the constellation Scorpius, catch M6, the "Butterfly Cluster" and M7 in 50mm or larger binoculars. Point a telescope at these two open star clusters to try to see the subtle dust clouds nearby.
Flaming Gas Clouds-Scan the Summer Milky Way with 50mm or larger binoculars or a telescope to reveal some of the best emission nebulas of July. Use an Orion Oxygen-III Nebula Eyepiece Filter for the most stunning views. In Sagittarius, track down M8, the "Lagoon Nebula"; M20, the "Trifid Nebula"; and M17, the "Swan Nebula." In the constellation Serpens Cauda, see the delicate "Star Queen Nebula, M16. Use big binoculars to frame both M16 and M17 in the same field-of-view, or use a really large telescope to coax out the faint violet glow of M16.
Dying Stars and Glowing Balls of Gas-Look to the constellation Lyra with a telescope to catch one of the best Planetary Nebulas in the sky - M57, the famous "Ring Nebula"!
July Challenge Object - Hercules Galaxy Cluster-About half a billion light years from Earth in the constellation Hercules, not far from the star Beta Hercules in the southwest corner of the "keystone" asterism, lays the "Hercules Galaxy Cluster." This association is a group of 200-300 distant galaxies, the brightest of which is NGC 6050 at about 10th magnitude and can be seen with an 8" reflector under very dark skies with good seeing conditions. A larger aperture, 14"-18" telescope will begin to show about a half-dozen or more galaxies in one field-of-view. How many can you see in your telescope?
All objects described above can easily be seen with the suggested equipment from a dark sky site, a viewing location some distance away from city lights where light pollution and when bright moonlight does not overpower the stars. All objects have been verified by actual observations by Orion Telescopes & Binoculars Staff at Fremont Peak State Park, and/or Deep Sky Ranch, 60 miles and 90 miles respectively from San Jose International Airport, San Jose, CA.
{ width: 160, height: 160, defaultImage: '', layers: 'Artimg-WhatsInTheSky_04-13_square' }

Explore the starry skies of April! There will be a number of intriguing celestial sights to enjoy during April with the help of a binocular and/or telescope, but there will also be a few events you can enjoy with unaided eyes. As the Year of the Comets continues, astronomers are hopeful April will present good viewing opportunities for Comet PANSTARRS and Comet Lemmon. Here are a few of Orion's top picks for April stargazing:
Catch Comet PANSTARRS — While not as bright as expected, Comet PANSTARRS is still putting on quite a show in the night sky. In April you'll need 50mm or larger binoculars, or a telescope to get the best views of this cosmic traveler as it races out of our Solar System. An especially awesome sight will occur on the nights of April 3rd and 4th, when PANSTARRS will glide within 2� (about 4 lunar diameters, or "Full Moon widths") of M31, the Andromeda Galaxy! Use 50mm or larger binoculars or a wide-field telescope to get the best view of this once-in-a-lifetime event.
Rise Early for Comet Lemmon — If you rise before dawn in April, you'll have a chance to see a second bright comet, Comet Lemmon. By mid-month this comet will be low in the southeastern dawn sky, and it will get higher with the passing days. This comet is expected to fade significantly by May, and it will then likely require an astrophotography setup to capture an image of it. So take advantage of pre-dawn viewing opportunities in April! Learn more about when to see Comet Lemmon in this informative article.
A Great Month for Star Parties! — With the New Moon occurring on Wednesday, April 10th, the prior weekend of April 6th and 7th, and the following weekend of April 13th and 14th both present great stargazing opportunities. Since the Moon will be relatively dim on these weekends, they will be great times to organize star parties and search for and explore faint Deep Sky Objects with friends and family!
Challenging Meteor Shower — On April 21st, the April Lyrids Meteor Shower will occur, but unfortunately this popular perennial event will share the sky with a waxing Moon, which will reach Full Moon phase on April 25th. The glare of the bright Moon will hamper meteor observations, but it will still be worthwhile to sit back in a comfy chair and try to sight meteors as they appear to radiate from the constellation Lyra in the northeastern sky.
Binocular Bounty — Use 50mm or larger binoculars in April to explore our personal favorite constellation — Orion! The entire constellation is a treasure trove of celestial sights, but we especially enjoy observing M42, the Orion Nebula, with big astronomy binoculars. For even better observations of this cloudy nebula, use a 6" telescope with a wide-angle, low-power eyepiece to obtain a nicely framed view of this stellar nursery where stars are formed.
Last Call for Giant Jupiter — By mid-April, Jupiter will be approaching the horizon about 9pm, but the gas giant will still be high enough in the sky beforehand for some respectable views. Bigger refractor and reflector telescopes and moderate to high power eyepieces will deliver the most rewarding views of Jupiter before it leaves the night sky for the season.
Spring Brings Galaxy Season! — April skies provide stargazers with ample opportunities to observe far-off galaxies. With the Virgo Galaxy Cluster and bright galaxies in the Big Dipper and Coma Berenices well-positioned in the sky, April evenings are truly a gift for galaxy-hounds. Check out a few of our favorite galaxies: M101, M51, and M106 near the Big Dipper asterism; M86, M87, M84 and M104 in the Virgo Galaxy Cluster; and don't miss NGC 4565, M64, M99, and M100 in the constellation Coma Berenices. While a humble 80mm telescope will show most of the galaxies we mention, you can't beat a big 10"-16" reflector telescope for jaw-dropping views of these galaxies!
April's Challenge Object — You'll need a big reflector telescope to go after this month's challenge object, which is a group of at least six faint galaxies closely packed around NGC 2687, which lies about a degree northwest of Talitha, the southwestern "foot" of the constellation Ursa Major (which also is home to the Big Dipper asterism). This so-called "Kevin's Sextet" of faint galaxies is quite challenging to detect in telescopes, so we recommend using a 12" to 16" Dobsonian reflector to find out how many galaxies you can see.
All objects described above can easily be seen with the suggested equipment from a dark sky site, a viewing location some distance away from city lights where light pollution and when bright moonlight does not overpower the stars. All objects have been verified by actual observations by Orion Telescopes & Binoculars Staff at Fremont Peak State Park, and/or Deep Sky Ranch, 60 miles and 90 miles respectively from San Jose International Airport, San Jose, CA.
{ width: 160, height: 160, defaultImage: '', layers: 'Artimg-M33_ap361' }

A New Moon is a prime time for observing distant galaxies. Some of the most interesting galaxies contain star birth regions, also known as HII regions. (Pronounced H-2). We have these in our own Milky Way, most notable among them is the winter favorite: the Great Orion Nebula - M42. When viewing these HII's in your telescope, imagine them as they might be seen from only a few thousand light years, rather than their actual distance tens of millions of light years away.

M101 is the classic example of a big galaxy full of star birth regions. It is 21 million light years distant, and appears faint visually due to its large size. Many of the HII regions in it were thought to be distinct objects apart from M101, and assigned their own number in the New General Catalog.
In a dark sky you can see the HII's in M101 - NGC 5462, NGC 5461 and NGC 5447. These will look like small grayish brightened lumps in the arms of the galaxy. I find it convenient to use the Big Dipper to star hop to M101. Starting at the handle star of the bow, I draw an arc from star 1 to 2, to 3, then arc slightly to M101 at 4.

M82 is paired with the spiral galaxy M81. They sit 12 million light years distant. Sometimes called the Cigar Galaxy for its elongated shape, M82 appears bisected by a dark intrusion across the near center of its minor axis. On both sides of the dark intrusion are glowing HII regions, where active star birth is taking place.
I hop to these galaxies by crossing the bowl of the Big Dipper (1 to 2), extending a bit more than that distance to a naked-eye star (3), then move just a bit north. A wide field eyepiece may provide a nice view of both galaxies in a single field!

M33 is called the Triangulum Galaxy - a nearby member of our own Local Group of galaxies (of which our Milky Way is the second largest member), and only 3 million light years from us. This time of year you can see it low in the northwest soon after dark. With good conditions in a dark sky, you may glimpse M33 naked-eye as a faint large glow.
Hop from Beta Andromeda (off the Great Square of Pegasus) to the point star in the constellation Triangulum. M33 is about 2/3rds the distance, and a touch west. Four NGC HII regions are in M33, most notable is NGC 604, which is equivalent to our own Orion Nebula.
{ width: 160, height: 160, defaultImage: '', layers: 'Artimg-Open_Cluster_NGC6645' }

Visual observer Roger Ivester tells how to find the open cluster NGC 6645 in Sagittarius.
NGC 6645 is a fabulous open cluster that is often overlooked by many amateur astronomers. You can find it about 2� north of the much brighter cluster, Messier 25. This summertime cluster is well positioned during the months of August and September.

I could easily see it with my 102 mm refractor at 50x, but it appeared only as a faint haze, west of a fairly bright chain of five stars. When increasing the magnification to 90x, an obvious grouping of stars made a small ring, devoid of any stars. I have observed this cluster on many occasions, but had never noted this most unusual feature. Others have reported seeing this small circlet of stars. From the Observing Handbook and Catalog of Deep-Sky Objects by Brian Skiff and Christian Luginbuhl: "The denser core is about 10' across and dominated on the N side by a 2'.5 circlet of a dozen stars with an empty center."
In Deep-Sky Wonders by Sue French, P-221: "My 10-inch scope at 115x reveals a lovely group of 70 irregularly strewn stars with a sable void near its center."
I could count about 20 of the brighter members with the 102 mm refractor, however, with a night of better conditions the transparency would have allowed resolving some of the fainter members.
A couple of nights later, with excellent conditions, using my 10-inch f/4.5 reflector and a magnification of 208x the "ringlet of stars" or the central void could be seen fairly easily. About 60 stars could be counted with 12-15 stars comprising the central ring. The overall shape of the cluster is mostly irregular, and I noted a fairly bright double star south-southwest of the center.
The above sketch was made using a No. 2 pencil, and a blank 5 X 8 note card, inverting the colors via my scanner. My observations of this cluster were made from my moderately light-polluted backyard in the foothills of western North Carolina. I thought this cluster needed a name, so I'm now calling it the "Ringlet Cluster." If you have not observed NGC 6645, please give it a try, and see if you too can see the ring of stars. Roger Ivester
Were you able to find the "Ringlet Cluster"? Could you make out the small ring devoid of stars? Tell us in the comments!
{ width: 160, height: 160, defaultImage: '', layers: 'Artimg-ESO_Toby_Jug_Nebula' }

Located in the southern constellation of Carina, IC 2220, better known as the "Toby Jug Nebula," pours its nebulous contents into space some 1,200 light years from Earth. Brought to light by a red giant star cataloged as HD 65750, this cloud of gas and dust was recently the subject of an observation done by ESO's Very Large Telescope (VLT), the most advanced ground-based system of optical instruments in the world today.
Deep within the folds, arcs and curls of the nebula, is the progenitor star - one which is about five times larger than our own Sun. Even though it is a relatively young star, around 50 million years old, it has aged fast. Instead of peacefully burning, it is spewing its mass into surrounding space and this material is forming a cloud of gas and dust around it as it cools. It is "star stuff"... dust which is made up of fine grains of elements like carbon, titanium oxide and calcium oxide.

IC 2220, Toby Jug Nebula. Credit: ESO
Yet that's not all. Thanks to infrared imaging, the VLT has also identified silicon dioxide, the probable compound responsible for reflecting the embedded star's light.
Spanning across about a light year of space, the Toby Jug Nebula is much like looking into a shaft of sunlight as seen here on Earth. As you gaze at it, you see tiny motes of dust spinning and reflecting the light. IC 2220 works on much the same principle. The star releases huge amounts of material in an almost symmetrical pattern and creates a structure we can identify.
Since this phase of stellar life is short, these objects are not only beautiful, but rare, too. Red giant stars are very near the end of their lifetimes - their storehouses of hydrogen nearly depleted. Once gone, the star no longer has fuel to burn and its atmosphere begins to swell to enormous proportions. Stars like HD 65750 burn a shell of helium outside a carbon-oxygen core, sometimes accompanied by a hydrogen shell closer to the star's surface.
Although you and I won't be around when it happens, our Sun may one day meet a similar fate. Billions of years from now, Sol will run out of gas and begin to inflate. Its proportions will encompass the current orbit of Earth and it will swallow all of the inner planets as it expands. Even if mankind survives that long, the Earth would not. If our Sun became a red giant, the massive increase in radiation and the intense solar winds which accompany stellar inflation would devastate our planet. All life would cease to exist, our oceans would evaporate and Earth would melt.
However, don't worry. Unlike our Sun, stars with high mass cycle through their lives much more quickly than lighter ones. Their timelines are measured in billions, rather than millions, of years. This gives us plenty of generations of astronomers to wonder over distant space creations, and plenty of time to drink from the Toby Jug Nebula.
{ width: 160, height: 160, defaultImage: '', layers: 'Artimg-NASA_NGC2070' }

Are you bothered by spiders? Then you might want to take a step back from the web as you view the latest Hubble Space Telescope image - the Tarantula Nebula. In this best-ever view, the imaging team has given us an unprecedented look into a stellar gem, filled with sparkling star clusters, brightly glowing gas and mysterious dark dust. In an effort to further understand what makes this star-forming region tick, astronomers are mapping its components in a study called the Hubble Tarantula Treasury Project. The goal of the HTTP is to scan the millions of stars within the Tarantula, mapping out the locations and properties of the nebula's stellar inhabitants. These observations will help astronomers to piece together an understanding of the nebula's skeleton.
Located about 160,000 light years away in the constellation of Doradus, this glowing treasure is cataloged as NGC 2070 and is a member of the Large Magellanic Cloud (LMC). It's an area so bright that it was once thought to be a star, but Nicolas Louis de Lacaille found it nebulous in nature with his tiny telescope back in 1751. Just how bright is it? Astronomers believe if it were as close to Earth as the Orion Nebula that it would be bright enough to cause shadows!
")
Image: Hubble Space Telescope Image of Tarantula Nebula Credit: NASA, ESA, E. Sabbi (STScI).
Even though the Tarantula has been imaged by the Hubble before, in 2004, 2010, 2011 and 2012, this new collection of photons takes an even closer look at this turbulent region, giving us the "deepest and most detailed view yet." This image includes both near-infrared observations from both Hubble's Wide Field Camera 3 (WFC3) and Advanced Camera for Surveys (ACS). The soft, violet hues scattered throughout the photo are the result of a combination of infrared filters, while the red ribbons signify the presence of dust. What's more, there are electrifyingly bright stars to help illuminate the scene.
What we are looking at is a prime example of an HII region. This is a huge, deep spread of partially ionized hydrogen gas. Here the low-density cloud is producing new stars, its fanciful shape caused by the random pattern of stars inside it. Just to the left of center you'll spy an incredibly tight star cluster known as R136. Its members are so close together that it was once thought to be a single star! Astronomers found it to be a mystery - they didn't understand how a lone, monstrous star could be able to ionize such a huge HII area. It didn't take long to figure out this was actually a cluster of stars: a "super star cluster."
Immense HII regions like the one seen in the Tarantula Nebula may be capable of birthing thousands of stars in just several million years. In this case, super star cluster R136 will some day grow up to be a globular cluster - a spherical collection of stars which orbits the center of its parent galaxy. Is this a spider's egg sack? You bet. R136 is so huge that it's responsible for the majority of the energy that causes the nebula to be so easily seen.
The studies of NGC 2070 will give us an even better understanding of star-forming regions as the Hubble Tarantula Treasury Project (HTTP) continues to scan and photograph several of the stars within it. These upcoming images will map out the locations and properties of those stars, giving astronomers a clearer understanding of the Tarantula's structure. Until then, we'll simply enjoy our journey into an intergalactic insect's web and thank the Hubble for the incredible inside view!

Original Story Source: Space Telescope.org
{ width: 160, height: 160, defaultImage: '', layers: 'Artimg-WhatsInTheSky_02-14_square' }

Clear February nights present some great stargazing opportunities. Be sure to bundle up and keep warm while you get outside for some stargazing fun!
Here are a few of Orion's top picks for February stargazing:
- Lunar Pairings - 45 minutes after sunset on the evening of February 1st, the thin crescent Moon will pass about 11 degrees northwest of Mercury low in the western sky. You can enjoy this close pairing with unaided eyes, but you can also obtain a great view in binoculars or a small telescope. If you have a telescope, Neptune will be only 3 degrees east/northeast of Mercury (but tough to see in the twilight)!
- On February 10th, the Moon will be 5 degrees south of Jupiter.
- At dawn on February 19th, the Moon will glide less than a degree from the bright star Spica. Adding to the spectacle, Mars will be only about 5 degrees above Spica towards the northeast.
- On February 22nd, the Moon will be very close to Saturn in the dawn sky. In the Southern Hemisphere, the Moon will actually appear to cover Saturn in what's called an occultation!
- In the pre-dawn sky on February 26th, there will be an amazing pairing of the Moon and Venus. Break out your solar system camera to capture this conjunction!
- New Moon Weekends - New Moons on January 30 and February 28/March 1 mean the best weekends to take your telescope out for some deep sky observing will be February 1st & 2nd and March 1st & 2nd. The dark skies presented by the New Moon on these evenings presents a great, albeit chilly, opportunity to get clear views of deep space objects in larger telescopes.
- Jupiter Shines Bright - The biggest planet in our solar system will be a splendid sight for stargazers throughout February. Look for gigantic Jupiter near the constellation Gemini. Since Jupiter sets well after midnight throughout February, it will be a great planetary target for telescopes and astrophotographers. At mid-month, Jupiter passes through the meridian about 10PM.
- Great Binocular Cluster - Get out your 50mm or larger binoculars for a great sight of the Pleiades star cluster (M45), which will be high in the northwestern sky during February. While you can see the Pleiades with unaided eyes (from a rural location with dark skies), the open star cluster is a much more spectacular sight in binoculars.
- Our Favorite Nebula - At around 9pm throughout February, almost due south and about halfway up from the horizon, our namesake constellation Orion will be in a great viewing position. Use 50mm or larger binoculars or a telescope and look in the area below the three recognizable stars of Orion's belt for a great view of M42, the Orion Nebula. Any telescope will show it, but we feel a 6-inch f/8 telescope with a 32mm, 2-inch eyepiece gives just about the perfect view, with the cloudy nebula neatly filling the field of view (use an Orion Oxygen-III Nebula Filter if you try this from the city).
- Winter Star Clusters - Look east of bright star Sirius with a telescope to see two beautiful star clusters, M46 and M47 in the constellation Puppis. For more star cluster observations in February, look in the constellation Auriga and go after glittering clusters M36, M37 & M38, or M35 in the constellation Gemini.
- Bright Galaxies - In late February, bright galaxies M81 & M82 will be about as high in the sky as they will get for North American stargazers. From a dark sky site, these galaxies are visible with a 50mm binocular, but we suggest you use a large telescope to chase these galaxies down just off the leading edge of the Big Dipper asterism. Many observers consider M81 & M82 the best pairing of visual galaxies in the sky!
- Challenge Object: In the constellation Monoceros there lies the 9th magnitude Hubble's Variable Nebula, named after the astronomer Edwin Hubble (yes, the same as the Hubble Telescope). While small, this distant nebula is bright enough to be picked out as a pin point of light with 70mm binoculars. As the name implies, it does vary in size and brightness since its glow is "powered" by a variable star buried within its nebulosity. What's the smallest scope you can see it with - tell us on Facebook!

9th magnitude Hubble's Variable Nebula
All objects described above can easily be seen with the suggested equipment from a dark sky site, a viewing location some distance away from city lights where light pollution and when bright moonlight does not overpower the stars. All objects have been verified by actual observations by Orion Telescopes & Binoculars Staff at Fremont Peak State Park, and/or Deep Sky Ranch, 60 miles and 90 miles respectively from San Jose International Airport, San Jose, CA.
{ width: 160, height: 160, defaultImage: '', layers: 'Artimg-NASA_Hubbles_Variable_Nebula' }

Discovered by William Herschel on the day after Christmas in 1783, Hubble's Variable Nebula, is a fan-shaped nebula illuminated by the star R Monocerotis, in the constellation Monoceros. It was the first object to be photographed by the famous 200-inch Hale telescope on Palomar Mountain back in 1949. But that is not what makes this deep sky object so interesting.
Unlike many of the seemingly-unchanging nebulae of the deep sky, this reflection nebula appears to change in brightness and structure over weeks and months. Stephen James O'Meara described this fluctuating nebula as "a puff of breath, an ignited match next to a raging forest fire. Or so it seems, in deep, wide-field photographs." Both the illuminating star at its apex, and the nebulosity are considered variable, and many amateur astronomers have used images to illustrate shadows sweeping across it - Edwin Hubble being the first to note the changes in 1916.
Walter Scott Houston noted that at times he could detect it in a three inch telescope, while at other times, at ten inch telescope was needed.
NGC 2261 is also known as Caldwell 46, and the chart below shows its location as C46:
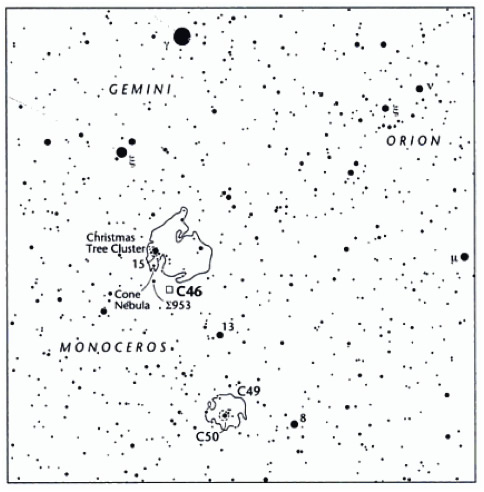
This month, make sure to locate Hubble's Variable Nebula, and share your observations with Orion's community - either as a "Review" on this article, or in the comments of this article on our Facebook Page. Here are two recent observations of NGC 2261:
Roger Ivester:
My observation was made using a 10-inch f/4.5 reflector telescope from my moderately light-polluted backyard, located in the foothills of western North Carolina. The nebula is fairly small with high surface brightness, which allows the use of high magnification if seeing is good enough. The illuminating star, R Monocerotis is positioned at the apex of the extreme southern tip of the nebula. The shape of the nebula is triangular with a wide fan shaped tail pointed toward the NNW. I saw the nebula easily at low power, but high magnification was necessary to see the faint and interesting details. When I increased the magnification to 267x, structure was noted. The brighter section just north of R Mon. has the greater concentration following the western edge and also along the NE edge. The broad fan tail fades very suddenly and the NE side makes an obvious curve toward the NW. See other articles and sketches by Roger Ivester HERE. Here is a pencil sketch of NGC 2261 by Roger Ivester, colors inverted on a scanner:
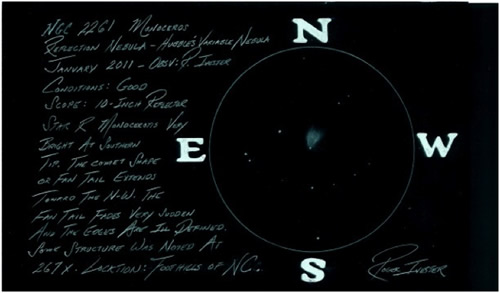
Kevin Ritschel of Orion:
In a 5" triplet, f/7.5 on an Orion Atlas Pro Mount: This was a nice challenge, since I have never attempted to see this object in a telescope as small as the 5" refractor. To locate the object I did not use GoTo function of the mount, I star hopped from 8 to 13 Monoceros, past where Hubble's variable nebula is to the Cone Nebula and went back towards 13 Mon to the area where the 2261 is located. At first, scanning the area with a 1.25" 25mm Plossl I did not see the object. Replacing the eyepiece with a 1.25" 14mm, 82 degree FOV eyepiece I could see the nebula with direct vision. Through the 5", it is directly visible, but nothing as noticeable as a brighter galaxy, or say M57; the brightness would be comparable to other, fainter NGC objects - say a 10 or 11th mag galaxy.
With the 14mm, 68x, the nebula is distinctly fan shaped - like a "V" or half-closed fan with the brightness fading irregularly the further from the tip of the fan where the blades meet. This object has a distinctive shape, very unlike a galaxy (which are more lenticular) when viewed through a telescope.
The object reminded me of a comet or an out-of-focus star in a poorly collimated telescope - except that all the other stars in the field were in focus and round pinpoints.
Switching to a 1.25" 6mm Orion Planetary eyepiece, 159x, 2261 was seen as having a bright node at the vertex of the v-shaped nebula (the dense part of the cloud that hides the variable star R Monocerotis (R Mon). Since the object was easily seen with direct vision, I did not use nebular filters to attempt to enhance the view.
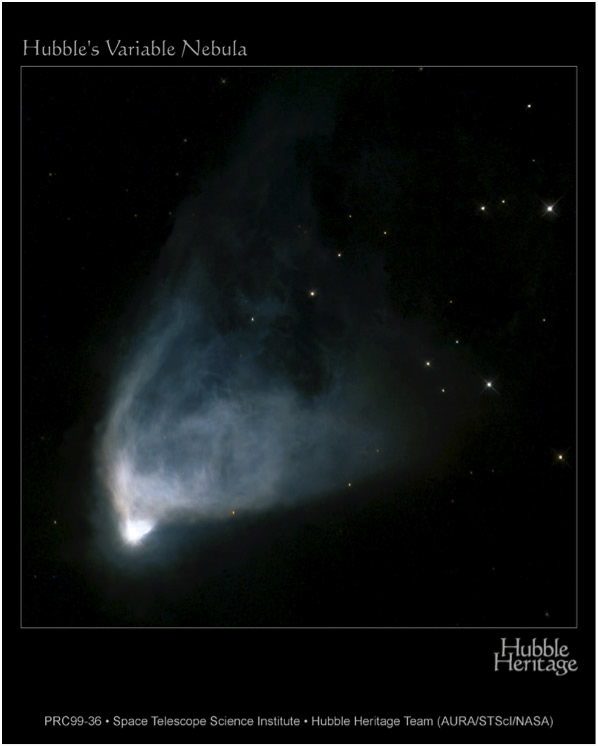
My first-ever view of this object was with a Coulter 17.5 Dobsonian (f/4.5) many years ago and NGC 2261 was far more distinct in the larger instrument; in fact, I was surprised how easy it was to see. Bigger is better!
{ width: 160, height: 160, defaultImage: '', layers: 'Artimg-WhatsInTheSky_08-14_square' }

Comfortable August nights seem to be tailor-made for backyard astronomers. Warm August evenings are great opportunities to get the whole family outside for stargazing fun exploring the heavens with your telescope or astronomy binoculars.
- Here are some of our top suggestions for August stargazing:
- Moon occults Saturn - Get outside during the evening of August 4th with a pair of 10x50 or larger binoculars to see ringed planet Saturn appear to "hide" behind the Moon during an occultation. You can also take a closer look at this celestial disappearing act in a telescope as the Moon passes between Earth and Saturn.
- Supermoon - The closest and largest Full Moon of 2014 will brighten up the night sky of August 10th. The Moon will not come as close to Earth again until September of 2015. This so-called "Supermoon" is also called a perigee Full Moon, since "perigee" is defined as the point in space where an Earth-orbiting object is closest to our planet. Even though the Moon will be much closer to Earth than normal, it is rather difficult to visually notice the difference in size, but it should still be a spectacular sight.
- The Perseid Meteor Shower - One of the most popular meteor showers of the year, the Perseids, peaks between August 10 and August 13. A waning Gibbous Moon in the sky may make it difficult to spot as many meteors as in past years, but we think it's worth getting outside for a chance to see these fleeting fireballs. Get some lawn chairs, a clear view of the sky and gather your friends & family for a night of stargazing punctuated by beautiful meteors!
- Venus and Jupiter Conjunction - The two planets will come within just � degree of each other in the pre-dawn sky of August 18th. As an added bonus, M44 the Beehive Cluster will only be a degree away as well. This will be a spectacular conjunction to observe a few mornings in a row as the planets move closer to each other.
- The Summer Milky Way - As soon as it gets dark on the evening of August 25th, when the Moon isn't visible during the New Moon phase, you can see the grandest unaided-eye sight in the night sky from a dark sky location - our home galaxy, the Milky Way. Use binoculars and telescopes to scan and tease out dozens of star clusters, nebulas and planetary nebulas. From a dark sky location, away from city lights, the Milky Way is easy to see and majestic in scale, but you can't see it near heavily populated areas due to light pollution; so plan a summer adventure to a national park or your favorite dark sky site to experience this "must-see" astronomical sight.
- Venus in the Morning Sky - Shining with astounding brightness throughout August is Venus, our next-door neighbor planet. To find Venus, get a clear view to the east in the predawn sky. it will be the brightest thing in the sky, except for the Moon! For an interesting sight, take a look at Venus through a telescope to see its partially illuminated "phase".
- Say "See You Later" to Saturn - August will be the last month this year to get a good view of Saturn through a telescope. At the beginning of August, Saturn will still be well above the horizon as the sky gets dark, so the "seeing" should be acceptable for good telescopic views. By the end of the month, it will be only about 10 degrees above the horizon at twilight's end. As an added bonus, Saturn will appear very close to the Moon - just 21 arc minutes away - on August 31st in a very close conjunction. Grab a powerful pair of binoculars or a telescope to see this nice pairing in the sky.
- Grand Summer Nebulas - Hercules Galaxy Cluster: These excellent examples of gaseous nebulas are well placed for viewing in August - See the star chart in Orion's online Community section to find out where you can track them down. The brightest are M16 the Star Queen Nebula, M17 the Swan Nebula, M20 the Trifid Nebula and the very bright M8, the Lagoon Nebula. All are visible in binoculars from dark locations with good seeing. Use a small to moderate aperture telescope with the aid of an Oxygen-III eyepiece filter or SkyGlow filter to see them from more suburban locations.
- Summertime Star Clusters - Hercules Galaxy Cluster: Even from the city, you can track down some of the brightest star clusters of the summer sky in August. The brightest and best include M13, M93, M11, M6 and M7. You can see these under good skies with a humble 60mm scope, but it will take something larger like a StarBlast 4.5 or a 6" to 8" Dobsonian reflectorto reveal their true beauty.
- August's Challenge Object - This month, our challenge is actually a very easy object to see with a telescope, but not so easy with binoculars! Well suited for observing this month is M27, the Dumbbell Nebula in the constellation of Vulpecula, just south of Cygnus, the Swan or Northern Cross. M27 is one of the nearest and therefore one of the brightest and largest planetary nebulas visible from Earth. It's so big that it can be spotted in 7x50 binoculars! Try to track M27 down this August with your binoculars, it will be a small dot, slightly larger than the surrounding stars, but definitely visible through binoculars. What's the smallest binocular you can see it with?
All objects described above can easily be seen with the suggested equipment from a dark sky site, a viewing location some distance away from city lights where light pollution and when bright moonlight does not overpower the stars. All objects have been verified by actual observations by Orion Telescopes & Binoculars Staff at Fremont Peak State Park, and/or Deep Sky Ranch, 60 miles and 90 miles respectively from San Jose International Airport, San Jose, CA.
{ width: 160, height: 160, defaultImage: '', layers: 'Artimg-Barastronomy' }
Inspiring tips from Duke Skygawker on how to publicize and host a successful astronomy outreach event.
Hosting an astronomy outreach event is probably the most rewarding and fun way to share the night sky with others. But doing astronomy outreach doesn't do much good if there's no one there to reach out to. So how do you make sure appreciative people are on hand to enjoy the astronomical wonders you'd like to share with them?
This article shares a number of tried and true strategies to help you advertise, brand, and effectively gain participants to your astronomy observing events. I start with strategies for getting the word out about traditional events at your local observatory or club, followed by strategies for nontraditional outreach events, like sidewalk astronomy, or my personal venture, Barstronomy
TRADITIONAL EVENTS:
It's very important to establish a presence in the market, especially if you count on the revenue from admission to help fund your operations. Being an established group or facility has its advantages, including potential patrons' ability to count on the fact that you have a public program on a recurring schedule.
My "home" dome, Perkins Observatory in Delaware, Ohio, does public outreach almost every Friday night, rain or shine, except holidays and in July. In this way, the public can count on a program whether or not sky views are possible. An entertaining talk about "what you would have seen," along with tours of the historic observatory-its "ghost story," many types of telescopes, and a full library go a long way toward salvaging a cloudy program night, and there's lots of those in central Ohio. Maybe you're luckier where you're located.
Manned by staff (only two people), Perkins counts on volunteers from the Columbus Astronomical Society to help park cars, operate telescopes on the front lawn, and engage program attendees in one-on-one conversation about the heavens. So these programs serve "double duty" as CAS outreach events, with all revenues going to Perkins, and the club earns its funds via member dues.
Perkins makes it easy to find program information: just go to their website. They're part of Ohio Wesleyan University, and right on the front page, you see this a list of their upcoming events.
Social Media:
Perkins observatory also has a Facebook page, promoting their programs and space news, and the CAS uses their Facebook and web presence to do the same. If your local club doesn't have a Facebook page, consider setting one up to get the word out and to document your events. You might even consider using Twitter and Google+ as well.
Media Presence:
Along with their own sites and pages, the "O" makes sure local newspapers and media outlets have their schedule, updated every few weeks, to ensure the programs will appear on local "things to do" calendars. Familiarize yourself with your local media outlets and establish a contact who you can send press releases or links to events pages-remember to give them a few weeks notice to increase the chances of them including your event. You might even be able to post your events directly to online events pages of your local media outlets.
It also helps to have a charismatic staffer to maintain a strong media presence, and Perkins' Director Tom Burns does exactly that. He uses his extensive knowledge, well-honed routine and genuine enthusiasm to write regular print articles, make radio and TV appearances, and serve as a very visible ambassador. Establishing a presence as the "go-to" person to ask about any astronomy news or sky event helps strengthen the brand as well.
Radio and TV public service announcements (PSAs) are yours for the asking, if you're a nonprofit or educational institution, as most doing public astronomy outreach are.
Event Flyers and Posters:
There are other things that can also help your scheduled, traditional astronomy programs reach a wide audience. Attractive posters are a great tool for creating visual enticement to attend. Display them in area businesses; busy coffee shops and cafes, for instance, as well as in libraries and government facilities. Design your posters to be eye-catching, and don't try to cram too much text onto them-most people will only have time for a quick look, so display the time and date prominently, with a brief summary of what to expect and your website or contact info for interested parties. Here is an excellent example of an event flyer, by the Austin Astronomical Society in Texas:

Most astronomy outreach events are great family activities, so be sure to advertise that kids are welcome, (if they are), and you'll likely see an increase in families marking their calendar for your event.
Signage at Your Event Site:
Good visible signage near your location, if possible, makes your site easy to find at program time, and is also a constant reminder to those who drive, bike, or walk by.
Embrace Your Current Followers:
Don't forget to preach to the faithful, either. Your observatory or club newsletter can go a long way in cajoling your members and patrons to talk about your programs, get them to return, and bring other patrons with them, too. The Austin Astronomical Society in Texas does this very well in their newsletter, publishing their event schedule, a full-color poster, and a regular request for members to print copies and post the information in their neighborhoods and nearby businesses. (Note not for publishing: included picture files of these items, using one or more at your discretion). The Austin Astronomical Society also publishes an outreach activity report each month, so members can understand how they're impacting the public, and be inspired to continue those efforts.
Word-of-Mouth:
Finally, don't discount word-of-mouth, always one of the best plugs there is-as long as your patrons have a positive experience! People who come away from your program satisfied and amazed are going to talk about it to their friends and neighbors, and that brings more visitors.
Many clubs not associated with an observatory or directly with another institution, often hold regular public observing nights in other locations, such as a school, park, or club observing site. The same methods of promoting the event are applicable to these as well.
NONTRADITIONAL EVENTS:
First, let's identify what a "nontraditional" astronomy outreach event might be. A good example is the one started by John Dobson and the San Francisco Sidewalk Astronomers. This sidewalk astronomy method of taking scopes to the city streets and parks, rather than making people come to an observatory or dark-sky observing site, serves to reach out to those who don't make up the usual program audience. The people you'll be interfacing with are passers-by, likely attending a nearby event or attraction, and it can be a great pleasure for them to unexpectedly stumble on you and your telescope. Many of the people you'll meet may be looking through a telescope for the very first time!
The

Internet Buzz:
Sure, the element of surprise is a beautiful thing when it comes to sidewalk astronomy and nontraditional events, but it also helps to let as many people as possible know about your planned set-up location, time and date.
Websites and social media can make a big difference. If you are able to drive traffic to your website, gain friends on Facebook, followers on Twitter and Instagram, and group members on Google+, these are great platforms to publicize your events.
Many "sidewalk" type outreach efforts take place on a regular basis, but others don't. For the more spontaneous, short-advance-notice type events, which may not take place until conditions are just right, the Internet is an "instant" way to get the word out to potential attendees-working much faster than newspapers, print ads, or newsletters.
Email Lists:
Email can play a very supportive role as well. If you capture email addresses from those who view at your sidewalk event, and are careful not to "spam" them or let others use your hard-earned email list, you can generate repeat visitors, and let those on the list inform others if they wish. The best way to get people to sign up for your email list is to inform them of exactly what to expect-that you'll be sending event info, and how frequently you'll be sending it. Most people won't sign up for an email list if they think you'll be peppering them with emails every single day, but monthly or bi-monthly email is usually a more-than-welcome approach.
Location, Location, Location:
But really, the best way to generate an audience for this type of outreach is to go where the crowds are! Don't worry about the city lights-just make sure you have a good line-of-sight to at least a couple of bright targets, like the Moon and Jupiter. The most important thing you can do for this type of outreach is just show up!
That said, don't just walk into a private venue or location and begin setting up. You do need to clear it with the owners or managers, whether it's a restaurant, bar, city park, library, or government building.
And remember, the just show up method is most effective when you are able to go where a crowd will be gathering for a popular scheduled event or venue-it may be a concert, sporting event, festival, or well-known bistro or watering hole.
City sidewalks do not require permission, although it's definitely advisable to let the police department or similar authority know what you're doing. They'll appreciate the heads-up. Be sure not to impede traffic or interfere with event operations so that you'll be welcomed back next time.
Signage:
Placing posters around your setup area will help you grow an audience, especially because people won't be expecting astronomical observing, and didn't come to the locale with that in mind.
The ubiquitous "quarter-sheet" flyer, which can be printed up quickly, cut and handed out to passersby, is a good way to let them know what's going on. A large banner, suitable for hanging on a fence, wall, window, or over a door, can also draw curious people who want to find out what it's all about. A "Moon Viewing" banner, for instance, can be reused many times, especially if you use sturdy material. Here's an example of a Barstronomy flyer:

Radio and Media:
If you've managed to gain some branding in your area, you may find local radio stations willing to take a call to promote your appearance. Electronically-generated news releases work too, if you're able to get them to daily media outlets at least two days in advance, although weekly newspapers will often need a bit more notice.
On-site Networking:
As you talk to your site hosts and attendees, always remind them you can be available for their location or other special programs. You'll be surprised how this type of networking can lead to other opportunities to bring astronomy to nontraditional audiences.
Sidewalk Equipment:
One other thing I think is very important: If possible, use equipment people can get their own hands on and operate. That's not usually the case for traditional programs, but it's the best way to go for "sidewalk" type venues. In other words, don't bring your Takahashi with a mint finish, or your best $1,000 eyepieces. Better is a nice simple 6-10" Dobsonian and some serviceable but inexpensive eyepieces. Have a red-dot finder like the
Tracking Trick for the Newbie:
People may have trouble tracking if they're worried about how the scope is moving, so here's an easy analogy I've found that works nearly 100 percent of the time: ask your participants if they've used a mouse to move a cursor around a computer screen. (Almost everyone has.) Then just tell them the object is the cursor, the FOV is the screen, and the end of the scope is the mouse. It can be one of the most effective ways to bring a successful hands-on, interactive experience to your outreach guests. And that success may just lead them to understand that telescopes don't have to be expensive and complicated to show some great views and get them to be a lifelong personal astronomy enthusiast. And isn't that what we want? I think it is!
Share your tips for hosting a successful astronomy outreach event in the comments!
{ width: 160, height: 160, defaultImage: '', layers: 'Artimg-WhatsInTheSky_10-14_square' }

October nights will be full of celestial treats for amateur astronomers to see with binoculars and telescopes. Here are some of our top October stargazing suggestions:
- Total Lunar Eclipse - If you live in the western half of North America or in Hawaii, mark your calendars to catch a Total Lunar Eclipse on the night of October 8th. During this must-see event, the Moon will pass through the Earth's shadow, causing the Moon to temporarily turn a beautiful, bright orange-red color. Use a pair of binoculars or unaided eyes to see this rare event, or go the extra mile and capture snapshots of the Total Lunar Eclipse by using a telescope equipped with a tracking motor drive and an astrophotography camera
- Jupiter Season Begins - Big and bright planet Jupiter will rise in the east around midnight in early October, and by about 10 PM near the end of the month. While Jupiter's brightness makes it easily visible to unaided eyes, try looking at the Jovian giant with a pair of 50mm or larger astronomy binoculars to coax out views of its 4 brightest moons; Io, Europa, Ganymede and Callisto. Check in on Jupiter every night to see these moons change position as the "dance" around Jupiter in their orbital paths. With even a small telescope, you'll see Jupiter's main equatorial cloud belts at high power, but step up to a 6" or 8" telescope and the show is spectacular.
- Best Chance to See Distant Uranus - On October 7th, planet Uranus will at opposition (meaning the Earth will be positioned between Uranus and the Sun along a roughly straight line). This is when Uranus will be in its orbit's nearest point to Earth. Grab a pair of binoculars or a telescope and a star chart or StarSeek app to try tracking down this 6.5 magnitude planet, which is just below naked-eye visibility, in the constellation Pisces. While the Full Moon of October 8th will make viewing Uranus a challenge, it's still worth the effort to know you're looking at one of the most distant planets in our Solar System.
- October Deep Sky Treats - In early October, catch your last glimpse of the year of the galactic center in the constellation Sagittarius, low in the southwestern sky, where you can track down four great emission nebulas - M8, the Lagoon; M20, the Trifid; M17 the Omega; and M16, the Eagle or "Star Queen" nebulas.
Two great planetary nebulas are still well-placed in October skies - M57, the Ring Nebula; and M27, the Dumbbell Nebula.
Look for interesting galaxy NGC 7331 in the northwestern section of the constellation Pegasus. With a 12" or larger aperture telescope and good seeing conditions, you may be able to tease out the galaxy's faint spiral arms.
- Partial Solar Eclipse - On October 23rd, grab your solar filter equipped telescope or binoculars and get outside before sunset to witness a partial solar eclipse! You won't want to miss the action as the Moon's shadow appears to "take a bite" out of the setting Sun just before sunset. We'd love to see your astrophotos of this rare solar event - but don't forget to use a protective Orion Solar Filter for your telescope.
- Challenge Object: NGC 404 - Use your StarSeek app or a star chart to track down star Beta Andromeda in the constellation Andromeda. Carefully inspect the area just northwest of the star to see the faint glow of galaxy NGC 404, a small 11th magnitude dwarf galaxy that's approximately 10 million light years away from Earth. You'll likely need a 6" or larger telescope at high power, but can you see it in a smaller telescope?
All objects described above can easily be seen with the suggested equipment from a dark sky site, a viewing location some distance away from city lights where light pollution and when bright moonlight does not overpower the stars.
{ width: 160, height: 160, defaultImage: '', layers: 'Artimg-WhatsInTheSky_10-13_square' }

October nights will be full of celestial treats for amateur astronomers to see with binoculars and telescopes. Here are some of our top October stargazing suggestions:
Get Ready for Comet ISON's "Impact" - While we know Comet ISON will NOT actually hit anything, it's sure to make an "impact" of sorts on your observing schedule and in social media as the comet approaches the Sun and the Earth this fall and winter. Early- morning risers may be able to catch a glimpse of Comet ISON on October 1st when Comet ISON will appear about a degree northeast of Mars in the pre-dawn sky. If predictions are correct, Comet ISON will brighten rapidly after it passes Mars on its way towards to Sun throughout October, and should be visible in 4" or larger aperture telescopes all month long. If all goes well, this comet may reach naked-eye visibility by Halloween! "Trick or Treat" indeed! Be sure to check out our online Community section for updates.

The Sickle of Leo, Mars, Comet ISON and the Moon, October 1 , looking east in the pre-dawn morning sky. Sky Map from Stellarium
Time to (Star) Party! - The weekend of October 5th and 6th is a great opportunity to get out to a dark sky site with friends and family to enjoy spectacular sights and inky-black skies. The New Moon of October 4th will make it the darkest weekend of the month, so it's the best time to see objects beyond our solar system, and to get great views of planets too.
Jupiter Season Begins - Big and bright planet Jupiter will rise in the east around midnight in early October, and by about 10 PM near the end of the month. While Jupiter's brightness makes it easily visible to unaided eyes, try looking at the Jovian giant with a pair of 50mm or larger astronomy binoculars to coax out views of its 4 brightest moons; Io, Europa, Ganymede and Callisto. Check in on Jupiter every night to see these moons change position as the "dance" around Jupiter in their orbital paths. With even a small telescope, you'll see Jupiter's main equatorial cloud belts at high power, but step up to a 6" or 8" telescope and the show is spectacular.
Best Chance to See Distant Uranus - On October 3rd, gas-giant planet Uranus will at opposition (meaning the Earth will be positioned between Uranus and the Sun along a roughly straight line). This is when Uranus will be in its orbit's nearest point to Earth. Grab a pair of binoculars or a telescope and a star chart or StarSeek app to try tracking down this 6.5 magnitude planet, which is just below naked-eye visibility, in the constellation Pisces.
October Deep Sky Treats - In early October, catch your last glimpse of the year of the galactic center in the constellation Sagittarius, low in the southwestern sky, where you can track down four great emission nebulas - M8, the Lagoon; M20, the Trifid; M17 the Omega; and M16, the Eagle or "Star Queen" nebulas.
Two great planetary nebulas are still well-placed in October skies - M57, the Ring Nebula; and M27, the Dumbbell Nebula.
Look for interesting galaxy NGC 7331 in the northwestern section of the constellation Pegasus. With a 12" or larger aperture telescope, you may be able to tease out the galaxy's faint spiral arms.
Challenge Object: NGC 404 - Use your StarSeek app or a star chart to track down star Beta Andromeda in the constellation Andromeda. Carefully inspect the area just northwest of the star to see the faint glow of galaxy NGC 404, a small 11th magnitude dwarf galaxy that's approximately 10 million light years away from Earth. You'll likely need a 6" telescope at high power, but can you see it in a smaller telescope?
All objects described above can easily be seen with the suggested equipment from a dark sky site, a viewing location some distance away from city lights where light pollution and when bright moonlight does not overpower the stars. All objects have been verified by actual observations by Orion Telescopes & Binoculars Staff at Fremont Peak State Park, and/or Deep Sky Ranch, 60 miles and 90 miles respectively from San Jose International Airport, San Jose, CA.
{ width: 160, height: 160, defaultImage: '', layers: 'Artimg-WhatsInTheSky_10-12_square' }

Here are a few of Orion's top picks for October stargazing:
October Meteors-The annual Draconid meteor shower peaks on the night of October 7th. While the Draconid isn't usually the strongest of meteor showers, it is known to have spectacular outbursts. Look towards the constellation Draco for your best chance to catch a glimpse of a Draconid meteor.
On the night of October 21st, you can feast your eyes on the Orionid meteor shower. Look towards the eastern sky, where the constellation Orion will rise after 10PM, for your best chance to see an Orionid meteor. As many as 50-70 meteors per hour will appear to radiate out of our namesake constellation as it peaks on the evening of October 21st.
The Milky Way-The brightest portion of our home galaxy will be visible in the constellation Cygnus. Are the skies where you are located dark enough to see it? With a star chart, trace the Milky Way from Cygnus to Cassiopeia. The cloudy galaxy keeps stretching all the way through Perseus towards Auriga, which is visible late in the evening.
Scan the Milky Way with Binoculars-You can see a lot in the Milky Way using just binoculars. Even if your skies are so light polluted that you cannot see the Milky Way with unaided eyes, use a star chart to determine its path in the sky. Using 50mm or larger binoculars, scan the path of the Milky Way for pleasing views of brighter star clusters and other interesting sights.
Big Jupiter-Rising about 10PM from the eastern horizon, big Jupiter will make its debut in October for the 2012/2013 observing season. Opposition occurs on December 3rd, but October will still provide great viewing opportunities of the gigantic planet and its brightest moons. While Jupiter is one of the brightest objects in the sky, easily seen even from the city with unaided eyes, Jupiter requires a telescope for good views. Almost any telescope will let you see the four brightest Jovian moons (Io, Europa, Ganymede and Callisto). Depending on the size of your telescope and the clarity and steadiness of the air, you may be able to observe Jupiter's striped equatorial cloud belts and perhaps even catch a glimpse of the Great Red Spot - an enormous persistent storm on the south border of the southern belt.
Fabulous Fall Star Clusters-Just west of Jupiter is the famous "open" star cluster Pleiades, also called M45 or Subaru. The Pleiades cluster is an excellent target for binoculars, since telescopes are usually too powerful to provide a view of the entire cluster in one field-of-view. About a hand's width southeast of the Pleiades, covering about 5 degrees of the sky is an association of brighter stars called the Hyades, with stars laid out in the shape of a "V", pointing west and slightly south. The Hyades is another great binocular object. Late in October evenings, low in the northeast sky, pick out the constellation Auriga; then using a star chart, see if you can pick out the three star clusters Auriga hosts - M36, M37 and M38 - all in a row and visible with binoculars or a telescope from a dark sky site.
Dazzling Globular Star Clusters-In northwest October skies, you can still catch a glimpse of M13, the Great Cluster in Hercules, which is one of the most famous globular star clusters. This giant ball of densely packed stars is very distinctive in any telescope, and is a spectacular sight in an 8-inch or larger aperture telescope.
In the eastern sky, off to the southwest of the Square of Pegasus is the grand globular cluster M15. This magnificent, densely packed ball of stars can be found with binoculars, but you'll need a telescope of at least 6" aperture to resolve individual stars within the cluster.
A Grand Galaxy-Located in the tiny constellation of Triangulum and just opposite the star Beta Andromeda is another splendid galaxy, M33. From a dark sky site, this galaxy is visible in 50mm binoculars, but a telescope at low power will provide the best views. M33 has very low surface brightness, so look when the Moon is down and from the darkest sky site you can find!
A Challenging Glowing Nebula-Making a small equilateral triangle with the stars Eta and Alpha Cassiopeia is the elusive Pac Man nebula - NGC 281. The Pac Man is a famous target for astrophotographers, but it is not easy to observe visually. From dark sky locations, you can pick out its faint glow with large binoculars, but a telescope at low power with the help of an Oxygen-III filter will show it best.
{ width: 160, height: 160, defaultImage: '', layers: 'Artimg-VirgoCluster' }

While we are embedded in our Milky Way Galaxy and view its spiral arms arching over our skies year round, we are also part of a Local Group of galaxies. The Local Group is dominated by the Andromeda Galaxy, and our Milky Way. The Local Group is part of the larger group though, the Virgo Supercluster of Galaxies, with galaxies numbering in the thousands. Some of this mind-boggling, gravitationally-bound conglomeration of "island universes" is visible to us in binoculars and telescopes, primarily around March each year in and around the ancient constellation Virgo.
The anchor galaxy in the Virgo Supercluster appears to be the giant elliptical catalogued as Messier 87, Virgo A, NGC 4486 and known colloquially as M87. At a distance of approximately 53 million light years, it subtends 7.2x6.8 arc-minutes size. Its physical size is best compared to our Milky Way to obtain some relevance. M87's diameter is 132,000 light years and contains trillions of stars, including over 1,500 globular clusters. The Milky Way Galaxy is around 87,400 light years in diameter and has around 200 globular clusters among 200-400 billion stars. The M87 galaxy will be visible in 50mm binoculars or any telescope, a glowing oval shining at a bright apparent magnitude of 8.6.
Virgo Cluster Messier Objects
Bright galaxies abound in this cluster between Gamma Virginis, the great open cluster Melotte 111 in Coma Berenices, and Leo's back haunches near Denebola. Virgo contains eleven galaxies included in Charles Messier's now famous list of objects that were "not" comets. Instead, they are examples of the brightest and most detailed deep sky targets in our part of our universe. Scan the area and you literally can't avoid coming across several. Better still, Orion's Deep Map 600 shows them all, making their locations easy to get to. And there is no need to stop at eleven objects in this target rich area. Many galaxies found in the Herschel Catalogue are found here as well ? bright and easy ones!
Feel this is still not enough? Try Markarian's Chain within the Virgo Cluster and close to M87's location.
Chart Showing Markarian's Chain Anchored By M84/M86
This favorite is an awe-inspiring sweep of nearly a dozen galaxies, with bright Messier's M84 and M86 dominating one end, sweeping in a gentle arc over several degrees. Needless to say, the larger your telescope the more you'll see. The general Virgo Cluster environment comprises thousand of galaxies, and hundreds are within reach of amateur telescopes.


Why Buy From Orion
- 30 Day Money Back Guarantee
- Safe & Secure Shopping
- Next Day Shipping
- Easy Returns
- Sale Price Guarantee
- Free Technical Support

- 800-447-1001
- Telescope.com
- © 2002- Orion Telescopes & Binoculars All rights reserved
- DMCA/Copyright
- Terms and Conditions
- Privacy & Security
![]()


About Orion Telescopes & Binoculars
Since 1975 Orion Telescopes & Binoculars has been offering telescopes for sale direct to customers. Now an employee-owned company, we pride ourselves on an unswerving commitment to best quality products, value and unmatched customer care. Our 100% satisfaction guarantee says it all.
Orion offers telescopes for every level: Beginner, Intermediate, Advanced, and Expert. From our entry level beginner telescopes for amateur astronomers to our Dobsonian telescopes to our most advanced Cassegrain telescopes and accessories, you can find the best telescope for you. Because we sell direct, we can offer you tremendous value at a great price. Not sure how to choose a telescope? Orion's Telescope Buyer's Guide is a great place to start.
Orion binoculars are known for quality optics at a great price. We offer binoculars for every viewing interest, including astronomical binoculars, compact binoculars, waterproof binoculars, birding binoculars, and sport and hunting binoculars.
Orion's telescope and astrophotography accessories will enhance your telescope enjoyment without breaking the bank. Expand your viewing experience with accessories ranging from moon filters to power-boosting Barlow lenses to advanced computerized telescope mounts. Capture breathtaking photos with our affordable astrophotography cameras. And when you're stargazing, Orion's telescope cases and covers, observing gear, red LED flashlights, astronomy books and star charts will make your observing sessions more convenient, comfortable and meaningful.
At Orion, we are committed to sharing our knowledge and passion for astronomy and astrophotography with the amateur astronomy community. Visit the Orion Community Center for in-depth information on telescopes, binoculars, and astrophotography. You can find astrophotography "how to" tips and share your best astronomy pictures here. Submit astronomy articles, events, & reviews, and even become a featured Orion customer!
sales, new products, and astronomy.